Please welcome Deb back to the blog. She has stopped by before with her favorite pattern, her Flat S visit, and she hosted one day of the School Days Jacket sew-along. Now she is here to give a book report on the Book Report Dress or how to add exposed zippers on welt pockets. Thanks Deb!
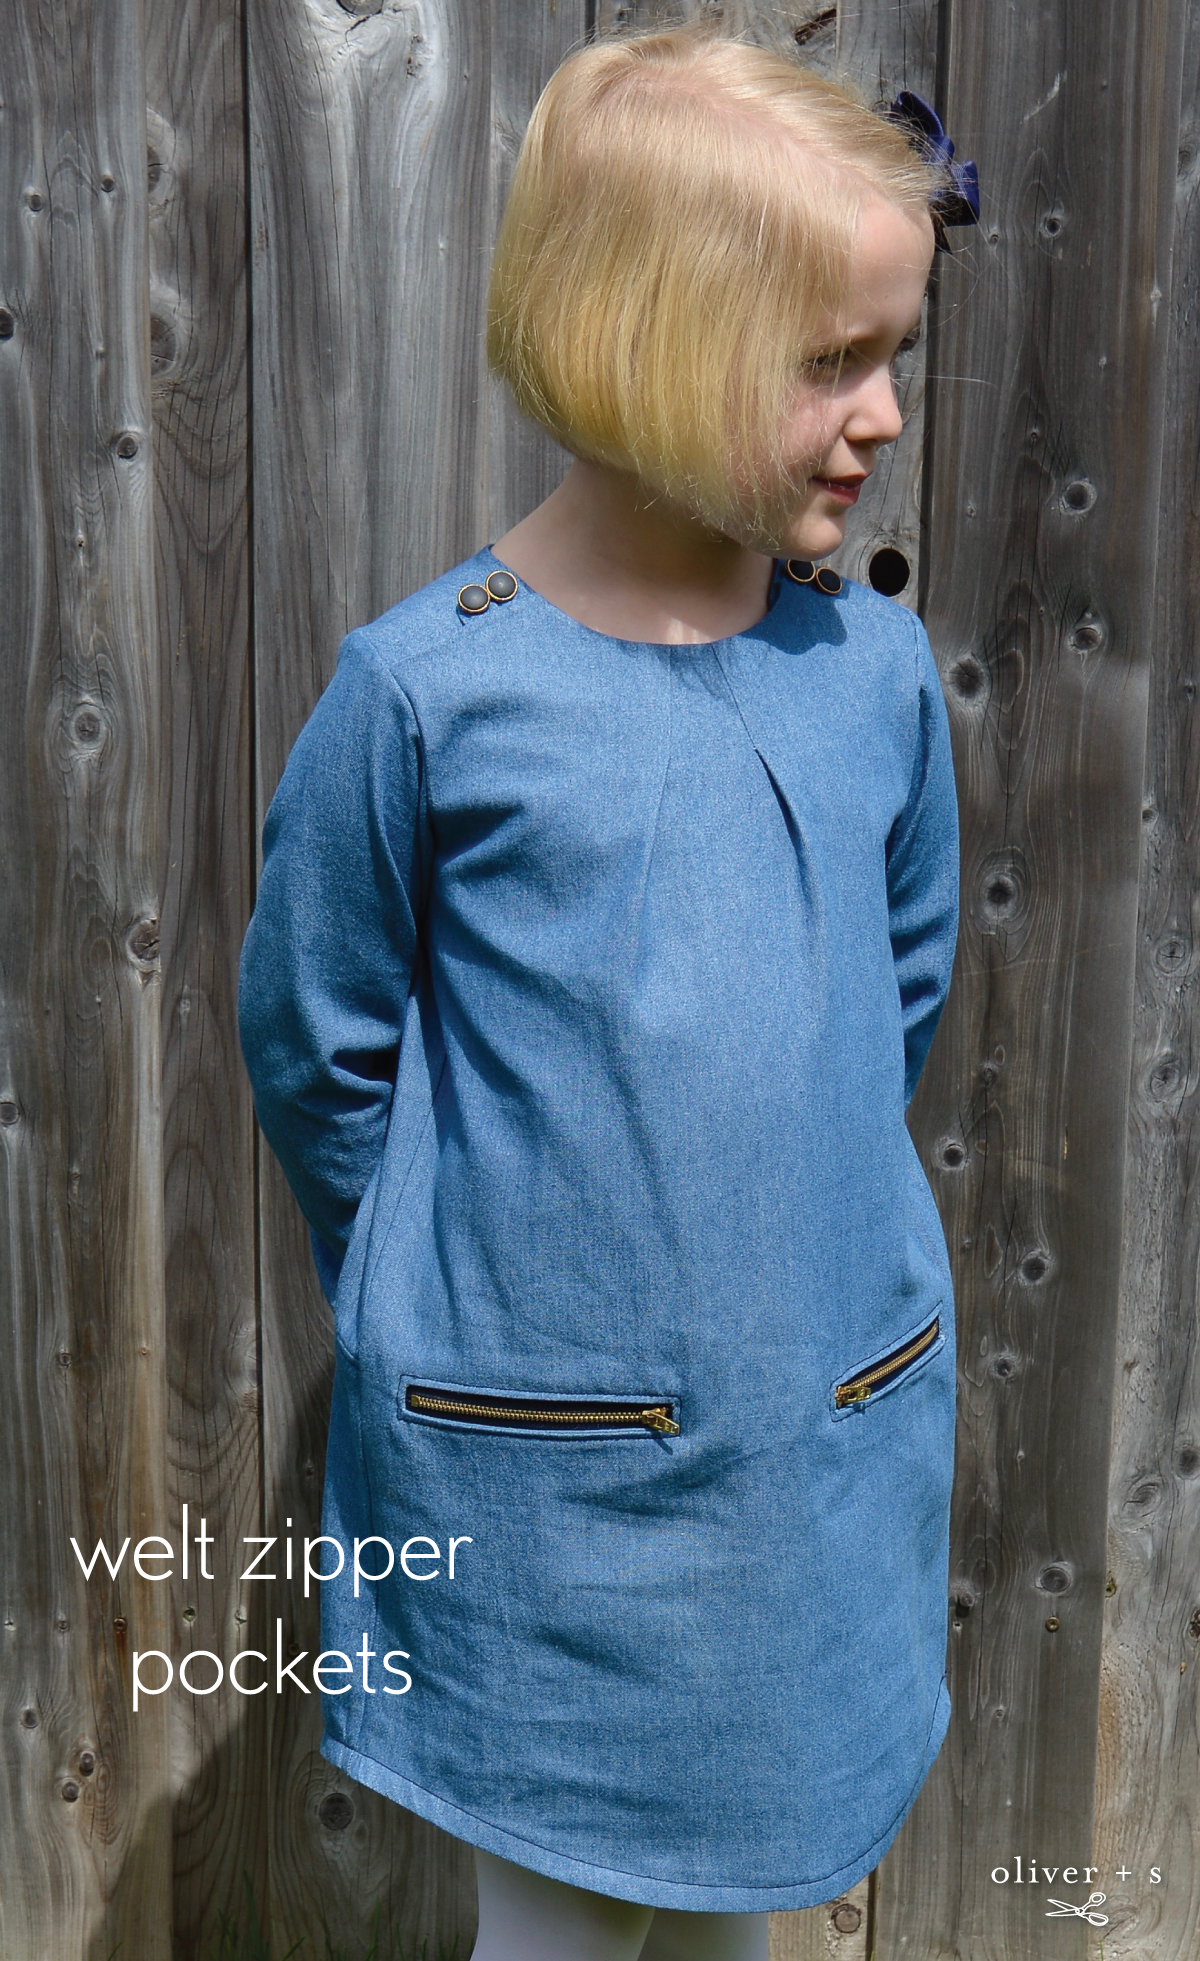
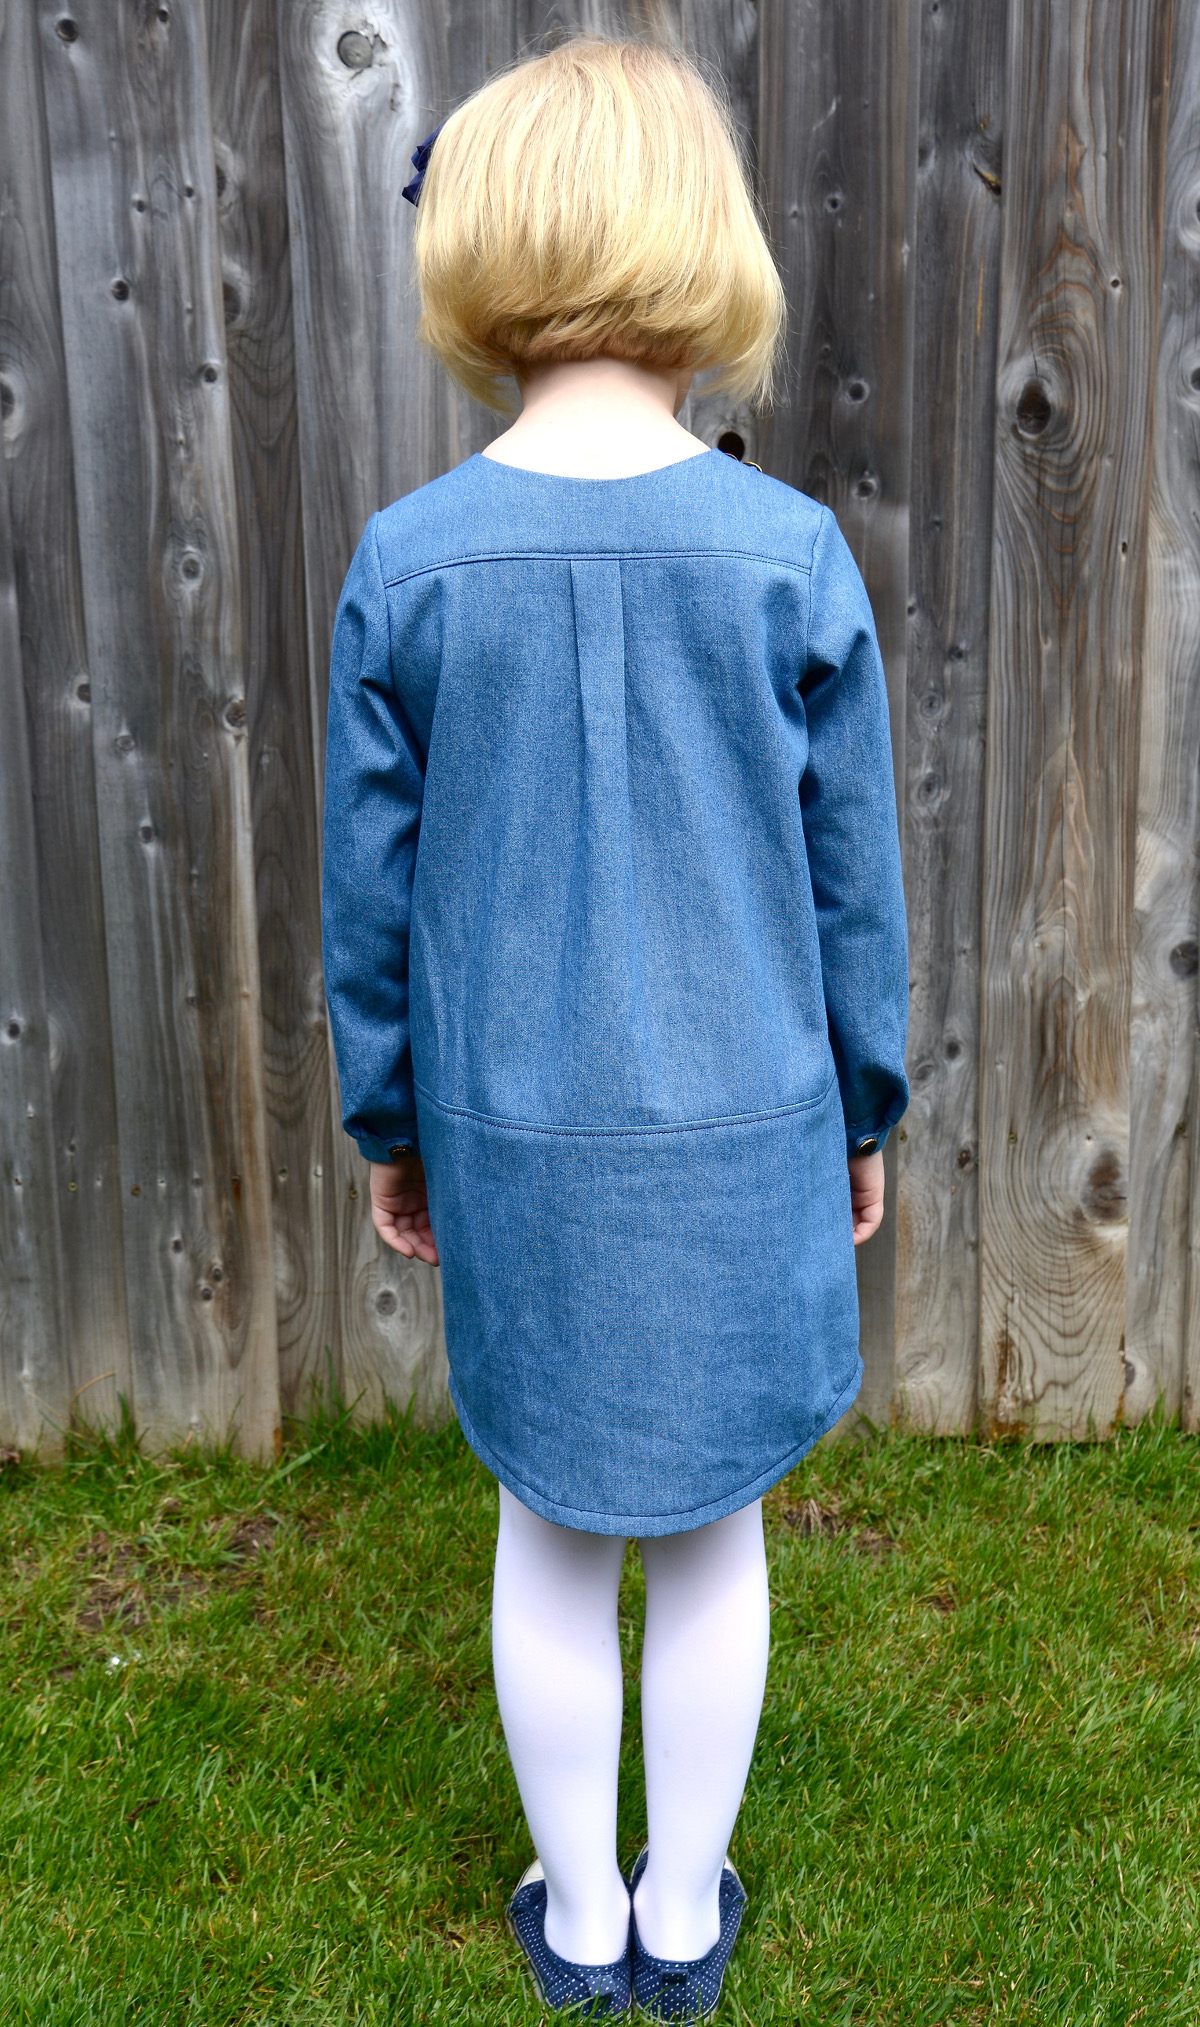
The Book Report Dress certainly lends itself to some fun modifications, not the least of which can be exposed zippers on welt pockets.
I’ve taken loads of boring but mostly in focus photos along with fairly verbose dialogue to show you how I accomplished exposing my zippers.
Here we go.
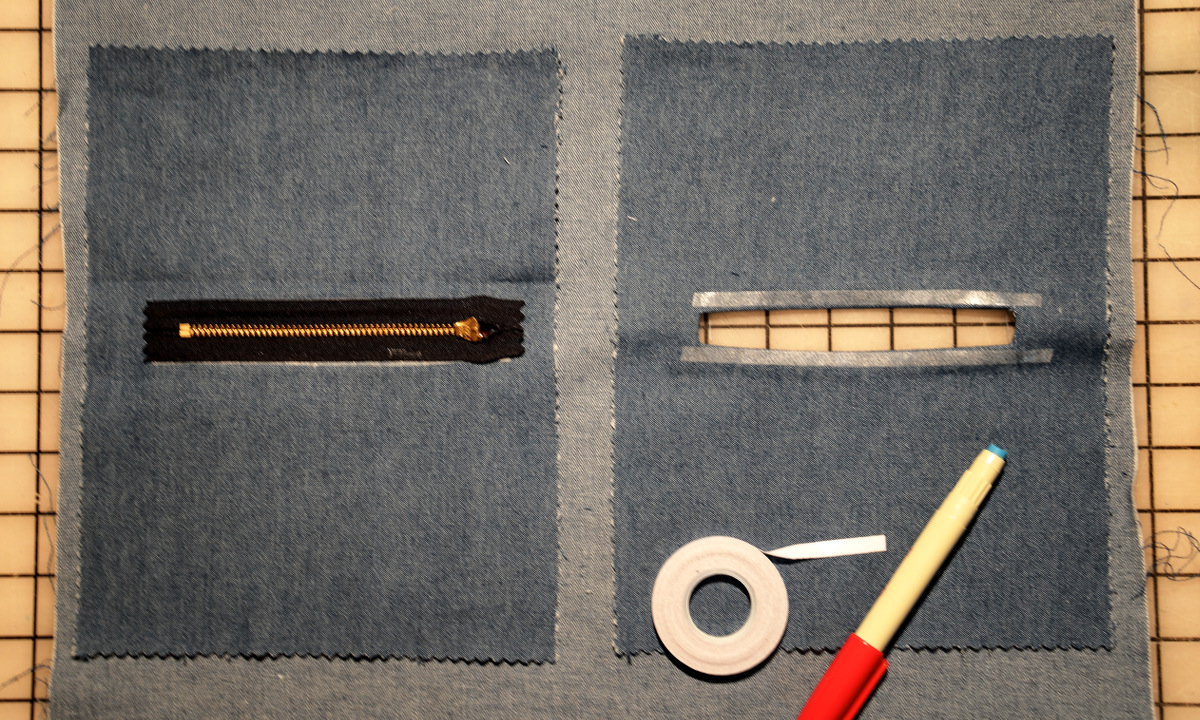
First of all, I highly recommend trying out this method using scrap fabric first so that the opening for the zipper, (a.k.a. the zipper peep hole) exposes the amount of zipper tape you want to see.
Instead of using a real zipper in the trial run, use a piece of grosgrain ribbon or a contrasting scrap of fabric with zipper teeth drawn on the same size as the zipper you’re going to use.
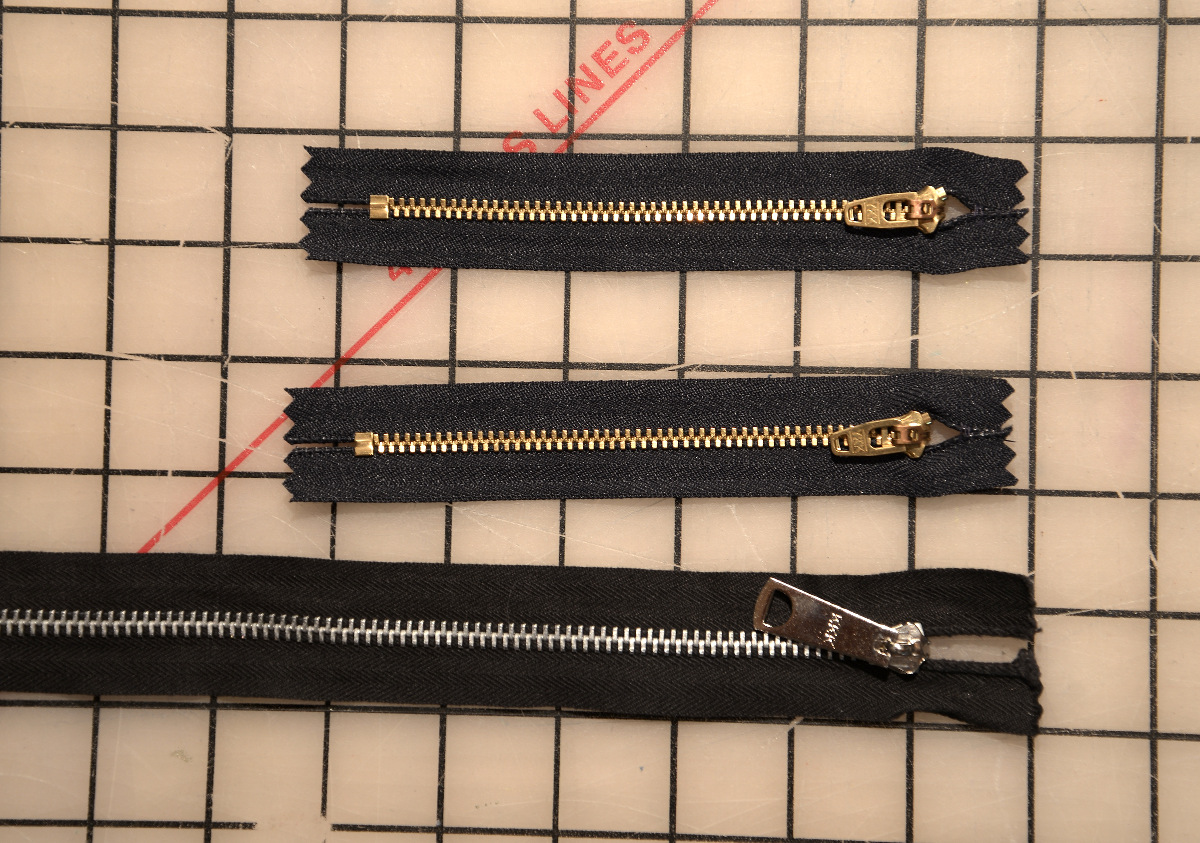
Oh, and as far as my Imperial/Metric conversions go, please note when I went to school we were taught to use Imperial measurements and then our country went metric so I had to re-learn measurements all over again as an adult. So a 1/2 inch for me is 1.25 cm but exact conversion is 1.27 cm. The 5 inch zippers I purchase are labelled 12 cm but are really 12.7 cm. Just sayin’.
The first time I tried exposed zippers on this pattern, I made a ton of errors. The first mistake was constructing the dress front and shirt front as two pieces as per the pattern and not making it one piece. Having a seam in the middle created extra seam allowances, unwanted fraying and bulk. Not good. Especially when using thicker fabric.
My preference is to lay the traced front pattern pieces (#2 and #5) over top of each other along the seam allowances so you can trace out one complete dress front piece. Oh, and don’t forget to add dots and all other marks from those two pieces.
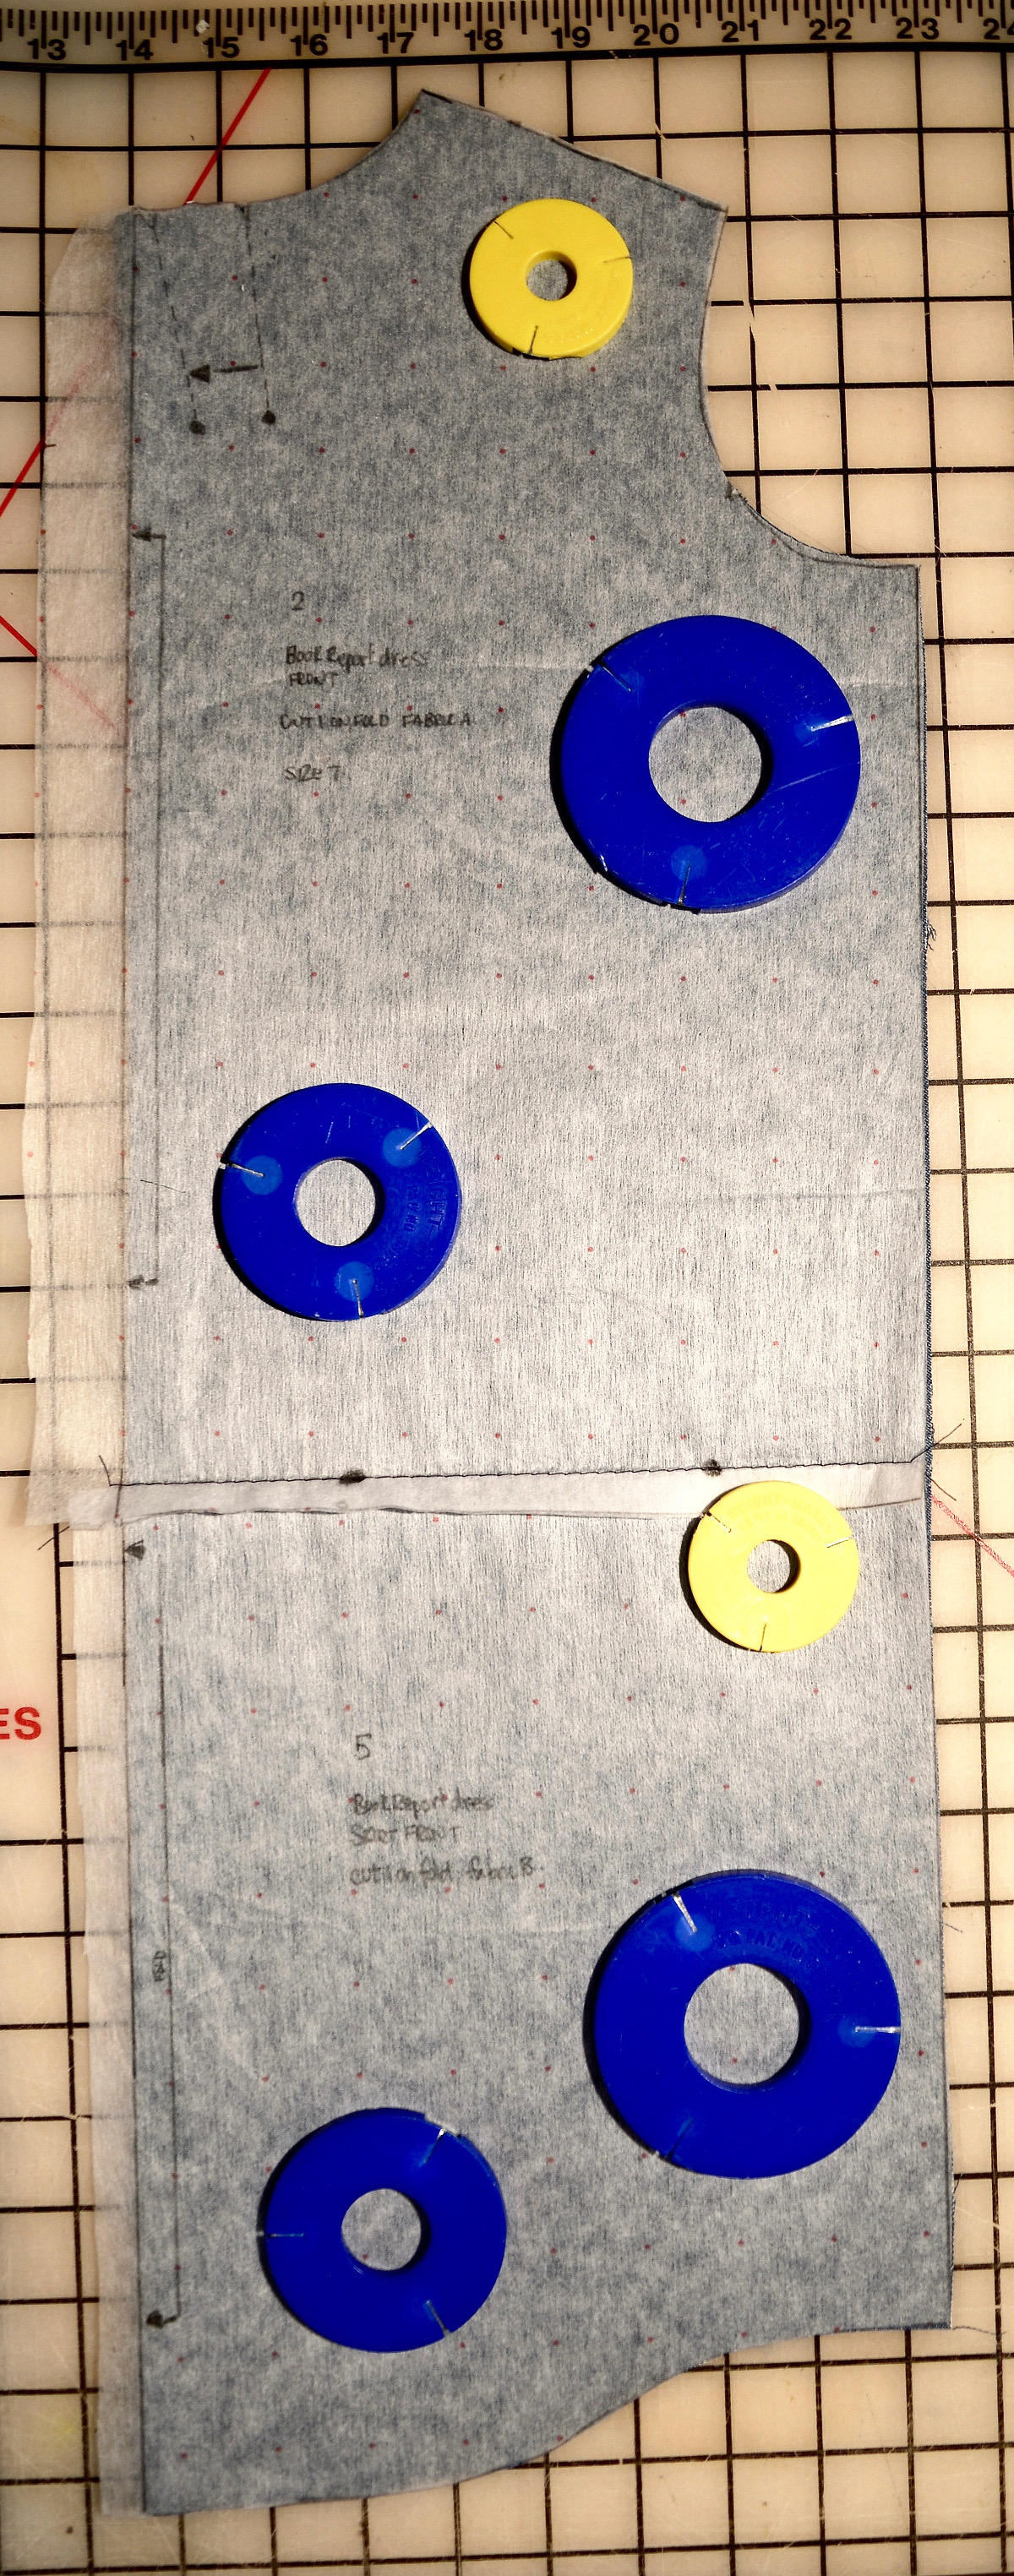
Now if you happen to use a fabric-like tracing medium, you can stitch the two together so you’ll get the piece exactly as it should be.
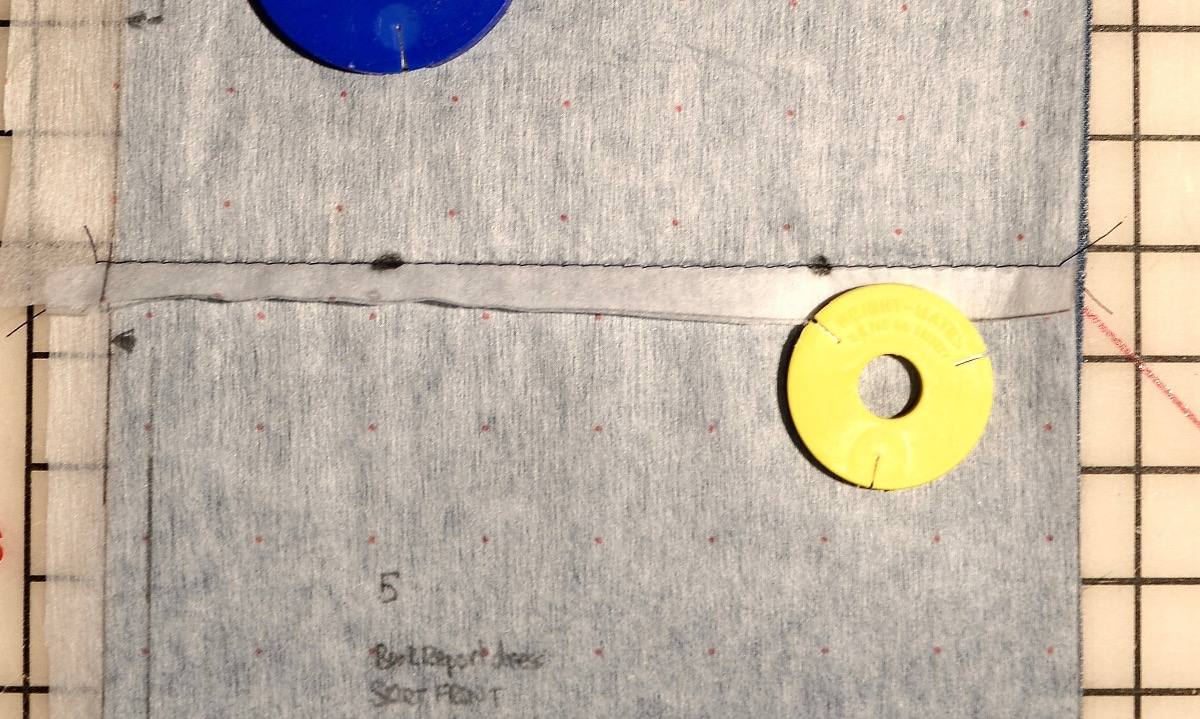
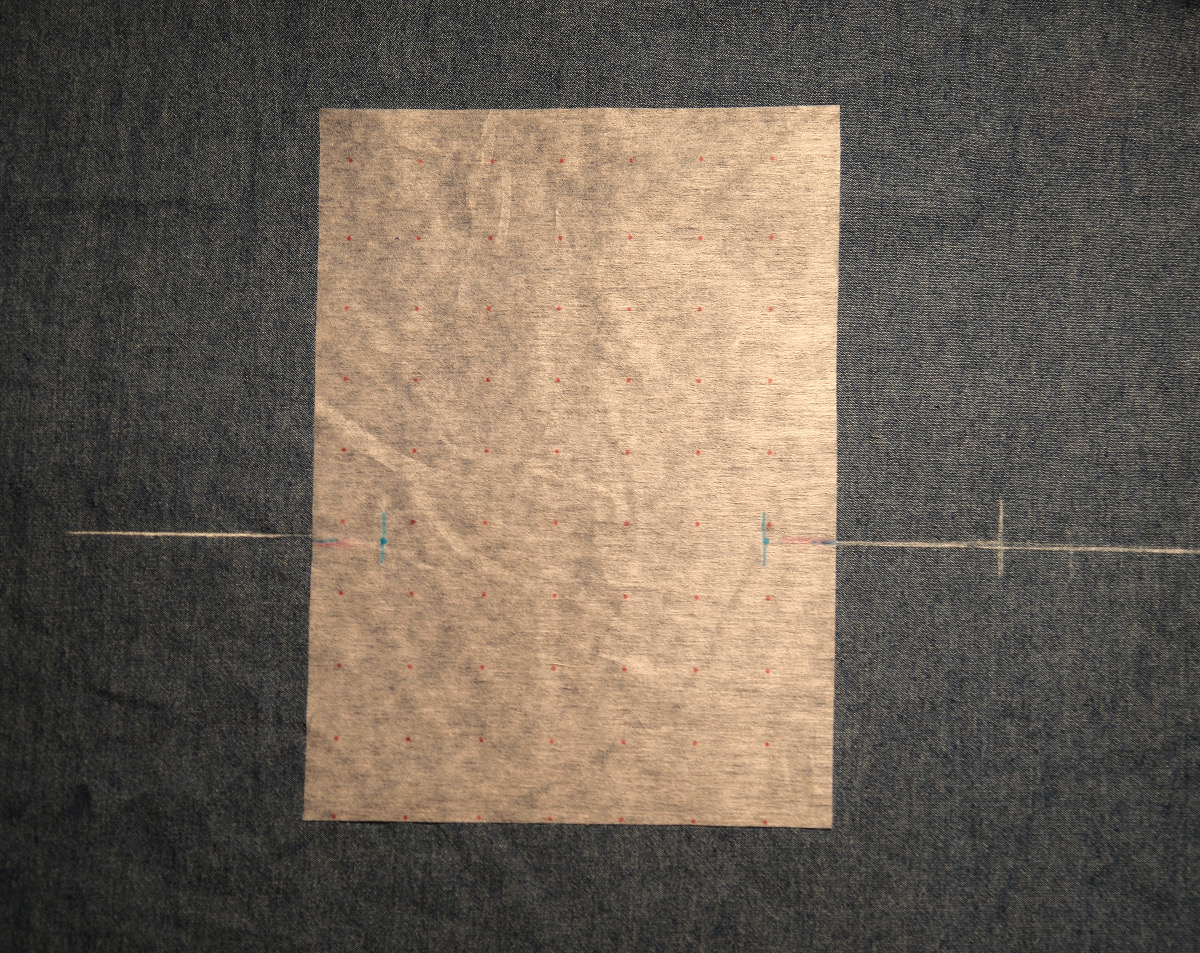
Next cut the dress fabric, open it up and draw a line using chalk or washable marker where the two pieces would have met and a seam would have been created. Let’s call this the “skirt line.” Clip the side edges of the dress front too beside the “skirt line” as this will combine handy when assembling the front to the back of the dress later on.
Now you’re ready to measure for the zipper placements.
Using chalk or another washable marker, mark the dots from the traced piece to the dress front. These will be called the “inside” marks.
Lay the zippers below those “inside” marks and then move the zippers where you want making them the same on each side. Mark new marks along the “skirt line” noting where the zipper stoppers begin and end. These are the “outside” marks.
Note the zippers I used are 5” (12 cm). I placed my zipper so that the zipper stopper end was 1/2” (1.25 cm) away from the “inside” mark and the pull tab end was 1” (2.5 cm) away from the other “inside” mark.
You can move your zippers closer or a little further apart if you want. The “inside” marks are merely a guide.
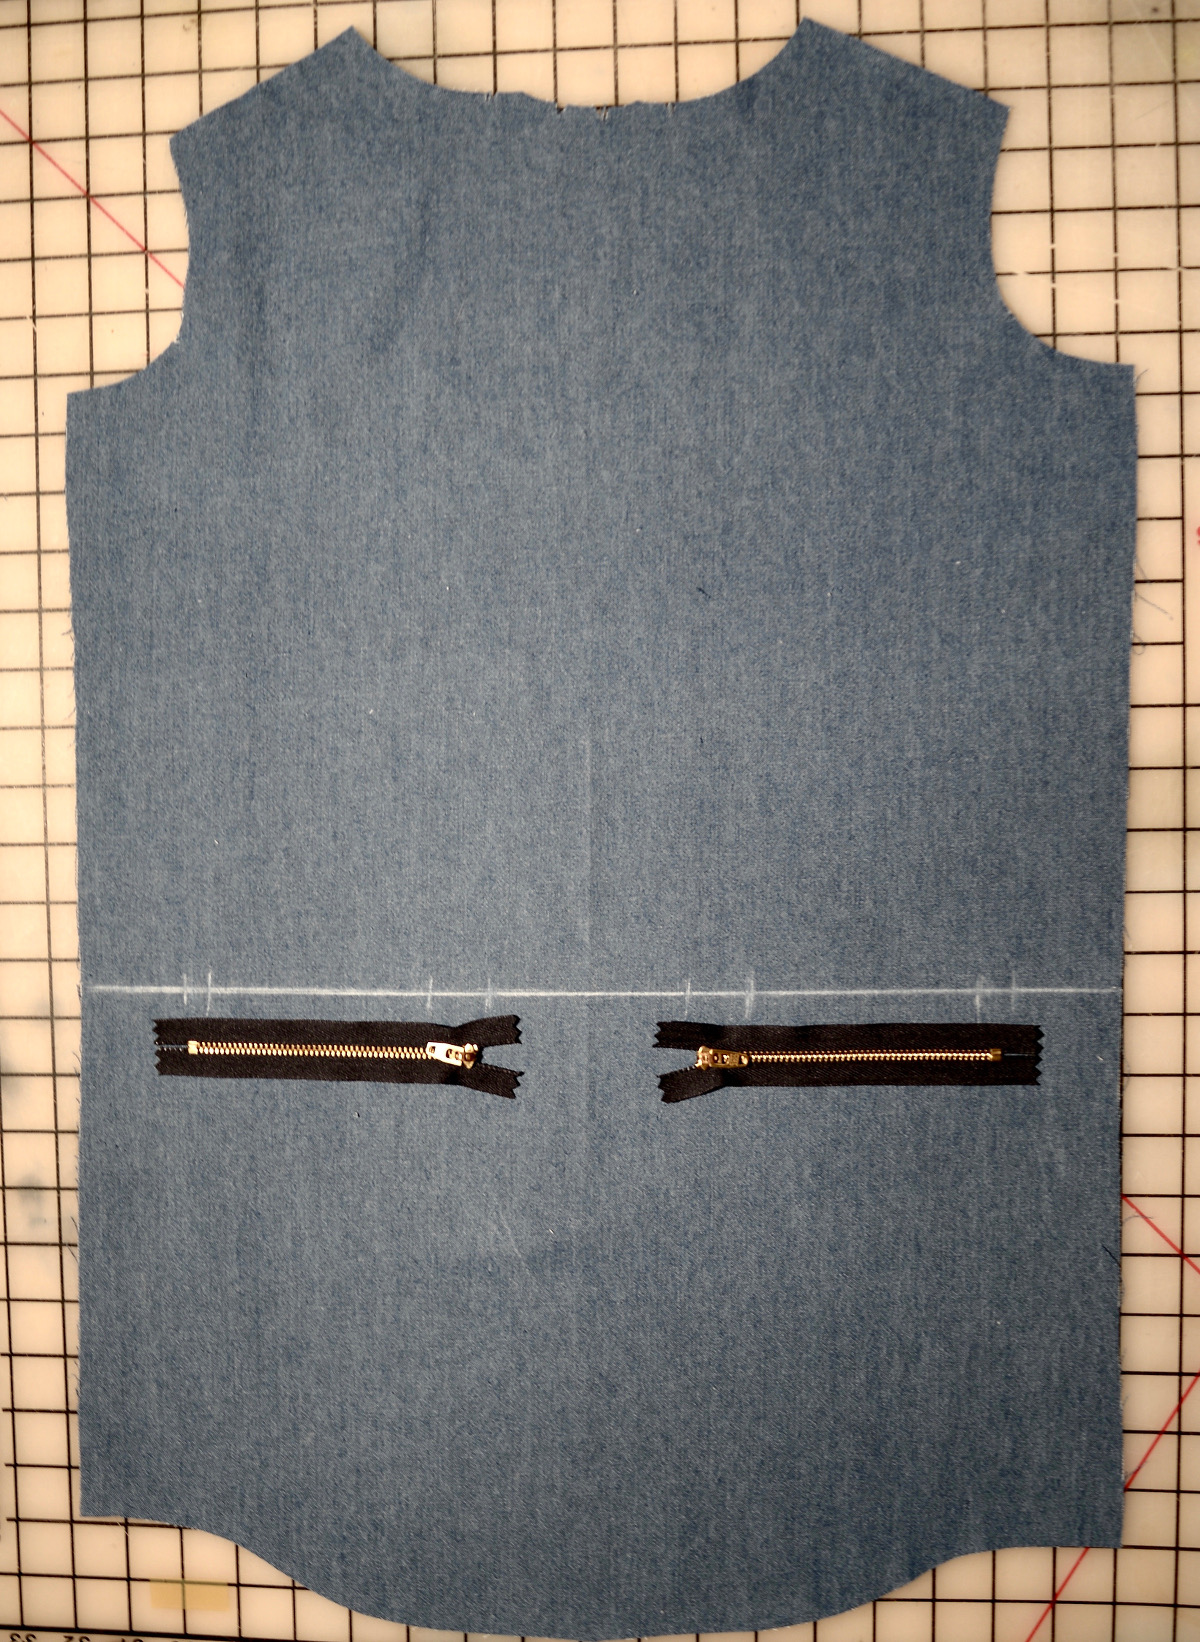
If the zippers you are using have open ends like the longer zipper with silver teeth as per the photo, hand stitch the ends together as I’ve done on my short zippers. Having the tape ends close together makes it easier to line up in the zipper peep hole later on.
Now that the zipper placement area is made, cut two pieces of interfacing and iron them on the wrong side of the fabric in the area where the zipper will go along the “skirt line” that’s marked on the other side.

The next step is cutting the pocket bags. I cut two pieces of fabric roughly 7 1/4” X 10” (18 X 25 cm). You can have larger or smaller pockets, but let’s work with these measurements for now. In the last step you can do some trimming.
The zipper placement area from the dress front has to be transferred to the wrong side of the pockets, however, the pocket pieces have to be staggered over the “skirt line”. So here’s what I did to get the markings in the right spot.
Cut two pocket pieces (sizes noted above) from whatever tracing medium you use.
Lay out those tracing pieces on the dress front and using the “skirt line” chalk line as a guide lay the top end of the pocket further away from the “skirt line”, say roughly 6” (15 cm) above, and the lower end of the pocket will lay a lesser amount below the “skirt line”.
Trace the marks from the dress front to the tracing medium.
With chalk or washable marker, transfer the “outer” marks and the “skirt line” from the pocket tracing pieces to the pocket fabric pieces.
Lay the pocket pieces (right sides together) on the dress front. Use the “skirt line” marks on the dress front and pocket pieces to help align plus, lift the sides of the pockets and take a peek to make sure the “outer” marks on the pockets are over the top of the “outer” marks on the dress front. Using a pin, stick it through the pocket piece at those marks aiming it at the marks underneath. That will also help.
Pin the pockets in place so nothing moves.
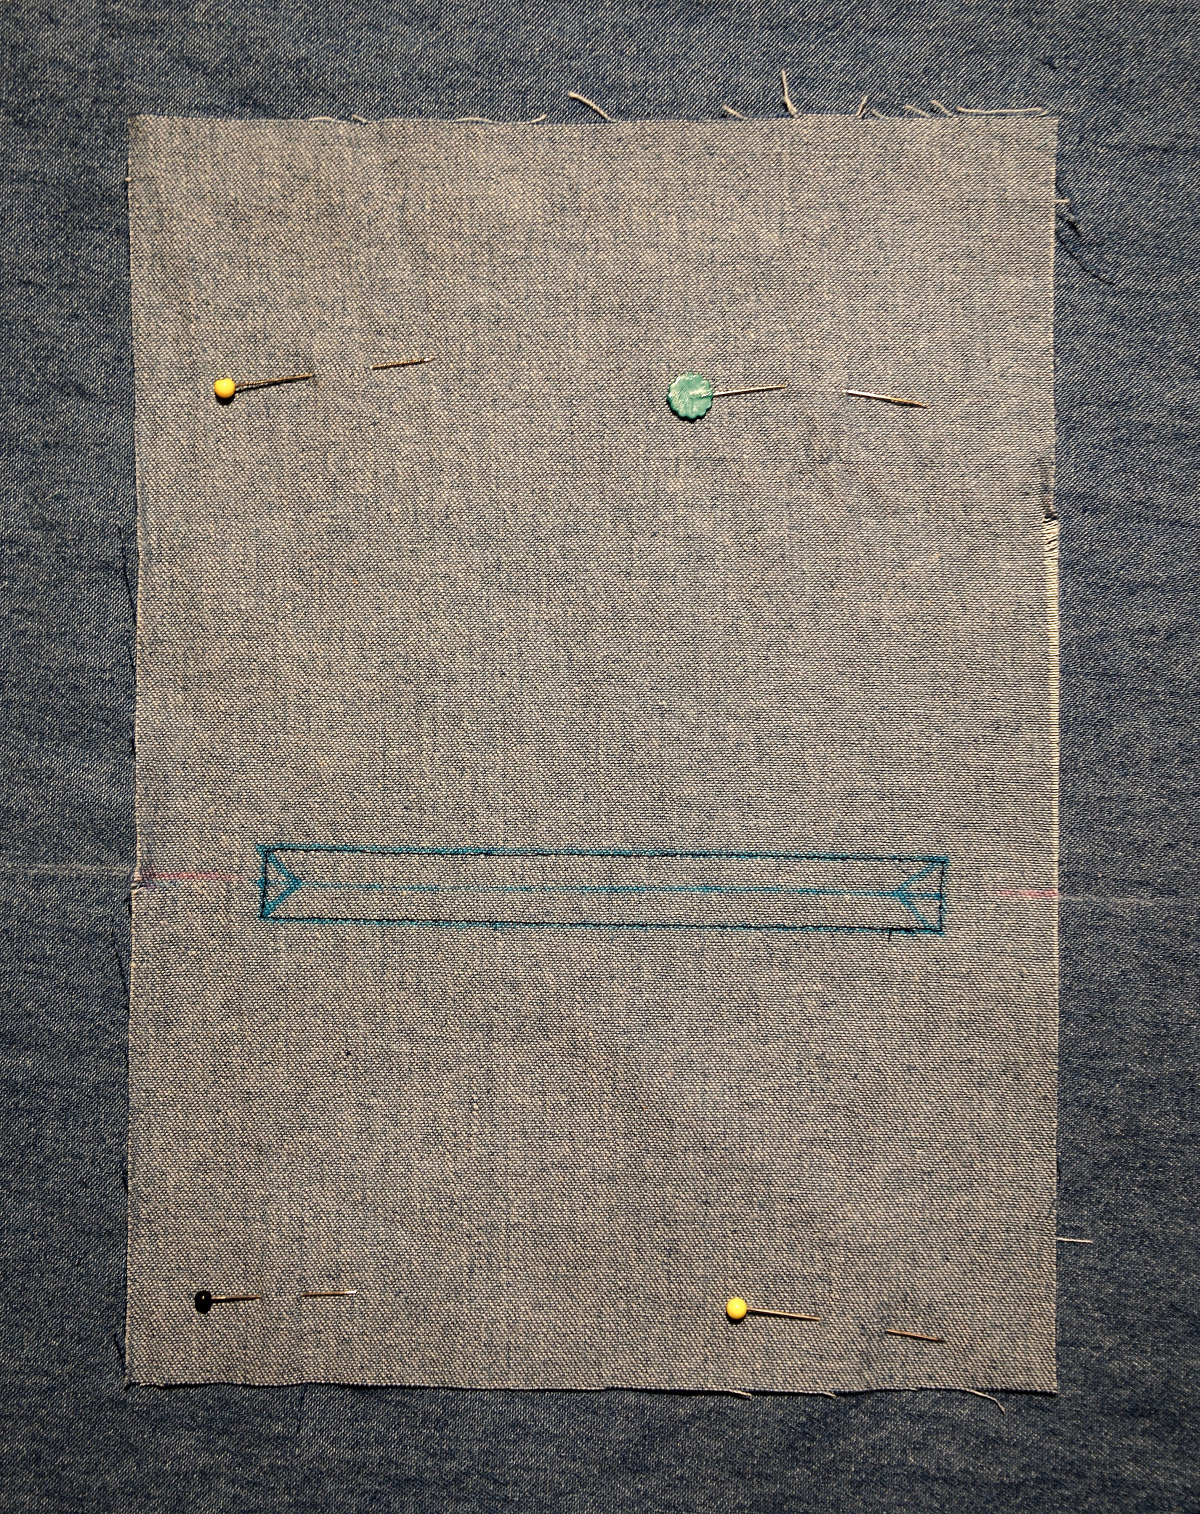
On the “outer” marks draw four vertical 1/2” (1.25 cm) lines in washable marker. Next, draw a horizontal line in between those marks. Now draw a line 1/4” (6 cm) above and below the middle line. You’ll have two long rectangular boxes with a line through the middle. At the end of the middle line, draw a “V” as seen in the photo.

Go ahead and stitch around the outside of each rectangle box. Note that when you stitch down the 1/2” (1.25 cm) sides, count the number of stitch and make sure you use the same number of stitches for each of the rectangle boxes.
I’m using a contrasting thread so you can see the stitching lines better.
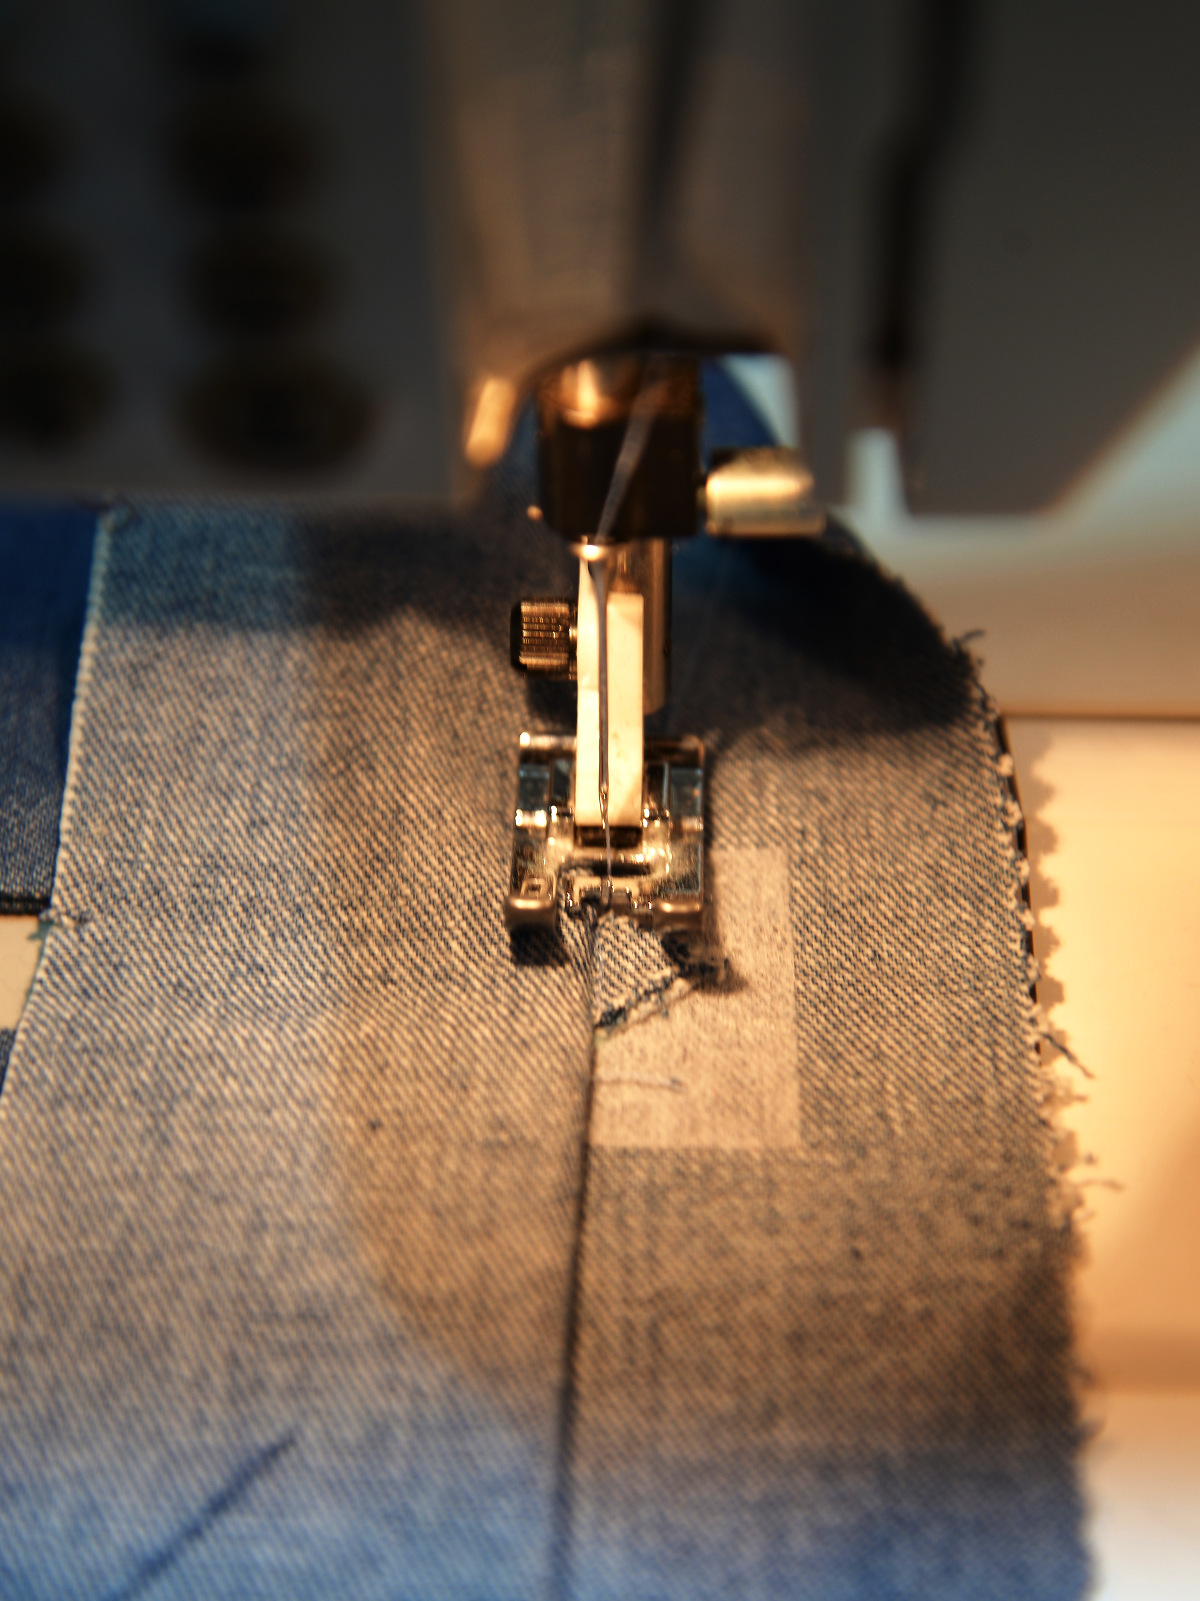
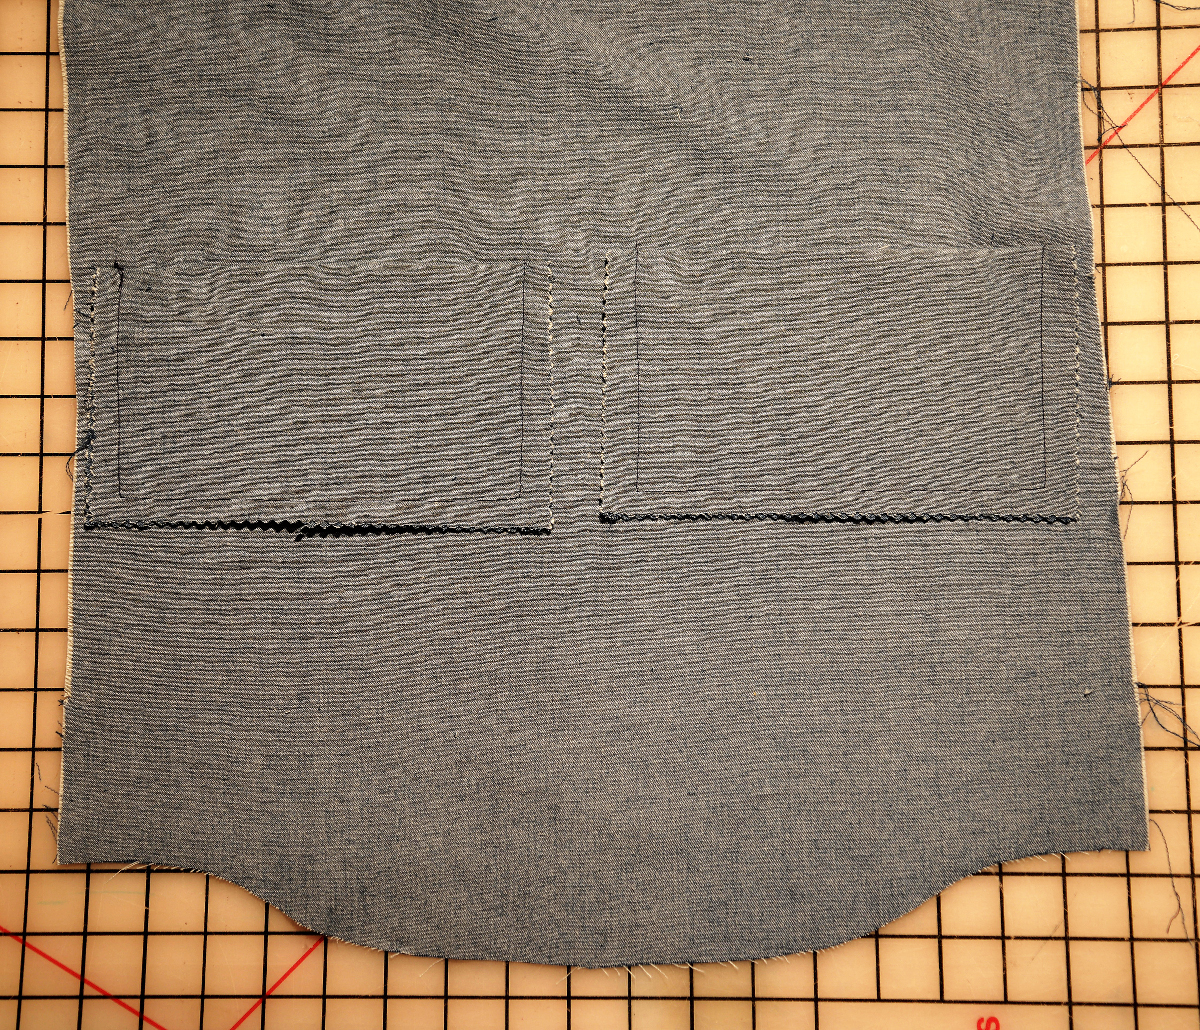
You are now ready to cut open the pocket area. Carefully cut along the middle line and when you get to the “V”, clip carefully up to the corner, but not through the stitches.

Pull the pocket fabric through the hole, flatten to the wrong side of the dress front and press.

Lift up the corner of the pocket pieces and stitch the little triangle, or the “V”, as close to the edge of the opening as you can with the pocket side down on the sewing machine.
Press again to make sure everything is flat and the seams along the zipper peep hole edge are perfectly aligned.
Now you’re ready to insert the zippers.
I find it really easy to use a fabric glue stick or sticky washable sewing tape (like Wonder Tape) to hold zippers in place before stitching. I also find it easier to apply the tape, or glue on the wrong side of the pockets opening and not on the zipper tape itself because the fabric opening can be easily manipulated.
If you don’t have washable tape, then use pins to hold the zipper in place.
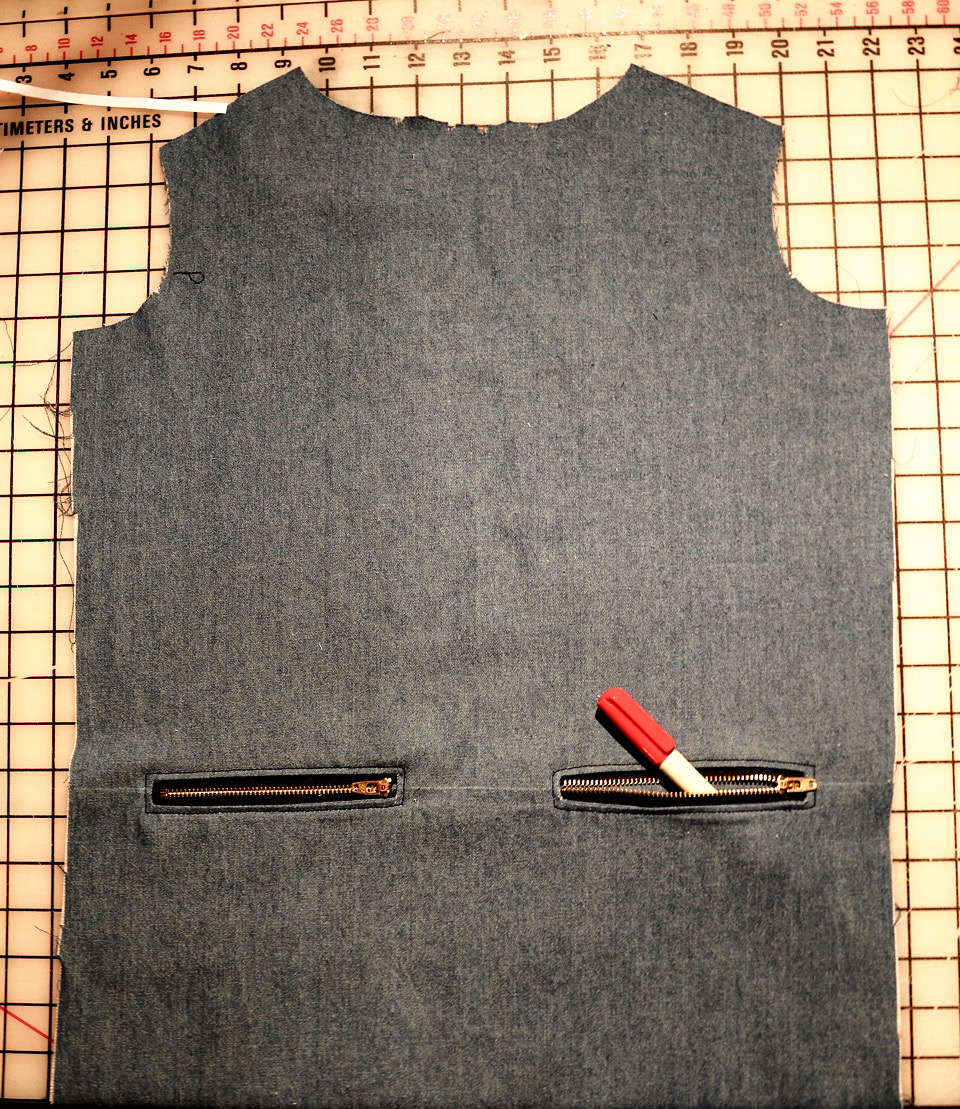
With the dress right side facing you and the zippers in behind, take some time to fiddle and fuss with the zippers so the zipper tape is exposed to your liking.
The photo below is showing the wrong side of the dress. The left side pocket in the photo shows the zipper stuck in place (face side down) and the right side pocket with the glue tape in place ready for the next zipper.
Since I find using pins for this task difficult, I only have a photo showing washable tape. However I have read that some people us scotch tape where they would place pins. Perhaps it’s worth a try?
The zipper should look something like this now. It’s stuck firmly in place and ready to be stitched around.
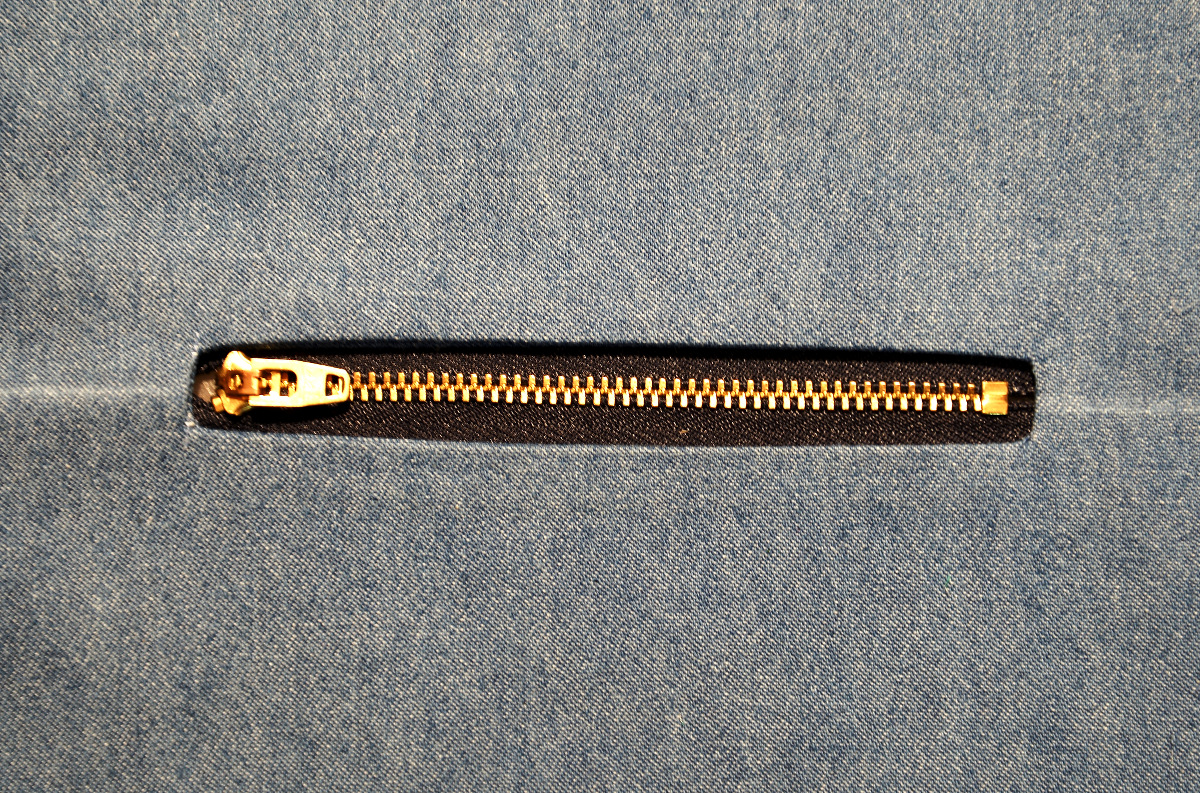
Now you can go ahead and stitch all around your zipper. I use two strands of thread through the sewing needle.
Last step. Turn the dress over to the wrong side. Pull the top of the pocket down to meet the bottom of the pocket making sure everything is laying flat, trim excess if necessary, press and pin in place. If you want the pocket even smaller, trim away, and when you’re happy with the size stitch around the three sides being careful not to stitch into the dress front.
That’s it! You’re exposed!
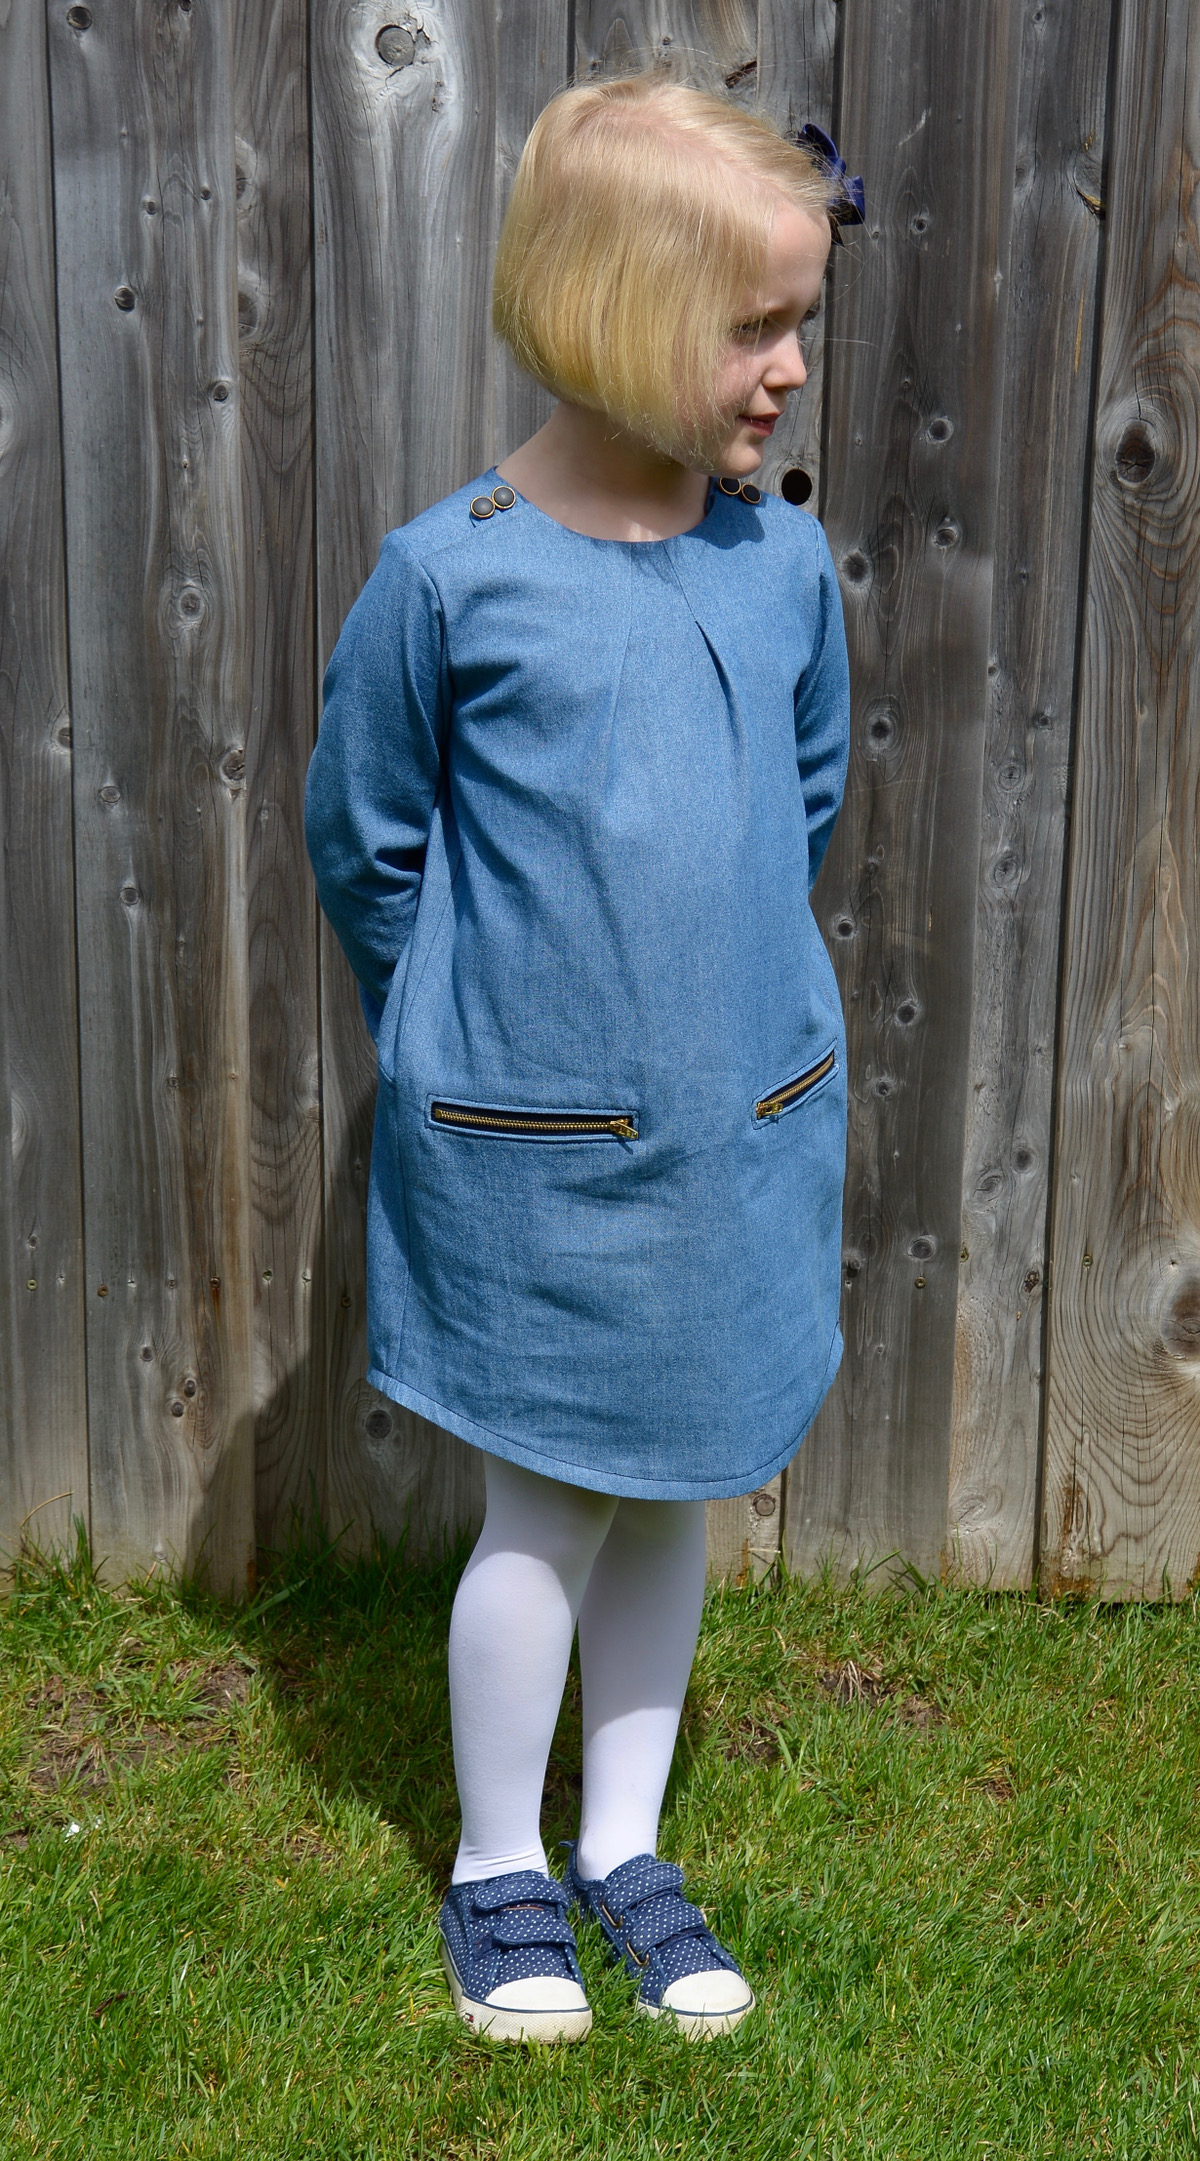
And the pockets are a perfect place to stash your dinosaur and zip it shut so you brother doesn’t get it.

I LOVE this tutorial, thank you. It’s something I’ll be using on my clothes!
Love it, thank you!
Fantastic Deb. I’ll be copying this in a few patterns I can think of. Would be very cute on the Bento tee which has original pockets the same as the Book Report dress.
Thanks for a very well written book report. A+
🙂
This is great, Deb!!! When did your little model become so big?!?!?! We’ve yet to sew the Book Report Dress, but I really like the variation you gave the pattern. Excellent idea!
Again, a lovely idea!! I’m very fond of this pattern – partly because it’s very generous in sizing, and fits for ages. FrancesSuzanne – you MUST try- pattern for your signature piping. Thank you for taking so much time and effort to ‘explain’ the process.
Thanks for this tutorial! My going to use the information to make jacket pockets.