Please welcome Shelly to the blog today. She blogs at Sew Shelly Sew and posts photos on her Instagram account: @sewshellysew. Dr. Seuss’s birthday is March 2nd and in order to celebrate it, many schools across the country do fun things related to the books written by this famous author. Have a look what Shelly did!
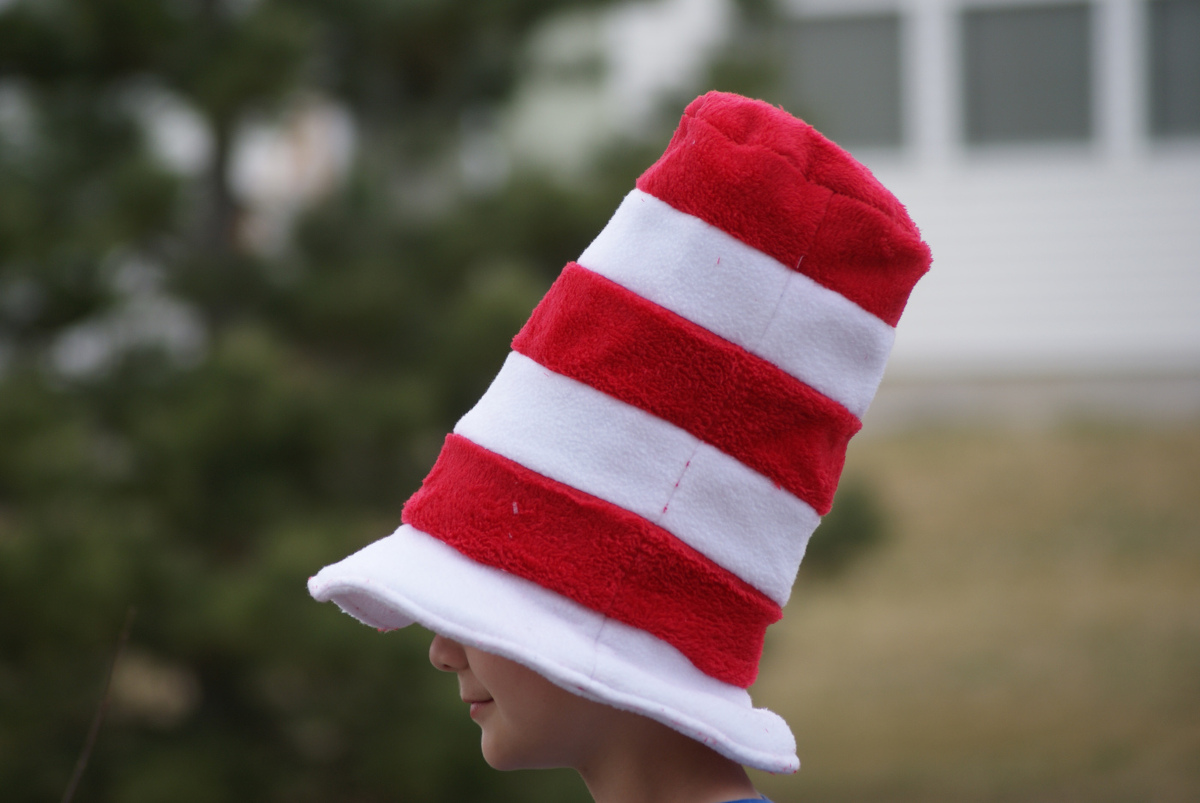
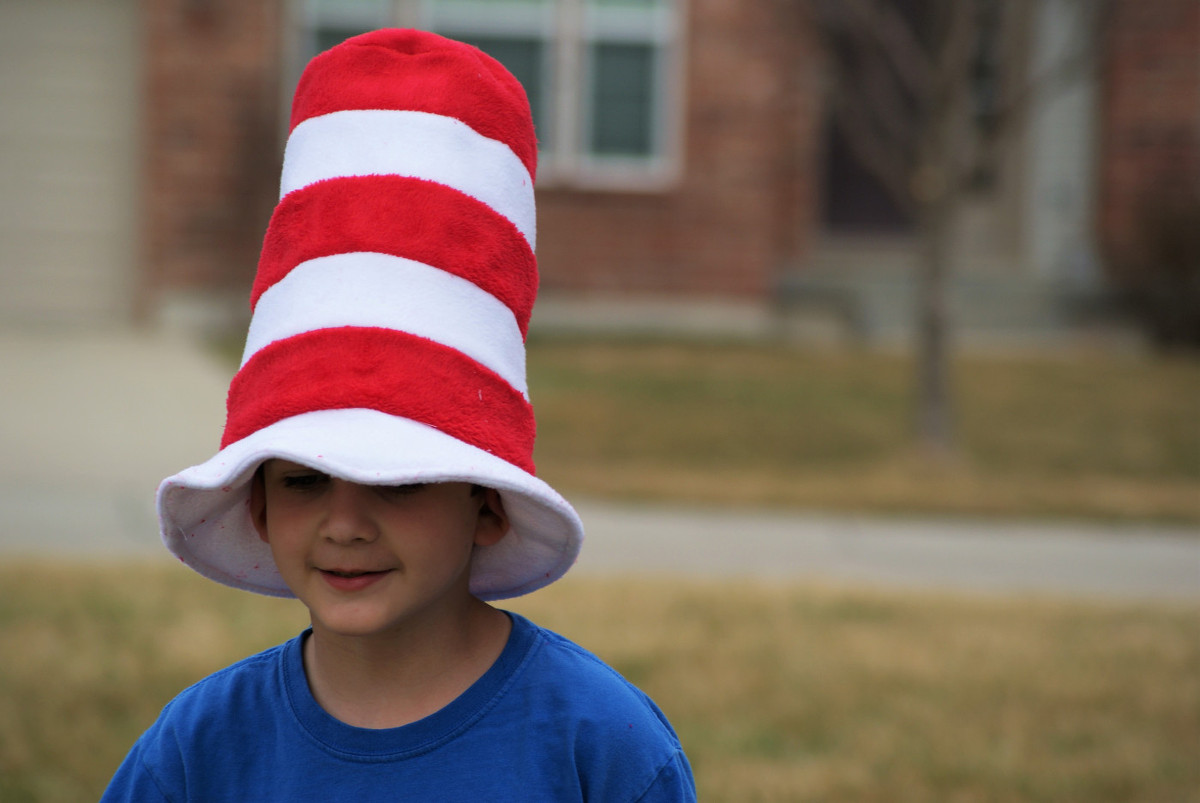
In honor of Dr. Seuss’s Birthday last week, Sam’s school is having a spirit week this week, with everyday having a different theme inspired by Dr. Seuss books. Since tomorrow is Hat Day inspired by “The Cat in the Hat,” I decided to sew Sam a “Cat in the Hat” hat of course.
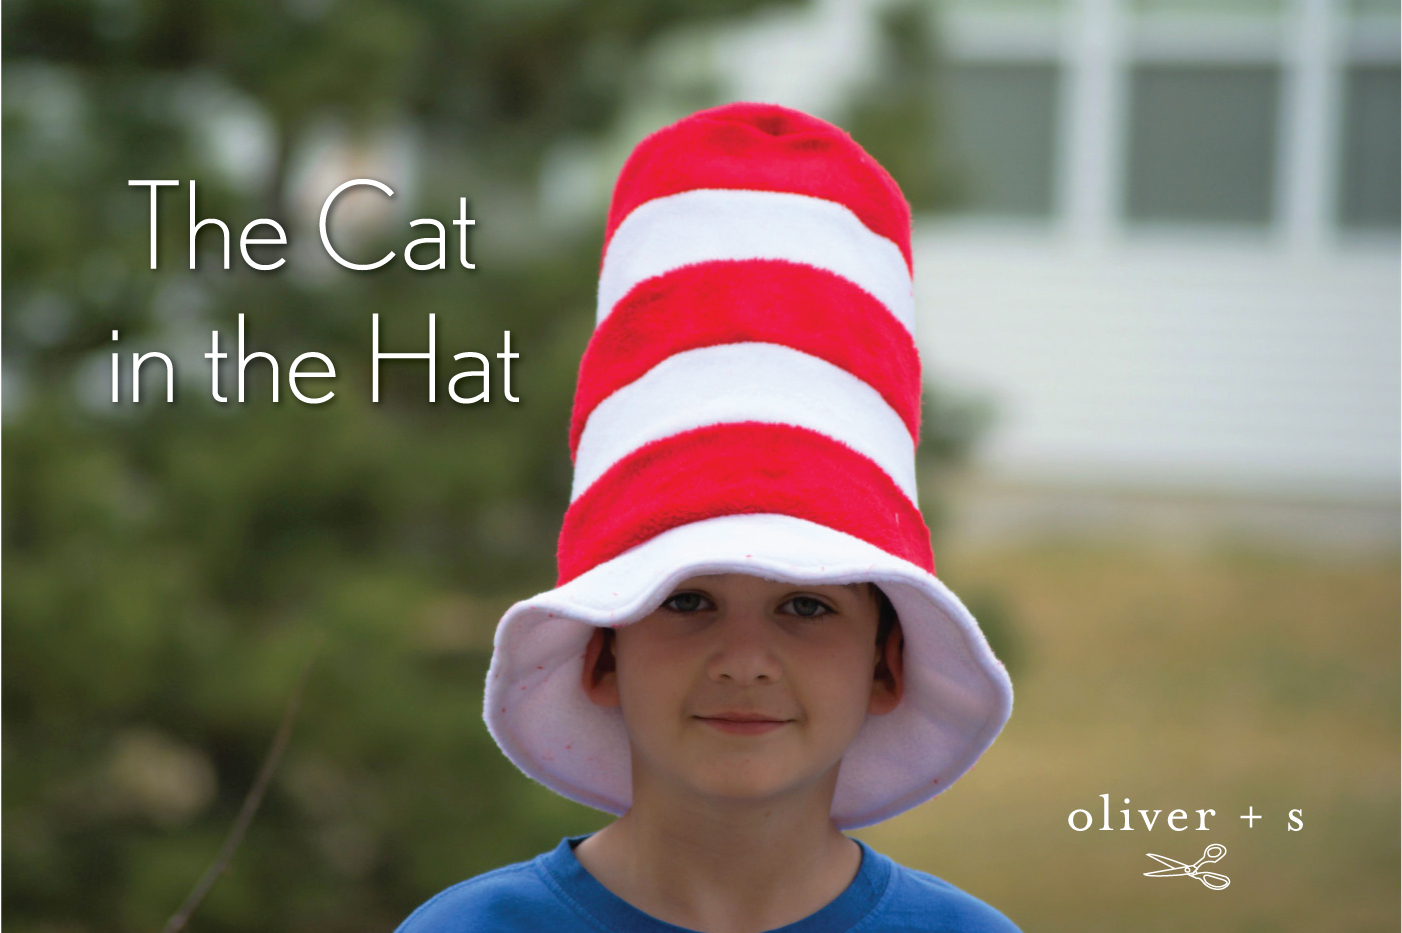
I used the Oliver + S Reversible Bucket Hat pattern and very easily adapted it to make this! All I did to alter the pattern was lengthen the side piece, then cut it apart and color blocked. I left the brim and the top as is. I used fleece for the outer and then quilting cotton for the lining. I also used heavy-weight interfacing on all pieces. The red fleece I happened to have (and I didn’t have time to go to the store) was that really soft kind that sheds everywhere, and my son was eager to model it right when it was finished, so please excuse the red lint in the pictures.
For the side piece, first I marked the 1/2″ seam allowance on both the top and bottom.
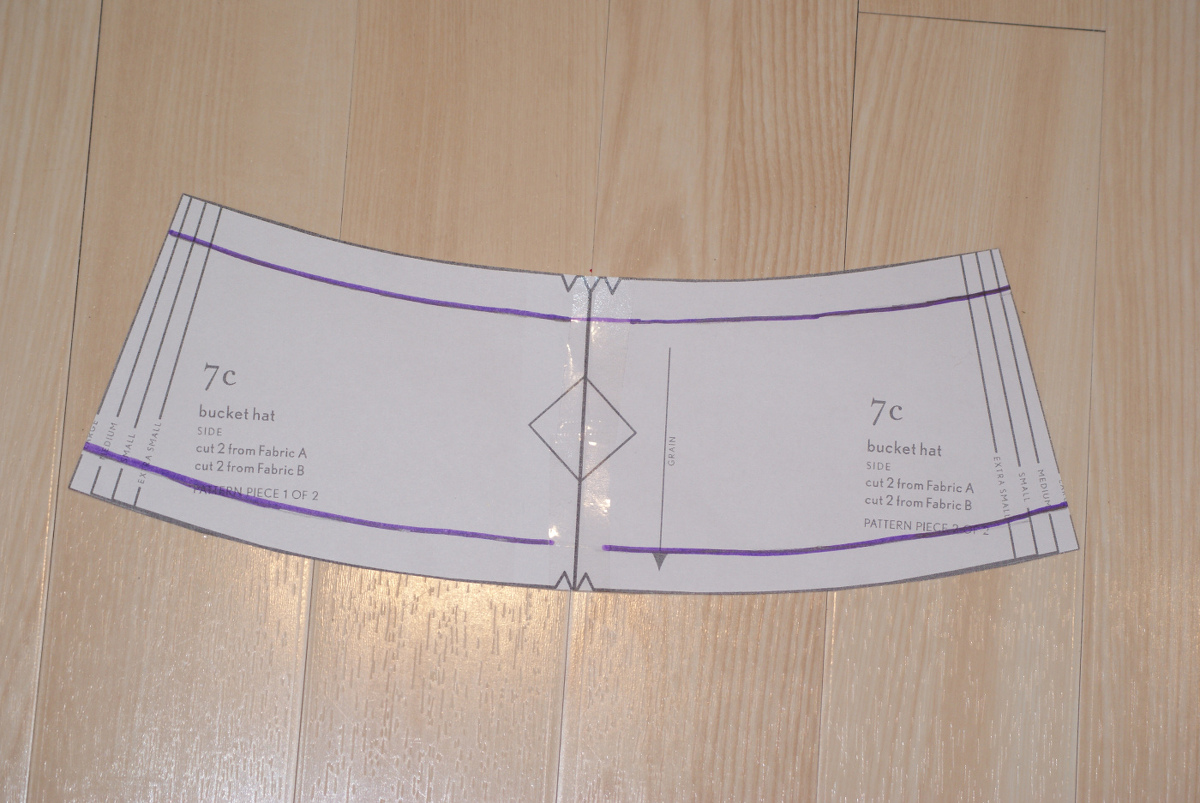
I cut the pattern piece in half from side to side and spread it apart on some freezer paper. I lengthened it (in height) to 10 inches from the top seam allowance line to the bottom seam allowance line and taped it down. I arbitrarily chose for each stripe to be 2″ high (times 5 stripes).
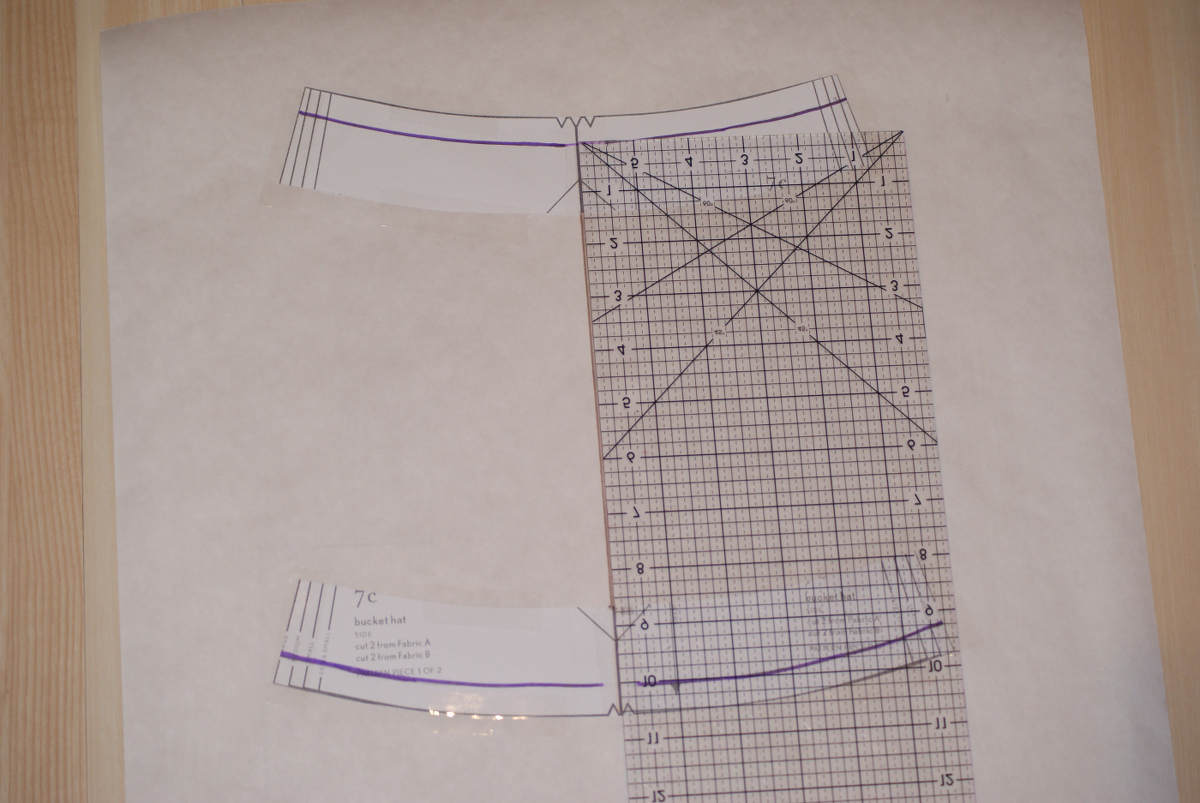
Since the pattern has a line already drawn down the center, it was easy to align the two halves on a piece of freezer paper and draw a new line connecting those center lines. To get the new side seam lines, I just drew a straight line from the top seam allowance line to the bottom seam allowance line, then extended that line up the 1/2″ to the top and bottom.
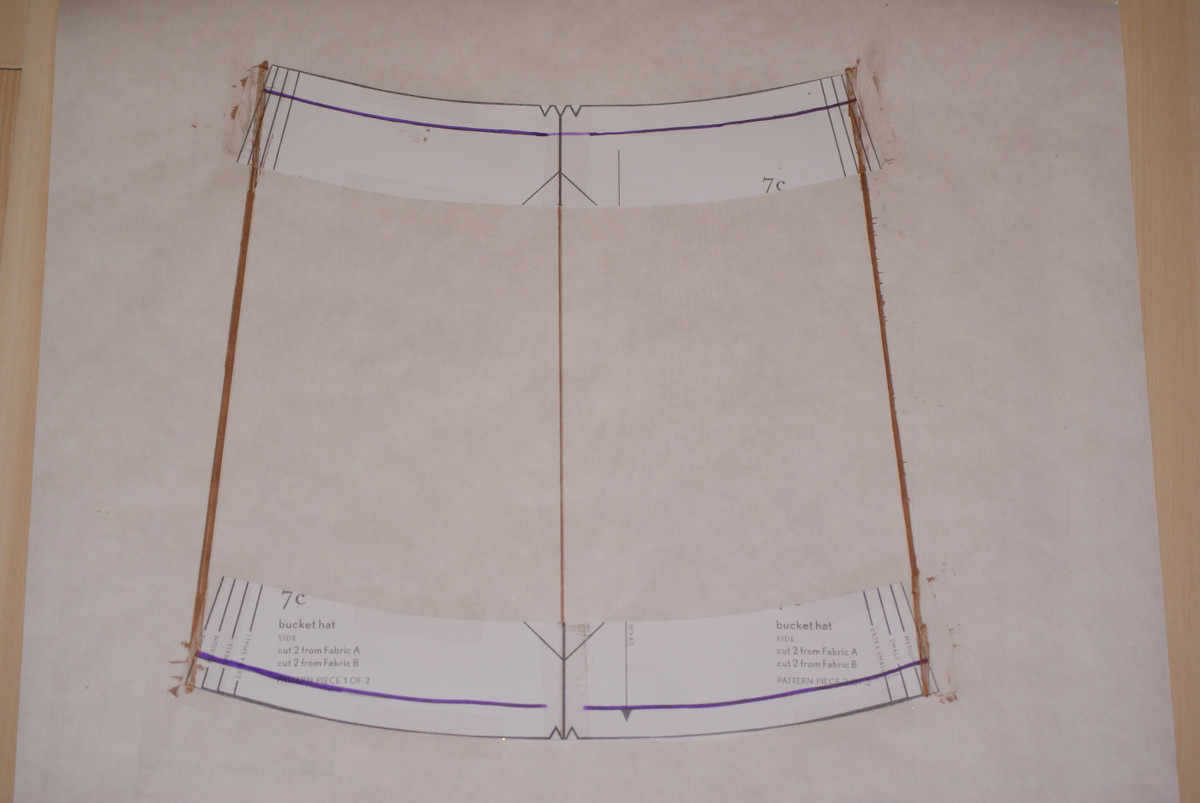
I cut out this big pattern piece and first used it to cut out the lining pieces. Then I divided the section between seam allowance lines into five 2″ sections. I drew a line every 2″ starting at the top seam allowance, following the curve of the pattern piece. I also labeled the pieces with numbers, just to keep them straight after they were cut out.
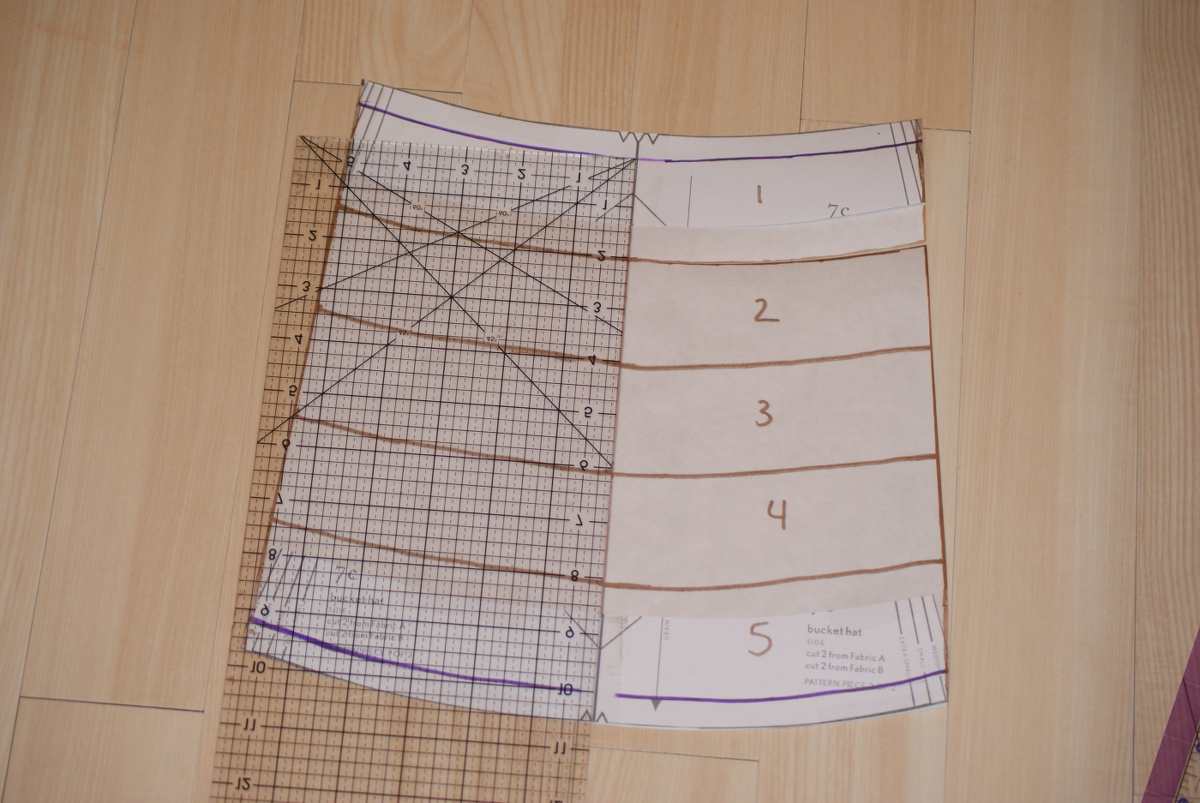
I cut apart this pattern piece into these 5 sections…. I only cut at the brownish colored lines…not the purple seam allowance lines.
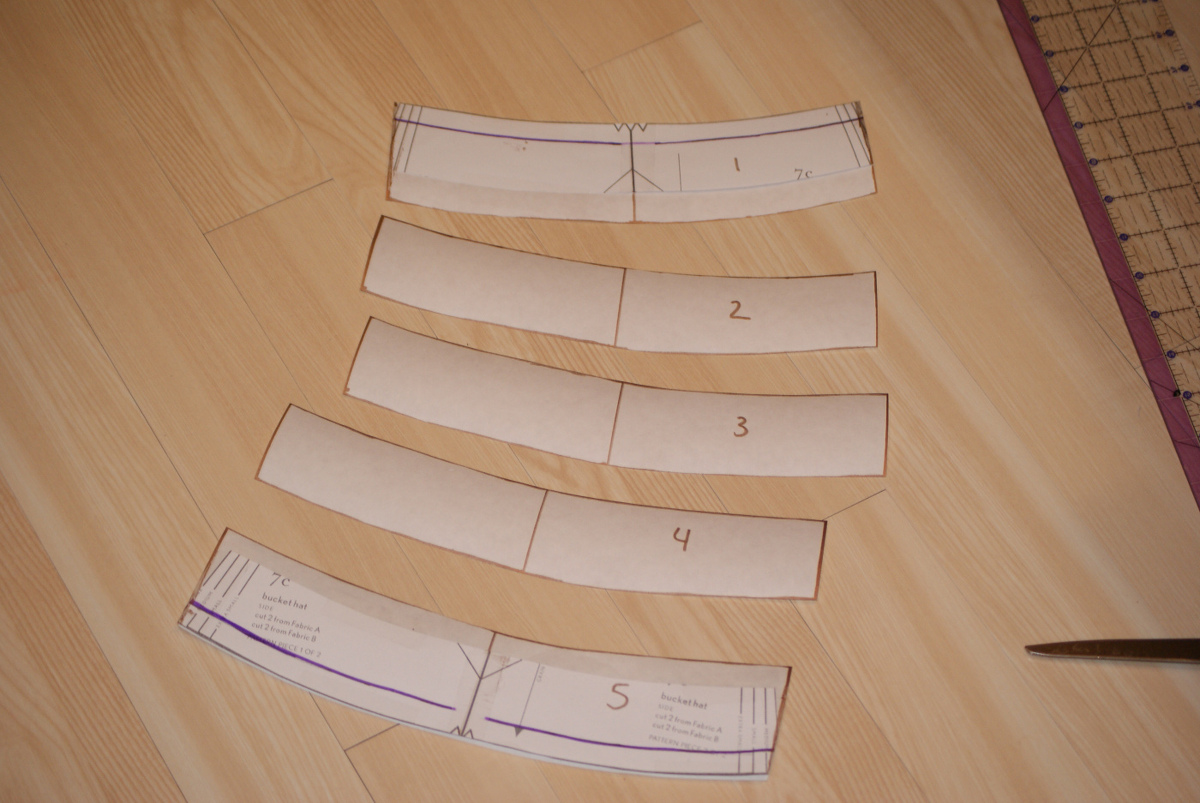
I used these 5 pieces to cut out my outer fabric. When cutting my fabric, I added 1/2″ seam allowance to the top and bottom edges of the three center pieces and to the bottom of the top piece and the top of the bottom piece (since the very top and bottom already included seam allowance). I cut pieces 1, 3, and 5 from red fleece and pieces 2 and 4 from white fleece.
I interfaced all of the pieces I cut (including the lining) with heavy-weight interfacing and I sewed the hat according to the directions except I sewed the two pieces of each stripe together at the short ends to form a loop, then sewed the stripes together in order, matching up the side seams and centers.
My kids were so thrilled with this hat. It is their favorite thing that I have ever sewn by a long-shot! It was fun to sew something that my kids were super excited by for a change! I hope Sam has fun wearing his new hat to school tomorrow!
Thank you Shelly for sharing your fun project with us!
Fun hat and a fun sew! Thanks for working it out and sharing.
Thank you Deb! It was a fun sew!!!
That is very cute! Perfectly executed and very well explained. Hats off to you!
Thank you!
I made one of these a few years ago for my son as a dress up for book week. I used the same pattern too! And his costume was the Sailboat top and naturewalk pants. It was great fun. Thanks so much for sharing!
You are awesome for making a whole outfit! I always wait until the last minute with these things and was lucky to squeak out a hat 😉