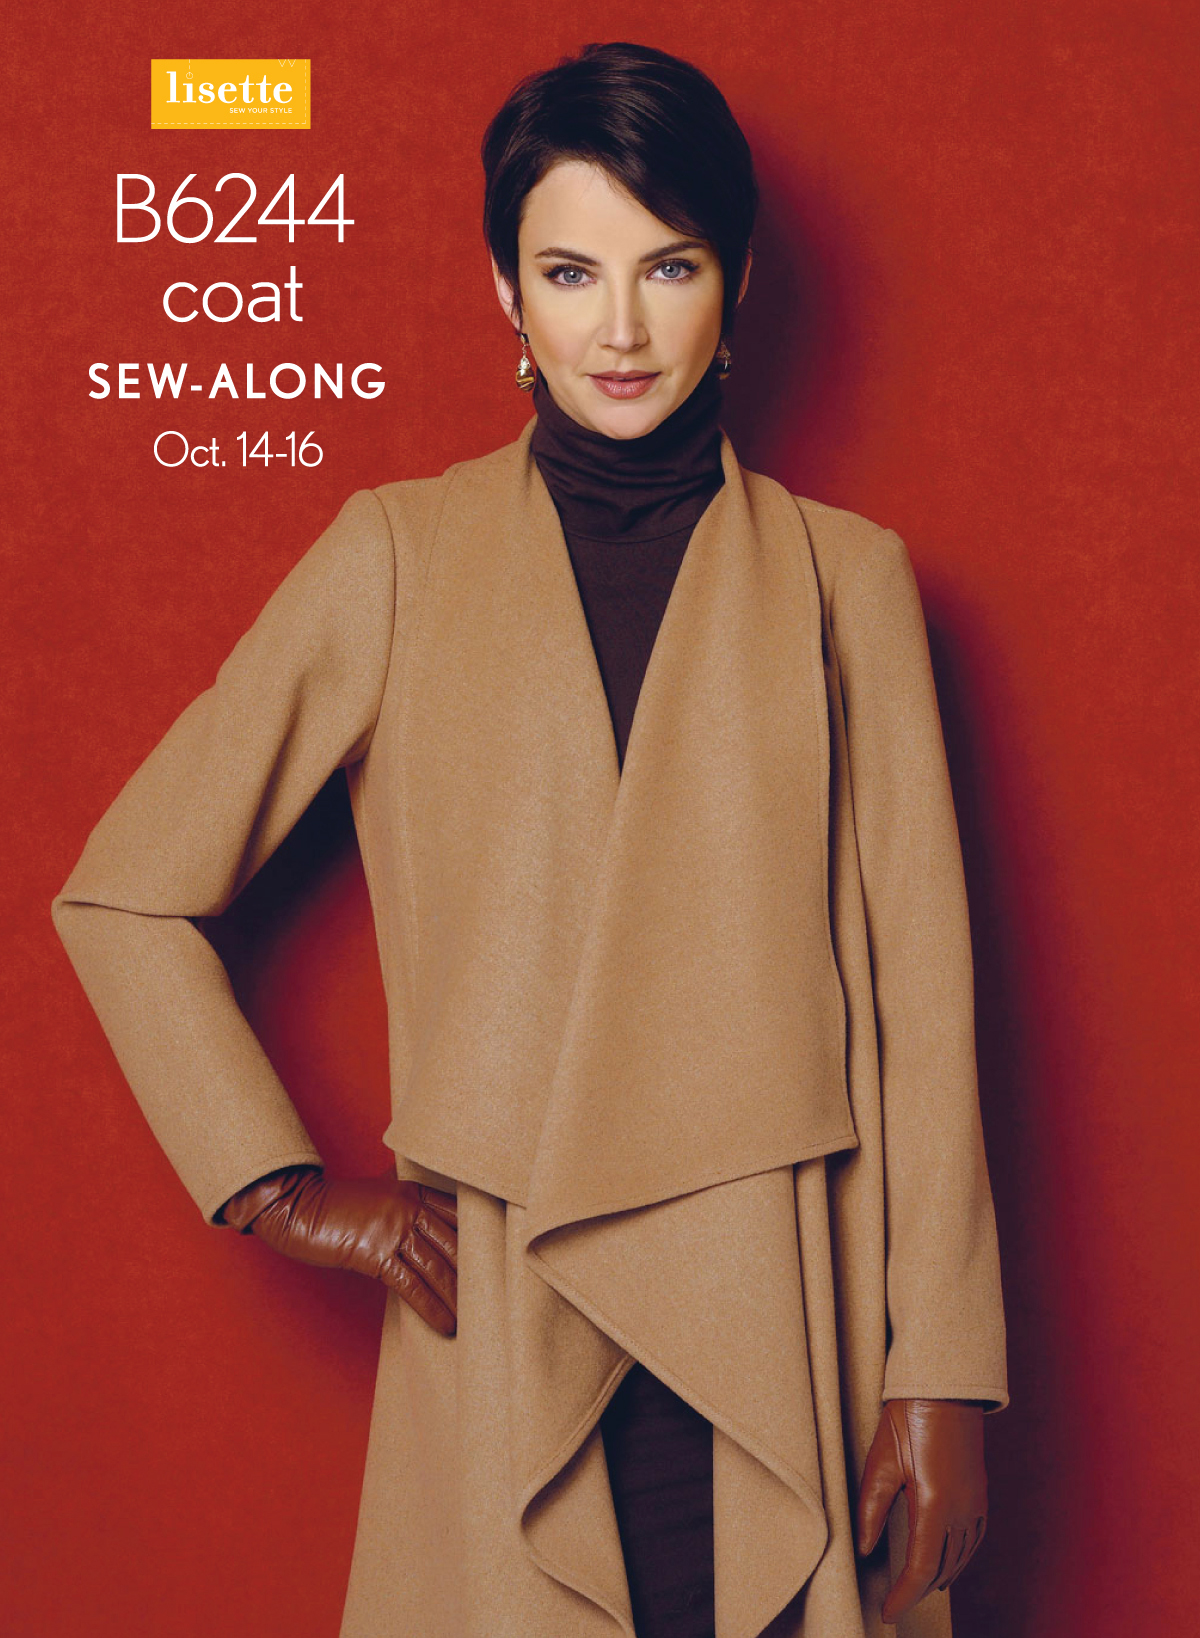
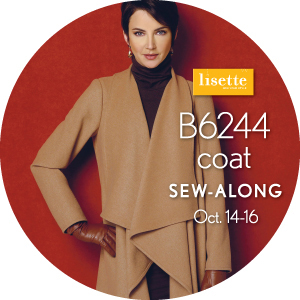
Hello, friends! I’m so glad you’re joining me for our Lisette coat B6244 sew-along. This is a really fast sew: with only three pattern pieces, no lining or facings, and a minimum of seams, we’ll be spending more time on flat-finishing the seams than on anything else. If you’ve never tried a flat-felled seam before, I think you’re going to like the way they look. They make the inside of the coat look as nice as the outside, which is important when you’re sewing such a simple piece.
Before we get started, I must apologize for the quality of the photos in the sew-along. When I sewed my coat–in early August, of course–all of our photography equipment was already en route to Spain (it still hasn’t arrived!), and I was sewing and photographing wherever and whenever I could, usually in between half-packed suitcases and overflowing boxes! But I think you’ll still be able to see all the steps clearly, and I’ll certainly talk you through everything to be sure it’s clear. Holler if anything is unclear. I’ve added lots of explanations to guide you along as well.
Also, please note that all the steps are taken directly from the pattern guide sheets themselves, and I’ve added my additional instructions in brackets where applicable. [Like this.] OK?
- Day 1 (today): sew the front and back of the coat
- Day 2: add the sleeves
- Day 3: hem and finish the coat
Don’t forget to grab a badge for your blog or for social media. Maybe you’ll inspire a friend to sew a coat, too!
Day 1
Front and Back
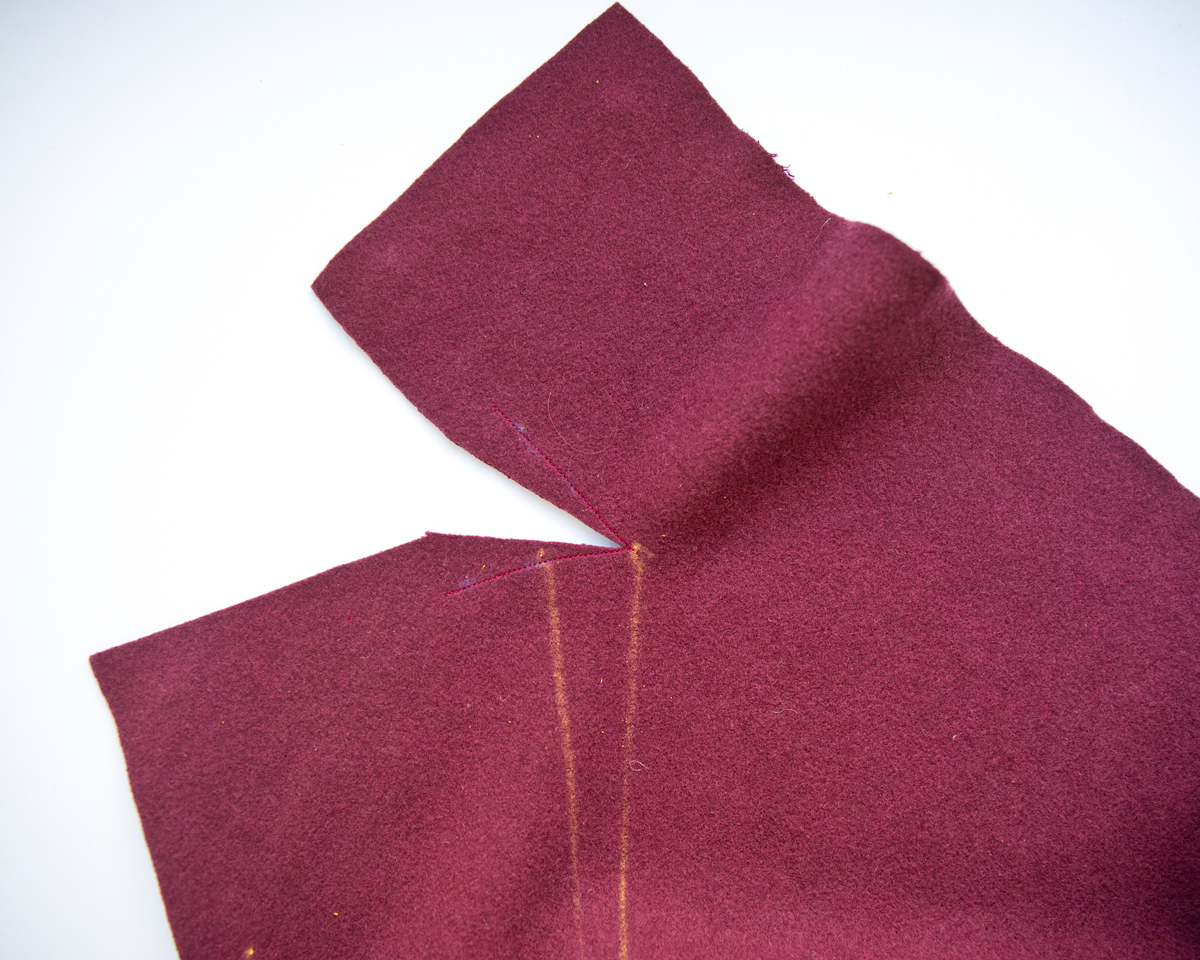
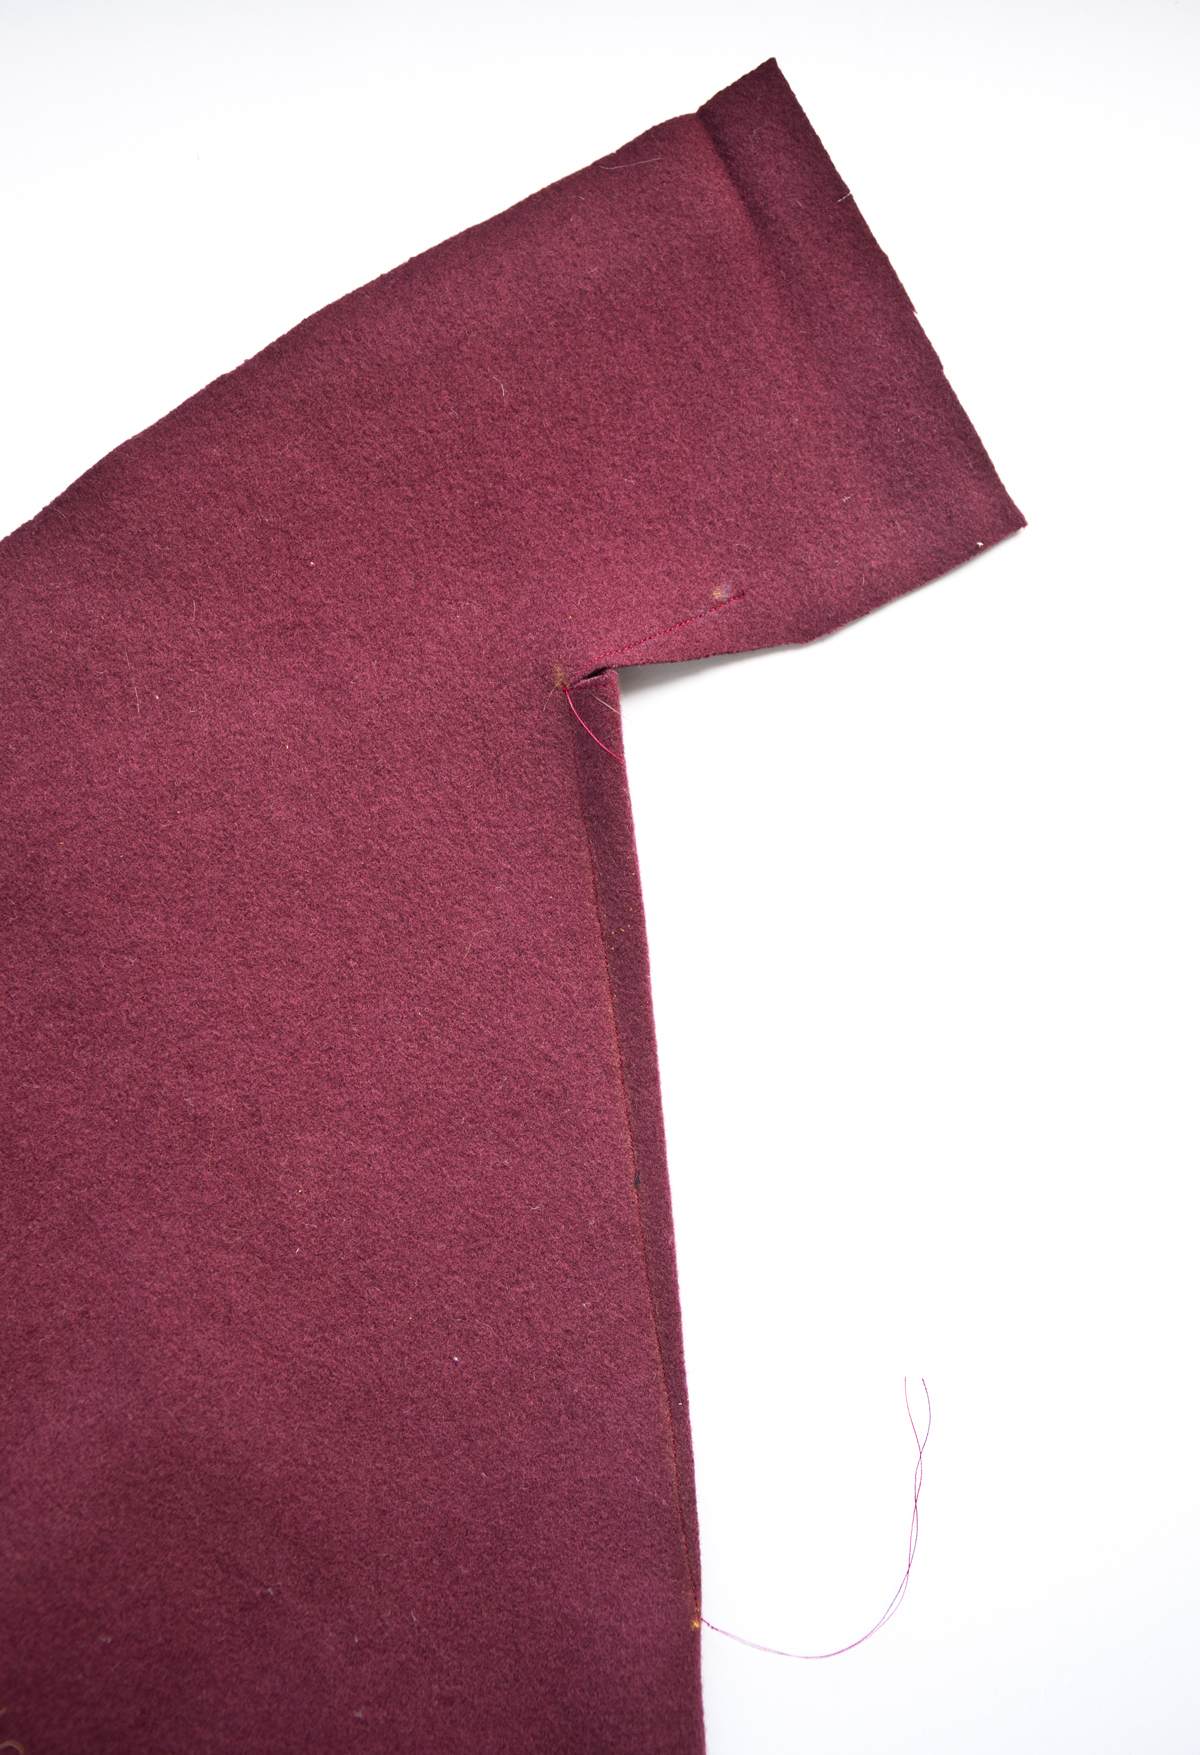
1. REINFORCE inner corner of FRONT (1), pivoting at inner small circle. [You’re simply using a basic straight stitch here as a stay stitch. Keep your stitch length relatively short, and use those markings you traced from the sewing pattern as your guide. Stitch to the innermost dart leg before pivoting to make a nice V shape.]
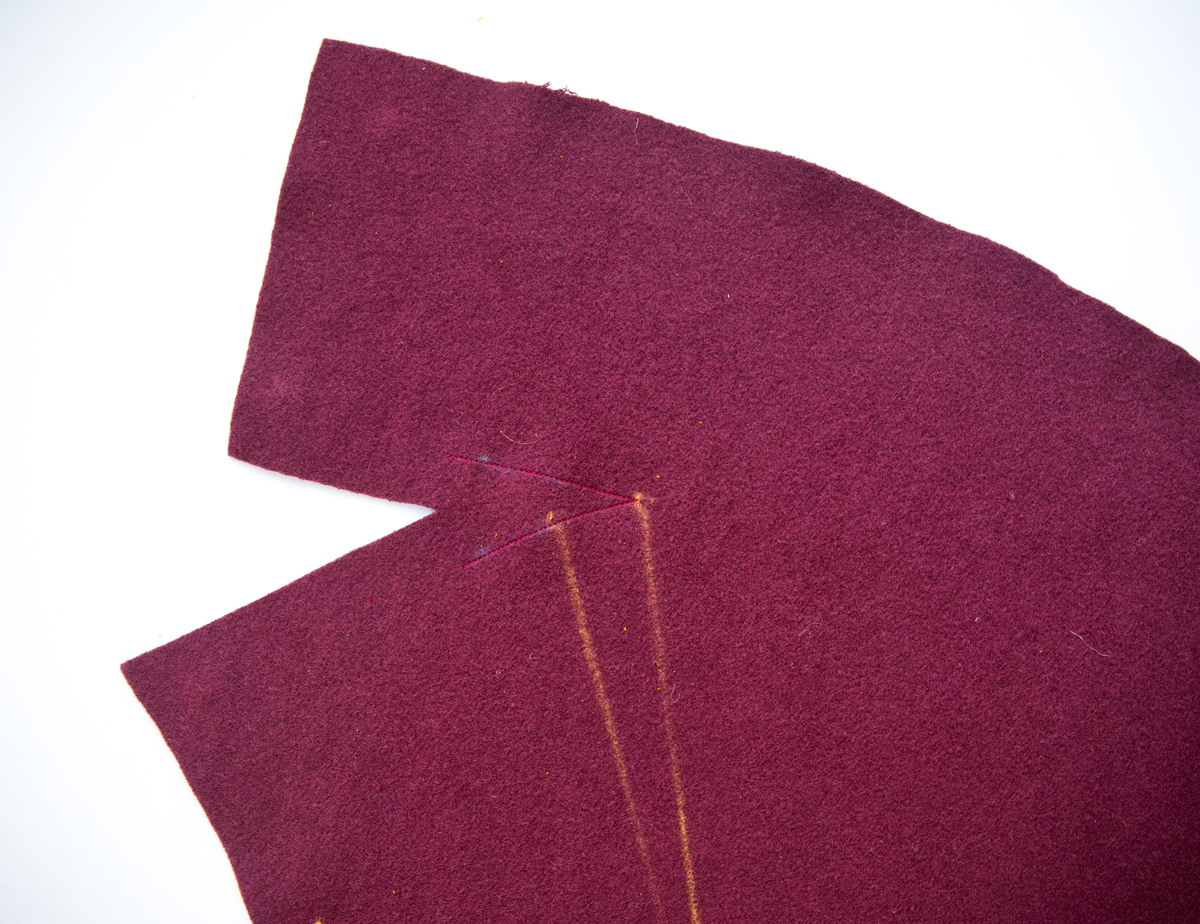
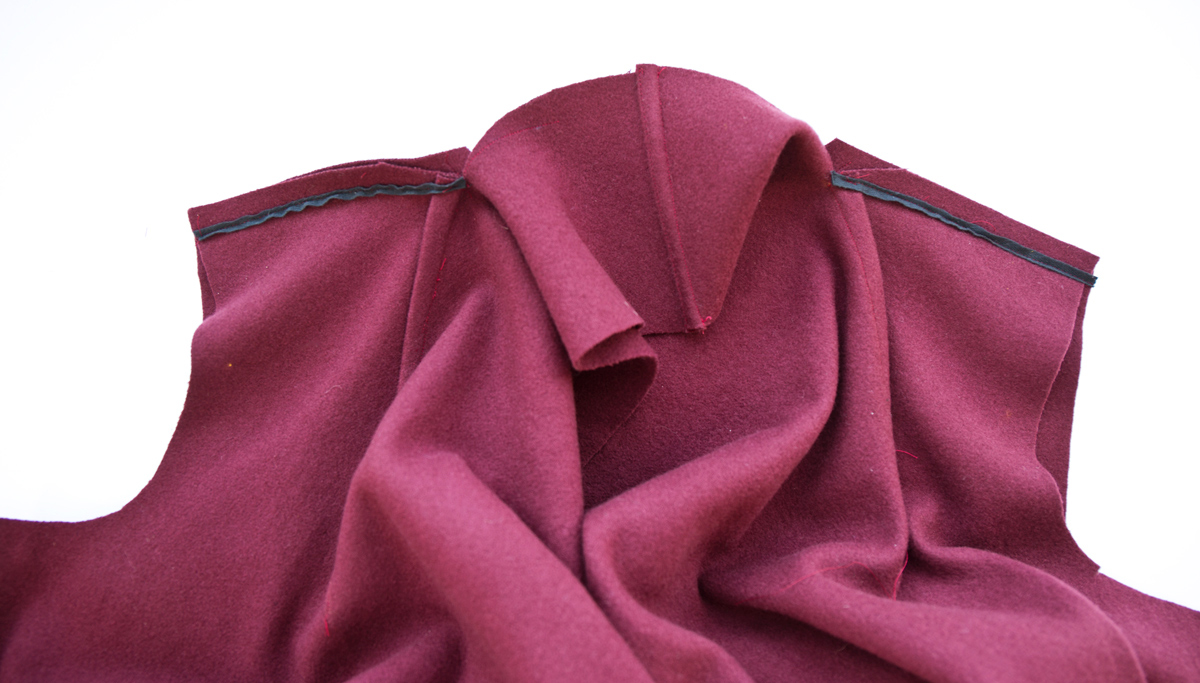
Clip diagonally to inner small circle. [Yes, nerve-wracking, I know. The staystitching will keep you safe, and now you’ll be able to stitch the dart closed in the next step. That flap above the dart is the back collar, by the way.]
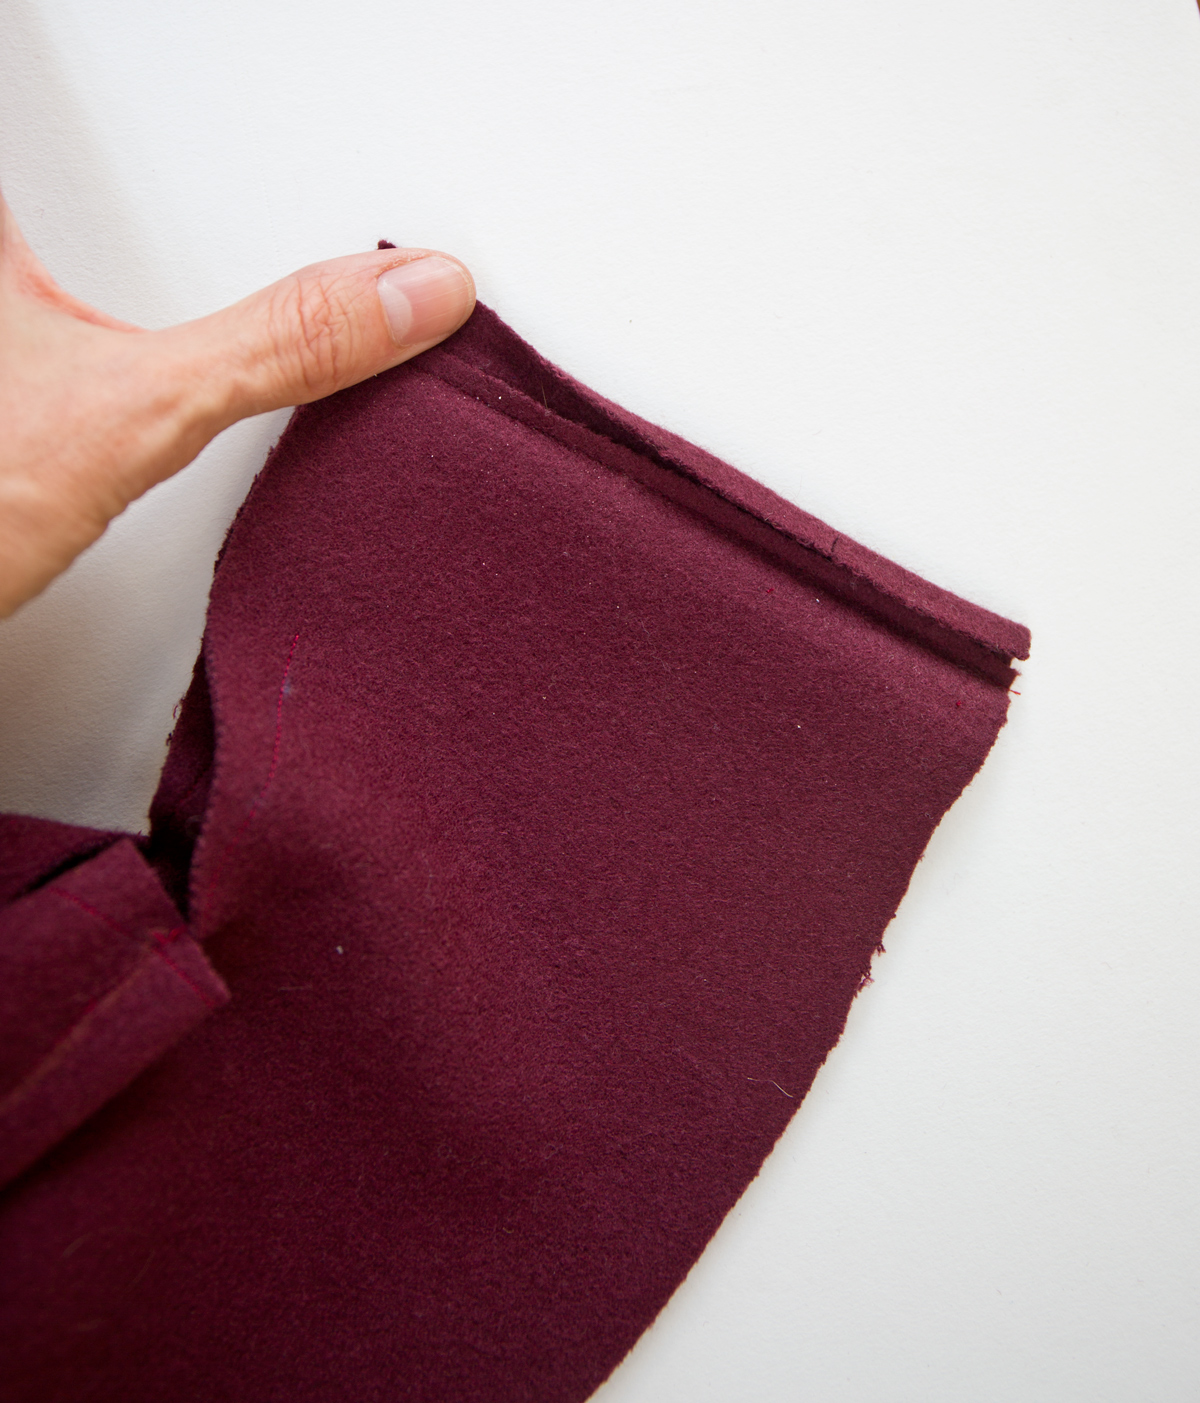
2. Stitch dart in front between outer small circles. Press fold of dart toward side. [This is a simple dart, so don’t over-think it. Just stitch from the widest point to the narrowest and leave thread tails at the point so you can knot them instead of backstitching or lockstitching–it just gives a better result. Then use lots of steam (and a pressing cloth or a handkerchief) and press the dart take-up toward the side seam.]
see my thread tails here before I knotted them?
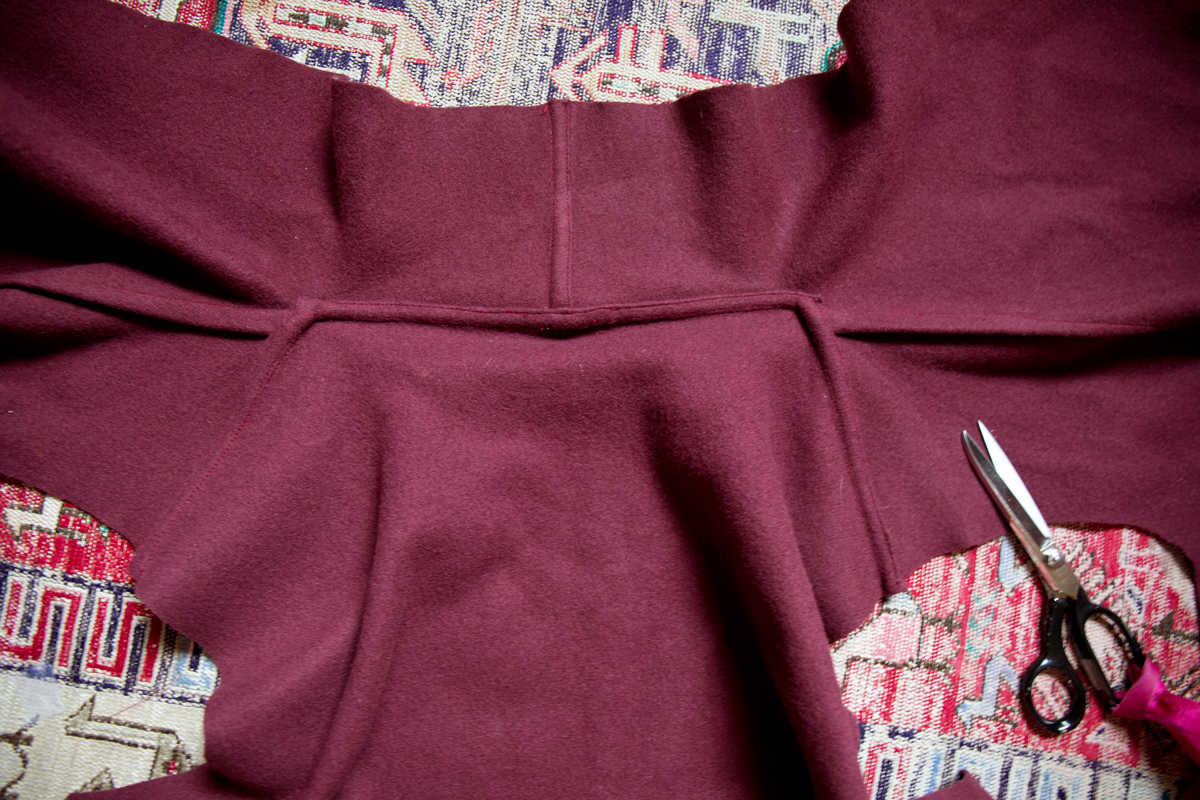
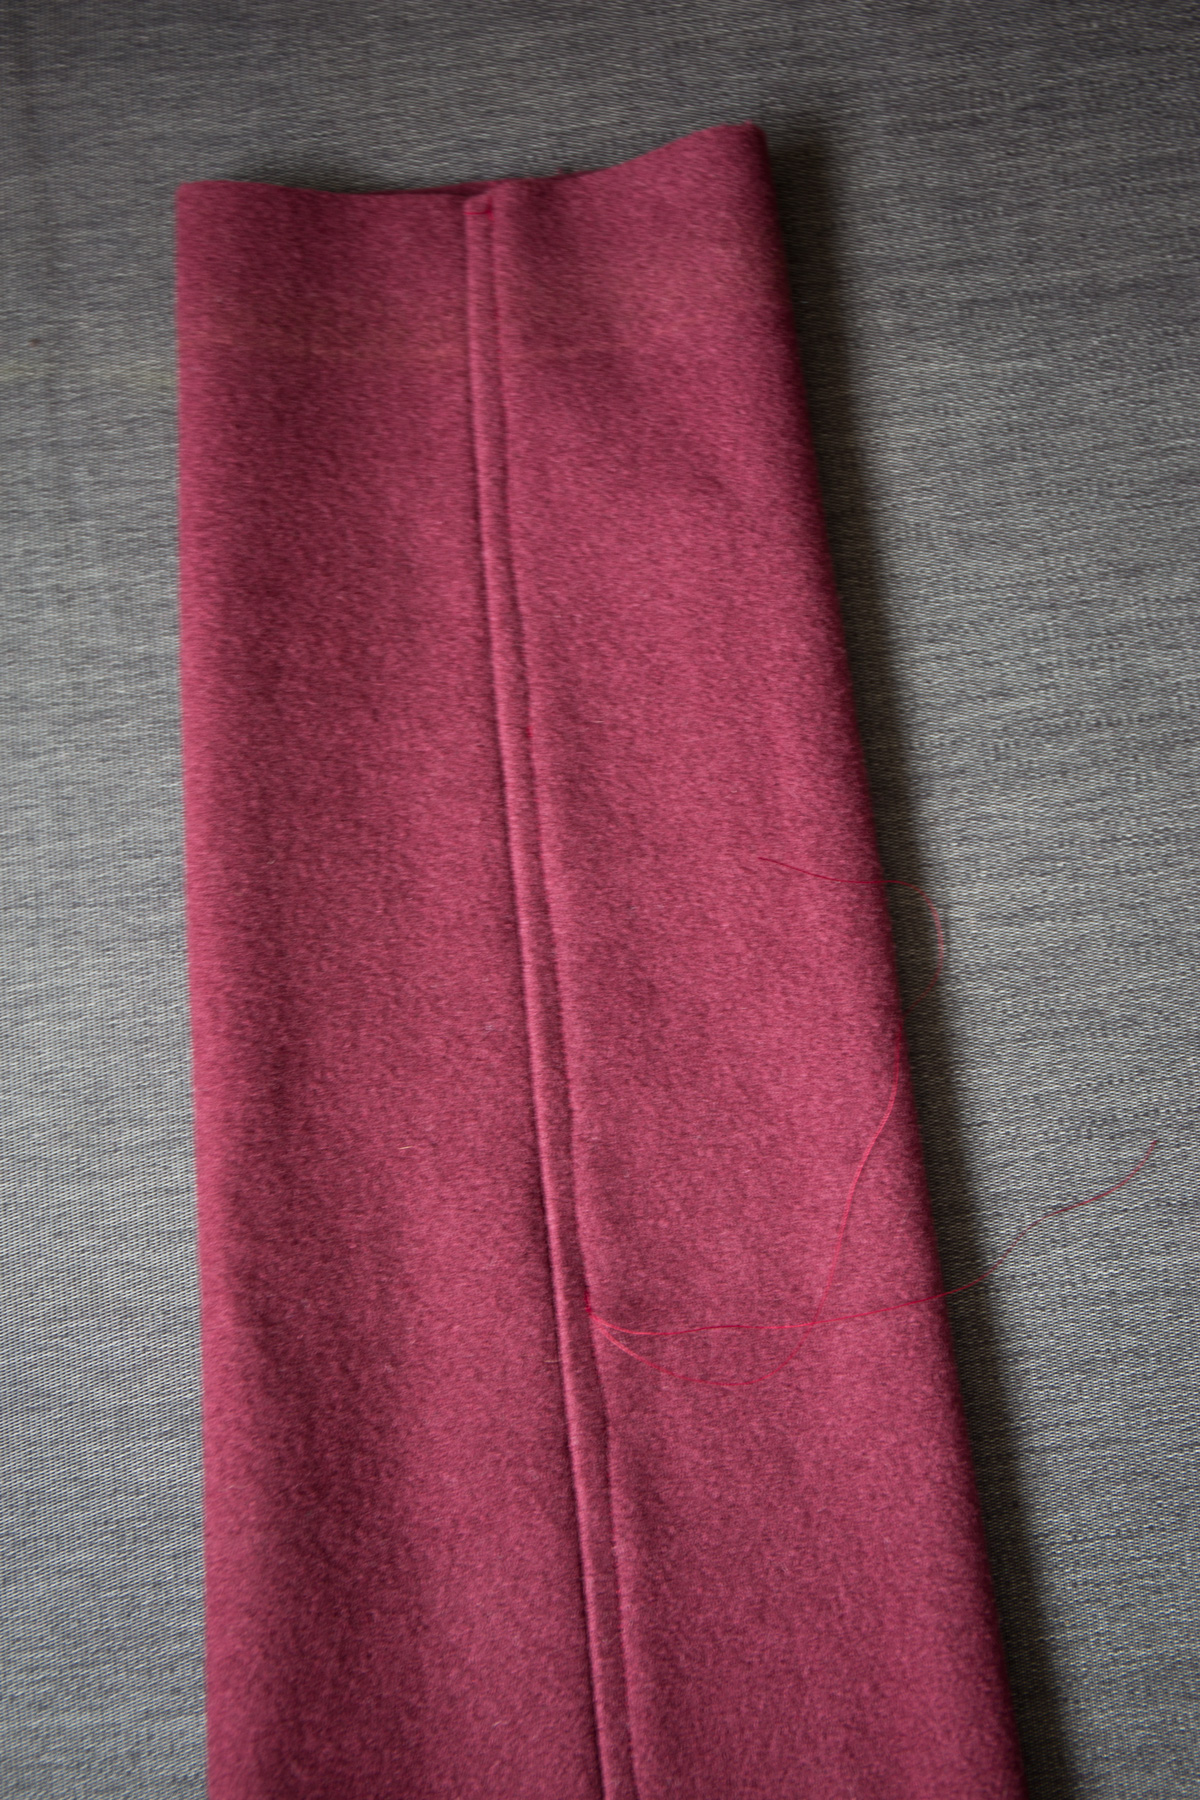
3. Stitch center back seam of COLLAR (which is in one with front), using a flat-fell seam as follows: [OK, in other words, sew the two collar flaps together with right sides facing each other. Easy. Then you’ll flat fell the seam as follows.]
pressing the longer seam allowances around the trimmed seam allowance
4. To make a flat-fell seam, trim right seam allowance to 1/4” (6mm). Press left seam allowance toward cut edge. Turn under 1/4” (6mm) on left seam allowance. Press. Stitch close to pressed-under edge. [Got that? Trim one of the two seam allowances to 1/4″, press the other seam allowance around the trimmed seam allowance, and then press the two seam allowances back toward the collar so the trimmed seam allowance is sandwiches and completely covered by the longer seam allowance. Then simple edgestitch the longer seam allowances along the folded edge to finish it. We’ll be doing this with all the seam allowances, so you may want to practice with a swatch until you find a stitch length that you like. A medium stitch length sometimes looks nicer than a short stitch because of the thick coating fabric. And if you have an edgestitching foot, lucky you! You’ll make good use of it here. If you don’t have one, you’re not alone–I don’t either. I just edgestitch by eye and find a spot on my presser foot or on my machine to help guide me as I sew.]
5. STAYSTITCH BACK (2) neck edge between circles. [Like step 1., this is a staystitch with a regular straight stitch. Now, I didn’t do it, but I wish I had: if your fabric is very stretchy, you might want to add a length of twill tape to the staystitching to prevent stretching in the finished neckline. If you do decide to add it, refer to step 6, below where I explain how to add it to the shoulders.]
6. EASESTITCH shoulder edges of back between notches and circles. [In addition to easestitching the back shoulders, I also decided to add twill tape to the front shoulders of my coat to prevent them from stretching. To do this, I basted the front shoulders at 5/8″, as instructed for the back, and I slipped a length of twill tape under my presser foot as I basted so the twill tape was caught in my basting. You can see the twill tape in the next photo. Feel free to do this to your back neck and front shoulder as well. The weight of the fabric can cause them the stretch if they aren’t reinforced.]
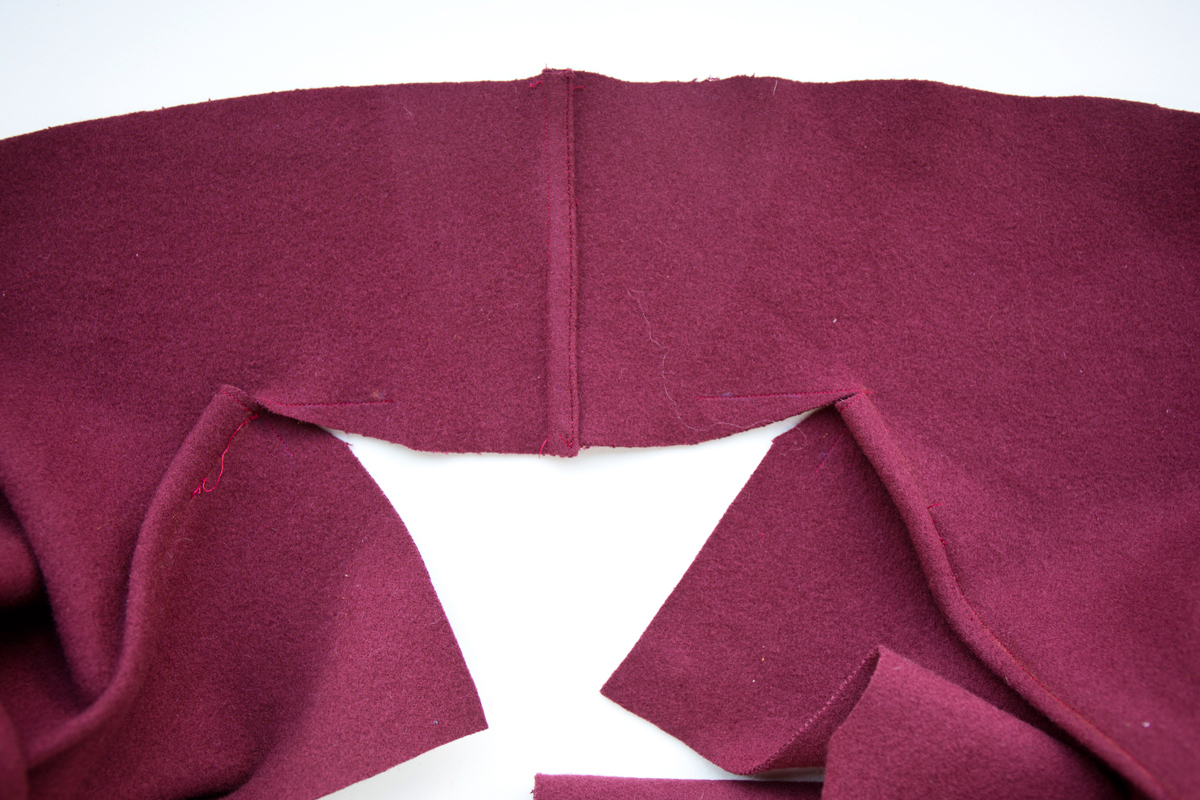
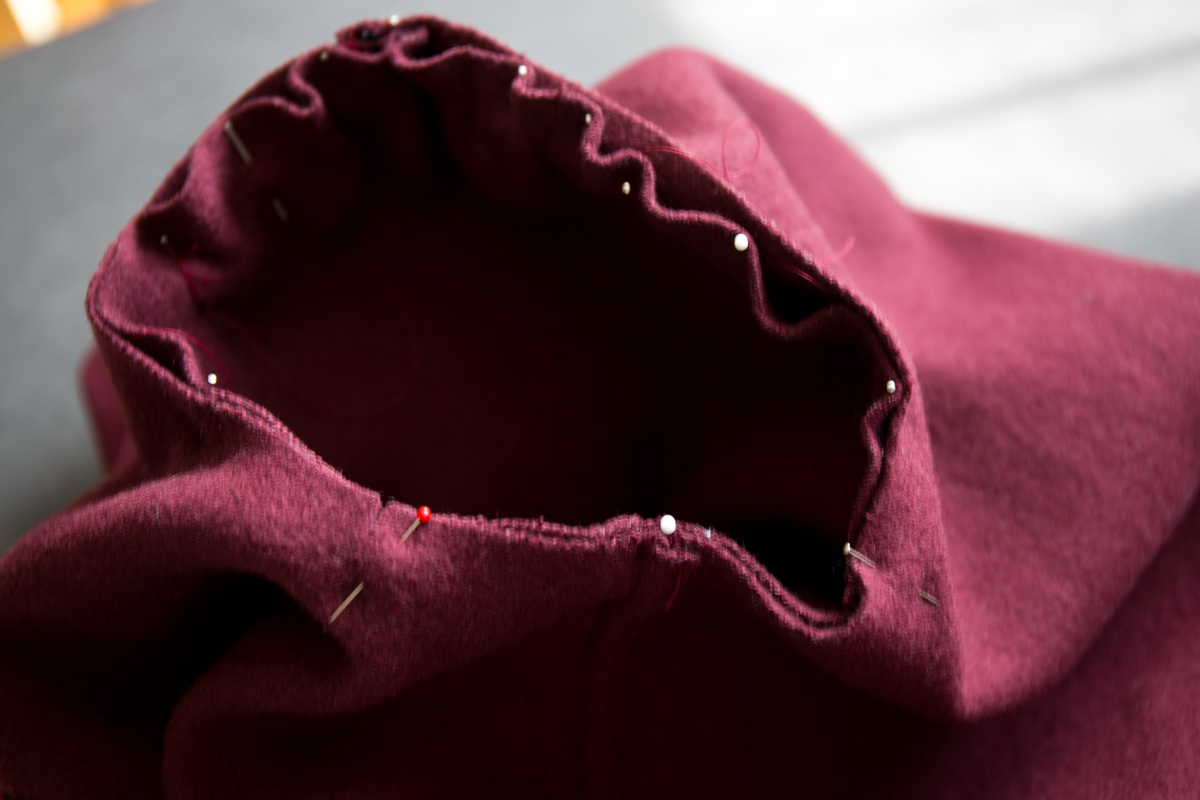
7. With right sides together, pin back to front at shoulders and neck edge, matching notches, center backs and circles. Adjust ease. [The back shoulders are wider than the front, so you’re simply easing them in a bit.] Baste, clipping back neck edge 1/4” (6mm) where necessary. Stitch, breaking stitching at circles, using a flat fell seam. [Let me translate this a bit for you: Start by pinning and easing the shoulders right up to the spot where you clipped in Step 1. When you reach that little clipped V–by the dart–on the coat front, match that to the dot on the back neckline of the coat and start pinning the pin the collar to the back neckline. Chances are that you won’t need to clip anything, since your wool is probably quite malleable. But if you do clip, clip conservatively. You want to keep the back neck as intact as possible to give a nice flat-felled finish to the neckline.]
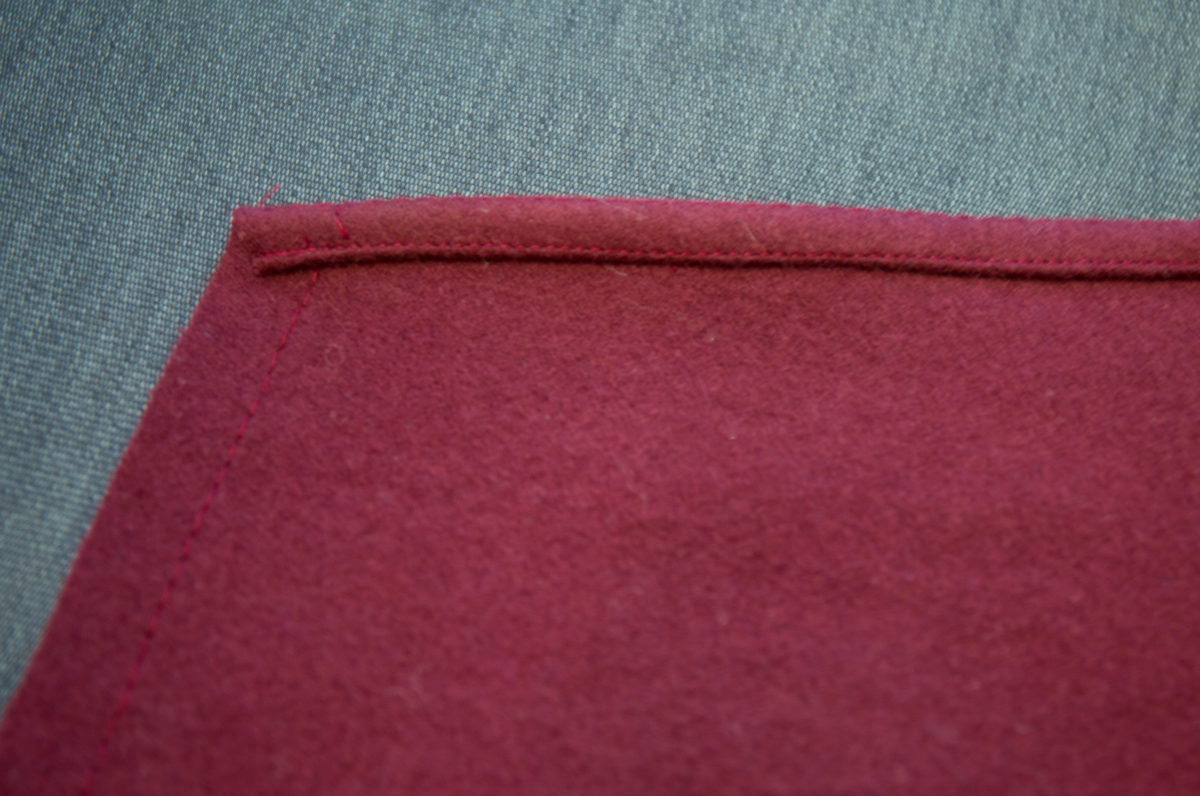
8. To make a flat-fell seam, trim front seam allowance to 1/4” (6mm). Press back and shoulder seam allowances toward cut edge. Turn under 1/4” (6mm) on back and shoulder seam allowance. Press. Stitch close to pressed-under edge, pivoting stitching at inner corners. [At first this step may not seem possible, but it’s actually pretty slick. Just think of it as three different sections and fold and press each section separately, focusing on getting the corners nice and neat before you edgestitch.]
9. Stitch back to front at sides using flat fell seams. [Side seams with flat-felled seams. You’ve got this. In fact, you don’t even need a photo!]
10. To make a flat-fell seam, trim back seam allowance to 1/4” (6mm). Press front seam allowance toward cut edge. Turn under 1/4” (6mm) on front seam allowance. Press. Stitch close to pressed-under edge.
That’s it for Day 1. You’ve already got the basic structure of the coat, can you believe it? Tomorrow we’ll add the sleeves.
Day 2
Hello again, and welcome to Day 2 of the B6244 Lisette coat sew-along. Today we’ll add sleeves to our coats.
Sleeve
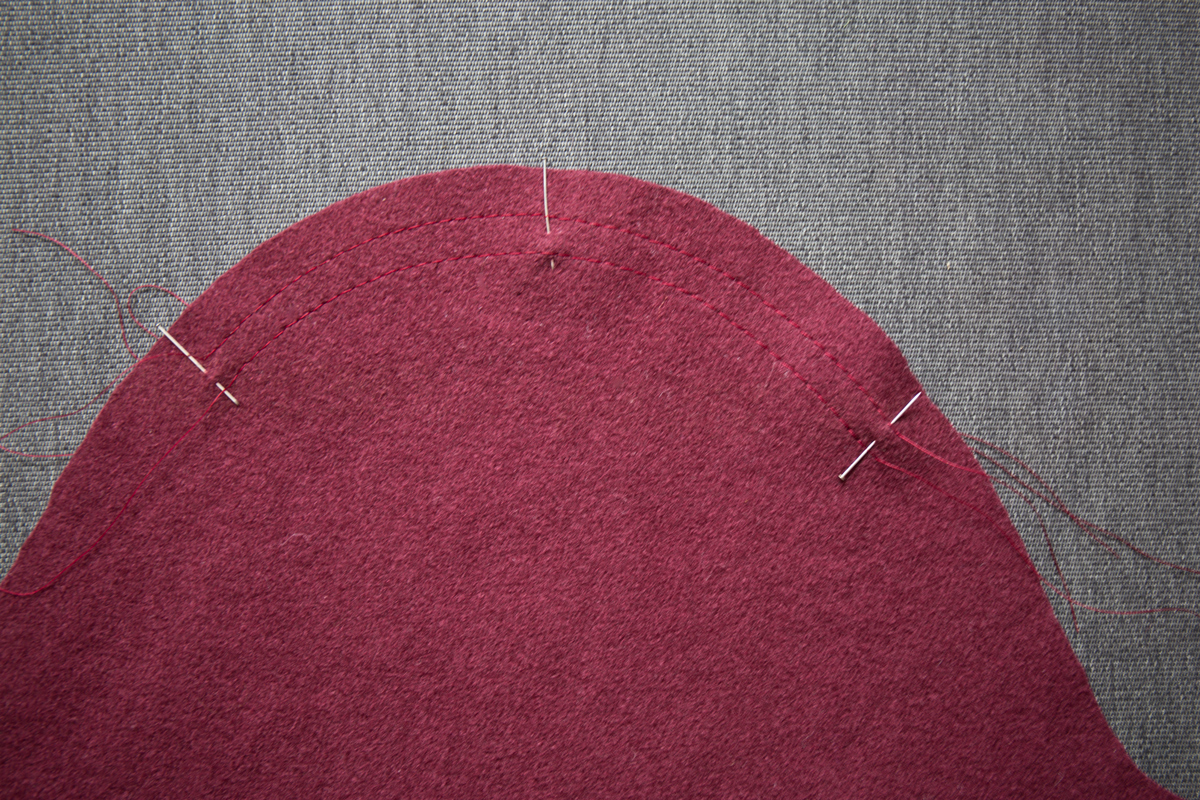
11. EASESTITCH cap of SLEEVE (3) between small circles. [If you sew my Oliver + S patterns you know that I prefer two rows of basting stitches for this step: one row on either side of the stitch line. So for this sleeve I stitched my gathering stitches at 1/2″ and 3/4″. But follow whatever method works best for you here.]
12. Stitch sleeve seam. [Here’s where we stitch the underarm seam. Easy peasy. But the flat-felled step on this one is a little tricky! I’ll talk about that next.]
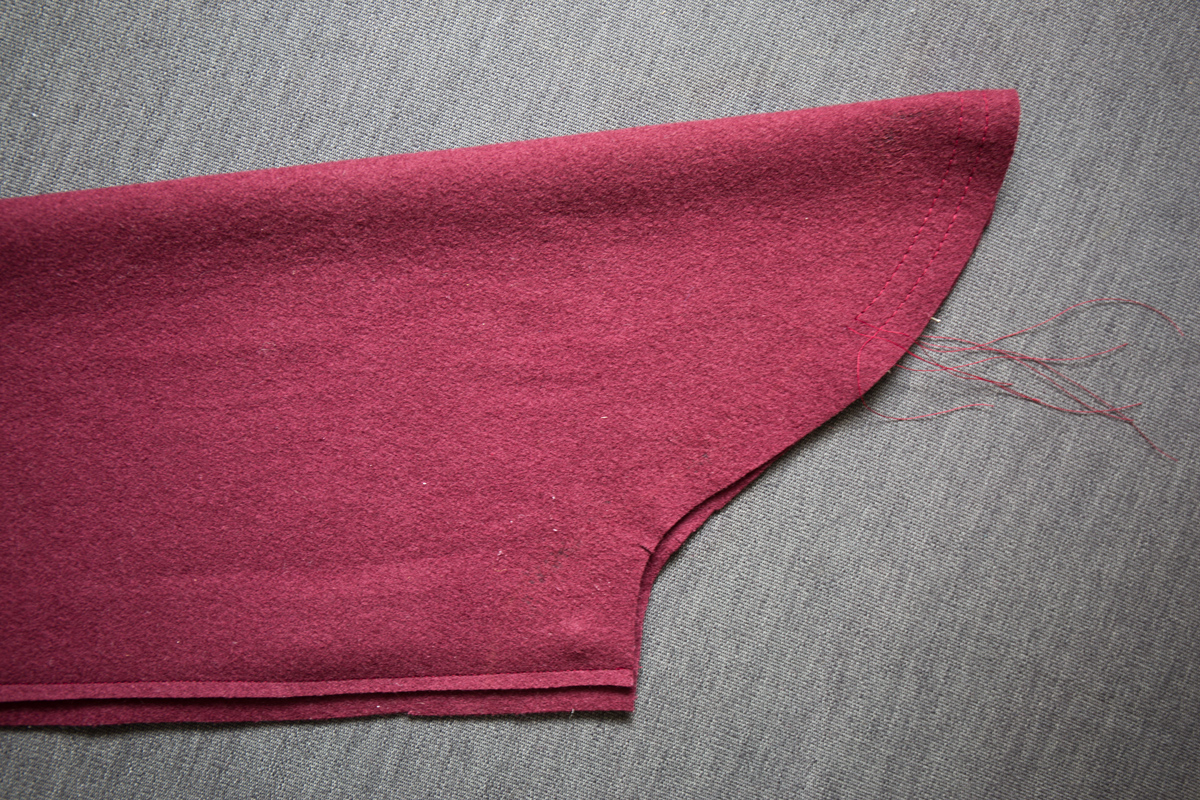
13. To make a flat-fell seam, trim back seam allowance to 1/4” (6mm). Press front seam allowance toward cut edge. Turn under 1/4” (6mm) on front seam allowance. Press. Stitch close to pressed-under edge. [Since the sleeve is narrow, even a free-arm machine will have a little difficulty reaching inside the sleeve for this step. I stitched it in two parts, working from either end toward the middle as far as I could reach. But if you simply can’t reach, don’t be afraid to skip the flat-felled seams at this step! The inside of the sleeves really won’t show, so if you prefer a simpler finishing method and want to use that instead it will be your little secret.]
 You can see where I broke my stitch line because I couldn’t reach any farther. Instead, I picked up at the other end and met at the center. But it was tricky, and my stitching is a little wavy as a result of the tight squeeze.
14. Finish lower edge of sleeve with a 5/8” (1.5cm) NARROW HEM. [In my Oliver + S patterns I recommend stitching a 5/8″ row of basting and using that basting as a folding and pressing guide for narrow hems. Feel free to use that technique here and for the outer edge of the coat. I find that it make hemming really easy and the end result is really smooth and even.]
15. With right sides together, pin sleeve into armhole edge, matching notches, underarm seams, small circles and large circle to shoulder seam. Adjust ease. Baste. Stitch. Stitch again 1/4” (6mm) away in seam allowances. Trim close to second stitching. Press seam allowances flat. Turn seam allowances toward sleeve. [Yes, there’s a lot of ease in the cap of the sleeve. Yes, the sleeve will fit. Just be sure you’re matching all your notches, and don’t be afraid to hand baste before you stitch. A little steam from the iron can also help to shrink out a bit of the ease. A glass of wine can also help.]
That’s it for today. You’re making great progress on your coat, and I’ll see you tomorrow so we can finish up.
Day 3
And here we are on the last day of our very short sew-along! Today is all about hemming the coat, and there’s a lot of hemming to be done. But if you use my basting trick (see below), it will go quickly. And at least we’re not sewing a lining! Today there are just two steps, and they’re identical.
Hems
16. On outside, finish front and collar edges of coat with a 5/8” (1.5cm) NARROW HEM. [Again, I prefer to stitch a row of basting stitches 5/8″ from the edge and use them as a folding and pressing guide. But do what works for you here. It’s a lot of folding, pressing, and stitching. Do your best not to stretch the fabric as you work, to prevent wavy edges. You’ll do the same to finish the hem in the next step.]
17. On inside, finish lower edge of coat with a 5/8” (1.5cm) NARROW HEM.
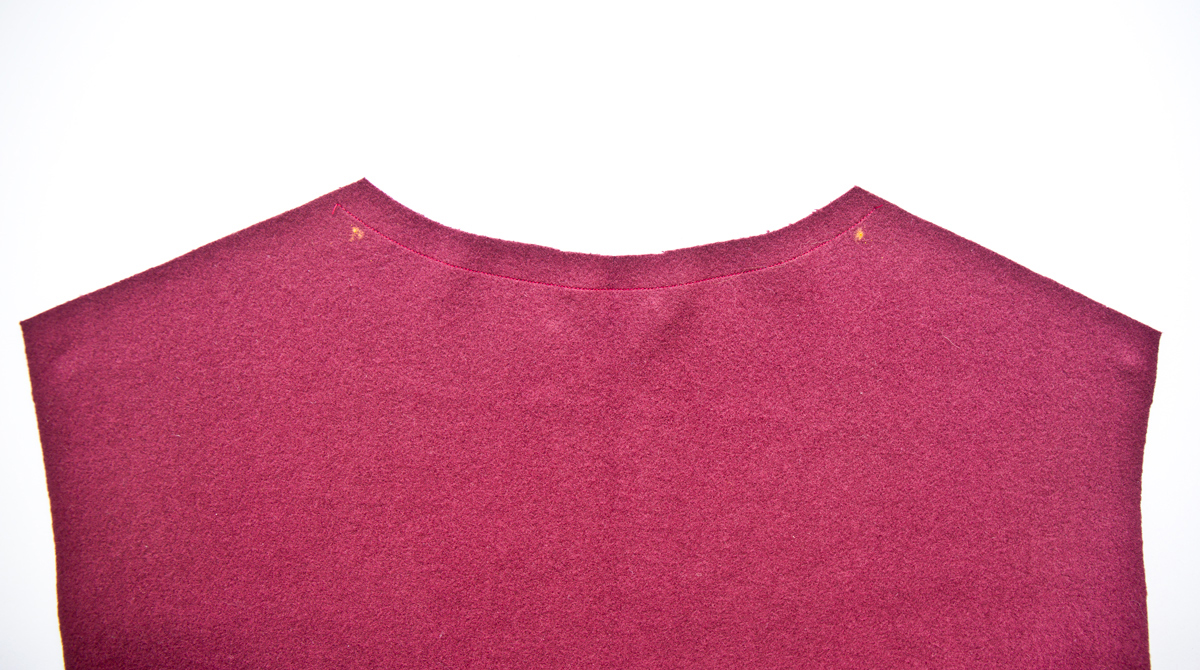
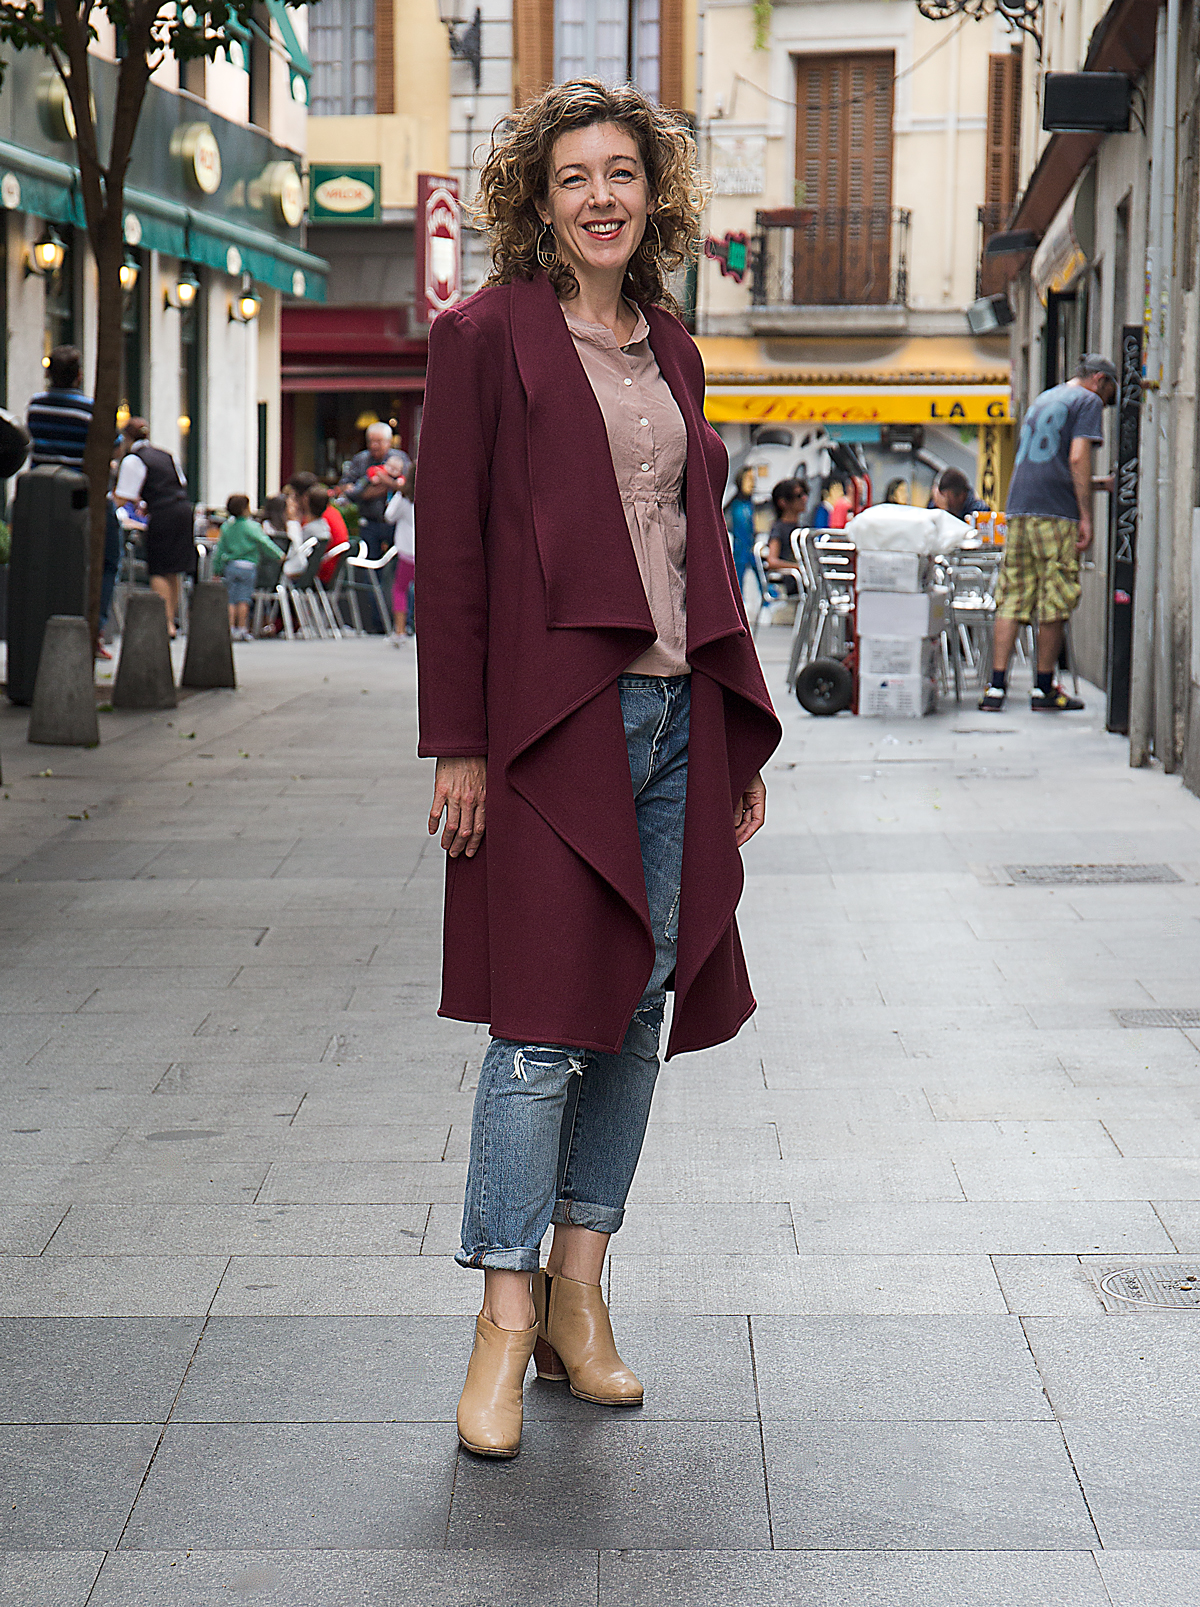
Now, one last tip. When you’re all finished, give your coat a good steaming. Much like blocking a sweater, you’ll want to coax the wool into shape so your coat looks really professional. (See the wave in the collar of my coat, below? After the photos were taken I steamed that out. Now it looks much better–but there’s no way I’m doing another photo shoot to prove it.) I like to use a spray bottle or a wet cloth to semi-saturate the cloth, especially the edges of the coat where they may have gotten a little wavy during hemming. Then set your iron to as much steam as it can muster and blast the fabric, holding the iron an inch above the coat so it doesn’t actually touch the fabric. You can also coax the fabric back into shape with your fingers. Let the fabric relax and dry (think of is as a spa experience for the coat) before you handle it again. Be sure to give the shoulders a good steaming, too, to coax all that ease into place in the sleeve caps. And then you’re finished! I hope you are really happy with your coat. And I hope it keeps you warm and cozy this fall and winter! I’m still eagerly awaiting weather that’s cool enough for me to enjoy my coat–but it won’t be long now.
I have been sewing for quite some years, but never cried – I am now crying. I cannot understand the instructions for the collar.
Looking at the back neck how does that fit in. In the pattern instructions it shows two loops/funnels where do they go.
Help.
Mary Turner
You sound very frustrated, Mary! Let me see if I can help. We do these sew-alongs and spend a lot of time taking the photos and setting them up just so we can help!
I think you’re getting stuck on step 7. Perhaps the photo above in Step 7 will help? The things you think are tubes are simply the shoulders and armholes–the illustration is trying to get them out of the way because you’re sewing the shoulders and the neck neck/collar in one long seam with a pivot where the shoulder meets the back neck. It’s not the easiest step, but I think it will make sense once you’ve seen it from another perspective.
We also have a discussion forum that can be very helpful when you have questions: https://oliverands.com/community/forums
Hi Liesl,
I picked this pattern as my first sewing project because it seems super easy. I stucked however on attaching the collar and the back… I was ready to give up on this halfmade coat until I found your post.
Thank you, thank you, thank you so much!! 🙂
I wish I had found this post before I finished the project. LOL I had a lot of trouble with the very 1st step. I didn’t do it right but I made it work. I will be making another one soon and I am so glad I found this post. Thank you, thank you, thank you!
What type of fabric did you use? Also, would this pattern work with a wool stretch fabric?