A few months ago I read a fascinating book called The Little Spark – 30 Ways to Ignite Your Creativity by Carrie Bloomston. The author just happens to be a fabric designer, too, by the way. Anyway, it’s a great interactive workbook for igniting creativity that includes inspiring exercises and images to get you out of any creative funk. If you haven’t read it yet, you should! One idea she mentions in the book is to take classes, she suggests to look online for craft or community education classes. That piece of advice motivated me to sign up for something that I’d never tried before. I took a flower pounding class and loved it! I can’t wait to share the results of my flower pounded fabric with you and how I created it.
Flower pounding technique
Pounding is just one way to extract beautiful colors from plants. You can use the colors found in flowers, as dyes to create stunning and unique printed fabric. You simply use a hammer to release the flower pigments into the fabric. This is really quite an uncomplicated technique, if you can hammer a nail, you can do this.
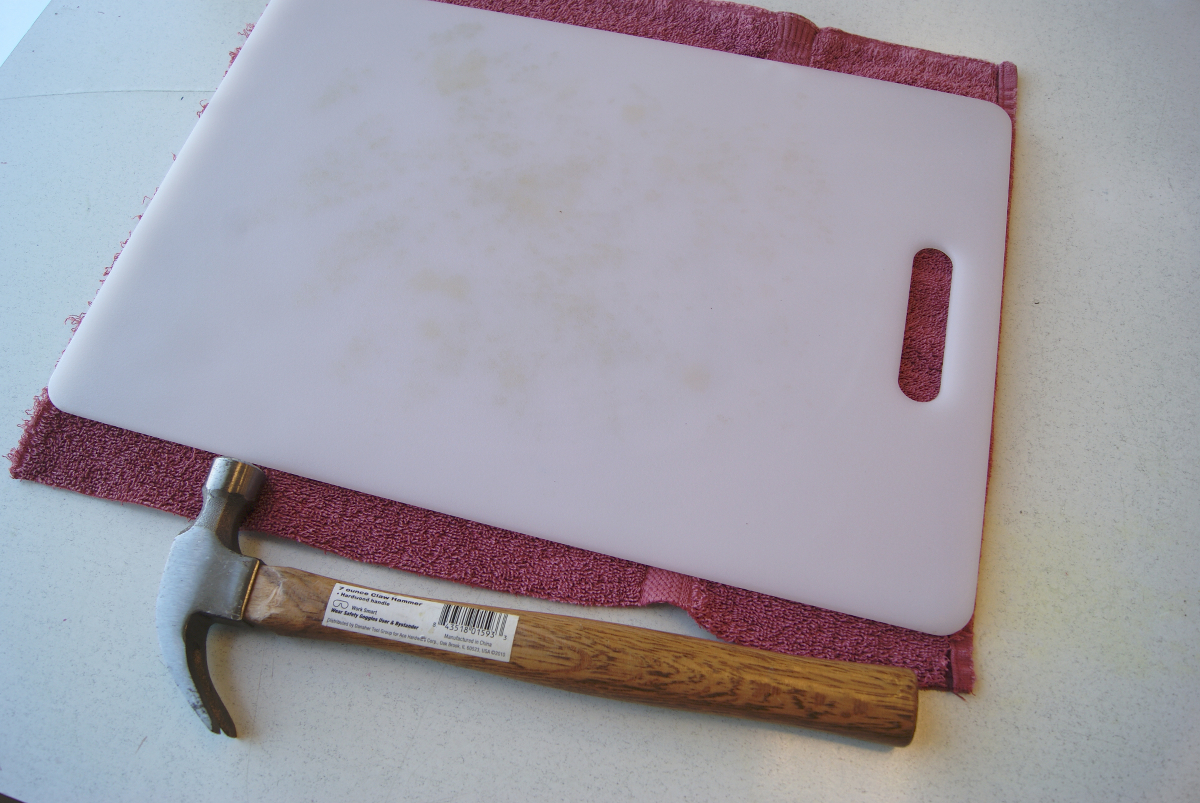
Supplies and tools
Very few tools and supplies are needed. Here’s what you need:
- flowers
- hammer with a flat metal head
- cotton fabric
- cutting board
- paper towel or Japanese sketch paper
- towel (optional)
- ear plugs (optional)
Steps
The ideal fabric to use for this project would be natural fibers as they absorb better. I would suggest cotton. The cotton should be pretreated with a substance called a mordant because it’ll be easier for the fabric to absorb pigments from the dye.
Run the fabric through the washer and dryer. Then place it in a mordant, an alum bath which consists of 1 cup alum and 4 tablespoons cream of tartar in a huge pot of hot water for 15-30 minutes. Dry and iron your fabric piece, then it’s ready.
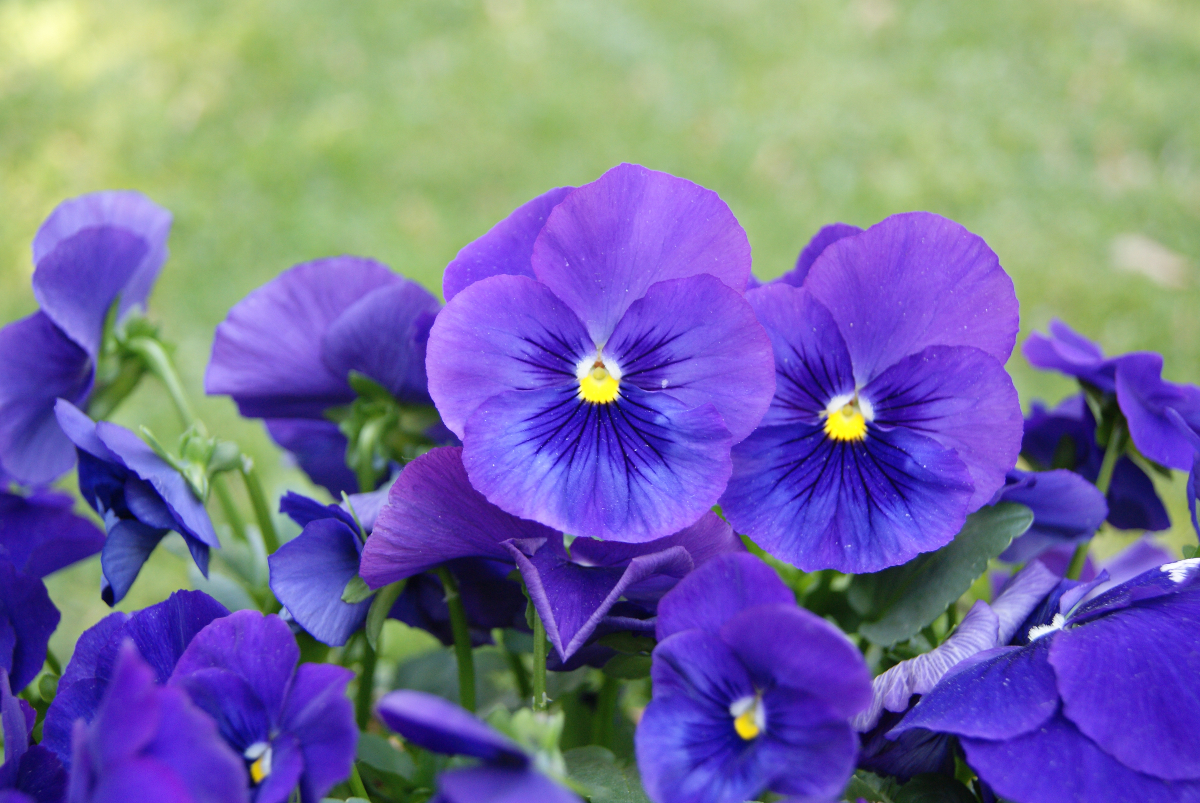
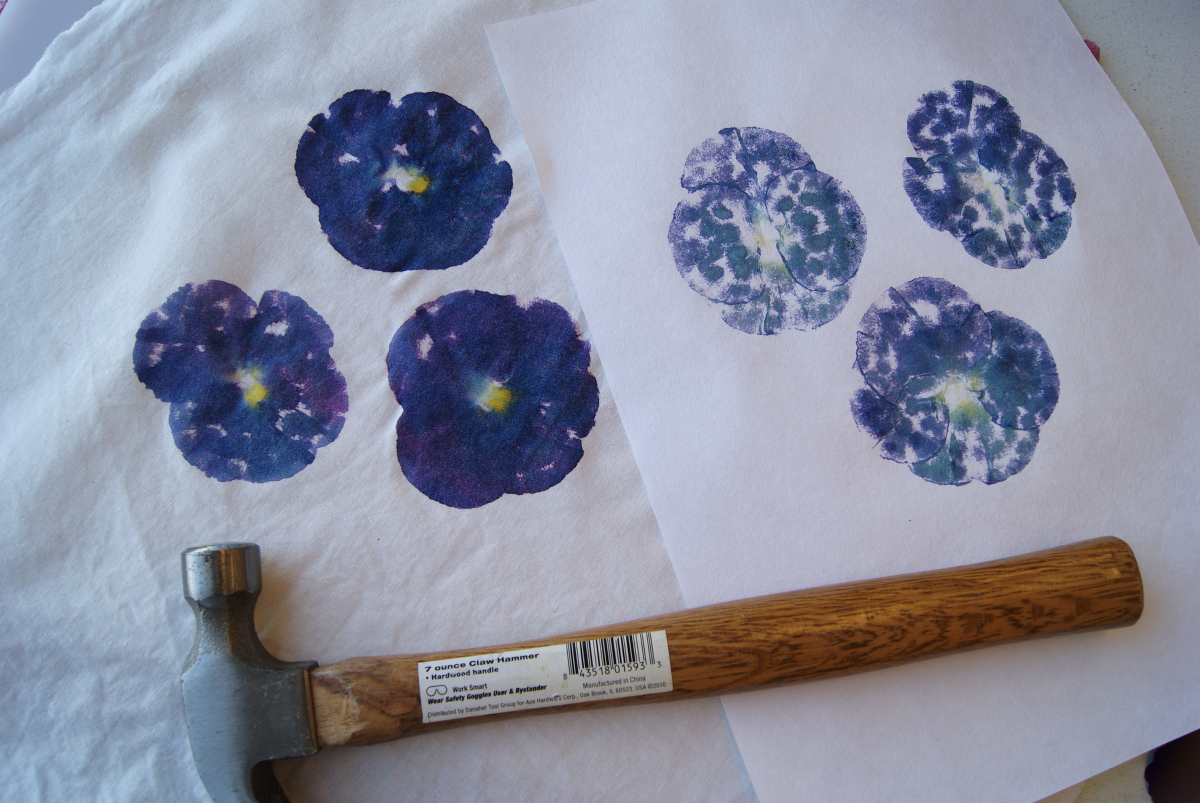
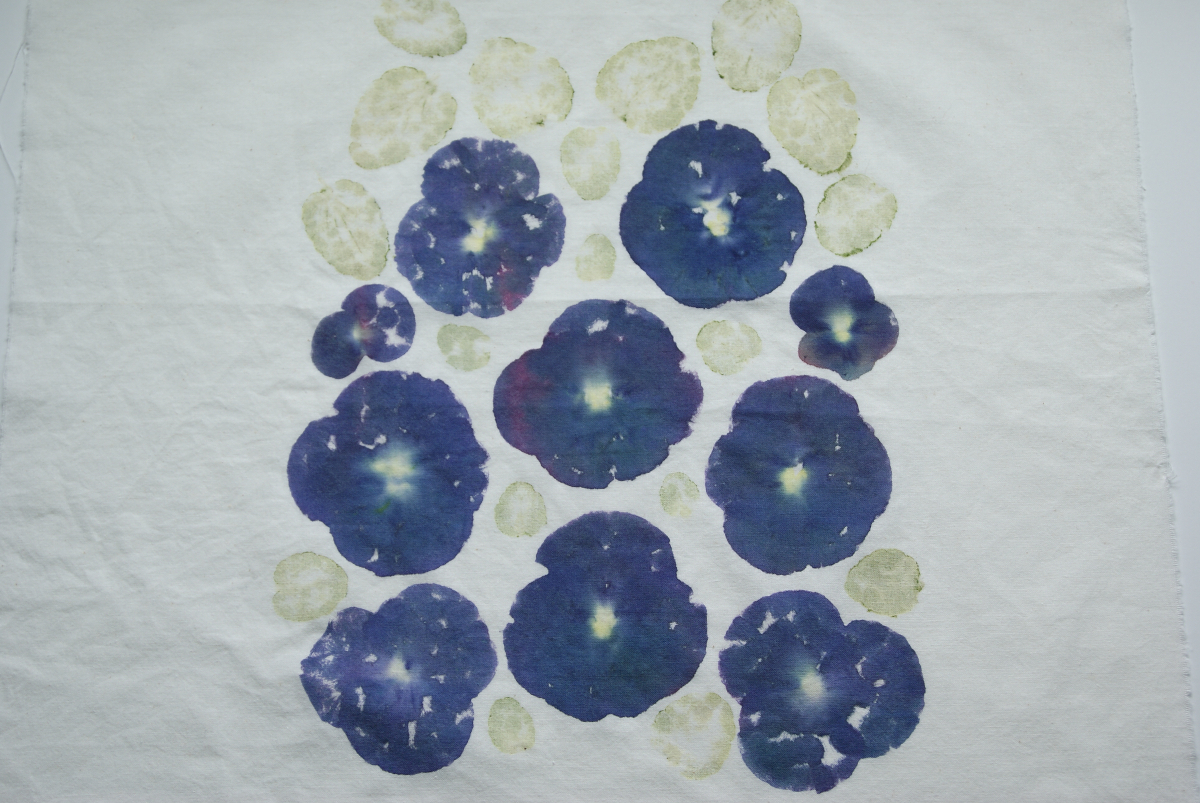
The process is relatively straightforward: take a flower, place it on fabric, cover it with a paper towel, and hammer away. First gather some poundable flowers, I used deep blue pansies.
Next up, prepare a hammering surface with a cutting board on top of towel.
The towel serves as a noise reducer and helps prevent the cutting board from sliding around.
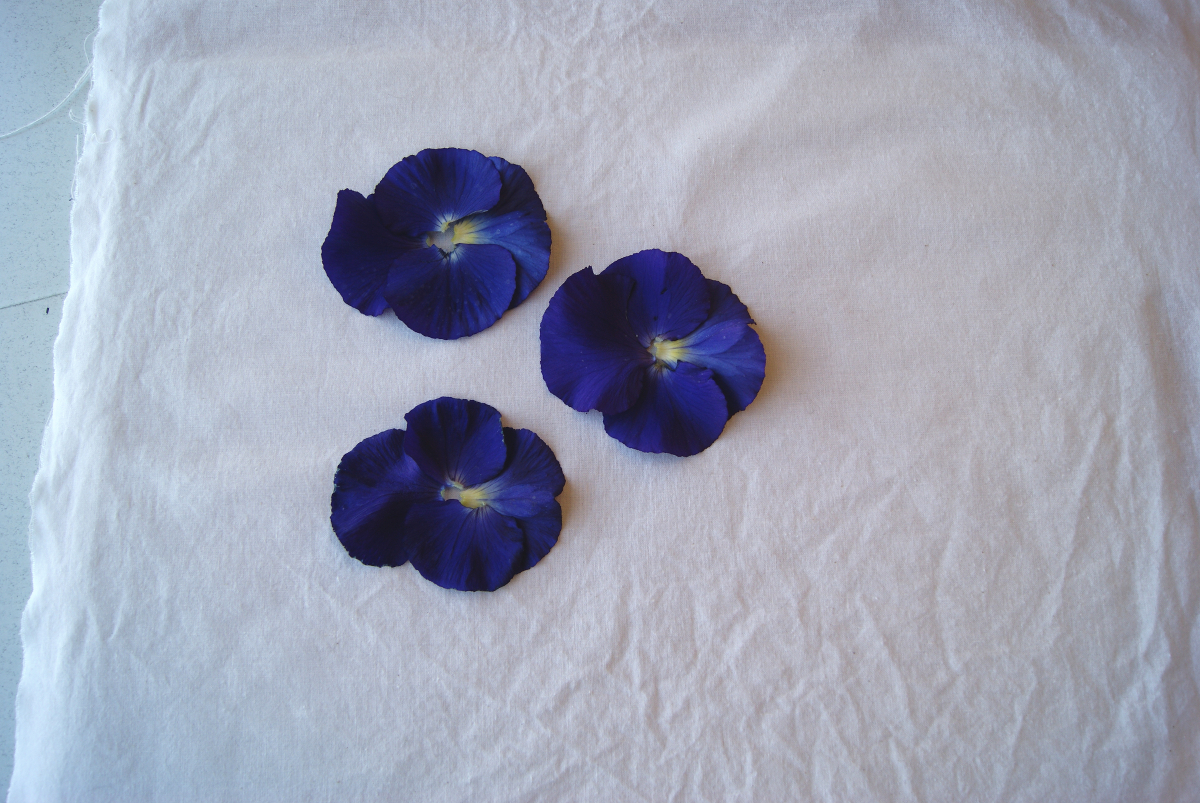
On top of the cutting board place the piece of fabric, for my project I used muslin. Remove the petals from the flowers and place them face down on top of the fabric.
Now onto the covering materials. You can use a paper towel or try some Japanese sketch paper like I did.

Place the Japanese sketch paper bumpy side down on top of the flower petals.
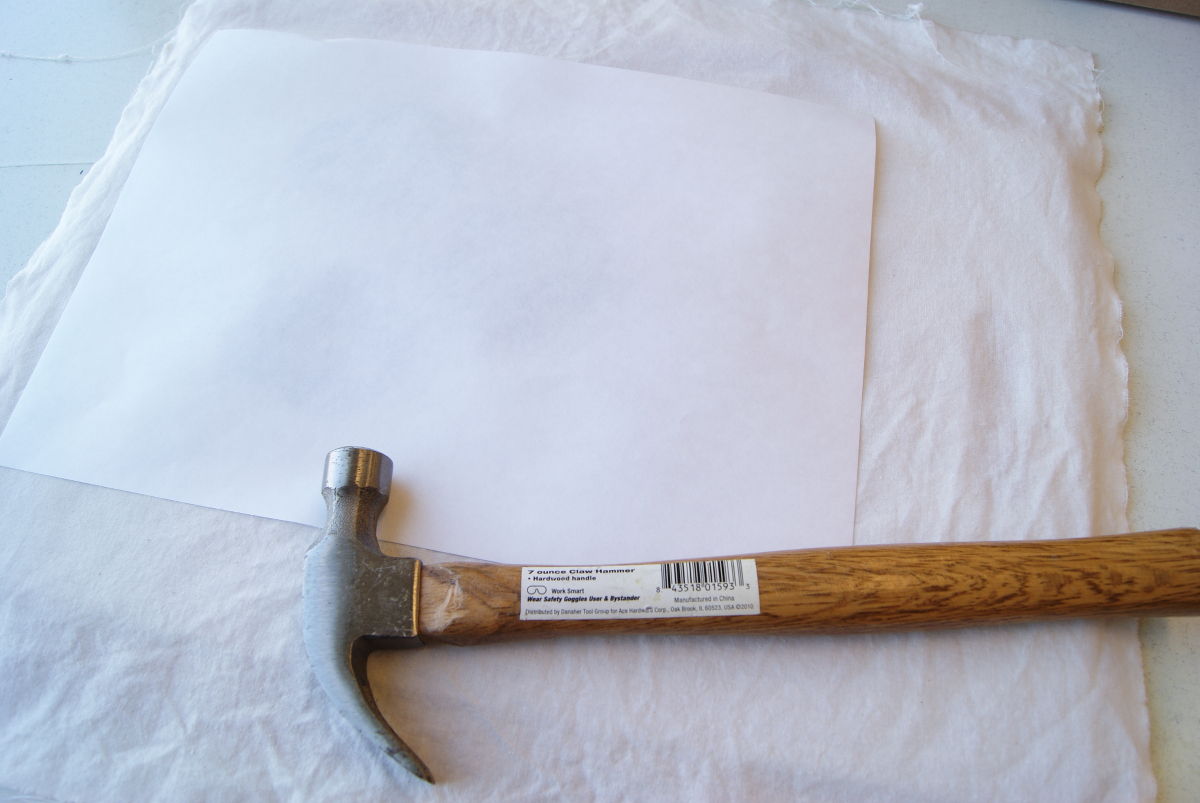
Hammer away! You might want to wear ear plugs at this point because the hammering can get really loud.
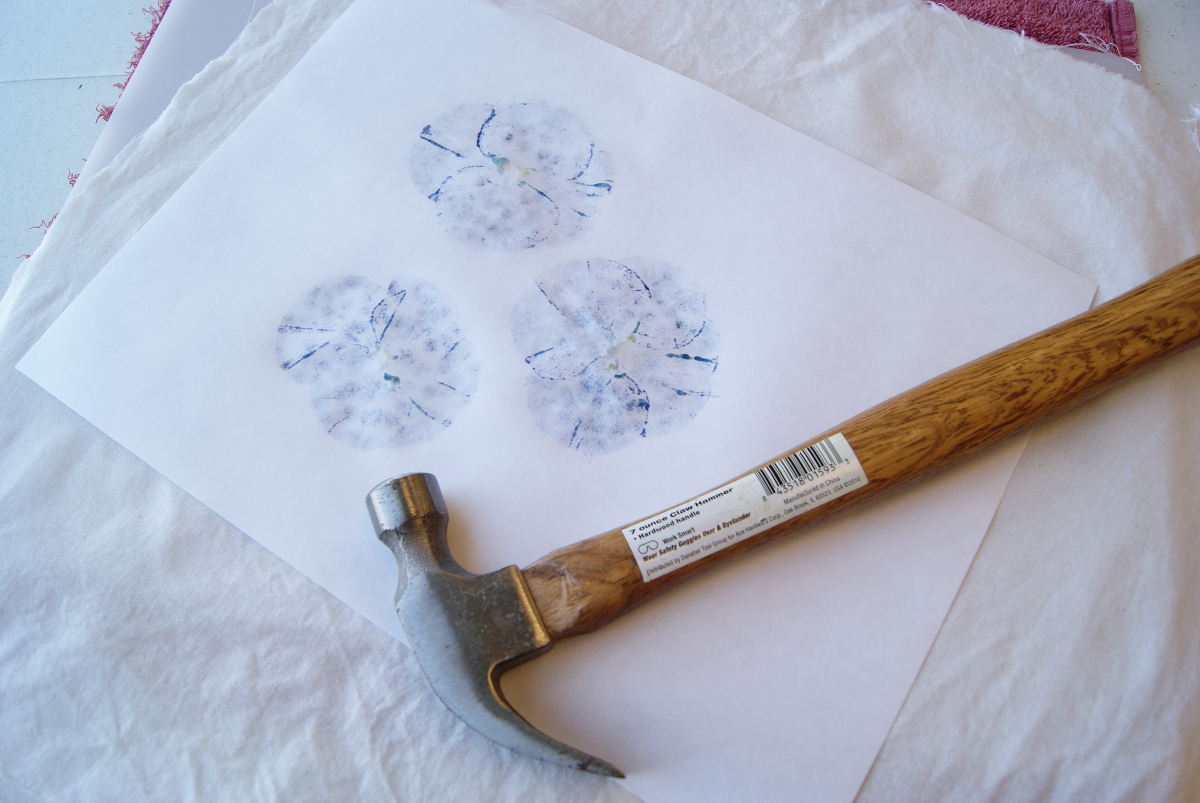
The results are instant. The hammered images will appear on both the fabric and the Japanese sketch paper. What a bonus to get two crafts in one! Now I have lovely blossoms on paper for paper crafting.
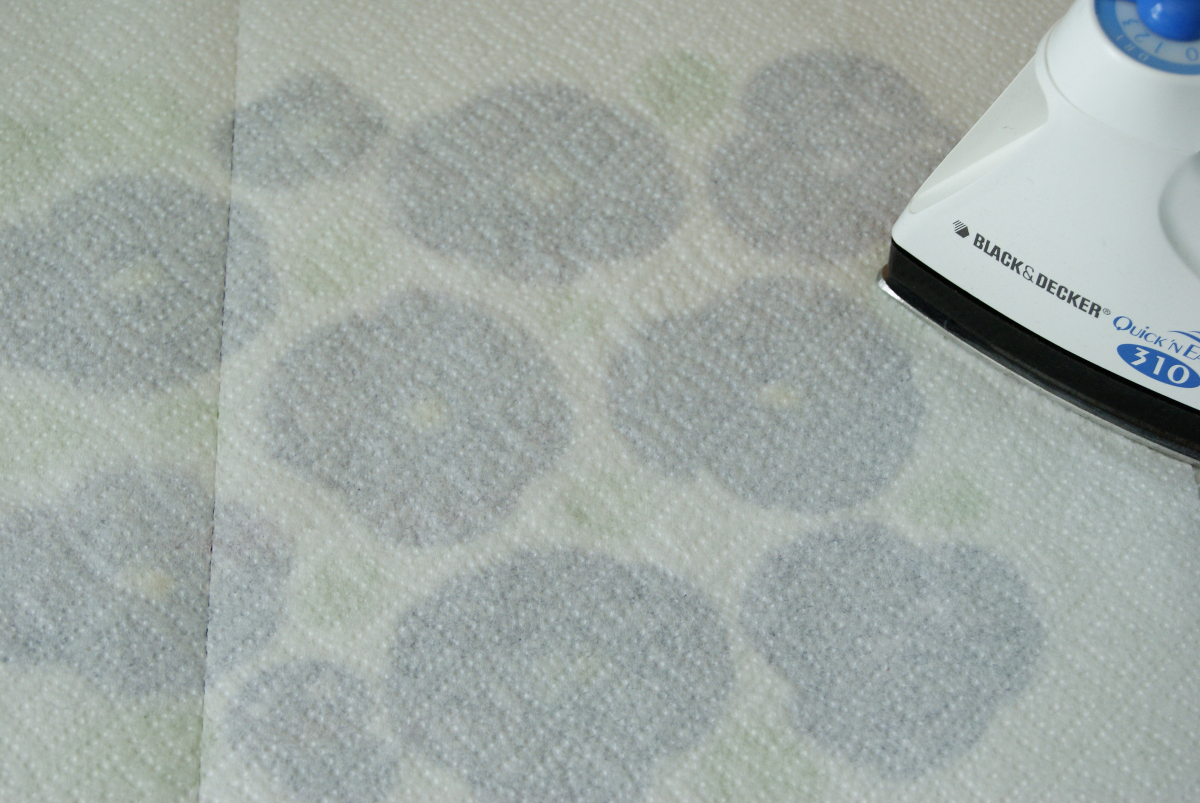
Lastly to set the design, I ironed my piece with a warm iron, but with a paper towel over it.
Don’t worry too much about all of this, the hammered images don’t have to be perfect by any means. Mine aren’t.
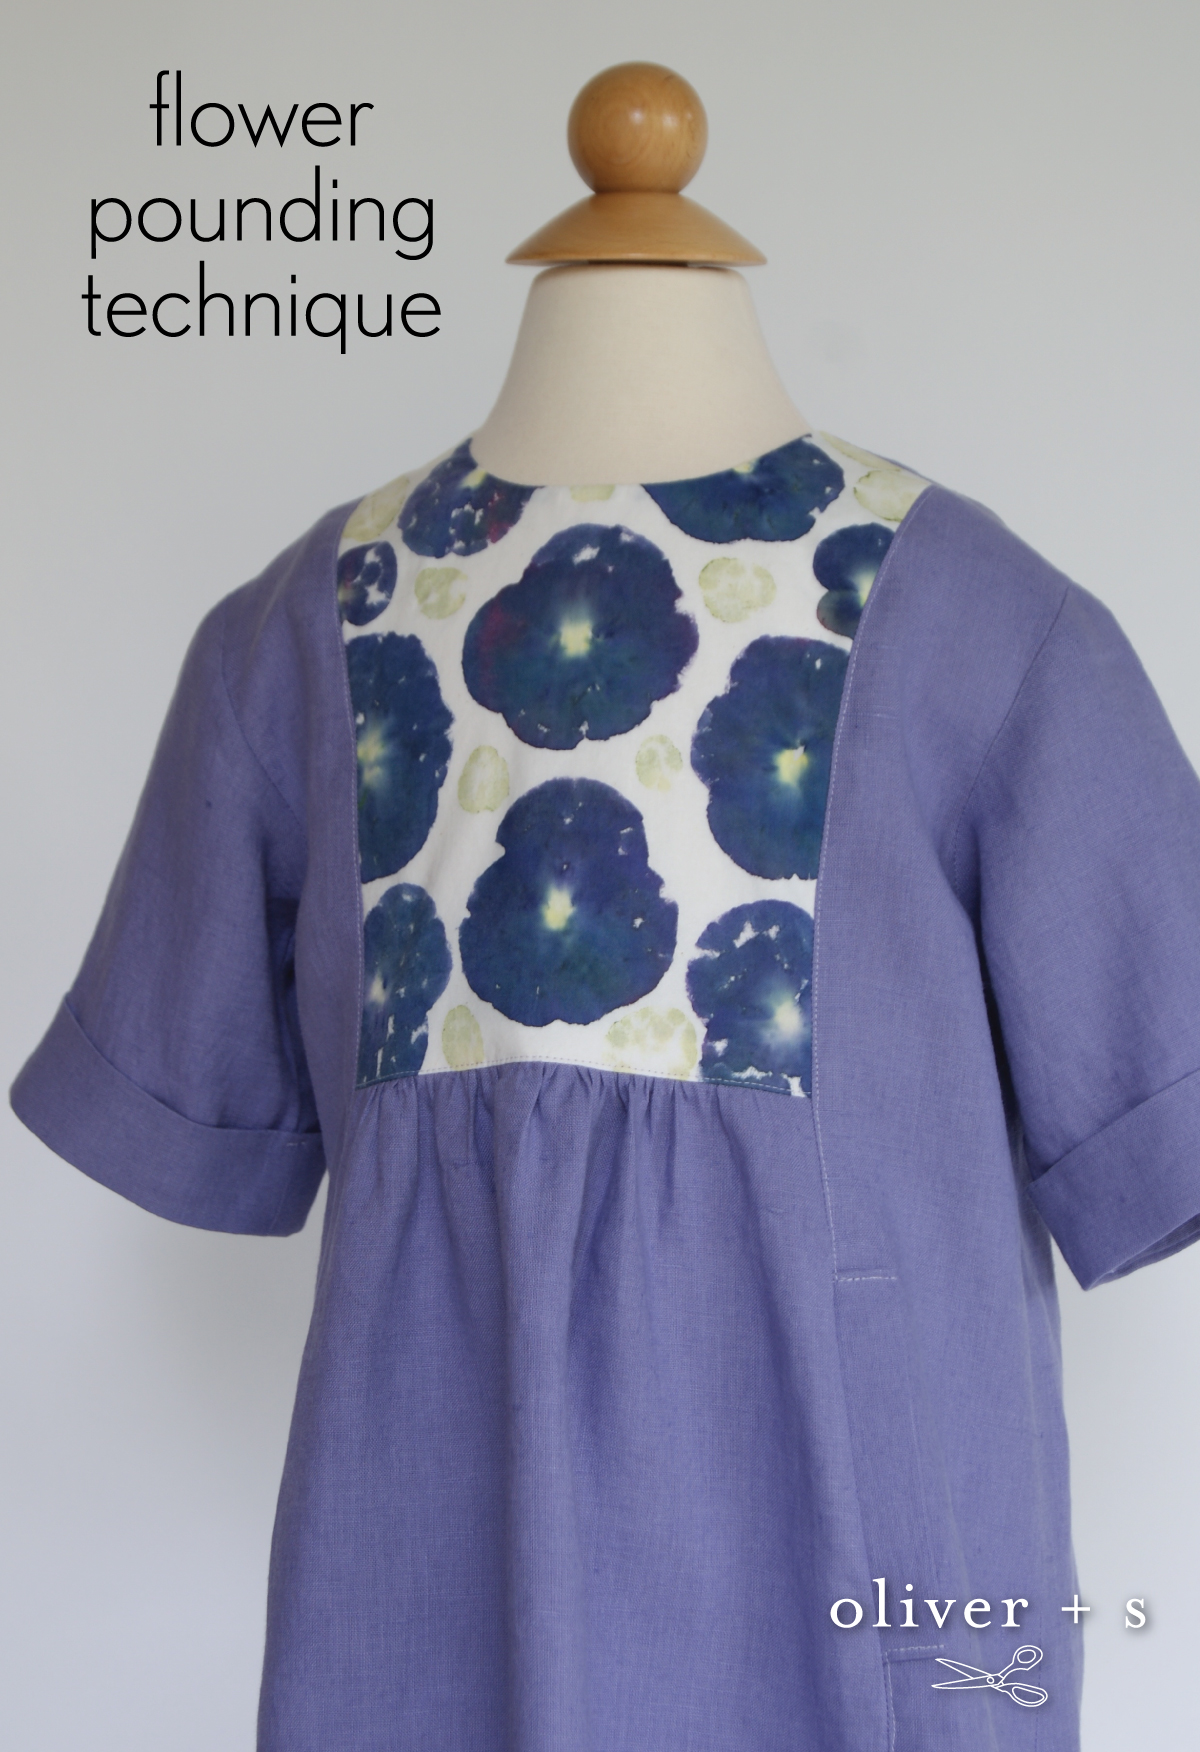
I paired my botanical impressions with some lavender linen and sewed up a Hide-and-Seek Dress. The floral images are showcased nicely on the front yoke.
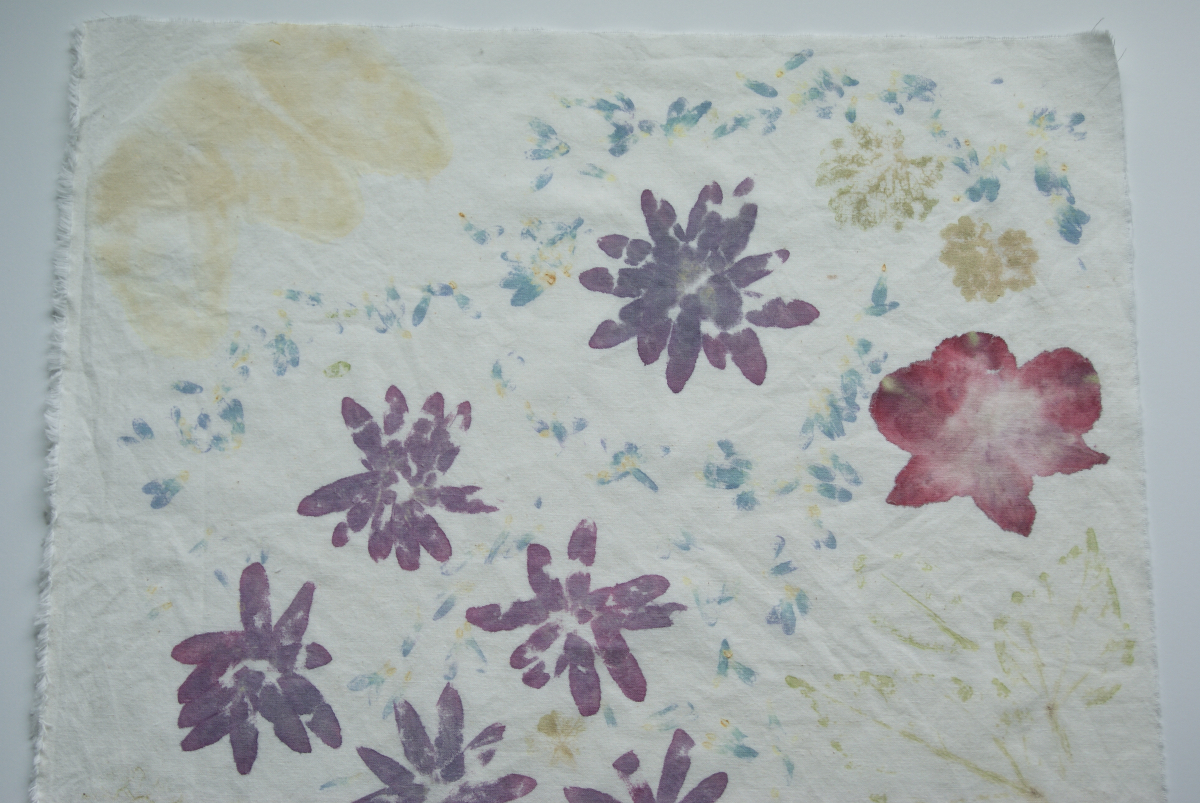
If you’re looking for a good resource, I suggest this book: The Art and Craft of Pounding Flowers by Laura Martin. It’s a treasure trove of information on the art of hammering flowers. You’ll learn what plants work best, what fabrics work best, and much more. For example, plants with darker pigments usually yield better impressions. For my second flower pounding project you’ll notice that the yellow flower petals that I pounded into the upper left-hand corner barely appear.
So there you have it. Maybe this might inspire you to try flower pounding and design and create your own floral print fabric to make wearable art.
How does the pigment hold up in the wash? Love this idea!!
This is SO cool! Now I am even more sad the Pansies around here have died. So, it says Japanese sketch paper or paper towel, does that mean you can use the paper towel instead of the paper?
I have done this with ferns in the past and loved the results. I will give it a try with flowers!
Wendy, good question as I haven’t tested it yet. I’m hoping that since the flowers have such strong bold colors that they won’t fade too fast. The author of the flower pounding book recommends dry clean only.
Brittney, yes, you’re right, you can use a paper towel instead of the Japanese sketch paper.
This is so awesome! Would also love to hear how it holds up to washing.
I love this! I want to try it too but I am with a few of the other ladies on wondering how long the color will last. I have to try.
Can’t wait to try this! My girls will love it! Thanks for sharing 🙂
I took a class on flower pounding at our local botanical garden. It was great fun, but the finished item cannot be washed. The teacher said it will wash out. Probably would leave some little bit of stain, but that’s it. She said most people make wall hangings or greeting cards with it. My idea is to make the print, scan it, and then order it printed by Spoonflower.
Great idea on ordering the fabric! I am also wondering if the dye stuff to help set the dye would work as well. (Sorry cannot remember the name of the stuff) I know I have seen quilters use it.
Beautiful! Thanks for sharing, and there’s such good info and ideas in the comment section too!
This is really beautiful, Rachel!
Definitely on my “must-sew” list! Thank you so much for sharing 😉
Although, I agree with some of the above comments – washing might be a tad too complicated 🙁
What an interesting concept…and so unique!!! You are becoming the dyeing queen…
this is lovely! Dd has a thing for roses and DH takes her somewhere with them (like the botanical garden or just walking in the large park) on her birthday. It would be so nice to use this technique for a keepsake garment.
That’s a wonderful idea, Reeni. If you do roses, you’ll want to gently take the flower apart and arrange each petal flat on the fabric. If you try to pound a complete rose, it’s too thick and you won’t get a pretty result. After you flatten it (face down), you can use masking tape to keep it where you want it. Then just keep going in the same way until you like it and then pound away. 🙂
I’ve just done some flower pounding! Looks amazing! What’s best to do afterwards? I’m worried the fabric will rot?
Thank you for this information.
I love this idea. My garden club is going to do this project in November. I will try this first. Thanks so much!!!!!!!
You used one cup of alum and four tablespoons of cream of tarter for how many yards (or square feet) of what kind of cotton material. I’m sure the weight and weave of the fabric would make a difference and the amount of yardage to soak up the alum mordant. I’d like to get as much material as possible mordanted. How light fast are the hammered designs? Could they be used as wall hangings?
Amazing . The pounding impressions are mesmerising