Today we are happy to welcome Michelle who is going to share one way of customizing the Ice Cream Dress. She shows with a few changes how to make the dress completely lined.
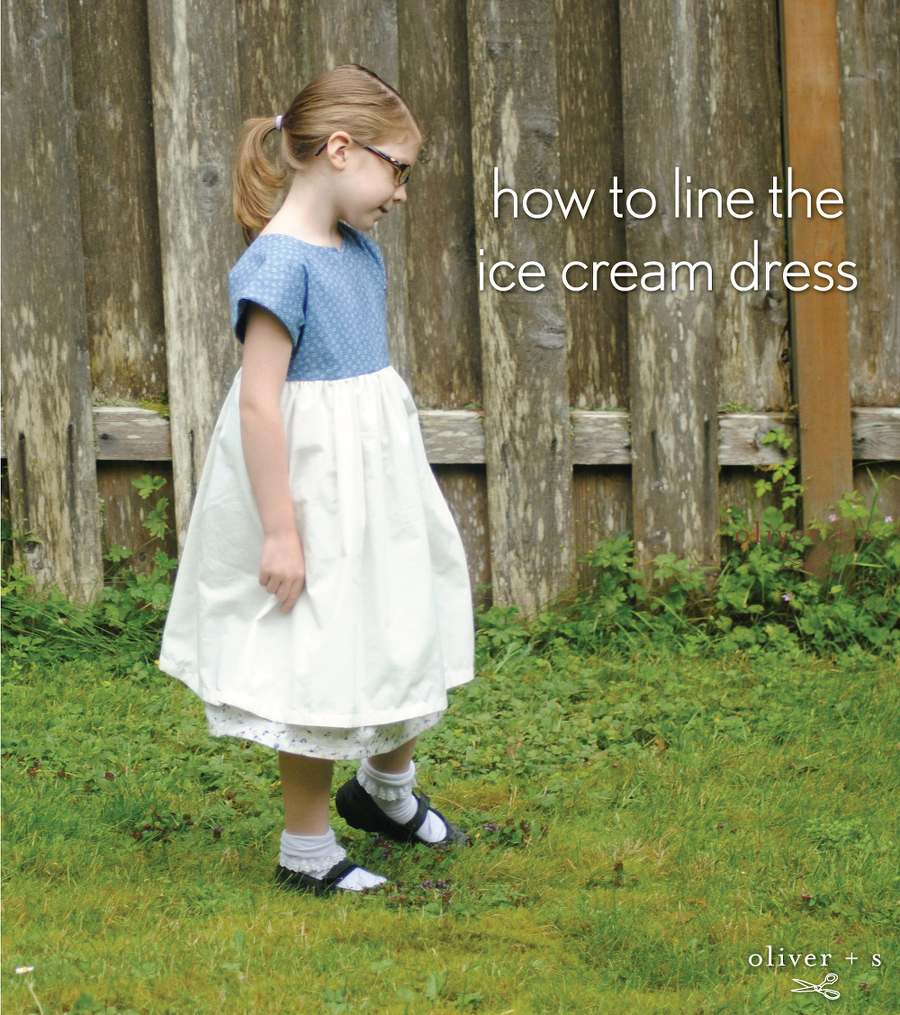
I love the Oliver + S Ice Cream Dress, but have always wanted to make one completely lined. The biggest challenge with that was the added bulk under the armpit where the yoke connects with the gathered skirt. With just a few very simple changes, I managed to keep the one piece yoke, remove the bulk, and line the entire dress!
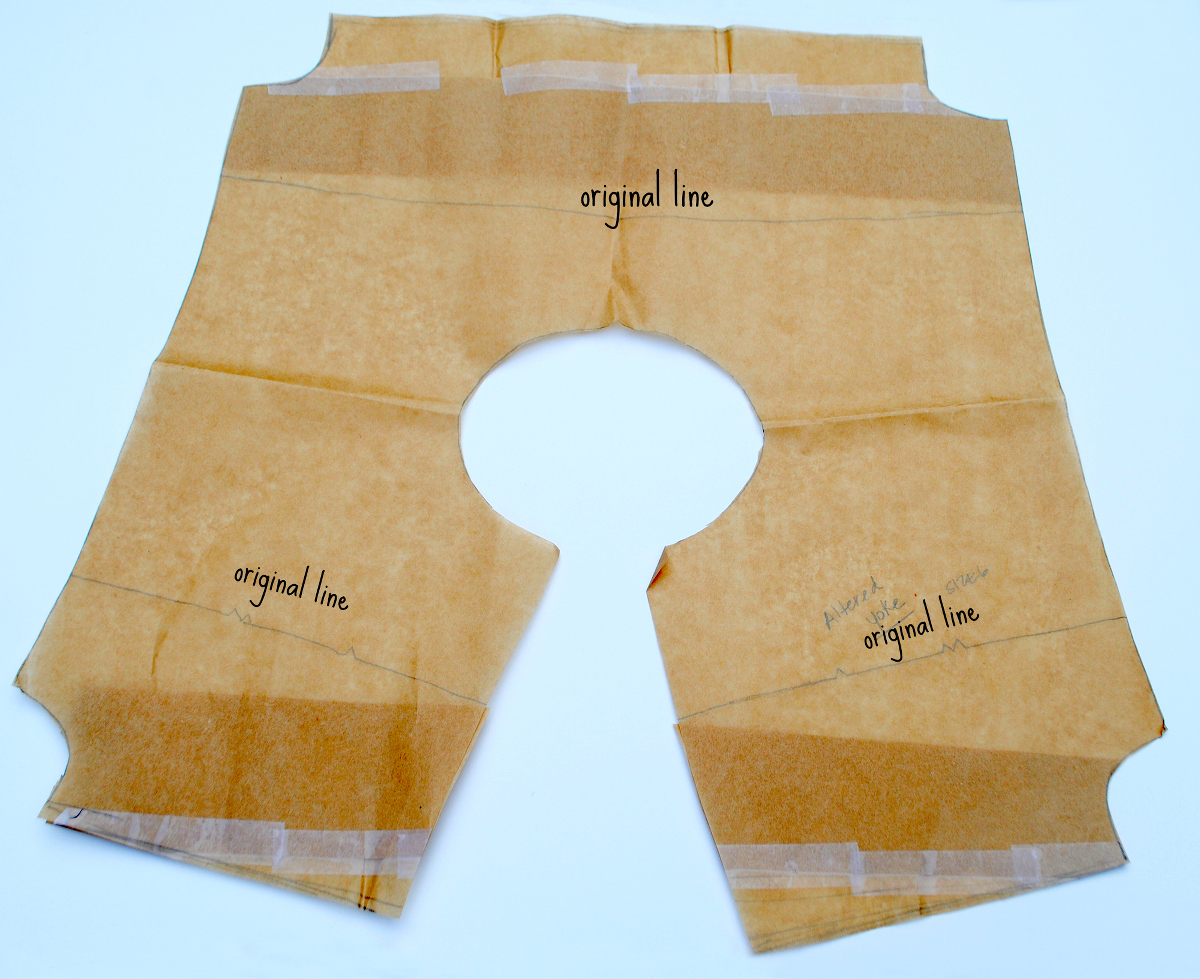
You start with tracing the size you need of the yoke piece. I traced a size 6.
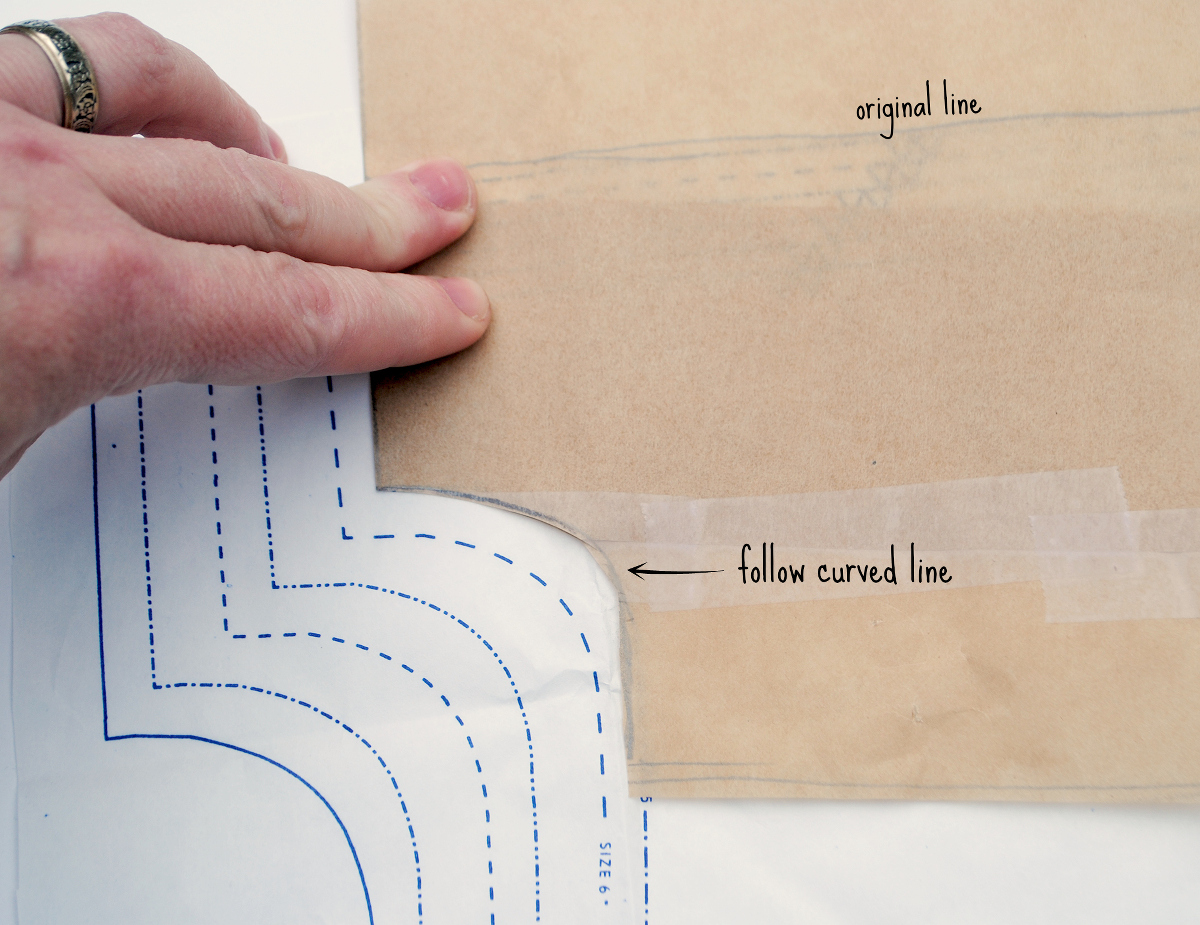
Then line it up on top of the curved part of the pattern piece for the gathered skirt and extend the curve and a few inches beyond it. Repeat for the three other sides. Remember to extend the same amount on all sides.
Now cut 2 out of fabric (one outer and one lining).

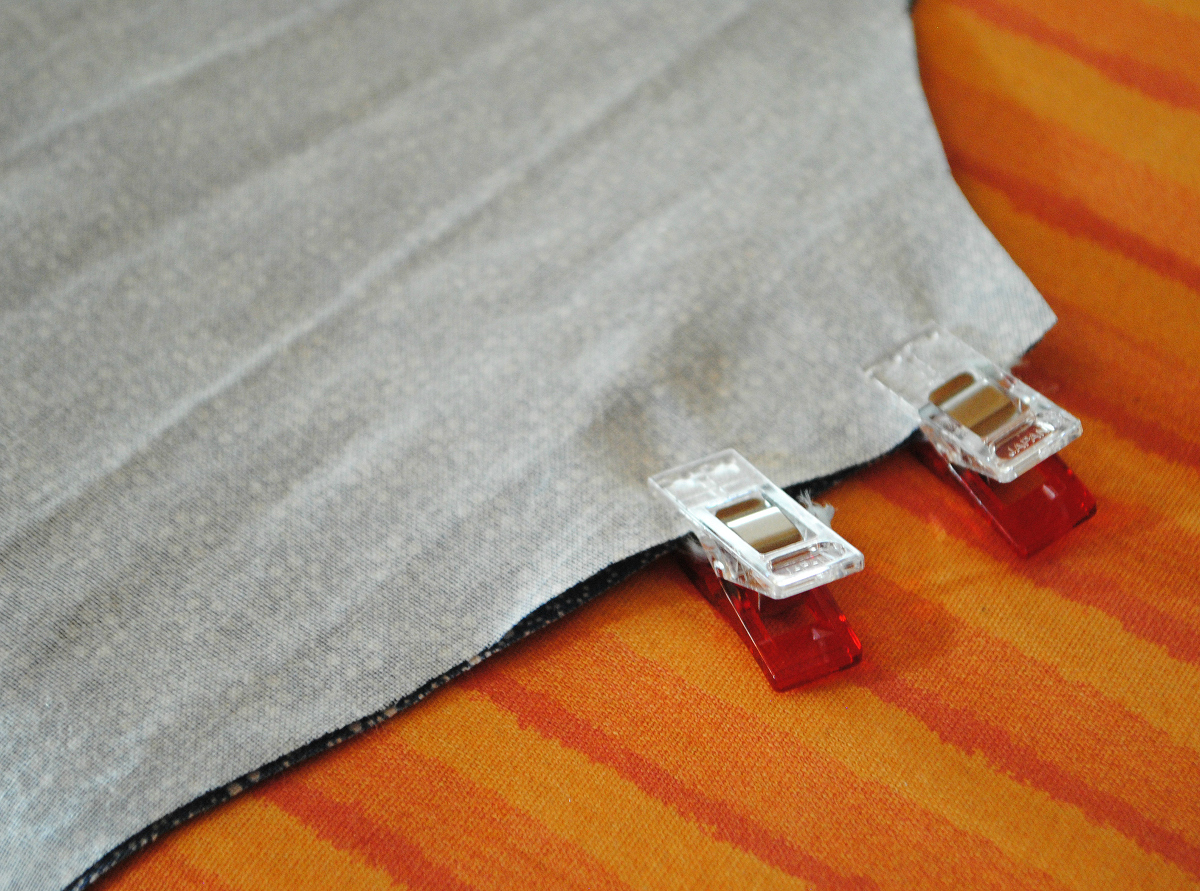
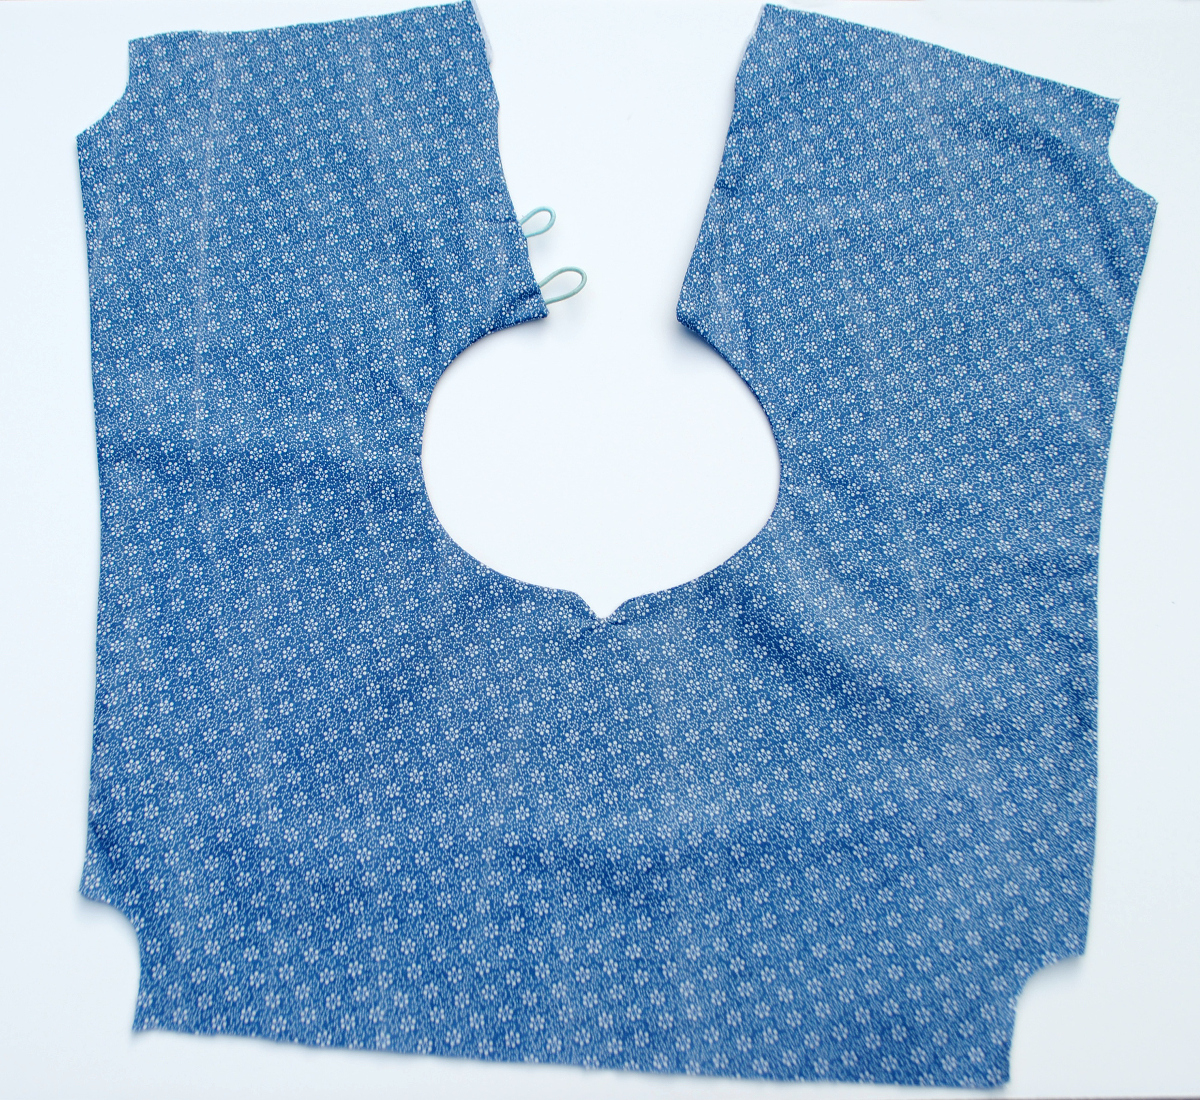
I decided the back closure would have two buttons with elastic loops. So I inserted the elastic loops and clipped in place.
Now, sew around the inner circle and down the back, but stop about 4 inches from the bottom, on both sides. Also sew down the flat outer edge (sleeves).

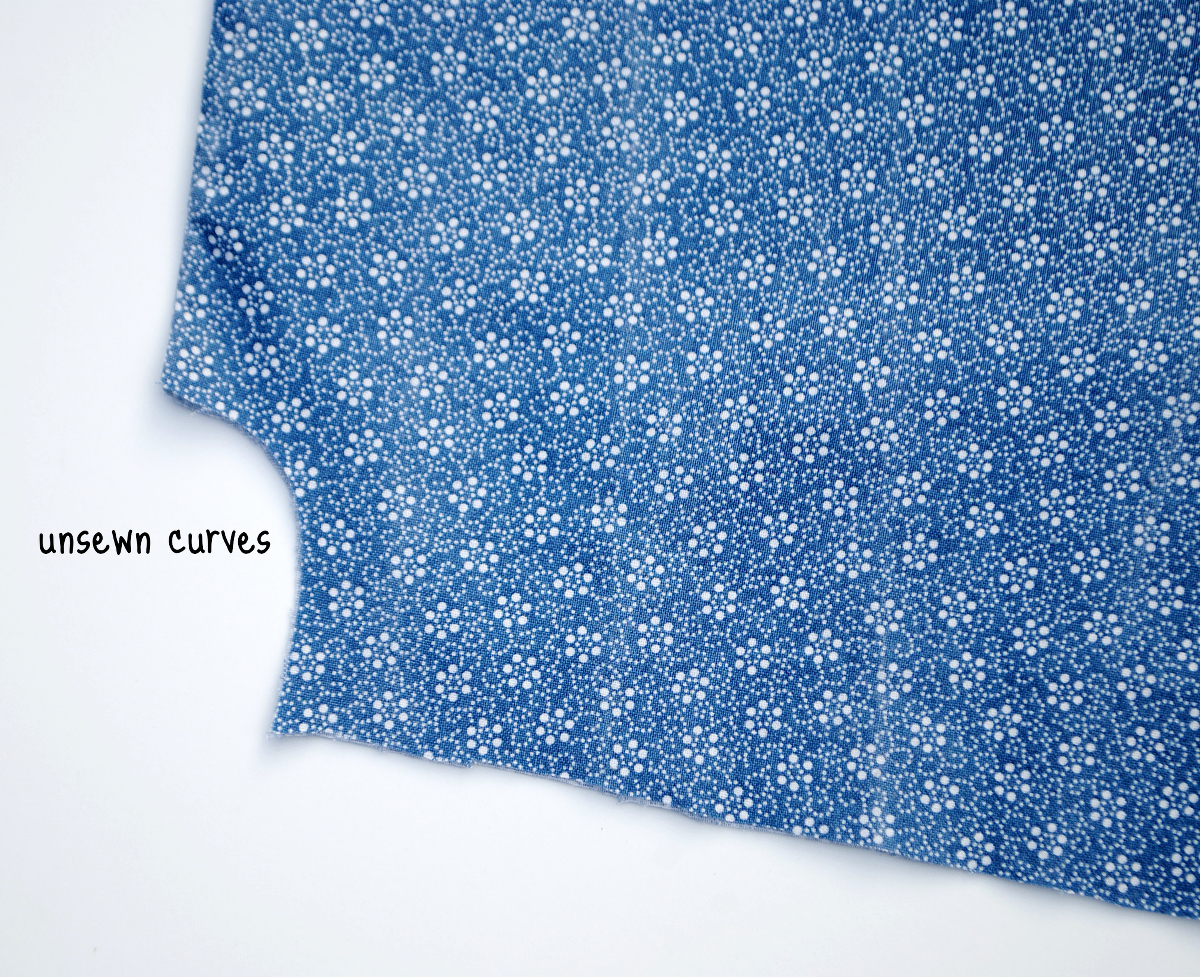
Do not sew outer curves (sides of bodice), yet.
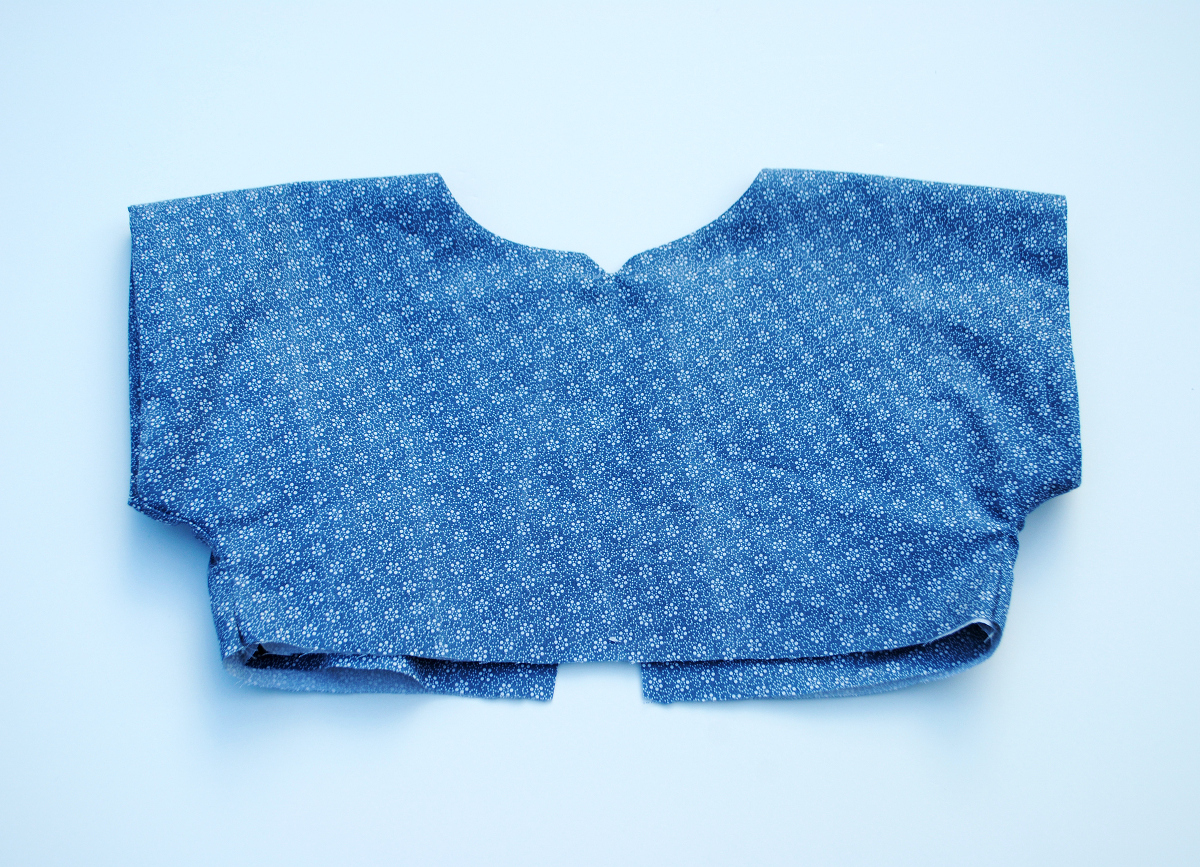
Turn whole yoke right side out and press flat.
Put together the curved sides by matching front outer piece to back outer piece, and lining front to lining back. Do this on both sides to put the bodice together.
Flip to the back.

Remember when we stopped sewing 4 inches from the bottom? Well, now we are going to close it up.
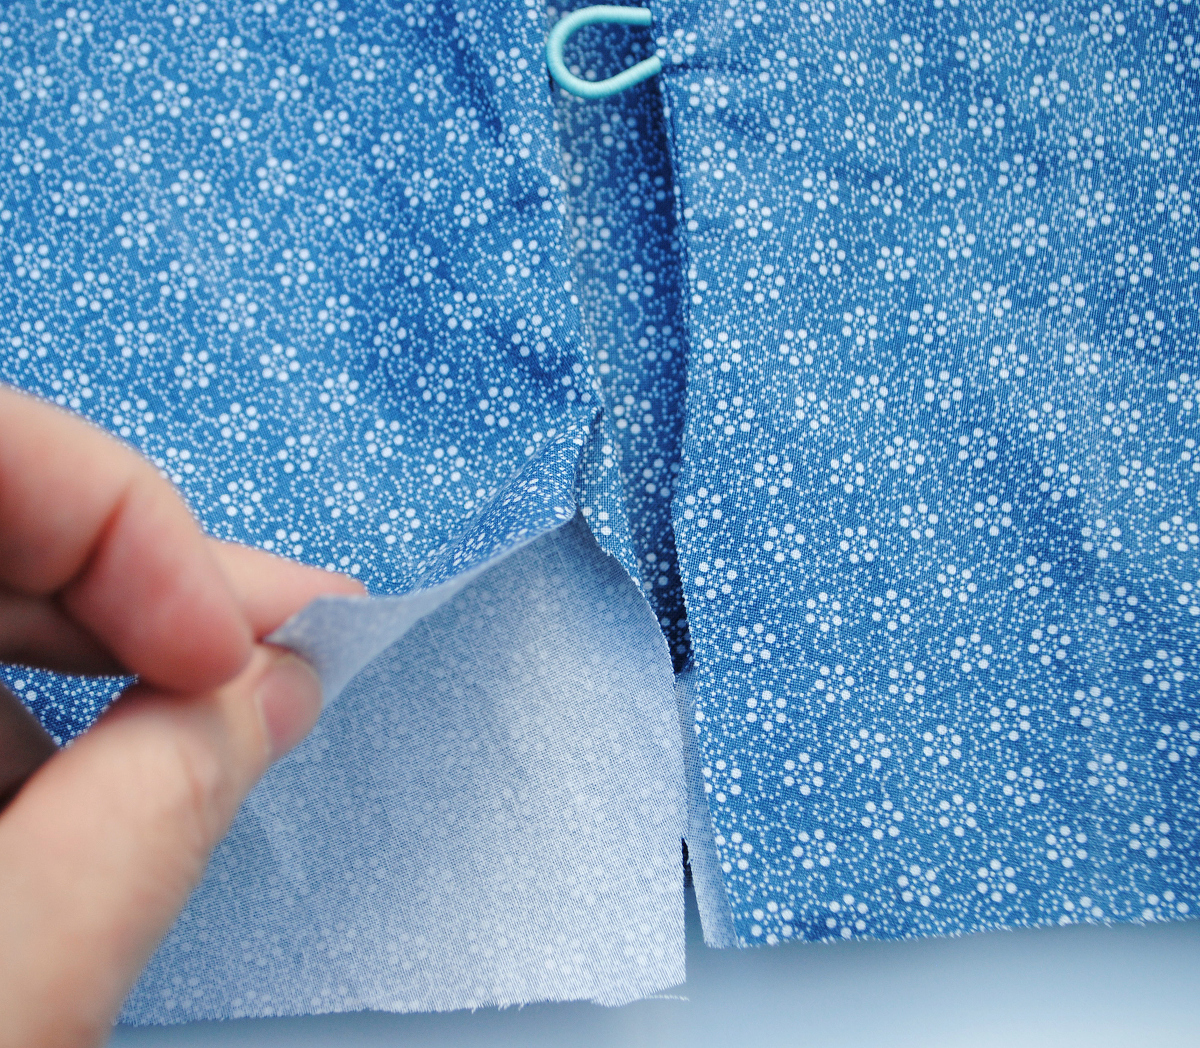
This can be a little tricky. Take the outer pieces and with right sides together, sew them to close up the back.
Then do the same thing for the lining.
Now you are ready to make the skirt part. I didn’t follow the pattern for these. Instead I cut out two rectangles (one outer fabric and one slightly longer lining). I like using the entire width of the fabric so it gathers up fuller. Feel free to make yours as full (or not) as you want! Also, you can choose at this point to make your lining shorter that the outer fabric. I liked the tiered effect, though.
Sew sides to form your skirt tube, and then gather top. Attach the outer skirt (right sides together) to the outer bodice.

Repeat for the lining, although to keep the seams from showing, I connect the wrong side of the bodice lining with the right side of the skirt lining.
Hem both skirt pieces. Sew on your buttons, opposite the loops.

Admire the new version of this sweet dress.

Thanks so much for having me today! I had a lot of fun with this one.
Thanks for sharing how to line this dress. I really like the added bodice length and the tiered skirt.
Nicely done!
~Deb~
YOU DID IT! — customized this Ice Cream Dress for your daughter by completely lining the empire-waist gathered skirt. I like the effect/style of the longer length for the lining! Also I love the 1-piece yoke in the tiny floral designs, white on a blue background, with minimal sleeves. UNIQUE girl’s dress — certainly you get lots of compliments, right? Your tutorial is detailed with 13 sharp photos, EASY for anyone to follow. THANKS for sharing, Michelle!