Over in the discussion forums a few weeks ago there were several requests for help with changing the back buttons of the Library Dress to a zipper closure. I asked if anyone wanted to give it a shot and write a guest post describing the process to help others make the change, and Lotta quickly volunteered. So without further ado, I’ll hand this post off to her. Thank you so much, Lotta!


I’m Lotta, lattemama in the forums. I live in Malmö, Sweden with my family, and I sew mostly for my 6 year-old Sofia. Her 9 year-old big sister Isabel has outgrown most of the Oliver + S patterns. That’s what happens when 6’1″ me marries a 6’11” guy and has babies. They grow tall. I work (almost) full time as a technical writer and do most of my sewing during the weekends or in the late evenings. It helps that I am quite the vespertine creature; I do my best work at dusk.
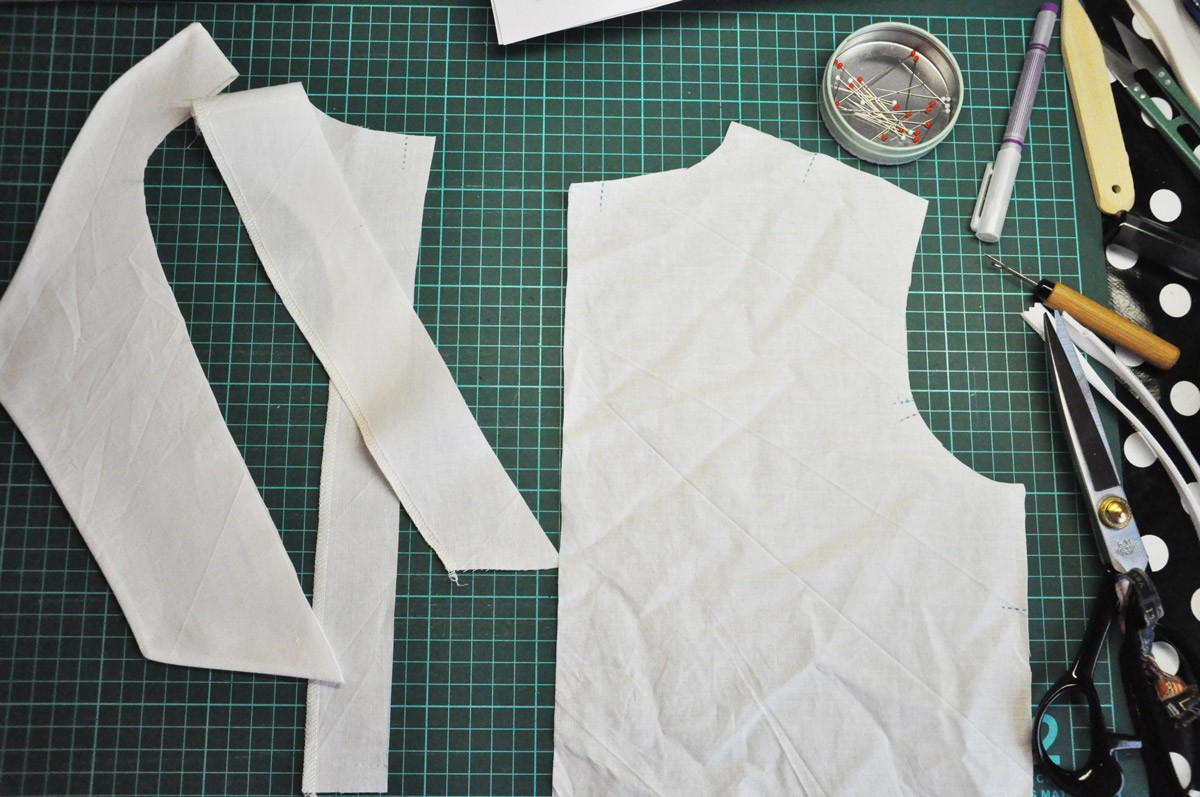
I decided to change the buttons for a zip on Sofia’s Christmas dress. I will show it on a sheet remnant I had because I wanted to try it out first on a toile (muslin) to make sure the size 10 I traced will be a good fit.
Before you start, you’ll need to make a few decisions. First, determine how long you want the zipper to be. The Library Dress’s mock wrap front opens up fairly well to make it easy to get on and off, and that means you don’t have to put in as long a zipper as a more fitted style like the School Photo or Fairy Tale dresses would require. I decided to add a zipper that ends at the waist.
You’ll also need to decide how you want to finish the inside of the dress. You have a few options:
- On this dress I made for my daughter Isabel last year I serged the edges of the back before attaching the invisible zipper. It’s a quick and easy method, but the finish isn’t as nice and you’ll still need to add a facing to finish the neckline.
- You could opt instead for a full lining like in the Fairy Tale dress. This way, you can omit the front and back facings completely and instead cut two sets of front and back bodice pieces. (You can refer to the Fairy Tale Dress instructions for details on this method if you like.)
- The third option is the one I will use for this tutorial. I’ll use the existing facing pieces to finish the inside of the bodice at the zipper. This method give the same clean finish at the zipper edge as a full bodice lining, so it looks really nice.


Ready? Let’s dive into the instructions.
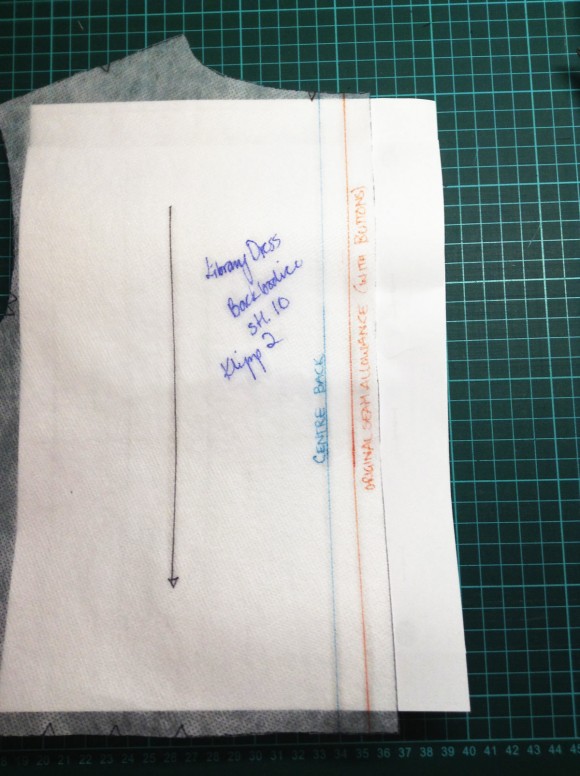
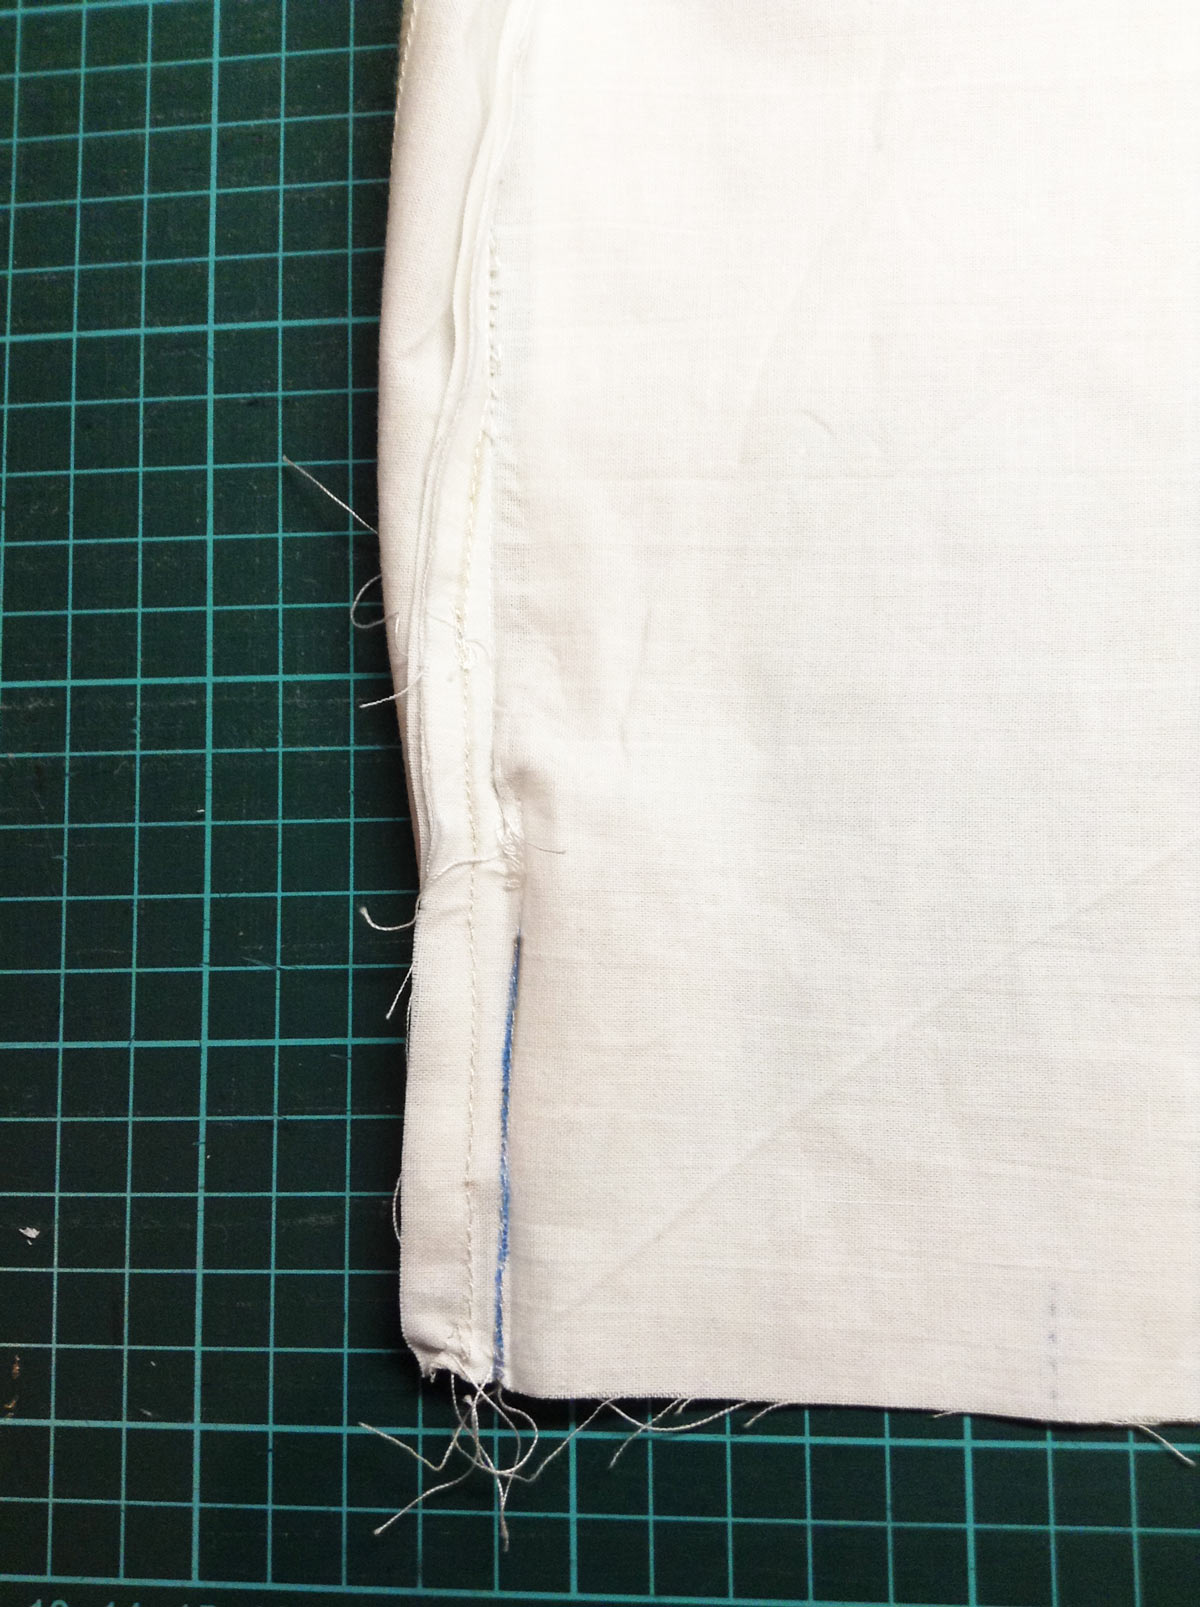
- First you will need to consult your pattern and find the center back of the back bodice pattern piece. On the Library Dress, the notch at the back of the neck is where the collar ends. The right edge of the pattern piece has a 1/2″ seam allowance included (marked in orange in the photo below). The center back line is located 1” in from the back bodice piece edge (the blue line in the photo).
If you don’t cut the extra fabric from the button extension you’ll end up adding a total of 1″ to the back of your pattern and will also get a 1.5″ gap between the collar edges. This will make the dress wider at the back and will throw off the line of the dress, so we need to trim 1/2″ from the back edge of the dress before inserting the zipper.
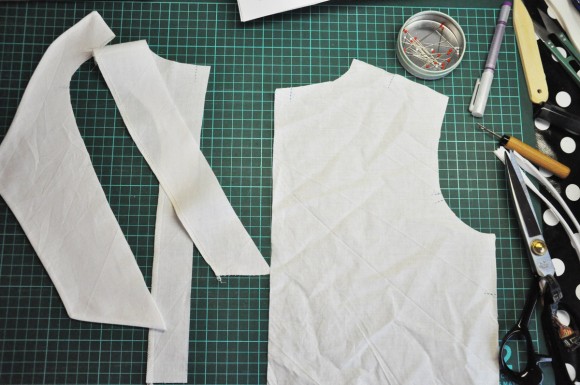
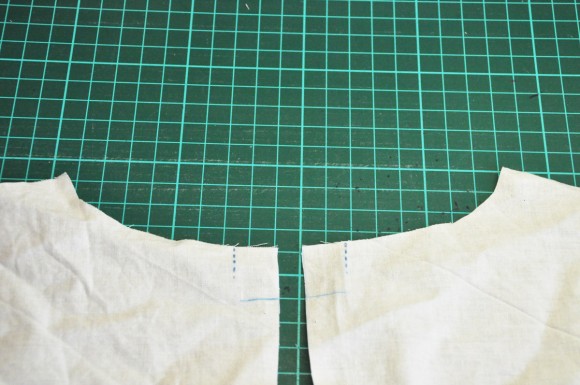
- The neck notch will now be 3/4″ from the bodice’s back edge – this is because the collar has a 1/2″ gap between the back edges in the finished dress. Remember to trim the same extension from the back facing pieces as well.
- Stitch the back and front facings together at the shoulders as directed in the pattern instructions. Also prepare the collar (I only did one side since this was a toile).
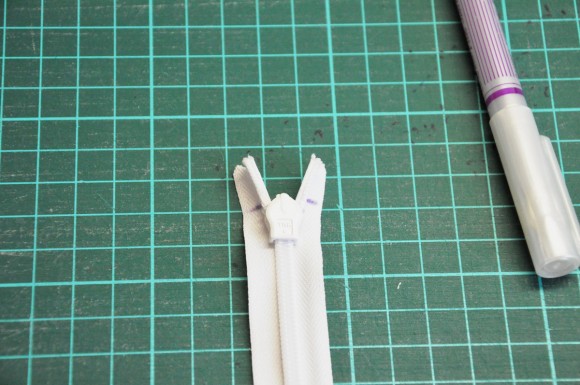
- I cut my zipper to be 1″ shorter than the back bodice, since I didn’t want to bother with matching the waist seam, but you can easily make the zipper longer as needed. I cut the zipper to the desired length and melted the end of the zipper with a match to seal it as much as possible. It won’t be a perfect seal, so be careful not to open the zipper all the way or you’ll need to start over with a new zipper. I stuck a pin through the end to stop me from opening it all the way by mistake. (You could also bar-tack or baste near the end of the zipper to prevent it from opening too far.)

From here I followed the instructions for the Fairy Tale Dress zipper, as follows:
- Fuse a 1”-wide strip of interfacing to the wrong side of each bodice center back. Align the interfacing with the raw edge of the bodice and follow the interfacing manufacturer’s instructions for fusing. If you want to you can neaten the center back edge with a zig-zag stitch or a serger, but since there will be a facing here I don’t normally bother. (Also, in the pictures I didn’t include interfacing because this is just a toile.)
- Draw a short horizontal line 7/8” down from the neckline’s raw edge using a disappearing fabric marker. Repeat on the other bodice piece. You could also mark the center back line if you want to. This is especially helpful if you don’t have an invisible zipper foot for your machine.
- Close the invisible zipper and use a pencil to mark the wrong side of the zipper tape at the top of the zipper slider (the metal part that moves up and down).
- Prepare the zipper by opening it and pressing it flat with your iron. Remember to keep it on a low setting or you might melt the plastic teeth (yes, it has happened to me). Leave the zipper unzipped until you’ve finished inserting it so that the coils stay pressed flat while you work.
- Starting with the wearer’s right back bodice, pin the right zipper tape right side down on the right side of the fabric so the tape lines up with the raw edge and the coils face away from the raw edge. The line at the top of the zipper should line up with the 7/8” mark you made at the neckline earlier. If you marked the center line then the coils should line up with that line.
- Pin the zipper in place and check to be sure it isn’t twisted the wrong way.
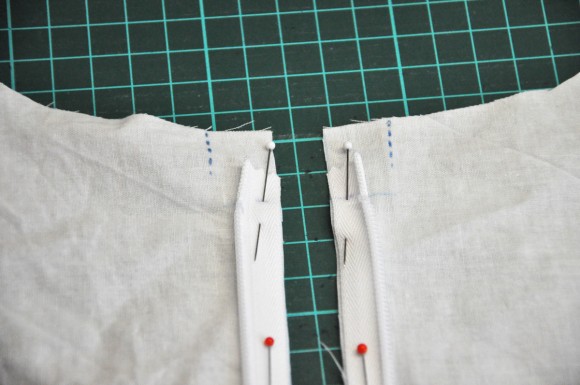
- Take the time to hand baste the zipper in place. I find that it gives a much better result.
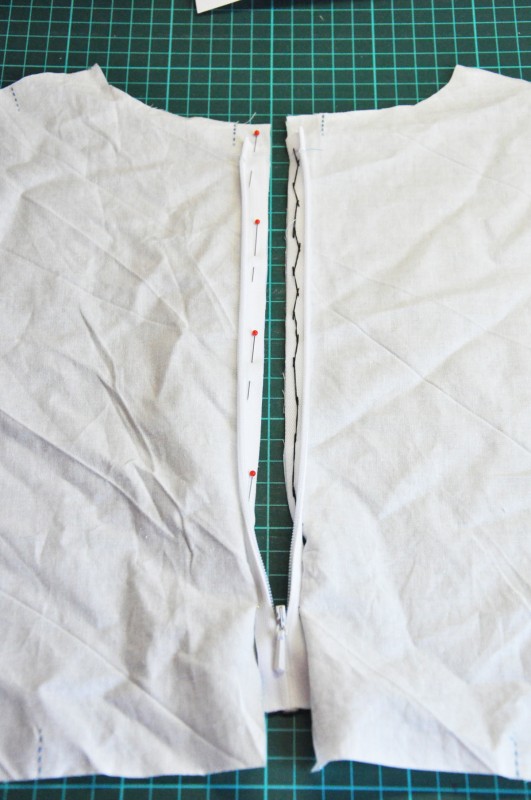
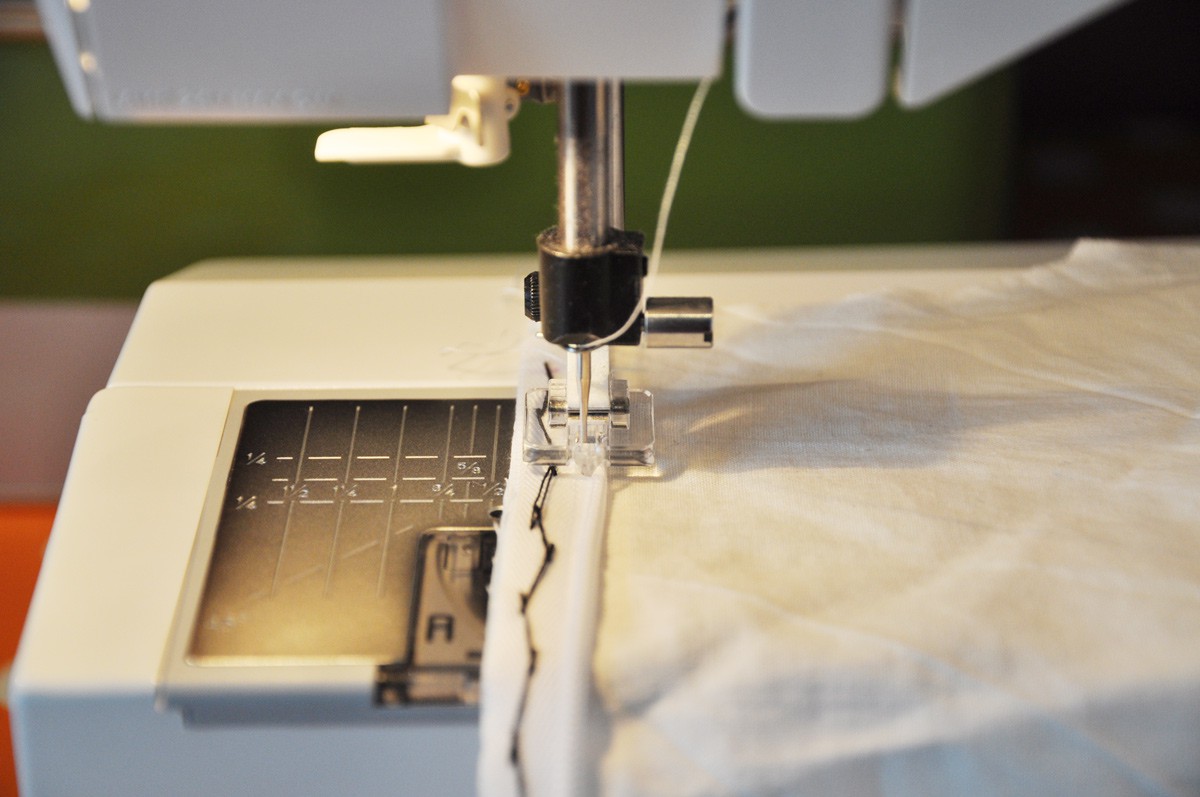
- Beginning at the mark you made, sew close to the zipper teeth using a zipper foot on your machine, moving the needle over so you can sew as close to the coils as possible without sewing into the coils themselves. If you have an invisible zipper foot like mine, attach it and drop the foot onto the zipper coils. The design of the foot takes you very close to the coils and gives you a nice finish. I have had to rip out zero zips since I got this foot, in stark contrast with how many I had to rip out when I used my regular zipper foot.
If there is an invisible zipper foot available for your machine and you can afford one I definitely recommend it.

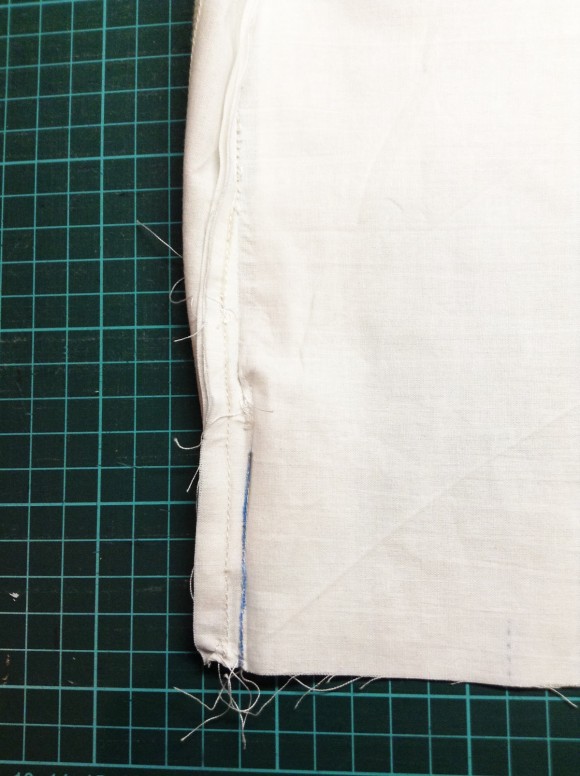
- Sew as far down as you can reach before hitting the zipper pull tab. If you left the zipper long instead of trimming it, stop approximately 2” or 2.5” from the bottom depending on the size you’re making.
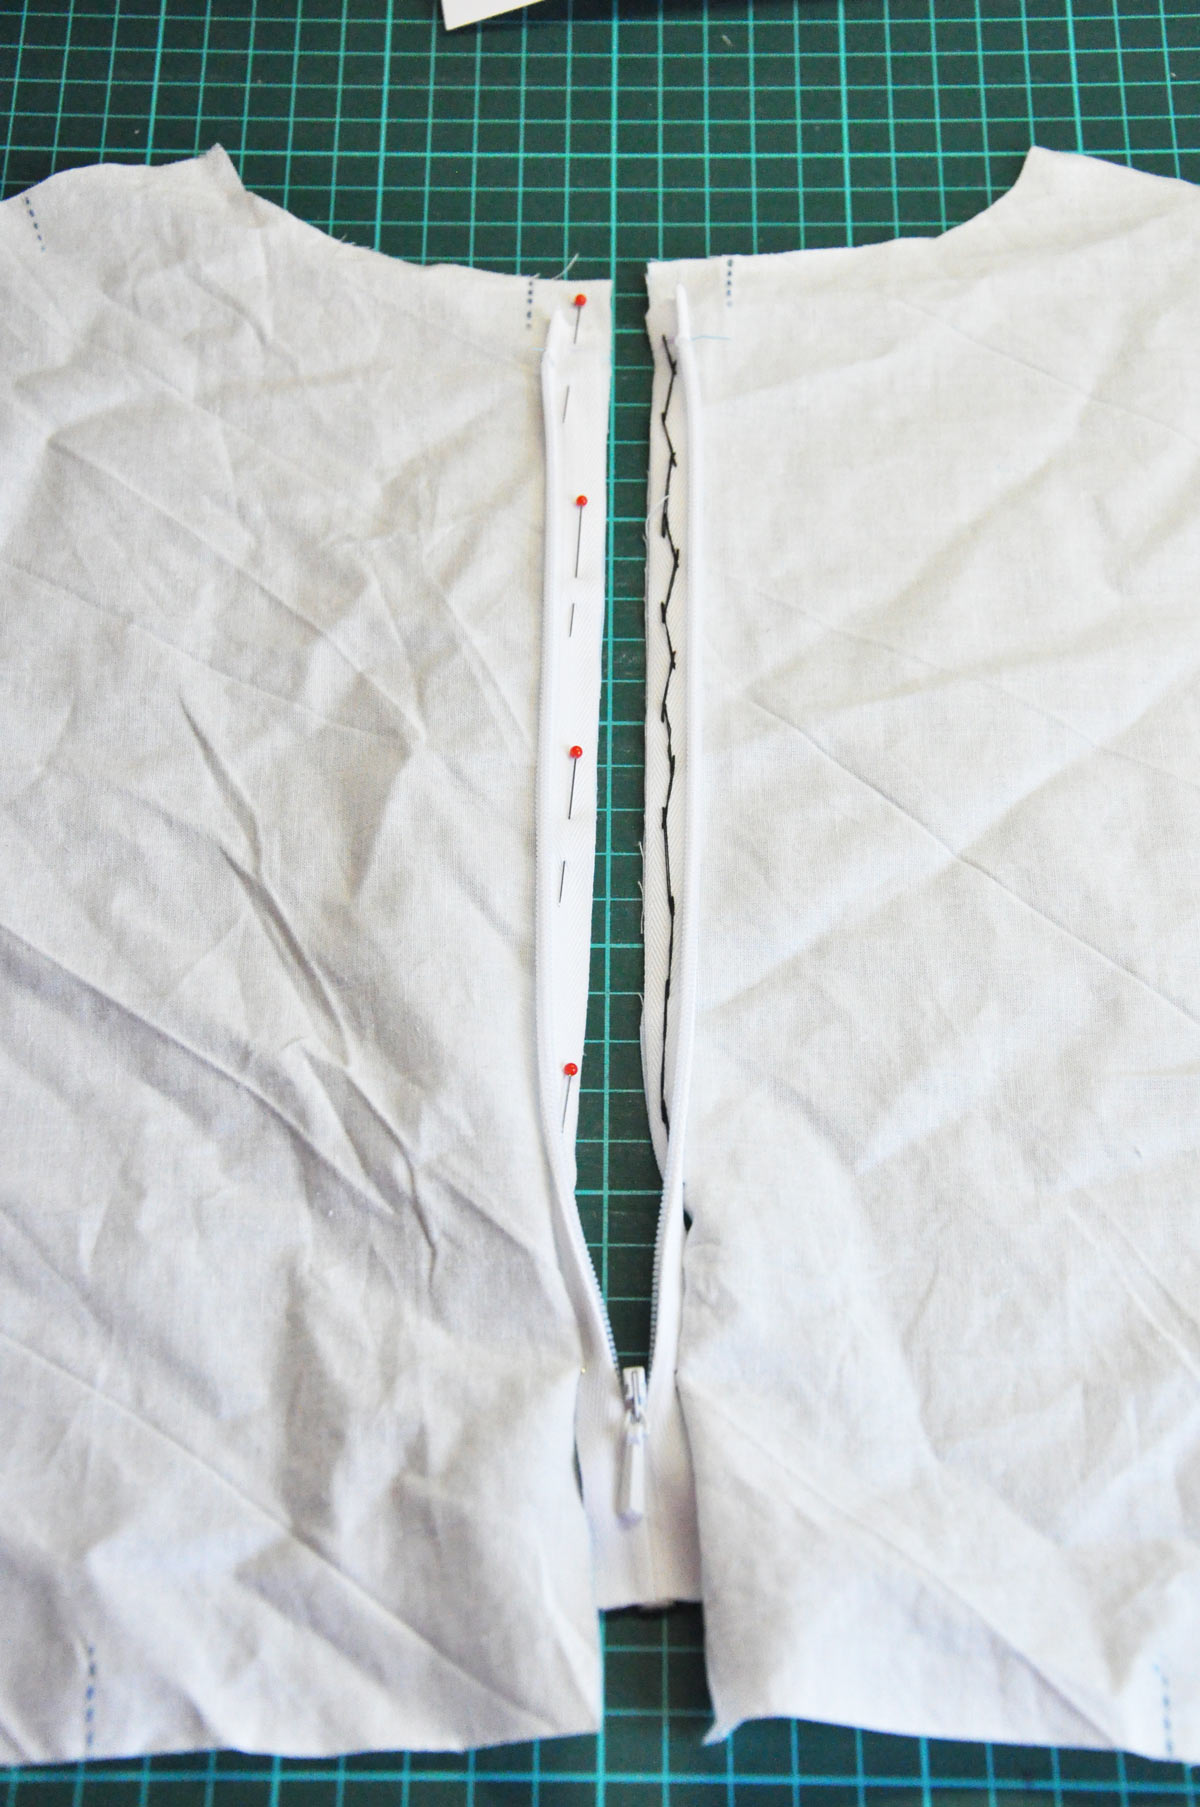
- Pin and baste the zipper to the other side of the bodice, making sure you don’t twist the zipper the wrong way. Sew it to the dress the same way you sewed the other side. Try to stop at the same place on both sides of the zipper. Remember to backstitch or lockstitch at beginning and end.
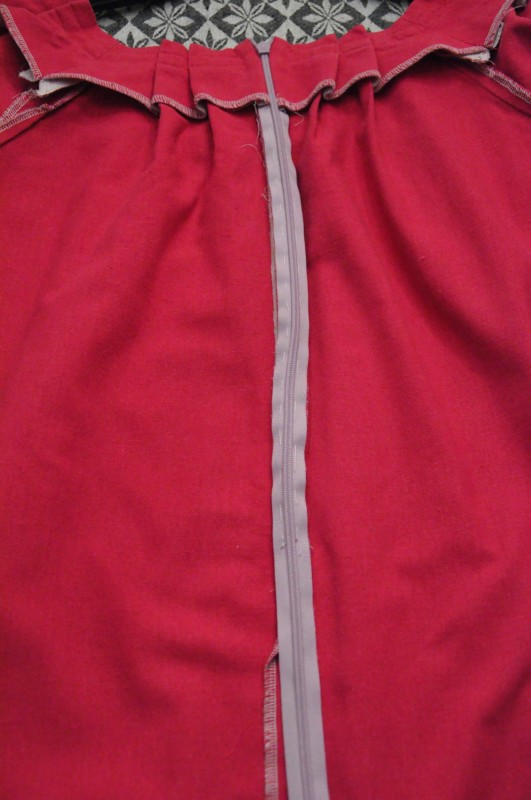
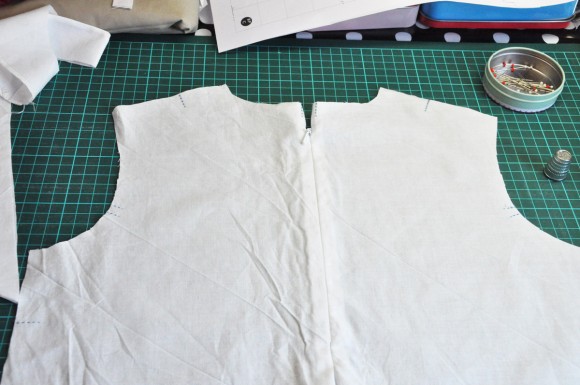
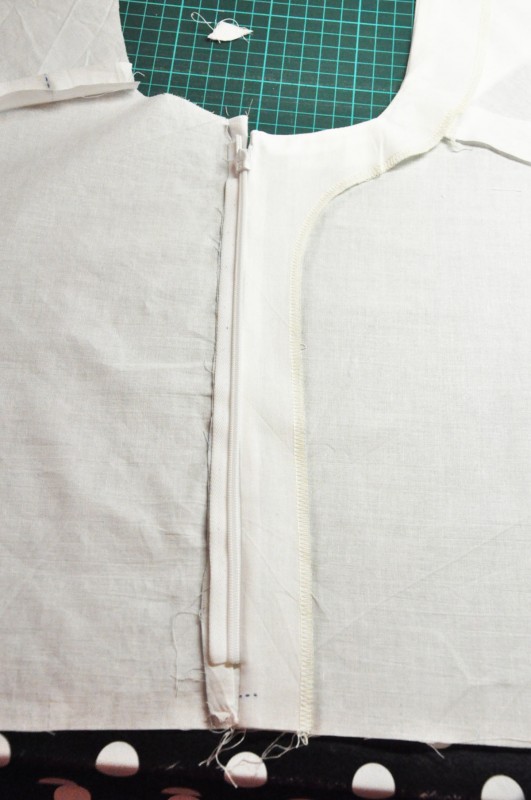
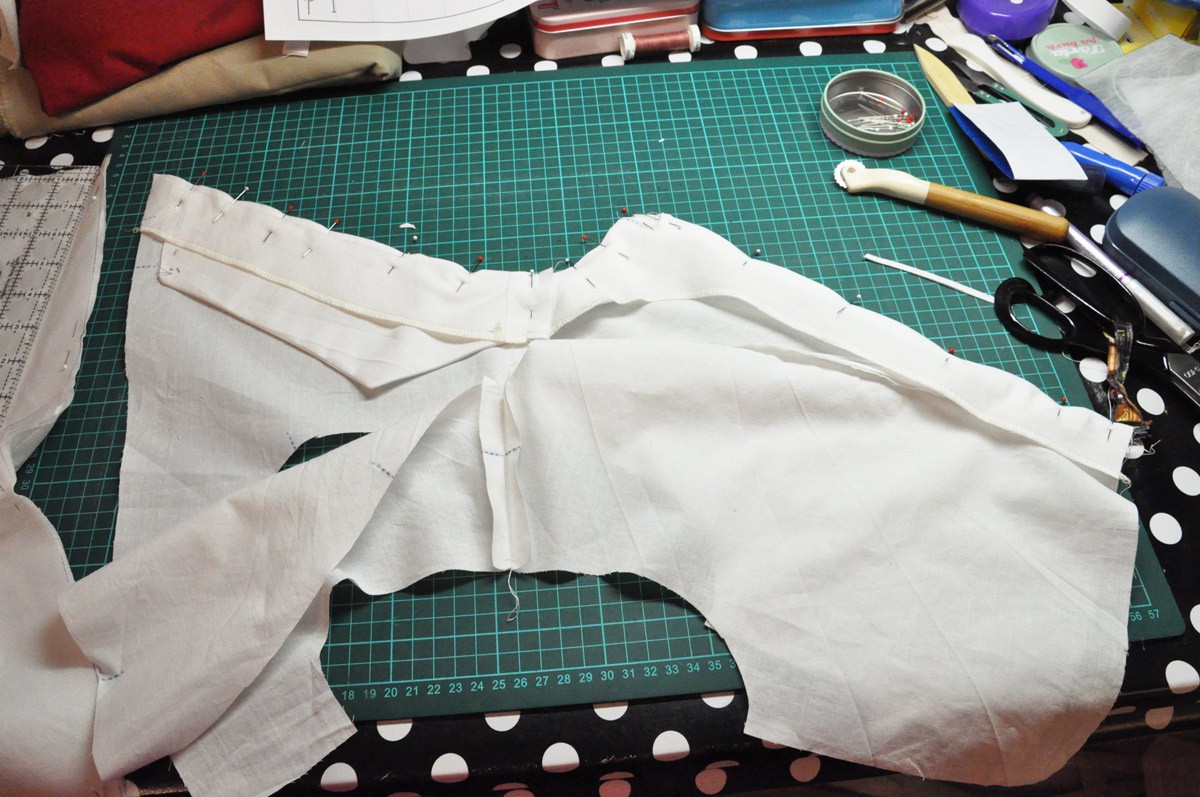
- Close the zipper and admire your work. (Hmmm, a good press wouldn’t have gone amiss.)
- Pin the bottom opening of the bodice’s back seam. Consider marking the seam line here. Change to a zipper foot if you haven’t already, and move the needle over (if your machine allows it) to sew as close to the zipper seam as you can. Once you move the needle your throat plate’s indications will be off, which is why it helps to mark the seam line before stitching this seam.
- Press the seam open and gently press the zipper on the outside to smooth out the bodice.


Now to finish the inside.
- If you haven’t done so already, assemble the collar and interface the front and back facing as directed in the pattern. Stitch the shoulder seams on the bodice as well, and baste the collar to the bodice. (I sewed an extra seam on my collar so I had to trim that off which is why it is slightly shorter. Good thing it’s just a toile.)
- Pin the front and back facing to the front and back bodice piece. Fold the little piece of zipper tape at the top into the seam allowance so it won’t show when the dress if finished.
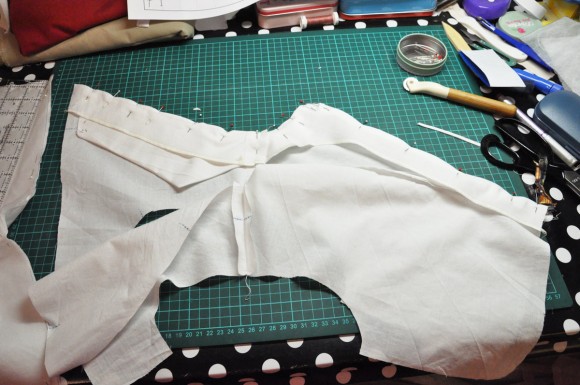
- Sew the front and neck line seams with your regular foot, remembering to bring the needle back to its center position so you sew with a regular 1/2″ seam. Sew all the way to the back edge of the neck line, and backstitch at both ends.
- Change to the zipper foot again, and move the needle over so you can stitch as closely as possible to the zipper. Stitch the facing to the back bodice in the seam allowance to keep it in place and to give the inside a nice clean finish.
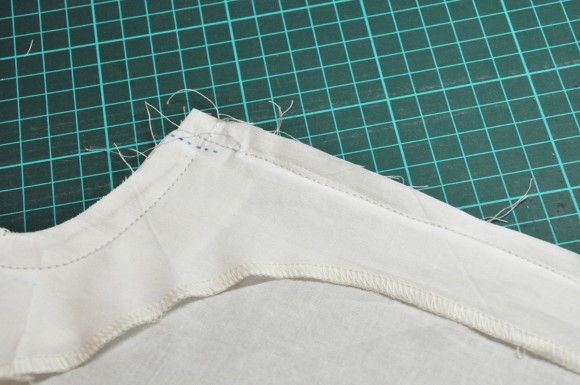
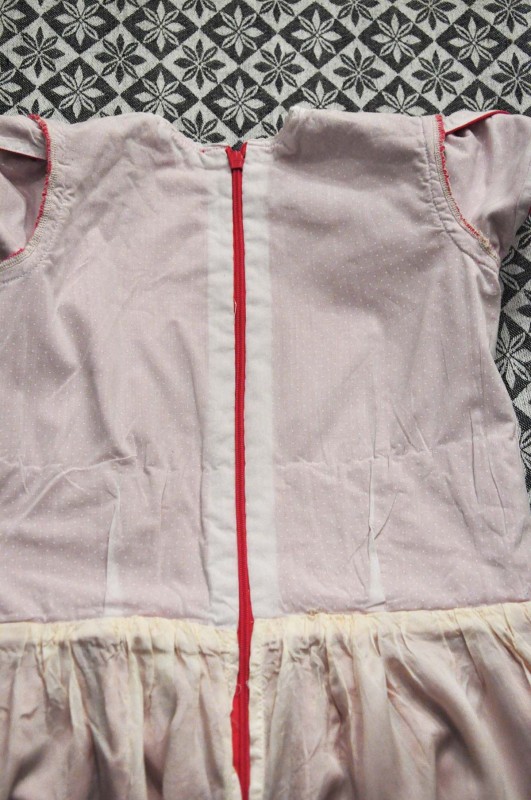
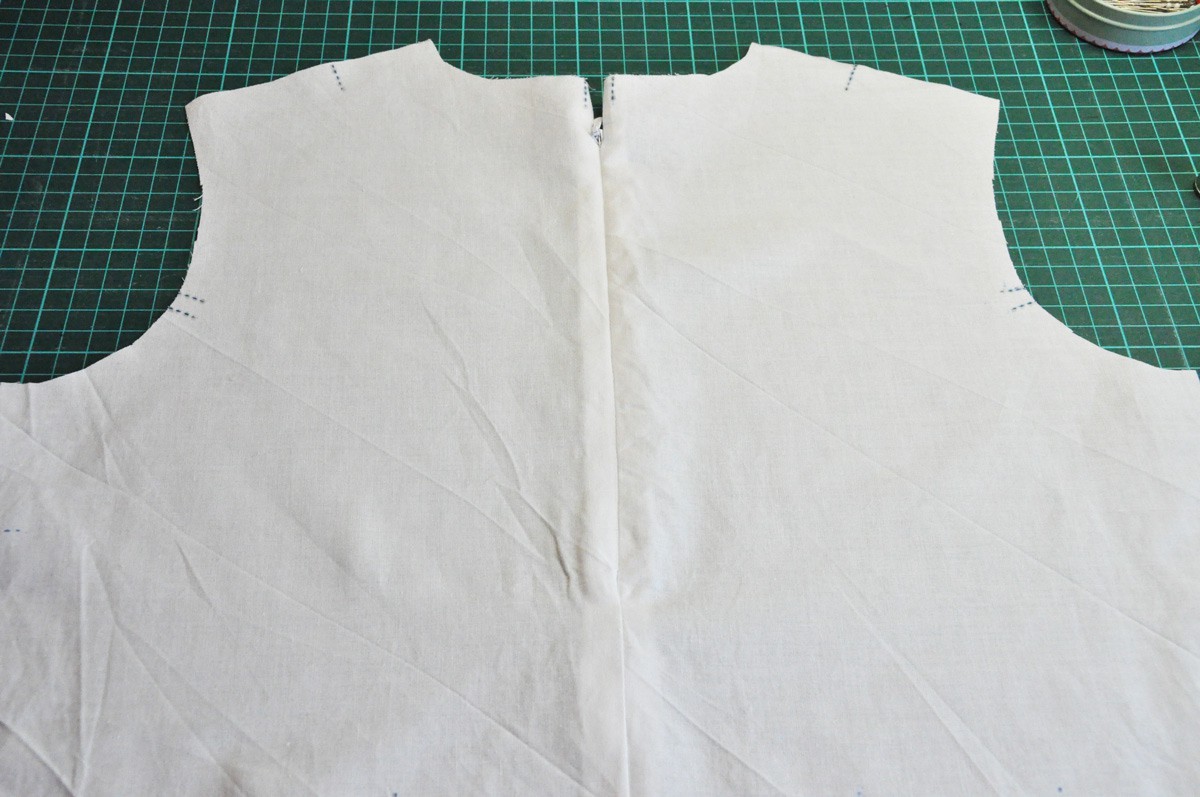
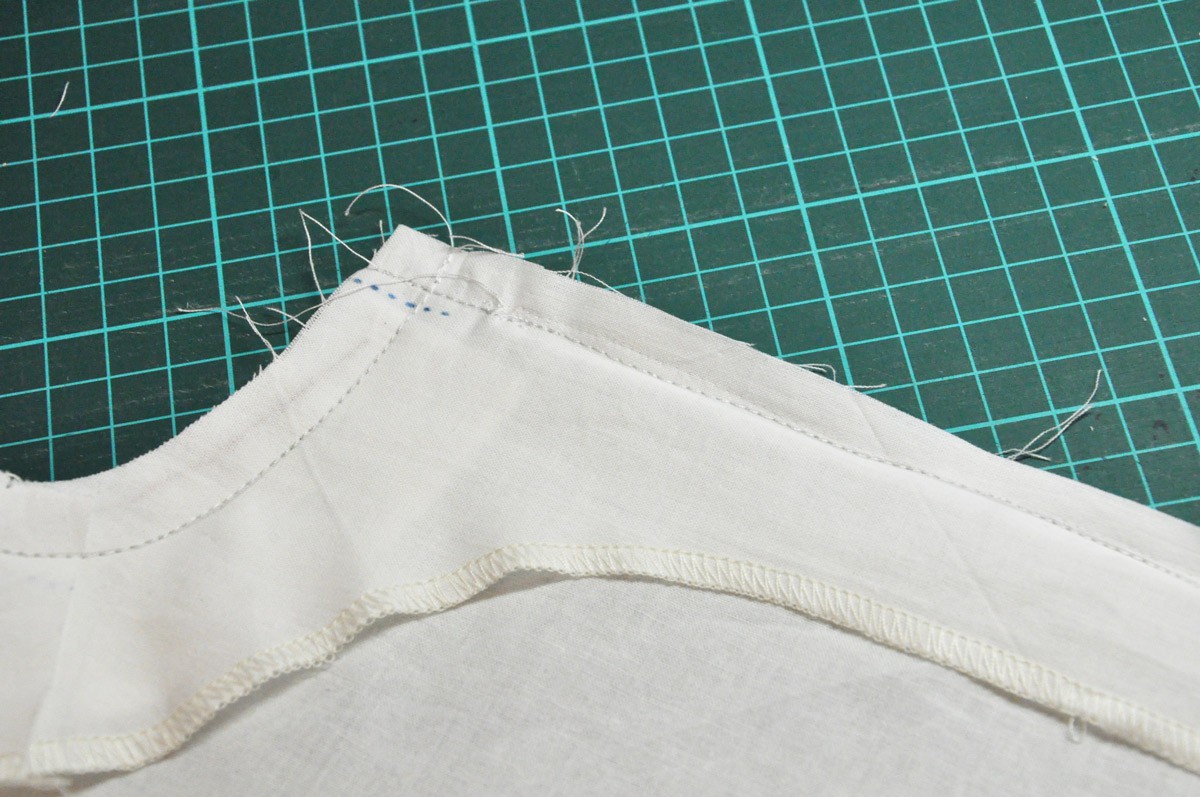
- Repeat on the other side, then clip the seam allowance on the neckline curves as directed in the pattern and turn and press the neckline. In this picture you can see the difference between leaving the back facing off and sewing it down. If you want to leave it off along the back you would still need to cut a modified back facing to finish the neck line. The facing gives the zipper a nice finish and hides the seam allowance and the zipper tape.
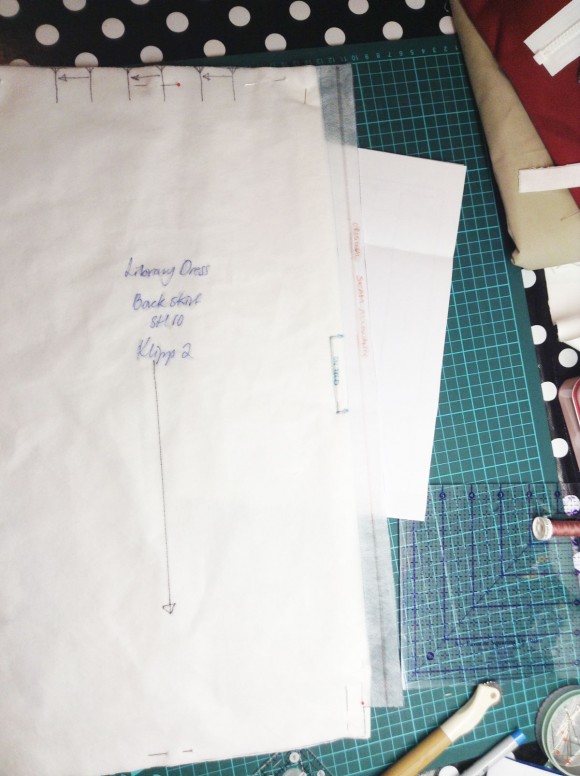
- Now for the back skirt. If you’re zipper ends at the waist like mine does, you can use the original pattern piece without trimming the back extension. Use the extra fabric to sew the center back seam with a with a French seam with two 1/2″ seam allowances (instead of the usual 1/4″ and 1/4″ like you normally do). Remember to leave the bottom edge straight instead of cutting the little square cut off at the hem, which is only to make hemming easier with the button placket (so it’s not needed for the zipper). For a tutorial on French seams click here.


Then follow the pattern directions to finish the dress. That’s what I’m going to do.
Thank you so much for having me!
This makes perfect sense! Very helpful, I’m going to pin it so I can reference it in the future. Thanks, Lotta!
Wow! thanks so much. It is apparent you are a technical writer as your instructions are so clear! Being a visual learner, the photos help a lot. I’m much more fearful of buttonholes than zippers. I would not take the time, nor have the confidence to figure out how to change from buttonholes to a zipper. You’ve opened up new possibilities. Thank you.
Awesome Lotta! Thanks for the excellent tute!
Thank you so much for the photo in #7 especially!
Wonderful instructions. Thanks so much Lotta.
Thanks for taking the time to do this!
Well done Lotta! I’m usre lots of people will be referring to this!
Perfect tutorial Lotta!
Wonderful Lotta, I am pinning this one!
So I tried this tutorial last year with average results. Tried again last night for a different project. It turns out an extra year of experience and an invisible zipper foot makes a huge difference! Thanks for a great tutorial.