A while ago, I saw a wonderful Family Reunion Dress appear in the Flickr group. The enterprising sewist had added a Peter Pan collar to the dress. I wasn’t the only one who noticed it. The modification also sparked a little discussion in the forums.
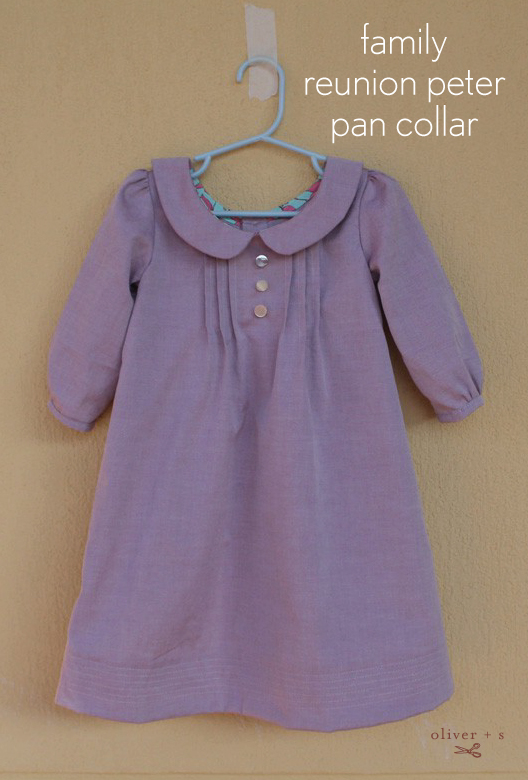
As soon as I saw this, I knew everyone would love the customization. It’s just a perfect touch for the pattern. So I reached out to Masha to see if she would be willing to write a tutorial for the blog explaining how she did this. Fortunately, for all of us, she was willing. So without further ado, I’ll turn this post over to her to explain how she made the collar. Thanks Masha!
First, a little about me. I am the wife of a U.S. diplomat and the mother of three children under the age of 4. We currently live in Tbilisi, Georgia (the country, not the state!). Besides taking care of my kids, I spend most of my time packing and unpacking our stuff, settling everyone into new homes, relearning how to drive (so that I can find fabric and notions stores, of course) and figuring out how to navigate grocery stores in foreign languages. After all that is done, I sew. I also blog at Where to Next?, albeit a little erratically since the birth of my son earlier this year. You may also know me as roundtheworldgirl in the Oliver + S discussion forums.
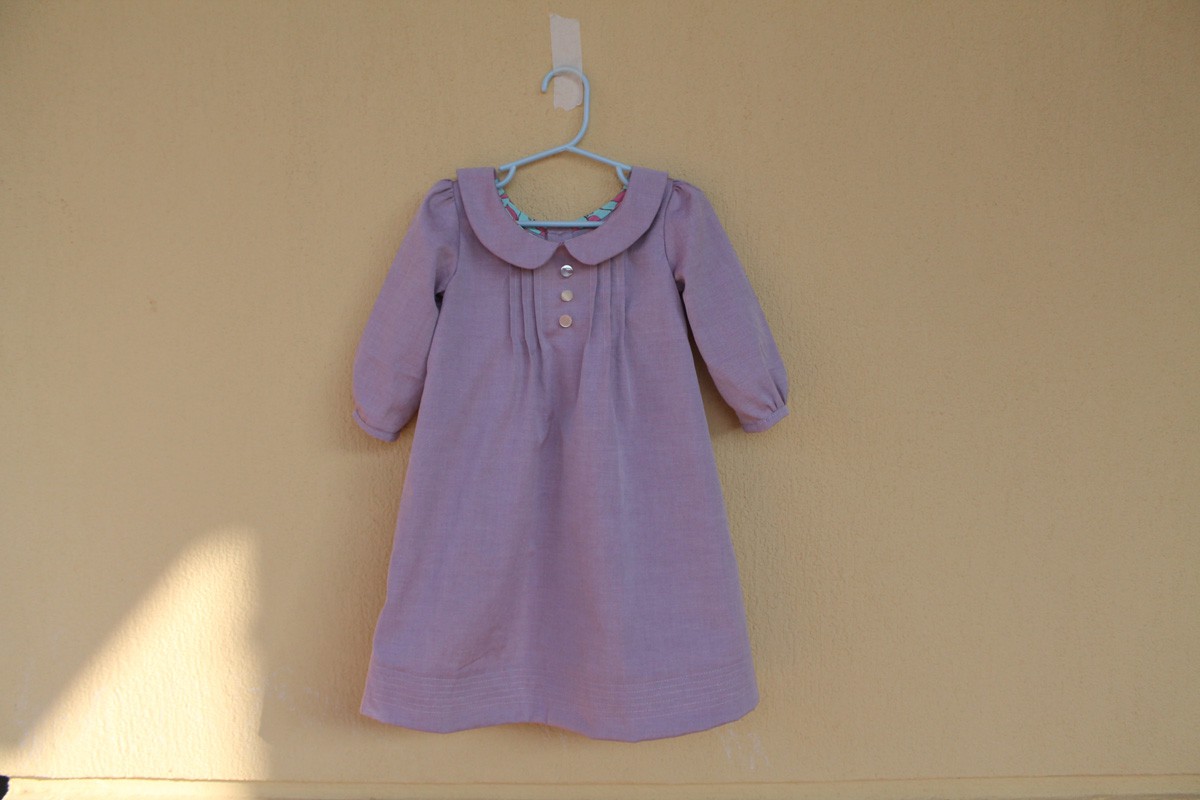
The Family Reunion Dress is actually the design that drew me to Oliver + S patterns. I have owned it for awhile, but I was intimidated by the pintucks, so I put it on the back burner while sewing other patterns. Finally, after getting about ten of the Oliver + S patterns under my belt, I pulled out the Family Reunion. My oldest daughter started preschool this fall, and I had cute fall school dresses on the brain while I was sewing that first dress. As I was attaching the neck facing, it occurred to me that a) this dress would look adorable with a Peter Pan collar, and that b) the alteration would not be that difficult if I could find a way to turn the facing pattern into a collar pattern. And so, immediately after I completed that first dress, I began a second. Here is how I did it.
The facing pattern comes in three pieces, one front facing piece, and two back facing pieces. To make a Peter Pan collar, we have to turn those three pattern pieces into two pieces, making sure there are seam allowances in the right places. We also have to keep in mind the fact that we will be cutting four of the resulting collar pieces (two for each side) since we have to sew them together.
I began by abutting the two facing pattern pieces together at the shoulder seam. I folded the seam allowances away, since we won’t have a seam there, and traced the inside curve, adding 1/2″ for seam allowance at the center front, and subtracting 1/2″ at the center back.
(Note: Wondering why we are subtracting 1/2″? Here is the math. The existing facing piece extends 1/2″ beyond the button placket so that it can wrap around it. Our collar won’t wrap around, so we have to subtract 1/2″ there. We also have to consider that the button placket on one side will overlap the other, and we don’t want our collar to overlap in the back (I learned that the hard way). The total overlap is 1″. We want our two collar pieces to meet at the back, so we will subtract another 1/2″ from each side. So now we’ve subtracted 1″ total. But we will also need a seam allowance at the back, so we add back 1/2″. The remaining adjustment is -1/2″.)
I also traced the outside curve.
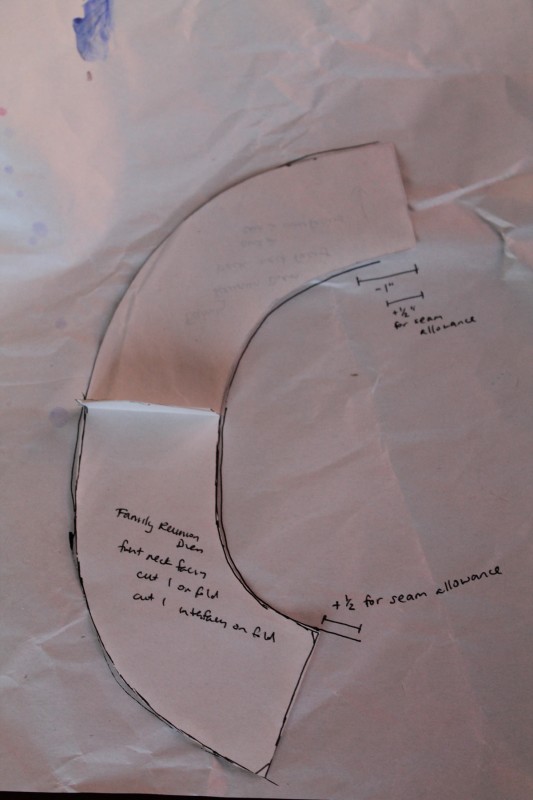
Forgive the paint blotches; I use packing paper to protect the table when my kids paint, and then reuse it for pattern tracing.
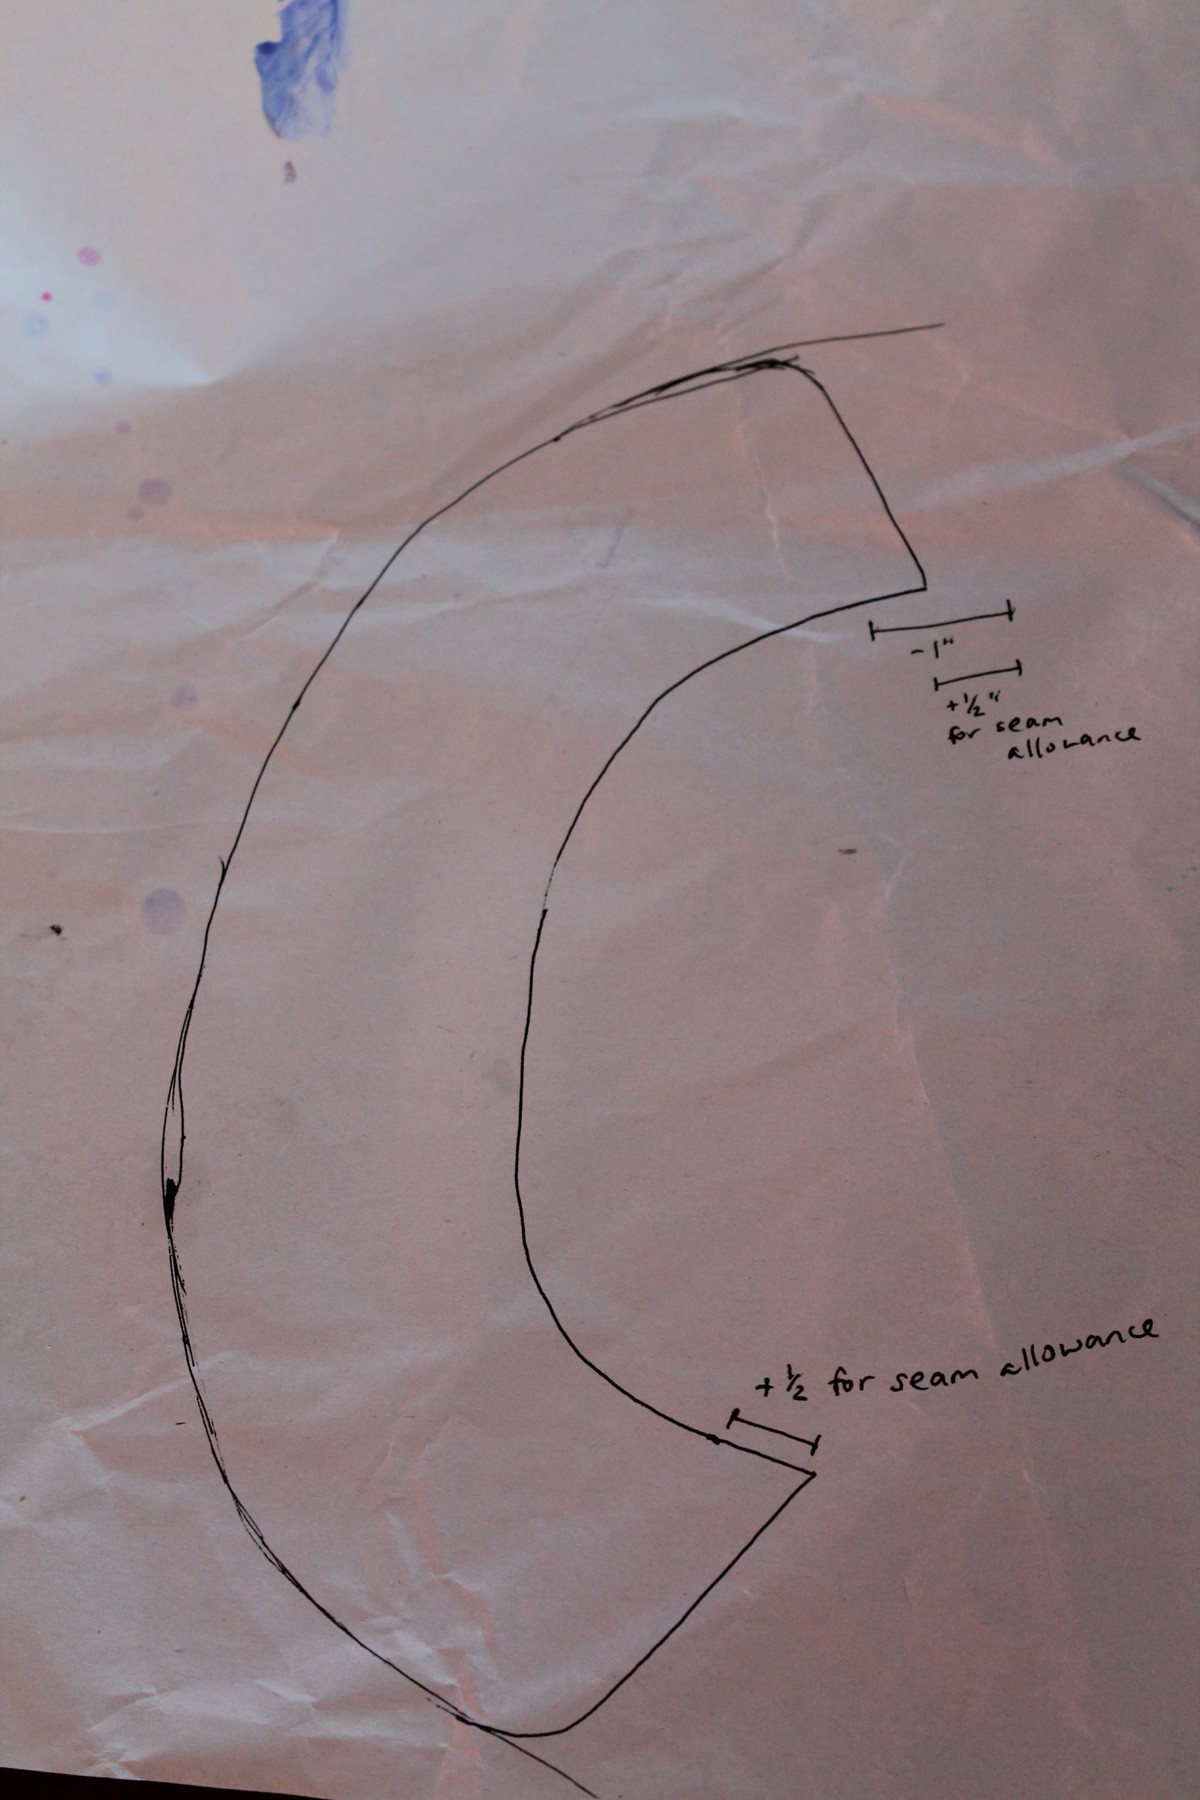
Then I connected the two curves, extending back from the inside curve to meet the outside curve, rounding it off at the bottom. You can use a plate or shot glass or something to help you make the curve if you want; I just eyeballed it.
So now we have our pattern piece. Here is what it should look like compared to the existing facing pieces.
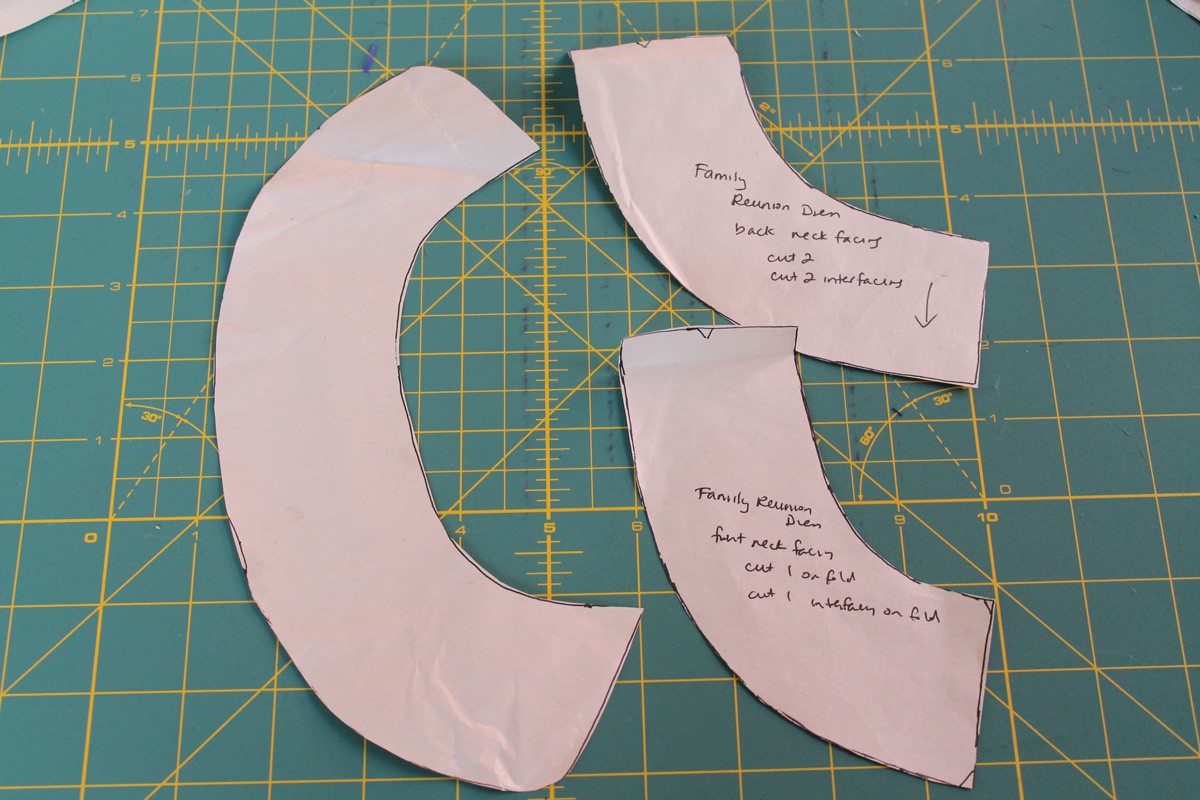
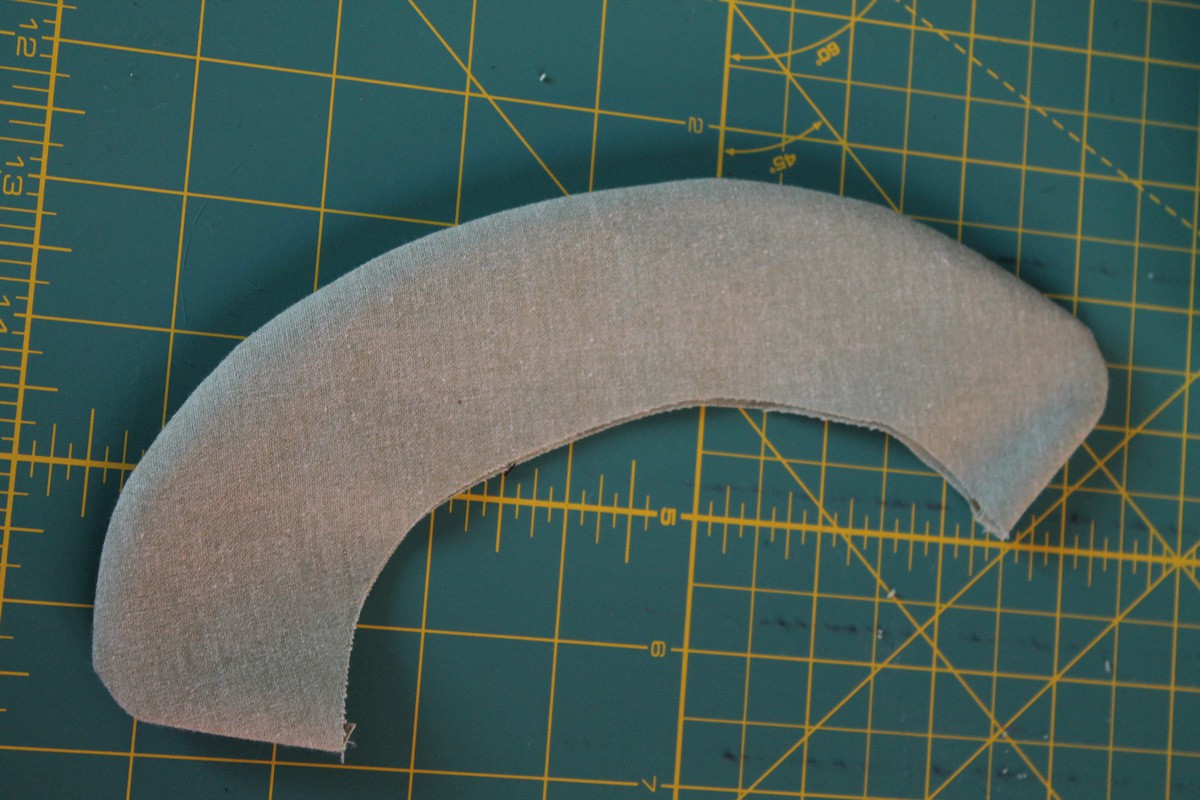
You need to cut four pieces using this pattern. Cut two, then flip the piece over and cut two more. You should also cut two pieces of interfacing from the pattern piece (cut one, then flip the pattern piece and cut another), and then trim it 1/2″ all the way to reduce bulk at the seams. Fuse the interfacing to two of your collar pieces, centering it on the wrong side of the fabric. Then sew one fused piece, and one collar piece, right sides together. Trim the seam allowances and notch them at the curves so they will turn smoothly. Finger press them well (thanks, Liesl, for teaching me to do that!), then press with an iron. Repeat for the remaining two pieces. Now you should have two collar pieces that look like this.
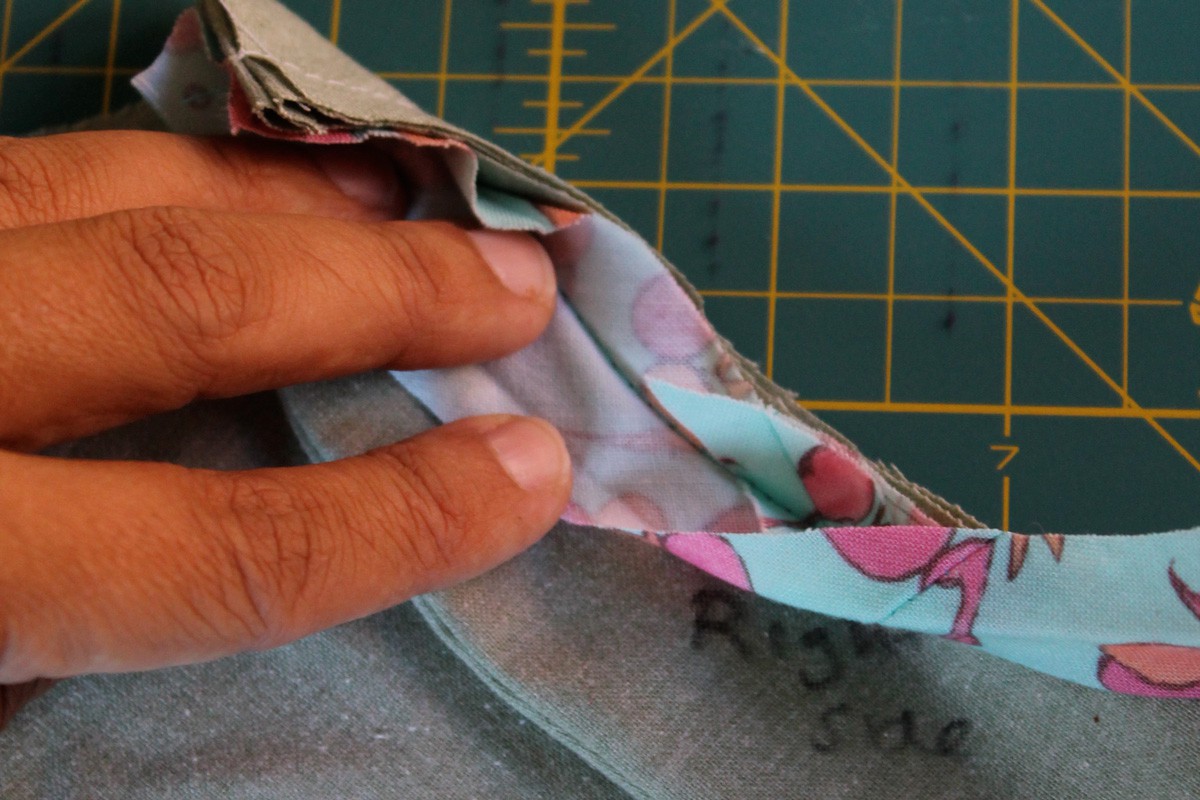
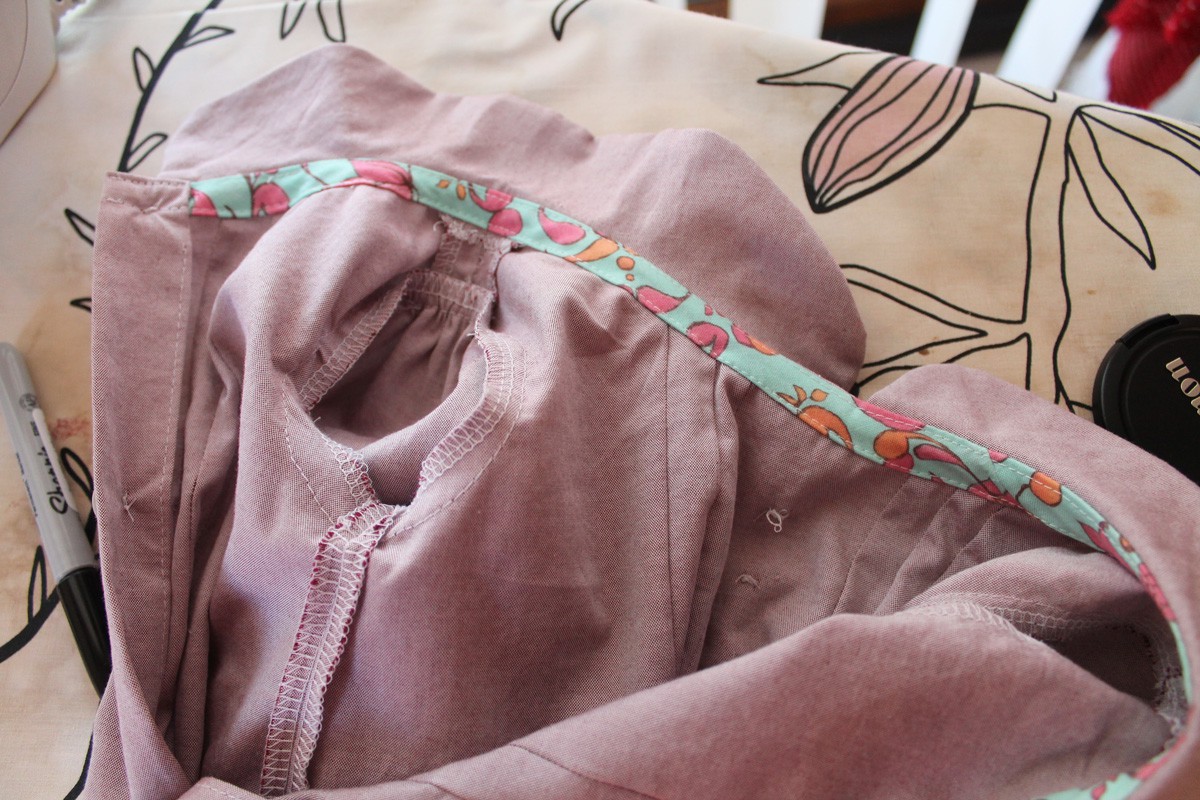
Now we are going to attach our collar pieces to the neckline of the dress using strips of fabric cut on the bias. I made mine using some homemade double-fold 1/2″ bias tape I had left over from another project. It was a bit too wide for this purpose. If I were to do it again I would probably cut a bias strip of about 1.5″. You want your strips to be long enough to go all the way around the neck when the button plackets are completely folded according to the Family Reunion sewing pattern. Press one long side of the strip to the wrong side 3/8″. Now you are going to sew the dress, the collar and the bias strip together with one seam. Stack them like so: On the bottom you will have the dress, right side facing up. In the middle you will have the collar, right side facing up. On top you will have the bias strip, wrong side facing up, with the unfolded edge aligned with the edge of the collar and the edge of the dress. Unfold the button plackets for this step; you will later fold them back over the binding and stitch them in place. Sew the layers together using a 1/2″ seam. (Note: The next two photos do not show the Family Reunion dress because I took these photos for the purpose of this tutorial, after I had made the original dress. For the purposes of the tutorial, I attached the collar to another piece.)
Next you will want to understitch the bias strip to the seam allowance by folding the bias to the wrong side, pressing, and then, on the right side of the bias, stitching a second seam 1/8″ from the first seam. (Thanks, Liesl, for teaching me to do this, too!) This will help keep the bias binding from rolling over and being seen from the right side of the dress.
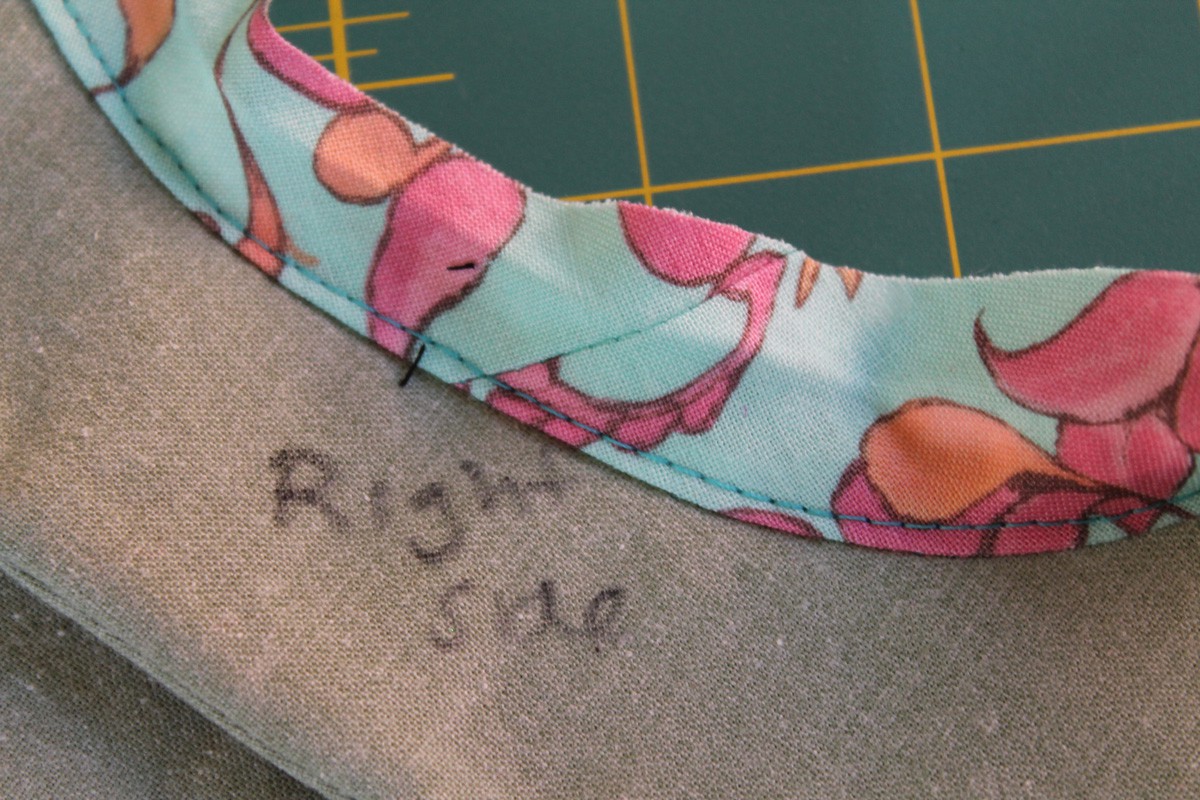
Now you have a sandwich with the dress and the bias on the outside, and the raw edge of the seam allowance inside. Press and pin in place, taking care not to make any tucks in the fabric. Moving the collar out of the way, and making sure that the button plackets are unfolded, edgestitch the folded edge of the bias strip to the dress. The result should look like this (except your edgestitching should extend to the very end of the bias; I forgot to do mine until later, so I couldn’t sew all the way down).
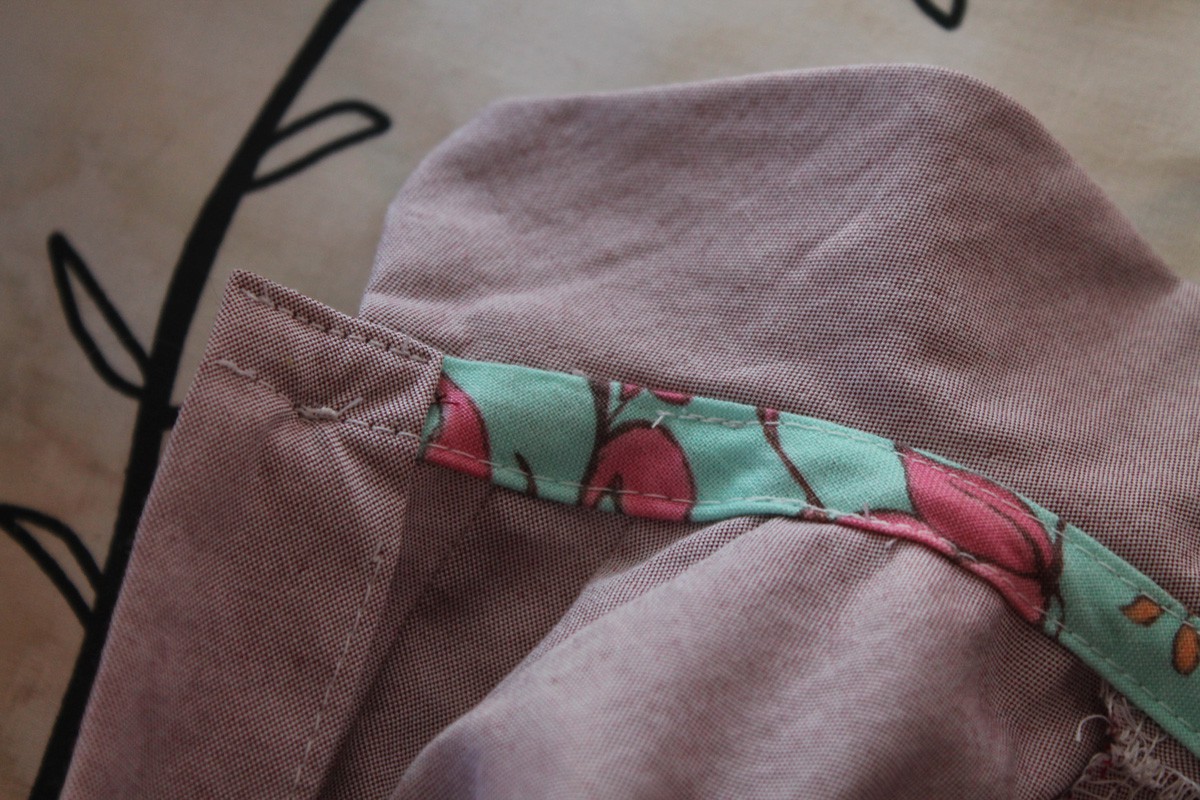
Fold the button placket over and tack it at the top to keep it from unfolding. These stitches will be hidden on the right side of the dress by the collar.
And you’re done!

This is lovely and would make a lovely idea for a blouse, too! Thanks for sharing!
This is a lovely adaptation! The collar is the perfect finishing touch here. Thanks for sharing this idea.
Simple yet stunning – and you eye balled the collar perfectly! Very pretty dress indeed.
Oh Masha, it is just delightful.
Thank you so very very much for your tutorial.
Thank you so much for sharing! I’ll definitely be “complimenting”.:)
Being a child in the 50’s, I’ve wanted to add peter pan collars to my garments for years and never figured out how to do it. Thanks for this information.
This is lovely. Did you use one of the other dress patterns for the sleeve or did you just wing it? Very sweet.
Thank you! I just successfully added a peter pan collar to my daughter’s Halloween costume. I used the peter pan pattern from another dress, but adjusted the length of it using the lining pieces for the guide, like you show here. I’m pleased with how it turned out.