Last week when I showed you the testers’ versions of our spring patterns you got to see Sue’s kantha quilt Helsinki Jacket. I thought it was so great it warranted another look, so I asked her to tell us more about it. And here she is!
I especially appreciate that Sue took the time to follow the instructions and steps exactly, which is what I request of our testers. She probably could have eliminated the facing to make the jacket simpler, but she took the time to sew it exactly as I wrote it, and I think the way she handled the facing was brilliant!
* * * * * * *
I loved making the Helsinki jacket! The minute that Liesl sent the pattern views and inspiration photos, I knew that I was going to have to make my version of a quilted jacket.
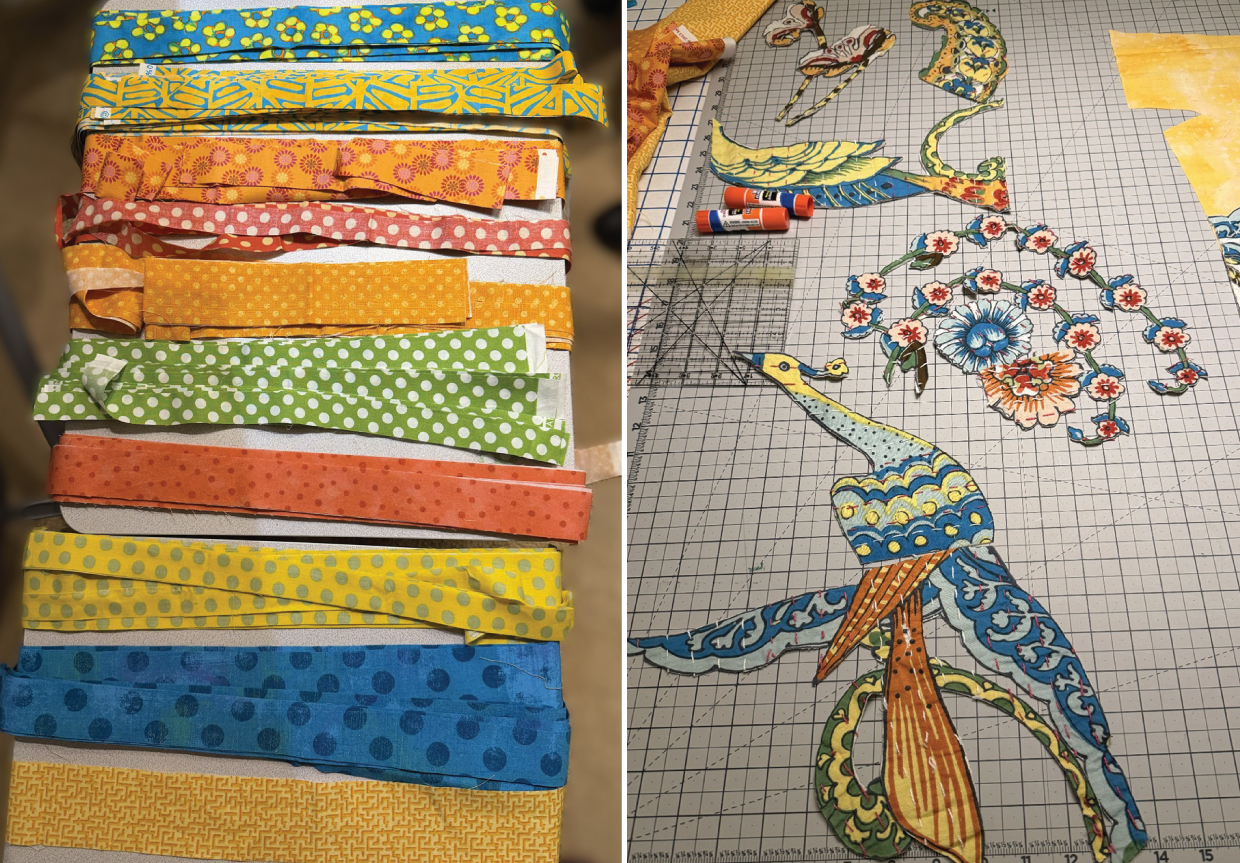
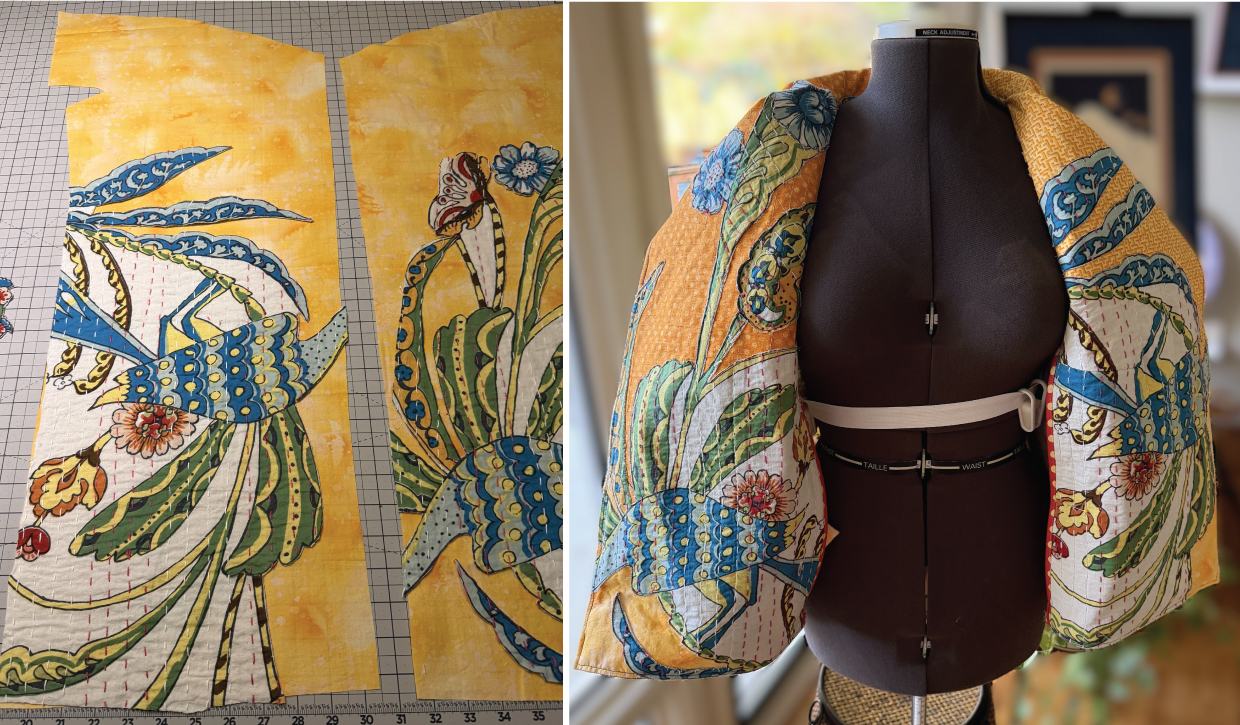
I started by laying out the pattern pieces that I traced onto tissue over a queen size kantha quilt that I’d purchased waiting for the right pattern. The quilt had a large design, so it was a process of moving my pattern pieces while also considering grainline to see how much of the jacket pattern could be cut and what I would have to fill in with additional fabric. I was able to cut the front, back, collar back and front sleeves from the quilt. After those were cut, then I pulled out quilting cotton from my stash to use for the front facings and lower sleeves.
Working with larger pieces of quilting cotton, I cut the left and right front facings and the lower sleeve pieces. I also cut designs out of the leftover kantha quilt to use as appliques on the lower part of the facings. I decided on placement of the applique pieces by moving them around on the facings and sometimes recutting the pieces into separate shapes.
Once the facings were appliqued (with a sewing machine straight stitch), I used binding to finish the inside edge of each facing and then used the completed facings following the pattern instructions.
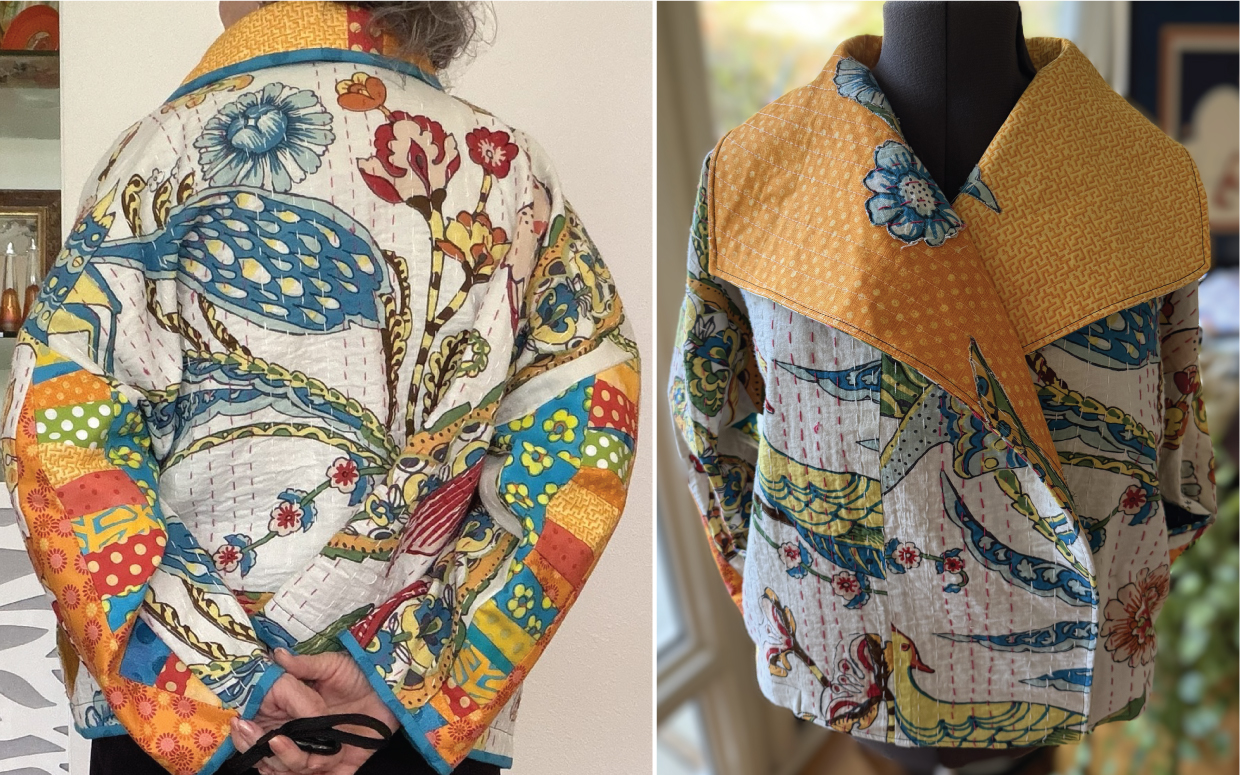
The lower sleeve pieces were worked in the same process. I chose quilting cotton strips to apply randomly to the base that I’d cut from cotton. When the “crazy quilted” lower sleeve pieces were finished, they were used following the pattern instructions.
Lastly, after completing the jacket per the instructions, the collar didn’t appear to be a cohesive element of the jacket design. Deciding to add a solid binding around the front and collar that reflected the strongest color of the quilt design I felt tied them together visually and allowed the design of the collar to “pop.”

* * * * * * *
Didn’t she do a great job? Thanks so much, Sue!
I introduced the Helsinki Jacket in this post and talked more about fabric and styling here. I’m excited to see how you’ll sew it! You can choose from the paper pattern or the digital version.
And here’s our little gift for you for a limited time:
Save 30% on our new spring 2026 patterns when you buy all three of them. To receive the discount, add the Helsinki Jacket, Leyton Knit Tank, and Norwood Blouse (paper or digital version, your choice!) to your shopping bag. Apply coupon code SPRING26, and these three patterns will be discounted by 30%. Note that you need to have all three items in your shopping bag before applying the coupon code for the discount to be appear. Offer valid on new purchases only. Coupon is good through Saturday, May 23 2026.
What a gorgeous jacket.
What an amazing jacket! Sue definitely has an eye for design. The binding around the collar is the perfect detail!