


Hello! I’m Lyndsey from the Advisor’s Circle. Last week I posted my spring sewing plans, and today I’m sharing my new Cannes Wide-Legged Trousers. I’m also sharing the pants-fitting method I used to get a fantastic fit on my new trousers. Fitting pants has been an intimidating process for me in the past, but now that I have a couple of methods to use, I am much more confident.

Last summer, I fit pants for the first time when I made my Lisboa Walking Shorts. As much as I dreaded the process, it wasn’t difficult to get a good fit. I used the Top Down, Center Out (#TopDownCenterOut) method for the Lisboa shorts. For the Cannes trousers, I decided to try a different technique, the Palmer Pletsch tissue fitting method. The two approaches are very similar, with the Top Down, Center Out method using a fabric muslin and the Palmer Pletsch method using pattern tissue. In both cases, my adjustments were nearly the same. The photos below show my final tissue fitting with the necessary adjustments. I wish I had taken pictures before we made any adjustments, but we were too excited to get to the alterations.

Fitting Adjustments
I will walk through the pattern adjustments I made during the fitting process. For this example, the pictures are not shown at scale.
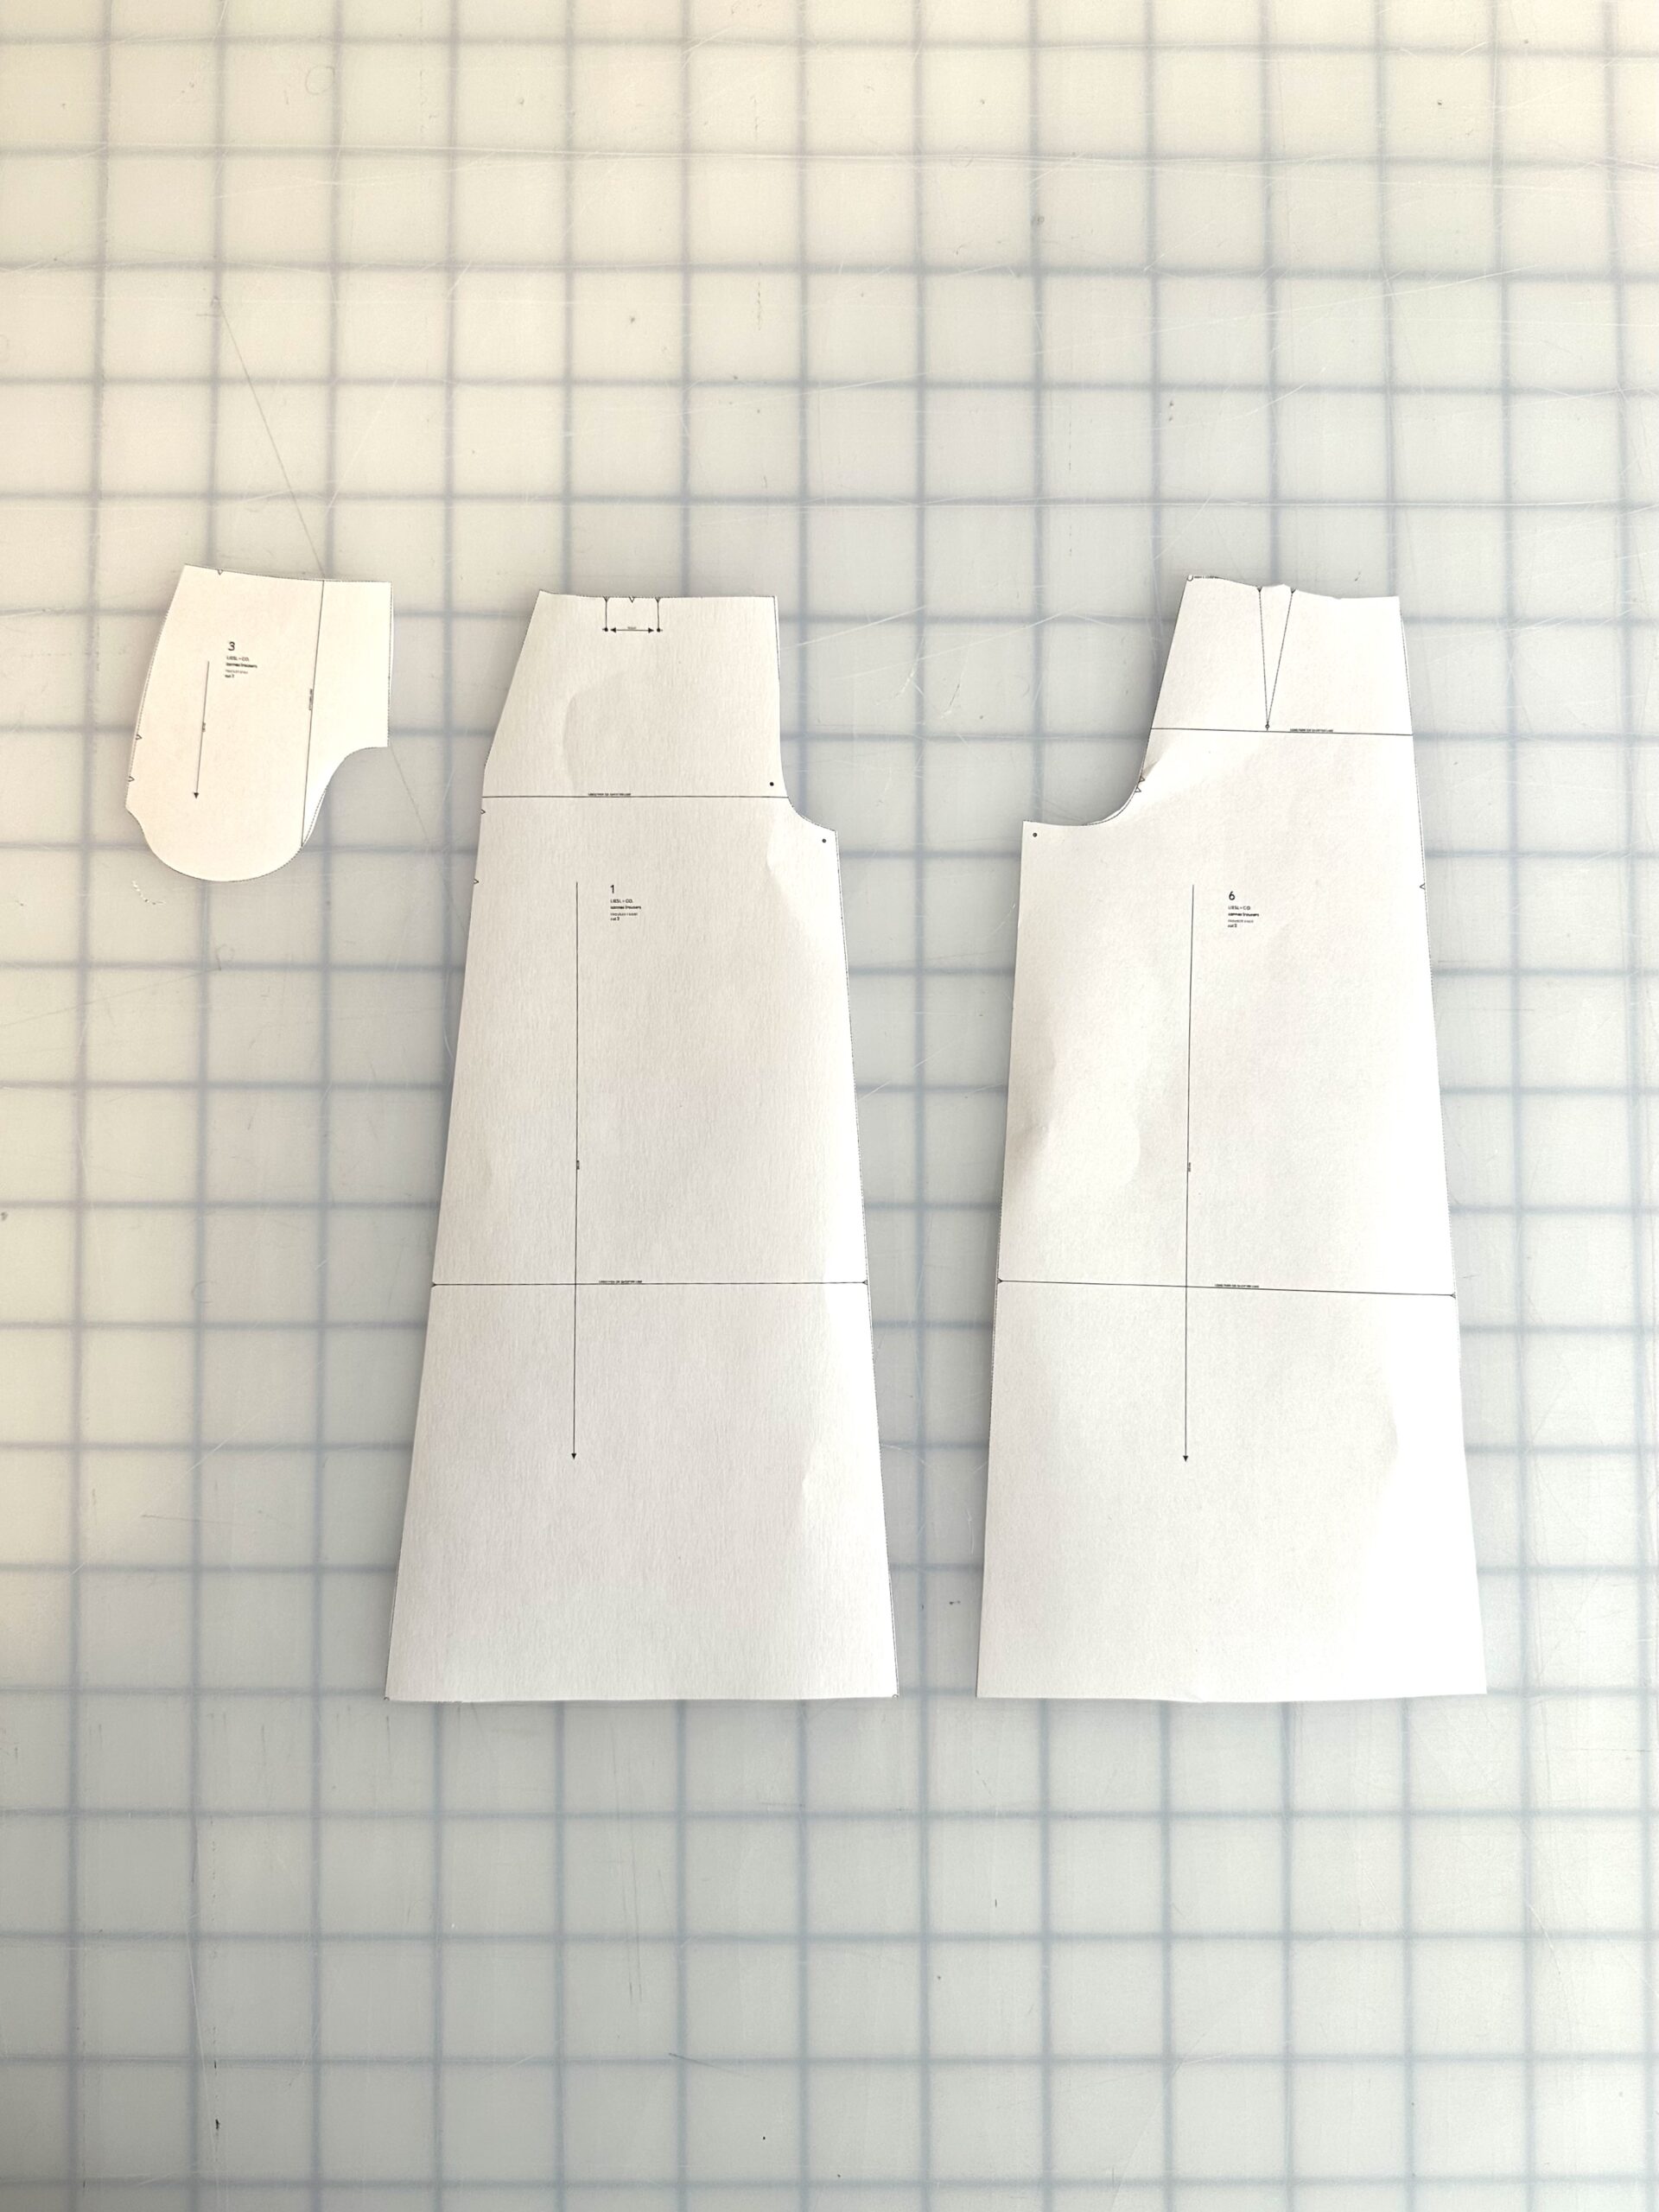
1. For tissue fitting, you will only need the trouser front, trouser back, and the pocket stay. All the other pieces, like the fly-facing and fly shield, can wait until the fitting process is complete.
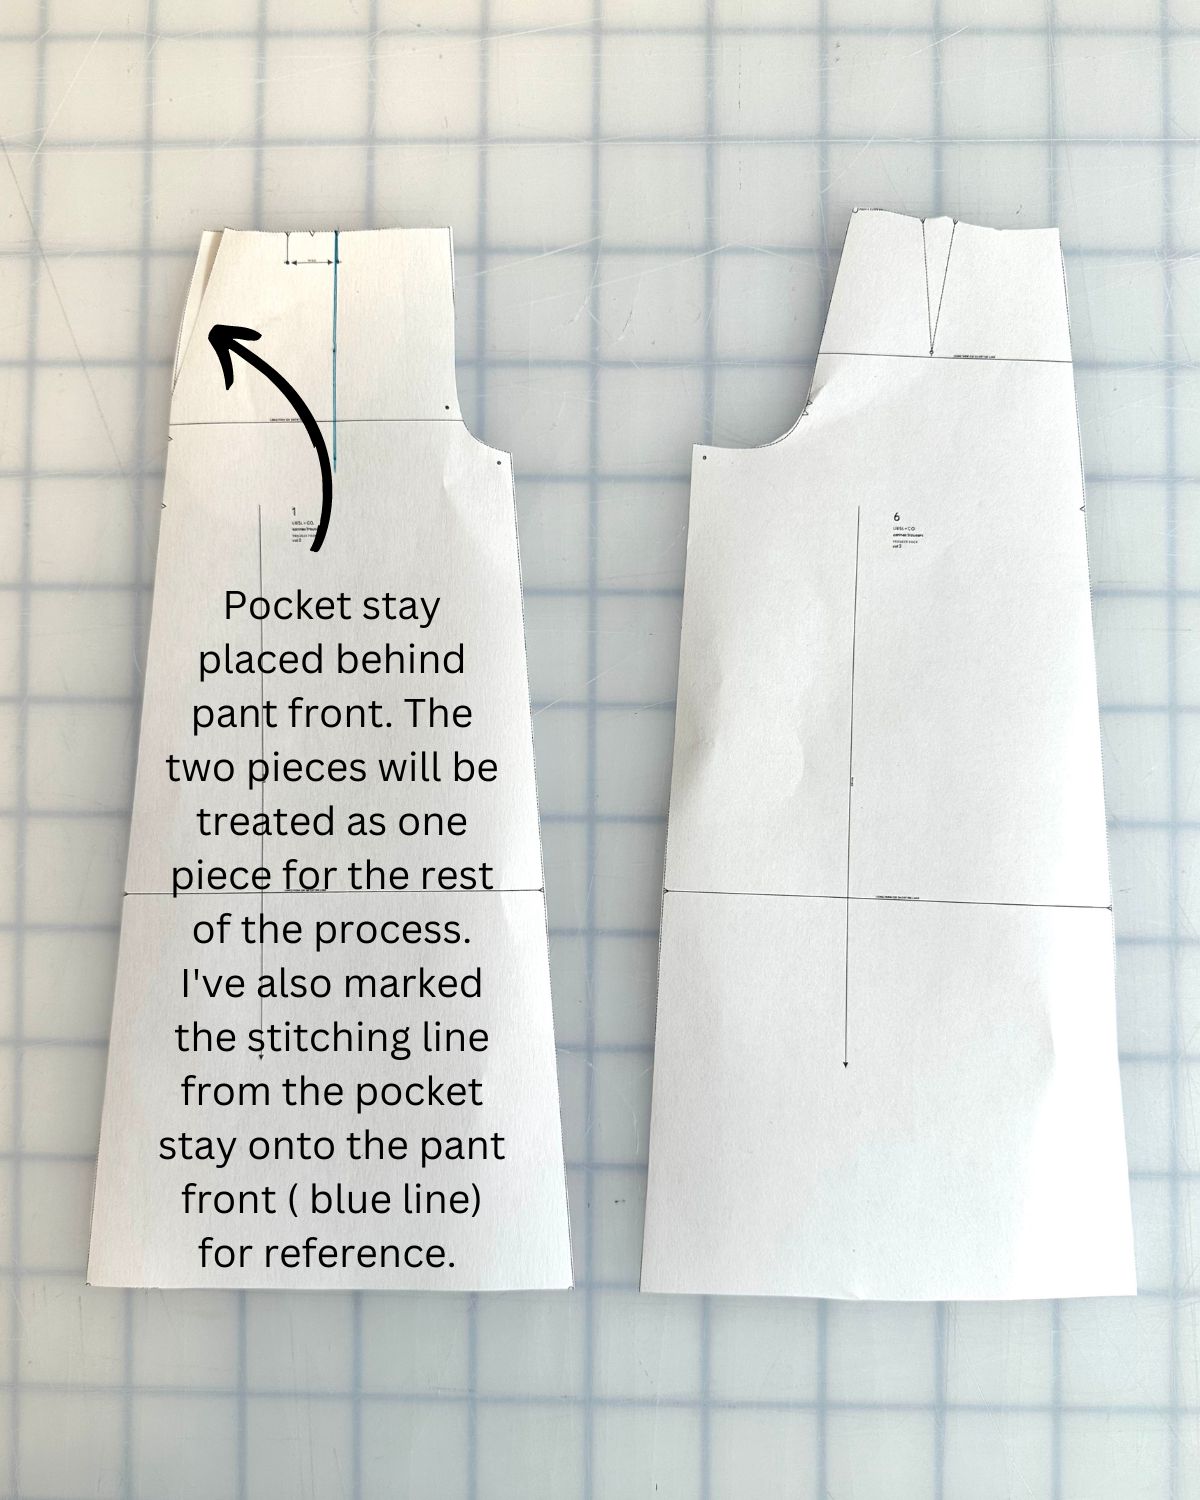
2. Place the pocket stay behind the trouser front and treat the two pieces as one unit for the rest of the fitting process. The reason for doing this is that this pattern has a trouser pocket which means the trouser front does not have the side seam where the pocket will be. I now have the full side seam by combining the pocket stay and the trouser front. I also transferred the stitching line from the pocket stay to the trouser front piece (blue line) for reference.
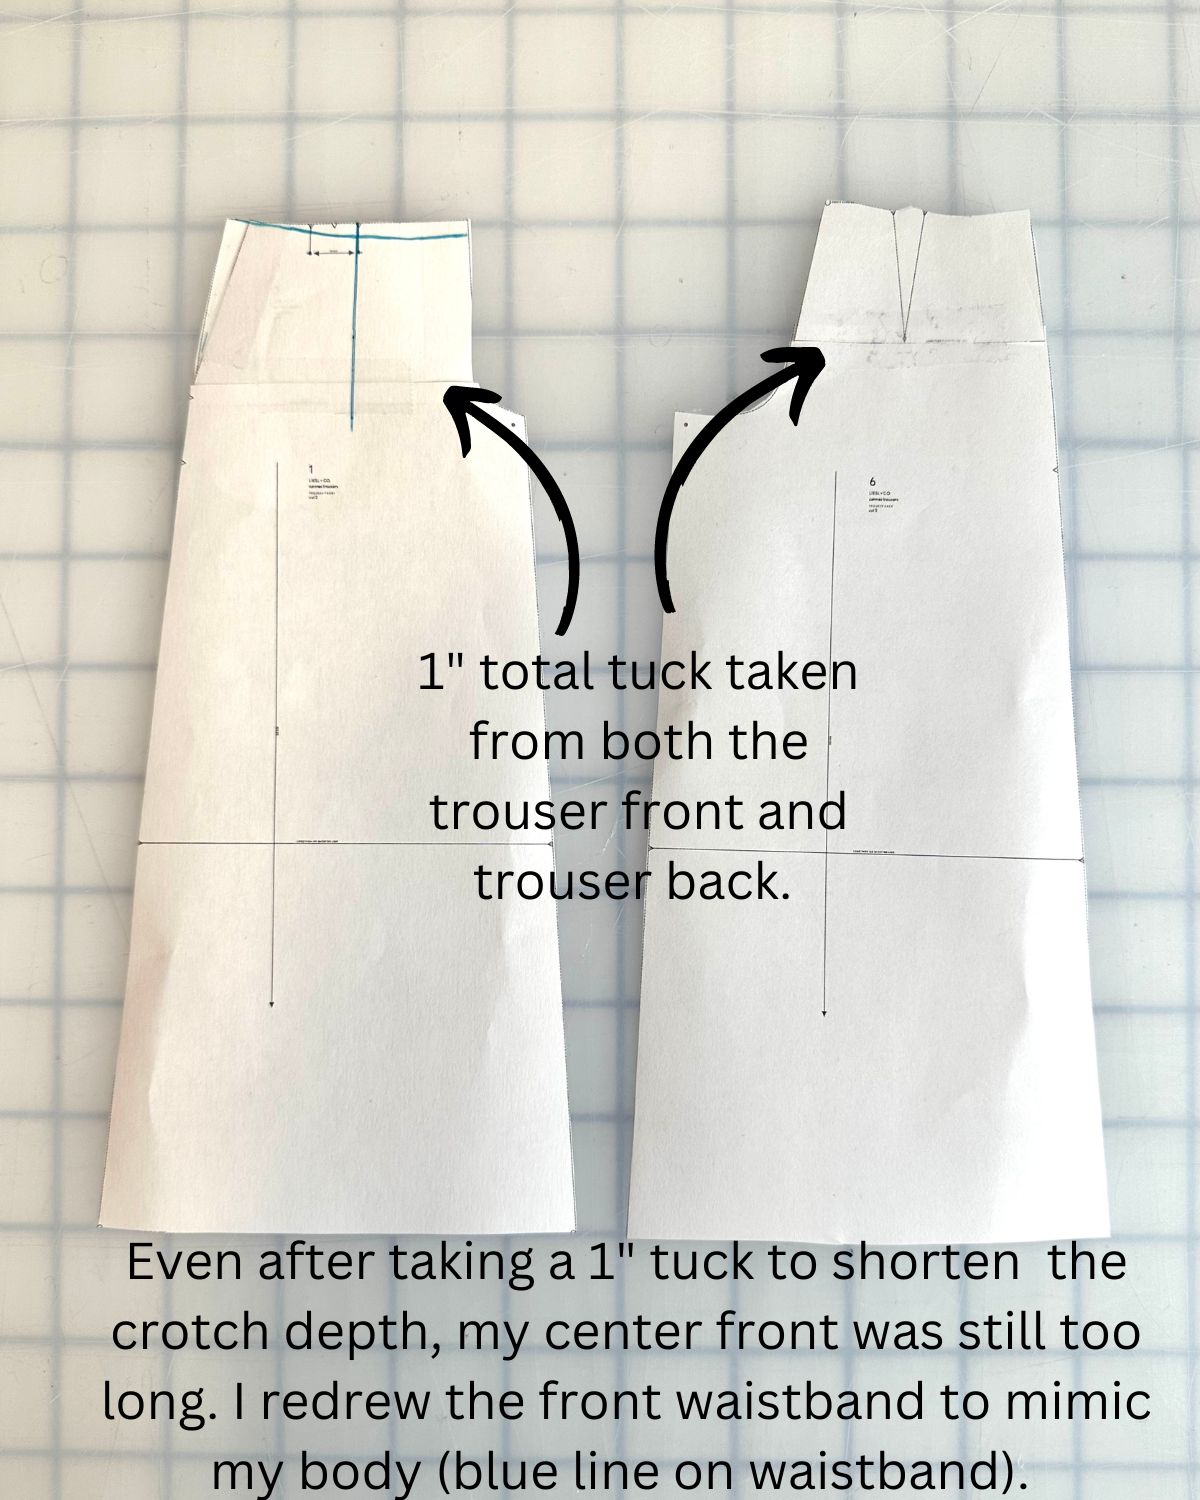
3. The first change I needed to make was to decrease the crotch depth by one inch on both the trouser front and trouser back pattern pieces. I took 1″ total tuck out of both pattern pieces. Even after decreasing the crotch depth by 1″, my front waistband was still too high at the center front. Therefore, I redrew the front waistband, following the shape of my body.
4. Next, I removed the excess at the front waistband by trimming off the area above the blue line marked in the previous step. Then, all I had left was to let out the hips by adding some additional tissue paper to the side seams. Finally, I tapered the extra width to nothing at the knees to ensure I wasn’t making the pants wider than drafted. With those few changes, my pattern was ready to go!

Final Trousers
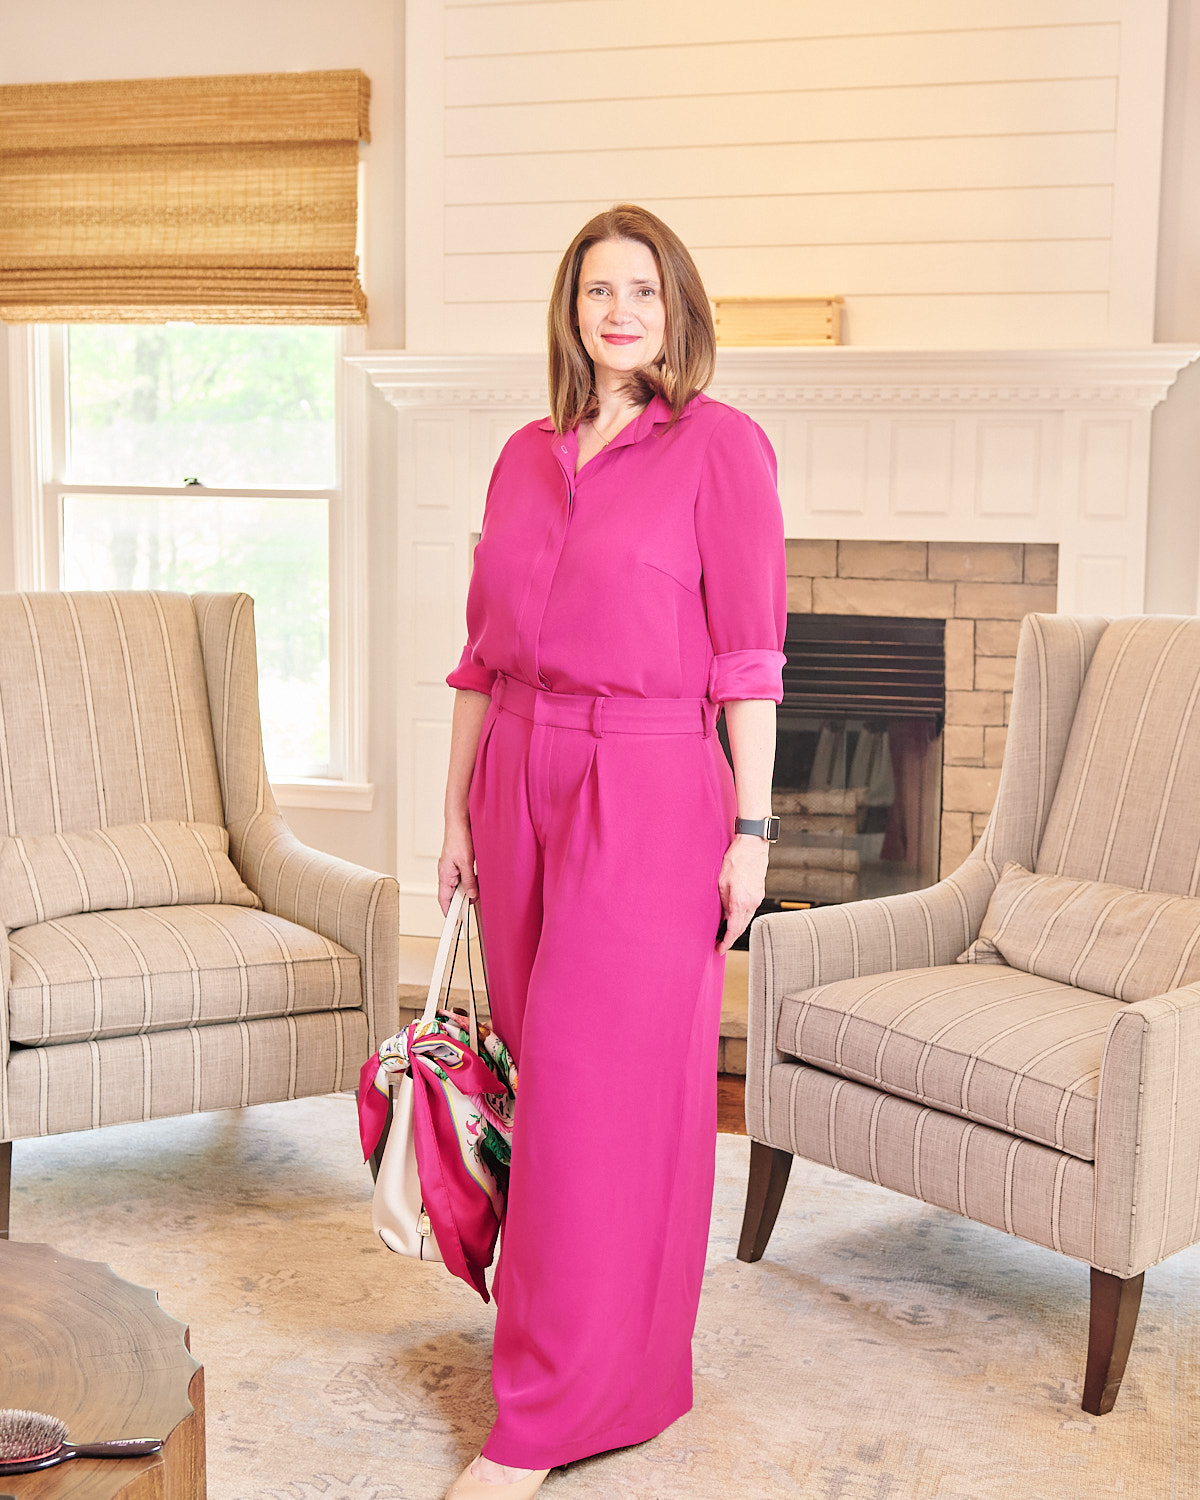
I love, love, love these trousers. Wide-legged pants have always been a flattering silhouette for my body shape. I sewed the trousers and a matching Classic Shirt in a pink silk fabric. The outfit turned out just like my inspiration photo! I was worried that all that pink would overwhelm me, but I love the drama of wide legs. These pieces will work well for this outfit and coordinate with other pieces in my handmade wardrobe.

The fitting adjustments I made really improved the fit of the pants. You can see in the images below that the fit is spot on. I can’t wait to make more versions of this pattern!
