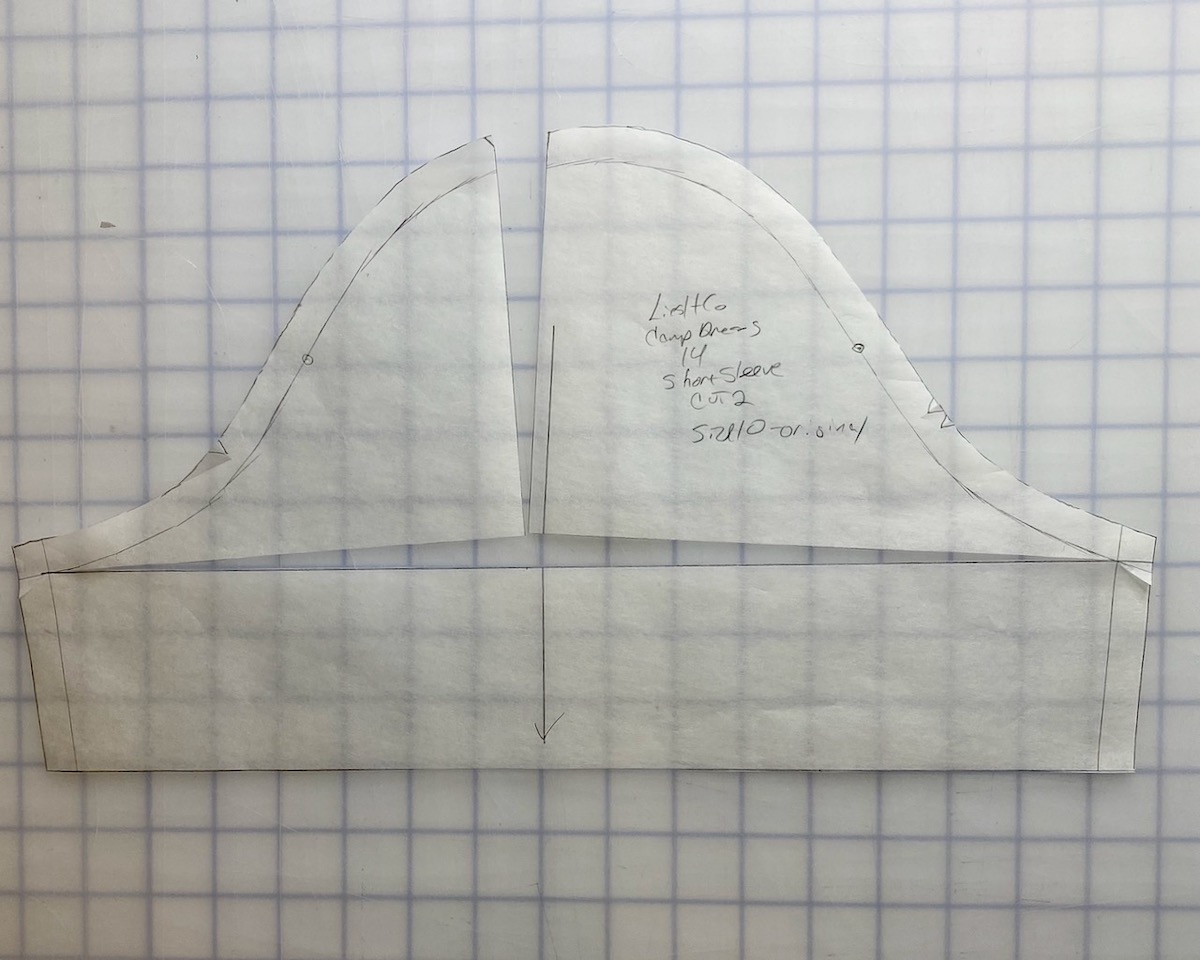
Hello, everyone! I am Lyndsey Stanfill, and I am sharing how I adjusted the Camp Shirt sleeve pattern to add cap-height.

Assessing cap-height fit
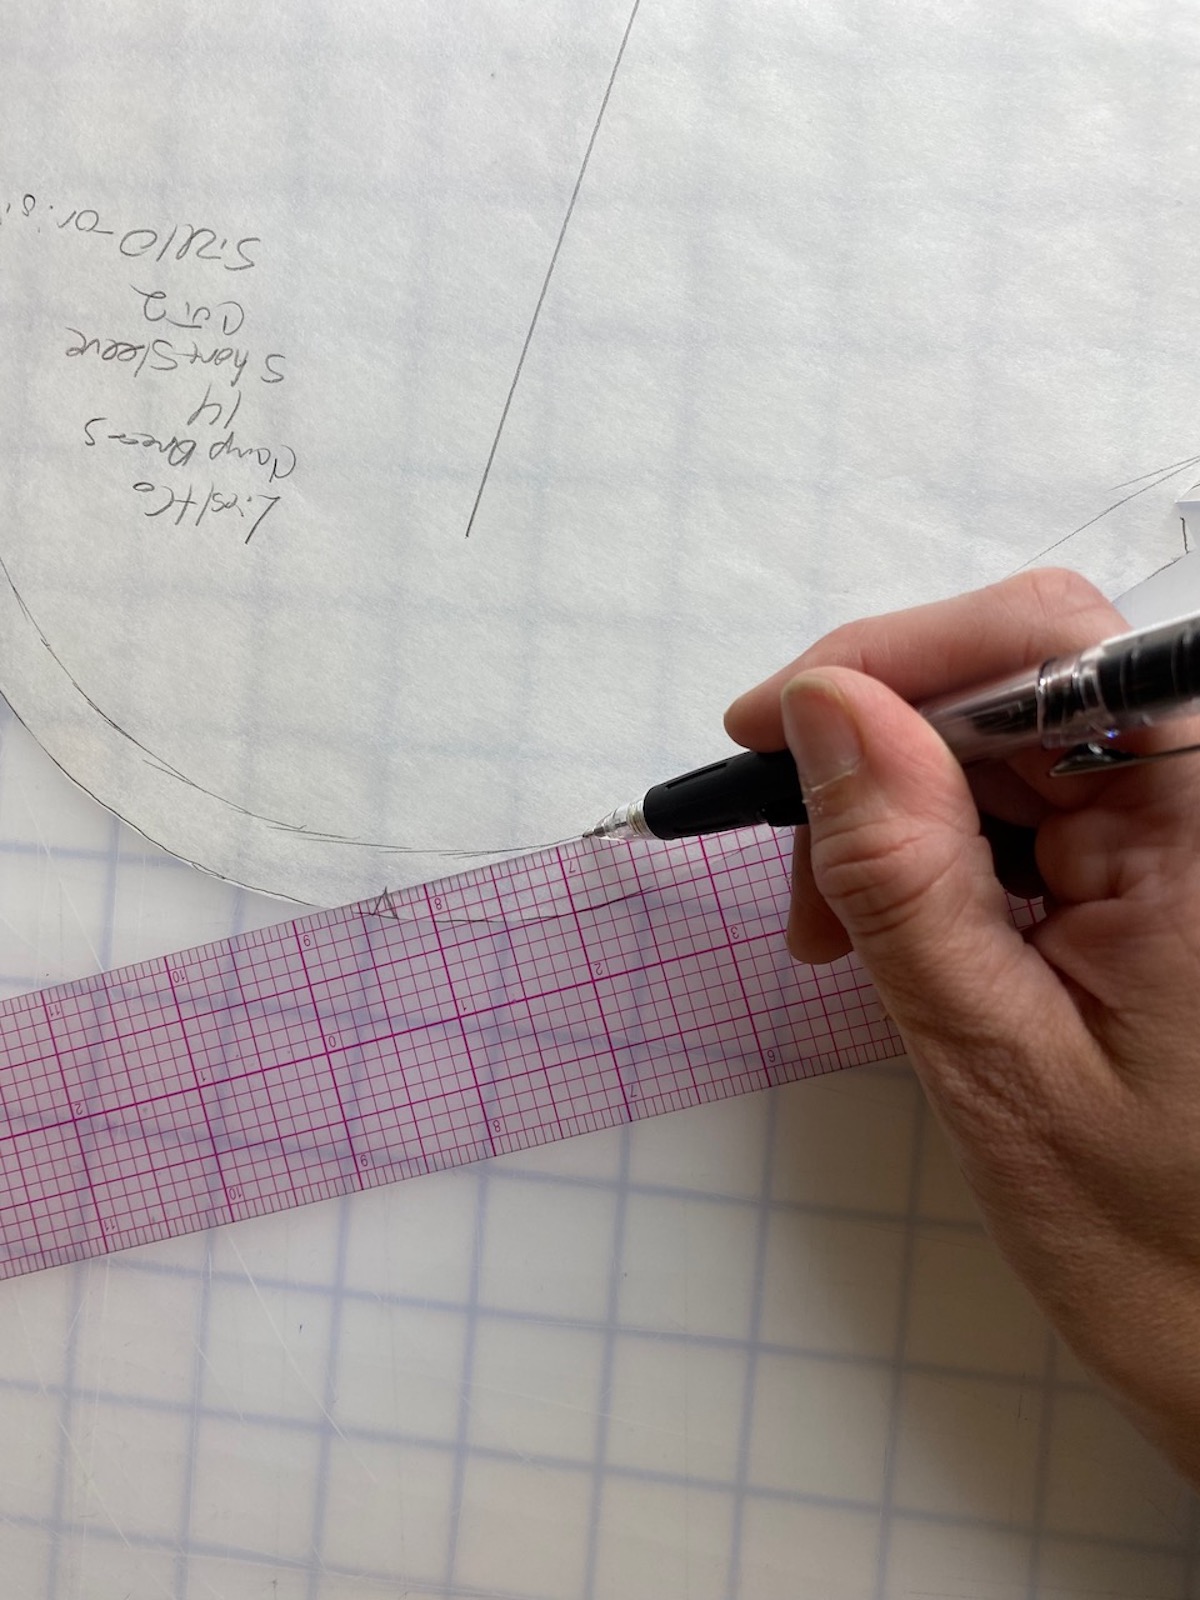
When sewing the muslin for my Camp Shirt, I had a great fit in the bodice but some tightness in the sleeve. I could pinch about 1.5″ of ease in the sleeve at the bicep, so I didn’t need a full bicep adjustment. However, my muslin sleeve had drag lines that pointed to the top of the sleeve, which usually indicates the need for additional cap height. To assess, I drew the grainline and bicep line in marker.
The cap height is the distance between the shoulder point and the bicep line. I’ve added two reference lines in the photo below. The red line represents where the bicep line should fall. The bicep line should be perpendicular to the grainline and parallel to the ground. Instead, the bicep line arcs up and does not stay parallel to the ground. The black line represents the new cap height-I need to make a 1/2″ adjustment.

Another way to assess how much additional cap height is needed is to slash the bicep line and let the bottom of the sleeve fall until it becomes parallel to the ground. In the photo below, I have slashed the original bicep line and have allowed the bottom of the sleeve to drop 1/2″. When I make the flat pattern adjustment, I am essentially adding the space created between the slashed lines.

Cap Height Pattern Adjustment
Step 1
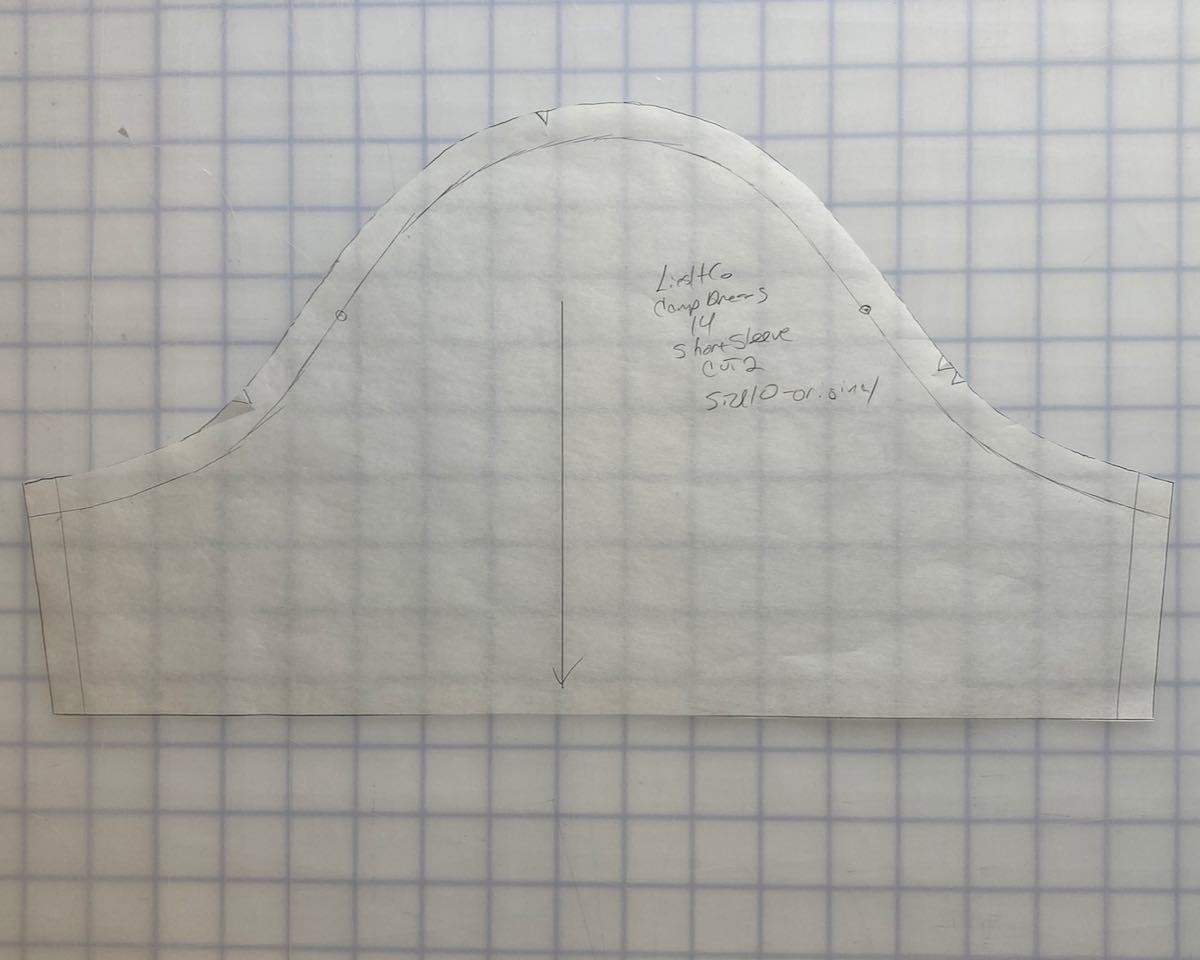
Draw stitching lines on the pattern equal to the width of the seam allowance. For example, the Camp Shirt has a 1/2″ seam allowance.
Step 2
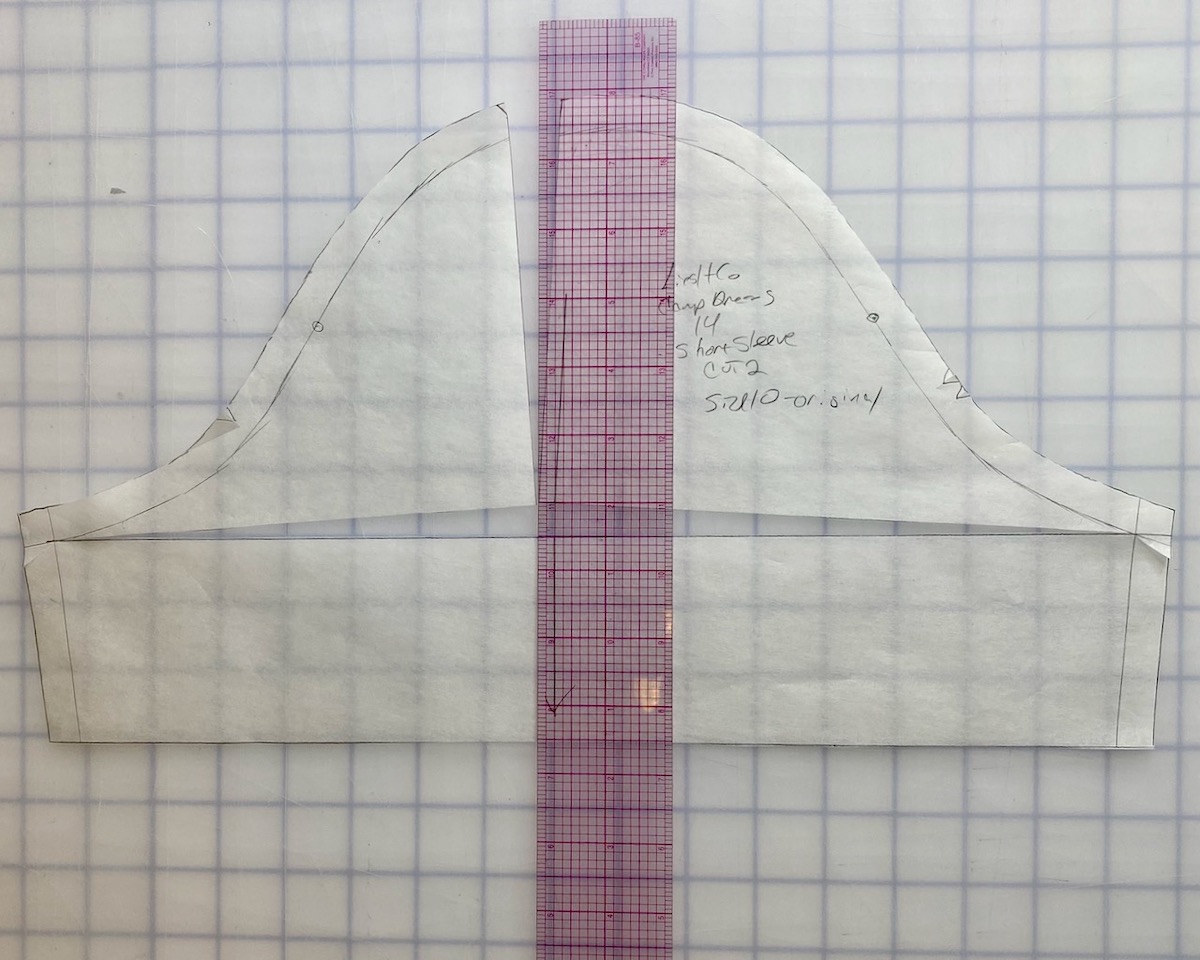
Draw a horizontal bicep line (perpendicular to the grainline) from one underarm point to the other. This is why we drew the stitching lines first. The bicep line does NOT extend into the seam allowance.
Step 3
Draw a vertical line (parallel to the grainline) from the shoulder point to the bicep line in Step 2.
Step 4
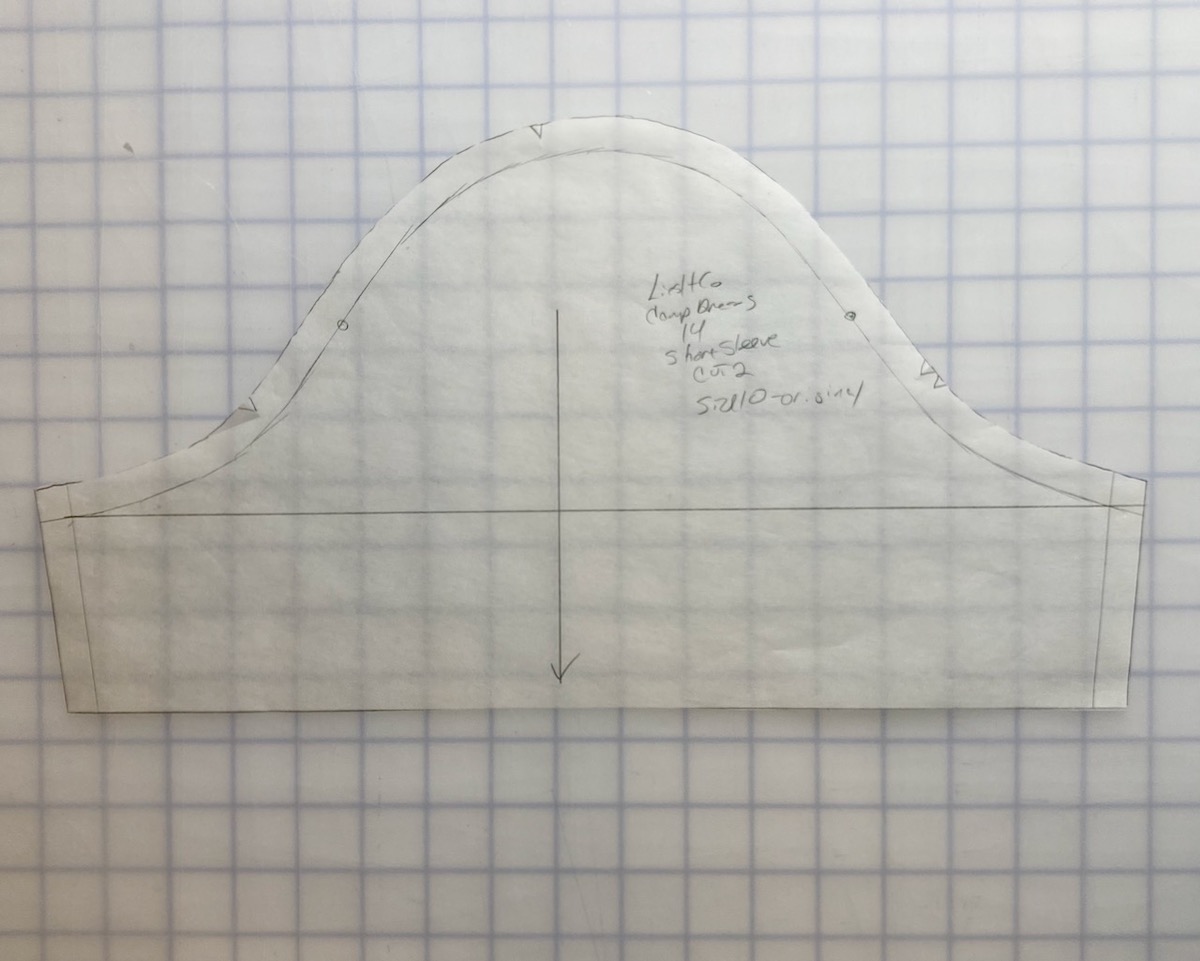
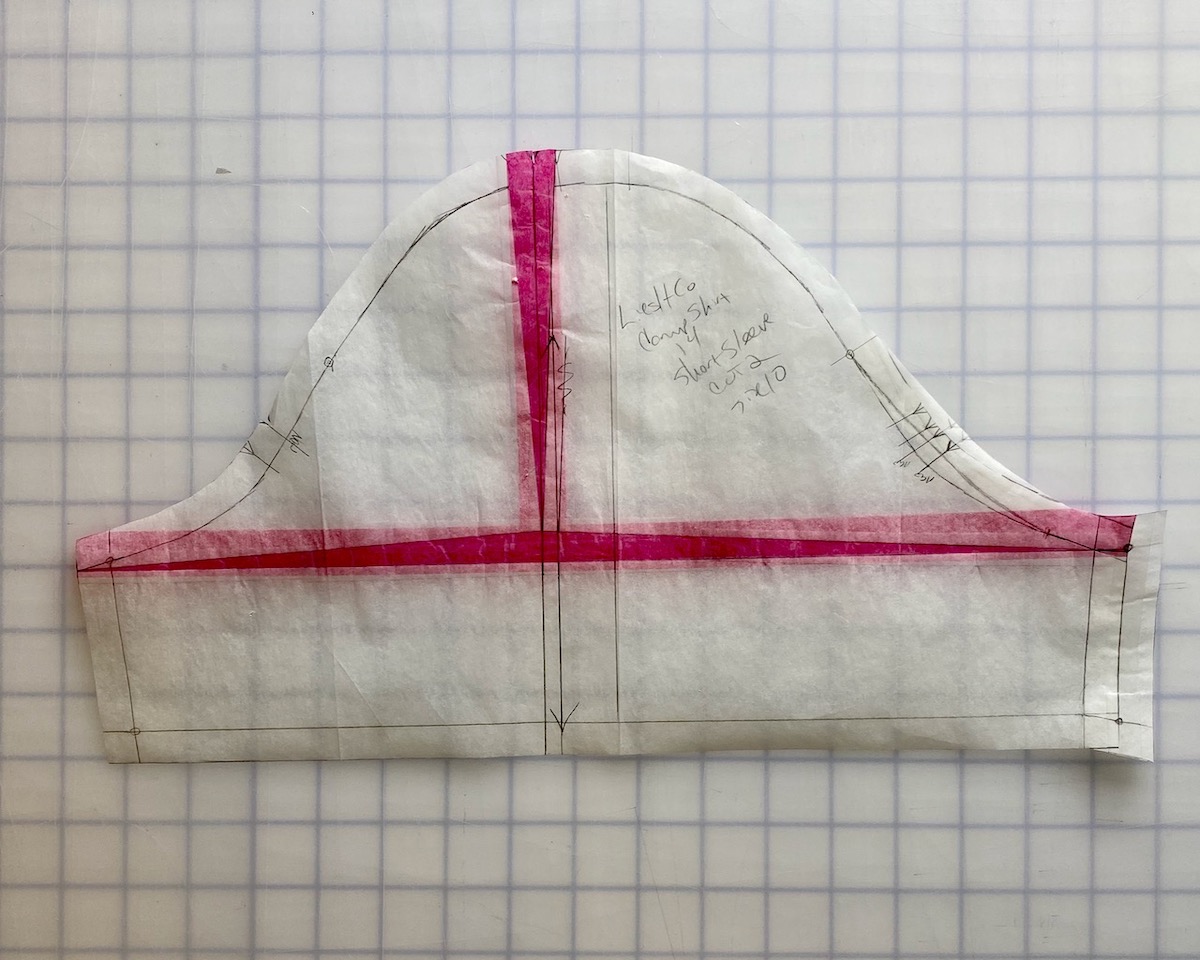
Slash the pattern along the bicep line but not through the seam allowance. Make a second slash on the vertical line. The vertical slash will continue through the seam allowance. Spread the pattern pieces to create 1/2″ additional height.
Step 5
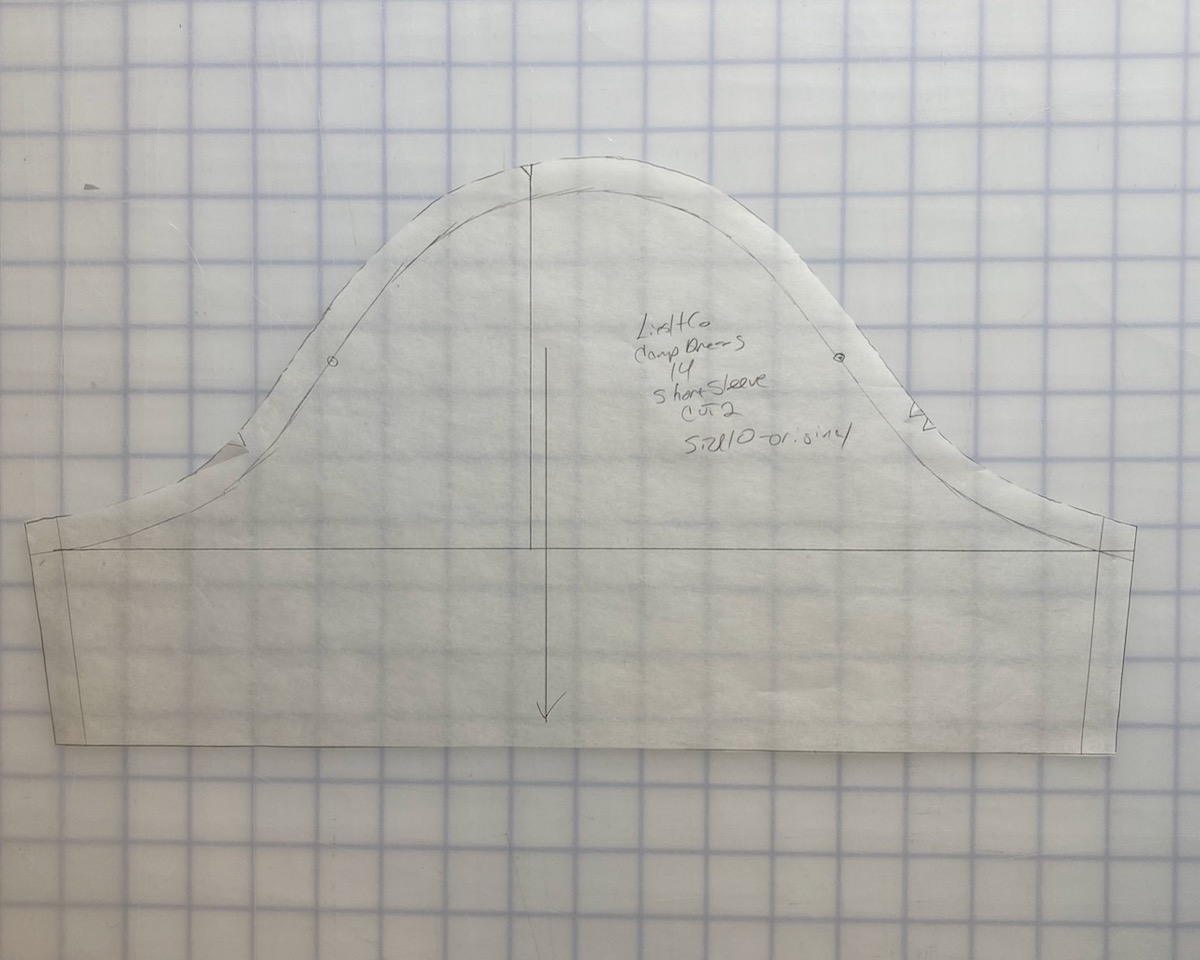
Add tissue paper under the slashed areas and tape the pattern securely. You’ve now added 1/2″ to your cap-height. Notice you have also added sleeve cap ease, which will need to be eased into the armscye.
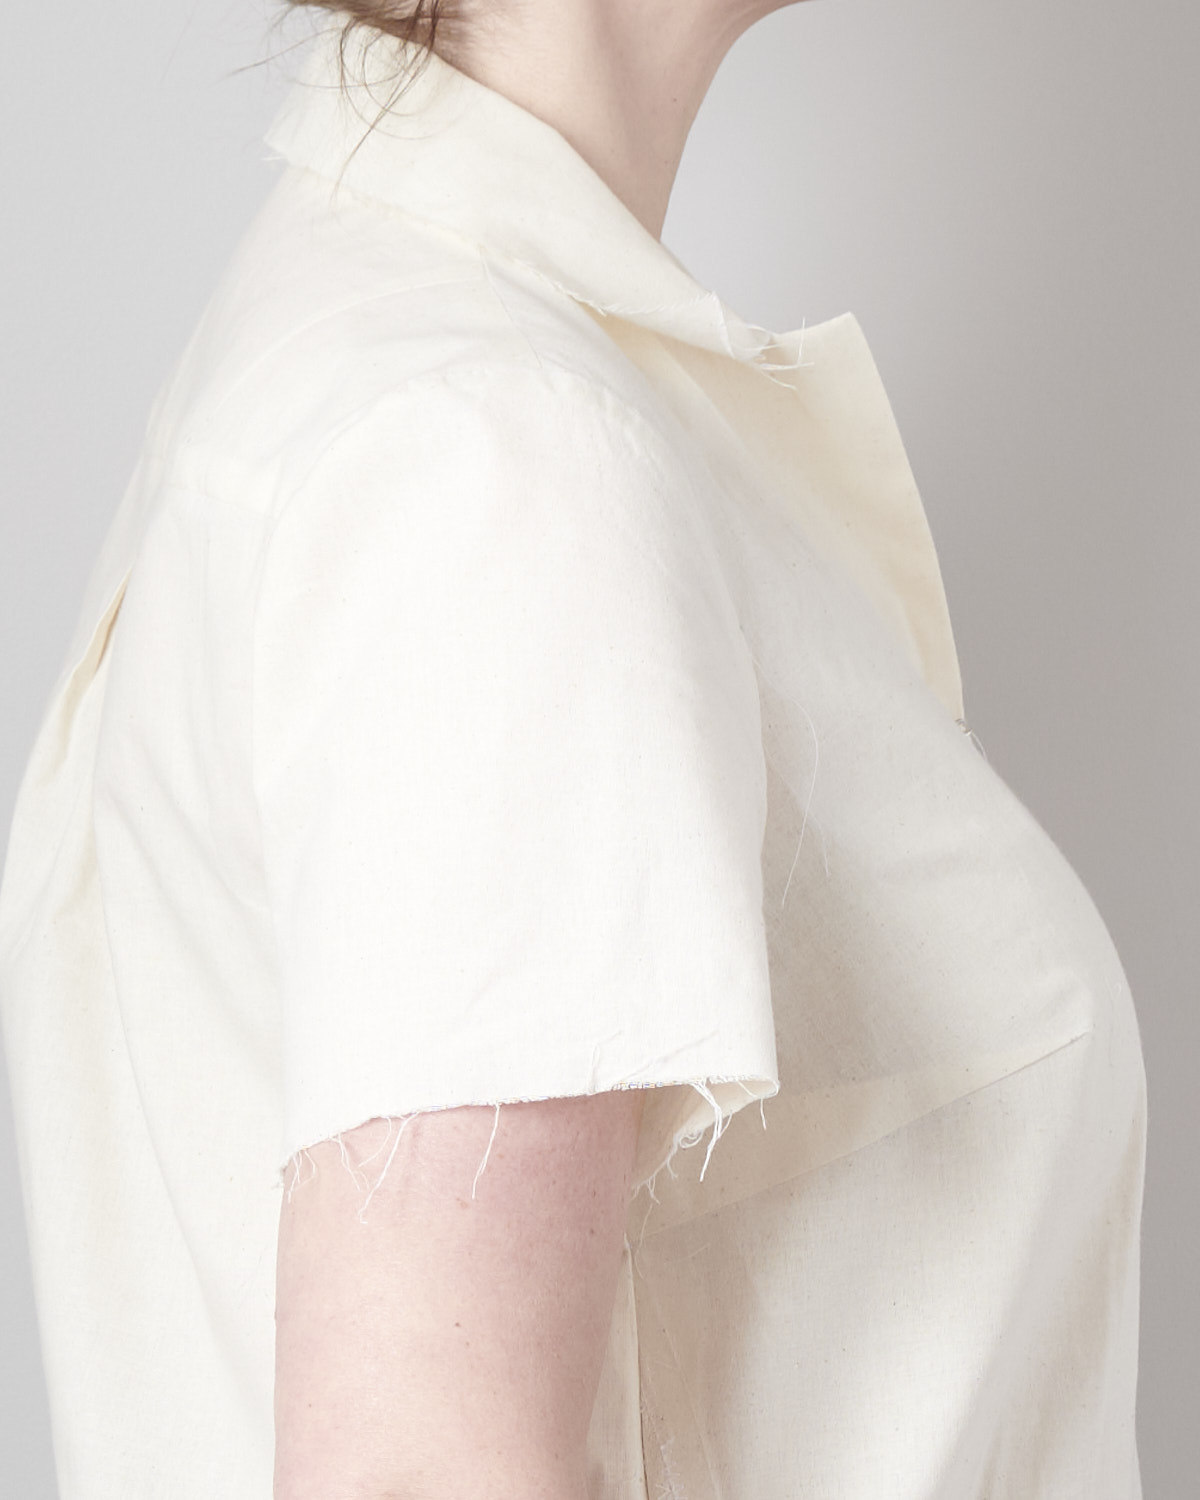
Adjusted sleeve
The adjusted sleeve fits much better. I no longer have tightness in the sleeve, and there are no longer drag lines pointing to the top of the sleeve.

Your fitting notes are always so helpful. Thanks
Thanks, Kathleen! Glad it was helpful. I found this one difficult to write-much easier to describe in person.
Thanks for this tutorial. I am interested in sewing more for myself and how to fit clothing properly to my body. In step 3, you say to draw a line from the shoulder point. In the photo this line appears left of center. Is there a reason not to center this line? If so, how do you determine where where the shoulder point is?
I’m not a pattern drafter, so anyone else jump in with the technical detail! From a lay person’s point of view, think of the shoulder point of the sleeve as the uppermost point on the sleeve that aligns to the uppermost point on the armscye. Usually the shoulder point is marked on the sleeve pattern-the top notch on the sleeve. Some sleeve patterns are symmetrical from the front to the back and the shoulder notch will be centered. On many woven/fitted sleeves, the front and the back are not symmetrical-more fabric is on the back of the sleeve. I think of this as “room to move your arms”.
Thanks for clarifying. Hopefully it will be marked on the patterns I attempt!
This is exactly what I was looking for to modify a sleeve on a different pattern so thank you! I do have one question though: you say that the 1/2″ extra length added to the length of armhole is eased in when stitching the sleeve. If I remember correctly you also do a forward shoulder adjustment. I am wondering if this extra 1/2″ in the armsyce can be adjusted by deepening the front armhole of the sleeve. Does that make sense? I am finding that there is a bit of bunching in the front armhole (between the neck point and arm pit point)
I had this happen too! I wouldn’t do anything with the armscye. The challenge is that you have too much ease on the front of the sleeve cap. What I did with my muslin was unpick the seam between the front notch and the the shoulder. Then shift the sleeve fabric out 1/8”. Your seam allowances are no longer even between the front notch and the shoulder, the fabric from the sleeve will be “hanging off” past the armscye. Check it to see if that resolved the problem. If not, repeat a little deeper than 1/8”. I only needed 1/8”! It’s amazing what a tiny adjustment can do. After you figure out the right amount, go back to your sleeve pattern and take off a similar amount between the front notch and the shoulder notch!
Makes sense. Yes, let me try it out. Thanks Lyndsey!