Our Fitting Room blog series focuses on altering patterns to fit your shape. One of the best things about sewing is the ability to make a garment fit the way you want. It’s all about your personal preference. Today, Sharon from the Advisor’s Circle talks about the adjustments she made to fit the Cappuccino Dress to her shape.
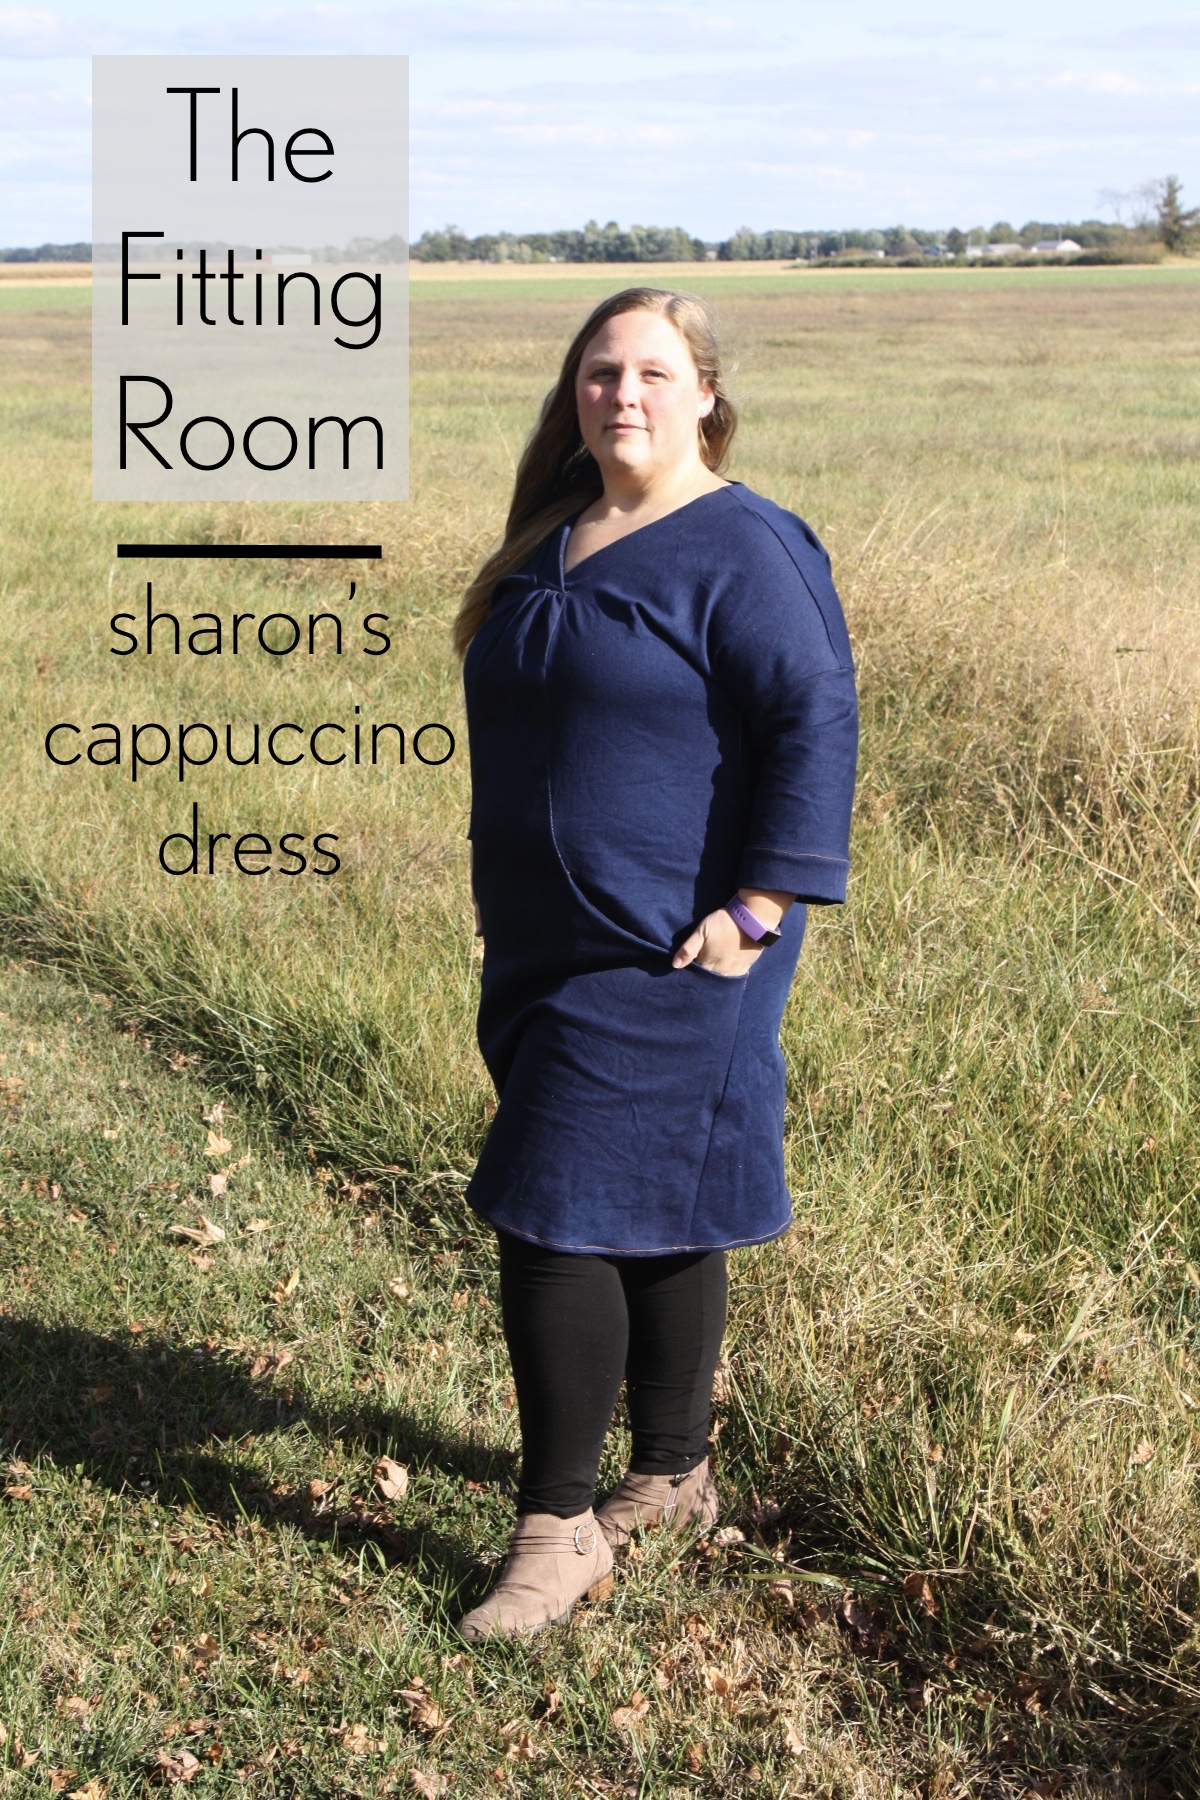
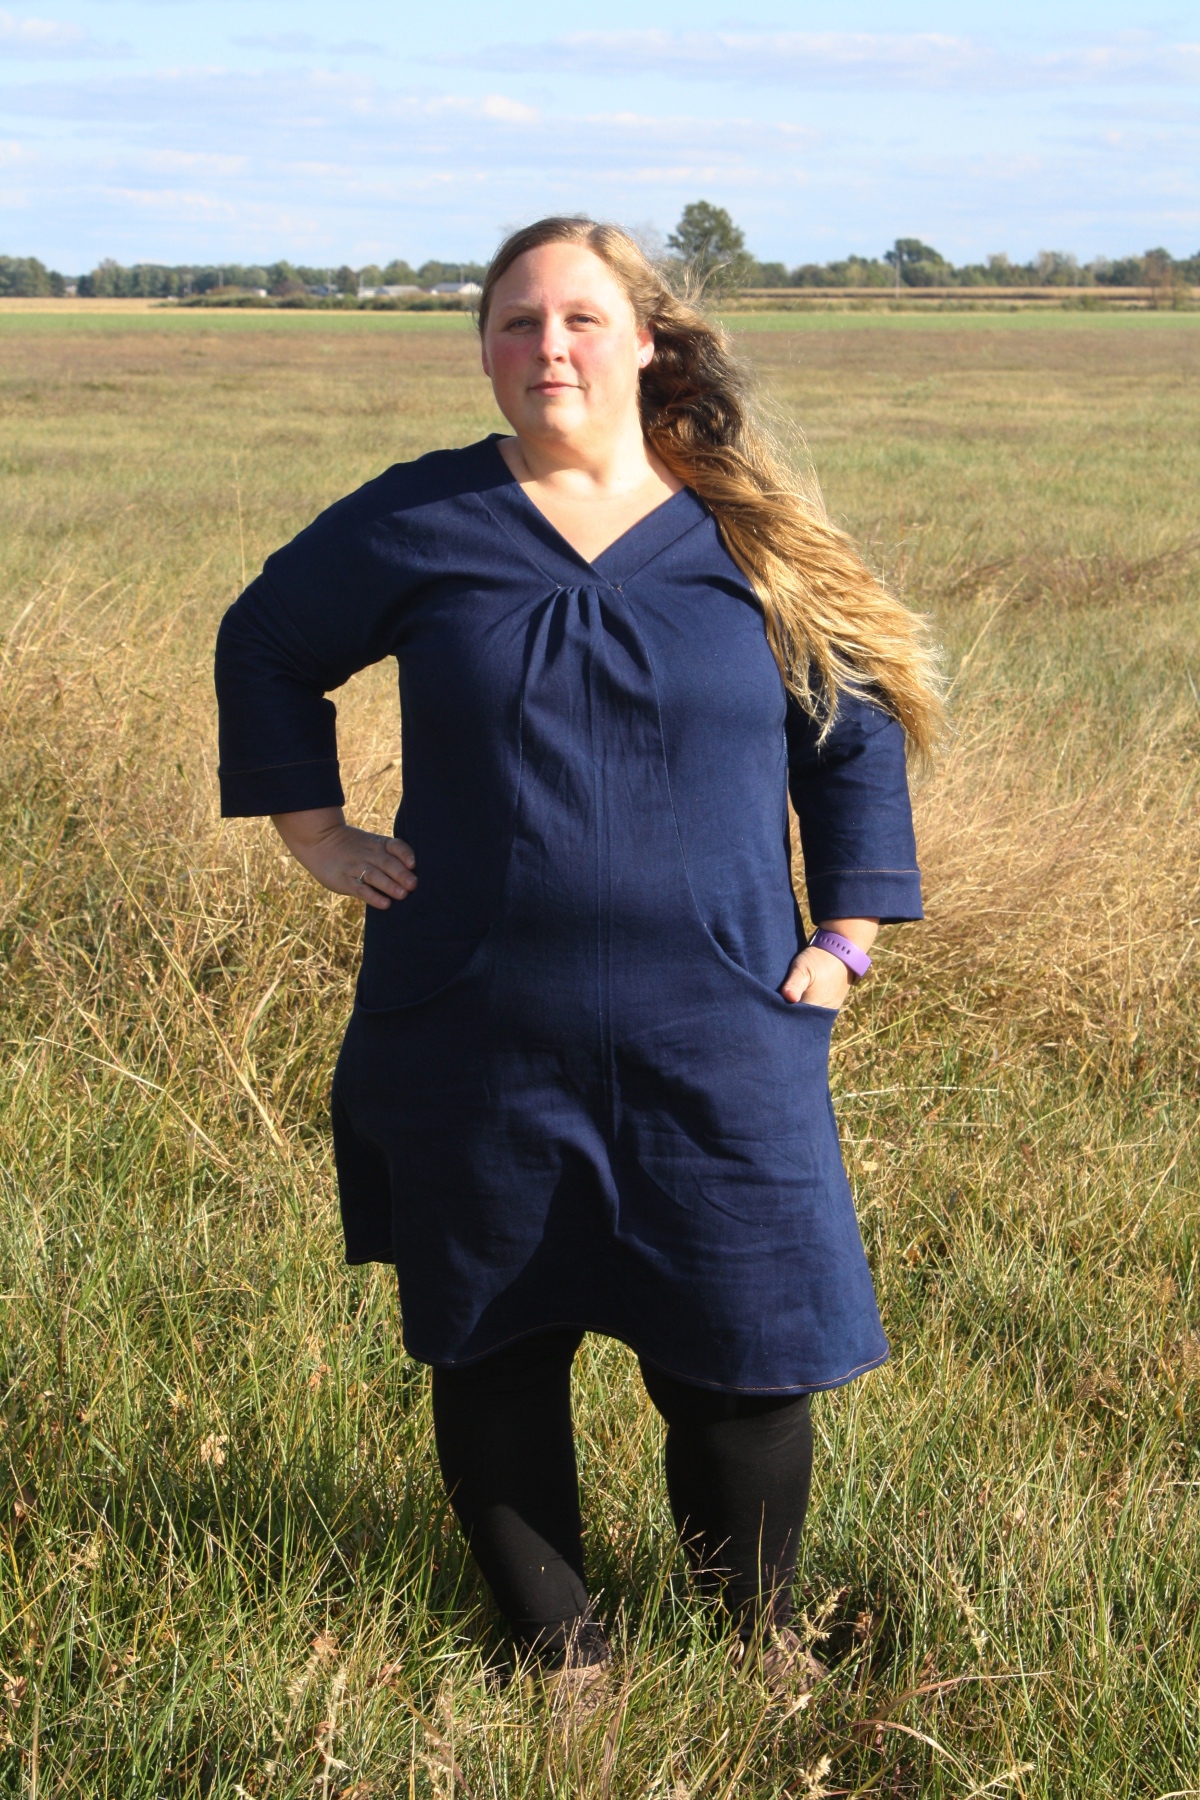
One of my personal favorite Liesl + Co. patterns is the Cappuccino Dress. I love the way it combines a relaxed fit with lovely lines. Plus, the pockets! They are definitely my favorite part. They are nice and roomy and just at the right height.
I have wanted to make this pattern in a heavy denim for autumn weather for a while now, and I decided this would be the year.
I have sewn this dress/blouse a few times already, so I already know which adjustments to make. I am a bigger girl, so I adjust the sleeves for a wider fit, and do a full bust adjustment (FBA) for the bodice. I also add some length to the neckline.
Full bust adjustment
The first adjustment that I made to the pattern was to perform a 1″ FBA on the bodice. I followed the directions that came with the pattern for the FBA:
To start, I drew a vertical line from the inside shoulder to roughly halfway across the bottom edge of the pattern piece. I started my line 3/4″ in from the inside shoulder. Next, I drew a horizontal line from my vertical line to the center seam, roughly at bust level.
Then, I cut down the vertical line, leaving hinges at the top and the bottom. I cut across the horizontal line from the side to the vertical line, leaving a hinge at the vertical line. After that, I spread the vertical line 1″ to accommodate my bust. (This also spread the horizontal line open, lengthening the center front to go over the bust.)

I taped paper under the resulting openings in the paper. And the final step when making an FBA for this pattern is to lengthen the center front piece to match the length of the adjusted bodice piece.
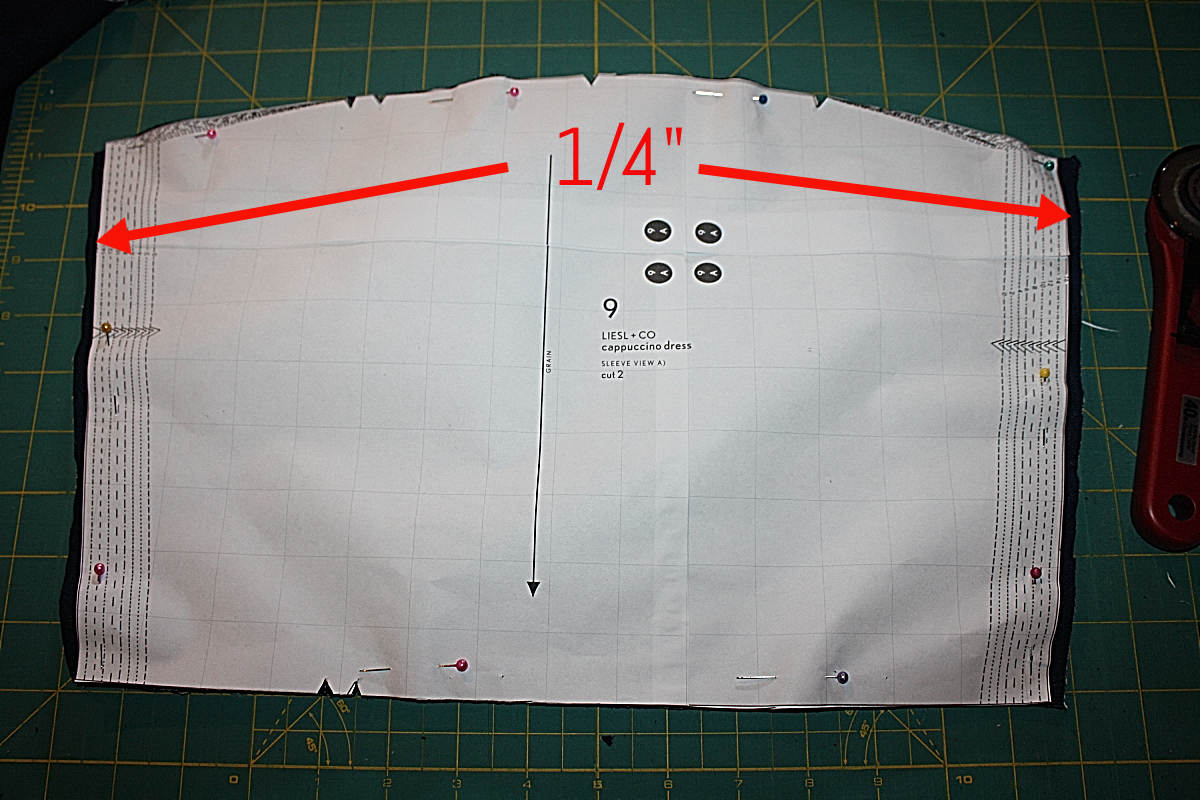
Widening the sleeve
The next adjustment that I made to the pattern was to widen the sleeves. This pattern has a dropped sleeve, so I need to widen the area where the sleeve meets the dropped shoulder. I also wanted to lower the neckline a little bit.
First, I adjusted the top of both the back and front shoulder pieces. I added 1/2″ to the depth of the shoulder at the neckline, tapering to 1/4″ at the bottom of the dropped shoulder. This adjustment gave me 1″ of additional neckline length. It also provided 1/2″ of extra arm and chest room for a better fit.
To make the sleeve match, I added 1/4″ to each side of the sleeve and the sleeve band, for a total of 1/2″ increase in sleeve circumference.
I’ve made this pattern twice before using knit fabric, and I didn’t make any of these adjustments for those, to accommodate for stretch. But I did use a lightweight interfacing in the neckband to keep it from stretching out. I also sewed the knit versions entirely on my serger, but you can use a stretch stitch on your sewing machine. This allows the fabric to stretch as needed.

I’ll use these adjustments again when I sew the blouse in a plaid flannel.
What pattern adjustments do you routinely make? Would you be interested in sharing them with our readers? If you’d like to write a Fitting Room blog post, drop me a line at contributors@oliverands.com.
It looks great! Thank you for sharing how you adjusted the sleeve. I have the hardest time getting that when adjusting patterns.
The tops and dress all suit you! Very nice job.
You did a wonderful job on your dress and I really like the tops and the fabrics you selected! I made the Lisette version of this dress twice. One with pockets and one without. The pockets drooped or flared out and I ended up stitching them down. Did you do anything special to yours. I think I will purchase this pattern as the neckline is different then the original and I think the V-neck is very flattering on you. Great work! Enjoy wearing your new dress!
Thank you! I only top stitched the seam allowance on the inside side of the pocket, which is in the instructions of this version. I own both version and love the pockets of the second one better. They are just the right height and shape that it wears so nicely.
Thanks for your reply, good to know about the difference in the pockets.