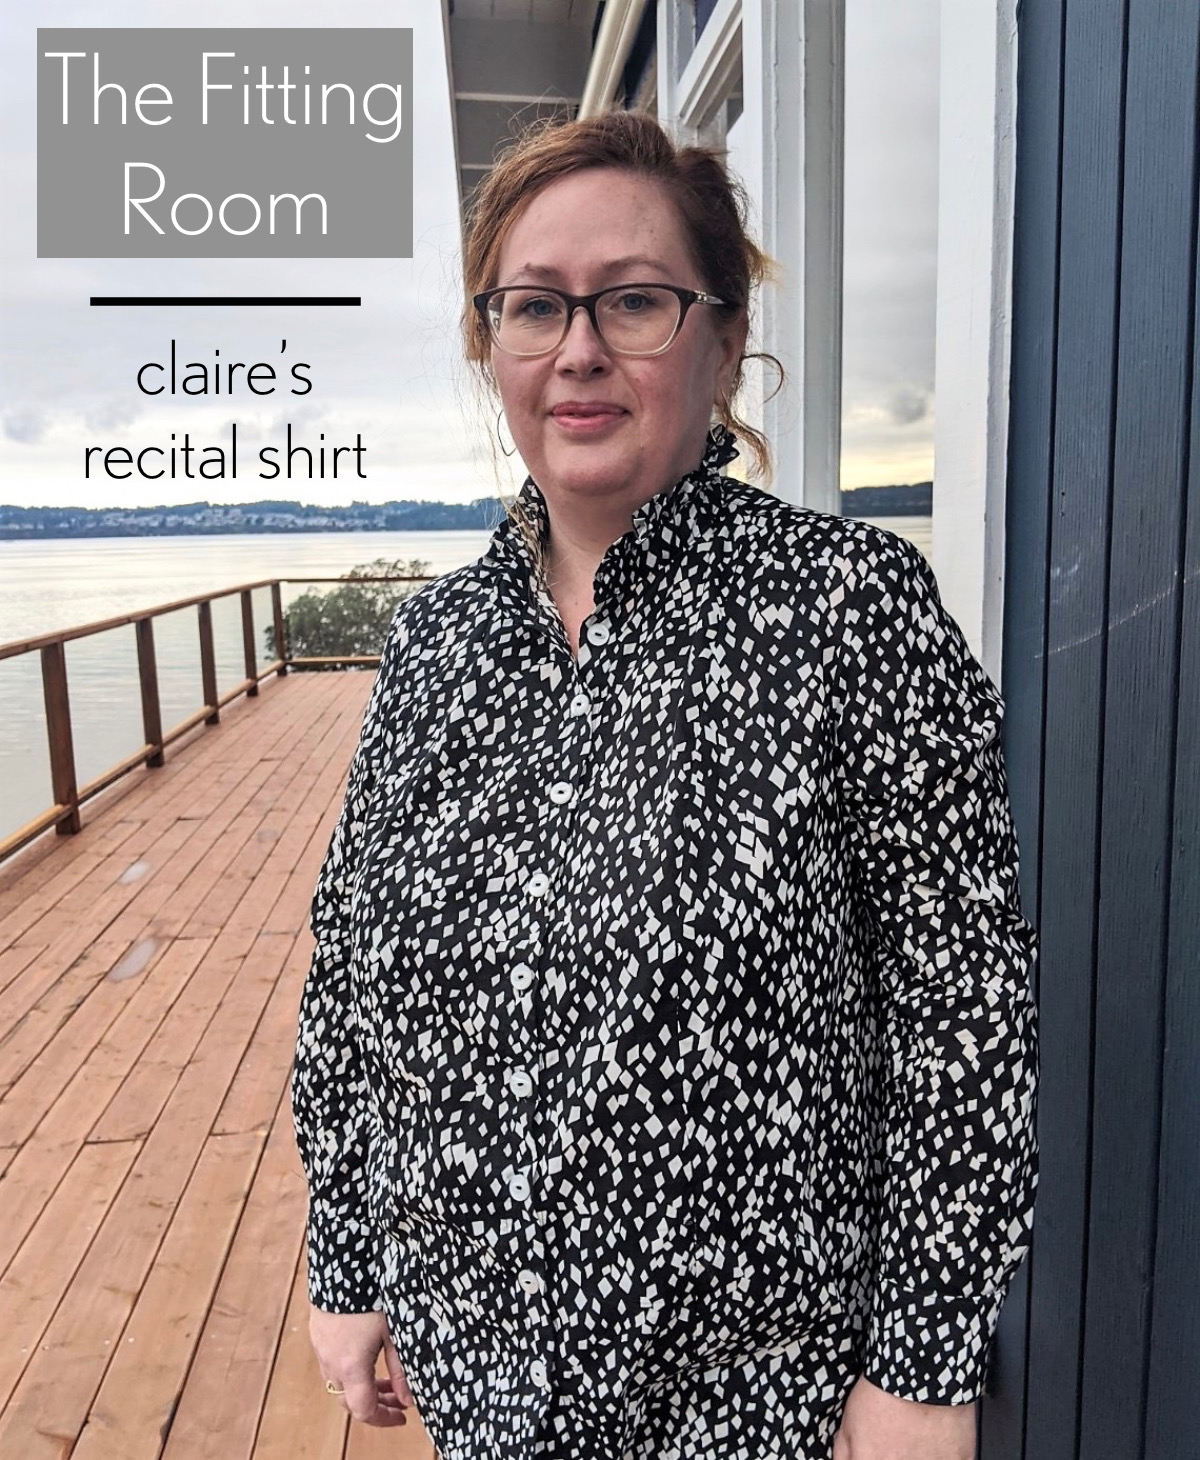
Today we welcome Claire from the Advisors’ Circle to talk about how she fit the Recital Shirt to her body. You all have asked to see photos of fit issues, and Claire has provided several. She also clearly illustrates how she resolved them. This post is a must-read for anyone who is interesting in fitting and pattern adjustments.
When Masha asked me if I’d like to contribute a fitting post for this series (as she knows it’s something I spend a lot of time thinking about) I already had the Liesl +Co. Recital Shirt on my list.
I had planned to go ahead and make that up with my usual adjustments for the post. It was only when I started on the project, that I realized it was a princess-seamed shirt, rather than a regular darted shirt, which I have much more experience with.
When I started looking around, I realized there were much fewer fitting resources on this kind of shirt. So I decided to go ahead and work on it – and here are the adjustments I made for my body!
First pass sizing
My measurements are 44″ bust, 40″ high bust (D cup), 37″ waist and 46″ hips. I know from experience that the 14 in Liesl + Co. patterns gives me a pretty good fit at the shoulders. The 14 D cup also corresponded to my full bust size, so it was a good starting point. My waist and hips, however, are more of an 18 than a 14, so I graded out to the 18 from under the bust onwards.
The shape of the back piece looked a little strange after I graded, so I looked at the ease, which is reasonable, and decided to adjust the shape a little to make it closer to the original. This made the grade on the back piece closer to size 16 than 18, but I decided to try it out and made my first muslin.
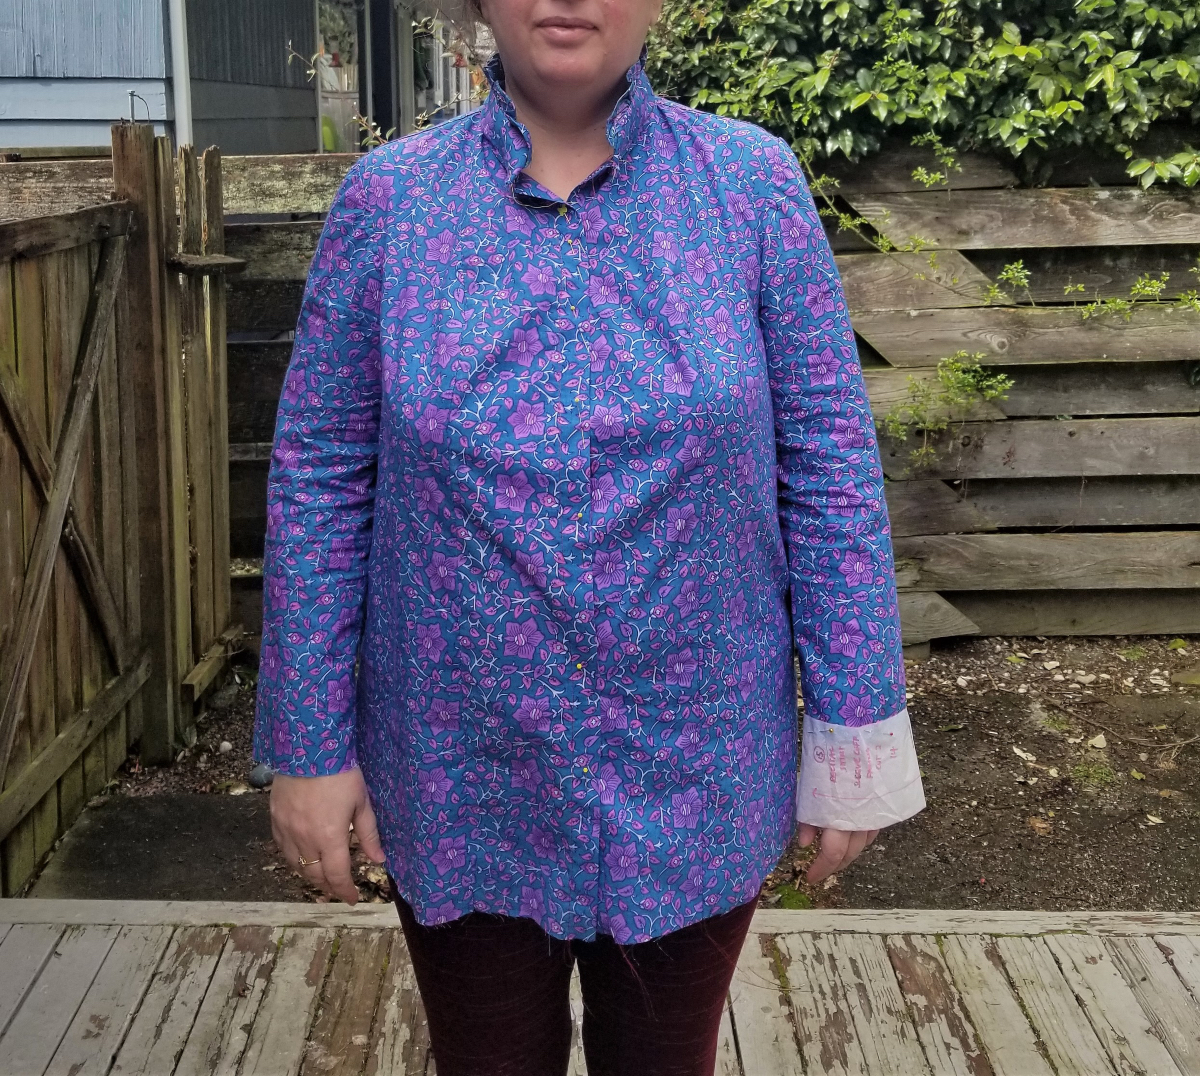
Muslin #1
There are three areas I always have to look at altering in any woven top: the bust apex, the lower back and the sleeves.
As you can see in the photos, the 14 fits me well at the shoulders and across the back. My shoulder seam is straight and there are no outrageous wrinkles. However, slightly south is the first area I usually have to adjust. I often find the bust apex too high, and it’s clear here that that is the case here too.
First adjustment – lowering the bust apex
You can see this very clearly in this shot I took from the top. All that excess fabric is pooling above my bust because that’s where the fullness was drafted. So, first things first – I need to move the apex down about 2 1/2″.
The issue is illustrated clearly here. I slashed the bust line vertically and you can see what happened. The fabric overlapped and reduced where there was too much of it, and spread out where I needed extra room, over my own apex, further down.
Slashing the muslin also relieved many of the other little wrinkles and creases both on the front and the back, which is why it’s so hard to assess fit perfectly with one muslin. For example, when I first tried the muslin on, the armhole felt a bit more strained than normal and I was thinking it was unusual, but maybe I needed to size up there. After I slashed the bust, the pressure immediately dissipated; it was a result of the shirt straining to cover the bust, which made it pull on the armhole. Now that there is room for my bust, the sleeve and armscye feel very comfortable. I guess that’s why it’s best to work on one thing at a time!
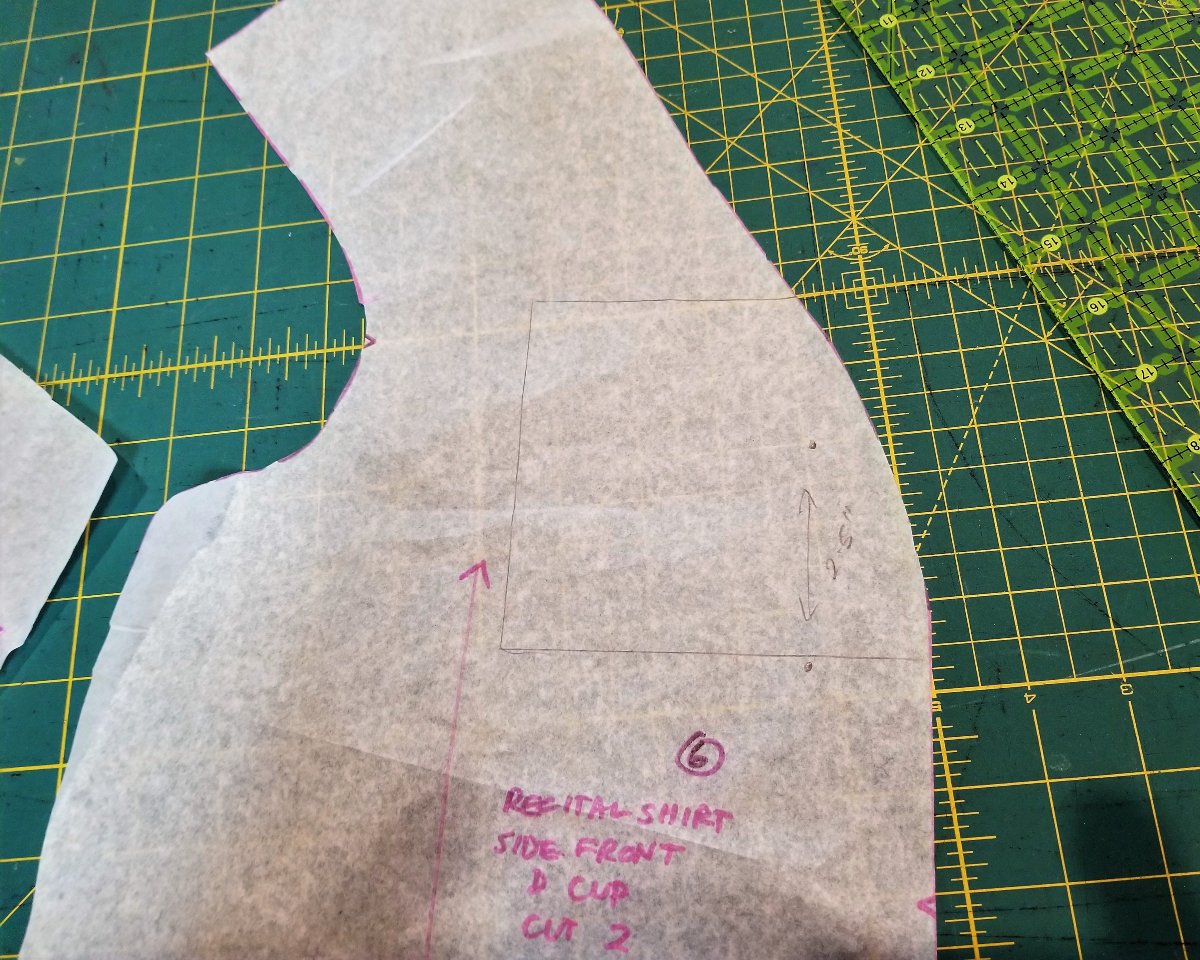
Therefore, the first adjustment I made was to lower the apex. This is a fairly straightforward change and similar to the adjustment in a darted blouse. You create a square around the bust apex point (marked on the pattern) and cut that out.
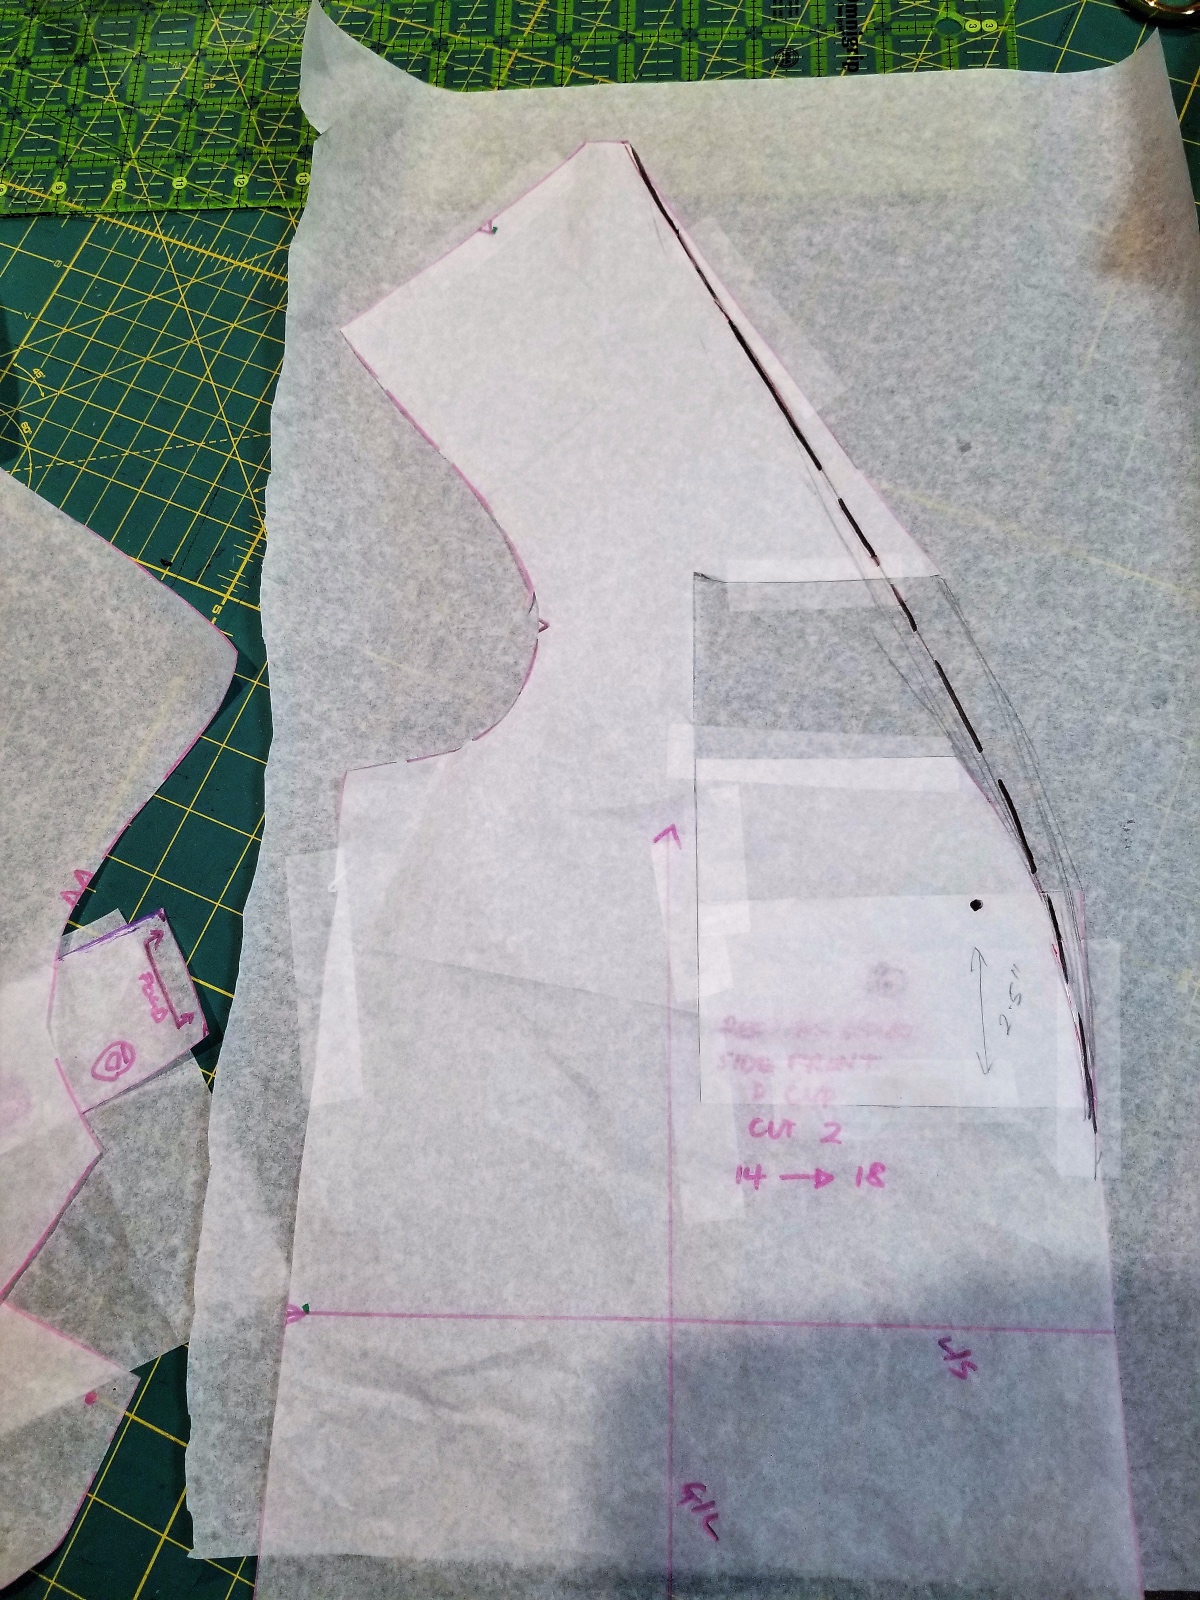
You then move that bust point down the required amount (in this case 2.5”) and tape down the square in its new position. After that, it’s a matter of creating the new seamline using your French curve (marked with the black line in the photo above). Often, you need to do a similar adjustment on the front center piece, but in the case of the Recital Shirt, this is a straight edge, so it’s not necessary. I made sure to compare the edges of the pieces at the end to make sure they were still the same overall length.
I made up a very quick second muslin to see how lowering the apex affected the overall fit. One simple adjustment changed quite a bit.

Much better!
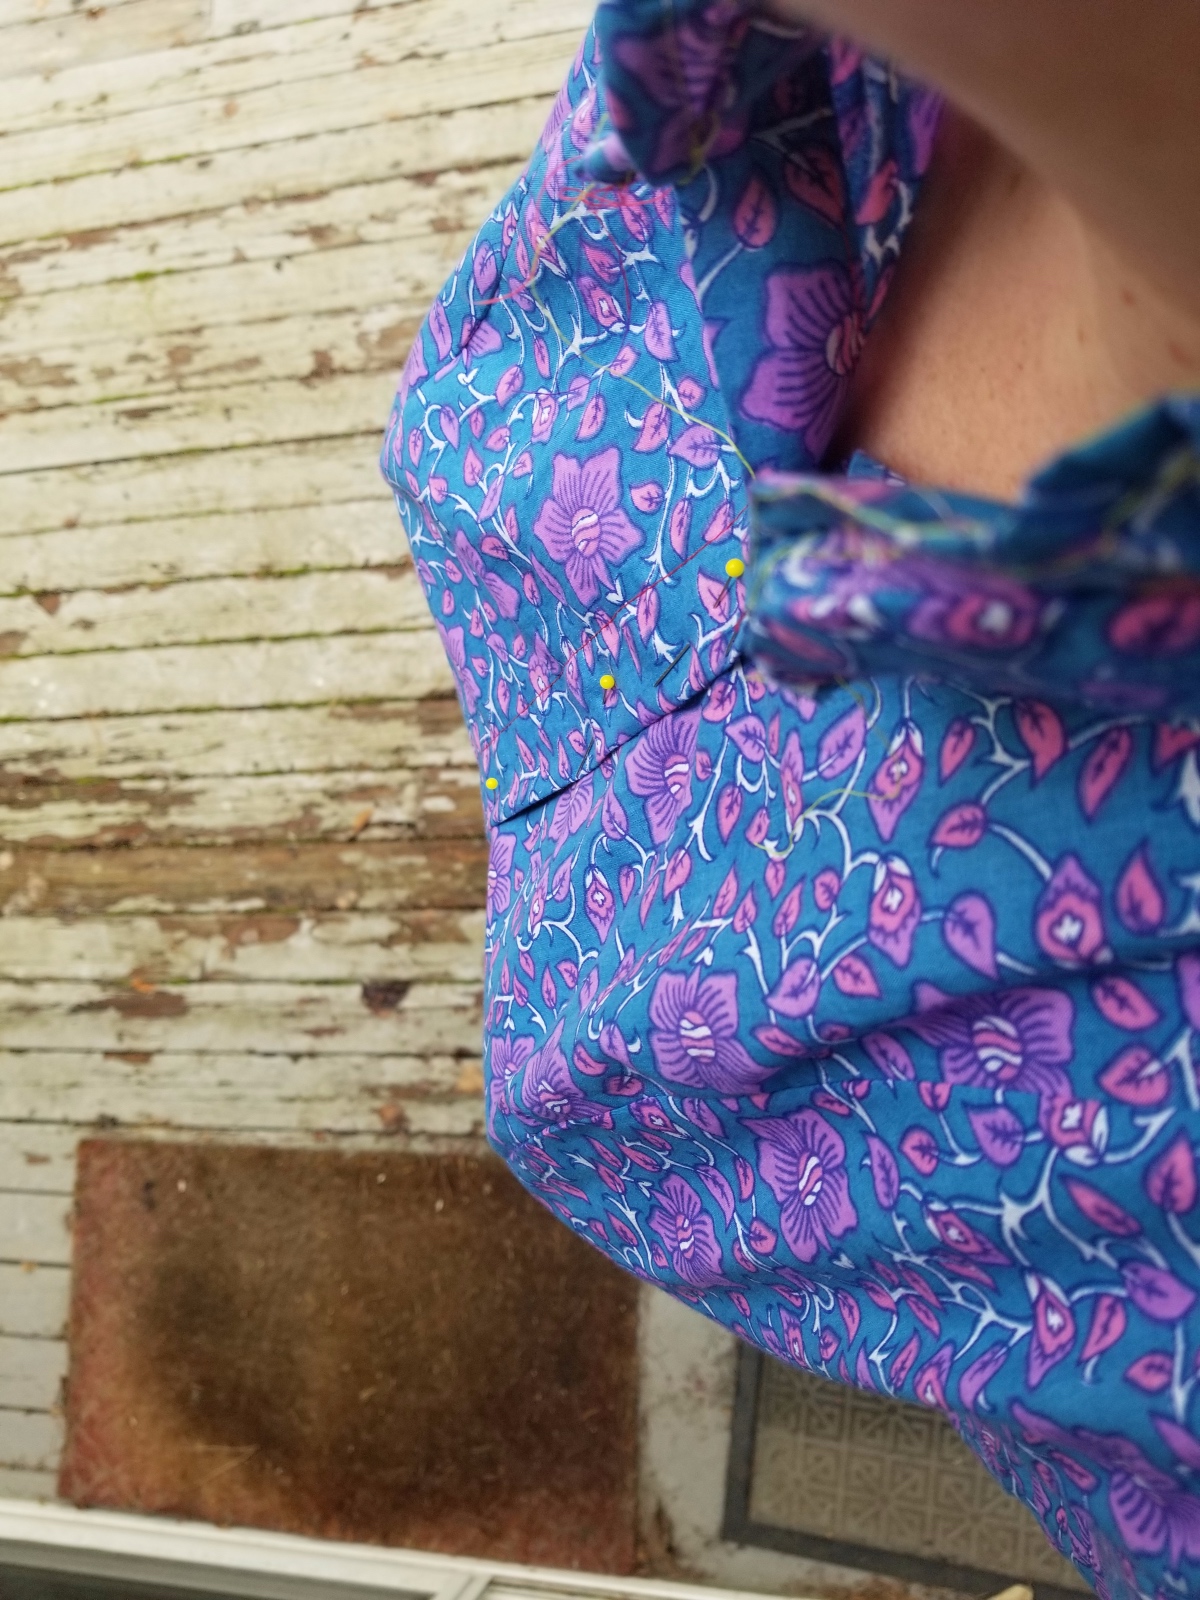
Second adjustment – lower back
The second area that usually needs attention for me with regards to fitted woven tops and dresses is the lower back. You can see quite a bit of pooling and some loose folds situated between my waist and bum. Since I had such a nice fit in the upper back, I wanted the lower to match a little better.
This is a difficult area to assess, in my opinion. A swayback adjustment is the adjustment you most often see to tackle this area, but it’s not always the right answer. Pooling of fabric in the lower back can have other causes. Having a prominent bum or not enough room at the hips can cause the same thing. Sometimes the piece is just too long in the back generally, rather than because of a specific swayback shape. Also, after looking at everything again, I realized that I had neglected to grade out the front center piece to an 18 as well as the side front piece, so I had already lost 1/2″ there, plus, as I mentioned above, I hadn’t graded to a true 18, so the lack of ease at the side seams could have compounded the issue.
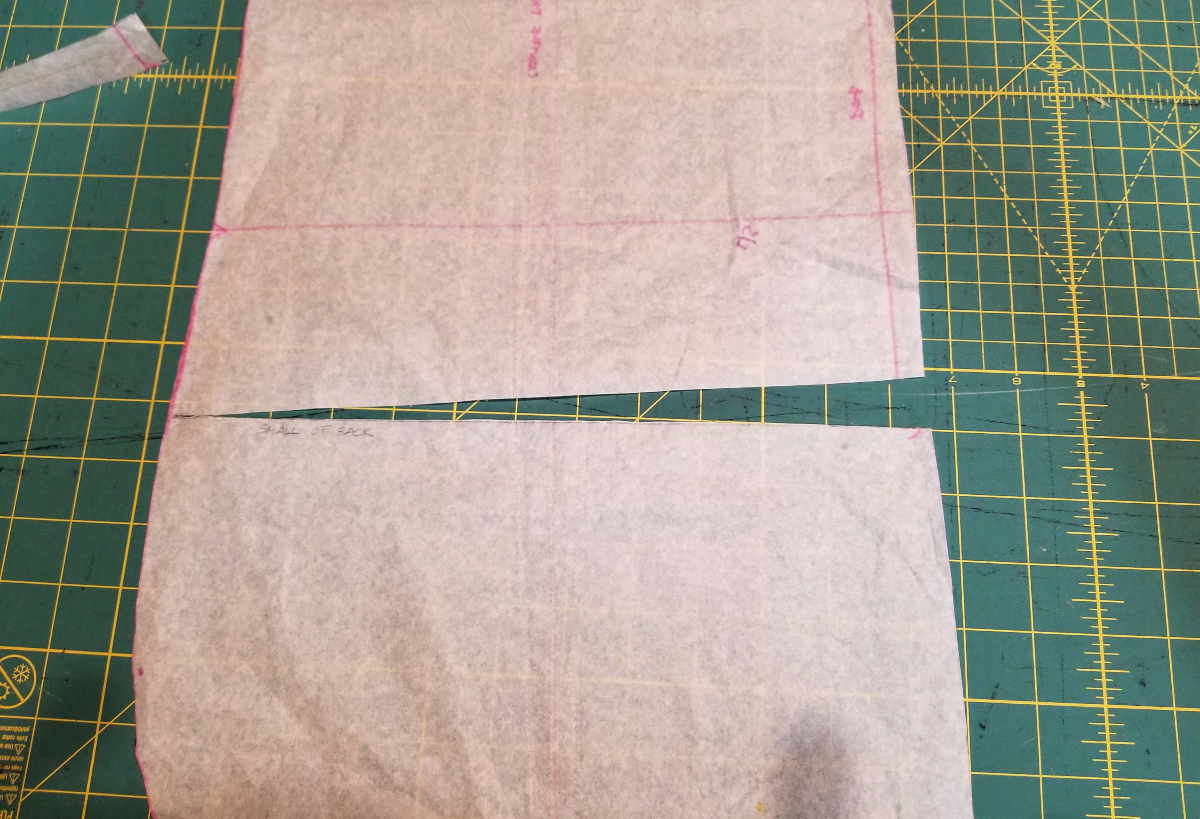
For my second muslin I had let out the seams by 1/4” (giving me a total 1″ extra in circumference) and this helped a lot, but I was left with the more typical swayback fold: a thin horizontal fold just above the small of the back. So I took a wedge out of the back piece that was about 1″ at the widest point at center back, tapering out to nothing at the side seams. I trued up the seam and re-drew the grainline as well.
Third adjustment: shortening the sleeves
Finally, my other adjustment was a simple one for me – I almost always have to shorten sleeves, so I took 1″ out of the sleeve piece at the lengthen/shorten line before sewing up the final shirt.
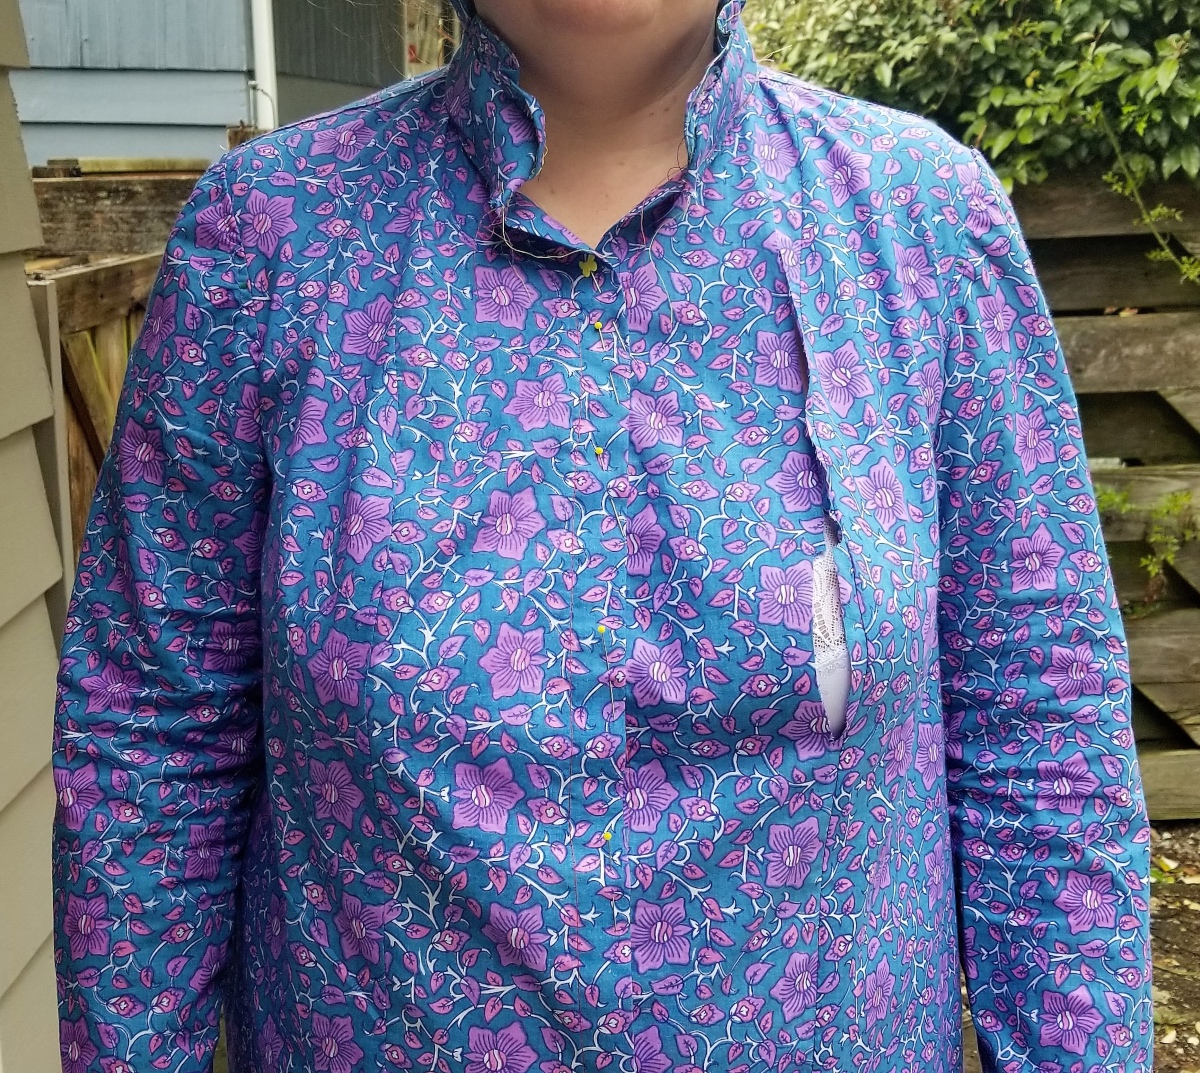
Final shirt
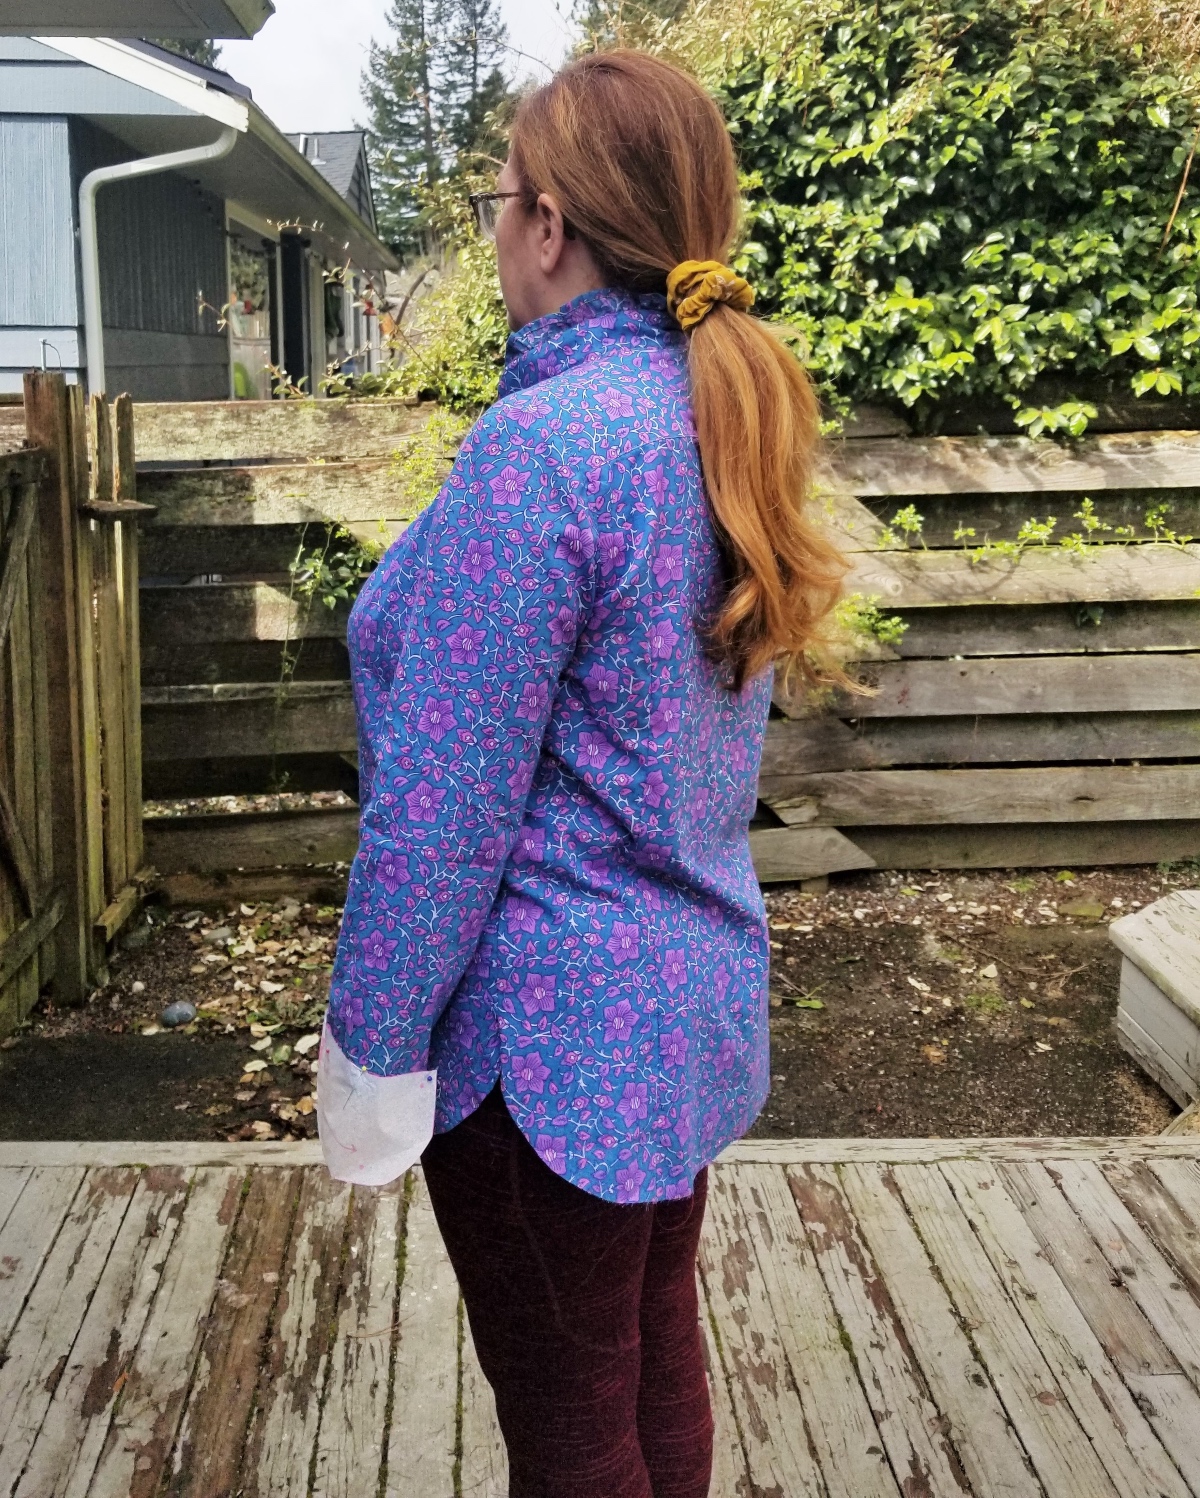
So here’s the final shirt! I have to tell you I’m pretty pleased with the fit, even if my black and white lawn fabric is hard to photograph.
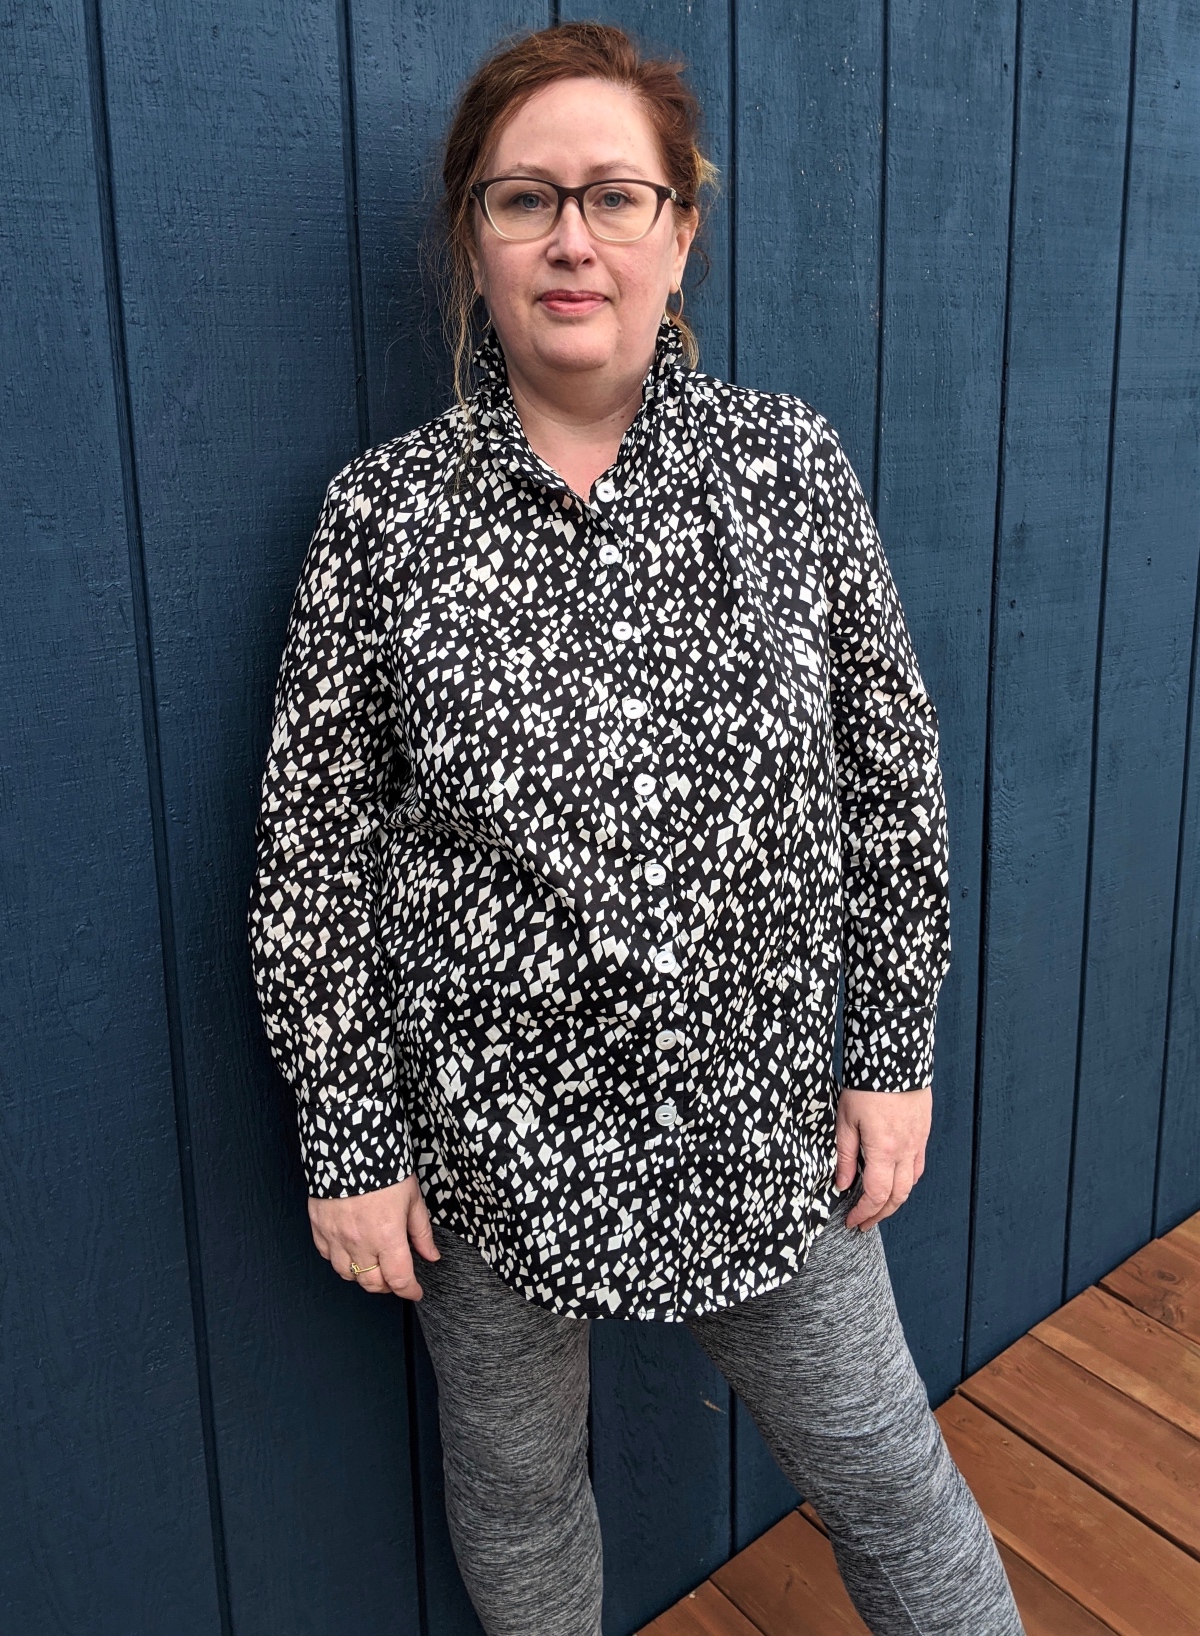
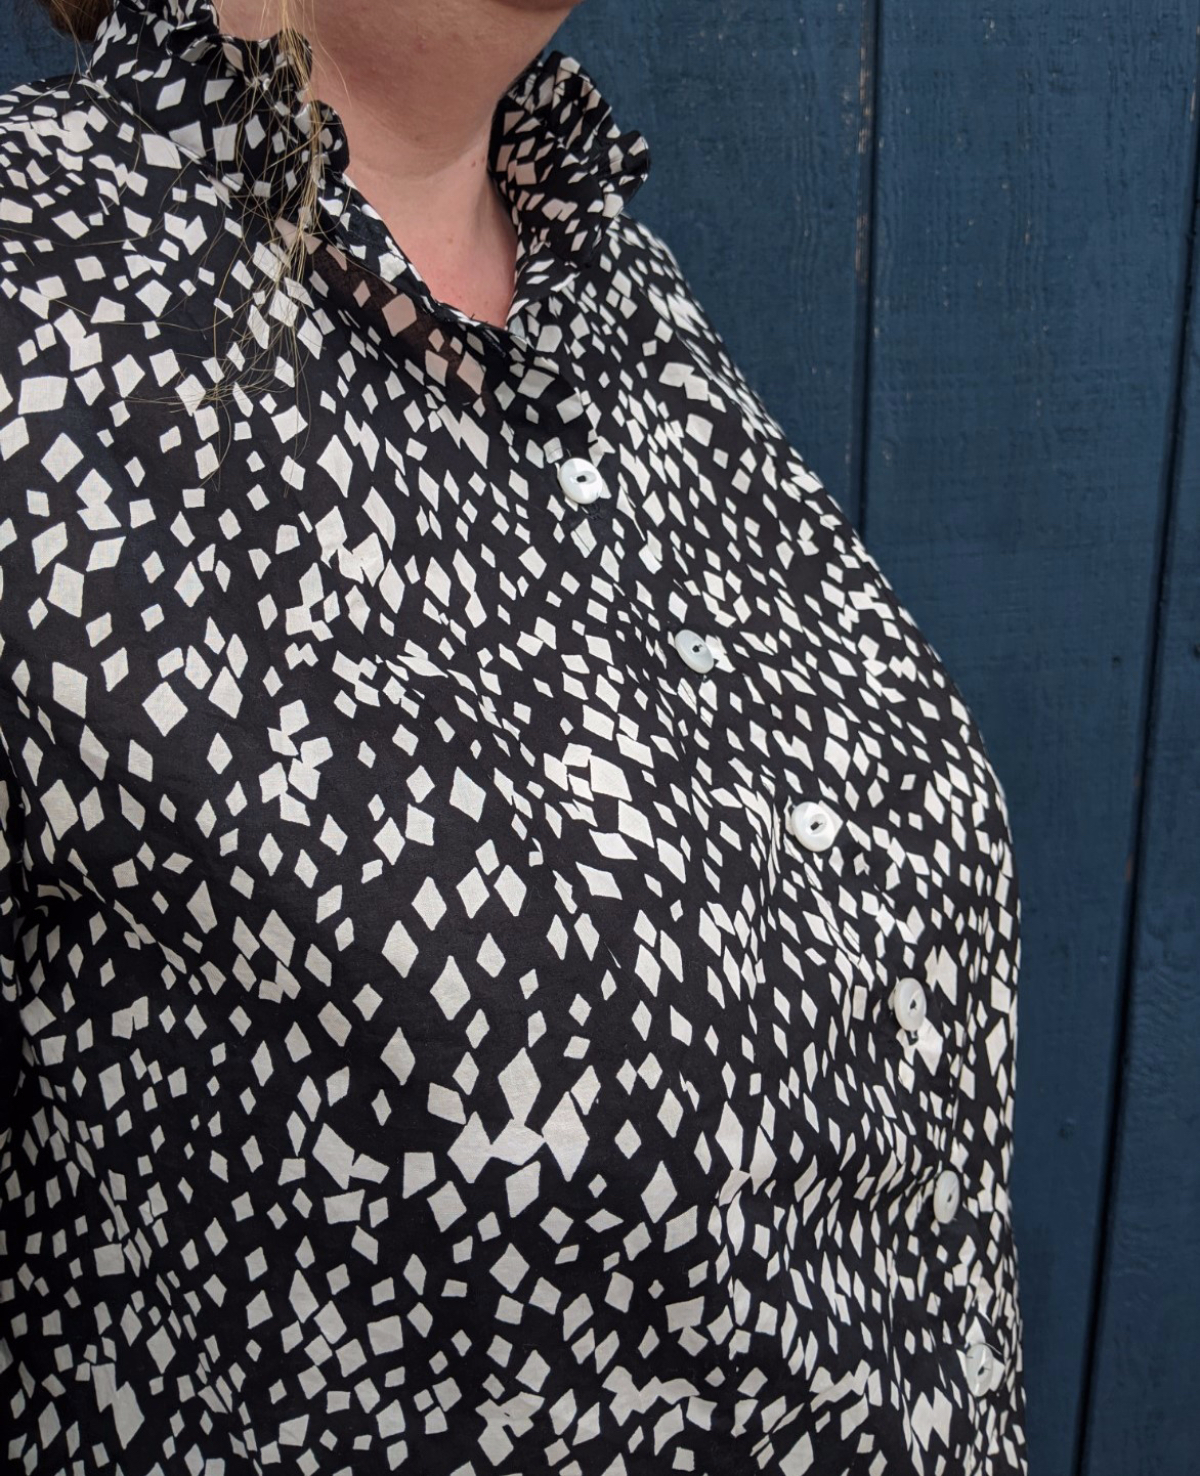
You can see that the bust area is a much better fit and I have zero gaping at the front center, which is highly pleasing!
The length of the sleeves is good and the shoulders are still a good fit.
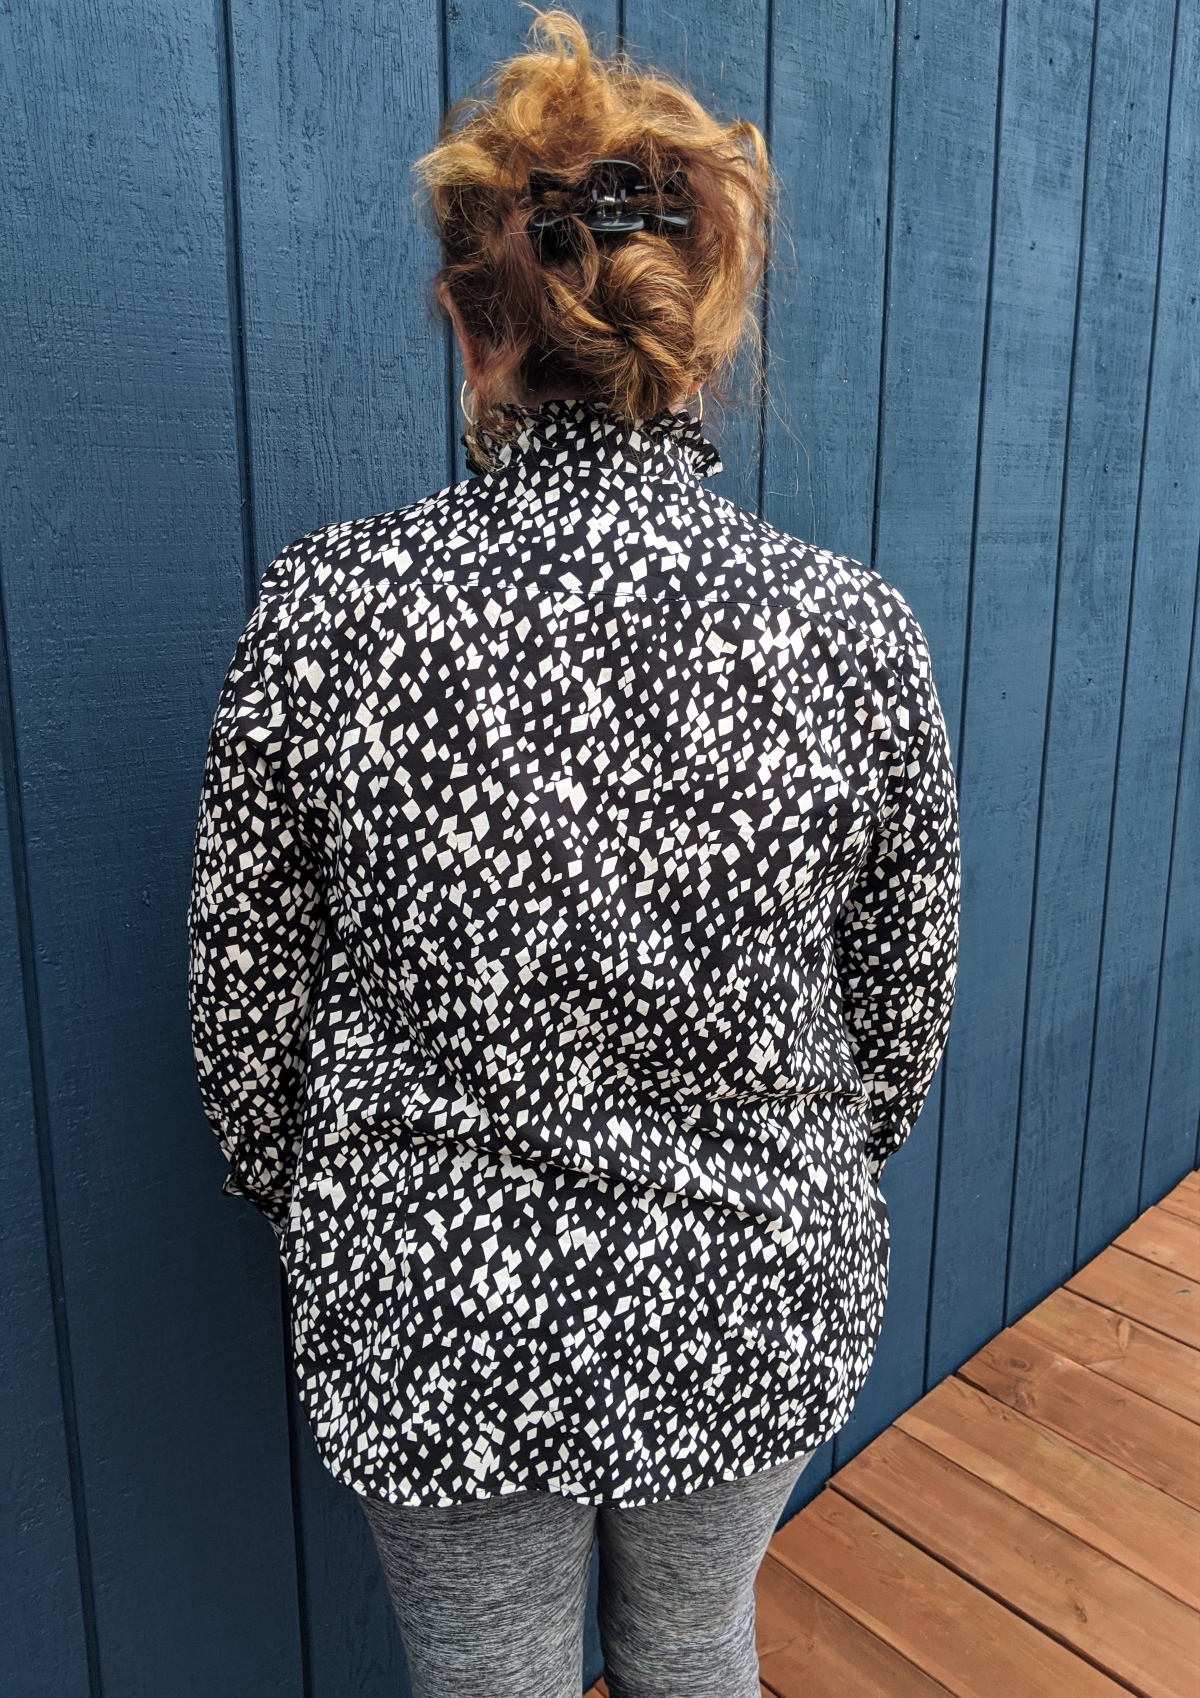
When I look at the back, it is much better, but there is still a touch of pooling, although nothing dramatic. I suspect I could take the back darts in a little more and that would fix that up.
I love the style of this shirt and am excited to try the pintuck version next!
This is so timely! I traced this pattern just this week – RTW buttoned-up shirts always fit me funny, so if I want one to fit me, I need to make my own! Thanks for all the pictures and details, and congratulations on your final, well-fitted shirt!
Thank you Nicole! I’m sure you’re going to enjoy sewing this one up – it’s a fun project!
Thank you Claire for such a well written and documented post. Your fitting process is so clear and will be such a great resource for fitting this pattern. Thank you for taking the time to put this together!
My pleasure, Terri! I definitely find other people’s fitting posts very useful, so glad I could contribute. It’s a great idea of Masha’s to do this series.
Thank you, this is a really helpful post.
You’re very welcome Allys – have fun sewing!
Such an interesting article! It was so helpful to see your process to make the shirt fit better, and all the photos illustrated it nicely. Although I have sewn numerous Recital Shirts, I have never sewn the ruffled collar. It looks very nice on you. Thanks for the inspiration!
Thank you! I was intending entirely to sew the pleated version myself until I remembered this fabric in my stash. I definitely want to make that version next and have an emerald green lawn I think will be perfect! 🙂
I think Claire did a beautiful job making her recital shirt. I would never have such patience to learn how to make those important adjustments. That is wht I am not a great seamstress.
Bravo. Look how much she learned.
Thank you for your kind words Susan! You’re right – I did learn a lot! 🙂
Thank you so much for starting the “Fitting Room” posts! Excellent job Claire!
Such a good idea of Masha’s! I love seeing how everyone approaches their own particular fitting needs.
Lovely shirt. You will get a lot of wear out of it. Not sure if you want fit advice but here it comes…
You have lines pointing to your shoulder where it meets your neck. If you go back to your muslin try releasing at that point and pinning in some fabric. This will probably drop your bust apex lower so you might have to raise that. This should relieve strain in the arms.
The across back right under your armpit looks tight. Is this because you need more width, the sleeve armscye is too high under your armpit or the bicep is too tight(or a combination of these)?
These are very fussy details and you may be perfectly happy with where the fit is. I am perfecting my basic button down shirt so I am overly aware of fit issues. I hope this is helpful and not annoying advise.
It was helpful to me to see your fit adjustments so thank you for sharing.
Thanks for taking the time to send me your comment Michele – I am all ears when it comes to constructive criticism on fitting. It’s the only way to get better, right? You have sharp eyes! You are right – there are still some very small tweaks I will make to the fit another time, and, interestingly enough, it’s more pronounced on one shoulder than the other. As most women (and perhaps men too?) have one shoulder slightly lower than the other, I’m actually wondering if that is the issue. The shirt is only semi-fitted, so I don’t really feel any tightness and it’s definitely not a bicep issue, but I did notice that little pull as well. I will mull over it some more and probably try adding a little extra next time, as you suggest. 🙂
Your shirt fits beautifully and I greatly appreciated your photos and explanation of the process. Thank you!
Thank you so much Lamar! I’m glad it was useful to you. 🙂
These are the alterations I most often need to make, so this post is perfect! Thank you for documenting your process with photos and clear instructions.
You’re very welcome Jennifer. Happy sewing!
This is very helpful and I look forward to more in the series, thank you.