


Shelley has been tinkering with our sewing patterns again. She’s got a tutorial for us today on how to turn a long sleeve shirt into short sleeves. Take it away Shelley!
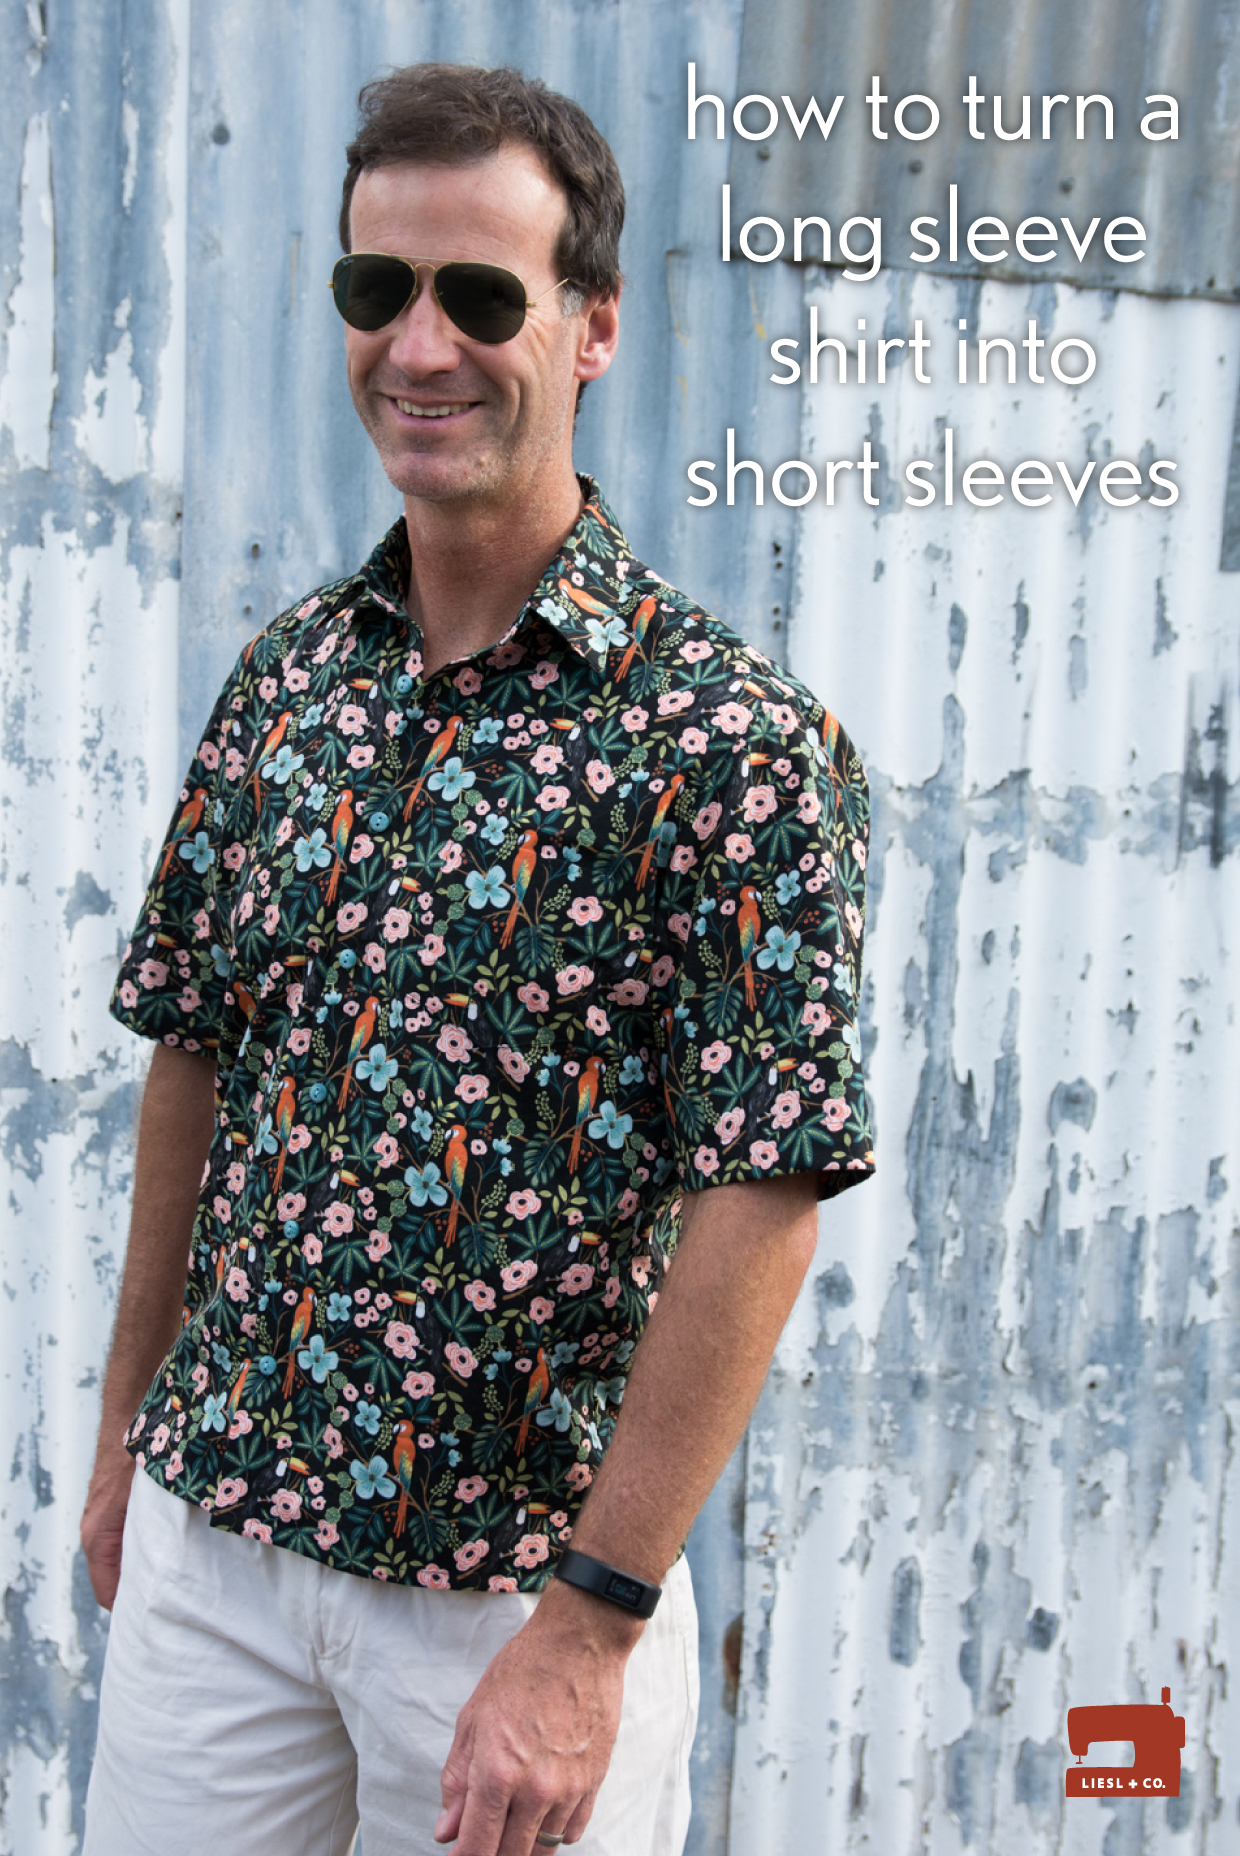
Have you sewn the All Day Shirt yet? I can’t rave enough about this pattern as a sewing experience, but I knew that for my husband to wear it, I would need to make that very simplest of modifications – short sleeves.
Making a long-sleeved shirt into a short-sleeved shirt is a very basic pattern modification, but there is a neat trick to making your sleeve hems behave. Of course, I forgot to do it on my first version, so I can put my own hand up for a refresher tutorial. Let’s jump into it!
The only pattern piece we need to adjust is the sleeve (pattern piece 15).

Measure your man from point of shoulder to where he likes his short sleeve shirt to end. Or grab his favorite short sleeved shirt out of the wardrobe and measure that.
Cut your pattern piece to the desired finished length. Don’t forget that there will be half an inch allowed for the sleeve head seam, so either measure down from the stitching line, or add that ½” onto your measurement. For my husband’s very casual longer length sleeve, the measured length happened to fall exactly on the lengthen/shorten line. Whether you’re cutting above or below this line, you can use it as a handy reference to keep your cutting line straight across the sleeve (perpendicular to the grainline marked on the pattern piece).

Now we just need to add a sleeve hem allowance. I decided to do a double fold hem with a 1 1/2” hem allowance. My finished hem is 1” deep which I felt would neatly mirror the 1” wide button placket, and be deep enough to not have the underside visible when worn.
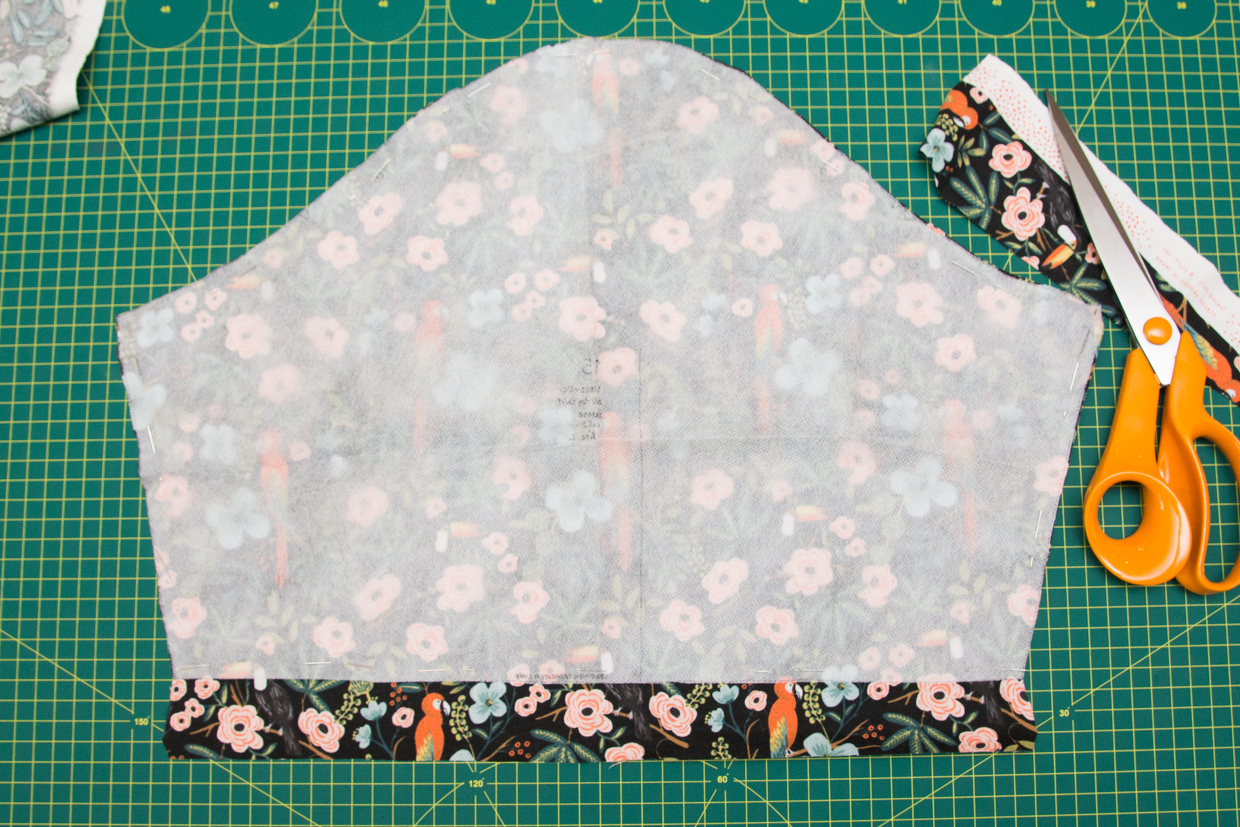
I’ve drawn two parallel pencil lines on my pattern, one above and one below, but each is 1&1/2” from the cutting line.

What we want to do is to “reflect” the tapering of the sleeve onto our hem allowance and turn it into a slight flare. If the tapering was to continue onto the hem allowance, then when we fold up the hem it will be too narrow for the sleeve and hard to stitch without puckering the sleeve itself. I’ll keep drawing it out in diagrams to explain it, but there’s an easy way to do it straight onto the fabric itself that we’ll talk about at the end.
Draw a vertical line on each side of the sleeve which transects the point where the sleeve side meets the uppermost line you drew in the step above.

Where these vertical lines meet the bottom most line will be the corners of your hem allowance. Now I’ll draw in the final adjusted cutting lines, marked in green:

If you like, you can make a little half inch (the depth of the second fold of our hem) trim off each corner. This reflects the angle that this part of the hem will fold back along. Now, when you go to press up your hem allowance you should find that all of your side edges line up nicely with no easing or puckering of the hem itself.

Taking the trouble to trace off the sleeve with the new length and hem allowance added is worth doing, especially if you’re going to make multiples of the same shirt. However, for a one-off, quick fix you can do it directly onto the fabric.
Pin your shortened pattern piece onto the fabric and then cut parallel to the bottom making sure you’ve added your hem allowance. Don’t cut along the sides of the sleeve yet. Fold the fabric under along the bottom cut edge of the pattern piece so that the hem allowance is turned back up towards the sleeve head. Now you can simply cut along the sides of the pattern piece and the hem allowance will have the reflected angle of the tapering sleeve.
My husband’s first short-sleeved All Day Shirt kept the original curved hemlines, but for the next two I went for a more Hawaiian style shirt with a straight hem. I added side vents using Liesl’s neat tutorial.

As you can see we also busted out some pretty loud fabrics! I suspect there’s a sociology thesis in the quiet man / loud shirt paradox, but here we’ll stick to the sewing commentary.
As our summer starts to draw to a close, I hope I’ve inspired you to dream of the balmy evenings and party shirts that might be in your sewing future!