Hello and welcome! We hope you’ve been inspired and gathered your supplies for your Liesl + Co. Chai Tee. We’re so glad you’re joining us for the sew-along. If you aren’t ready to get started yet, rest assured the sew-along will still be here for you when you’re ready to start!

We’ll be working through the pattern over the next three days. Here’s our schedule, and each day is pretty easy!
- Day 1: Assemble the Shirt Front, Yokes, and Back
- Day 2: Finish the Neckline
- Day 3: Assemble and Attach the Sleeves, Finish the Tee
And, remember. If you want to grab a badge to share on your blog, you can get one from the post announcing the sew along.
Over the next couple of days, we will be updating this post by adding the steps for additional days as they arrive. So be sure to check back here if you are sewing with us day-by-day instead of looking for a new post each day.
Let’s begin, shall we?
Assemble the Shirt Front, Yokes, and Back
1) Using tailor’s chalk or a water-soluble fabric-marking pen, transfer the dots and fold lines from the shirt-front pattern piece to the right side of the cut fabric piece.
HINT: To transfer the dots, poke a pin through each dot on the pattern piece while the pattern is still pinned to the fabric. One dot at a time, gently pull open the fabric layers along the pin’s shank; and mark the fabric at the pin to transfer the dot to the wrong side of the fabric on both halves of the shirt front. Remove the pin and pattern piece and use a ruler and a water-soluble fabric-marking pen or tailor’s chalk to connect the marked dots to their corresponding notches, referring to the pattern piece as a guide.
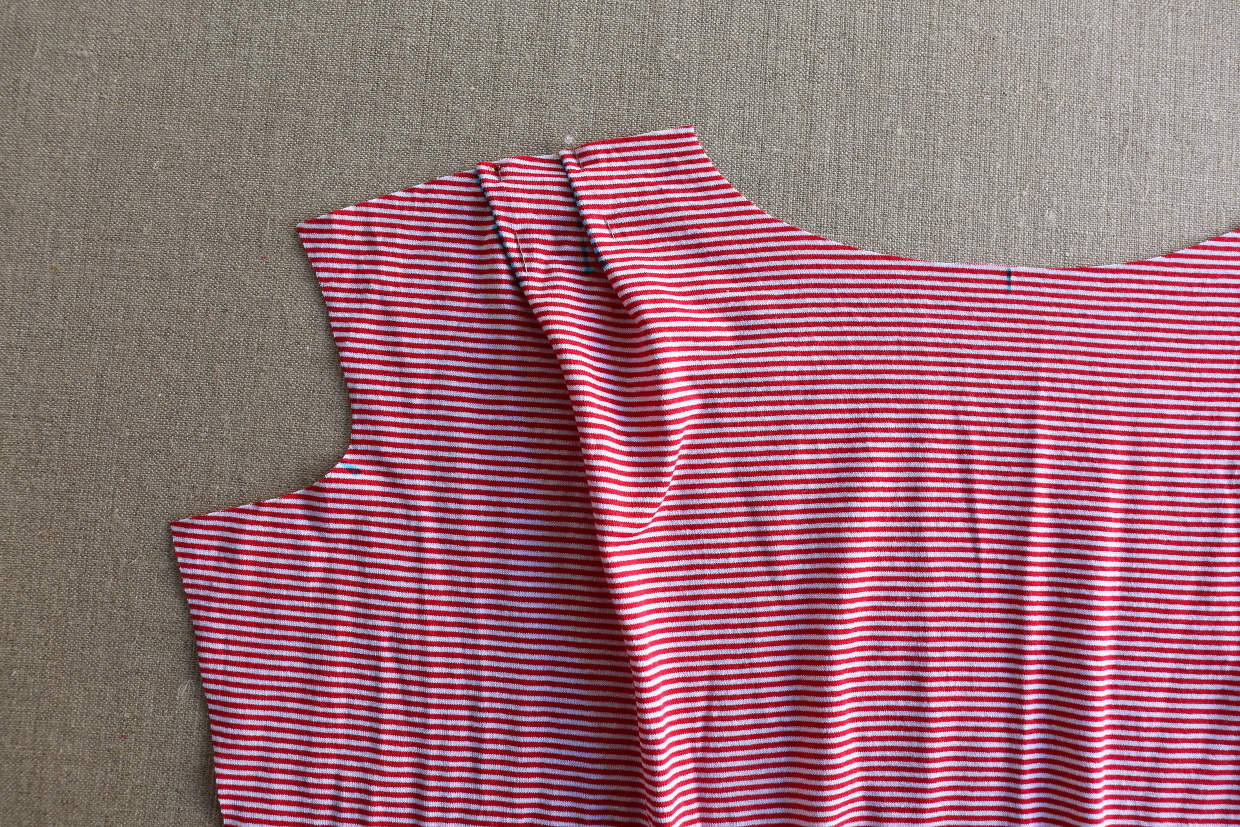
2) To form each pleat on the shirt front, fold the fabric along the line with the large dots, wrong side together, and match the crease to the line with the small dots. Baste the pleats to the shirt with a 3/8” seam to hold them in place.
From Liesl: If you prefer to fold the pleats in the opposite direction, that works too!

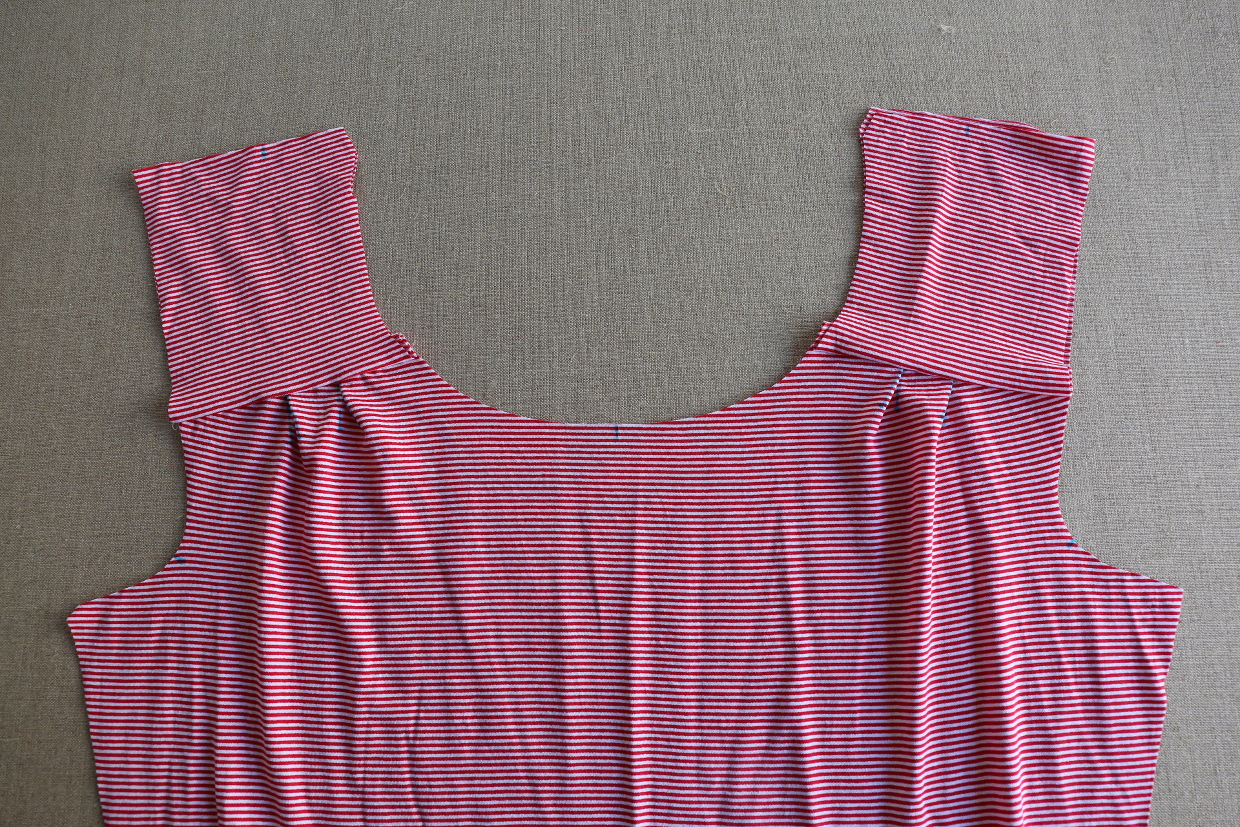
3) Pin one yoke to the shirt front at the shoulder, with right sides together, aligning the notches and raw edges. Pin the right side of the second yoke to the wrong side of the shirt front so the shirt front is sandwiched between the two yokes. Stitch the three layers with a 1/2” seam. Repeat to attach the second set of yoke pieces to the other shoulder.
4) Trim the seam allowances to 1/4” and press the yokes away from the shirt front.
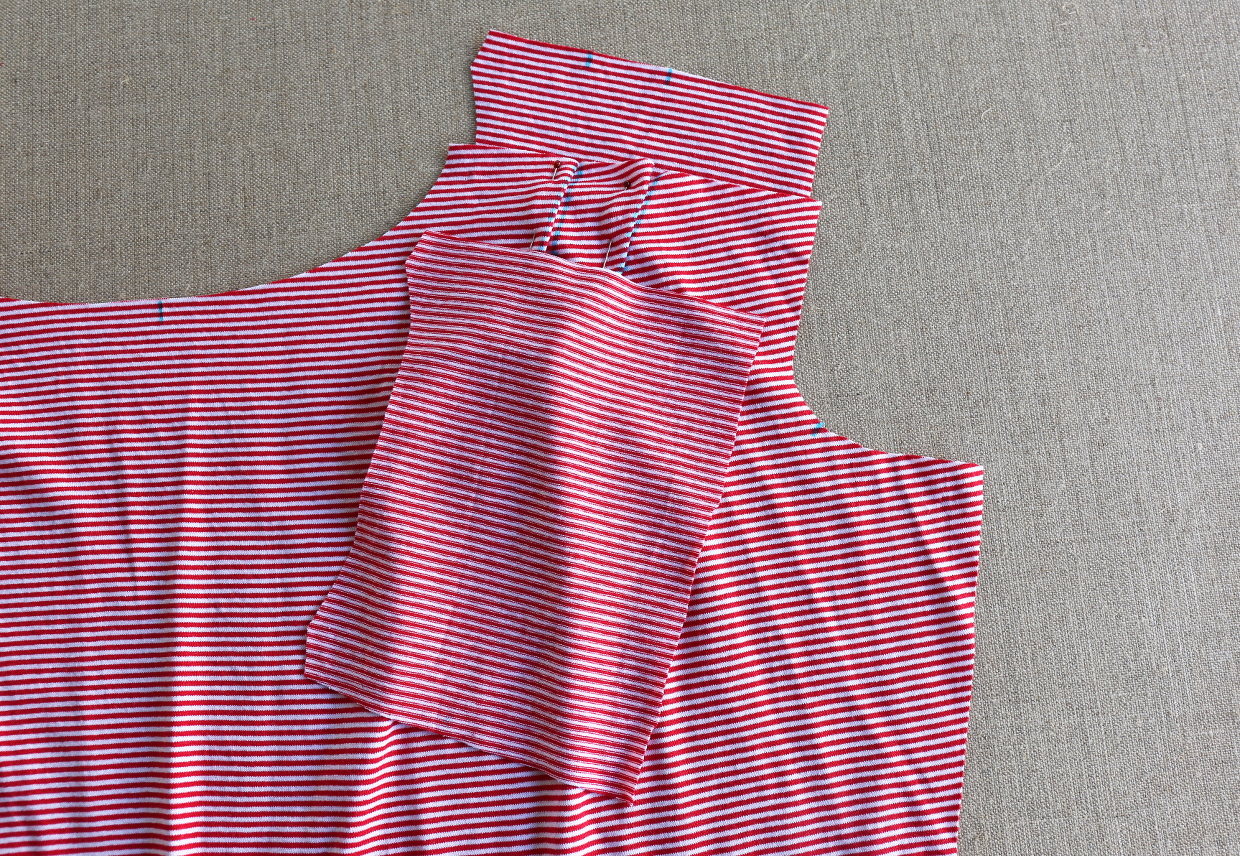
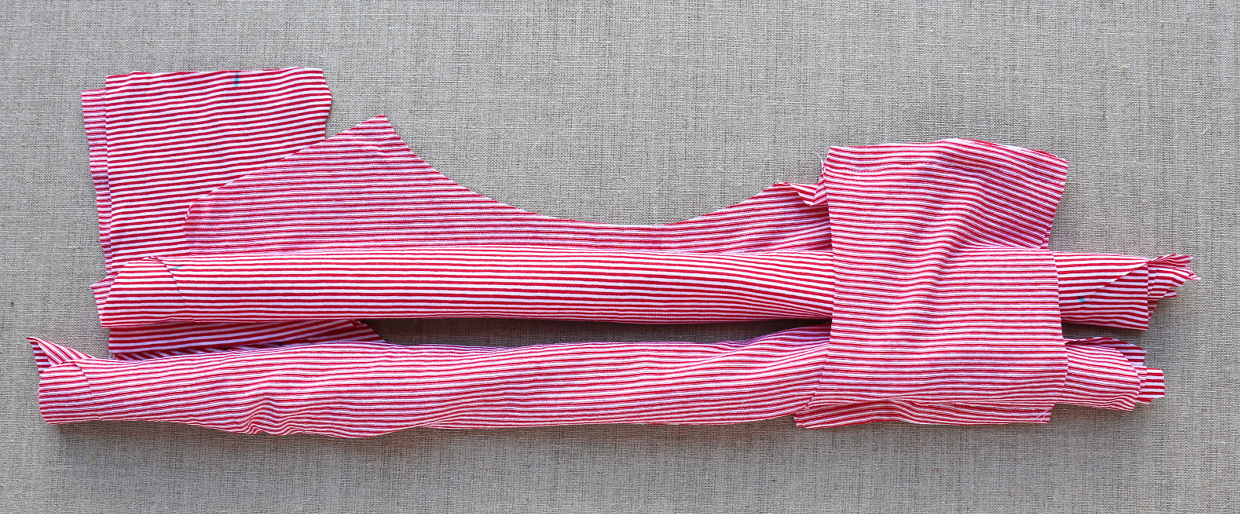
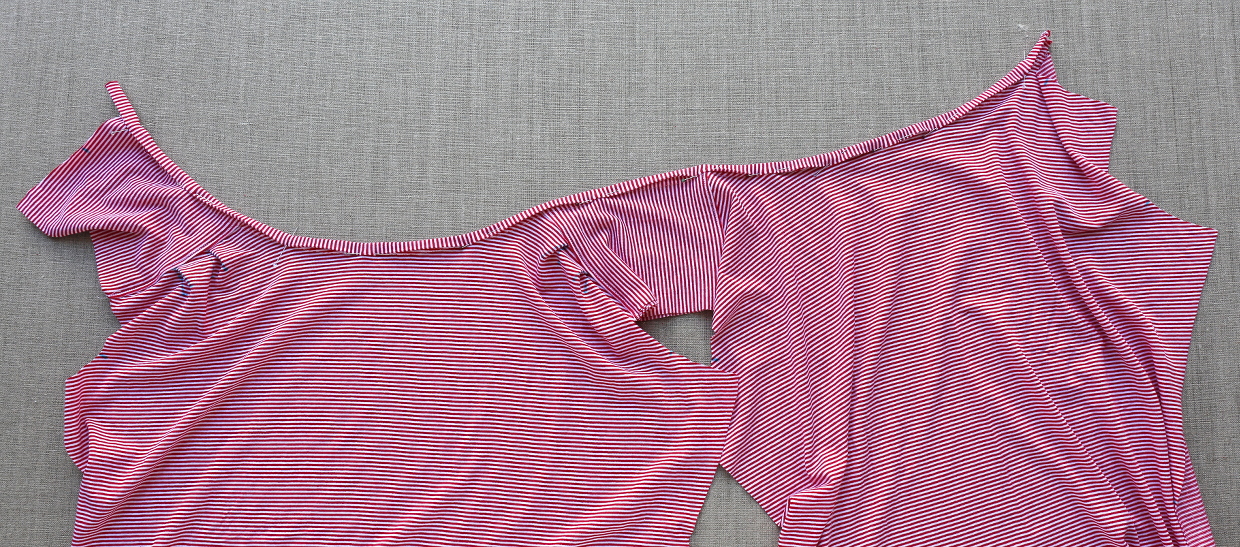
5) Roll the right side of the shirt front from the hem edge toward the neckline, stopping an inch or two below the yokes.
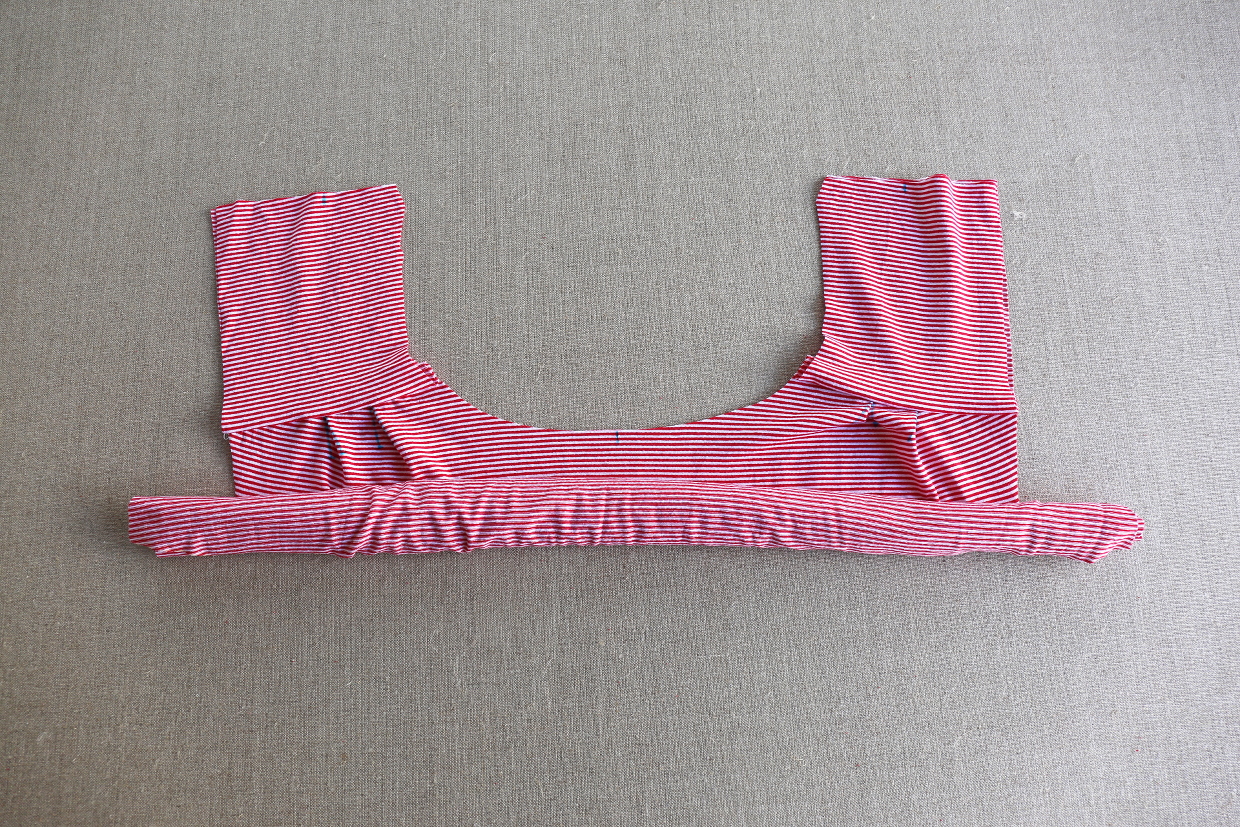
6) Roll the wrong side of the shirt back from the hem edge toward the neckline, stopping just short of the neckline.
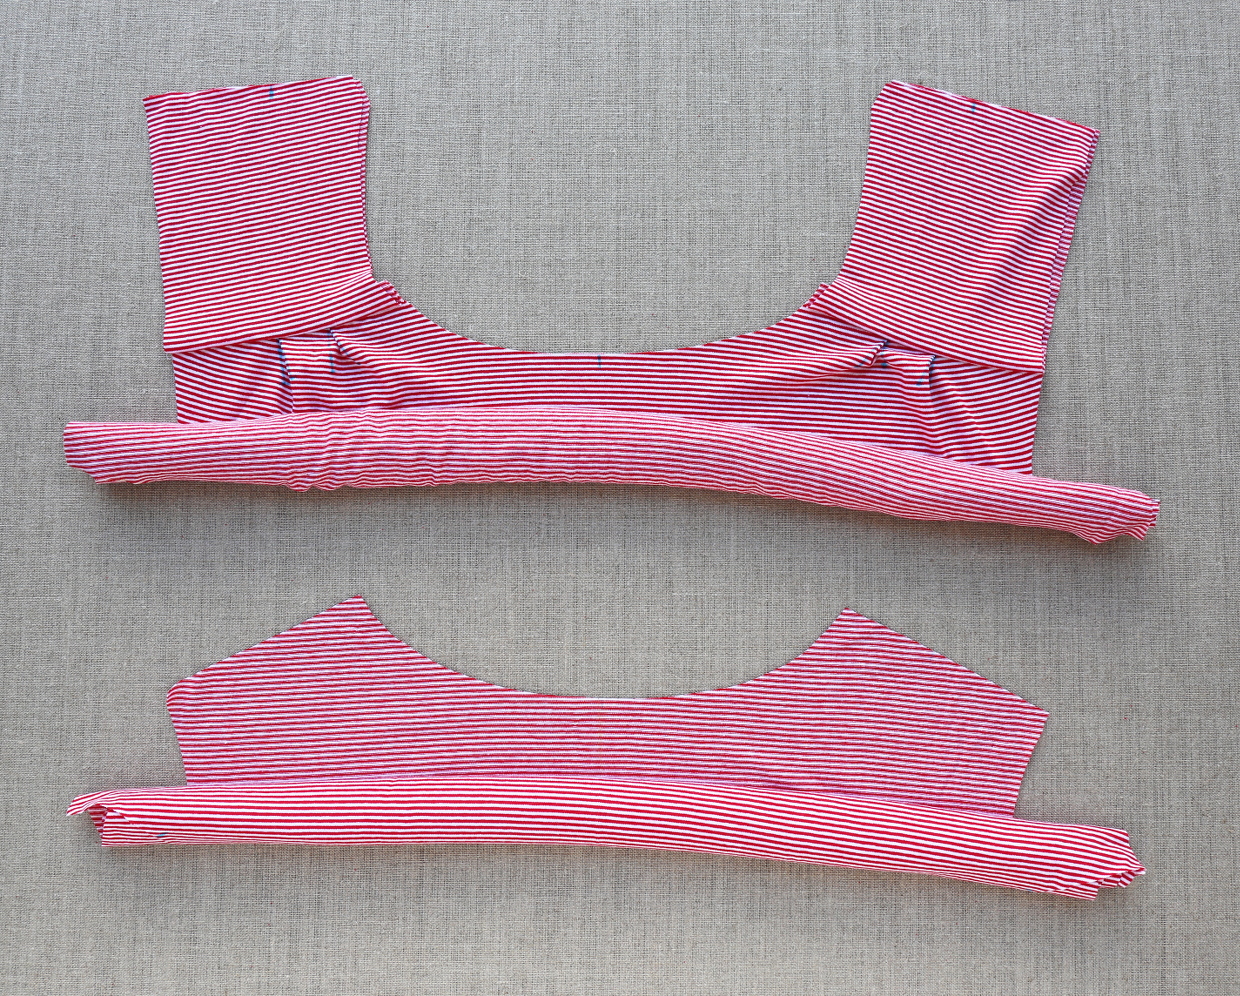
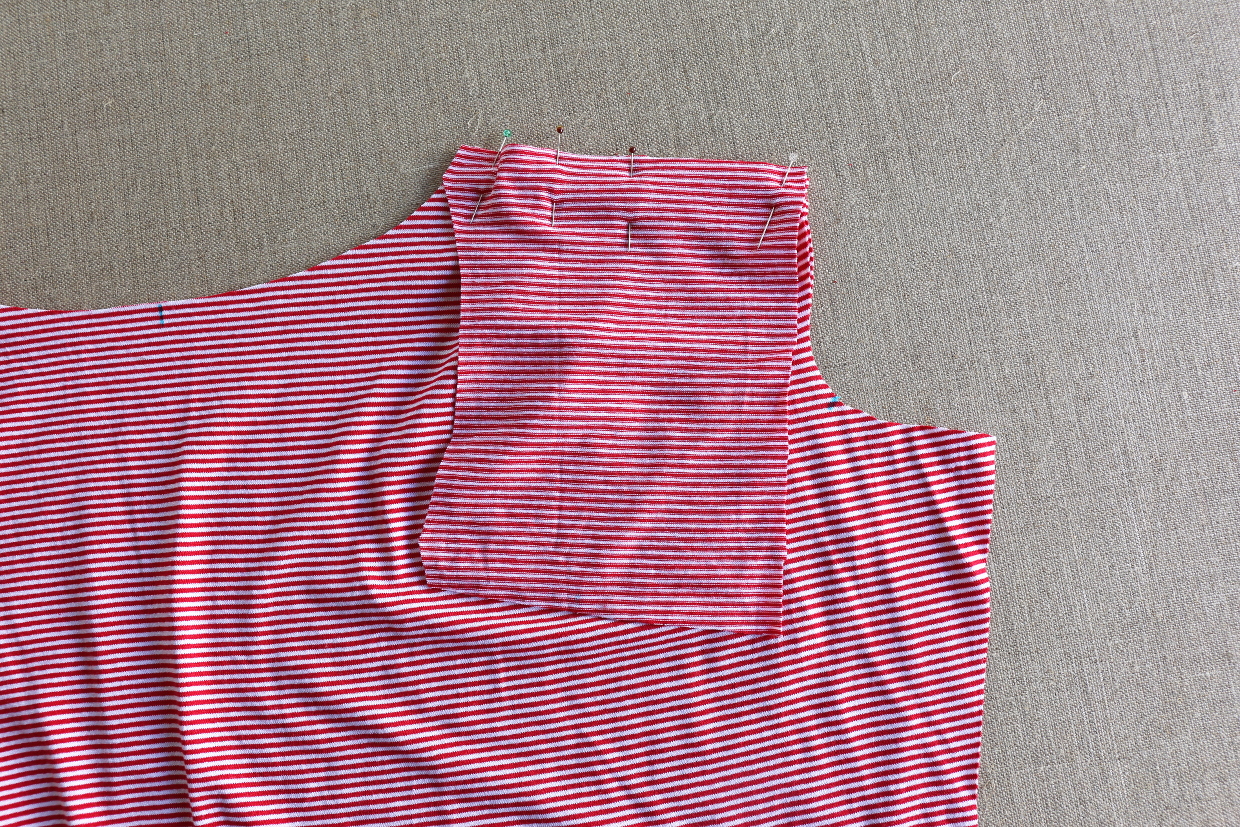
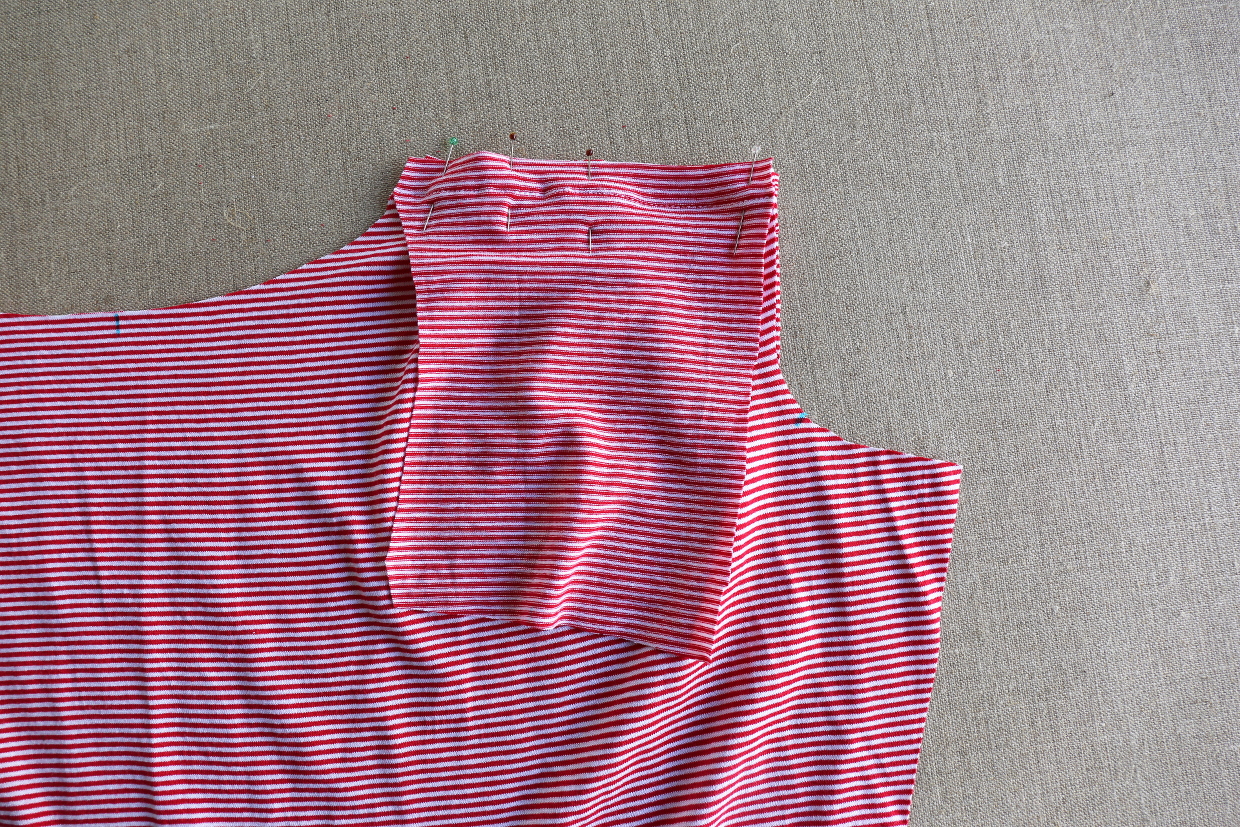
7) Place the rolled shirt back on top of the rolled shirt front, between the rolled portion and the yokes. Then, on one shoulder only, wrap the two yoke pieces around the rolled shirt pieces and pin them to the shoulder of the shirt back so that the right side of the yokes face each other, with the shoulder of the shirt back sandwiched between them. Stitch the pinned shoulder with a 1/2” seam, backstitching or lockstitching at both ends. (This is sometimes referred to as the “burrito method” of yoke construction because of all the fabric rolling.) Leave the yoke on the opposite shoulder unstitched to make it easier to attach the neck binding.
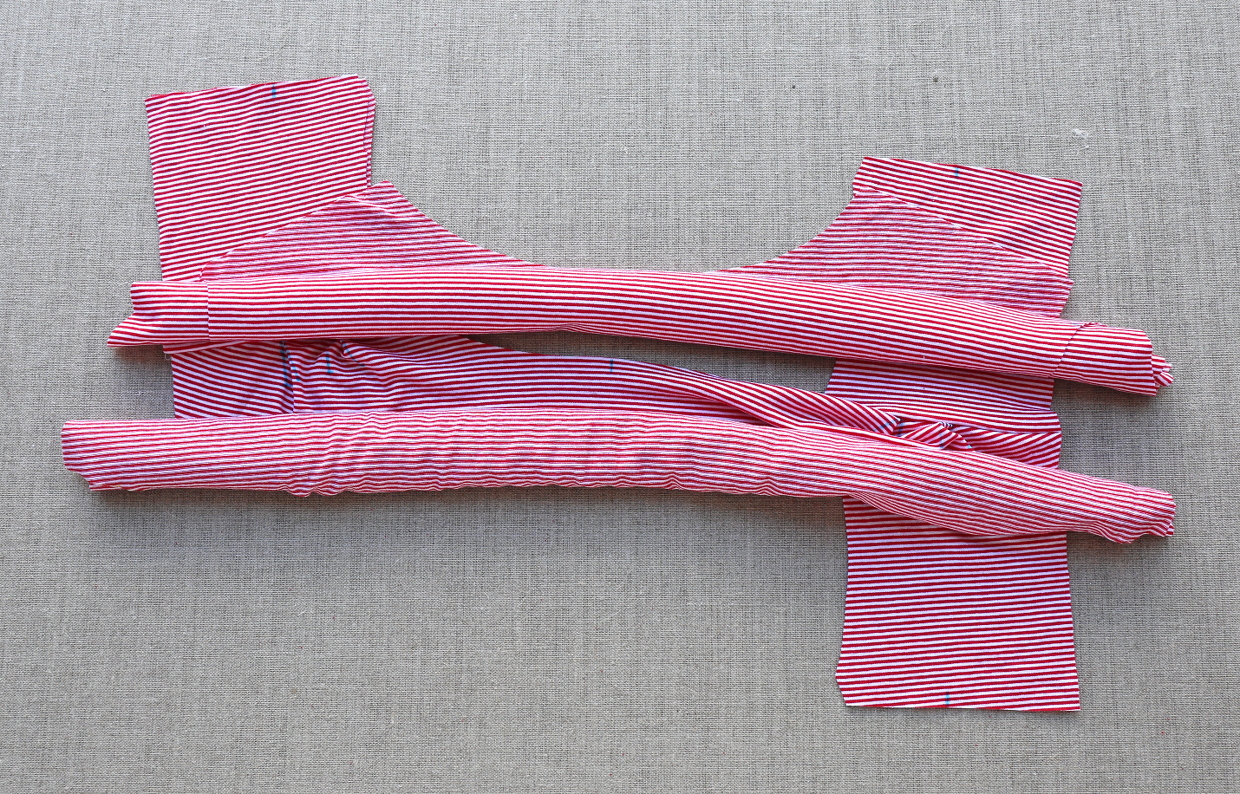

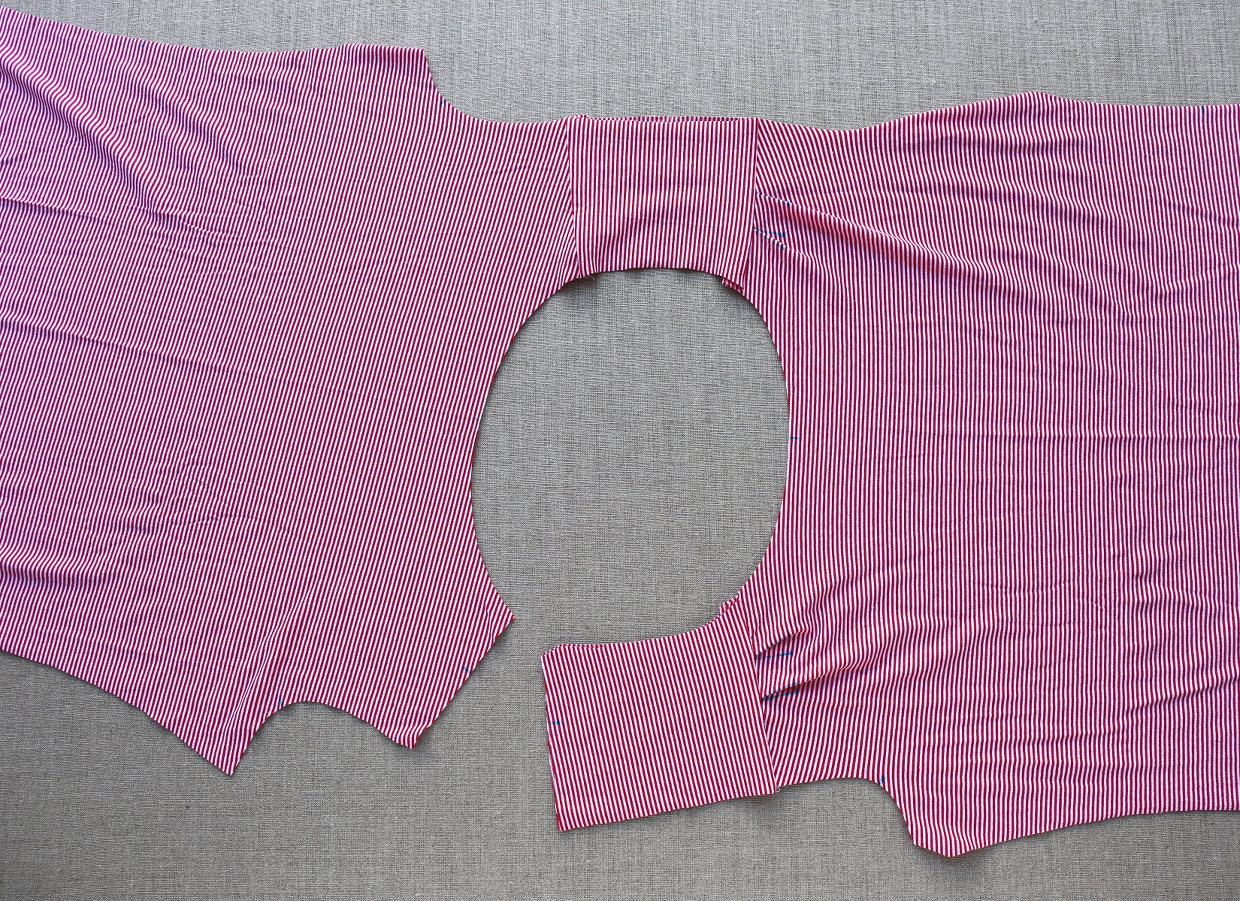
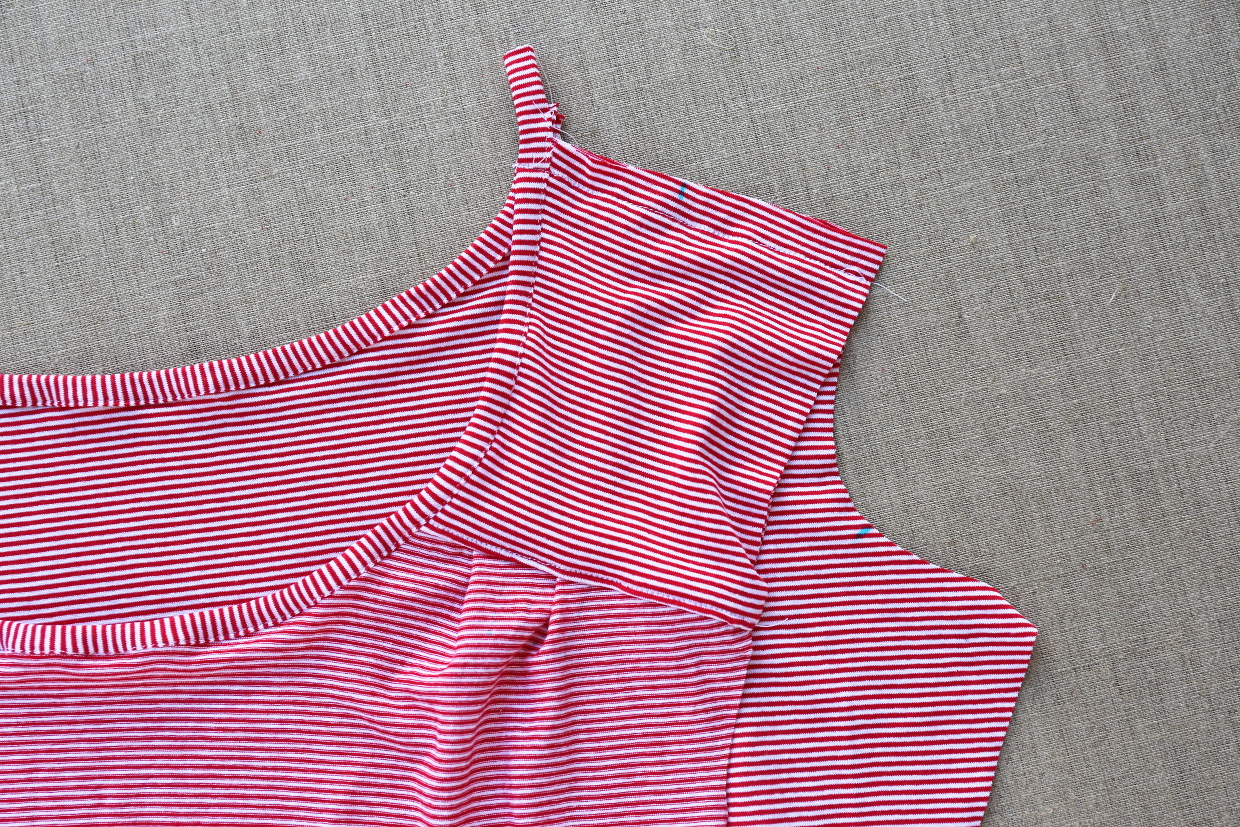
8) Turn the stitched shoulder yoke right-side out and unroll the shirt front and back. The tee is now connected at one shoulder, and that yoke is clean-finished on both the inside and the outside of the shirt. The other shoulder is still unsewn to make it easier to attach the neck binding. Press the stitched seams and edge stitch the pressed seams to finish them. Baste the unsewn yoke edges together to make it easier to work with them as one layer going forward.
HINT: To edgestitch the yoke seams, use a walking foot and lengthen the stitch length to approximately 3.2 mm. Stitch approximately 1/8” from the seam, taking your time to keep the stitching even and smooth.
From Liesl: By sewing the yoke this way we leave one seam shoulder seam open, which makes it easier to finish the neckline. Once you’ve sewn the shirt this way you might decide you prefer to sew both shoulders at the same time and attach the neck binding in a loop, which is a perfectly valid way to sew the shirt as well. It all depends on your personal preference!
That wasn’t too difficult, was it? Be sure to come back for Day 2 of the sew-along when we tackle the neck binding. See you then!
Finish the Neckline
From Liesl: I debated about the best way to finish the neckline of this top and ultimately decided this way looked best and gave good results. But if you have a different method, feel free to use it! Everyone has their own preferences. I’ve found that a walking foot really helps for sewing the binding, but if you don’t have a walking foot try putting a piece of tissue paper under between the fabric and the feed dogs to give the fabric a little support.
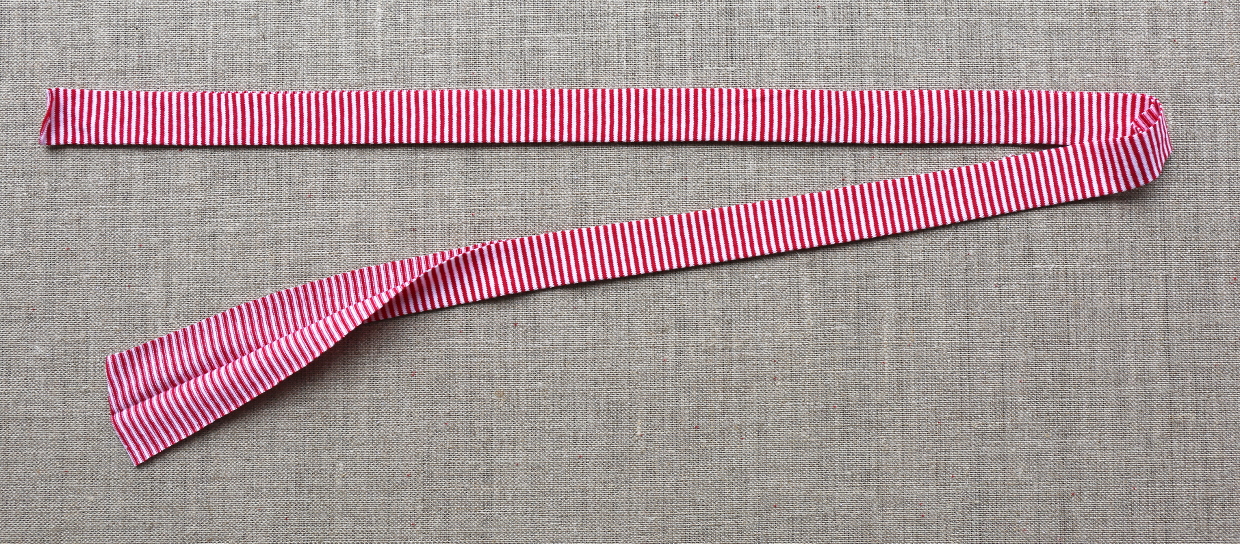
1) Fold the neck binding in half lengthwise, with wrong sides together, and press the fold to make a center crease. Open the piece and fold and press the two long edges to the center crease.
HINT: Use lots of steam when you press so the creases will stay in place when you start working with the binding.

NOTE: If you sew this pattern in woven fabric, it works best to cut the neck binding on the bias. You may also want to add length to the binding and stretch it less as you stitch it.
2) Unfold the neck binding and working on the wrong side of the tee, pin the right side of one long edge of the binding to the neckline, leaving approximately 1/2” of binding extending beyond each end. Stretch the binding to fit the neckline, pinning it in place evenly as you progress. Stitch the binding to the neckline with a 1/4” seam. (The smaller seam allowance will give enough room for the binding to wrap around the neckline in the next steps.)
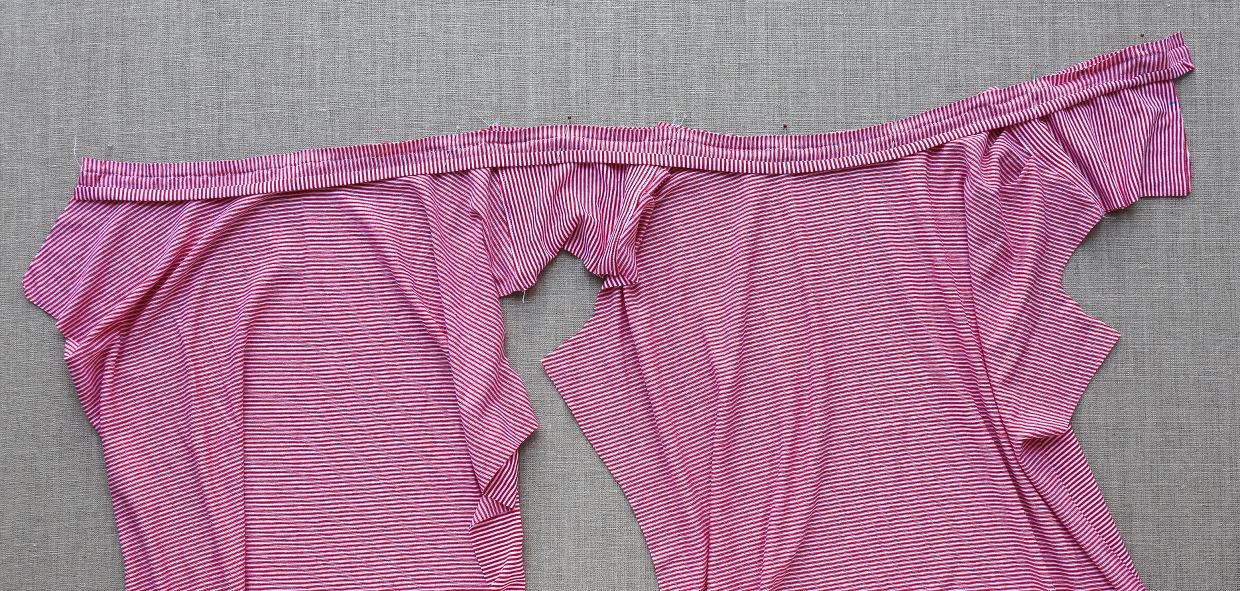
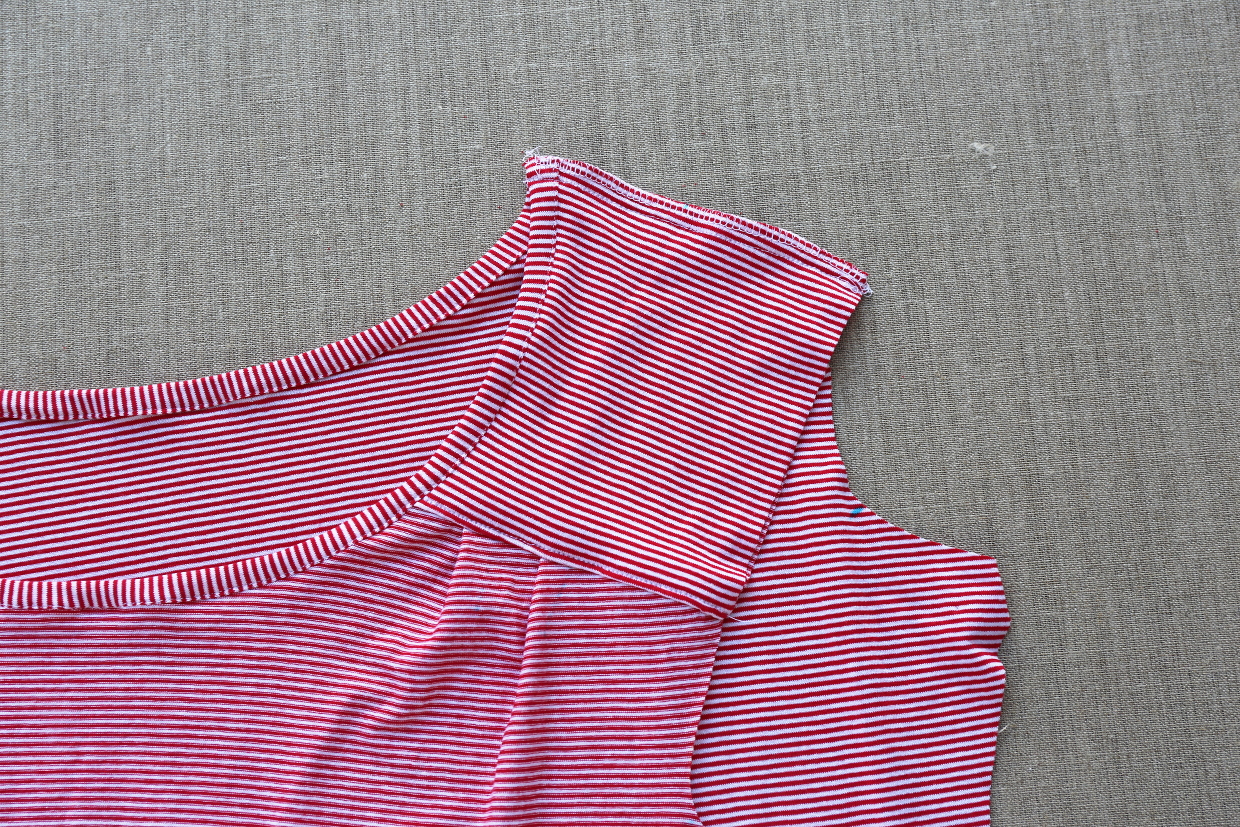
3) Turn the tee over so the right side is up and wrap the binding around the neck edge. Pin the binding to cover the stitching line and edgestitch the binding to the neckline. As with the edgestitching on the yokes, a long stitch length (3.2 mm) and a walking foot works best for this step.

4) Pin the unsewn back shoulder to the unsewn yoke with right sides together. Stitch the shoulder and with a 1/2” seam, continuing through the neck binding and backstitching and lockstitching at both ends. Take care, as you stitch, to keep the edges of the neck binding very even so the neckline will have a neat finish.
5) Trim the neck binding that extends beyond the seam allowances and trim the seam allowances to 1/4”. Finish the seam allowances together using your preferred method. Press the finished seam allowances toward the yoke. Edgestitch the yoke seam to match the other yoke seams, catching the neck binding in the stitching to hold it in place so it won’t be visible when the tee is worn.
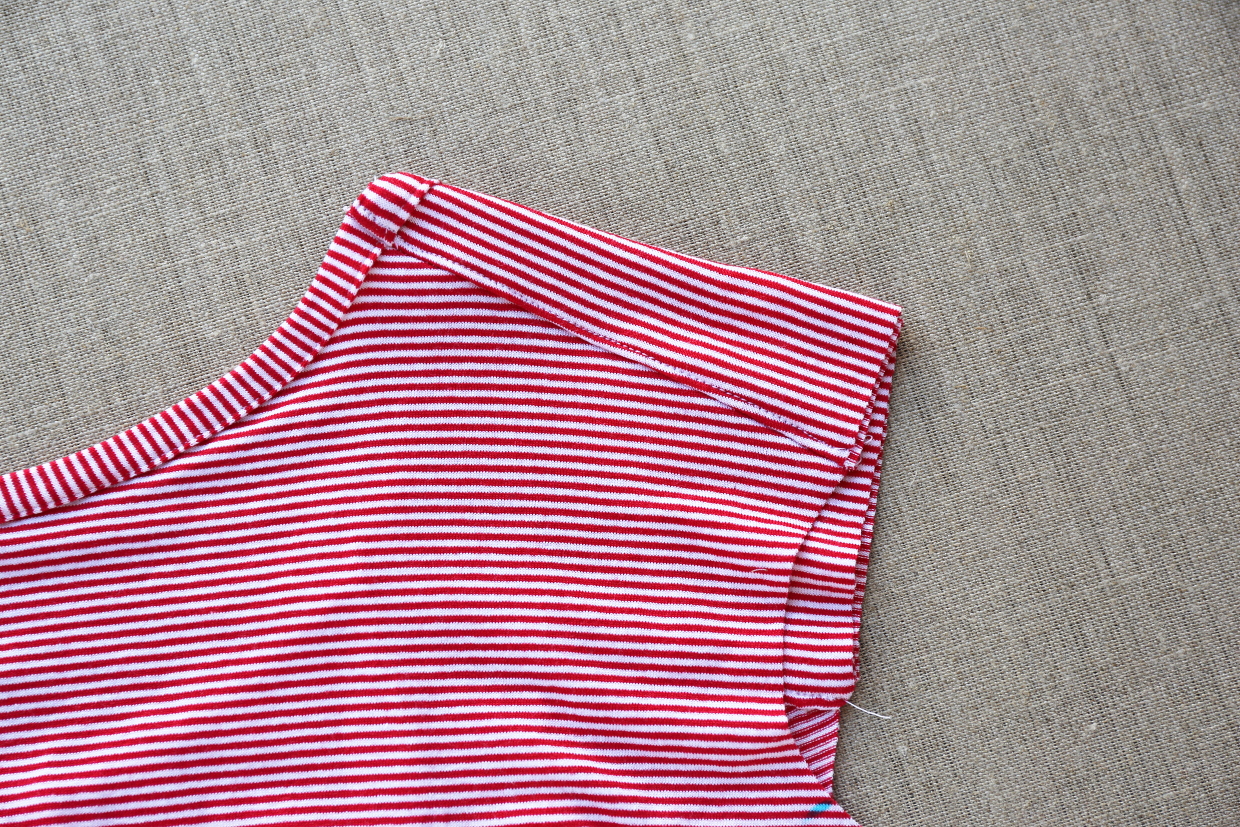
6) With right sides together, pin the front and back of the tee together along the side edges. Stitch the sides with a 1/2” seam, backstitching or lockstitching at both ends. Trim the seam allowances to 1/4” and finish them together using your preferred method.
From Liesl: You can see that I used a serger and trimmed the seam allowances as I serged for the side seams. If you have a serger but aren’t sure where to line up the fabric with your machine to get the right seam allowances, mark the first few inches with a 1/2″ line (use scraps to test) and watch to see where the edge of the fabric needs to line up with your machine in order to stitch on the 1/2″ line. You can even mark this spot on your machine with a little washi tape to use as a guide in order the keep the stitch line consistent.

Tomorrow we’ll finish up! I hope your top is coming along well.
Let’s sew this one up!
Assemble and Attach the Sleeves
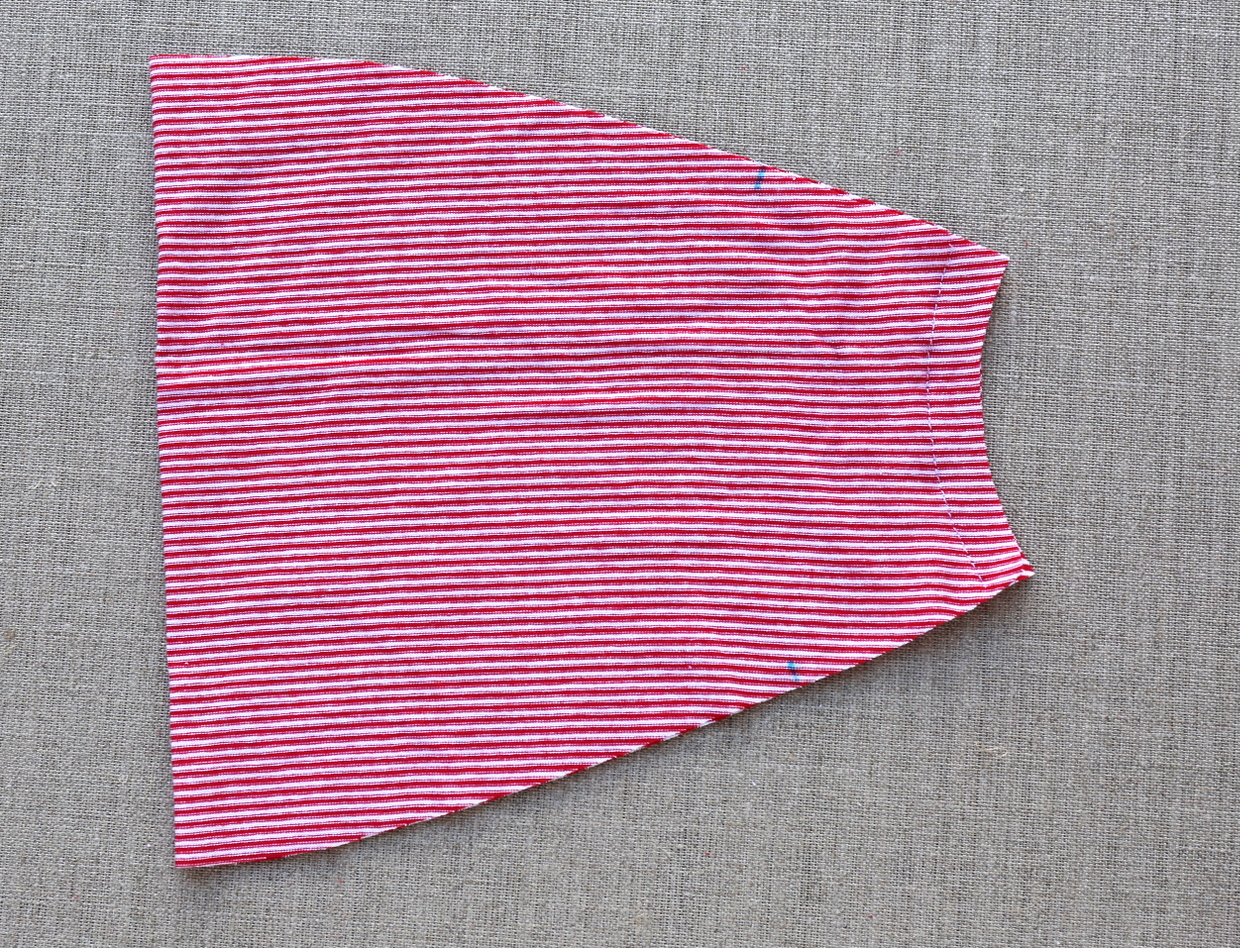
1) Fold one sleeve in half with right sides together, matching the two short edges. Stitch the short edges with a 1/2” seam, backstitching or lockstitching at both ends, to make a tube.
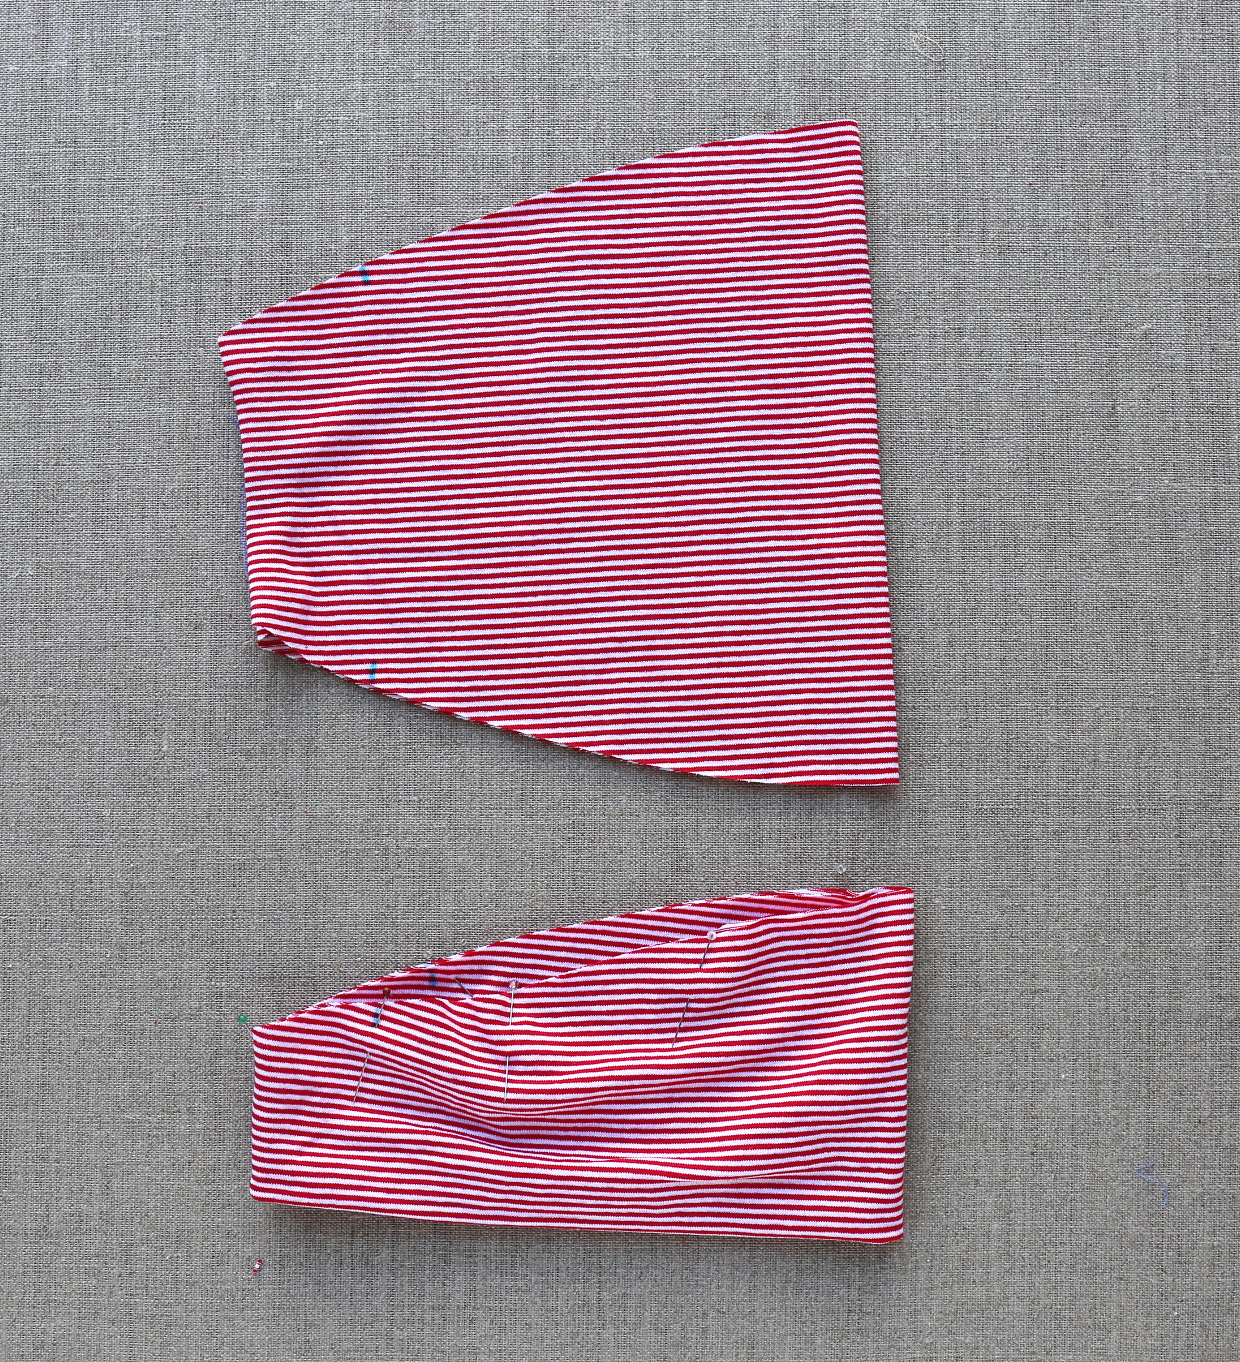
2) Press the stitched seam allowances open and trim them to 1/4”, then turn the stitched sleeve right-side out and fold the resulting tube in half, with wrong sides together, aligning the notches and raw edges. Pin or baste the raw edge of the sleeve with a scant 3/8” seam to hold it together temporarily.
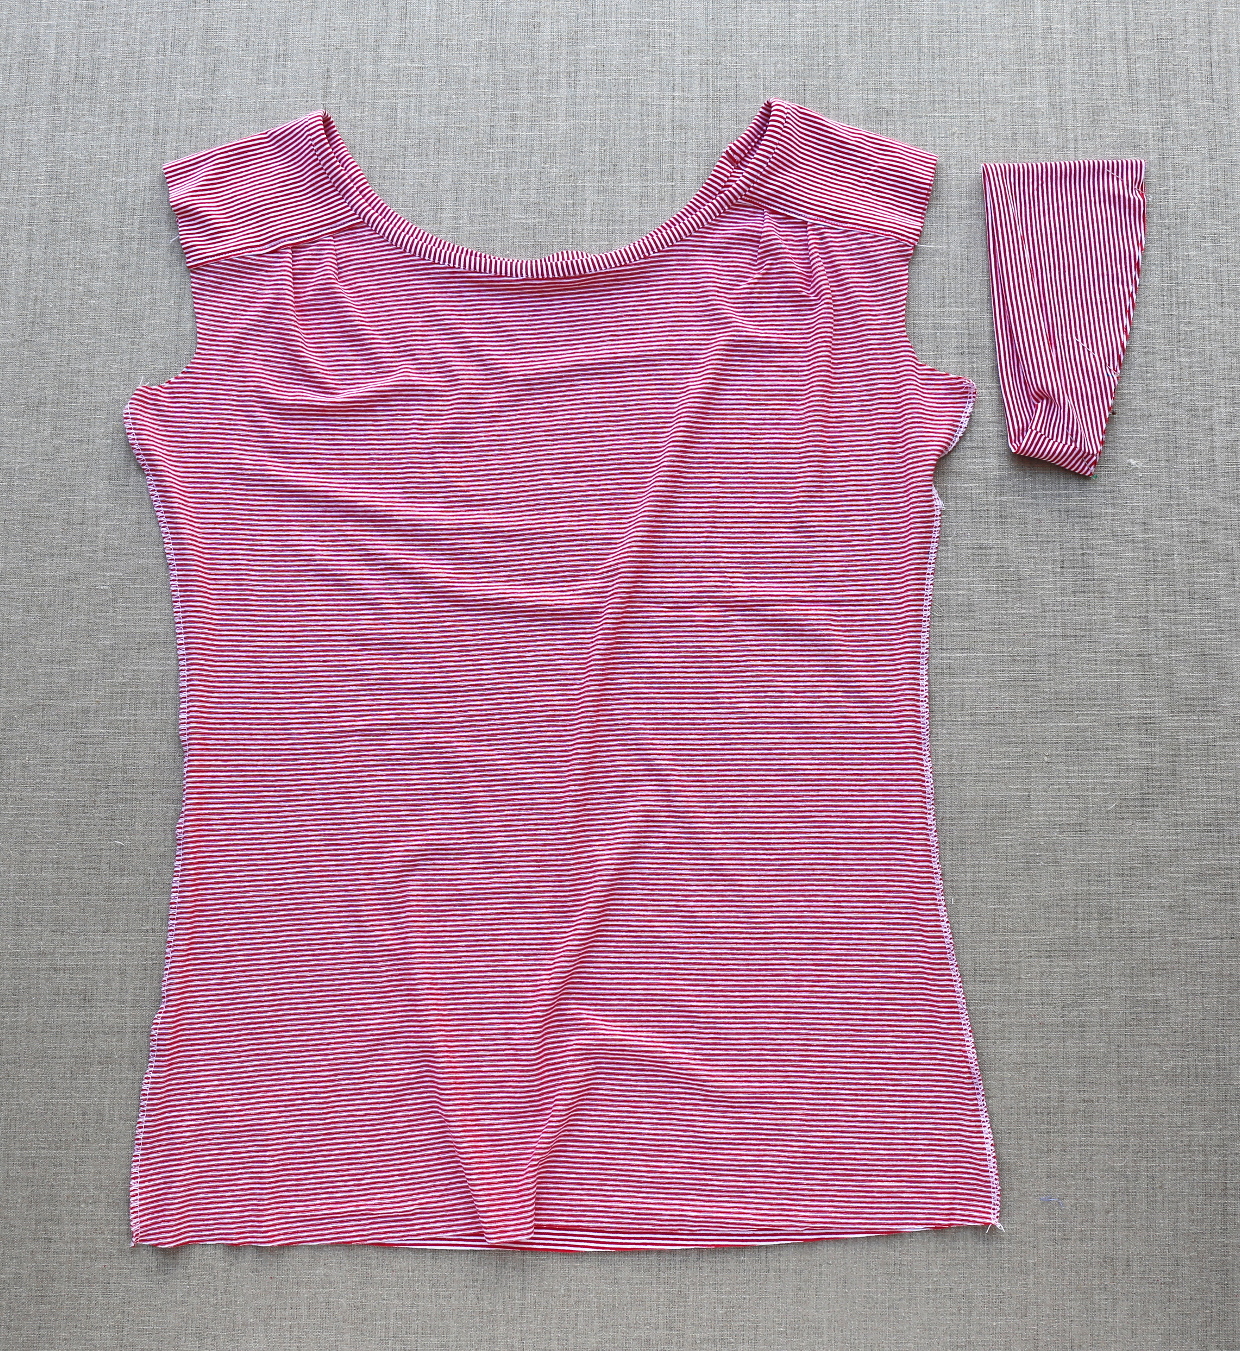
3) Turn the tee inside out and slip one sleeve into the armhole. Match the raw edges, seams, and notches, and stitch the layers together with a 1/2” seam, backstitching or lockstitching at both ends to secure your stitching. Trim the seam allowances to 1/4” and finish them together.
Finish the Tee
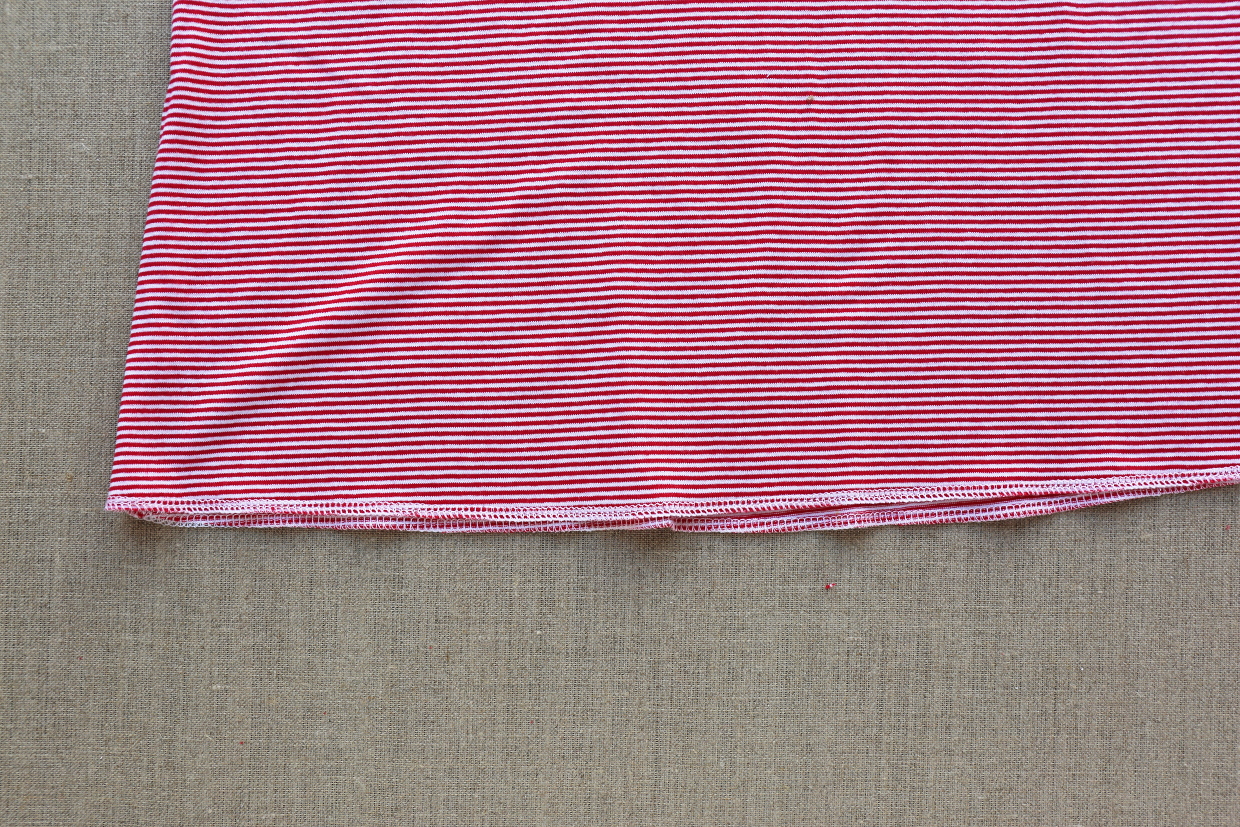
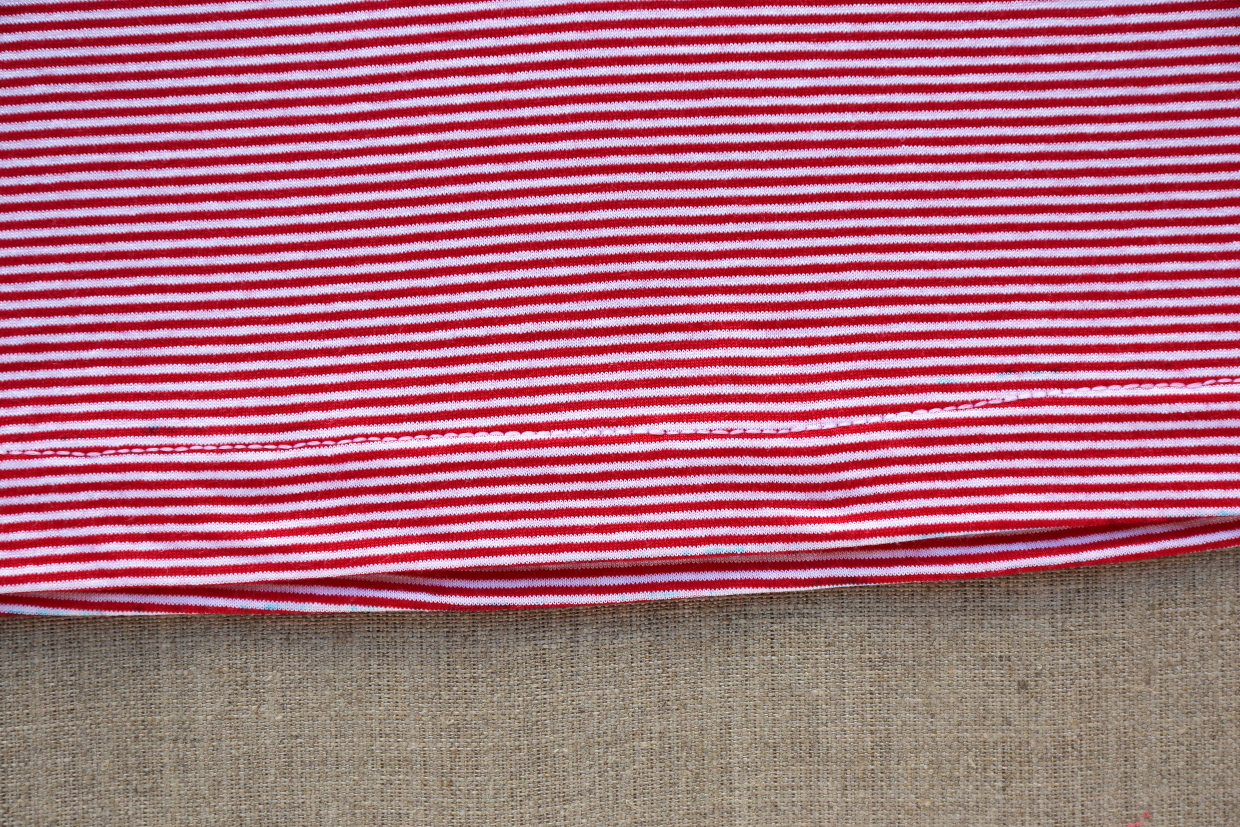
1) Finish the raw bottom edge of the tee with a zigzag stitch or with the serger (disengage the serger’s knife, or serge the edge without trimming it.) Then press the finished edge to the wrong side by 1” and pin it in place. To hem the tee, stitch close to the finished edge of the folded hem with a narrow zigzag stitch or with a double needle for a really professional look. (If you have a coverstitch machine, you’ll want to use it here.)
From Liesl: I prefer to use a water-soluble fabric pen to draw a 1″ hem line on the outside of the tee to use as a folding guide, but you could also use a hem guide if you have one. One of my favorite ways to stitch a hem is to use a double needle. (For a tutorial, click here.)
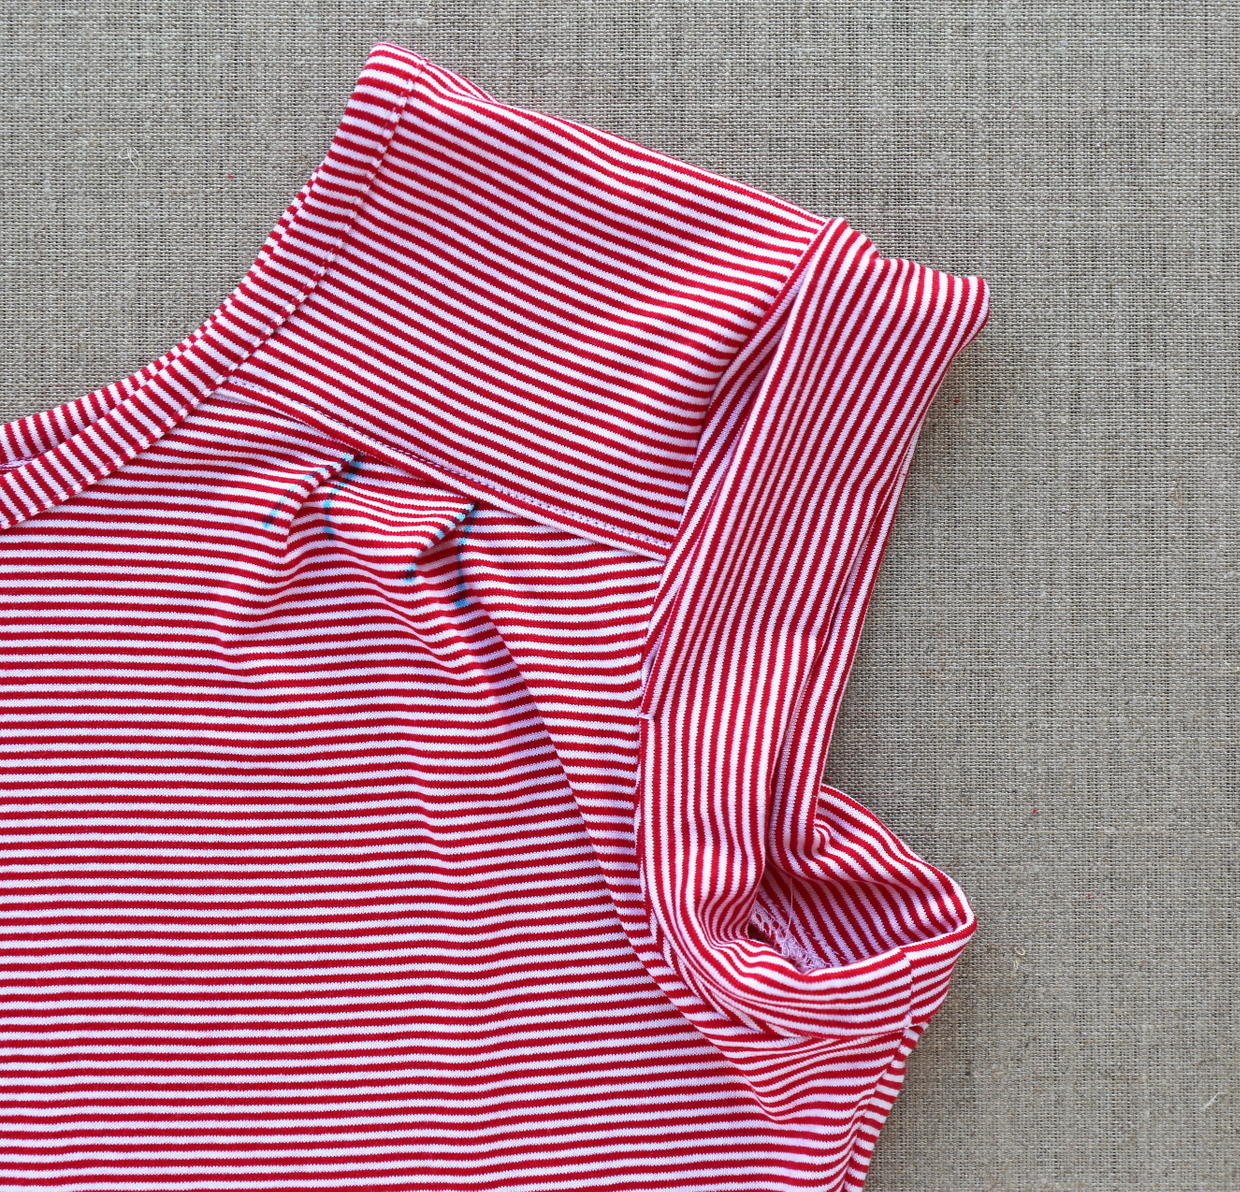
2) For View B, fold back the sleeve onto itself and use a small machine-bartack to secure the folded edge of the sleeve to the seam at the top, bottom, and halfway up the front and back of the armhole to keep it discreetly in place.
HINT: A bartack is a zigzag stitch with the stitches very close to each other. Set your stitch length very short (0.5 mm), and choose a zigzag stitch that’s not too wide (2.5-3.0 mm).
3) You’re finished!
We hope you’ve had fun sewing this pattern and will sew many more tees using it in the future. Don’t forget to tag your tees #lieslandco and #chaitee so we can see them! And once you’ve posted your photo add a link here.
That is a very clear description/images of the burrito method! Thank you 🙂
Hi Sil, Apologies that I didn’t see your comment until just now. Your fabric choice will have a big impact on the neckline. If you have a very drapey, stretchy fabric you’ll want to stretch the binding a lot more as you apply iot. I prefer the method we used in the instructions/sew-along because it adds less bulk and still gives lots of stretch. I hope that helps!
How can I make the sleeves longer in this pattern?