From Liesl: We’re delighted that my dear friend Rita is here to lead you through the process of sewing a pair of SoHo Shorts for this sew-along. Rita specifically requested that I design a pattern like this, so it seems particularly fitting that she should be the one to talk you through sewing the shorts. I hope you’ll learn lots of fun new techniques through this pattern. I use this method of sewing the waistband a lot because it gives such a professional result, with no stretching out once you’ve finished sewing it! If you prefer to sew the SoHo Skirt you can also follow along, although there are a few differences (mostly in how the pleats are formed), so you’ll want to refer directly to the instructions for those steps.
We’ll be working through the pattern over the next five days. Here’s our schedule, and each day is pretty easy!
- Day 1: Make the Shorts Pleats.
- Day 2: Sew the Pockets.
- Day 3: Assemble the Shorts, Prepare the Side Seam for Zipper, Attach the Waistband.
- Day 4: Attach the Zipper.
- Day 5: Finish the Shorts.
And, remember. If you want to grab a badge to share on your blog, you can get one from the post announcing the sew along.
Over the rest of this week, we will be updating this post by adding the steps for additional days as they arrive. So be sure to check back here if you are sewing with us day-by-day instead of looking for a new post each day.
And with that, let’s kick off the sewing! Here is Rita.

Getting Started
1. In addition to cutting the interfacing called for on the pattern pieces, cut two 1” by 7” strips of interfacing for the zipper.

Make the Shorts Pleats
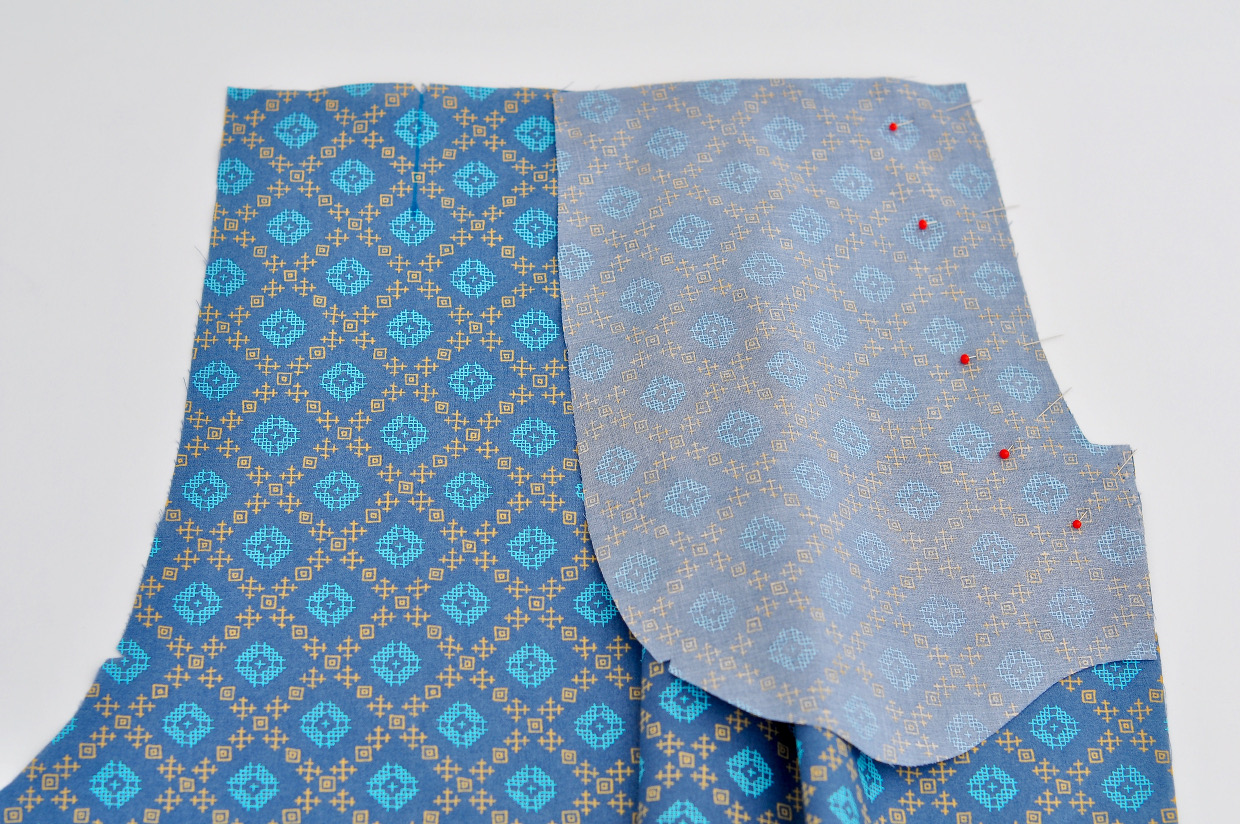
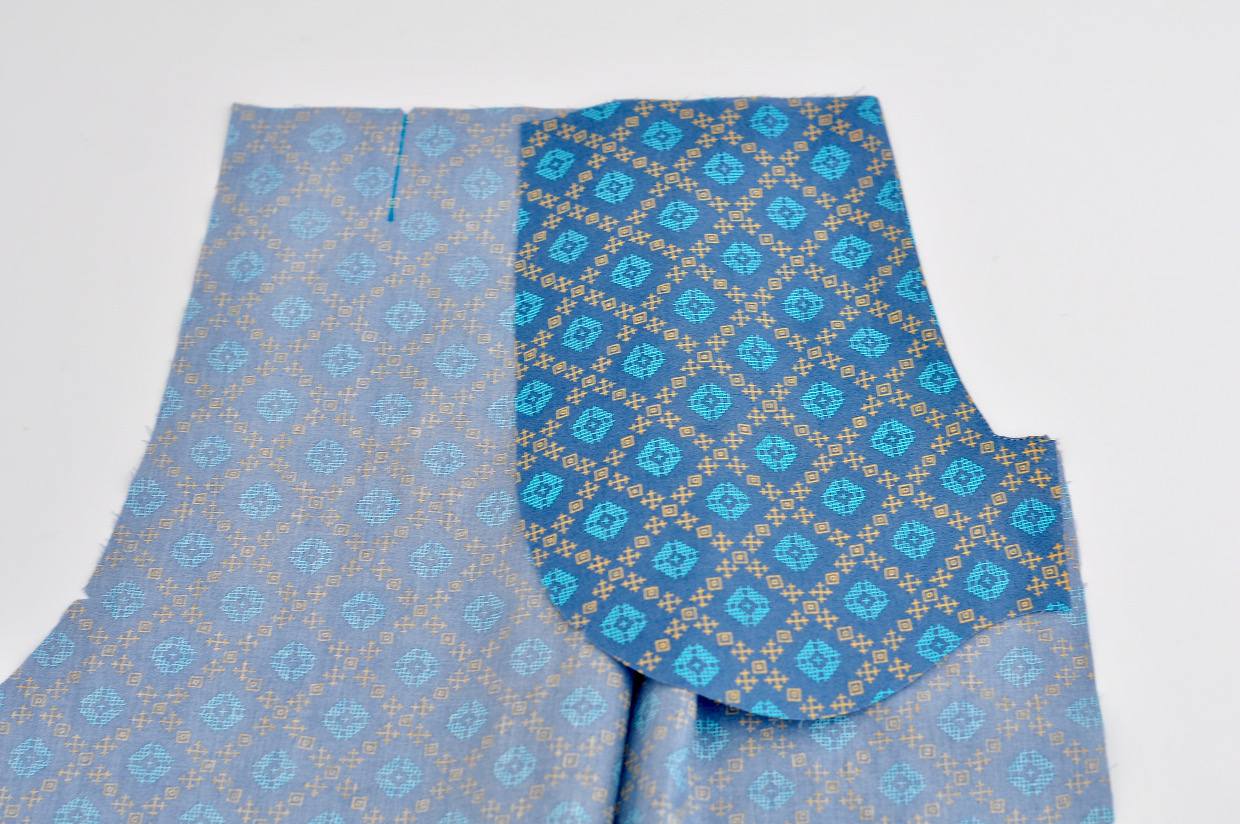
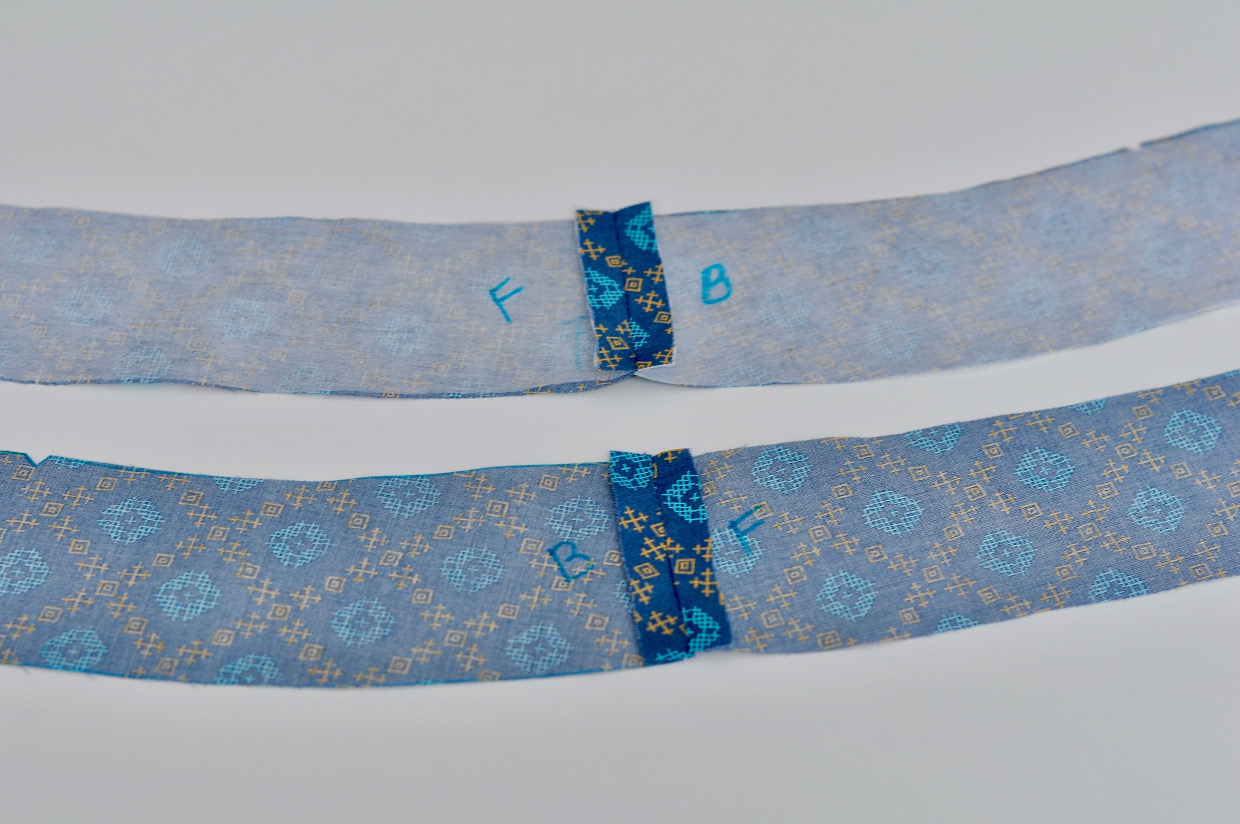
1. Using tailor’s chalk or a water-soluble fabric-marking pen, transfer the dots and fold lines from the shorts-front and shorts-back pattern pieces to the right side of the cut fabric pieces.
Hint: to transfer the dots, poke a pin through each dot on the pattern piece while the pattern is still pinned to the fabric. one dot at a time, gently pull open the fabric layers along the pin’s shank and mark the fabric at the pin to transfer the dot to the right side of the fabric on both halves of the shorts front. Remove the pin and pattern piece and use a ruler and a water-soluble fabric-marking pen or tailor’s chalk to connect the marked dot to its corresponding notch, referring to the pattern piece as a guide.
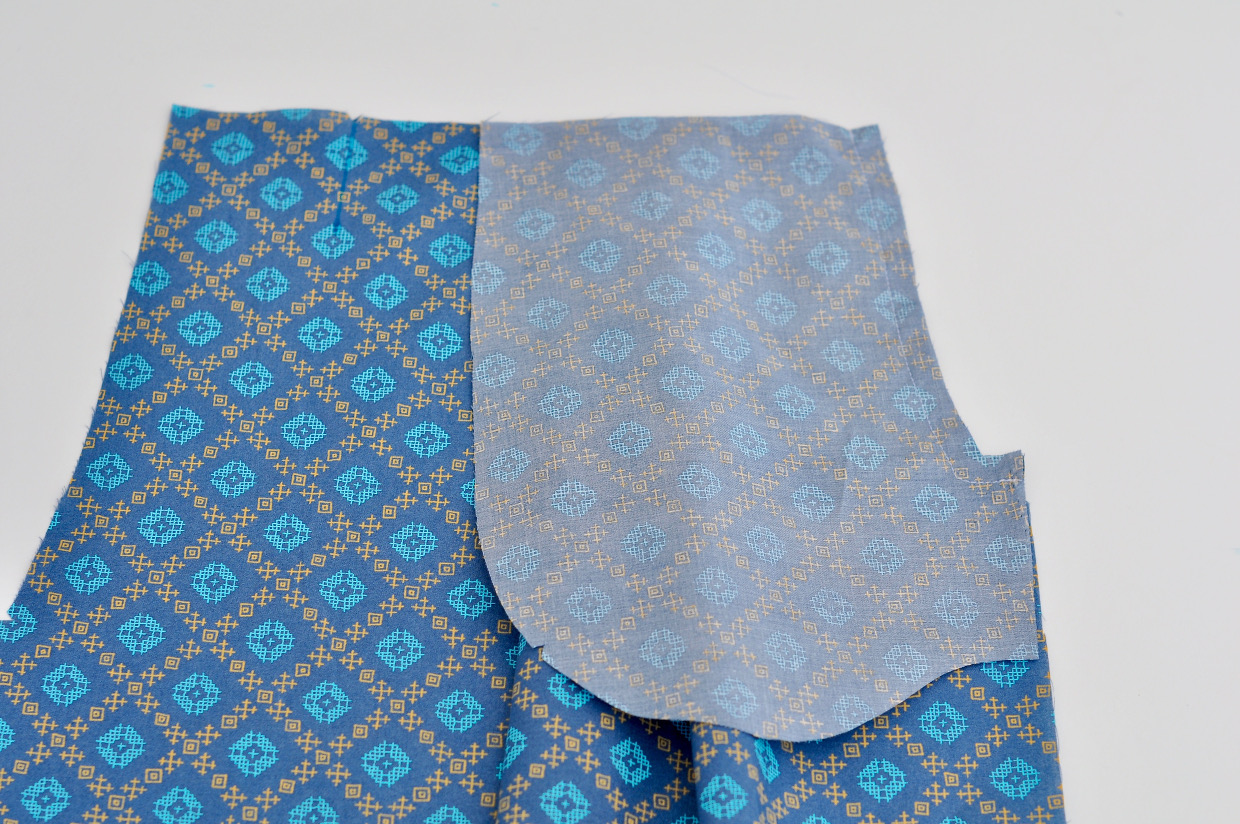
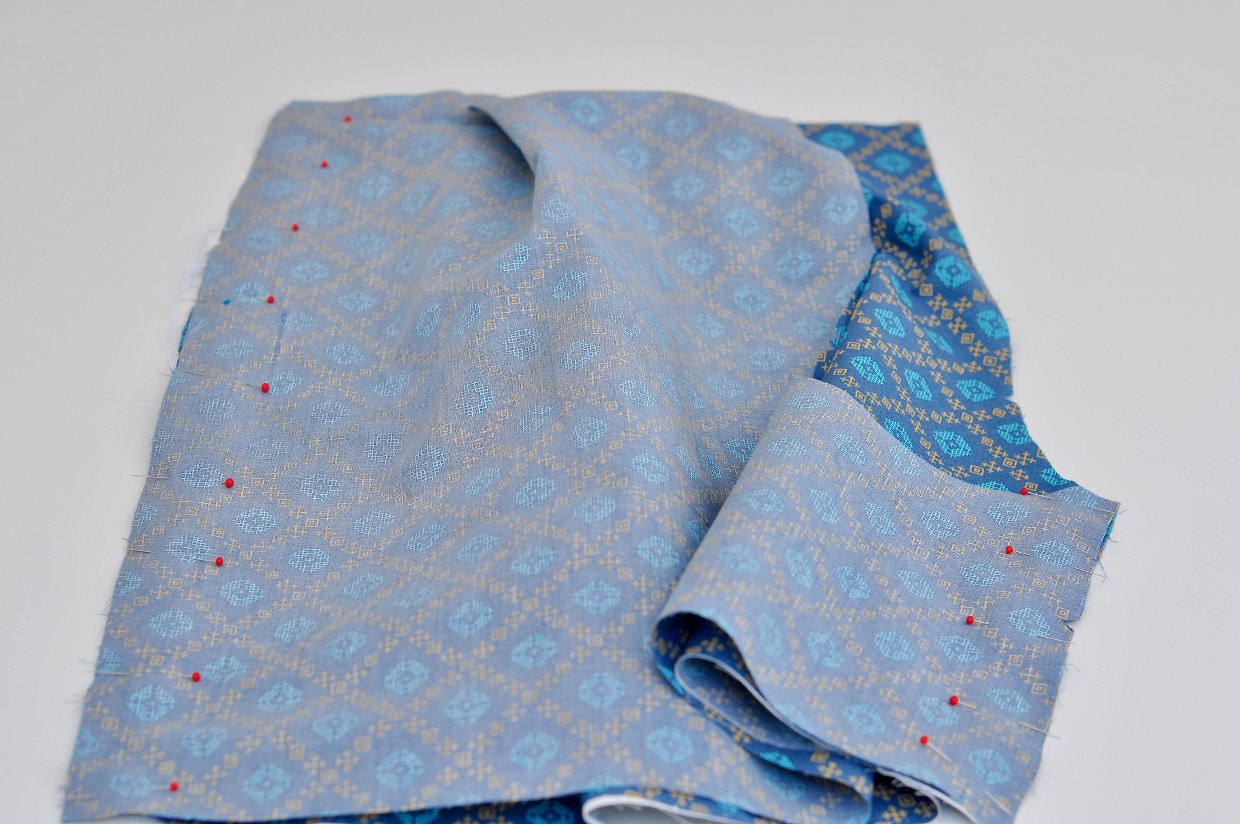
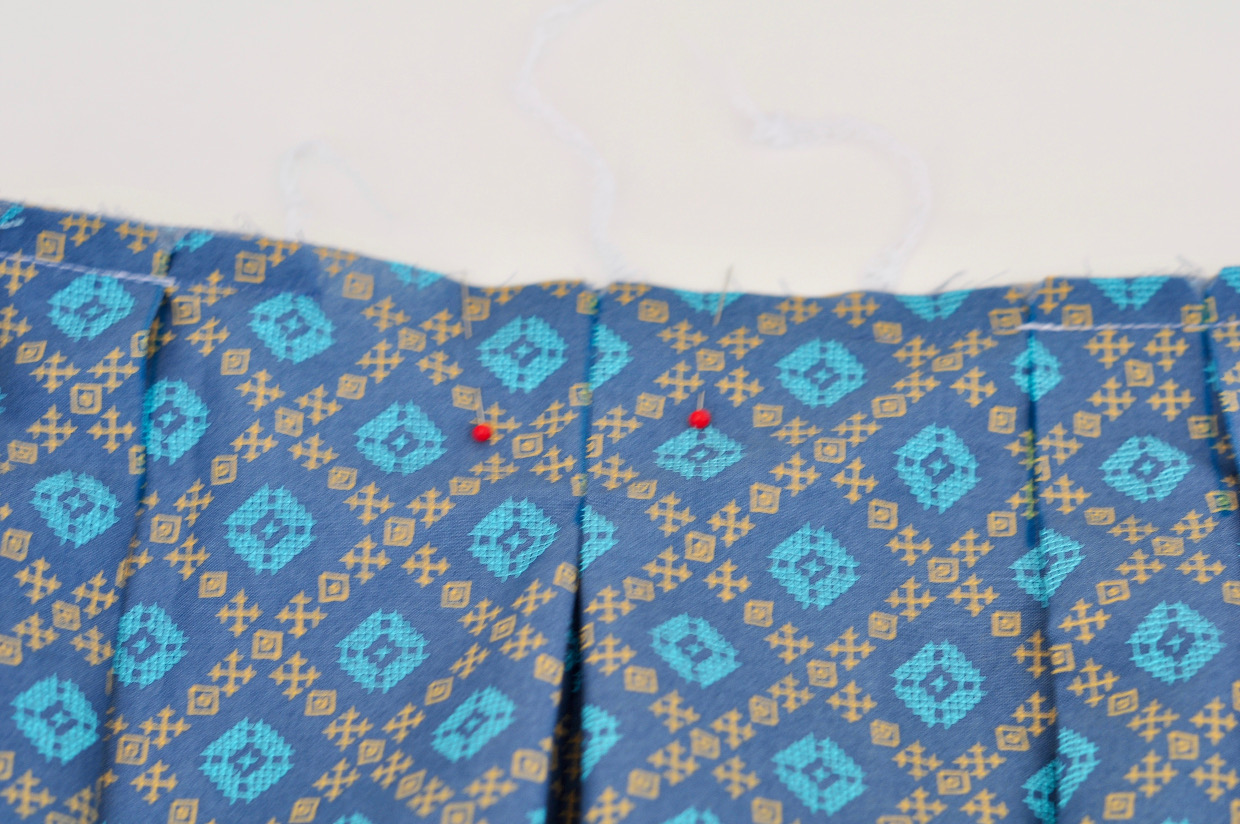
2. Working from the right side of the shorts front, form the first waistline pleat by creasing the fabric along the line with the small dots nearest to the side seam with wrong sides together. Match the creased edge to the corresponding pleat line with the large dots and pin the pleat to hold it in place temporarily.

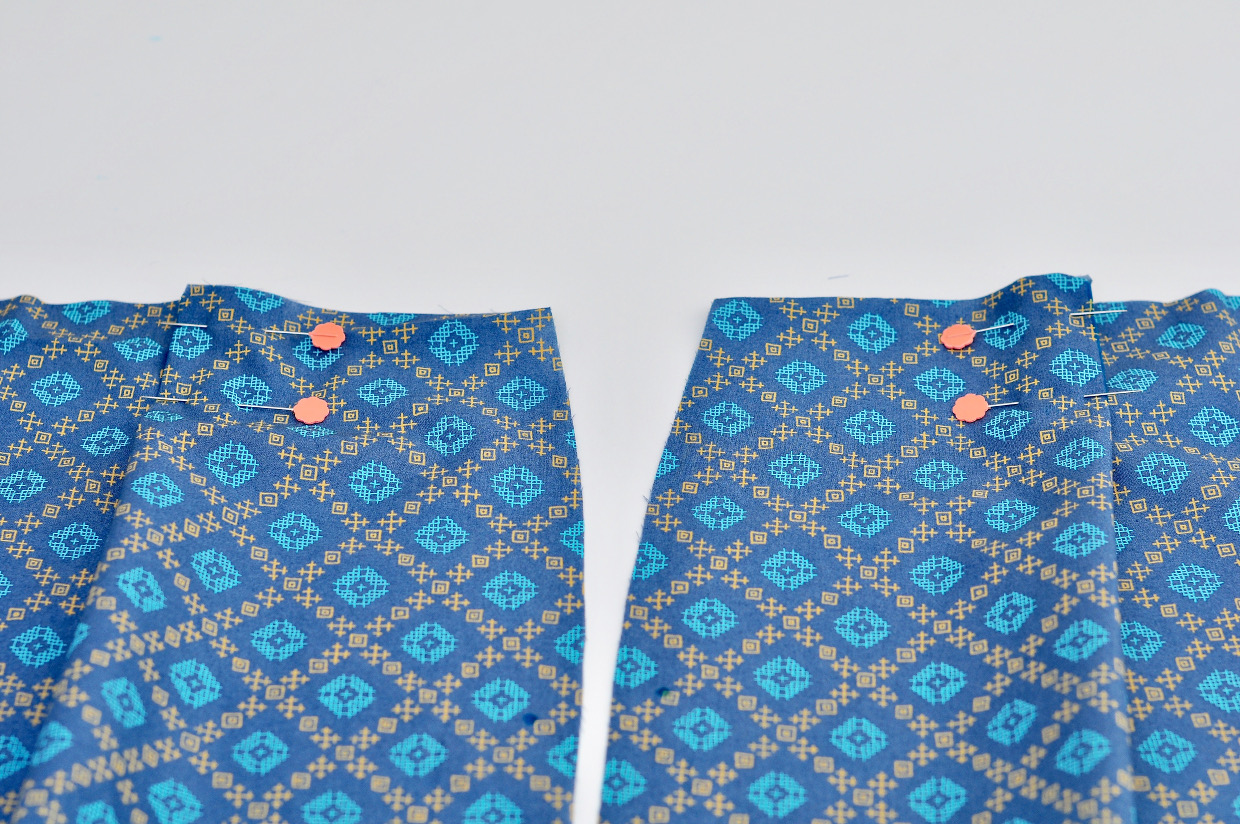

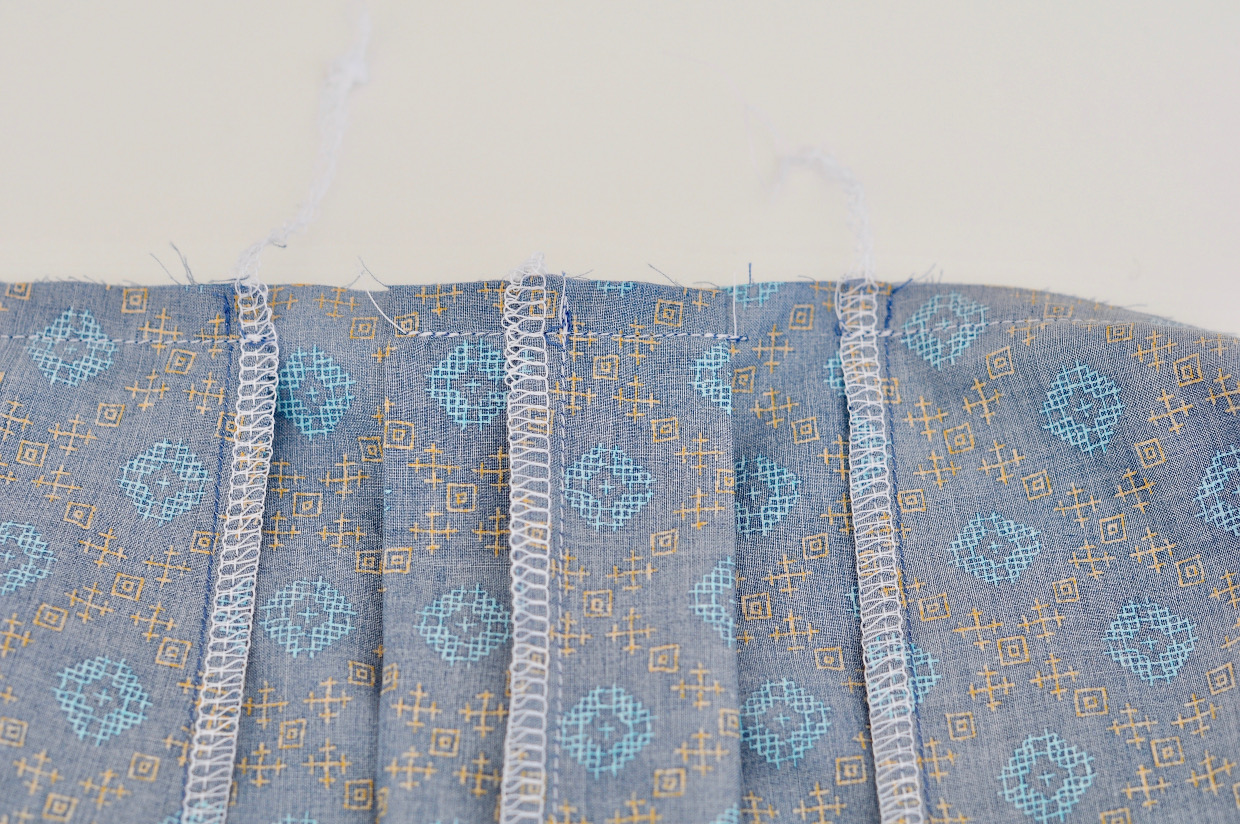
3. Repeat step 1 to form the second pleat, then baste the top of the shorts with a 3/8″ seam to hold the pleats in place temporarily. The pleats will overlap each other.

4. Repeat steps 2–3 to form the pleats on the second shorts-front piece. Leave the center-front pleat (which is a single pleat line nearest the rise on each shorts front panel) open for now; you’ll close that pleat later.
From Liesl: For the shorts, the center pleat gets sewn after the shorts rise, which is why we’re leaving it for now.
5. Repeat step 2, above to form the pleat on each side of the two shorts-back pieces.
From Liesl: Well, that was easy, wasn’t it? We’ll see you right back here tomorrow for Day 2.
From Liesl: Welcome back for Day 2 of the SoHo Short sew-along! Today we’ll tackle the pockets, which is a really easy step and doesn’t take much time at all. Also on the blog today we’ve got a special treat for you because Shelley, aka Lightning McStitch, stopped by to show you how to add belt loops to the SoHo Shorts and Skirt. We wanted to be sure to post her tutorial in time for you to add them during the sew-along if you desire, so don’t miss it. And now, here’s Rita!
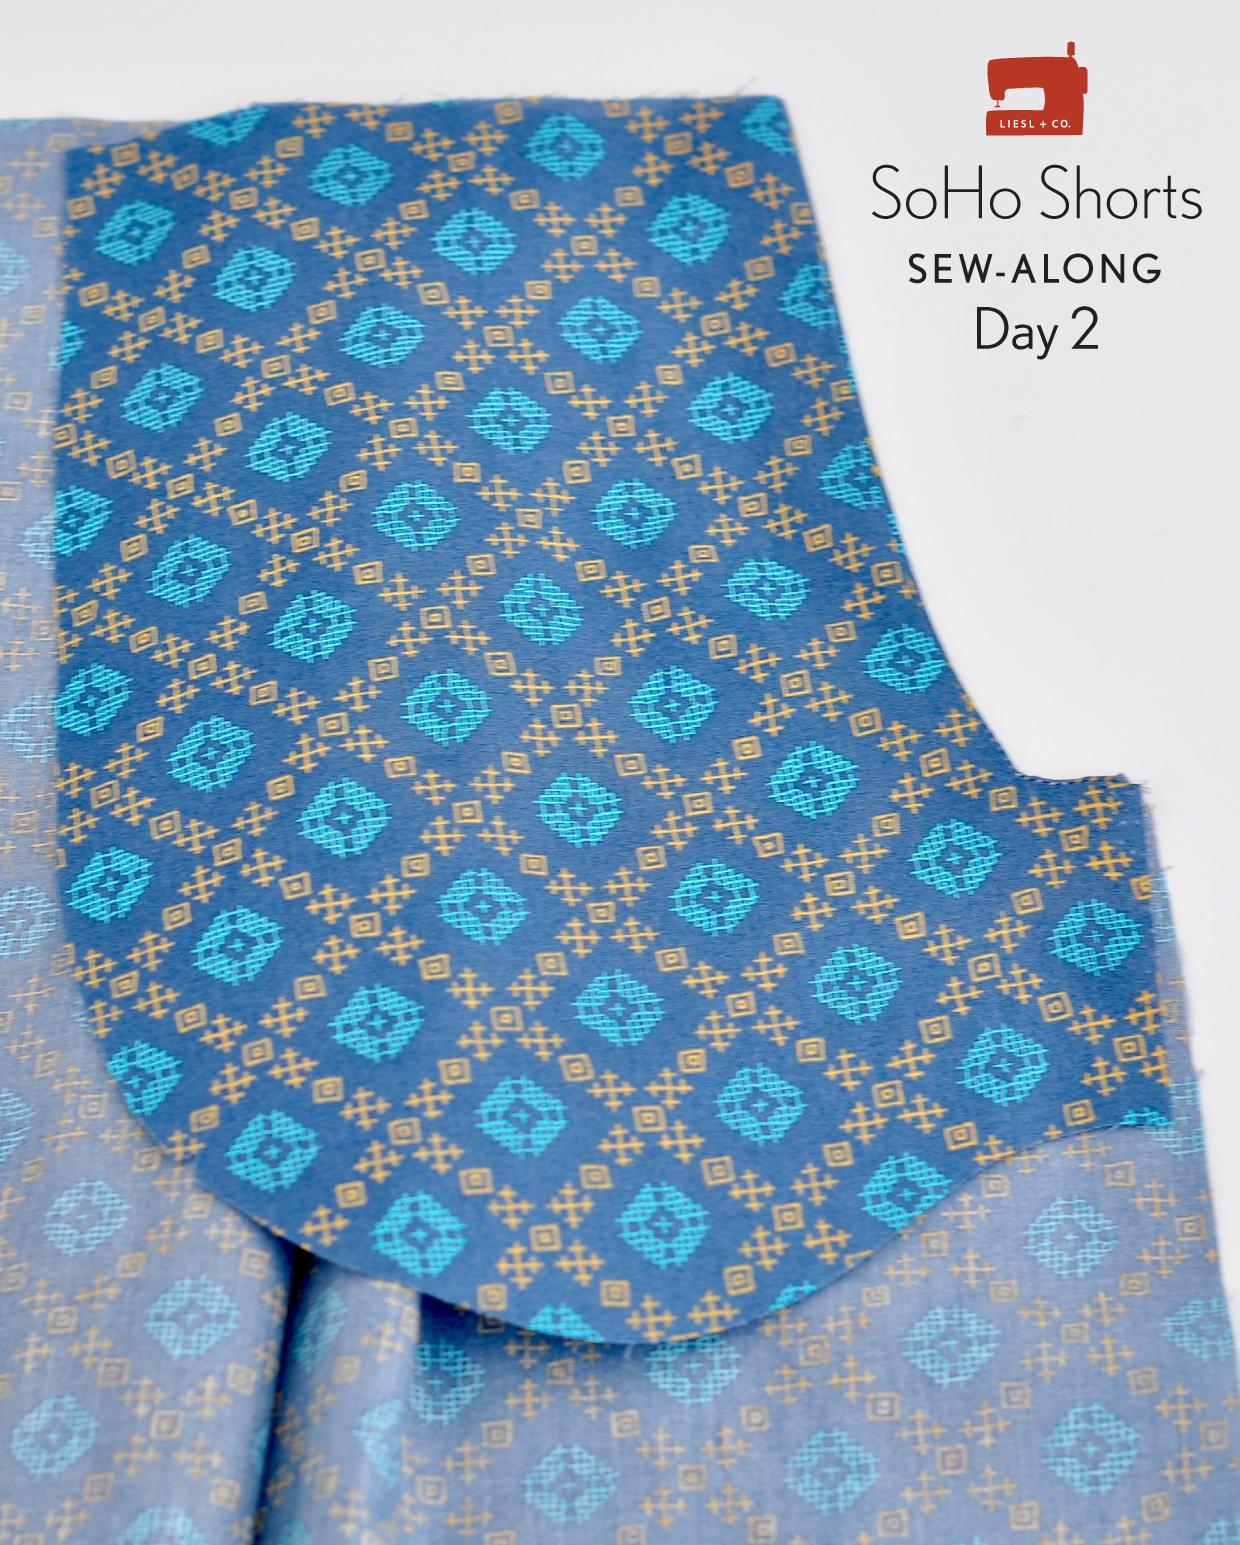
Sew the Pockets
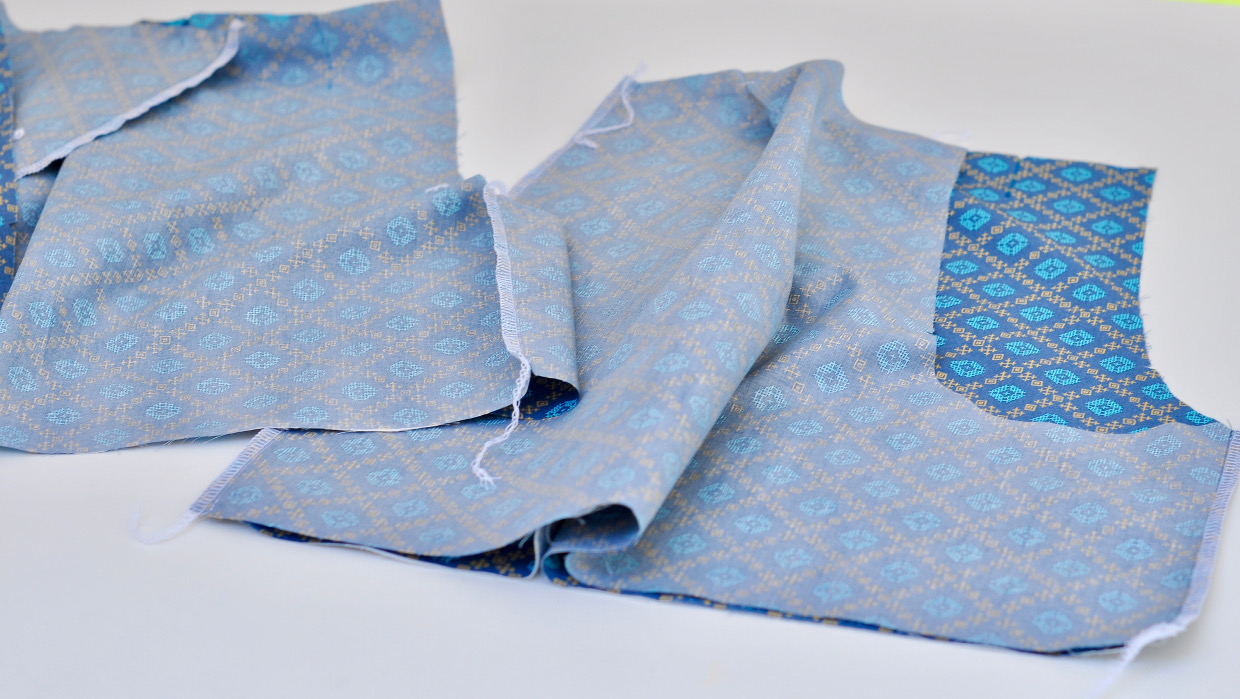
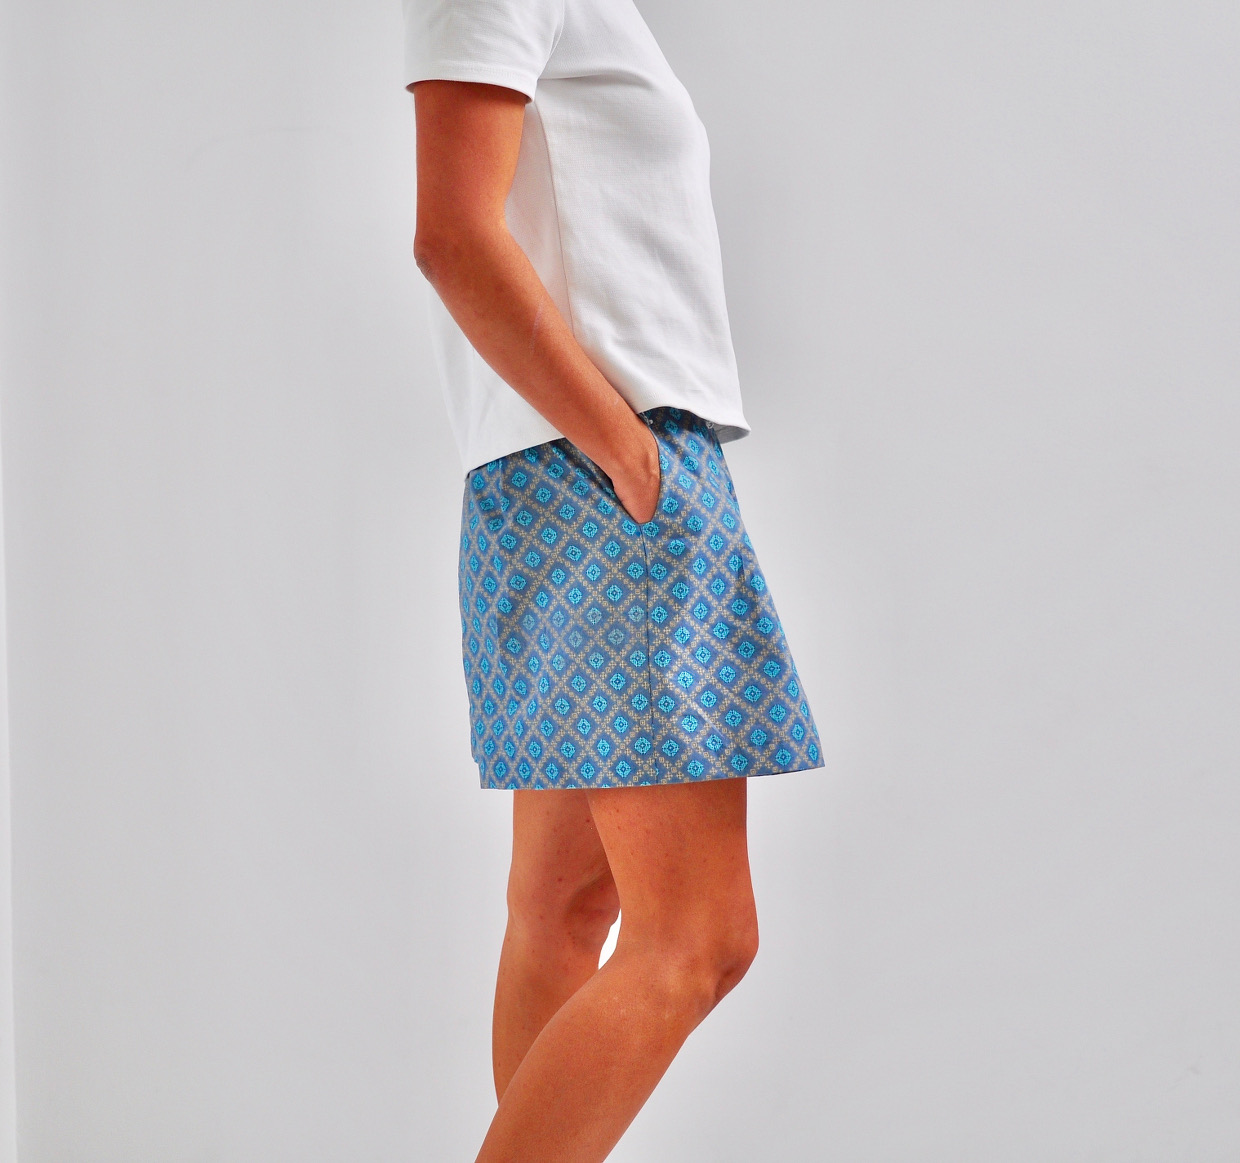
1. To make the front pockets, first pin one cut pocket bag to the upper side edge of its corresponding shorts-front piece, with right sides together and the raw edges and notches aligned. Stitch the curved pocket edge with a 1/2″ seam, backstitching or lockstitching at both ends.
2. Trim the seam allowances to 1/4″ and press the pocket bag toward the seam allowances. Understitch the pocket bag 1/8–1/16″ from the seam line.
3. Turn the pocket bag to the wrong side of the shorts front and press the sewn edge, rolling the seam slightly toward the wrong side so it won’t show on the finished shorts.
4. Lay the shorts-front panel so the wrong side is facing up. Pin the cut pocket piece to the sewn pocket bag, with right sides together and matching the pocket’s curved edges. The top and side of the pocket should form a continuous line with the edges of the shorts. Pin just the pocket and pocket lining together (take care not to pin the pocket pieces to the shorts) and stitch the curved edge of the pocket with a 1/4″ seam. Finish the pocket’s seam allowances together using your preferred method.
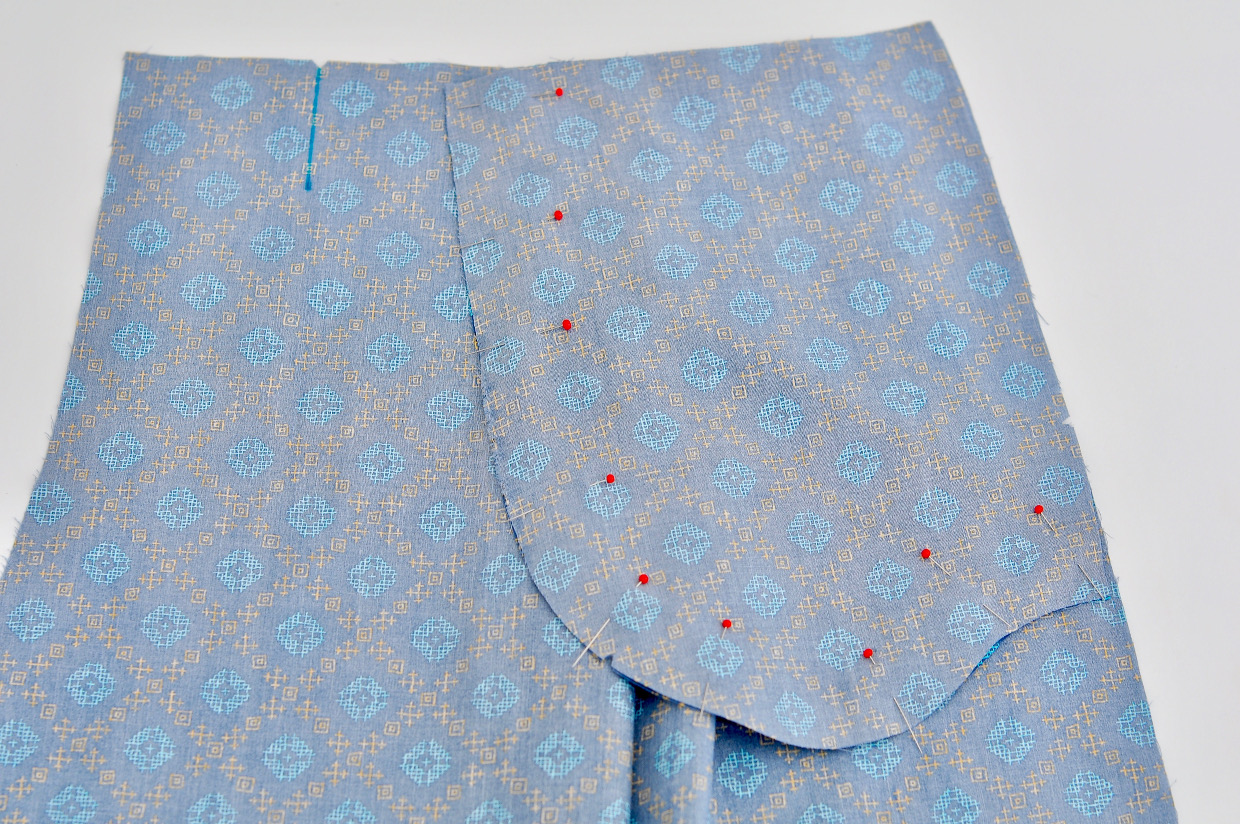
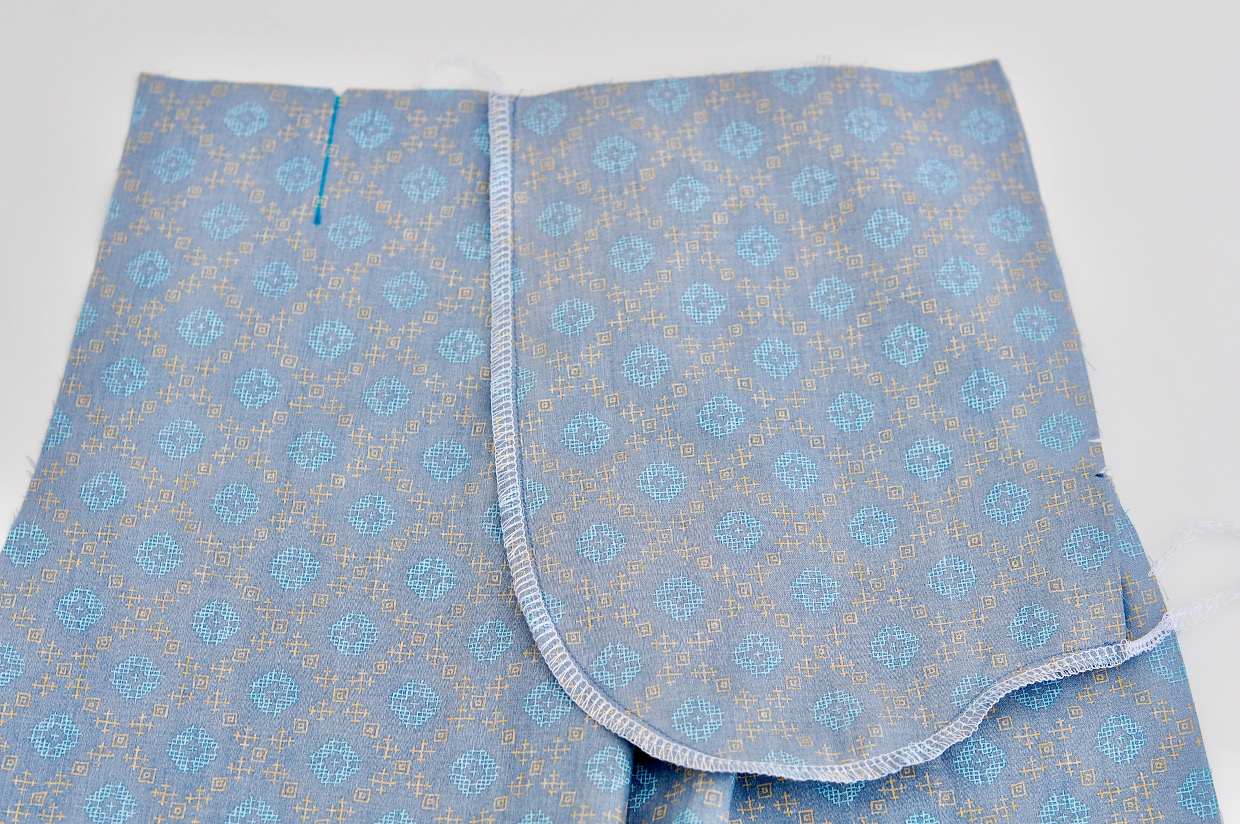
5. Pin the pocket to the shorts front so the top and side edges are even, and baste the pieces together with a 3/8″ seam along the top and side edges.

From Liesl: That was simple, right? Tomorrow we’ll be covering a few more steps than we have for the last two days, but tomorrow is also when it starts to get exciting with that waistband I told you about. See you then!
From Liesl: Hello again for Day 3 of the SoHo Shorts sew-along! This time we’ll be sewing the shorts rise and finishing that last center pleat, and then we’ll get the waistband assembled before attaching it to the shorts. That way we’ll be all set for the invisible zipper tomorrow. Are you ready? Here’s Rita again.
Assemble the Shorts
1. Align and pin the wearer’s right shorts-front panel to its coordinating shorts-backpanel, with right sides together, and stitch the inseam and outseam (the side seam) with a 1/2″ seam. Finish the seam allowances separately and press them open, or fin them together and press them toward the shorts-back panel. Stitch and finish the seam allowances of the inseam on the second leg of the shorts (the wearer’s left side) in the same manner, but this time don’t stitch the side seam since you’ll be inserting the zipper on this side.
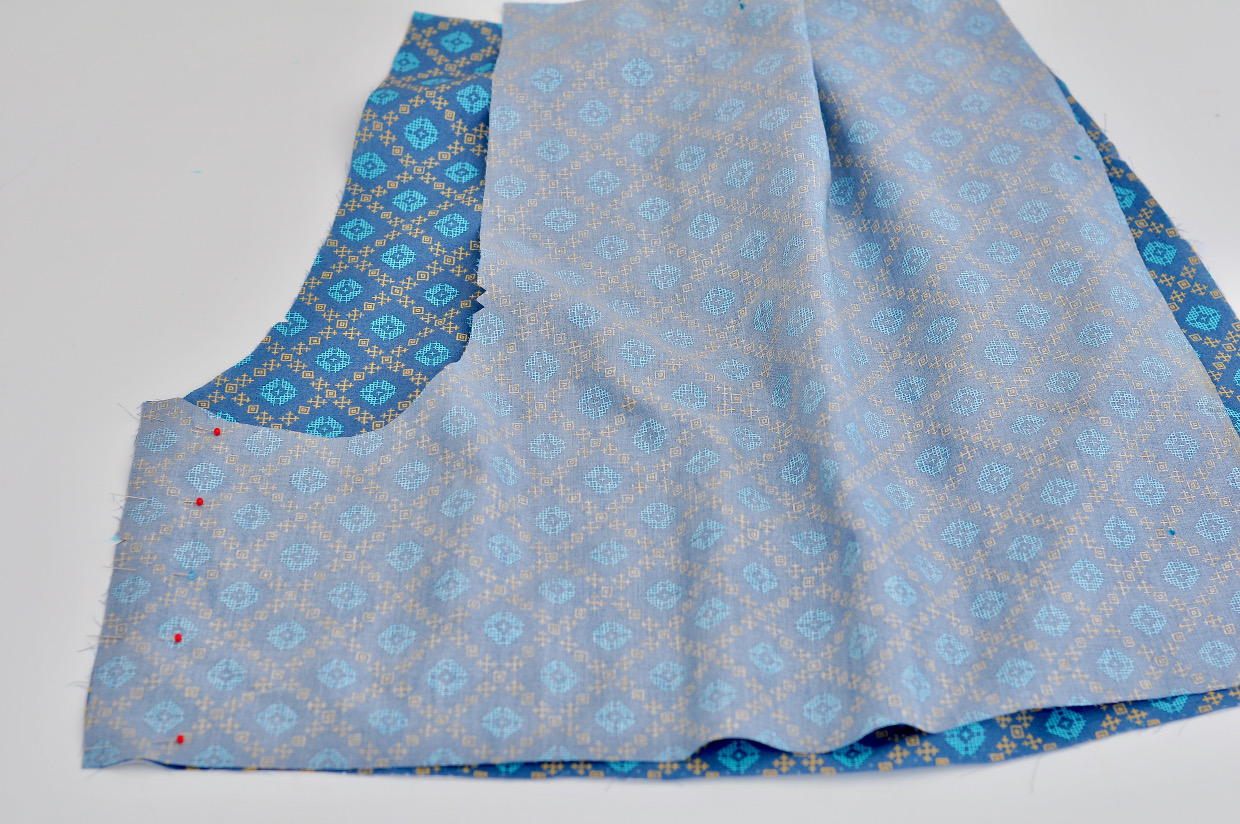
2. Turn the wearer’s right shorts leg right-side out and slip it into the wearer’s left shorts leg with right sides facing. Pin the layers together with the edges, notches, and seams aligned. Stitch the rise (the crotch) with a 1/2″ seam, backstitching or lockstitching at both ends, then finish the seam allowances separately and press them open, or finish them together and press them toward the back.
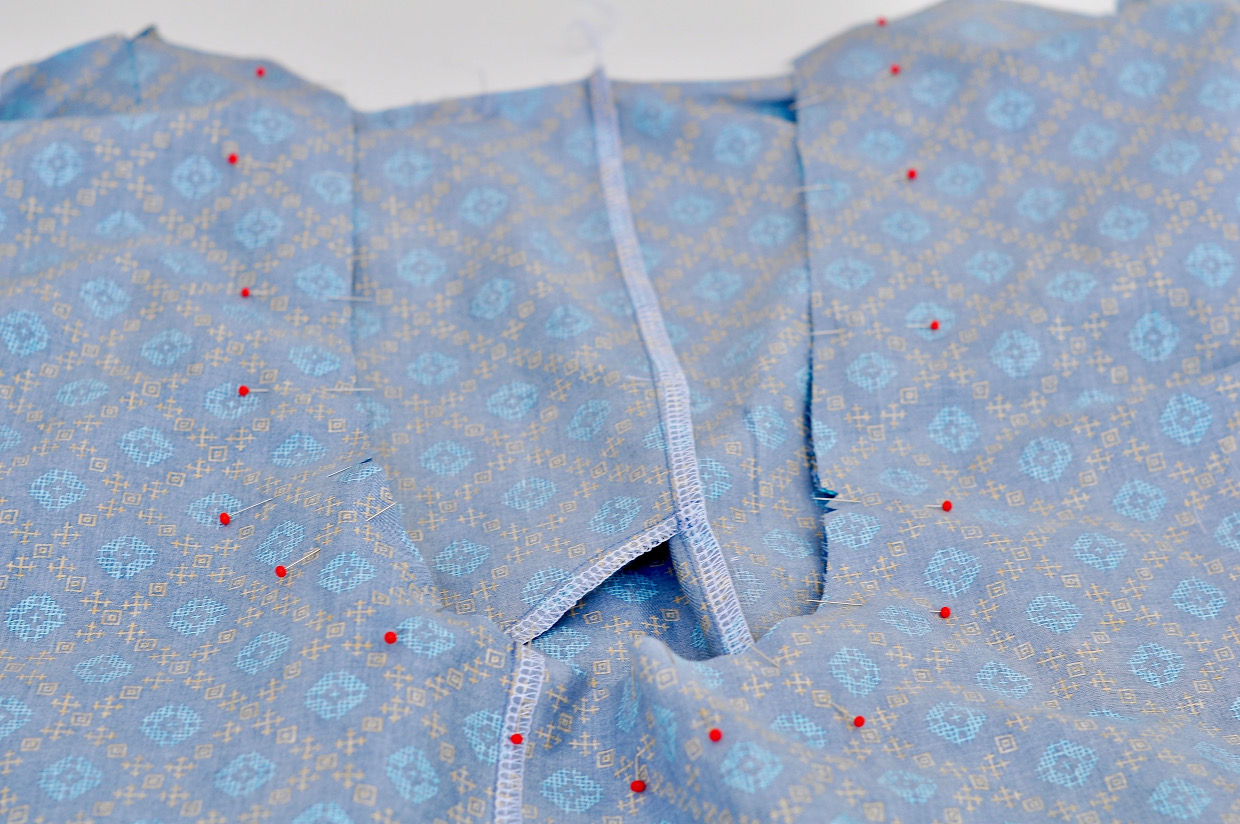
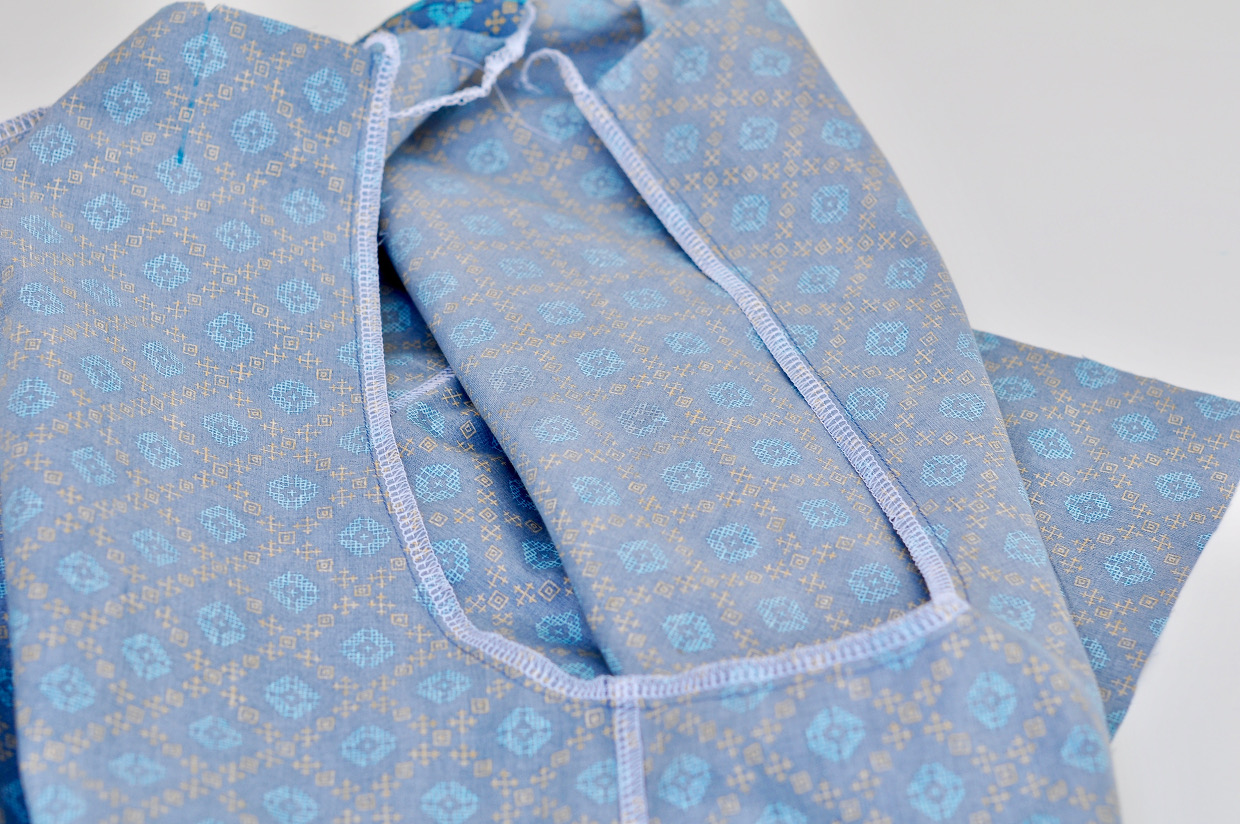

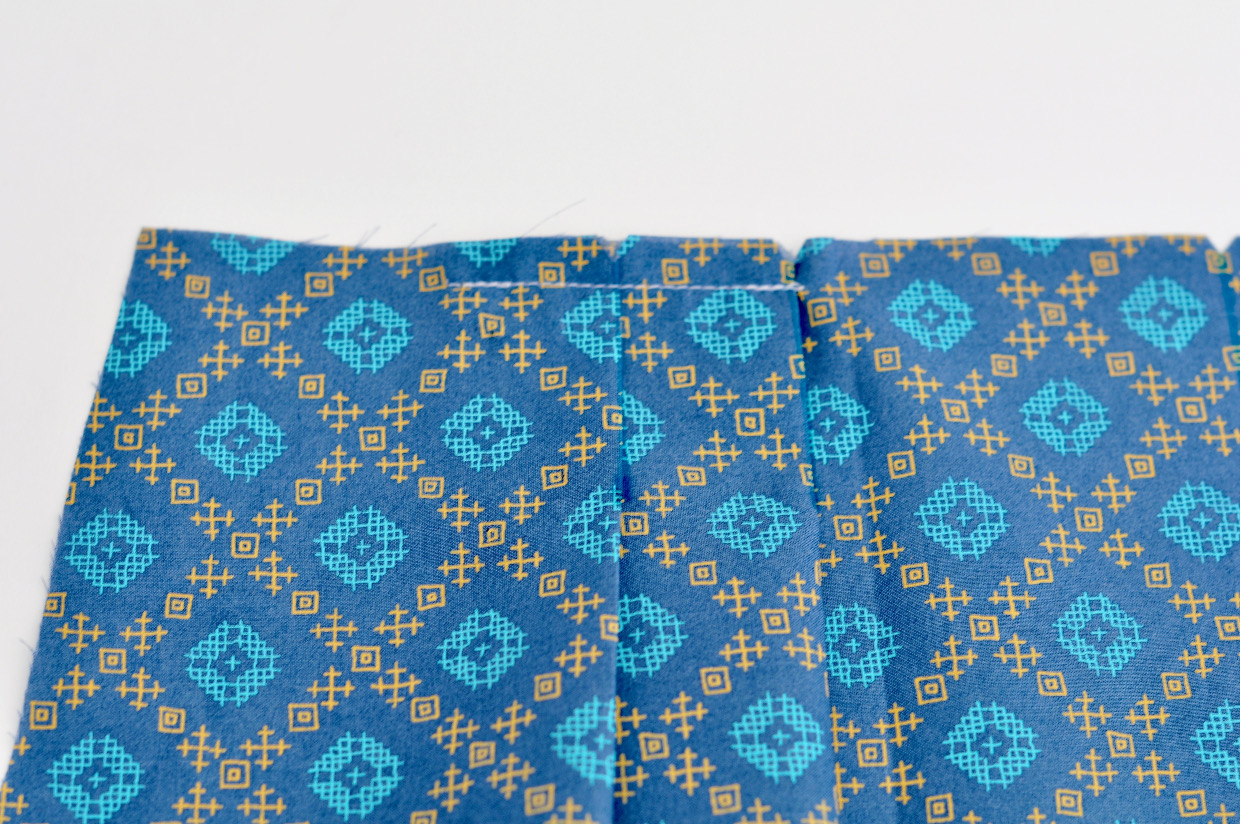
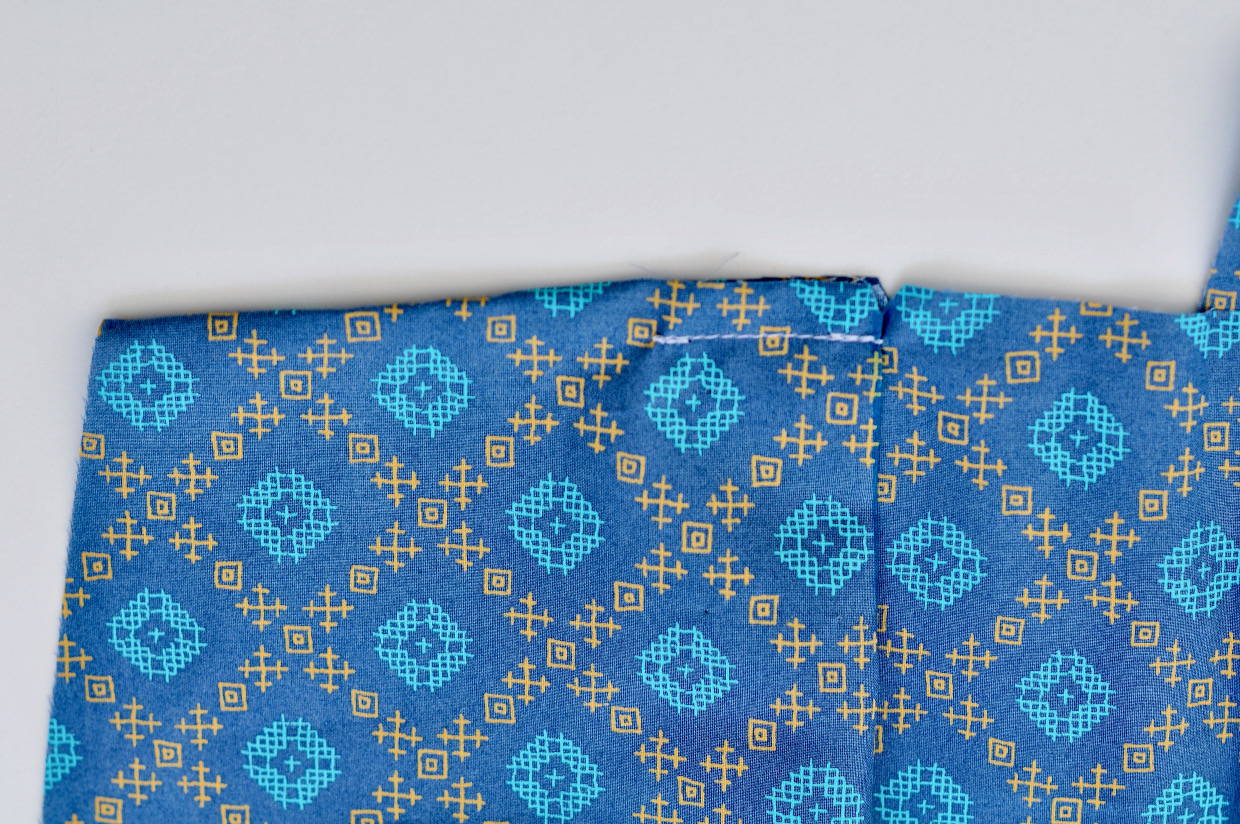
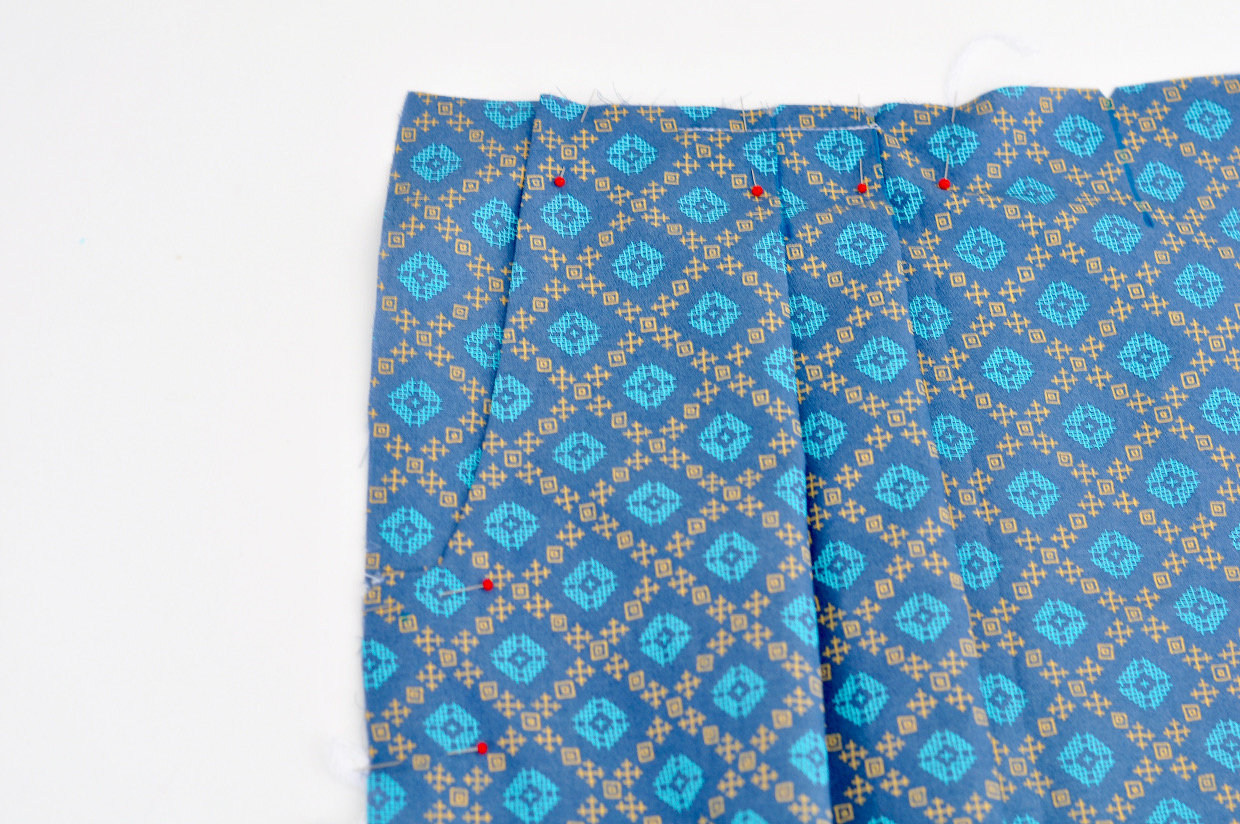
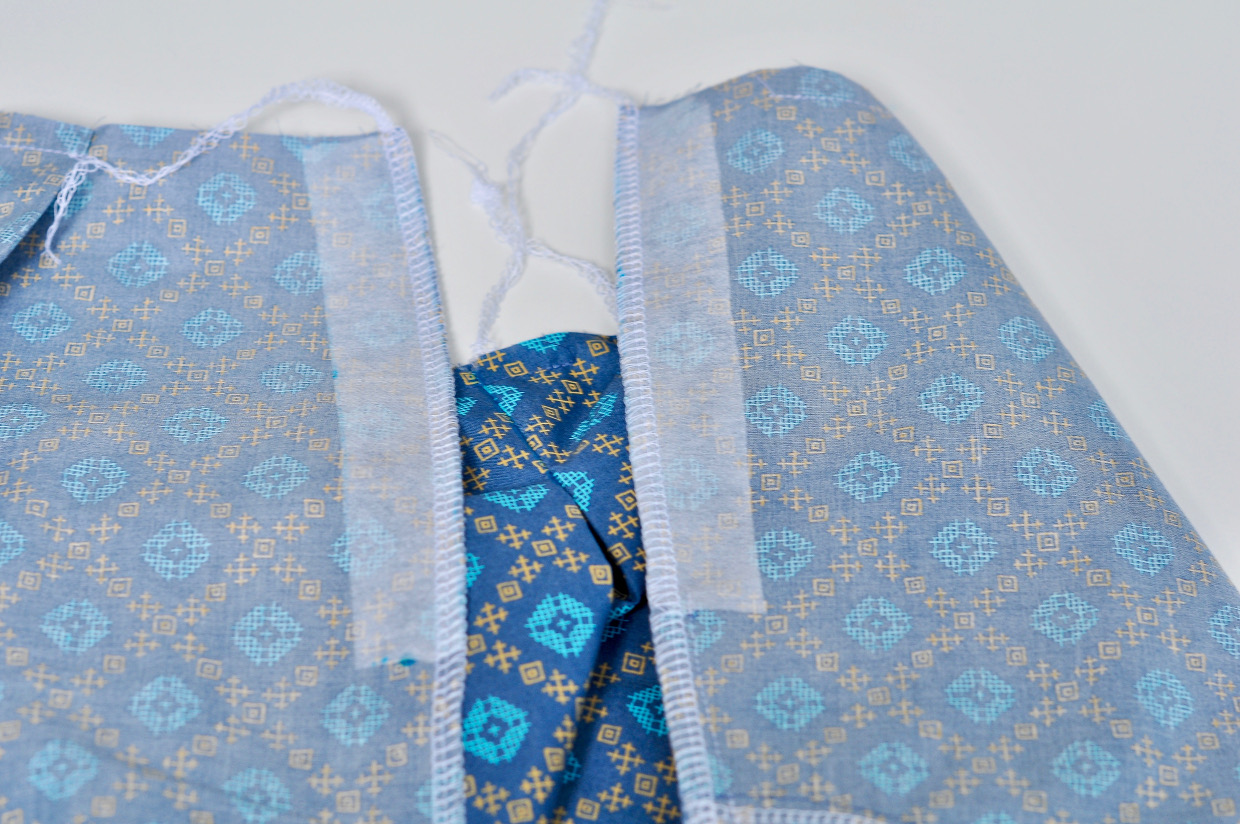
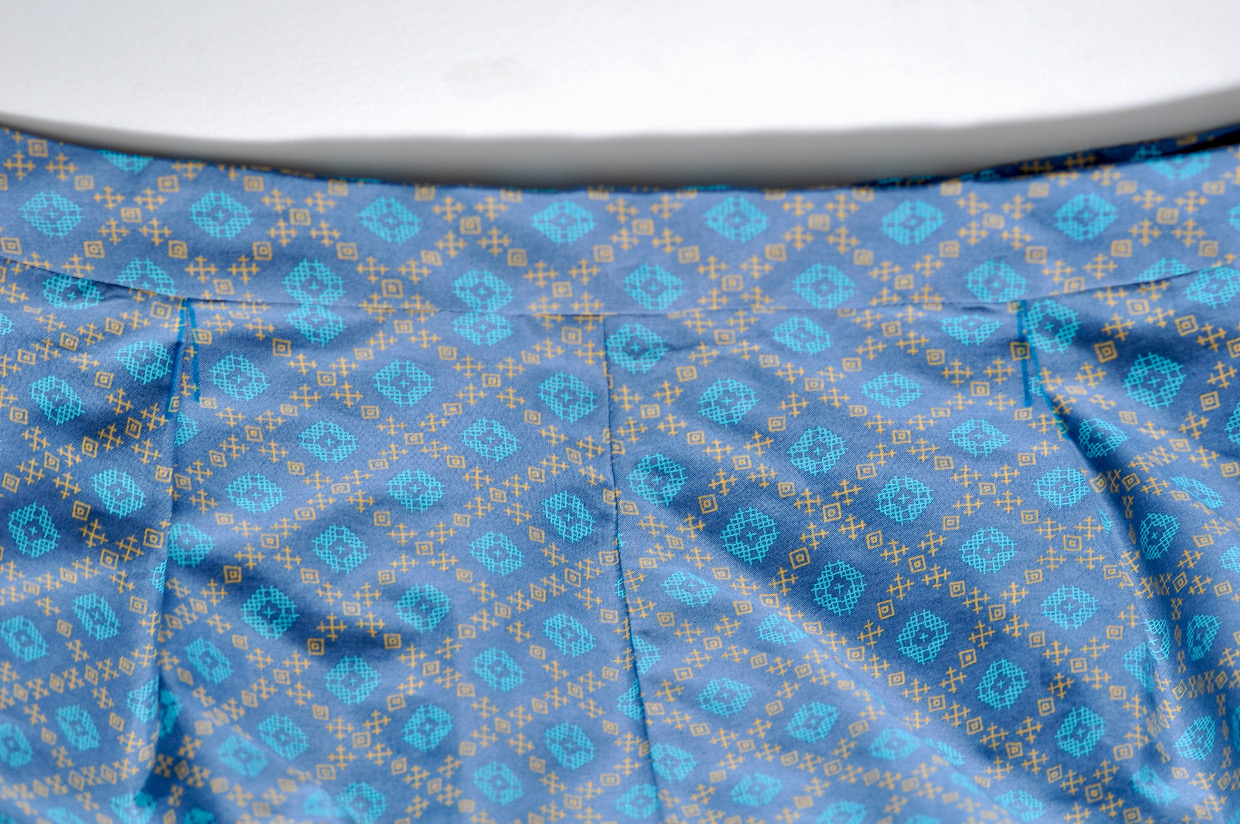
3. To make the center-front inverted box pleat, pin the two front halves of the shorts with right sides together. Match the unsewn set of pleat lines closest to the rise and baste the two fronts together along the matched pleat line, stopping at the end of the pleat line.
From Liesl: If you’re sewing from the first printing of one of our paper patterns, take a minute to make sure your pleat lines are correctly positioned since there was an errata for this pattern. You can see the details right here. If you’re sewing from a digital version, that problem has already been fixed for you.
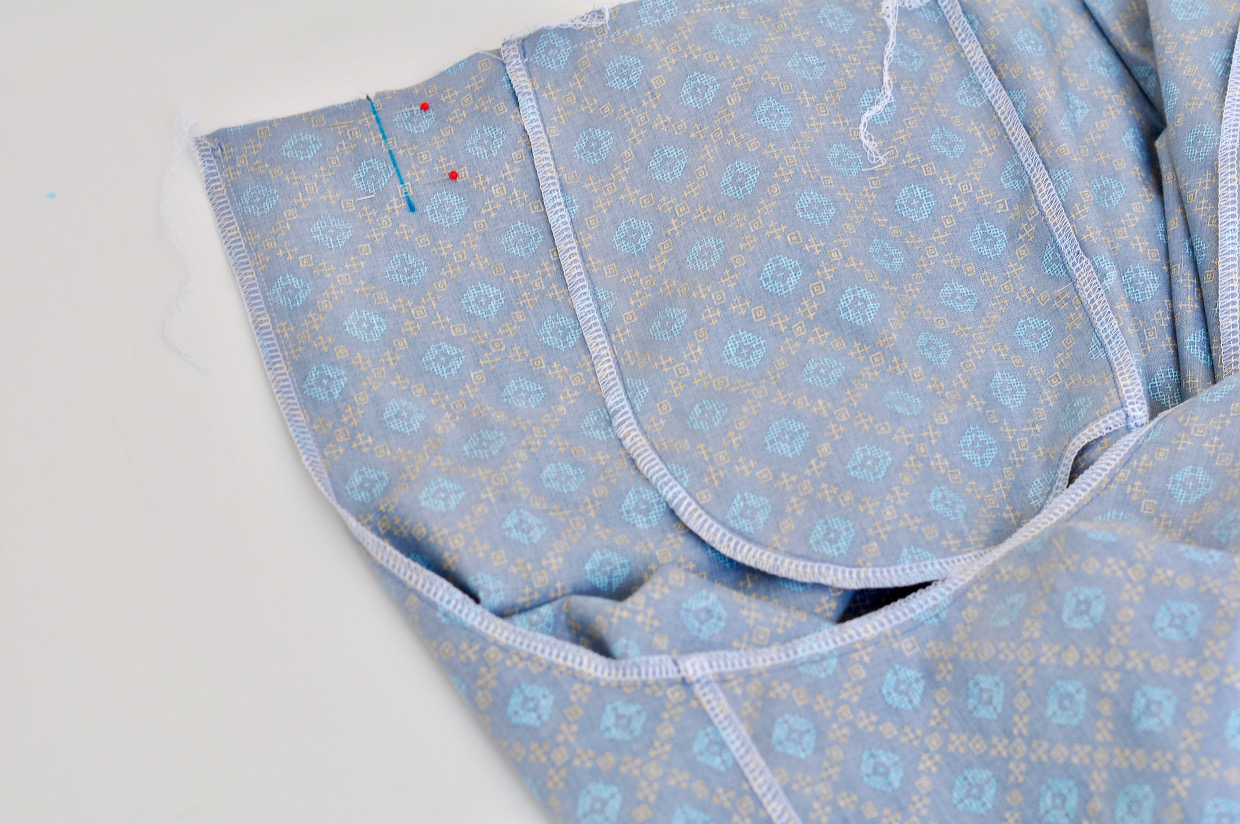
4. Separate the two fronts and pin the pleat seam to the rise seam to form the center-front inverted box pleat. Press, then baste the top of the pleat with a 3/8″ seam to hold it in place temporarily.
Prepare the Side Seam for the Zipper
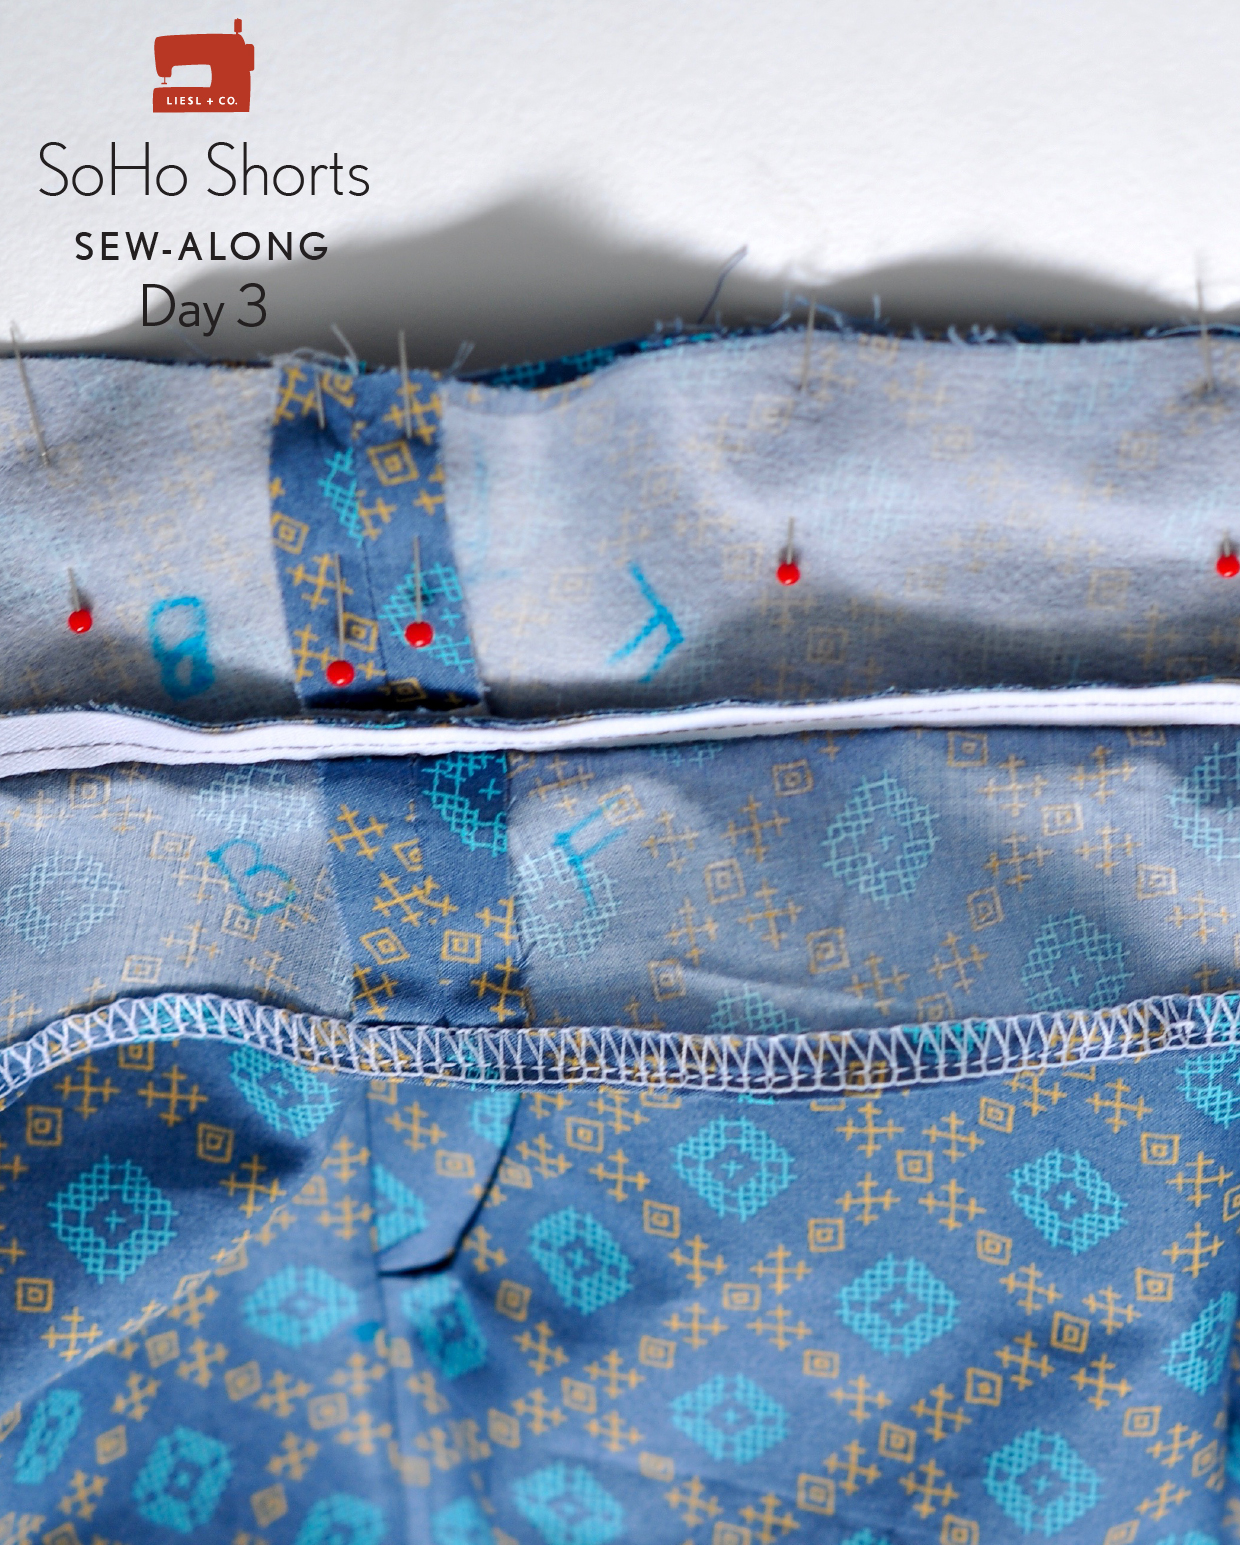
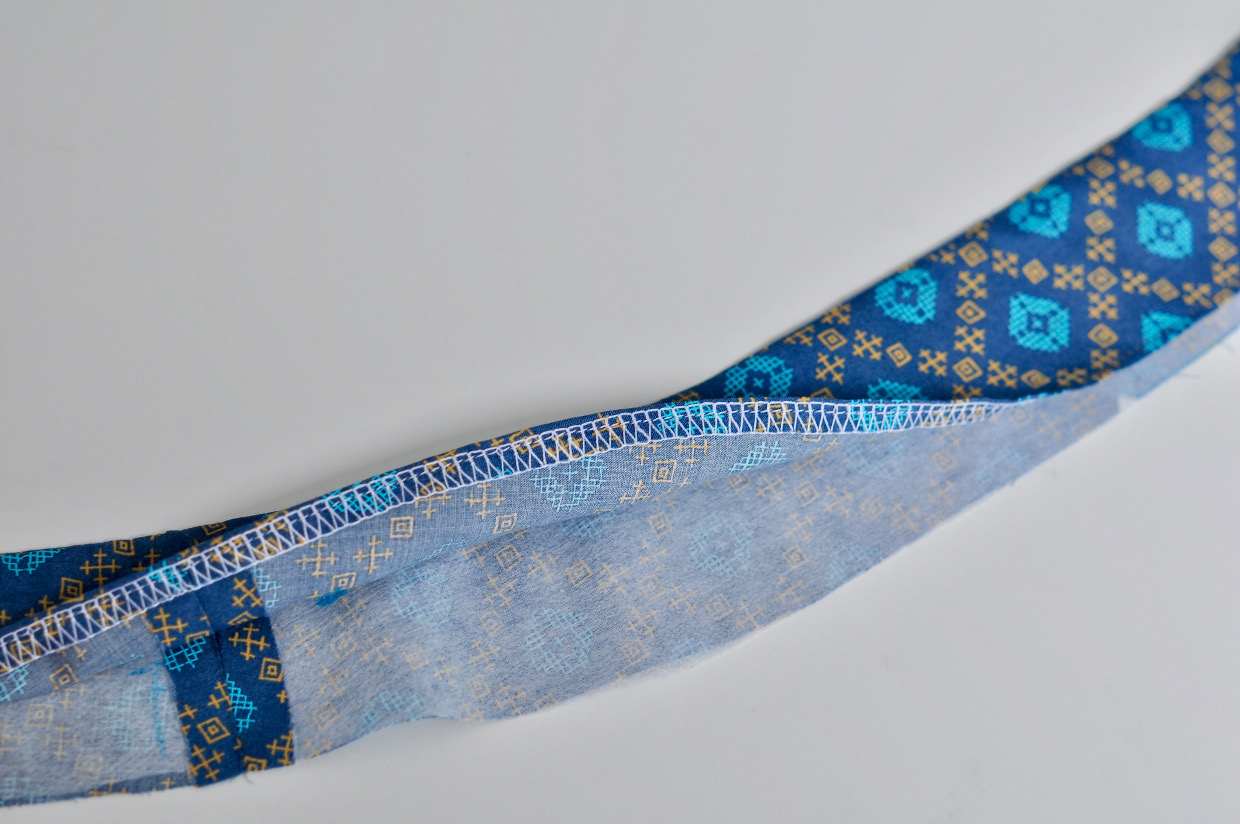
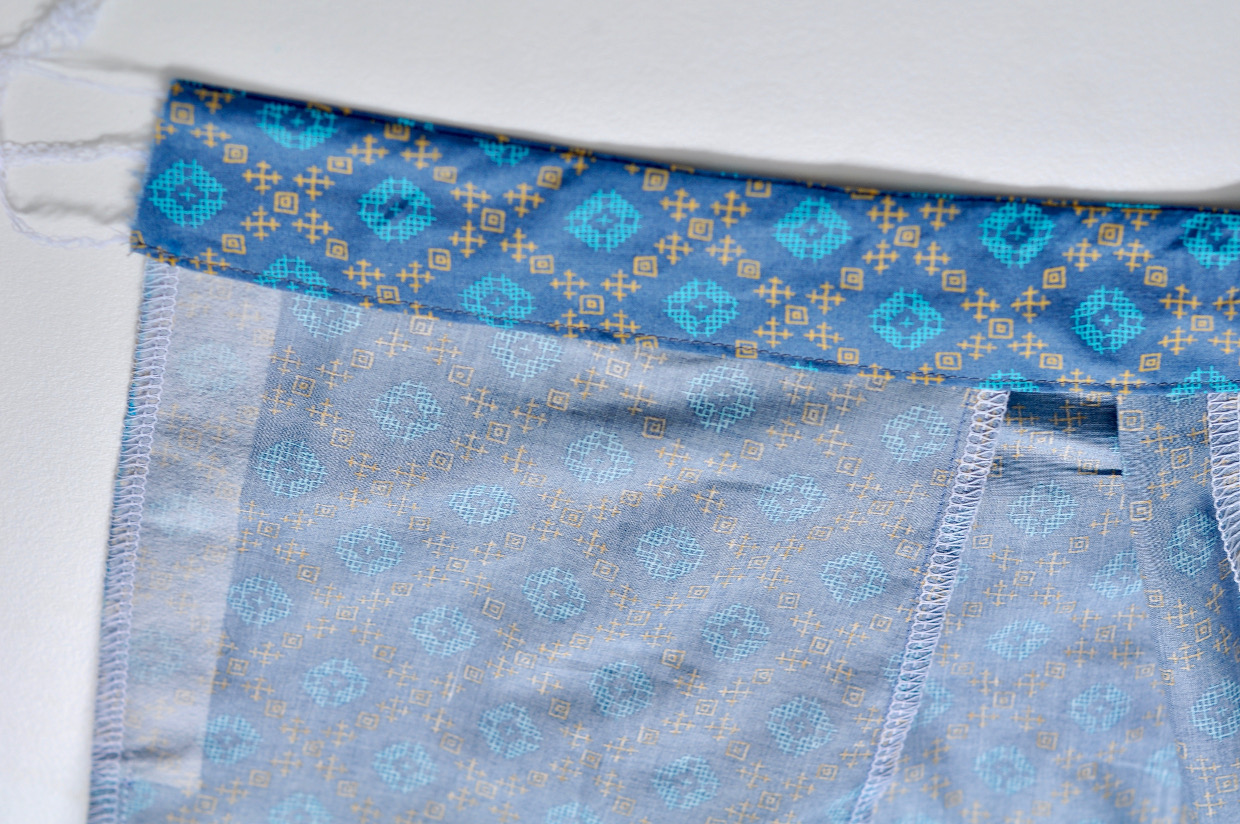
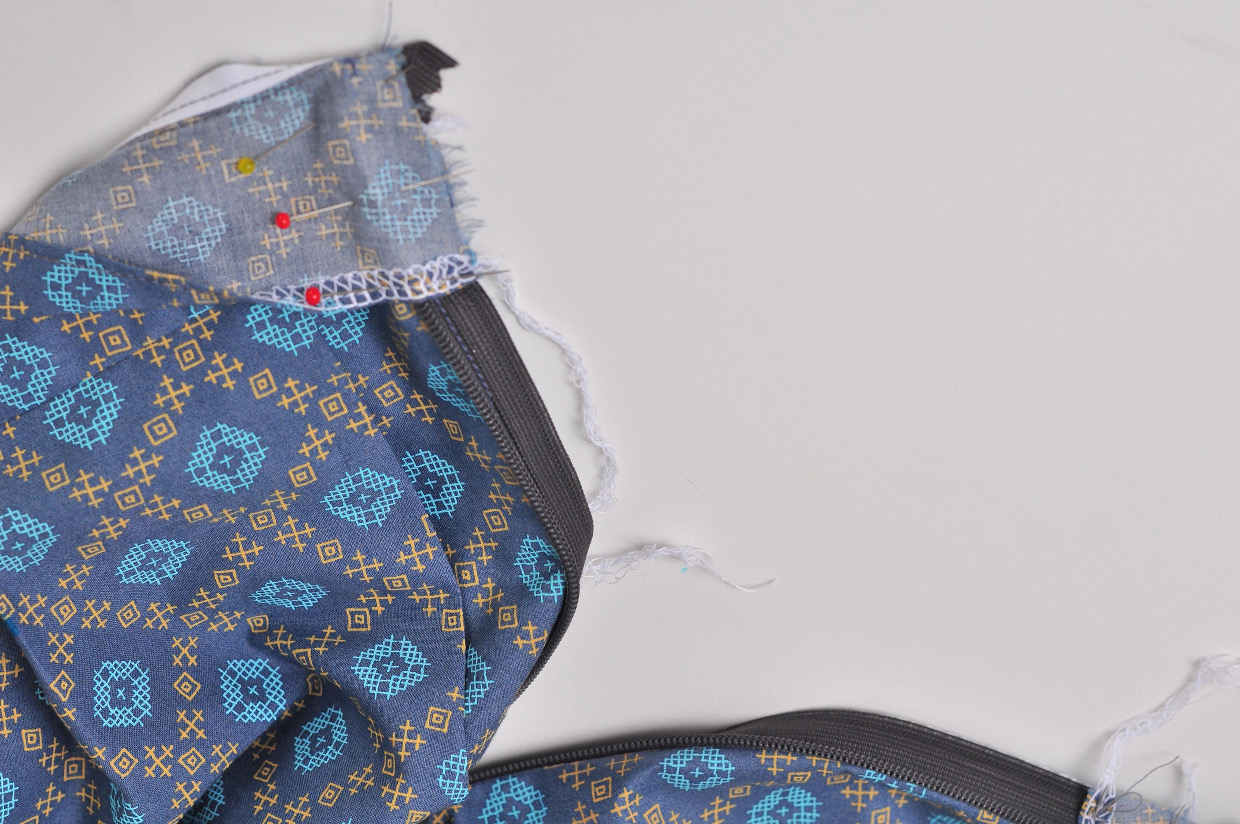
1. Using the 1″ by 7″ strips of interfacing you prepared in step 1 of Getting Started, and following the manufacturer’s instructions, fuse (or baste if you’re using sew-in interfacing) one strip of interfacing to the wrong side of the shorts back on the wearer’s left side, starting at the top edge of the waist and ending just below the dot you transferred from the pattern piece. Fuse or baste the other strip to the shorts front on the wearer’s left side in the same manner. Finish the unstitched seam allowances using your preferred method. (If you use a serger to finish the seam allowances, be sure not to trim the fabric.)
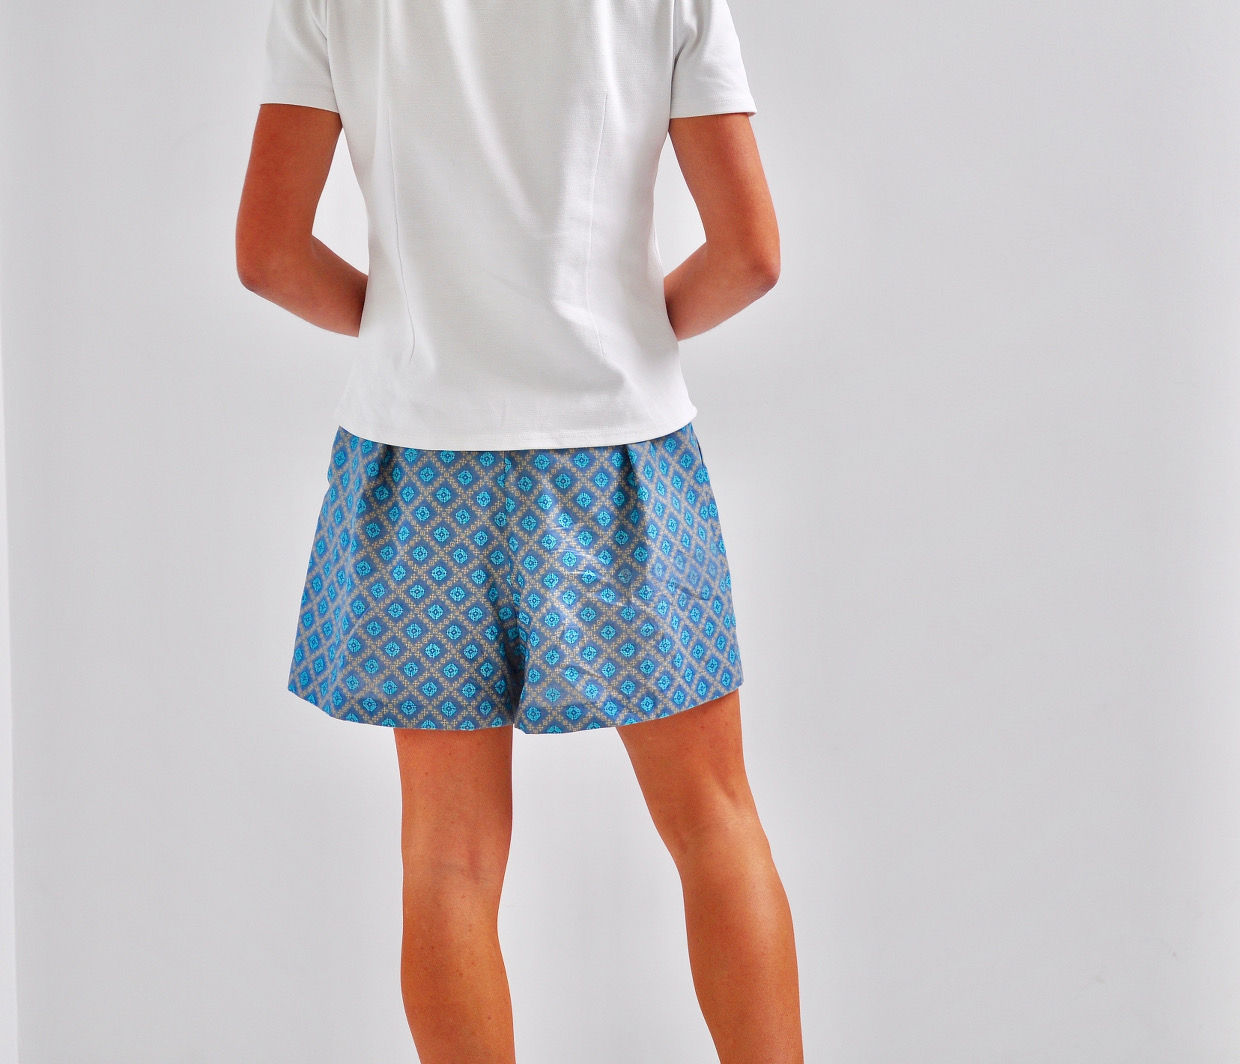
Attach the Waistband
From Liesl: The only tricky part about these next few steps is paying attention to left and right sides of the front and back pieces. The waistband and waistband facing will be sewn on opposite edges so they mirror each other when the top edges are sewn together shortly. If you mark your pieces with a water-soluble fabric-marking pen like Rita has done it will help you to identify the pieces easily.
1. Following the manufacturer’s instructions, fuse (or baste) the waistband-front and waistband-back pieces cut from interfacing to the wrong side of the waistband-front and waistband-back pieces cut from fabric. (Note: if you’re using self fabric for the facing, simply choose one waistband-front piece and one waistband-back piece to interface and then set the other waistband pieces aside to use as the facing.) Pin the interfaced waistband front to the interfaced waistband back, with right sides together and raw edges aligned. Stitch the short ends of the wearer’s right side together with a 1/2″ seam. Press the seam allowances open and staystitch the top edge with a 3/8″ seam. Repeat to sew the wearer’s right side of the waistband facing together, but take note that for the waistband facing you’ll be sewing the opposite ends together because the facing will be inside the waistband. If you’re using self fabric for the waistband and facing, be sure to mark the facing pieces to prevent confusion in the steps that follow.
2. Pin the waistband facing to the waistband, with right sides together, and stitch the top edge with a 1/2″ seam, backstitching or lockstitching at both ends.

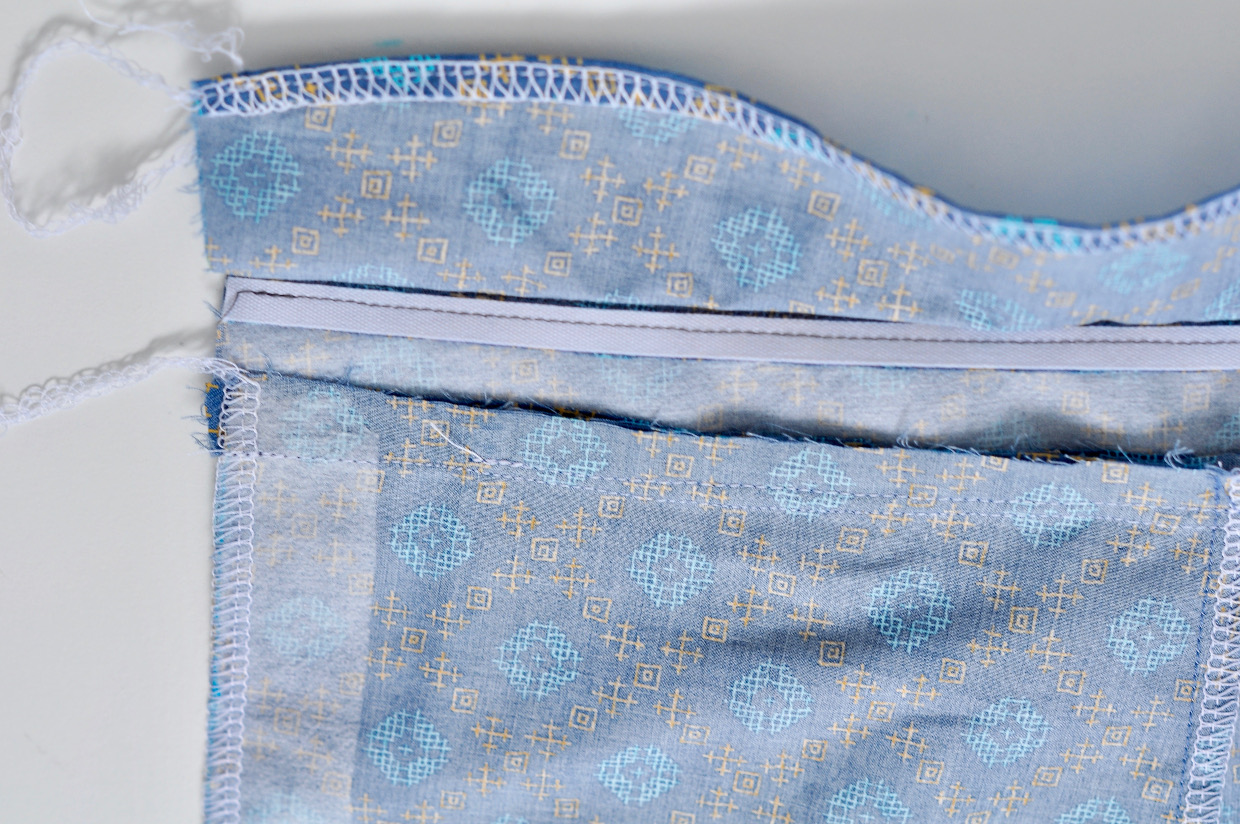
3. Stabilize the top edge of the waistband (to prevent it from stretching during wear) by sewing a length of 1/4″ twill tape to the seam allowances on the facing side of the waistband. Align the edge of the twill tape with the waistband stitching, and sew the tape to the seam allowances with a straight stitch or a zigzag stitch. Trim the remaining seam allowances to approximately 1/4″ to prevent the fabric from pulling on the finished waistband.
4. Press the seam allowances toward the facing side and understitch the waistband seam.
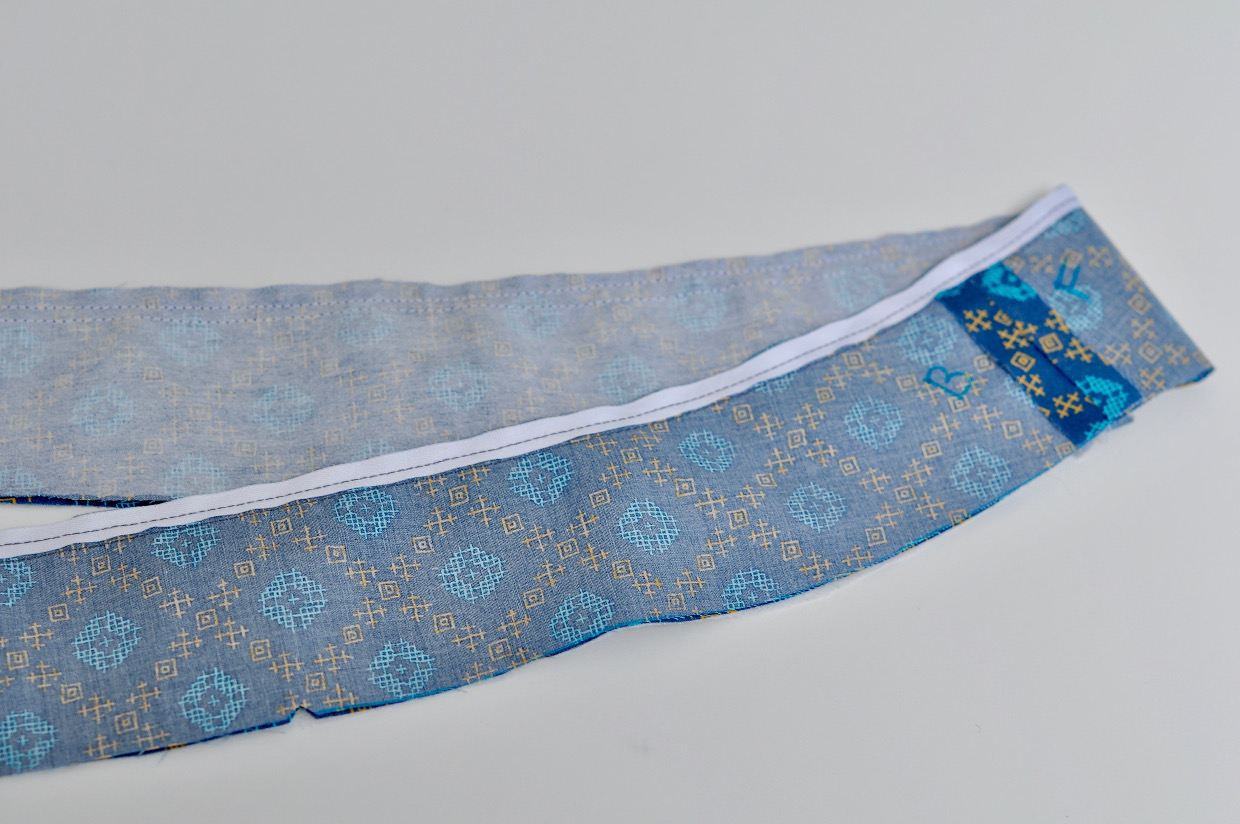
From Liesl: For this step you’ll be understitching on the facing side so it doesn’t show when the shorts are worn. The understitching helps to hold the facing in place so it doesn’t show later. Here’s a photo of the understitched waistband from when I was sewing them for the pattern cover. The solid blue fabric is the facing.
5. Finish the long raw edge of the waistband facing using your preferred method. We recommend that you zigzag or serge the edge (don’t trim if you’re using a serger), then fold and press the finished edge to the wrong side by 1/4″ and edgestitch to finish.

Hint: If you prefer, you can also use a lightweight bias binding to finish this edge. A contrasting color binding might be a fun design detail here.
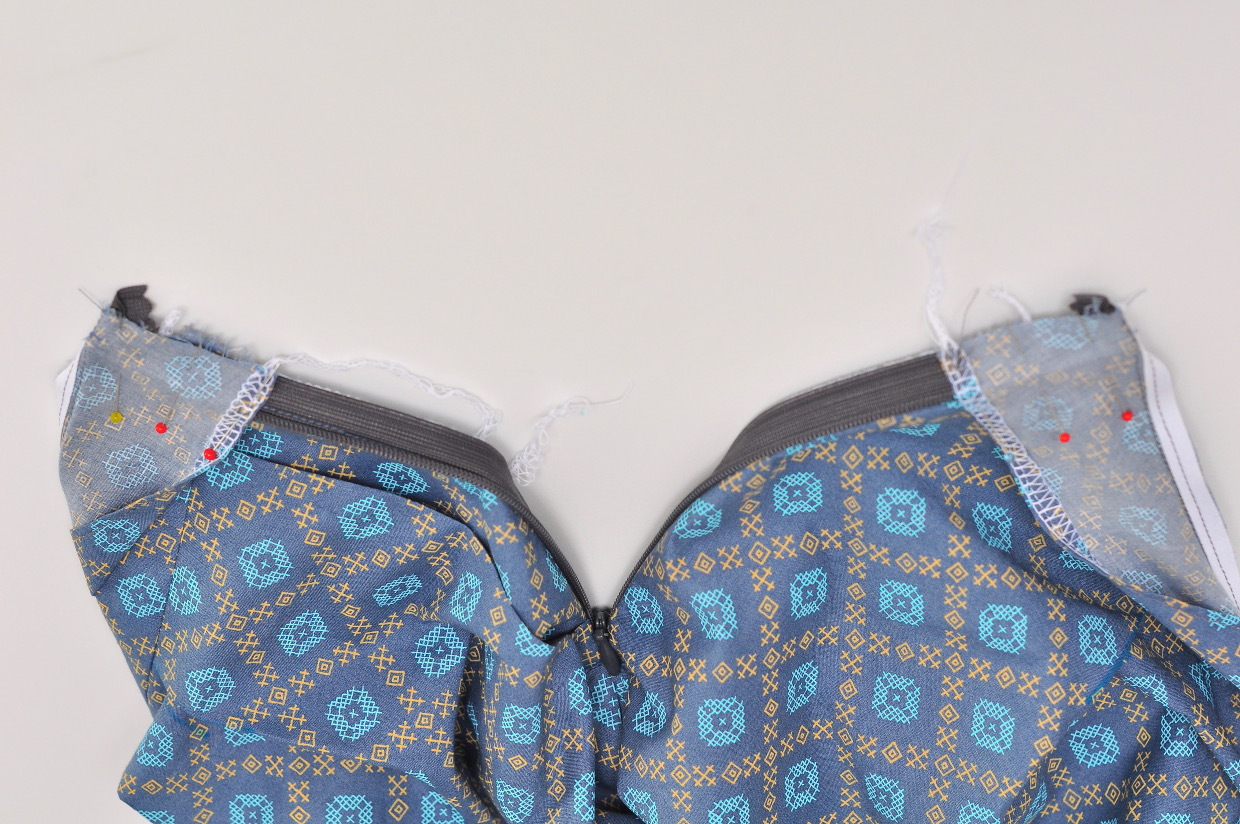
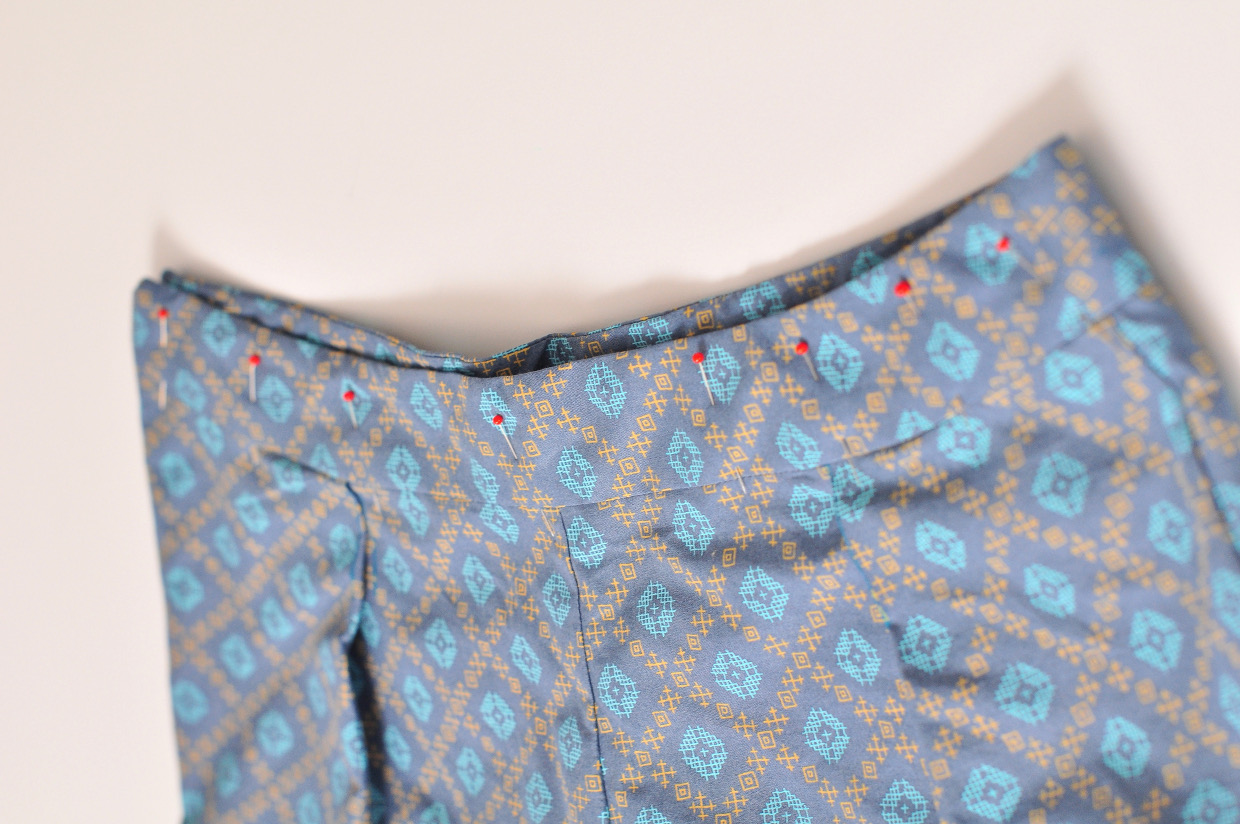
6. Press the waistband along the waist seam, rolling the seam slightly toward the facing side so it won’t show on the finished waistband.
7. Unfold the waistband and pin the unfinished edge of the waistband (not the facing) to the top edge of the shorts, with right sides together. Match the center-front and center-back notches and the edges. Stitch the waistband to the shorts/skirt with a 1/2″ seam. Press the seam allowances toward the waistband.

From Liesl: Later, the waistband facing will cover your stitching and seam allowances when you fold it over to the inside of the shorts, which we’ll do after sewing the zipper tomorrow. We’ll see you back here for our super-easy, super-popular invisible zipper application method, OK? In the meantime, look how great that waistband is looking already!
From Liesl: Wow, we’re almost done! Today we’ll sew the zipper and finish the waistband, and tomorrow we’ll finish the shorts. If the idea of a zipper puts you into a panic, never fear! I think the invisible zipper is the easiest to sew, and we’ll walk you through it step by step.
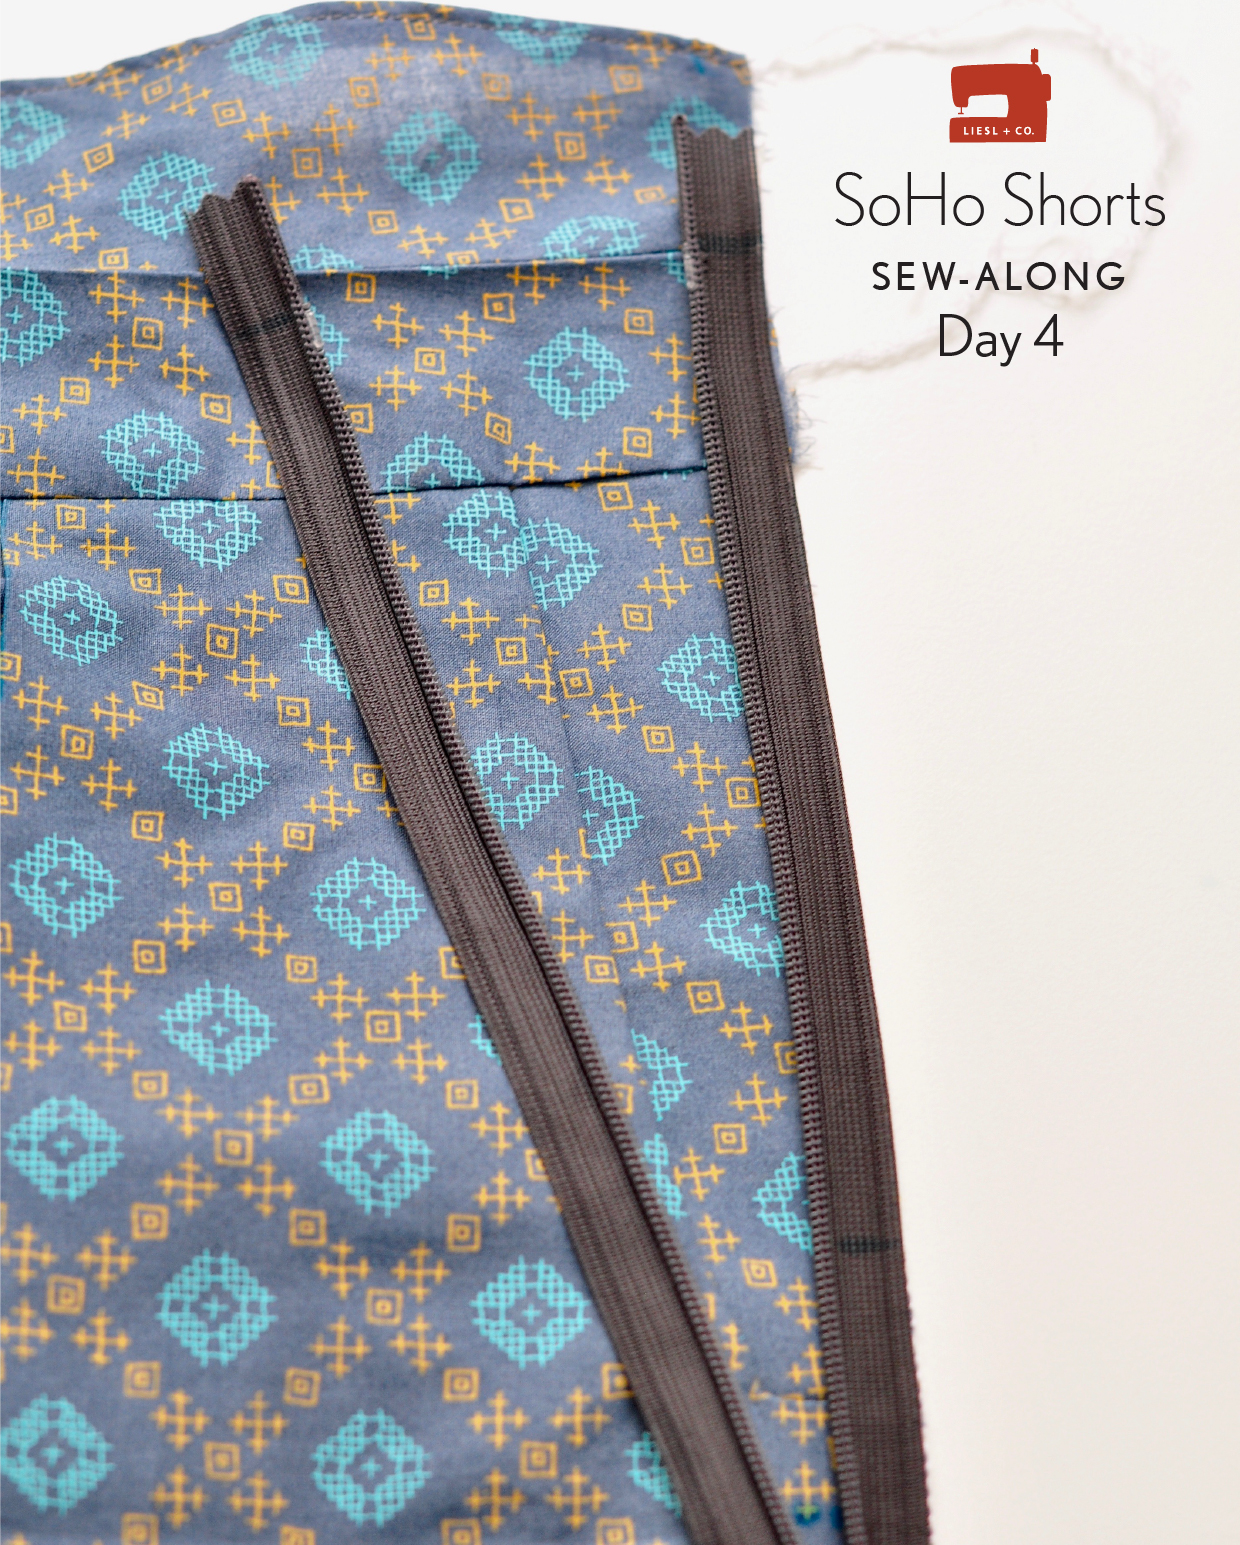
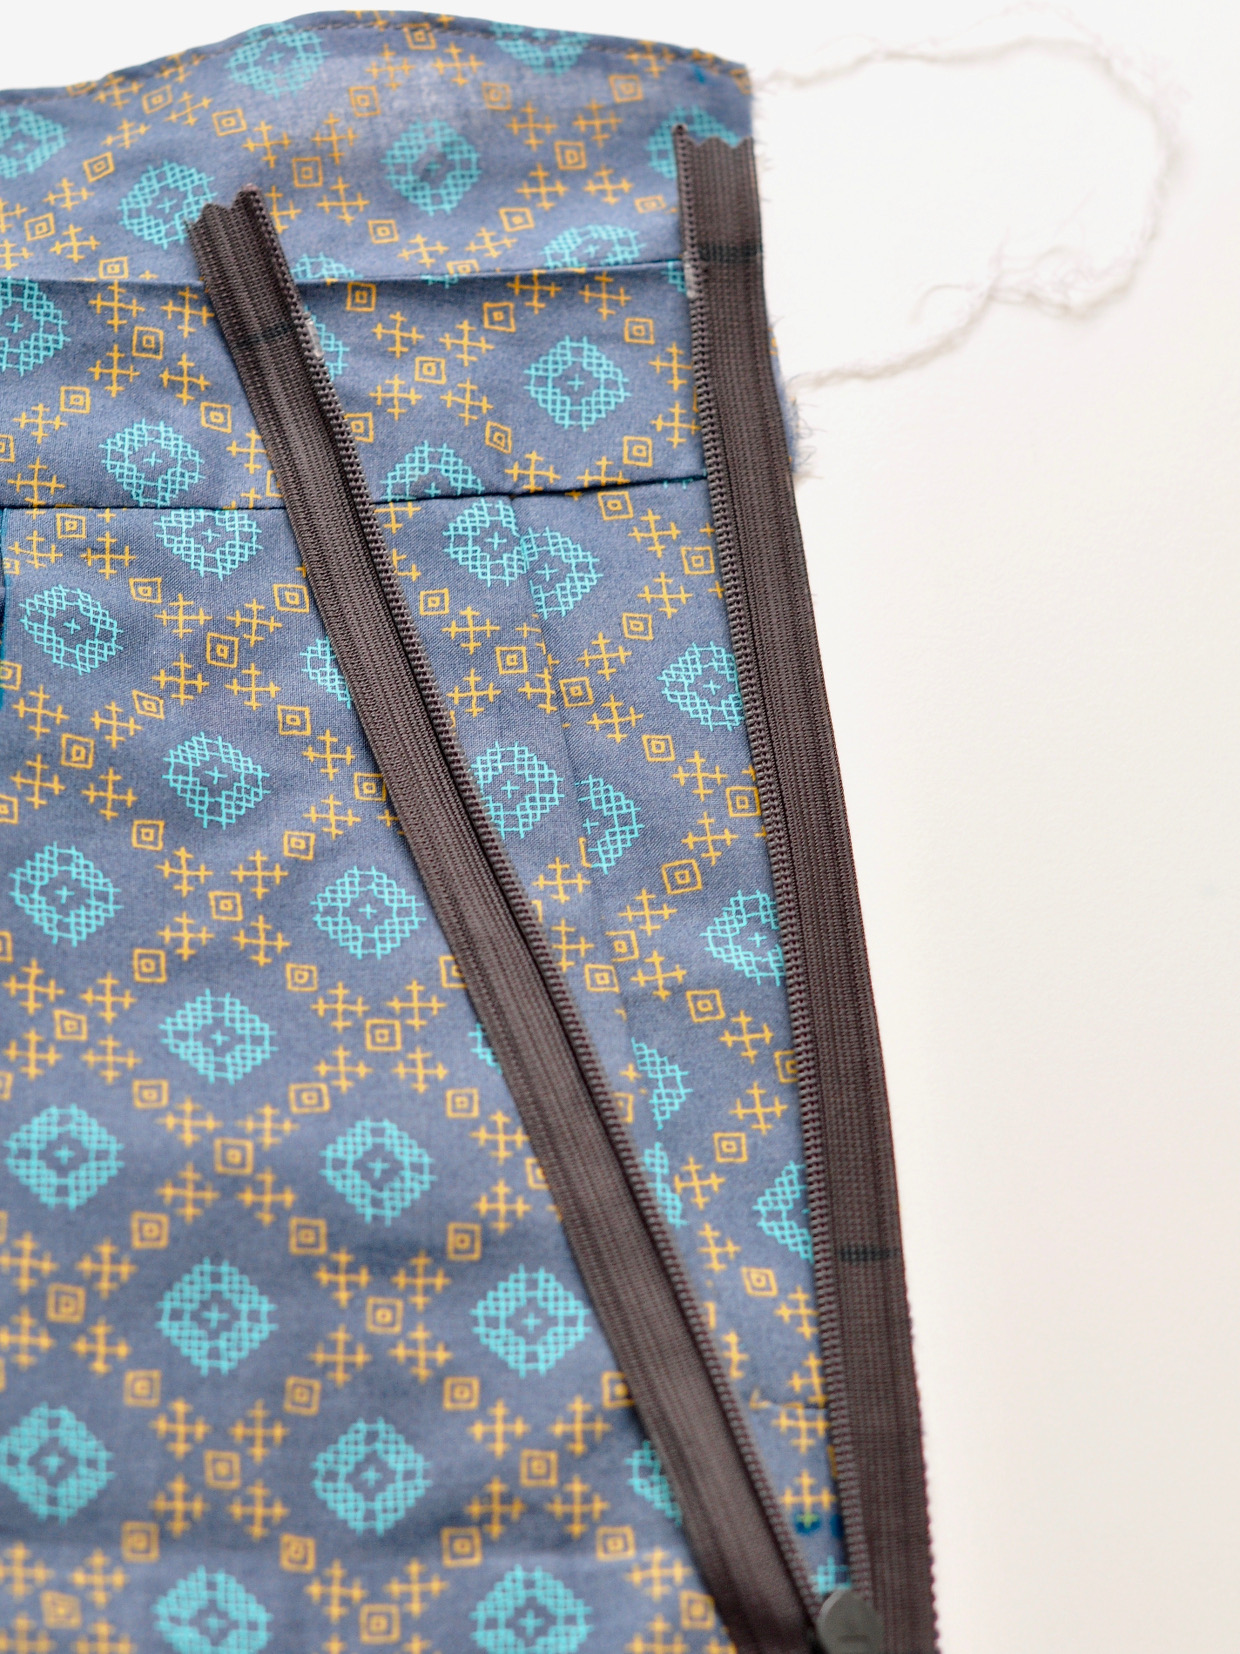
Attach the Zipper
1. Close the invisible zipper and use a pencil or fabric-marking pen to mark the wrong side of the zipper tape at the top of the zipper slider (the metal part that moves up and down).
From Liesl: This marking just helps you to properly position the zipper so it lands in the right place on the shorts.
2. Unlike a regular zipper, the zipper tape on an invisible zipper “folds over” next to the coils, or teeth, so that the coils wrap to the back of the zipper. To insert the zipper, you’ll first need to iron the zipper tape flat so that your sewing machine can stitch very close to the edge of the coils. To do this, begin by setting your iron to a low setting (to keep from melting the plastic coils). Then unzip the zipper and, working from the zipper’s wrong side, press the zipper tape flat, uncurling it as you press. Leave the zipper unzipped until you’ve finished inserting it so that the coils stay pressed flat while you work.starting with the wearer’s left side of the shorts-front piece, place the zipper tape face down on the right side of the fabric. Pin the left side of the zipper tape to the fabric so the edge of the coils aligns with the 1/2″ stitch line, the zipper tape sits in the seam allowance, and the mark at the top of the zipper sits just below the folded top edge of the waistband (1/8″ is a good distance). Hand-baste the zipper to the fabric along the center of the zipper tape to the dot you transferred from the pattern piece. If the zipper is longer than the dot, just leave the zipper’s extra length hanging for now. If you have an invisible-zipper foot, attach the foot and line up the needle with the center mark. If you’re using a regular zipper foot, attach the zipper foot to your machine and adjust the needle to be on the left side of the foot. Stitch the zipper to the fabric close to the coils (without stitching into the coils themselves), sewing from the mark at the top of the zipper to the dot and backstitching or lockstitching at both ends of the seam. note that the zipper will be longer than the dot, and you won’t be sewing all the way to the end of the zipper.
3. Close the zipper (for just a moment, so you don’t need to press it flat again) and mark on both sides of the zipper tape where the waistband seam hits the zipper and where the zipper hits the dot you transferred from the pattern. This will help you to line up the zipper on the back of the shorts so the waistband seam and the side seam line up when the zipper is closed. Reopen the zipper and pin the zipper to the right side of the shorts back, matching the markings on the zipper tape to the top of the waistband and the dot you transferred from the pattern.
4. Move the zipper foot (or the needle, depending on the type of zipper foot you’re using) to the opposite side so the needle sits to the right of the zipper foot. (If you’re using an invisible-zipper foot, you may not need to make any changes.) Pin the opposite side of the zipper face down to the shorts-back panel so, again, the edge of the coils aligns with the 1/2″ seam line, the zipper tape sits in the seam allowance, and the mark at the top of the zipper sits just below the folded top edge of the waistband, the same distance as you placed it in step 2 above. The zipper tape will seem to be twisted at the bottom if you have everything pinned and stitched properly. as before, baste and then machine-stitch the zipper to the fabric close to the coils, sewing from the mark at the top of the zipper and continuing down to the dot you transferred from the pattern piece, backstitching or lockstitching at both ends of the seam.
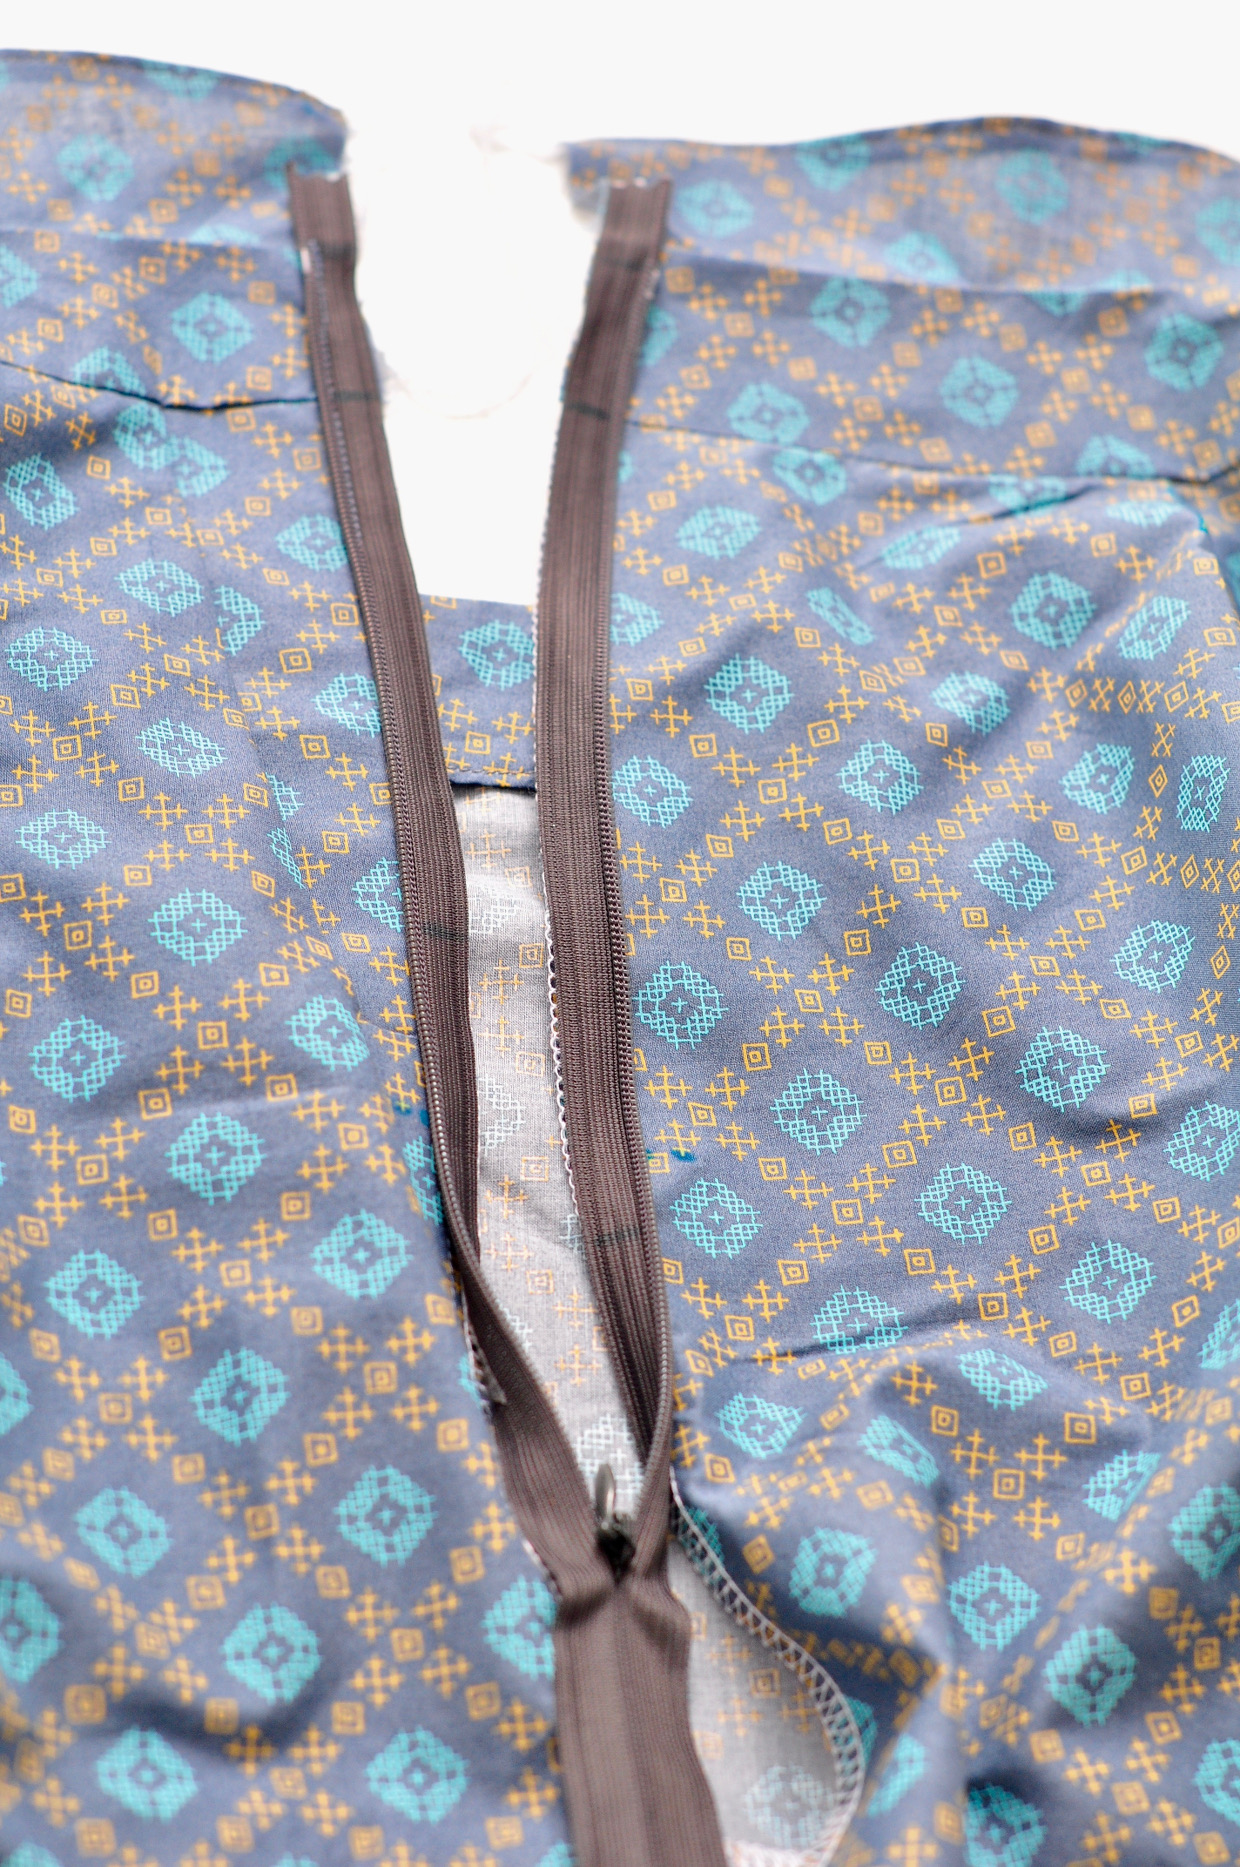
5. Close the zipper and check to be sure that it is invisible from the right side of the fabric. (if the zipper shows, you may need to stitch again closer to the coils.) Pin the shorts-front and shorts-back pieces together below the zipper opening, with right sides together. Fold the end of the zipper out of the way and lower the machine needle by hand about 1/8″ above and just slightly to the left of the last stitches on the zipper. Note that the two seam lines will not meet but will instead be slightly offset. Stitch the seam for about 2″ using the zipper foot, backstitching or lockstitching at the start of the seam. (The zipper foot will allow you to get closer to the seam line without the bulk of the zipper interfering.) Then switch to the regular machine foot, if desired, to finish sewing the side seam.
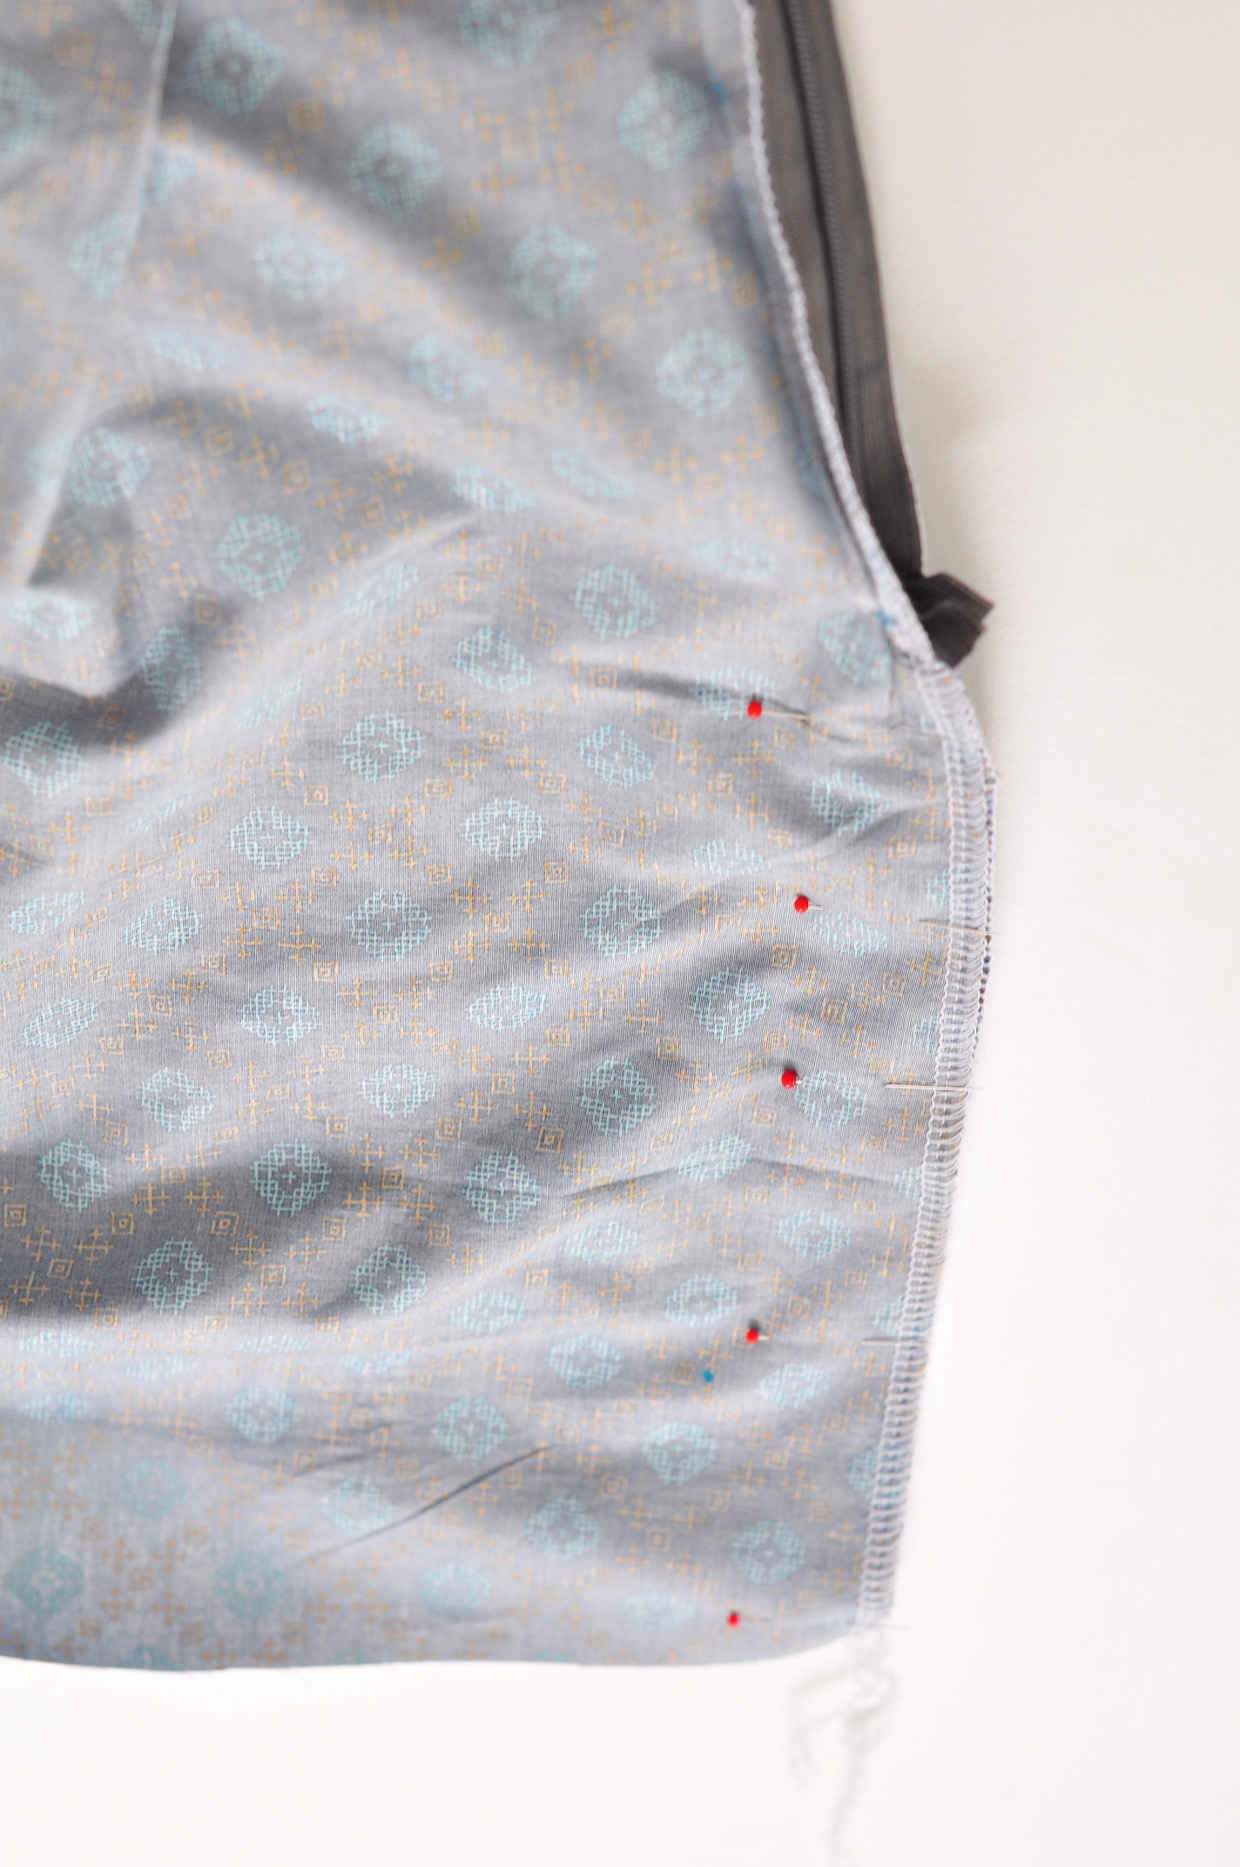
6. Press open the seam allowances below the zipper. Check to be sure that the side seam is smooth, especially at the base of the zipper. If the seam puckers or gaps, adjust it as necessary. It may take a little fiddling to get everything aligned properly.
7. At the bottom end of the zipper, stitch about 1″ of the zipper tape to the seam allowance to secure it. This will make it easier to close the zipper and will keep the bottom of the zipper from shifting.
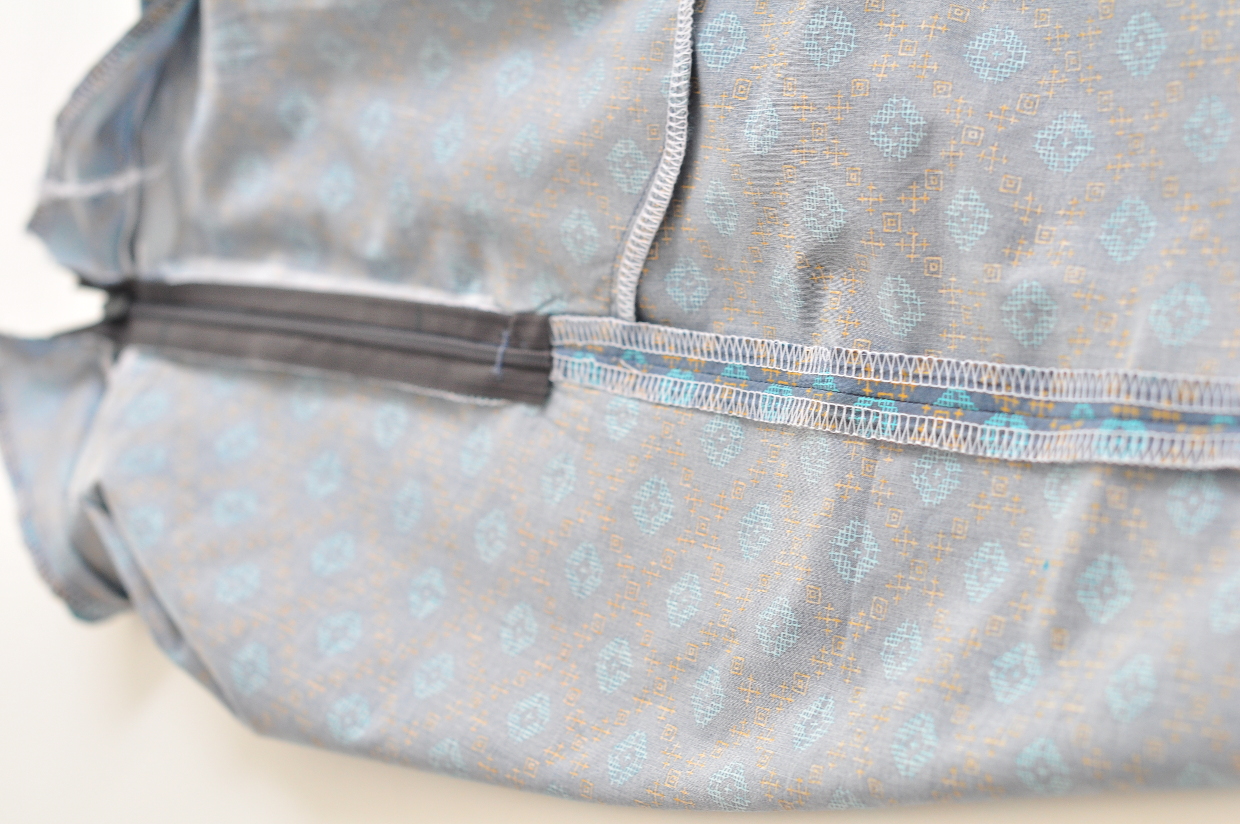
8. Open the zipper and bend and fold the top of the zipper tape toward the seam allowances of the garment. Stitch the loose top ends of the tape to the seam allowances to keep the tape out of the way.
9. Wrap the waistband facing around the top of the waistband and pin it to the waistband, covering the zipper, with the right side of the facing to the right side of the waistband. With your zipper foot, stitch the facing to the zipper just inside the first zipper stitch line, backstitching or lockstitching at both ends. Repeat with the other end of the waistband.
10. Turn the waistband right side out so the facing is inside the waistband. Check to be sure that the edges of the facing are finished smoothly and the zipper closes. (If the zipper has trouble, you may need to sew the facing a little further away to give the zipper room to maneuver.) Smooth the waistband facing along the inside of the waist- band, pinning it to the waistband from the right side of the waistband. Edgestitch the waistband seam or stitch-in-the-ditch to finish it, catching the facing in the edgestitching. (If you prefer, you can also slipstitch or catchstitch the facing by hand to finish it.)
From Liesl: OK, tell me that wasn’t so bad now. You survived, right? The more you sew zippers like this, the easier and faster they’ll become. Did you decide to add belt loops using Shelley’s tutorial? We’ll be back tomorrow to finish up the shorts, if you can wait that long.
From Liesl: Ah, the last day of our sew-along. And this one is so easy! In fact, it wouldn’t surprise me if you just jumped ahead and did it yesterday since you were already so close to finishing. But here we are with just the hem to sew in one last step.

Finish the Shorts
1. To hem the legs of the shorts, fold and press the bottom raw edge of each leg to the wrong side twice: first by 1/2″ and then by 1”. Edgestitch the innermost folded edge to finish the hem, then press the hem to finish it. Remove any visible basting stitches.
From Liesl: I always like to use a row of basting stitches to act as a folding guide, especially for the 1/2″ seam allowance. Then I usually use tailor’s chalk to mark the 1″ hem.

2. You’re finished!
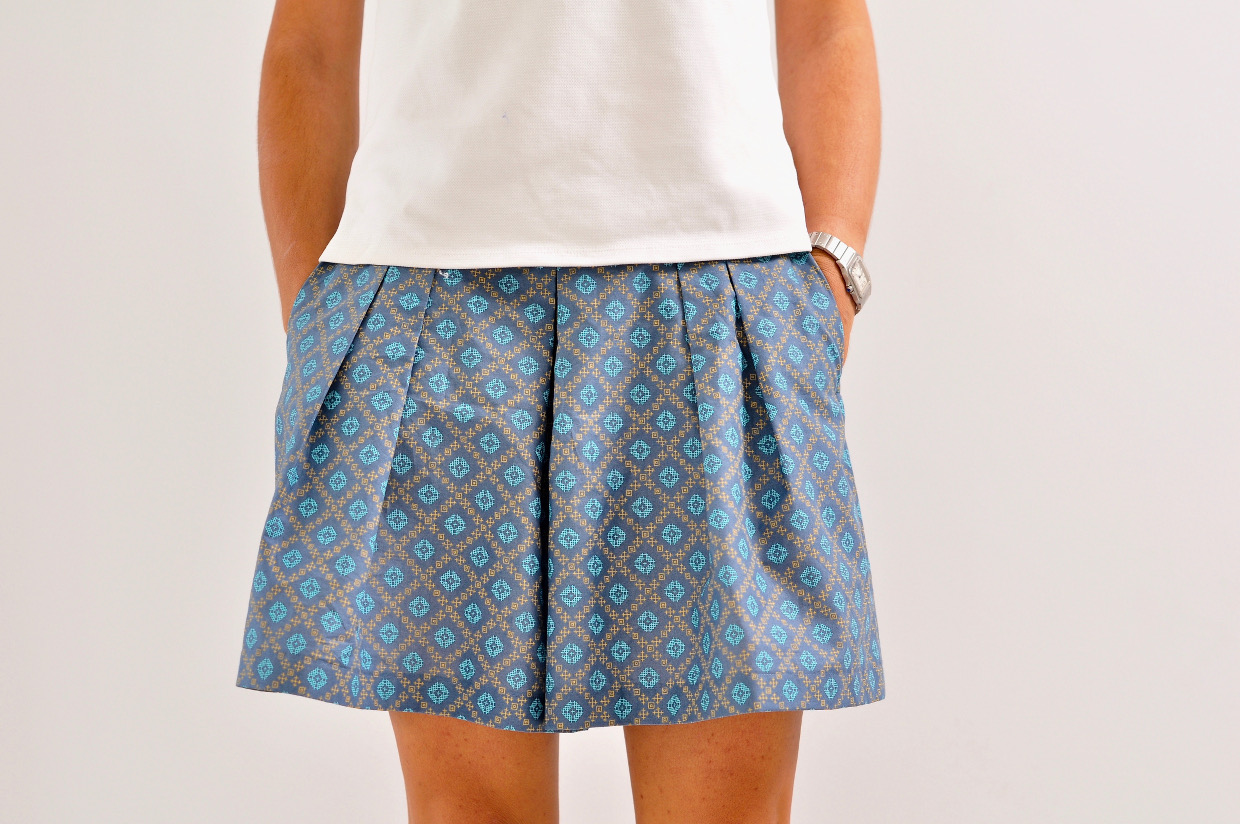
From Liesl: I love how Rita’s shorts turned out. She used lawn from my Woodland Clearing collection for Robert Kaufman for this pair, which means they’re really light and should be comfortable all summer, even here in Madrid.

Thanks for joining us, and I can’t wait to see how your finished shorts (or skirts) look. Now it’s time to share what you made! Post photos to our Liesl + Co. Flickr group or tag them #sohoshorts or #sohoskirt on Instagram. And then make sure to add them to the linky party here so everyone can see. Thanks for participating, and let us know how it went!
Oh I missed the announcement, but great to see this is coming! I bought the pattern shortly after it was released and would love to sew a pair of shorts! Probably I won’t be able to join the sewalong this week, as I will not have a lot of time, but good to know I can come back and have a look here 😉 Thanks!
Thanks so much! I’m just about to get started. I do have a question about the twill tape to stabilise the waistband – would bias binding tape work instead? I have the latter but not the former in stock!! Many thanks
I haven’t tried bias binding, but it would probably work if it’s strong enough to hold without stretching or breaking.
I love the waistband on these! So professional and comfortable! I planned on making the skirt but cut out some shorts too, and I am glad I did – I love them! Thank you for these sew-alongs, it’s a great excuse to get these new patterns made right away!
I sewed up a pair of soho shorts in size 12 (am a 33″ waist and 38″ hips) after making a muslin in size 14 which was too big. The size 12 is too big as well. Yet this is what the pattern says I should use based on my measurements. Any suggestions?
Julia, are you using a paper version of the pattern? If so, did you catch the errata notice that is posted here: https://oliverands.com/shop/soho-shorts-skirt-sewing-pattern.html#tab-errata? That might explain.
Same! I’m a RTW size 6 (knowing RTW isn’t the same as sewing patterns but WOW) and cannot fathom I’m looking at a size 16 per the chart…
Our patterns are very close to RTW, so I’m not sure what you’re referring to?
I loved making this skirt! Could I use the pattern to make a gathered version?
Thanks!
Of course you could! I don’t think you’d need to make any changes–just gather instead of pleating.
I completed my shorts today, and love the look from the front. However, the back pleats must be changed to darts. I wear size 10 in RTW, checked measurements and cut and sewed size 12. The waist is perfect and I love the roomy comfort of the shorts. I will make a note on my pattern to change the back pleats to darts. Love your patterns! They are well engineered.
dag er staan mooie modellen op
maar vind jammer dat ik nooit de patronen kan vinden voor ze af te printen
ou je peux trouve le patron du short