Many of you have asked about the Building Block Dress book and how it can be applied to other patterns, including women’s clothing. Here’s an example of how the book could inspire you to look at sewing patterns differently.
It’s my hope that once you start to alter patterns like the book shows you how to do, you’ll start to look at clothing differently. Rather than focusing on the pattern envelope image, you’ll look at the “bones” of the designs. It doesn’t matter what the fabric on the cover of the pattern is; what’s important is that you look at the structure of the design itself and think about how you could you alter that design to make other styles.

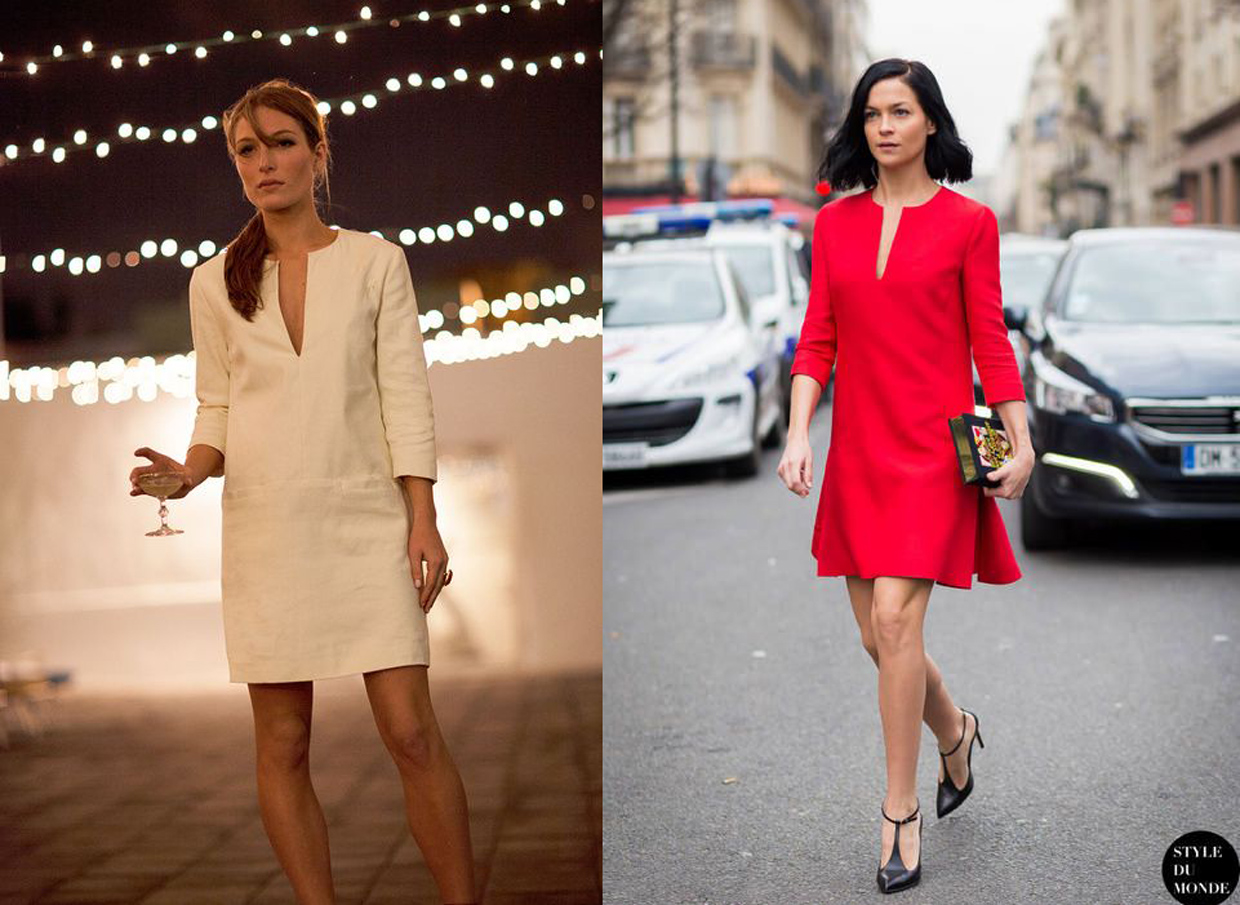
Here’s an example for you. For quite a while now I’ve had these two images saved in a Pinterest folder. Both dresses are really cute, and I thought it would be fun to make a similar style. I especially had my eye on the white Emerson Fry dress because I love the silhouette and the hip seam with pockets, and I had some perfect sateen from Robert Kaufman that I wanted to use for my dress.
So I decided to start with one of the patterns I’m most proud of developing, our Liesl + Co Bistro Dress. It doesn’t look much like the photos above, does it?

This is a classic sheath dress pattern, and I’m especially proud of this pattern because I spent a lot of time getting the structure and details just right. It’s one of my block patterns, and I’m especially happy with the armhole and sleeve, which turned out beautifully. I knew this pattern would be a great place to begin, even though it looks nothing like the inspirational images. So here’s how I did it:
1. I started with the front and back dress pieces. Right away I made a muslin (details on page 7-11 of the Building Block Dress book), eliminating the waist darts on both pieces to get a looser fit through the waist in order to get closer to the inspiration photo.
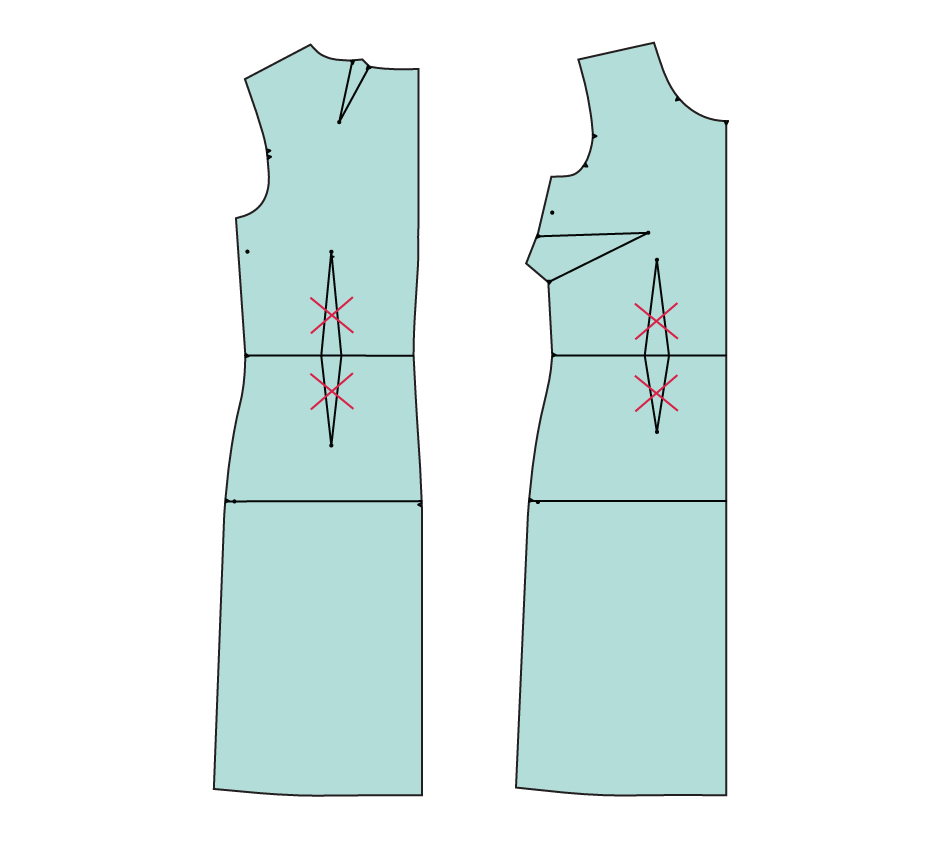
Then I used the muslin to determine where I wanted to make changes to the basic pattern. Here are the changes:
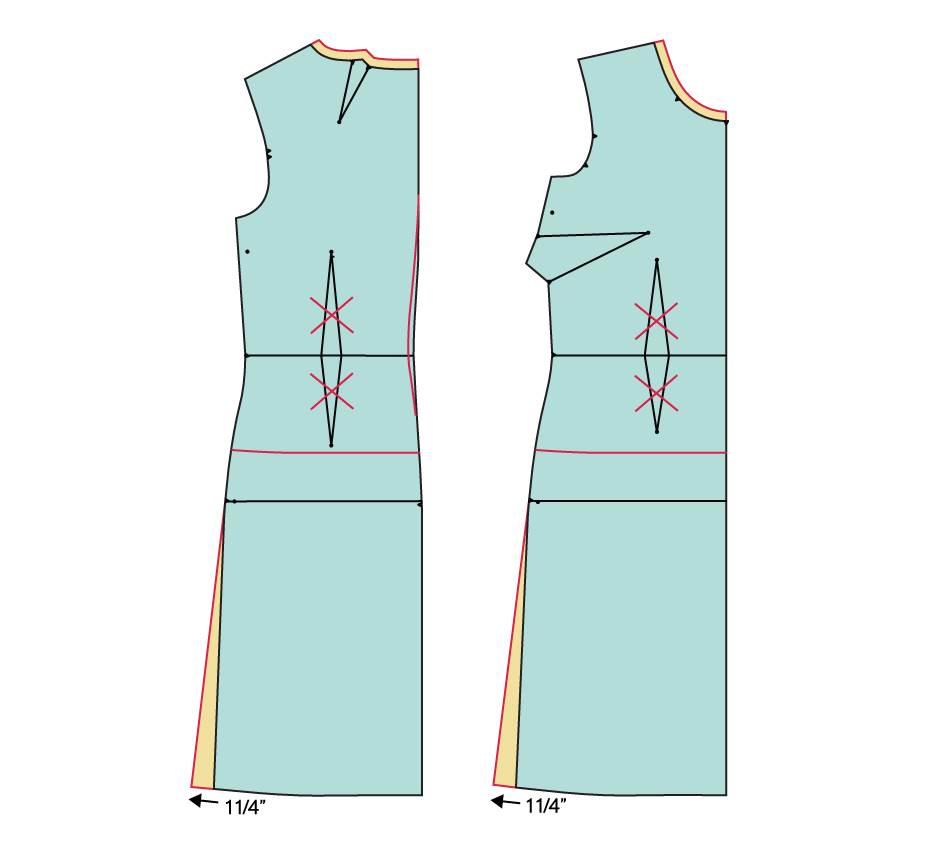
- I drew where I wanted the hip seam to be positioned on my body, which is about 1/2″ below the tip of the un-sewn dart. (See the red line on the illustration below and refer to Color Blocking on page 90 of the Building Block Dress book).
- I also added a little width to the skirt itself, starting from the hip line on the pattern piece and increasing by 1 1/4″ at the hem. (This is a modification to the A-line dress instructions on page 82 of the book, since I only flared at the side seam.)
- I shortened the hem to a few inches above my knee (see Lengthening and Shorting a Pattern on page 12) and determined how deep I wanted the neckline to be. I marked the neckline depth on my muslin. (See Shaped Neckline, page 117.)
- I kept the back seam of the original pattern so I could contour the back of the dress a bit. The side seams of the dress already have a nice curve to them, and I wanted to curve the dress back a little more since I eliminated the darts. So I pinned the muslin in a few spots along the back seam to determine how much I wanted it to contour. (The sewing term for this is a “swayback,” but that makes me think of an old horse so I avoid the term when I can, thank you very much.)
- Also, I forgot to do it for this dress, but for the next one I want the neckline to be higher and narrower, so I’ll raise it by 1/2″. This is the same amount as the seam allowance, so I just need to add 1/2″ seam allowance to the existing neckline.
Here are some photos of the muslin itself, for your reference. You can see how I used it as a working draft of the dress. This allowed me to figure out all the details and changes I wanted to make to the pattern before I cut into my fabric. I determined how low the neckline should be, where to add the hip seam, and how much flare to add to the skirt. It also meant I didn’t need to worry about anything when it came time to sew the dress itself. I could check to be sure I wouldn’t need a zipper, confirm that I liked the shape and the position of all the details, etc.
Here’s a quick look at my muslin.
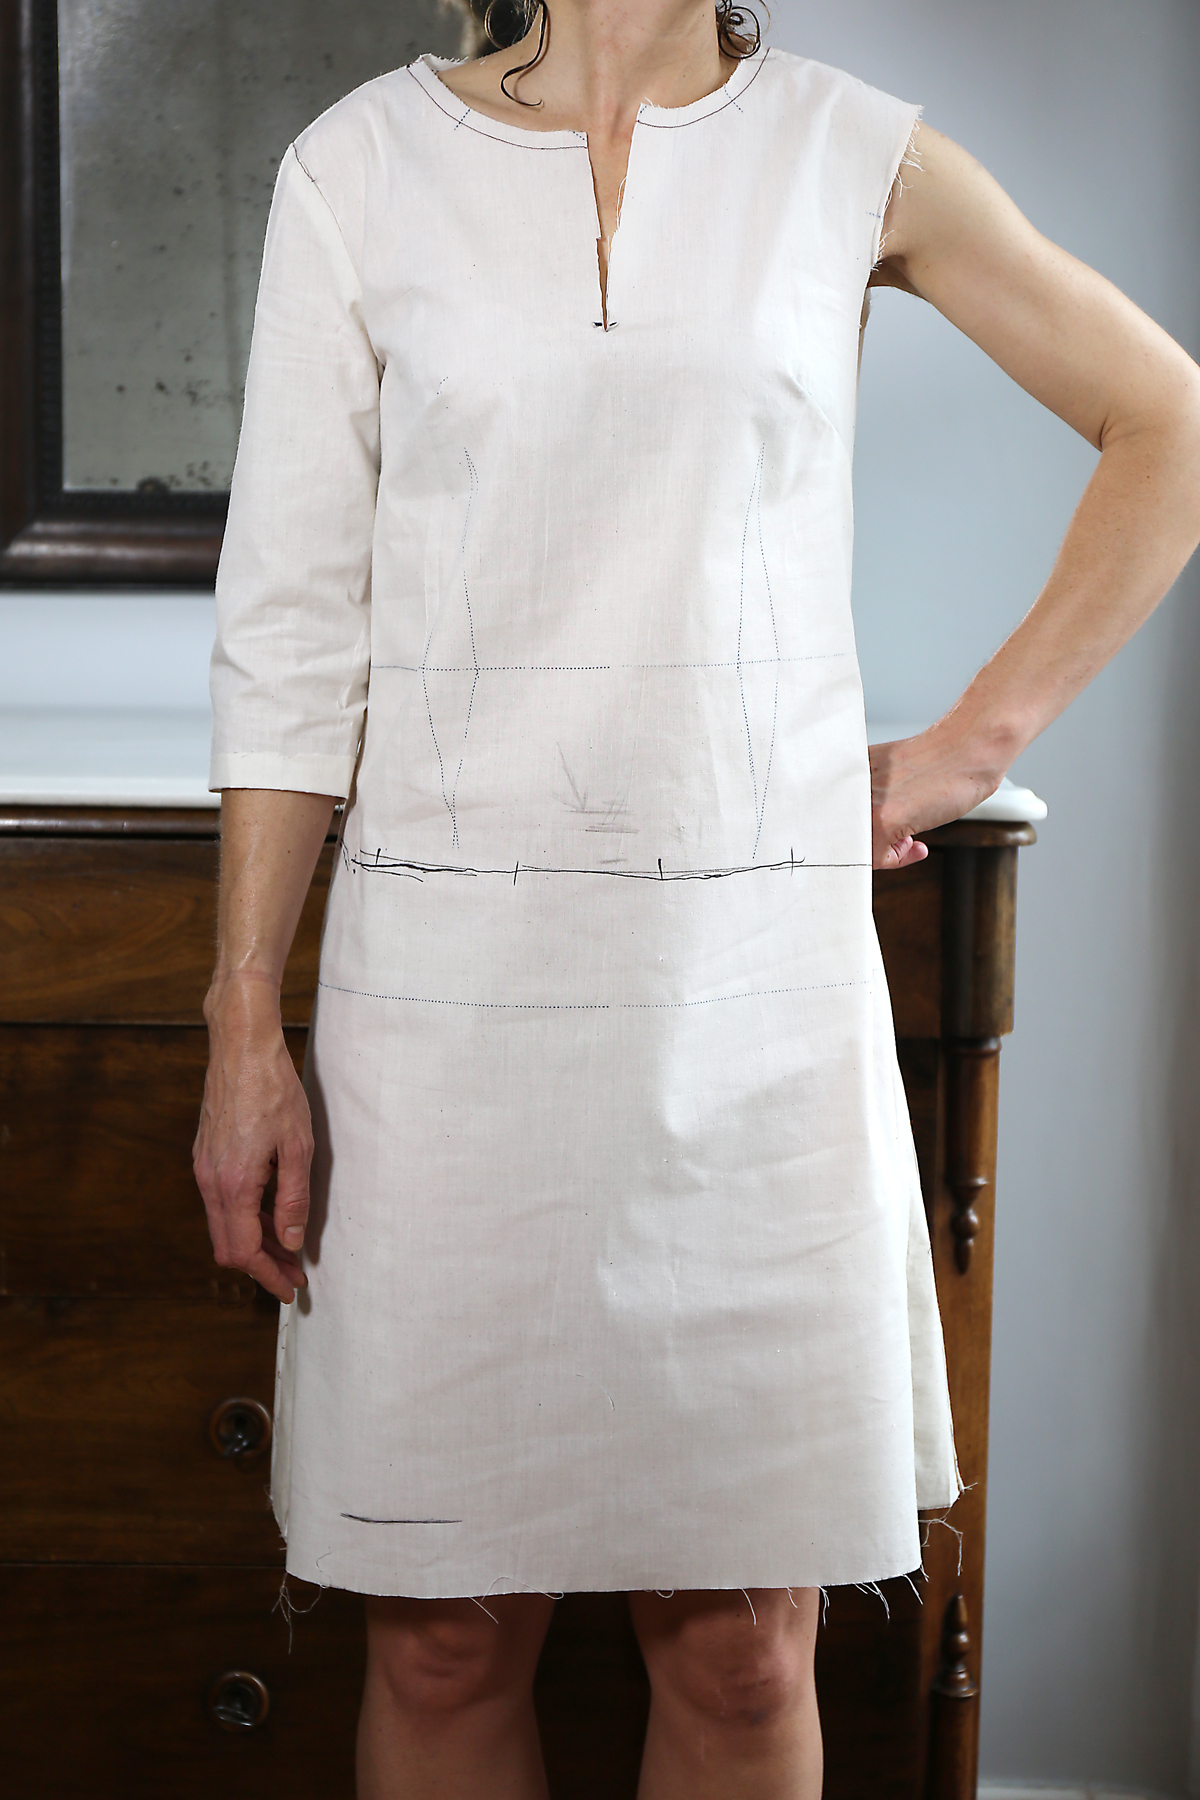
You can see in this photo where I indicated the final length of the hem. It’s always a good idea to try on your muslin with undergarments and shoes like you’ll wear with the finished garment because you’ll get a better idea of the final appearance.
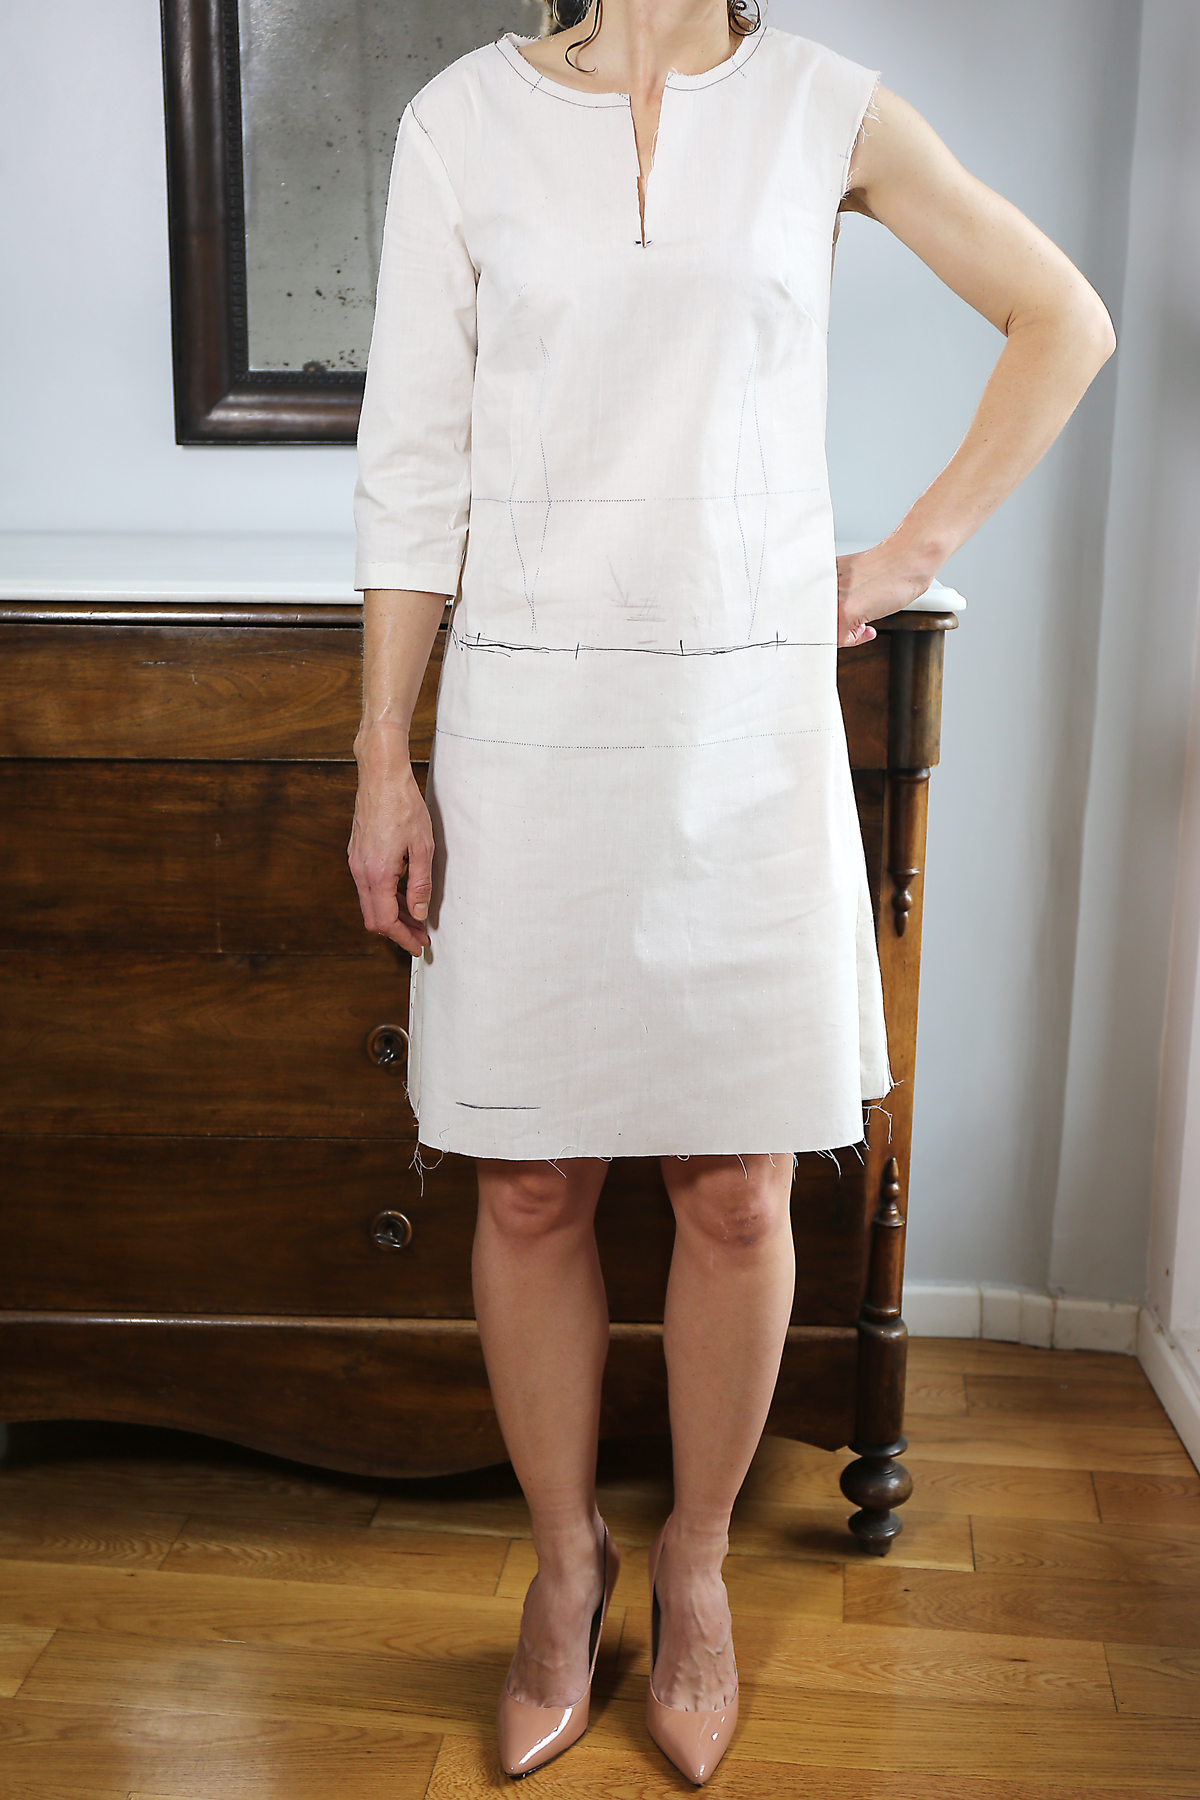
Here is a close-up of the side seam at the hem where I added a wedge of fabric to flare the skirt a bit. As you can see, I also drew on the dress with a Sharpie while I was wearing it to indicate approximately where I wanted the hip seam to be located. Muslins are your working draft; use them to your benefit!

2. Once I was done fitting the muslin, I transferred the changes back to my pattern pieces and added hip seam pockets to the front pattern pieces. (I modified the In-Seam Pockets instructions on page 98 of the book.) The pockets are similar to the pockets on our Liesl + Co Bento Tee as well as the Oliver + S Book Report Dress and Lunch Box Tee, if you already own any of those patterns.

3. Then I turned my attention to the facings. I raised the neckline of the facings by 1/2″ to match the revised neckline of the dress and added to the bottom of the front facing to accommodate the deep V of the new neckline. (See Internal Neck Facing on page 118.)

4. I also shortened the sleeve, marking the desired finished length on my muslin so I could check the proportions on my body.

After that, sewing the dress was very easy and fast, especially since I knew I didn’t need the side zipper for this version. Everything was straightforward, especially if you’ve sewn some of our other patterns before. If you’re not sure how to sew any of the changes you made to the pattern, refer to the sewing instruction for that section in the Building Block Dress book itself. I really made sure to design the Building Block Dress book so you can refer to each section and assemble the dress based on the changes you make to the pattern. The sewing instructions are a huge part of this book; they’re thorough so you don’t get lost once you’ve altered the pattern.
And here is my finished dress! I wore it quite a bit on my trip last month and got lots of compliments.

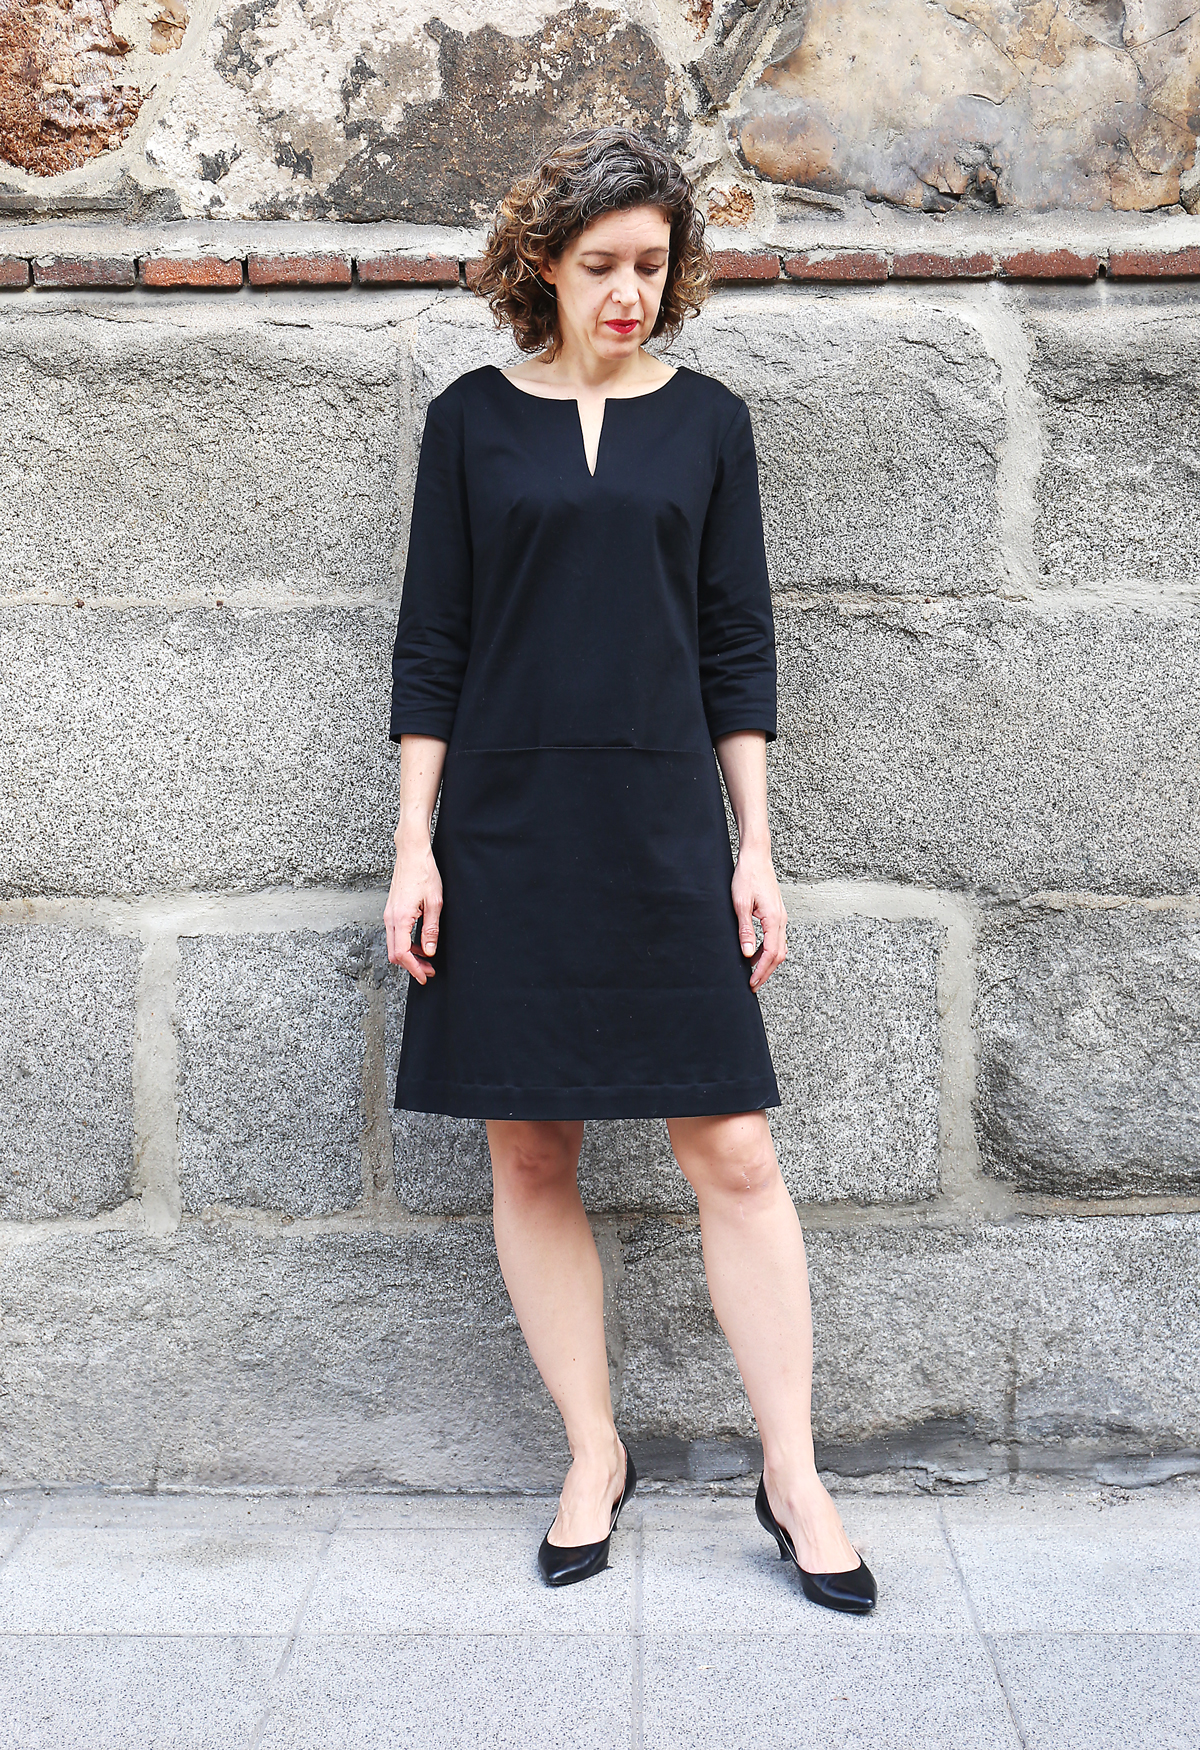
I like it so much that I’m busy sewing another one in silk velvet for the holidays, which I’ll show you as soon as it’s finished. It’s been slow going since each seam needs to be hand basted before machine stitching, but now that I have the altered pattern I can sew it as many time as I want. Or make other changes to the pattern using the techniques from the book, whenever I have new ideas for changing it.
I hope this gives you a good sense of how you can use the Building Block Dress book in sewing for yourself as well as sewing for the girls in your life.
Love the dress!
Thanks, Kerri!
Wow! I love this. Thanks so much for what you do. Now to go check out the price of the Bistro dress.
I’m so glad you like it, Barbara!
I love this mod!! And thanks for talking about using the techniques for women’s patterns!
My pleasure, Inder. Thanks for the comment.
I LOVE this dress! I need to make some time for selfish sewing!
I hope you make it, Laura!
Your book is a real game changer for me – I am so grateful! As a newbie I have already planned to use it to help with lining my grown up dresses!
That’s great to hear! I hope you’ll get lots and lots of use out of it.
Wonderful! Thanks for taking the time to explain the details.
Thanks for the comment, Sarah!
Thank you for the tutorial! I love the idea of perfecting the fit of a basic pattern, then using it as a base for style alterations. Your dress came out very much like the inspiration – it looks fantastic.
I’m glad you like it, Siobhan. The book has all kinds of tips and tricks to help you make much larger changes than this, too!
The Bistro dress is one of my favorites and I love it as a shift dress. Thanks for the inspiration. Once I get through dance recital sewing this week, I’ll be ready for some selfish sewing.
I hope you’ll show us when you finish, Julie. And I’m glad to hear that you like the pattern so much.
Your detailed instructions and the thinking behind all the changes are so helpful! I love the finished dress, and seeing the muslin really helps me visualize how to best use the info provided by the muslin process.
I’m glad it helped, MaryLou. It’s really a quick process once you understand how to make a muslin.
I was going to make my second bistro dress with some divine black linen, but may try this. Love it. Thank you for the instructions!
That’s fantastic, Ksenja! I’d love to see it when you’re done.
Beautiful dress Liesl. Can’t wait to see it in velvet. That will be perfect for the holidays! Thank you for the instructions.
I think it will be fun to wear, too, Lisa! Now I need an invitation to a fancy party…
So essentially you only scooped out some fabric from the middle of the back seam to compensated for no darts?? And to give a bit of shape?
Yes, more or less. It’s just like pinning a side seam to fit your shape more. Nothing dramatic, just a little more curvy so it’s not too straight.
Oh this is super exciting thanks so much (again). I haven’t used the BBD book yet but have admired the girls dresses on FB and I purchased the Bistro Dress a few days ago. I have many Lisette and Liesl & Co patterns in my stash plus fabric for them but have only made four so far, Late Lunch Tunic, PJs, the Everyday skirt and B6182 (not a good shape for me unaltered).
Not sure if this is an ‘intelligent’/appropriate question but… do you design for a certain shape eg pear, broad shoulders, C cup etc? I’ve noted comments elsewhere online that certain designers aim for a particular shape and feel this is important to know upfront. I felt like a champion making my GD dresses from your patterns but daunted when it comes to fitting myself. I’m determined though 🙂 apologies for the long comment.
Lynda, I try to design for a variety of different shapes. Some of my designs will probably look best on certain body shapes more than others, but in general I try to design to accommodate a variety of shapes so our pattern can work on many different people. And every pattern includes instructions for a Full Bust Adjustment so it’s easy to get a good fit without too much guessing. I hope you’ll have fun sewing from the patterns!
Is there guidance in the Building Block book, or somewhere online, of how to make a muslin, make fit changes, and then transfer them back to the pattern? This is probably the biggest obstacle to me making clothes for myself – I can’t figure out this first step. Thanks!
Treen, yes. Pages 7-11 walk you through the process of making and fitting a muslin. I think it’s an important step in sewing and can save you a lot of time and frustration.
Oh I love both dresses! Thank you for showing what can be done with darts. I love the way you draft your patterns! And your book is such a wonderful reference!
Thanks very much, Emily! I appreciate your kind words.
Love this dress Liesl and how it came to be. I haven’t sewn the Bistro dress yet, but your description of it’s arm/sleeve has me keen.
Oh, and this old nag refuses to do swayback alterations too, but I think I need to learn that wordier version of the same manoeuvre
Shall we come up with a better term for it, Lightning? It’s not very flattering a term to use, that’s for sure. And we might as well come up with something that helps us feel good about our bodies. I like my back just fine…
Thank you so much for this. I LOVE the Bistro Dress (made one for myself a few months ago), and I’ve been searching for the perfect shift dress for the hot and humid climate of Singapore where I live. I also just got the Building Block Dress book and have been reading it eagerly – too busy with Christmas projects but am looking forward to getting back to sewing clothes soon! I will definitely be trying this modification of the Bistro Dress as soon as I can…
I love this post and your dress is beautiful. You always have such clean looking designs and I would love to see this kind of pattern manipulation/tutorials for women’s clothing more- so thanks!
Very Pretty! Not sure if I could make all those changes correctly, but I sure would buy the pattern if it becomes available!
I love this, would you suggest lining this? Thanks!
Thank you for such a helpful tutorial! I am currently designing my first dress using my fitting shell. Do you have any suggestions for smoothing out the side seam at the waist when making a shift dress? Right now I get an awkward point where the bodice and the skirt meet.
Why didn’t you Sew in a zip? Was that dress easy to slip over your head ??
Gosh. Would you consider making a ready made pattern for this dress?
I would like to know how to get the pattern you made into the black dress. I think this will work for me.
Thank you soo much. I love ” new look” dresses. Fuss free. Zip, and still looks elegant.