Let me introduce you to Heidi who lives in Australia. She is a huge Oliver + S fan. She usually doesn’t sew a pattern only once, but multiple times. She has got a lot to share with us today, so I’ll hand it over to her. Thanks so much for being here Heidi!

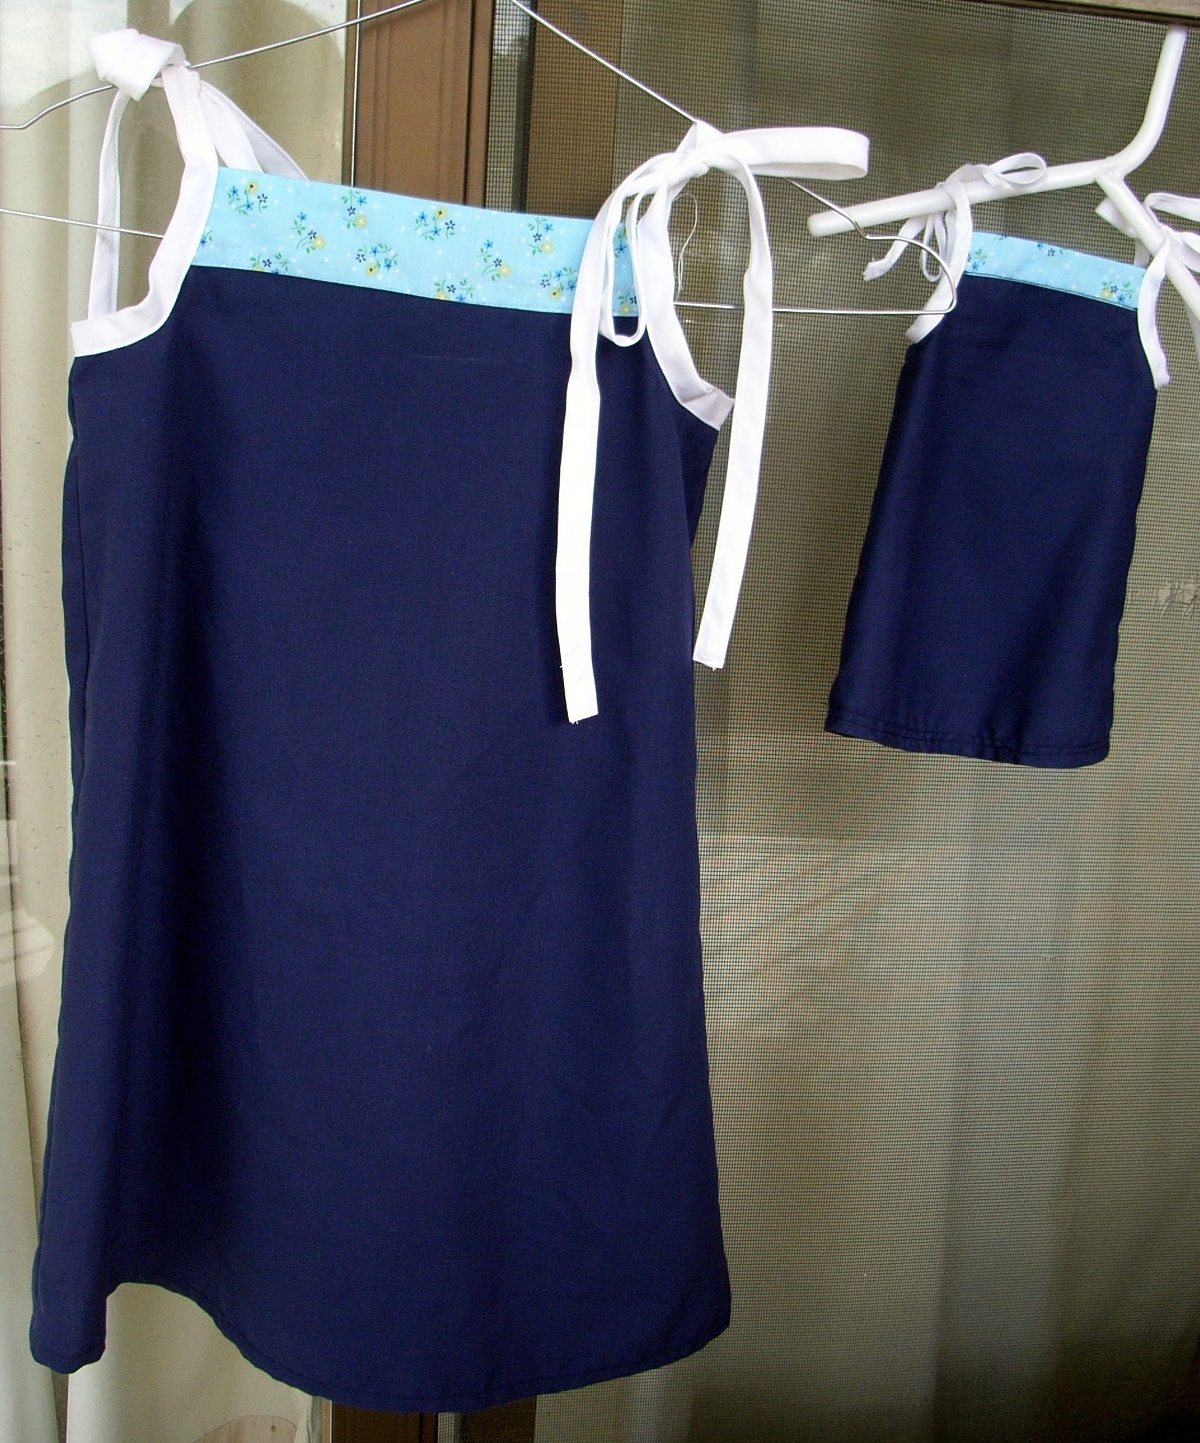
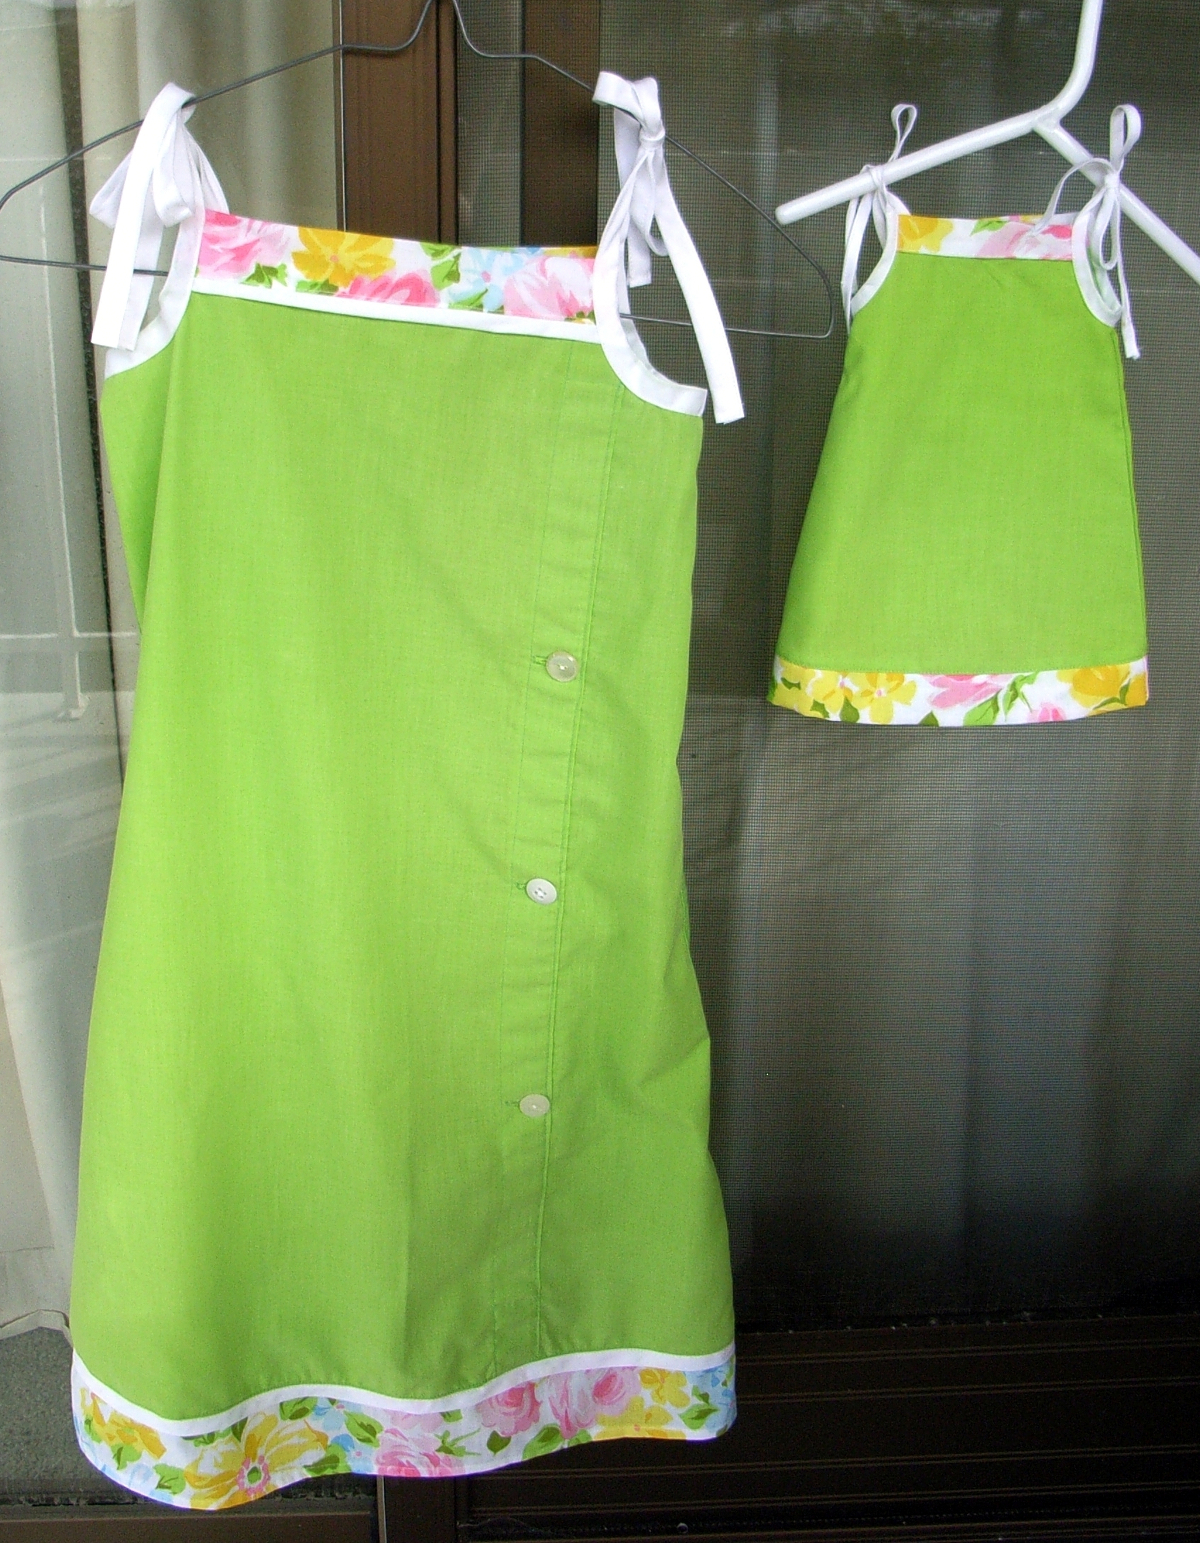
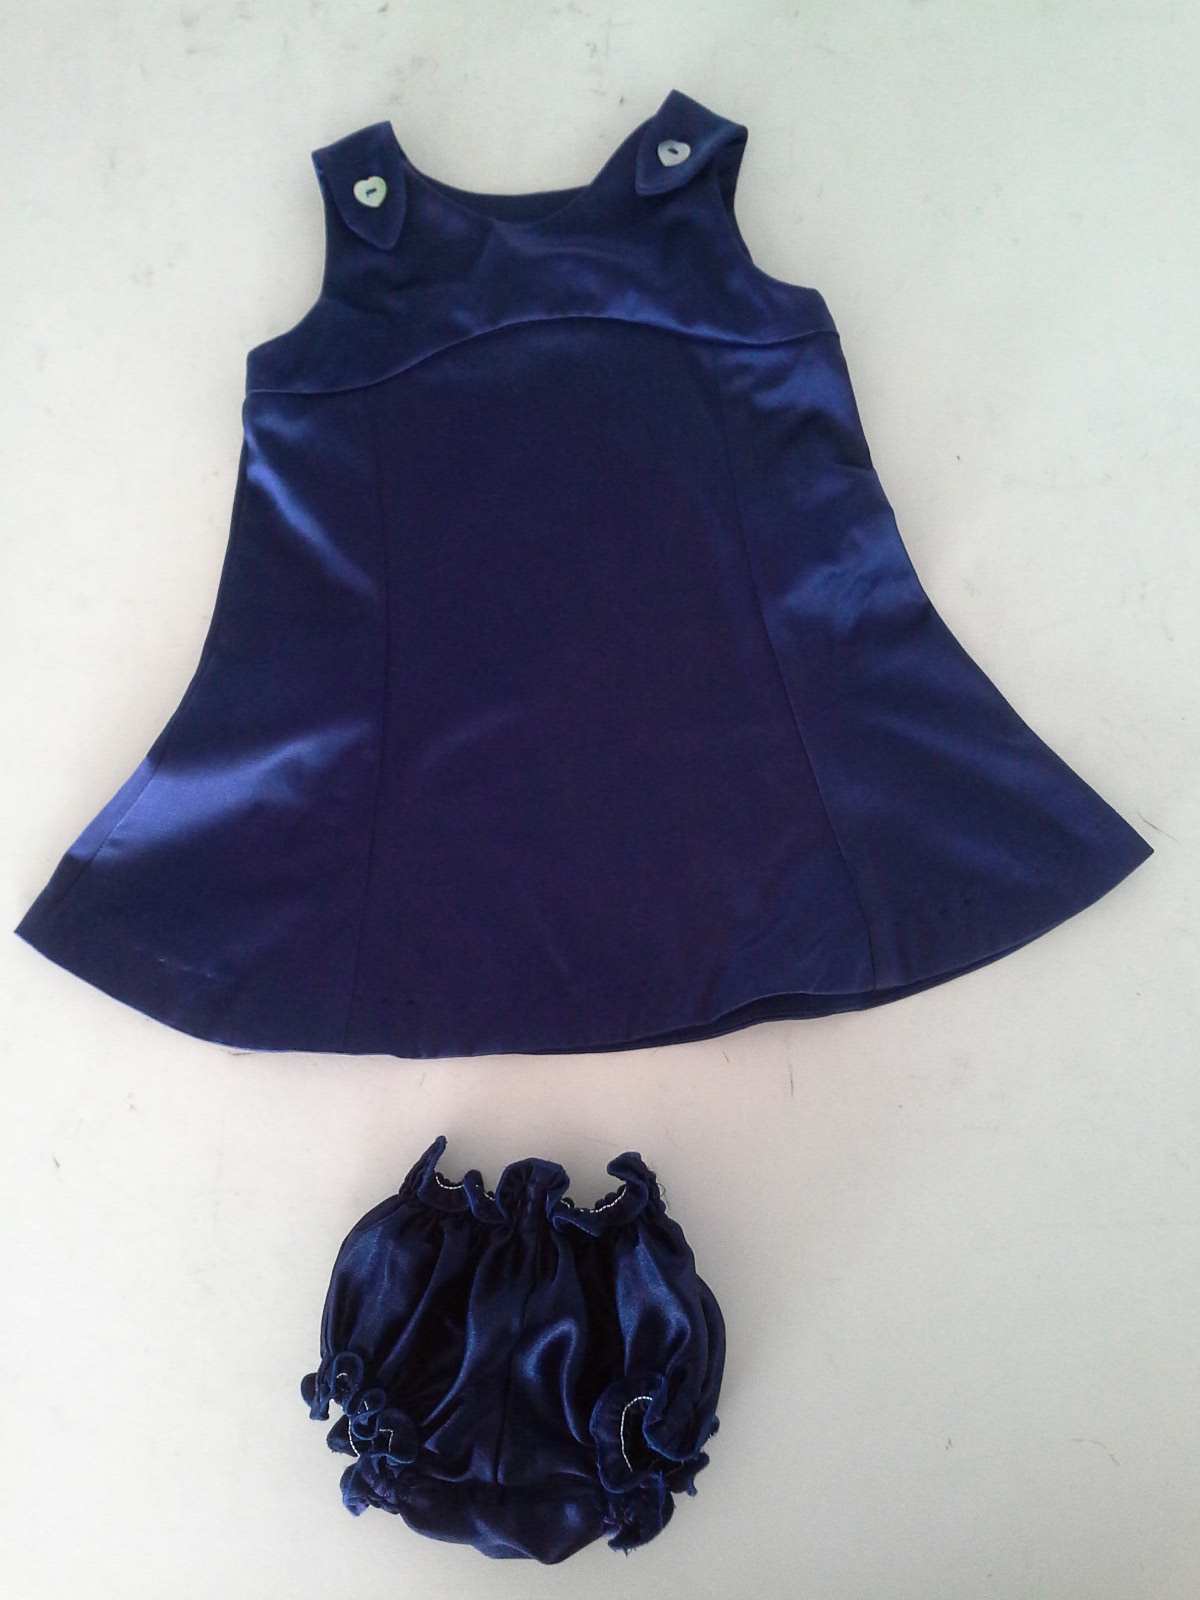
The very first Oliver + S pattern I sewed was the Popover Sundress. I was looking for a boy’s vest pattern with multiple pockets and I found the Explorer Vest in the Little Things to Sew book. I was reticent to buy a whole book for one pattern as I have a few sewing books I have never sewn from. However Oliver + S had a free pattern, the Popover sundress, so I printed it out and made one to check out the company’s pattern drafting and instructions. I made three girls and two dolls dresses and ordered the book! The rest is history.
I have now made fourteen of those Explorer Vests, but it’s not my favorite pattern.

I own 35 of the 48 patterns available; fifteen are digital and twenty-one are paper. I own nineteen in both size ranges. I also own the Little Things To Sew book. I prefer my patterns to be in paper format, however it is much cheaper and more convenient for me to buy the PDF patterns than pay for postage to Australia. I love the way Oliver + S PDF patterns are arranged, one pattern piece at a time. I get really frustrated when I have to put together a PDF that ends up as a huge rectangle, rather than each separate pattern piece. I think I own all the boy/unisex patterns, except the Bedtime Story pattern. I love the boys patterns. I originally found Oliver + S because I was looking for a great boy’s pattern. I use them for both boys and girls, changing the fabrics to match the kid’s personality. I’m disappointed that the eldest boy I sew for (11) has just sized out of the size 12 and that the next two boys are already in size 10.
I have sewn 25 of the 35 patterns I own, plus 18 out of the 21 projects in the Little Things to Sew book. I sewed 75 items from Oliver + S last year representing 40% of my sewing output. This year I’ve sewn 28 items again representing 40% of my sewing output. My most sewn pattern for the last two years was the Tea Party pattern. I have made four dresses, three playsuits and eight pairs of bloomers.

I combined the skirt with the Parachute Polo to make a dress (and added the pockets from the Hopscotch skirt).

I also used the bodice and added a different skirt.
That’s 17 items from one pattern in the last 18 months, but it’s not my favorite pattern.
There are many things that I love about Oliver + S patterns: the fantastic instructions, the PDFs, the great styles, and the ability to modify the patterns easily. The instructions are always fantastic and the patterns go together very easily. The combination of diagrams and written explanations makes the patterns very easy to use. I like the PDFs because each pattern piece is printed individually. This makes it very easy to put together as any small errors on my part are only across 1 to 2 joins of the paper rather than the small errors accumulating and causing larger problems across 6 or 7 joins in the paper. Also I prefer working with up to 6 pages at a time rather than trying to put together a PDF pattern with over 40 pages at once.
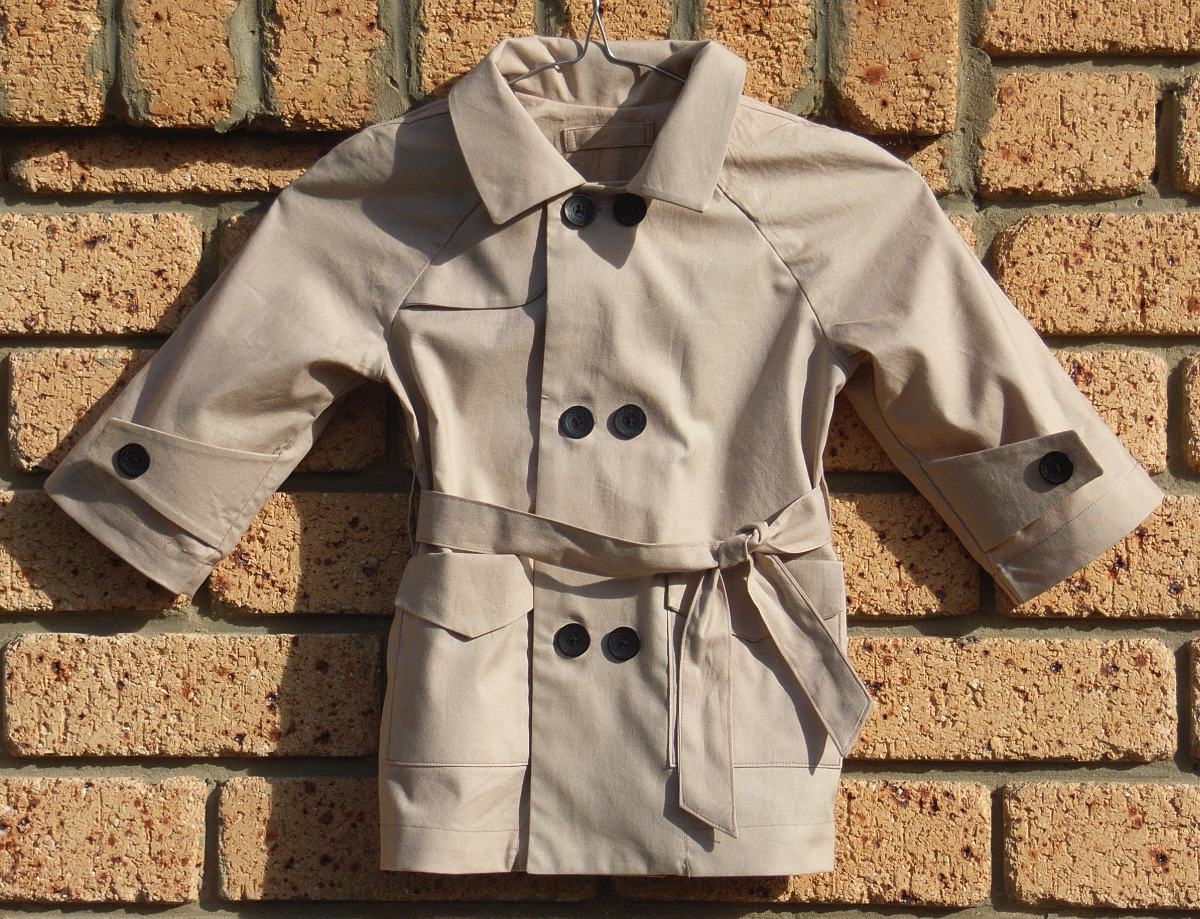
The styling of Oliver + S patterns fits well with my aesthetic. I like the modern takes with vintage detailing. I feel this combination contributes to the versatility of Oliver + S over their large size range, the patterns are suitable for babies right up to preteens. An example of this is I have made the Secret Agent Trench Coat for both a toddler and an 11 year old, and in both cases it got worn very frequently.
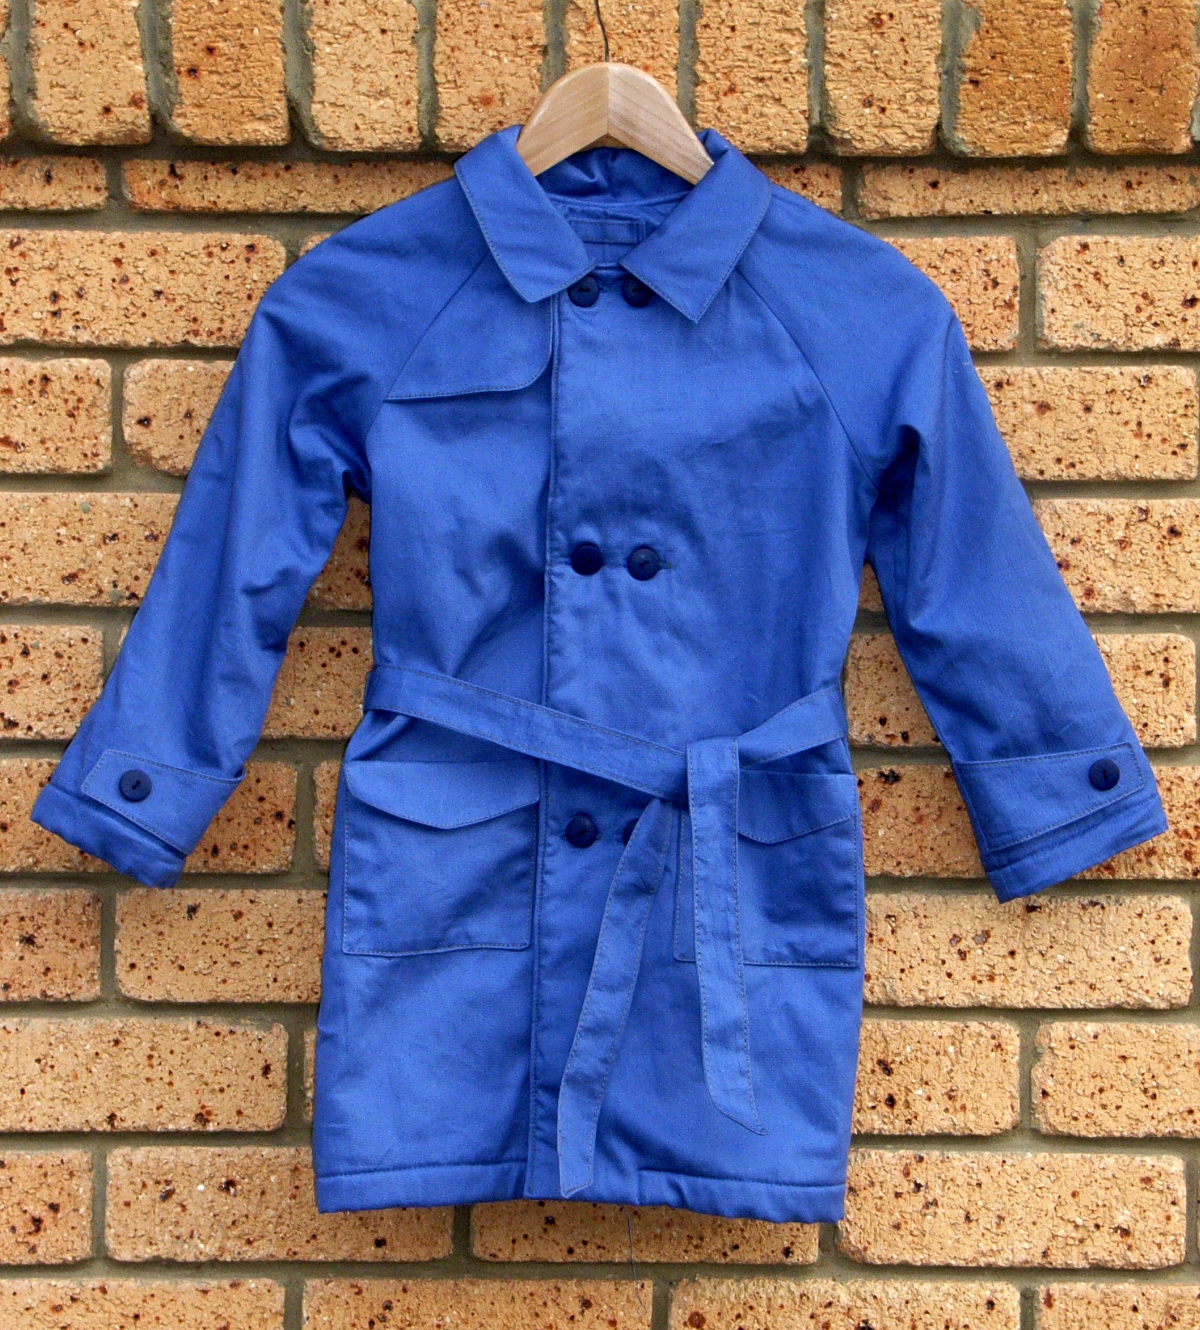
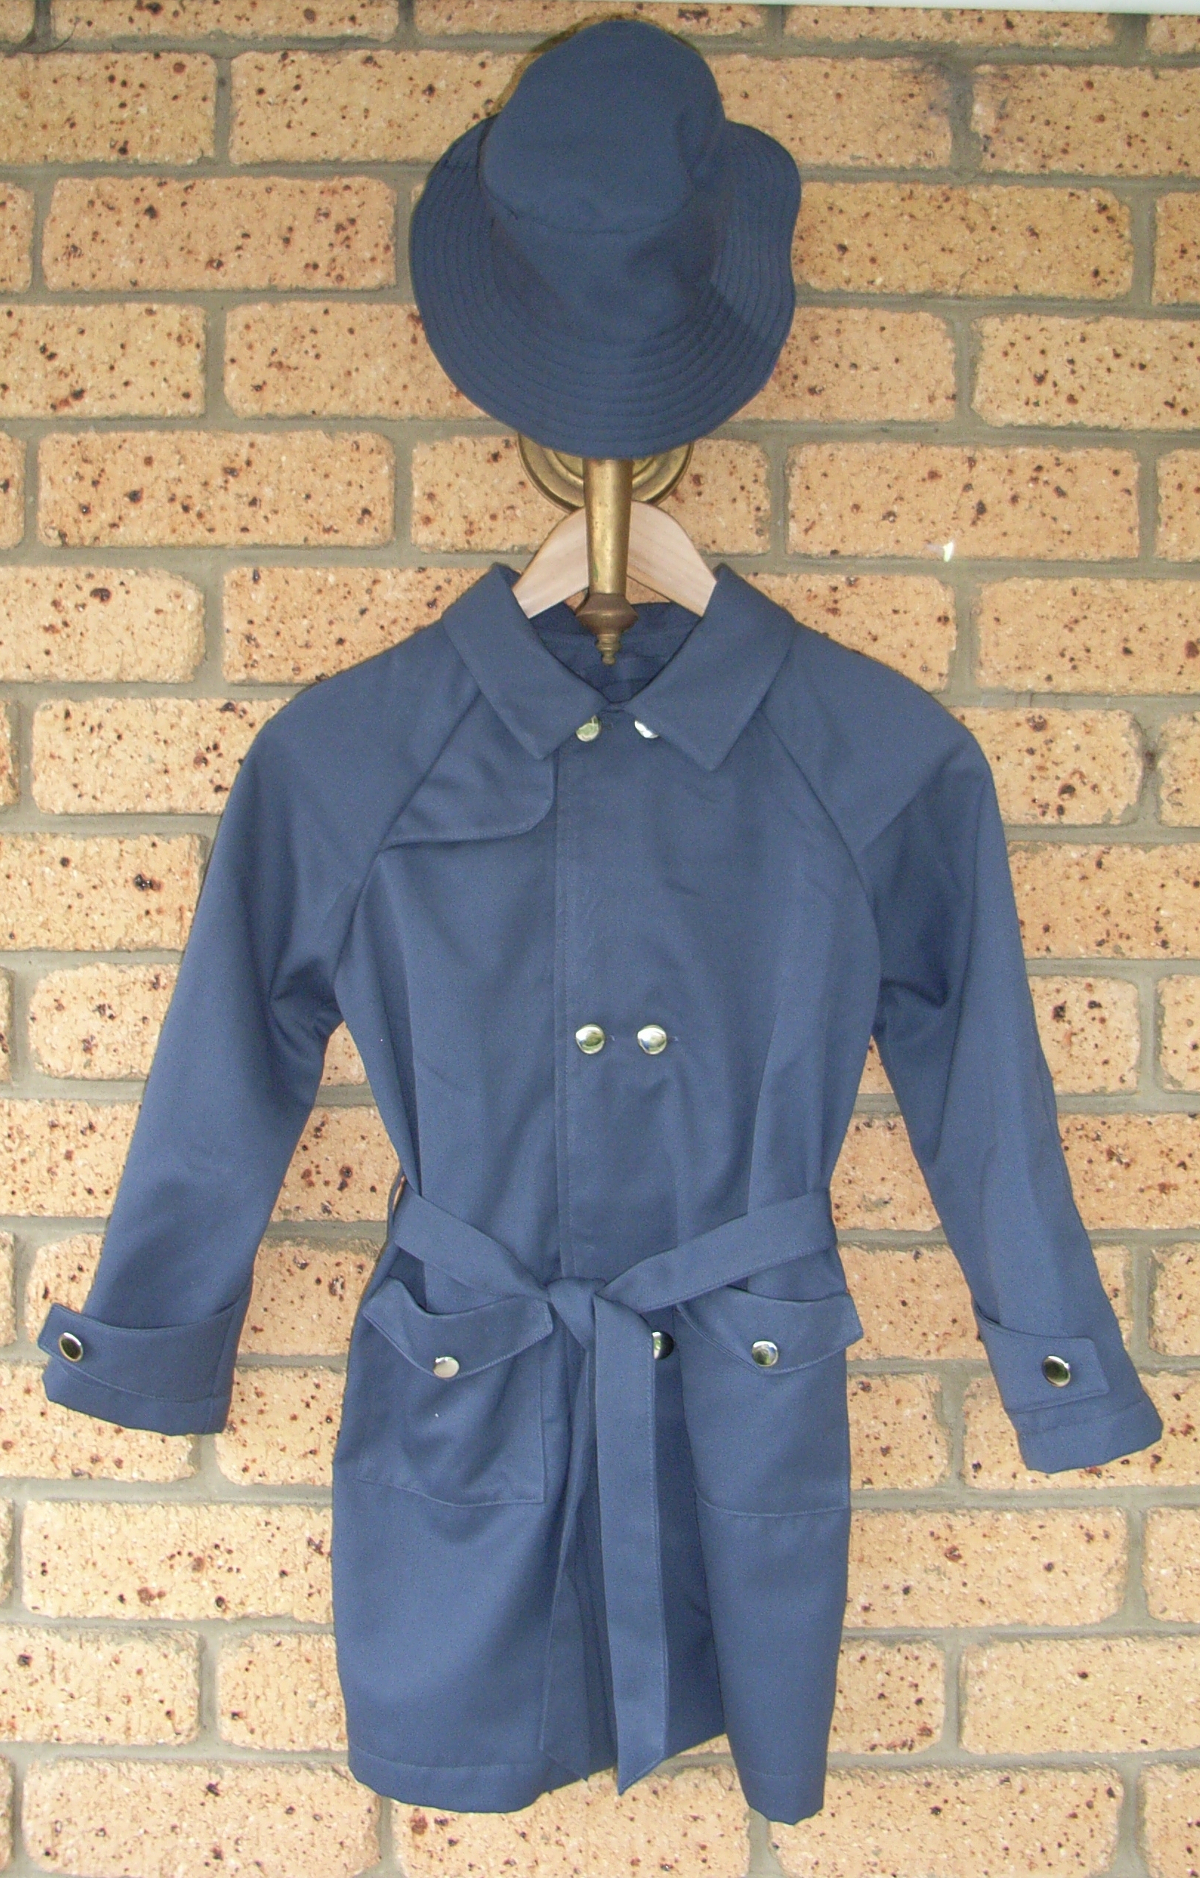
I’m making another one at the moment, that brings my total for the Secret Agent Trench Coat up to six, but it’s not my favorite pattern.
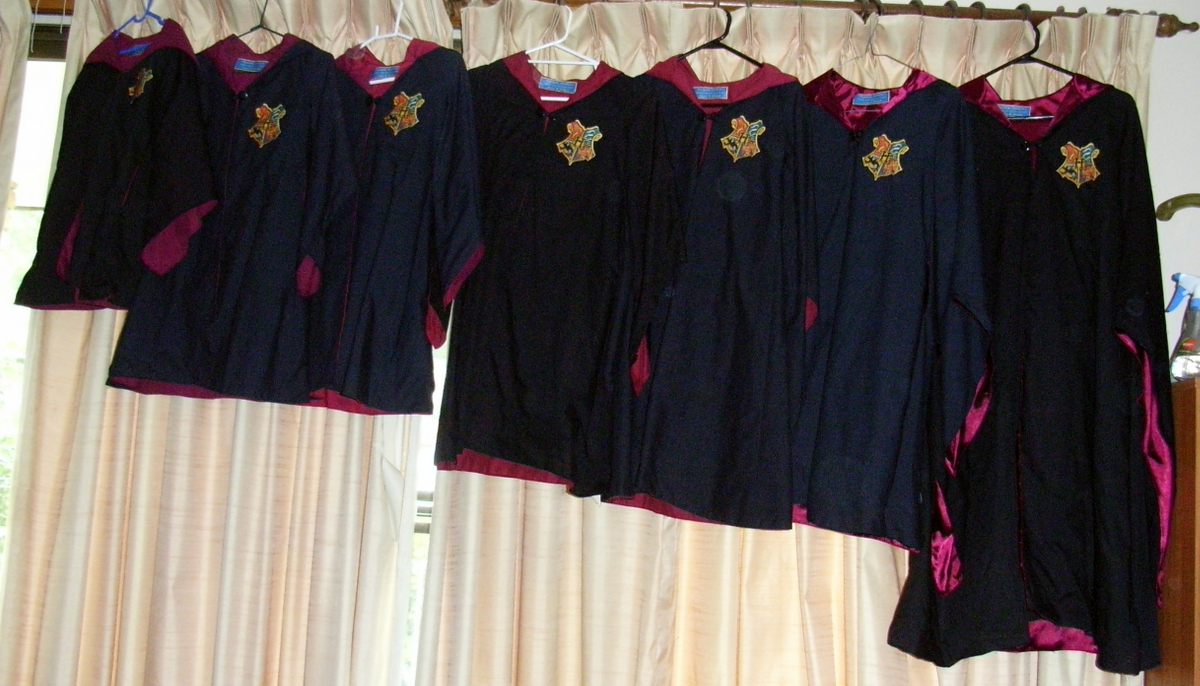
I like to use Oliver + S as base patterns when I am sewing from my imagination. I enjoy being able to choose a pattern based on the main shape I am looking for and then change the details to fit my vision. All the patterns are made from the same block I find it easy to exchange sleeves or other detailing between patterns. In more than one case I have ended up with a finished product that bears minimal resemblance to the original pattern. For example, I’ve made: Hogwarts robes (Nature Walk):
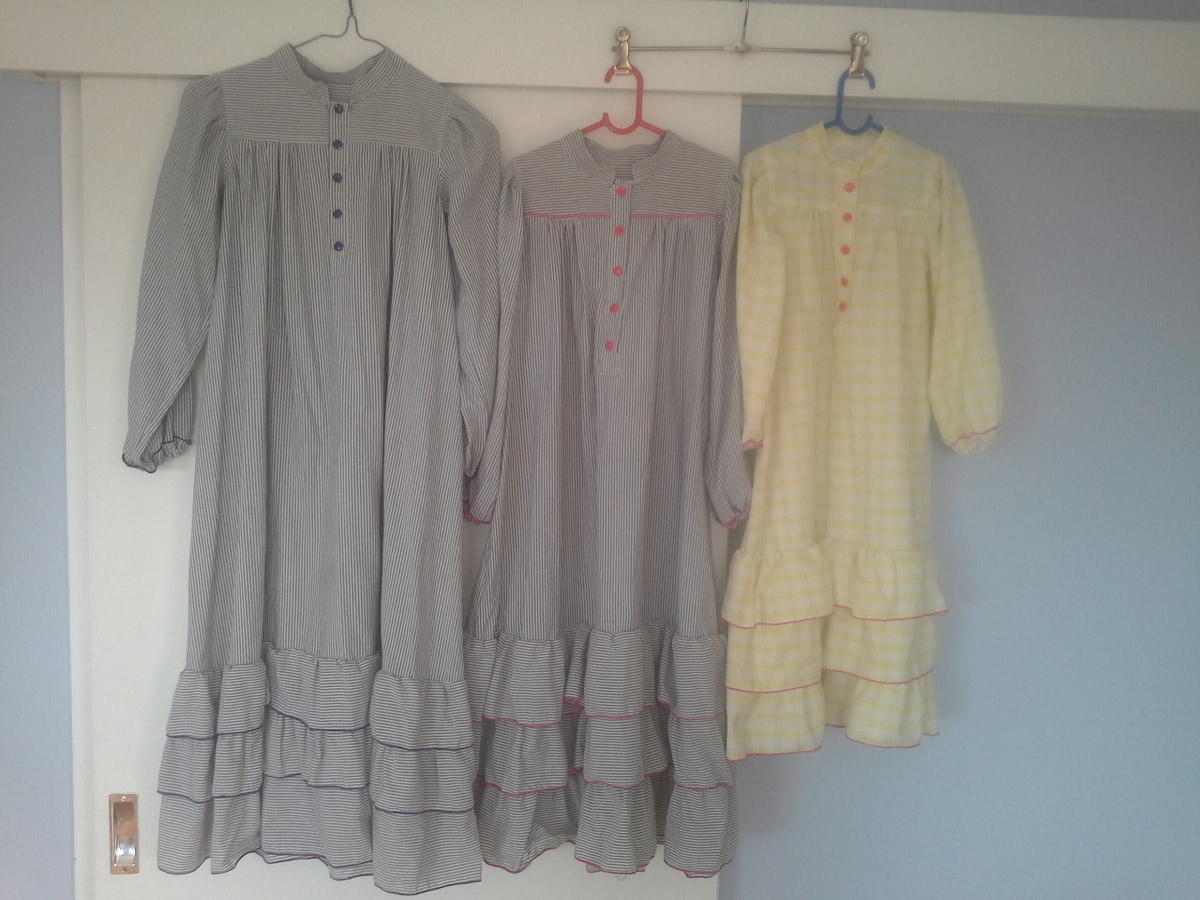
Laura Ingalls nightgowns (Music Class Blouse):
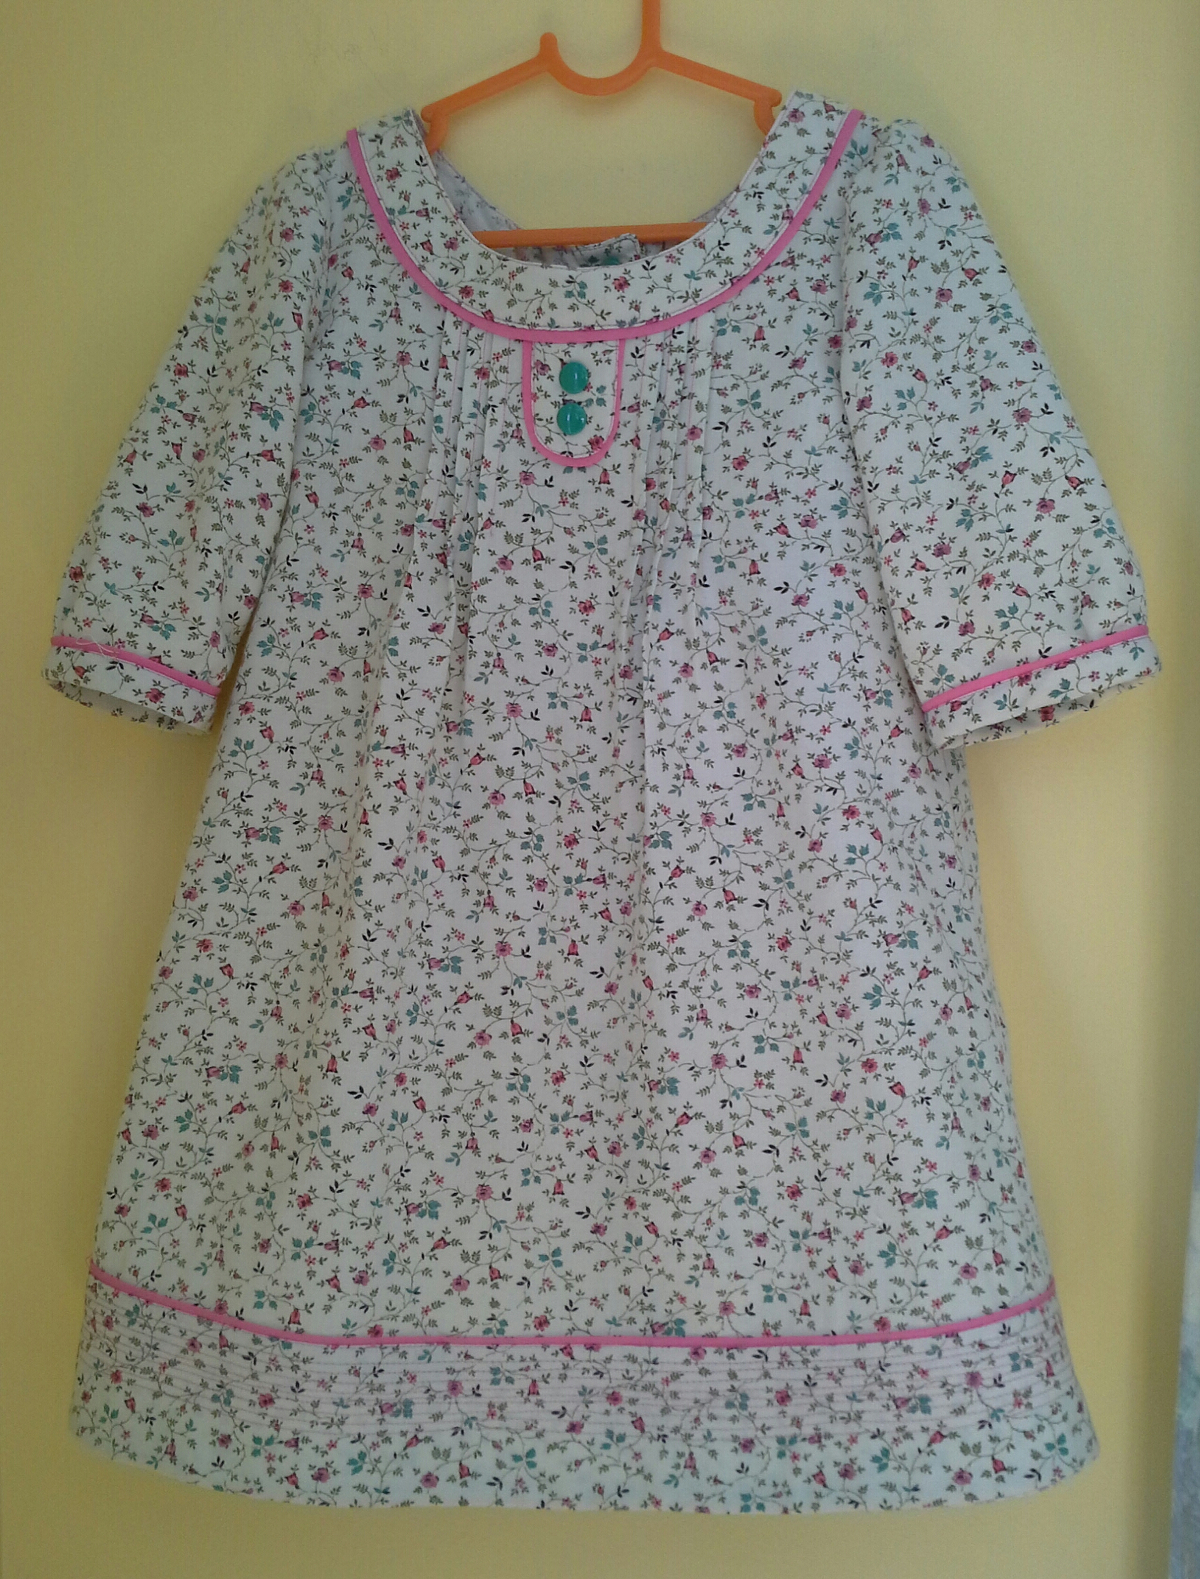
A Family Reunion Dress with the School Photo Dress sleeves:
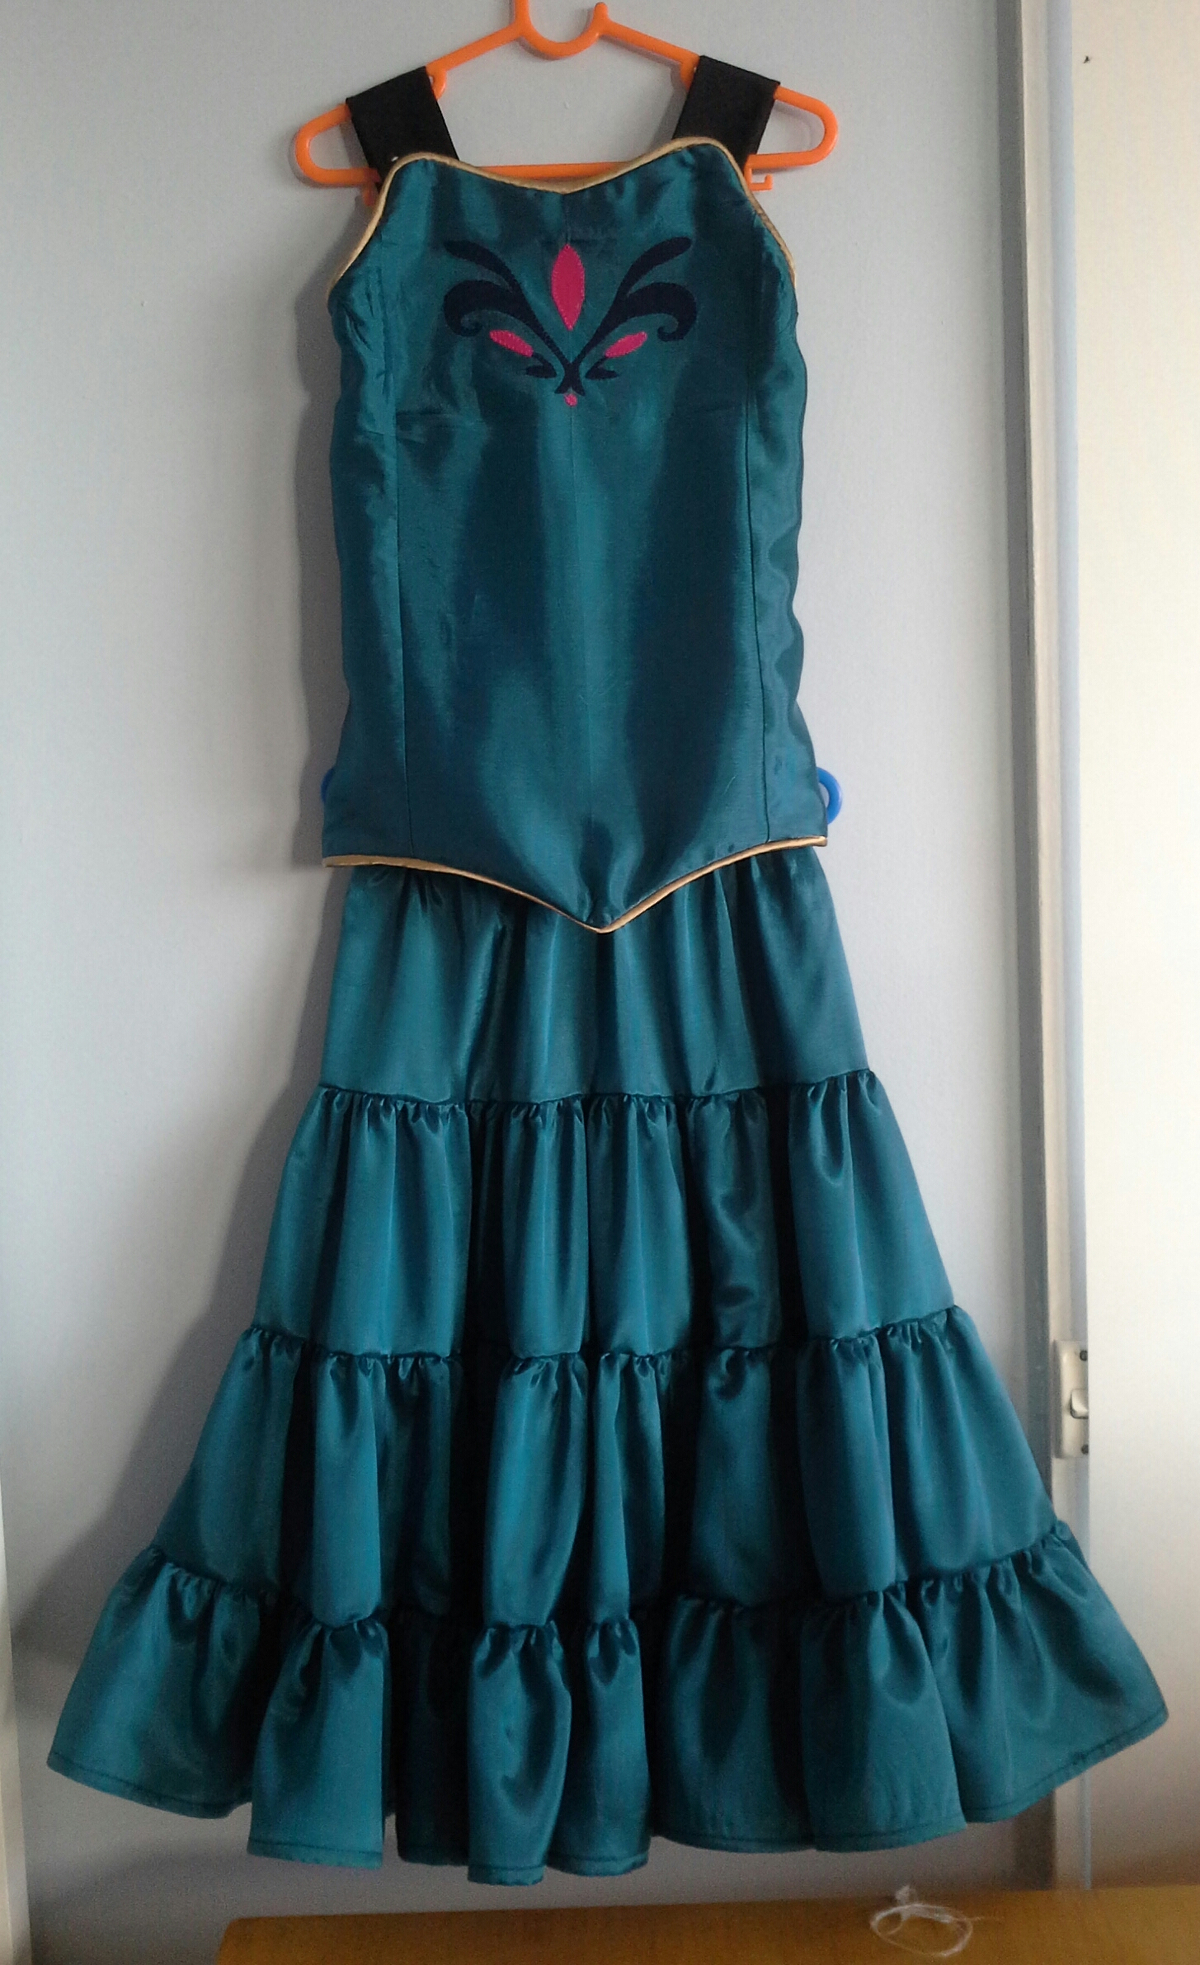
Elsa’s coronation dress (Seashore Sundress):
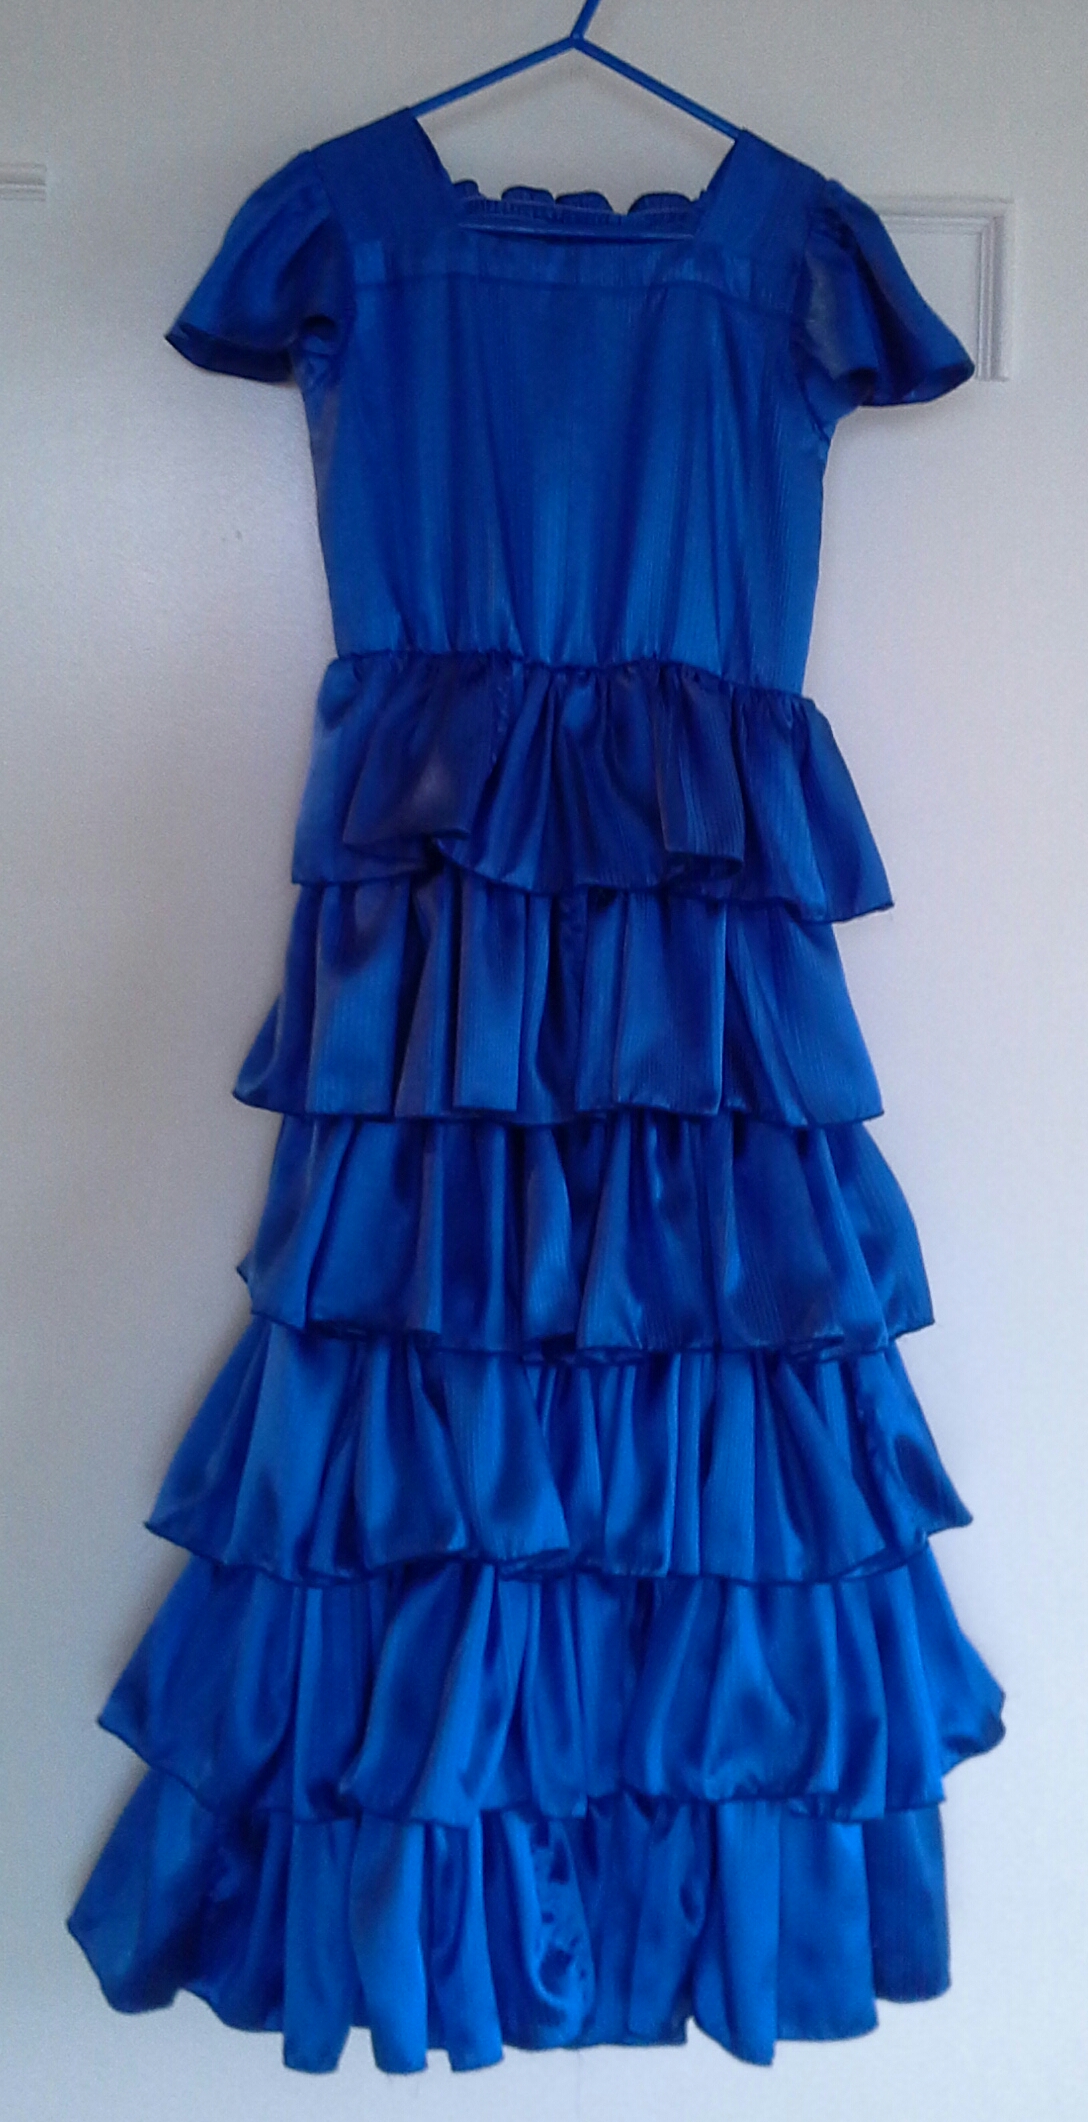
And Hermione’s Ball Dress (Garden Party):
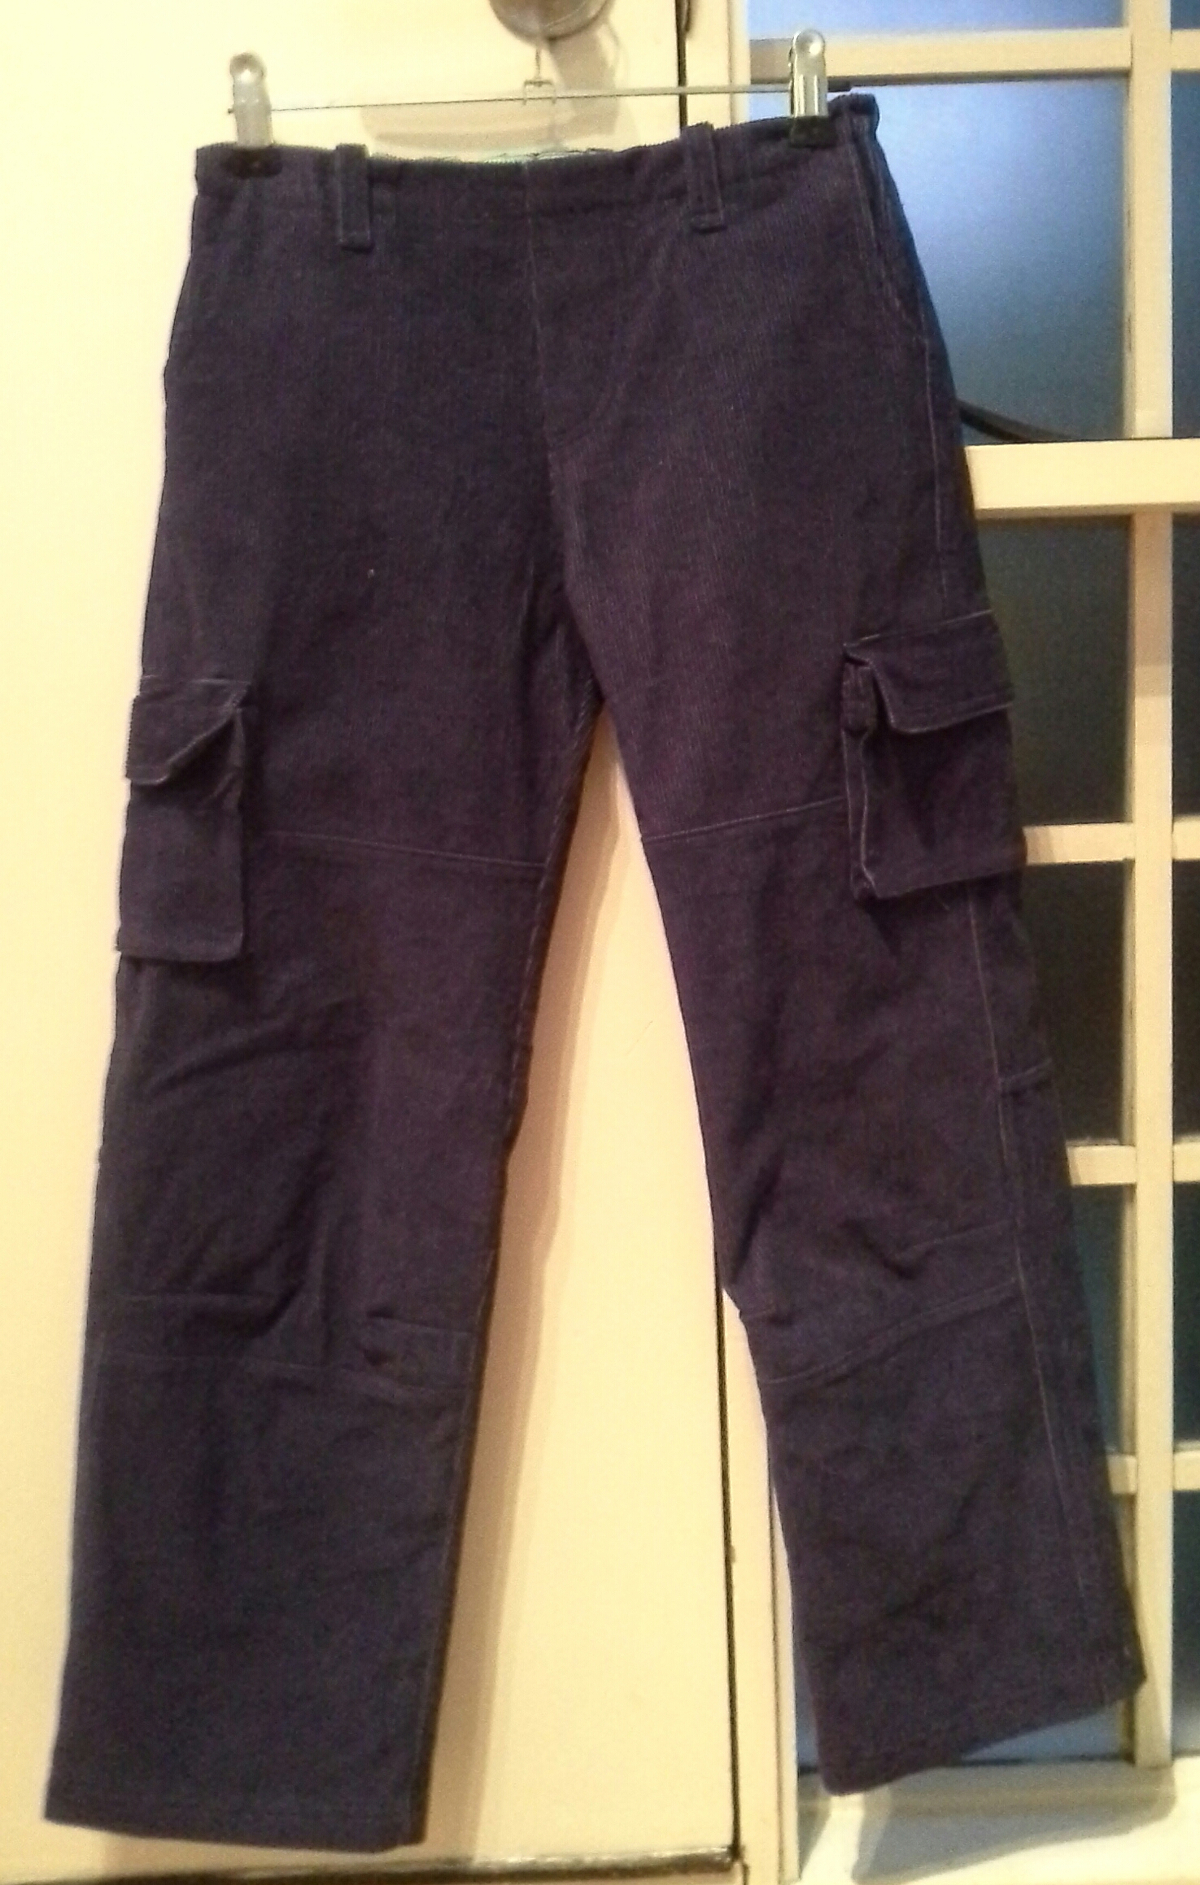
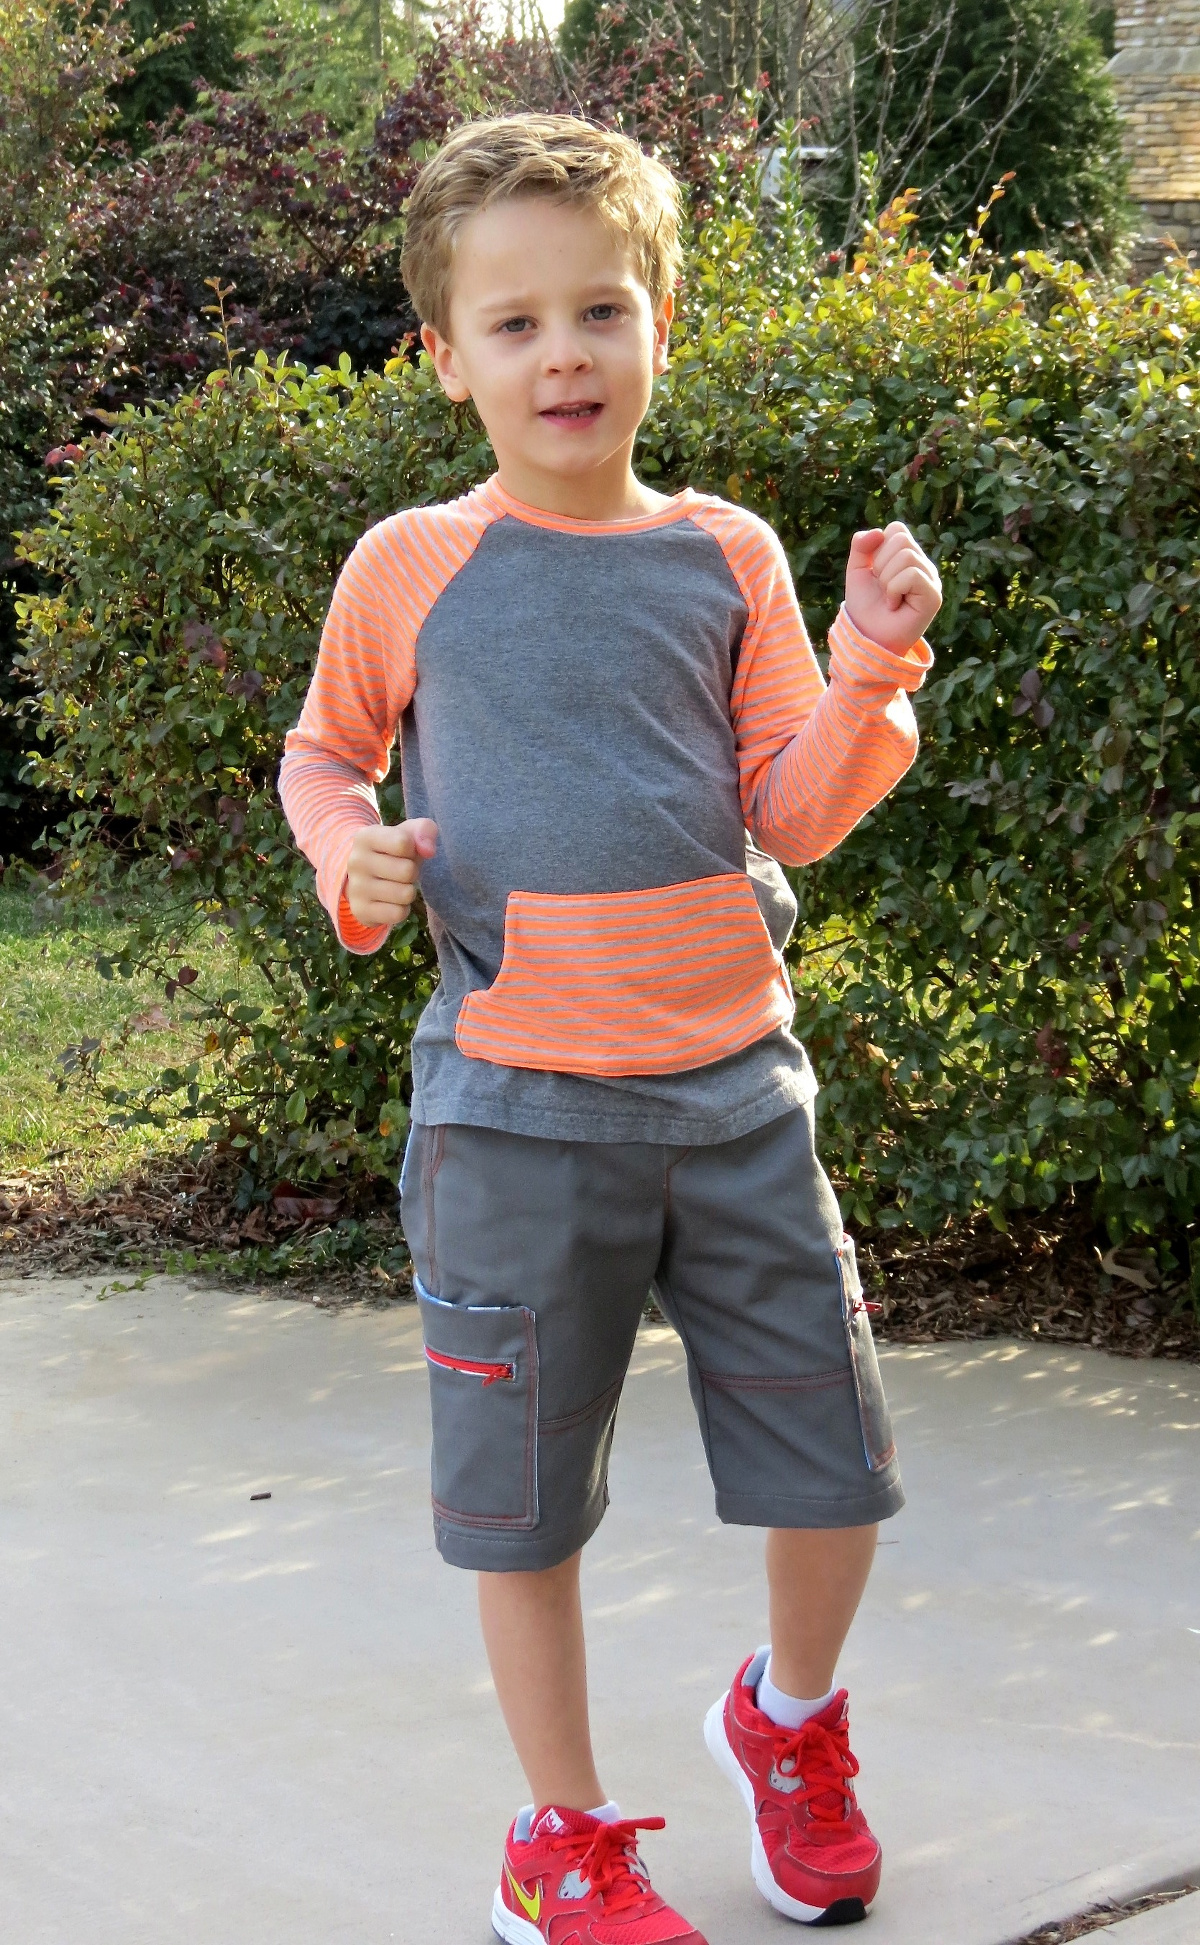
My favorite pattern is the Field Trip! In particular the cargo pants. There are so many things I like about this pattern; it’s perfect for boys and girls, colour blocking, it makes a fantastic shorts pattern, top stitching and a very professional level of detail.
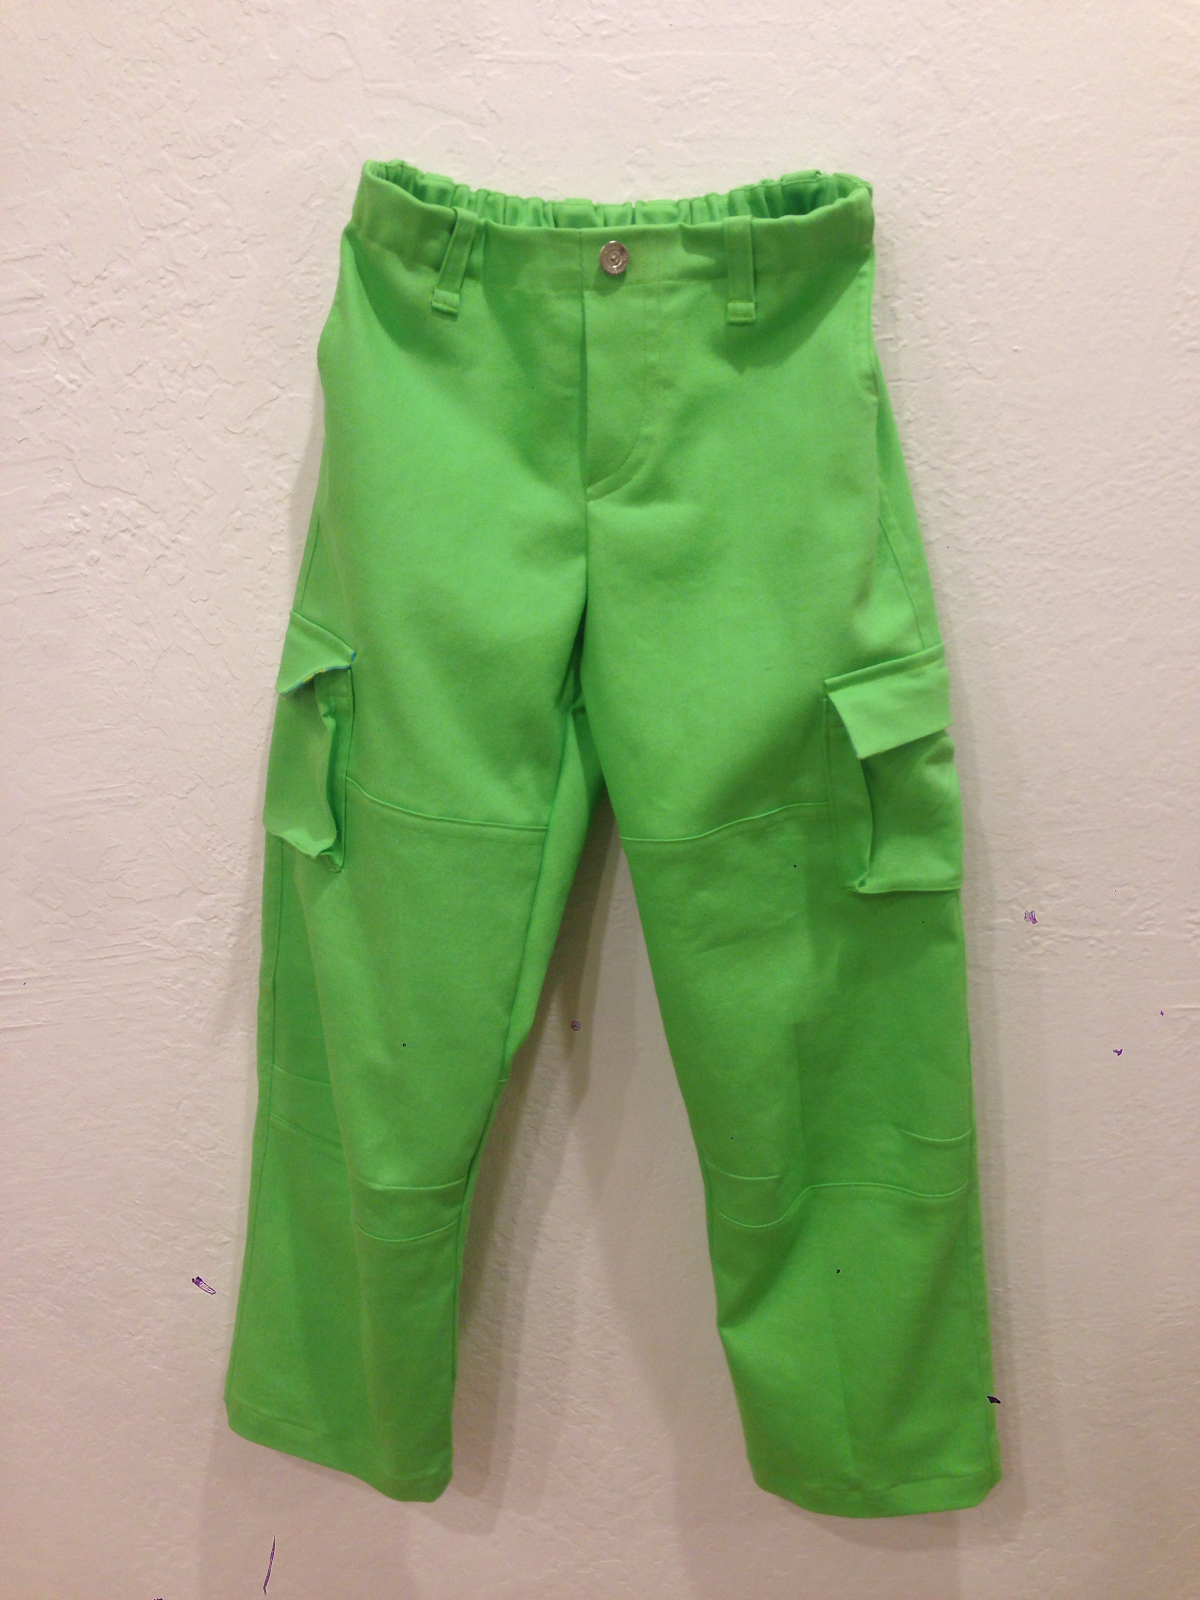
I love a good pattern that can be used for boys and girls. One of the families I sew for have two boys and then a girl. The girl loves what the boys have and often wants the same, but in pink or purple. This pattern, with all its pockets, is appealing to both genders and can easily be customized to the individual child by changing the colour and/or fabric. I made yellow ones and green ones a few years ago as these were the two boys favourite colours at the time.

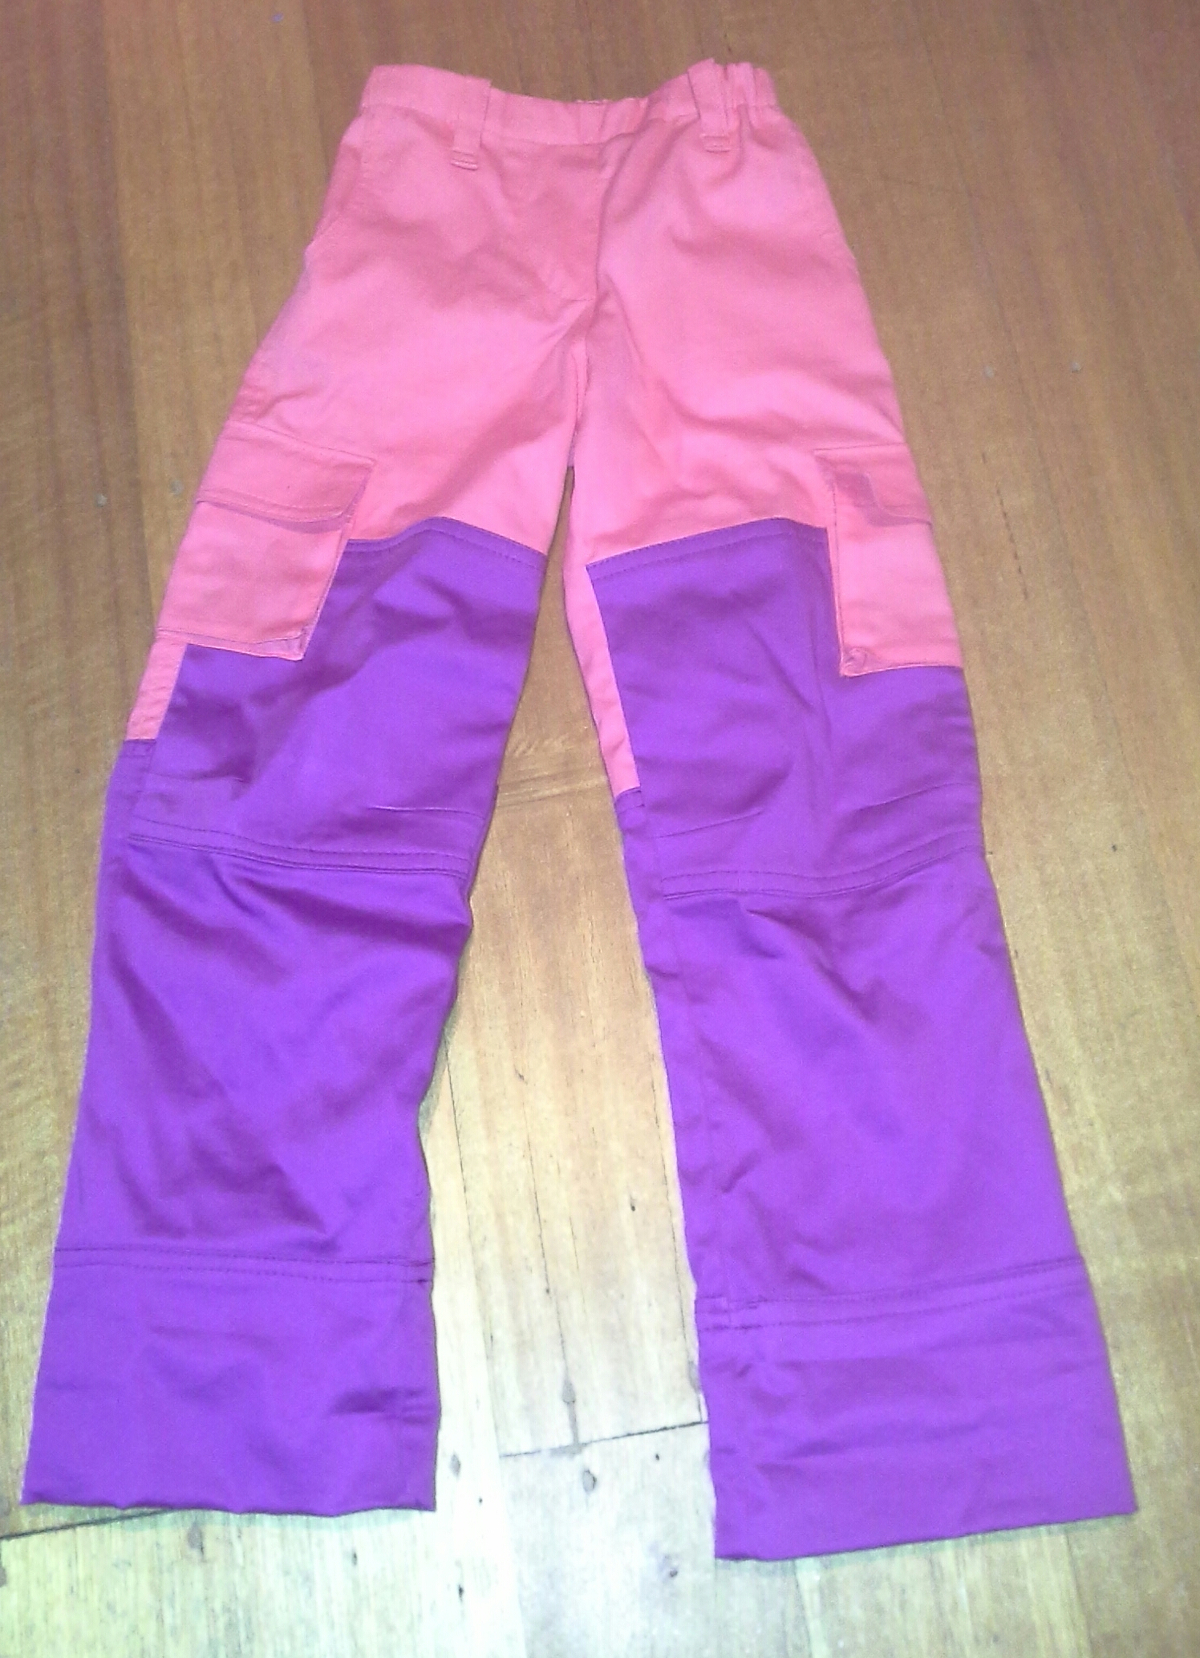
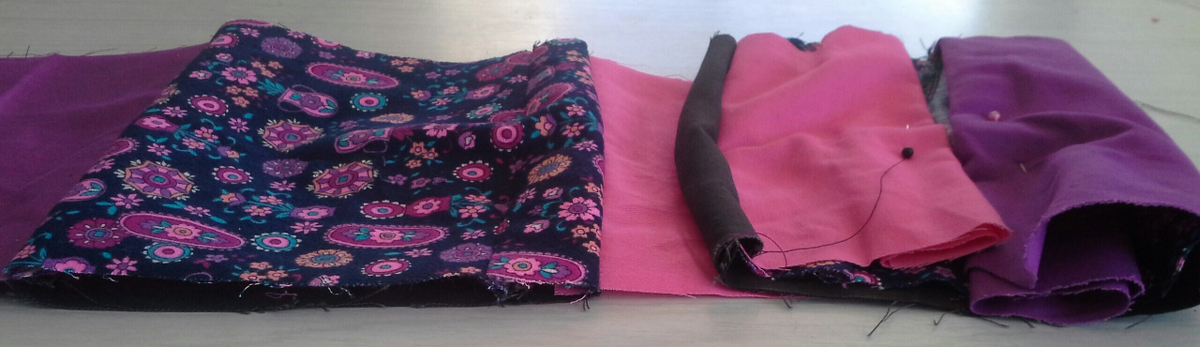
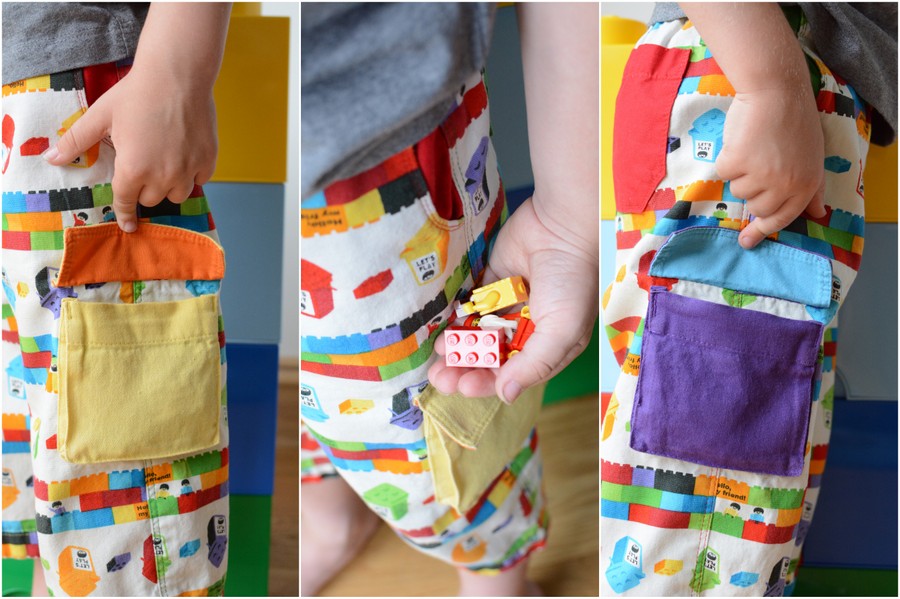
At the time I also made their younger sister a pair, but hers were pink and purple! I utilised all the different pieces to make a colour blocked version. The girl and I worked together to decide where the the colours would go. Below is the final design decision and the matching pants. Colour blocking also allows for me to use up smaller pieces of fabric than would otherwise be needed for the pattern. I had a small piece of the purple left and another small piece of pink along with a vintage pink and purple print. When she requested a second pair I combined all these fabrics making a cohesive girly pair of Field Trip Cargo pants.
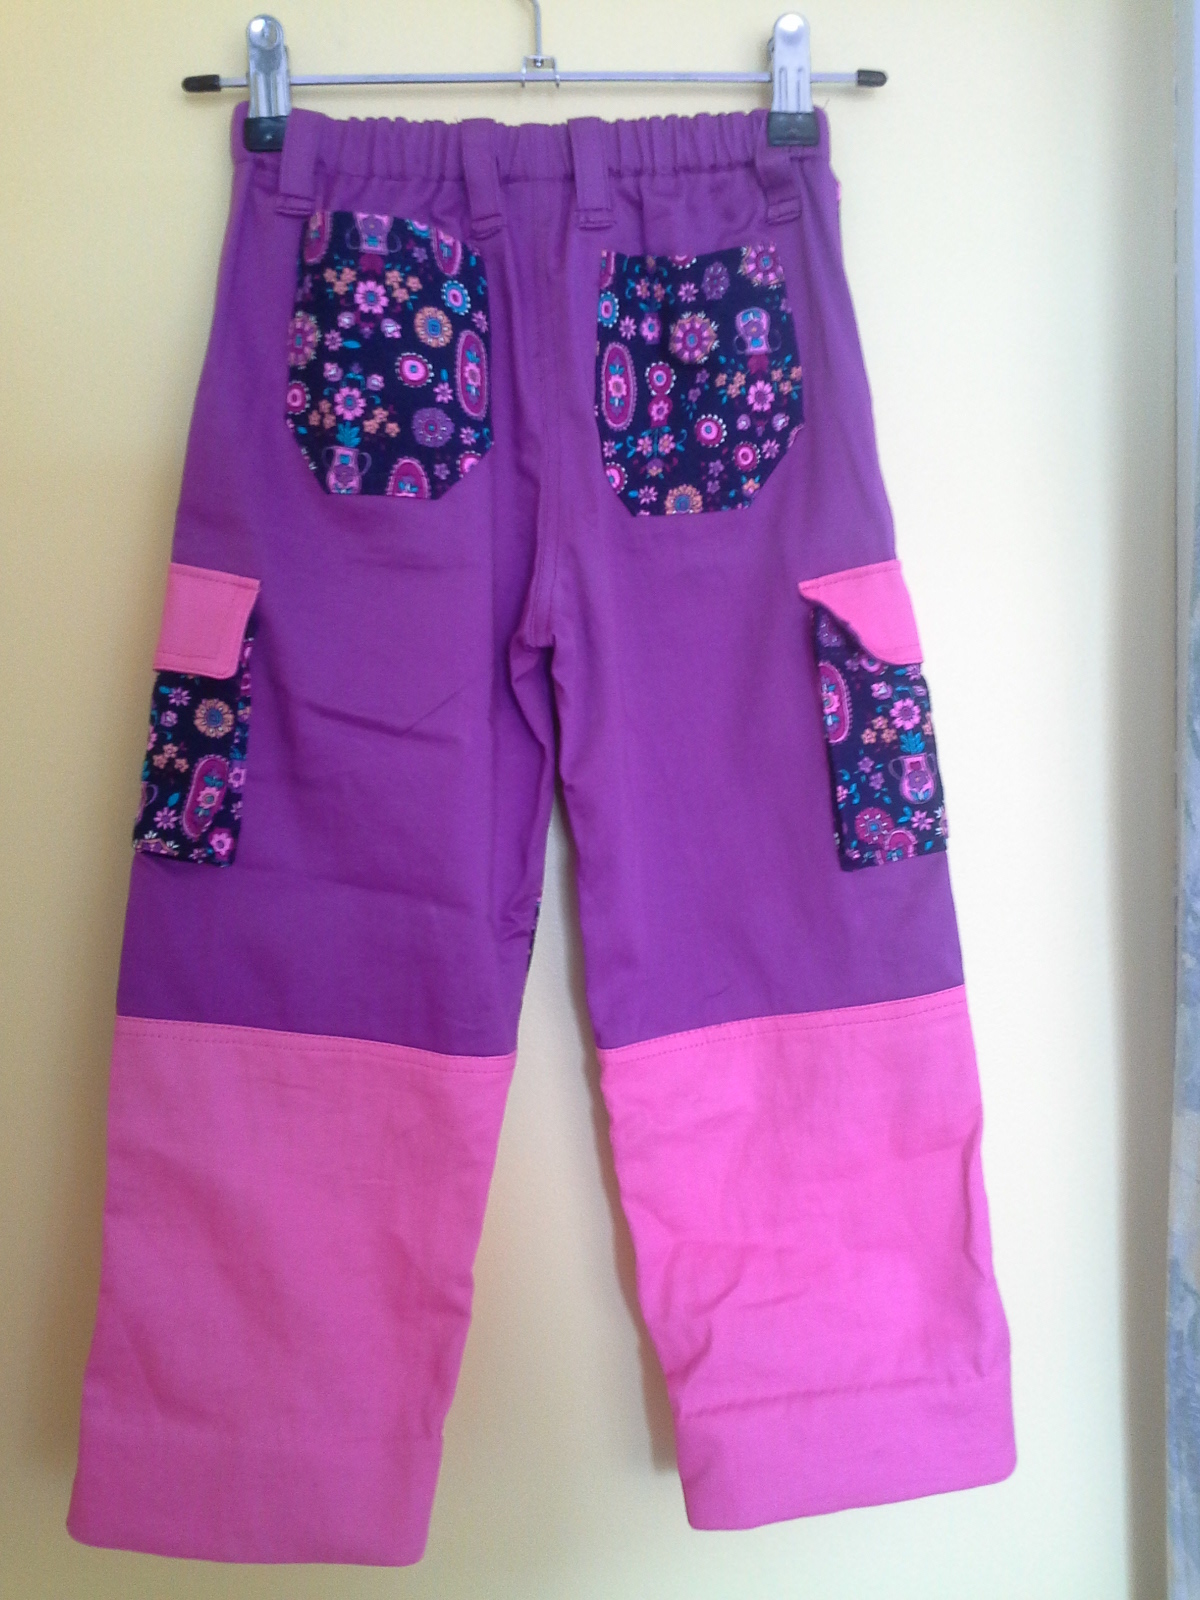
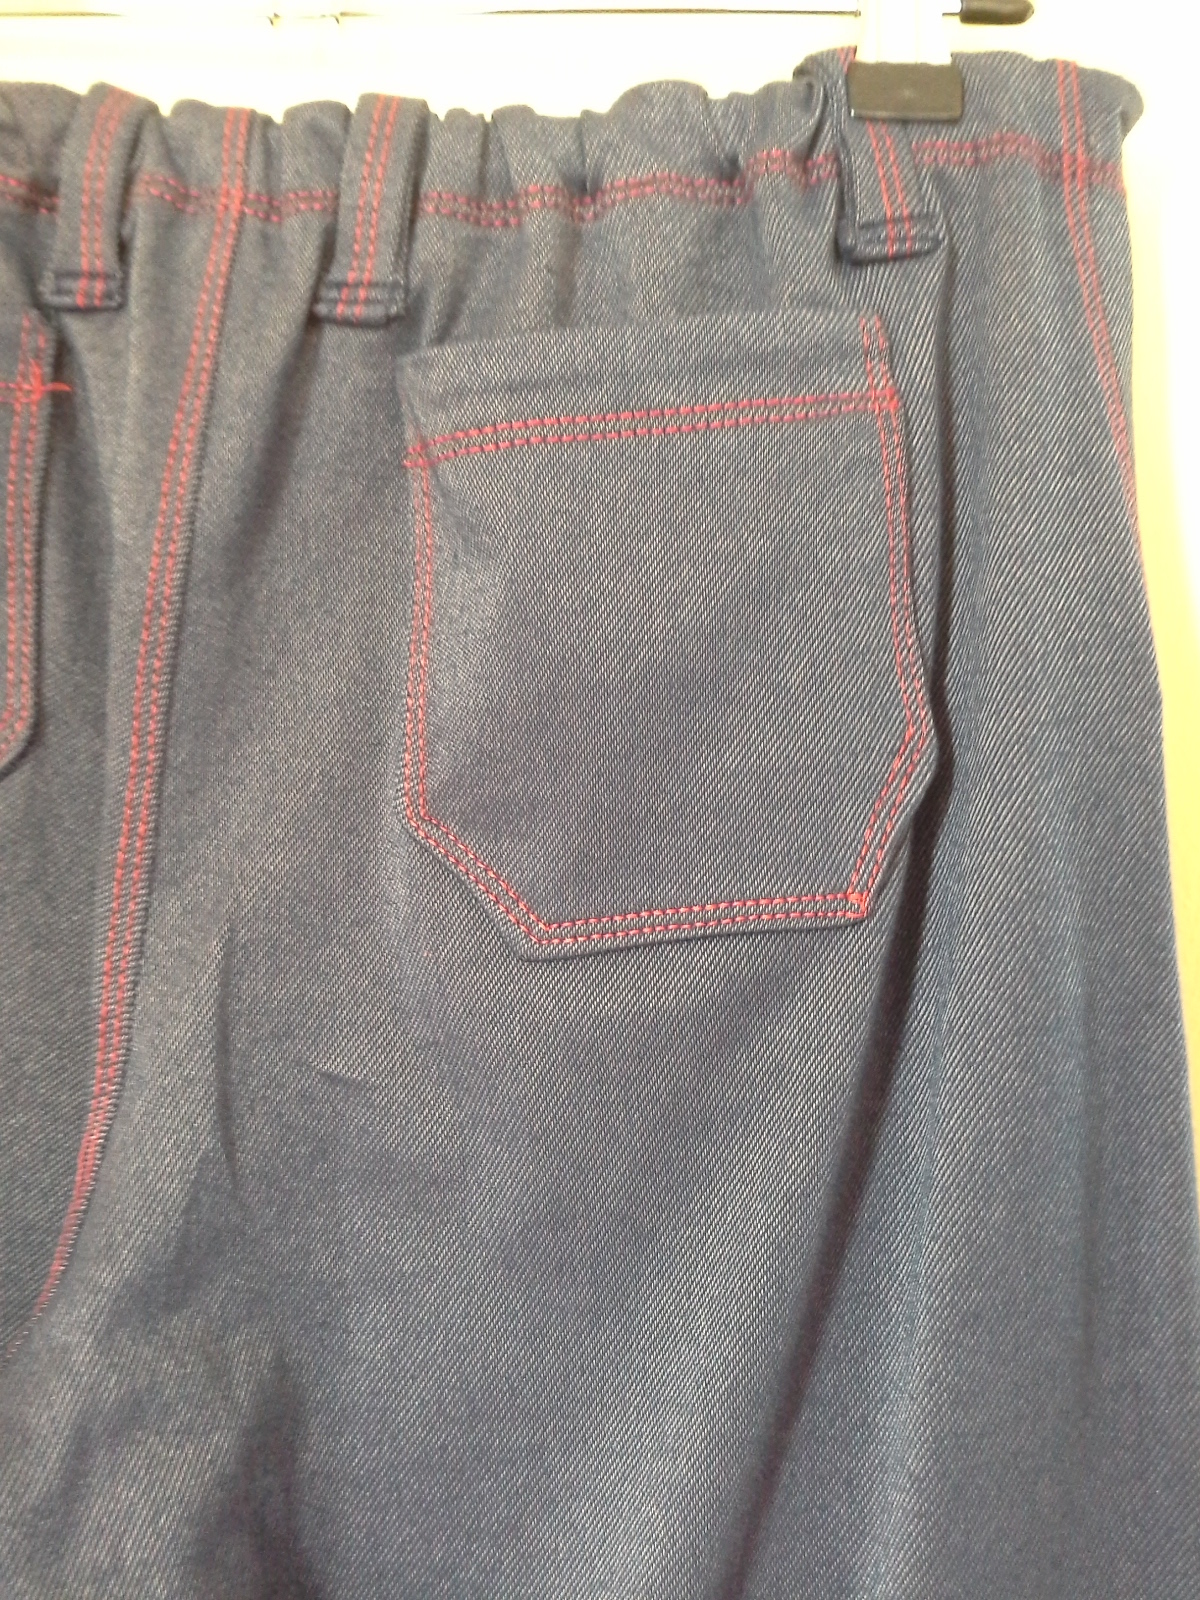
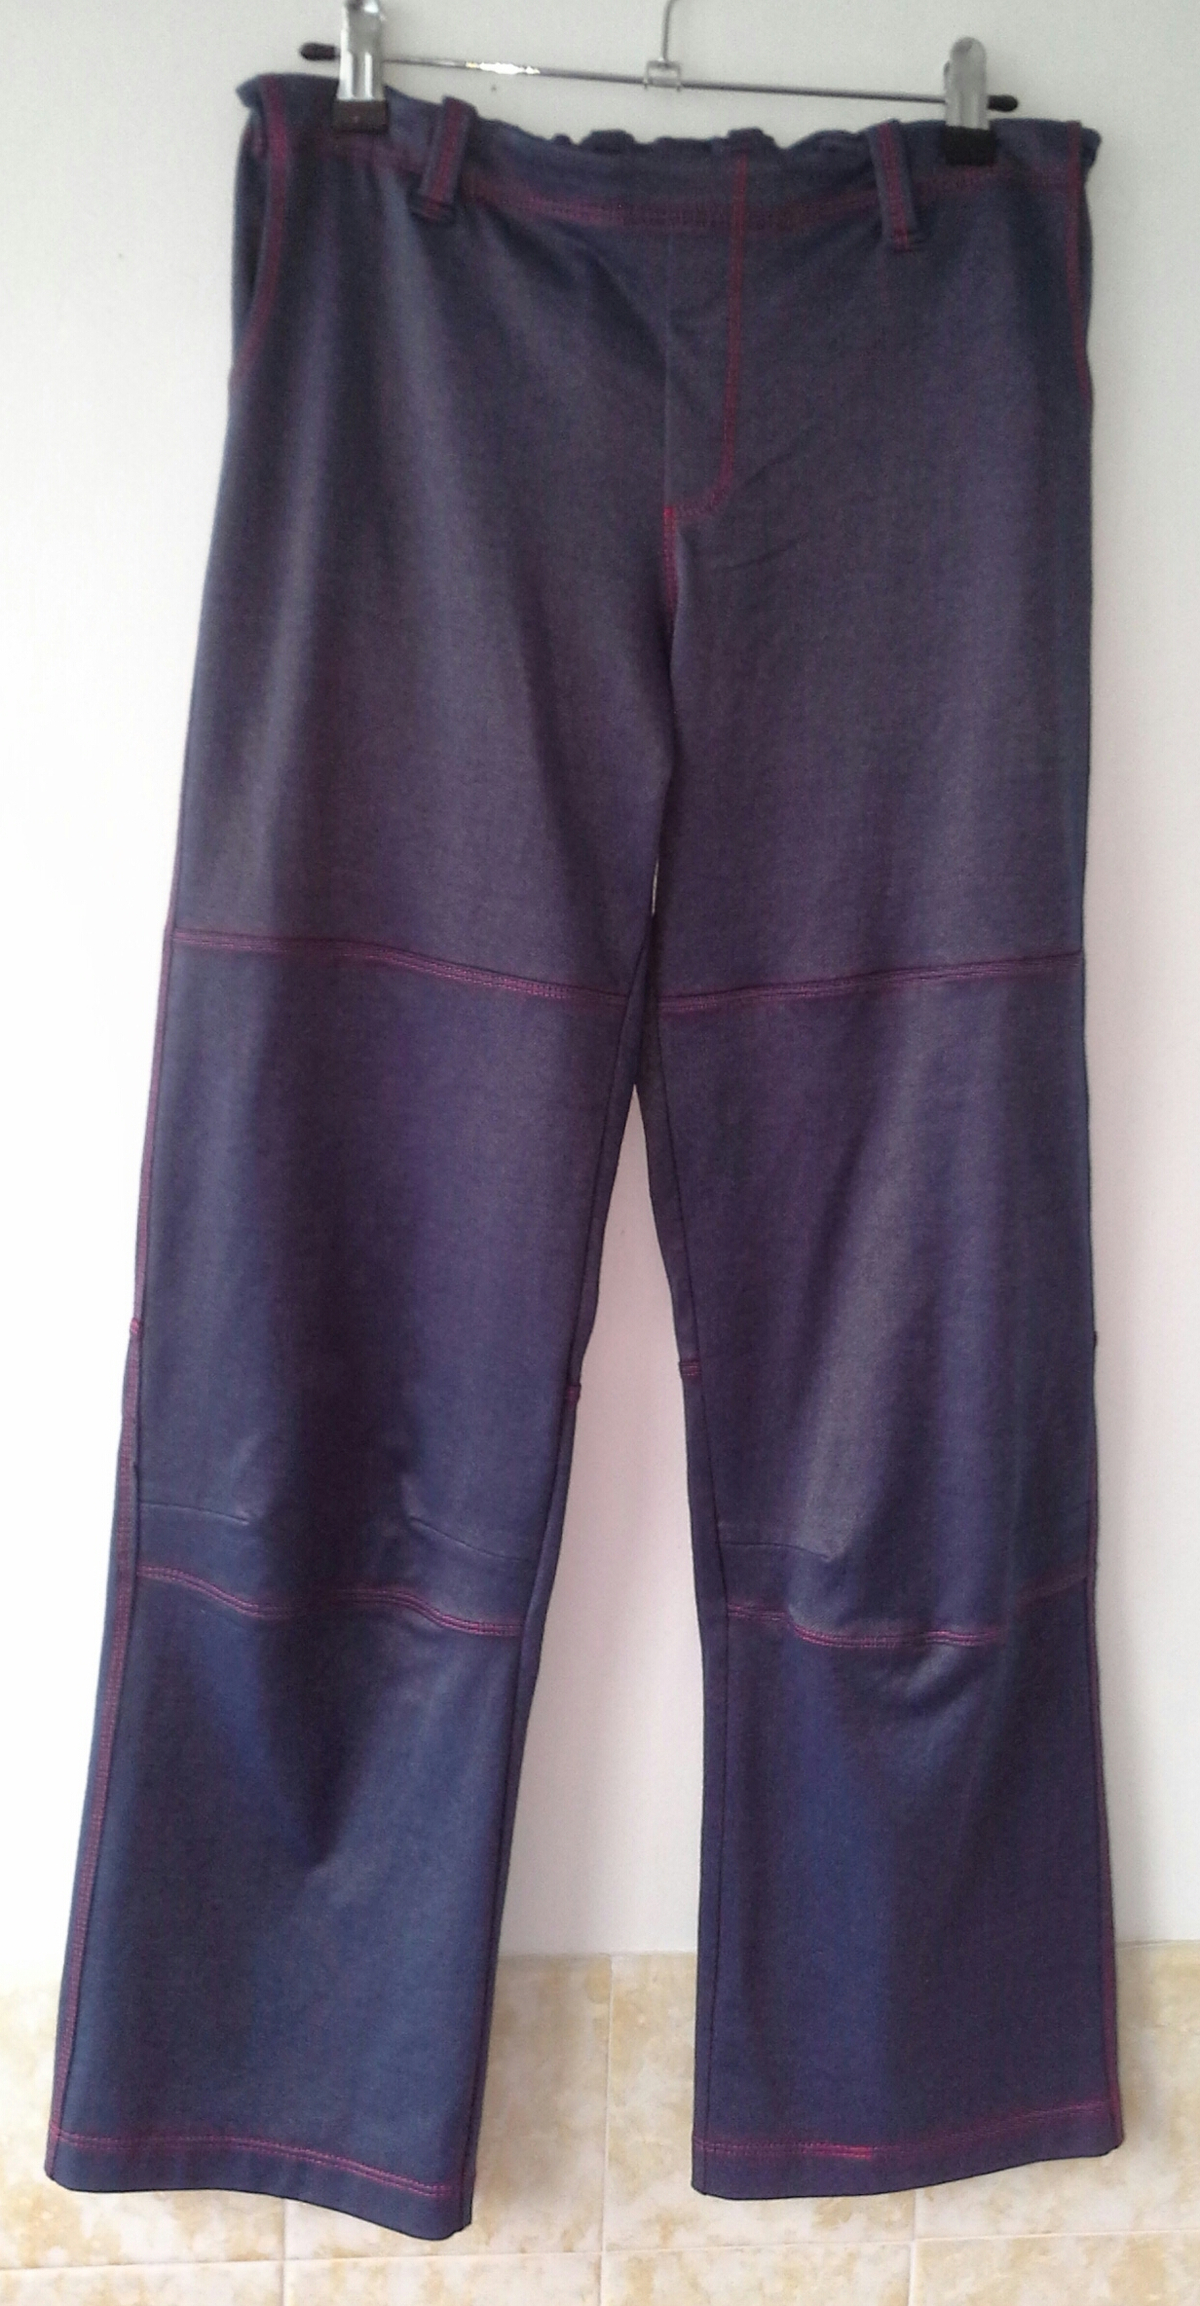
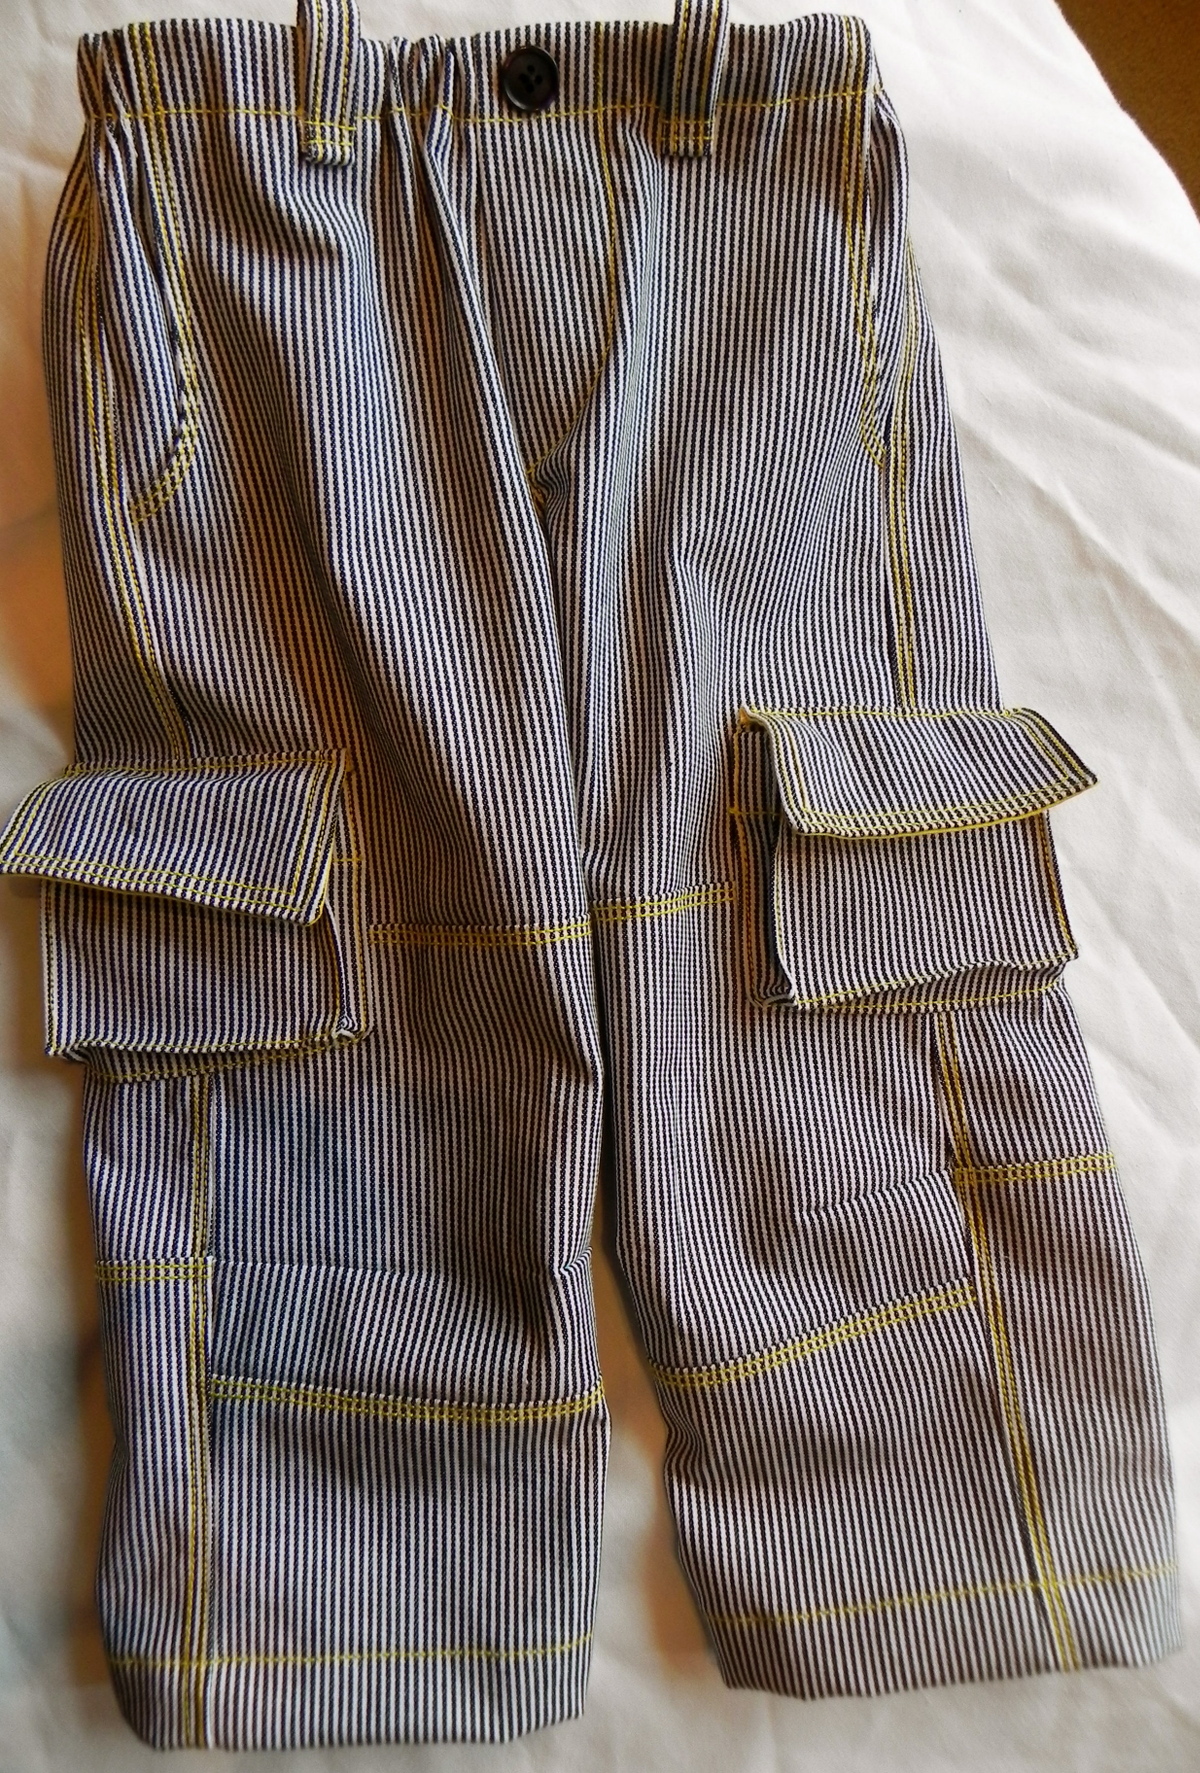
I love the topstitching and level of detail on the pattern. I feel the topstitching gives a very professional feel to these pants. If I am using a bright colour for the pants then I’ll often do matching topstitching as this allows the bright fabric to shine, and yet the subtle topstitching is an essential part of the finish. When I use a more subdued fabric, like denim, I love adding brightly coloured topstitching. This allows me to customise it for the individual child. This pair has red topstitching since it is the recipient’s favourite colour. I feel the contrast topstitching really adds to the professional look of the pants.
I also love the level of detail Liesl has included in this pattern. Cargo pockets with flaps, front and back pockets, two piece back and three piece front including articulated knee, belt loops and an elastic waist. This level of care and detail is one of the things that sets this pattern apart for me. Like all Oliver + S patterns everything matches and lines up beautifully and the instructions are impeccable. But the joy of taking a basic piece of often “boring” fabric and adding all the details and making it into a pair of amazing pants that look fantastic and that the kids will pick every time they are clean and the parents are enthusiastic with how smart the kids look, is the sign of an amazing pattern.
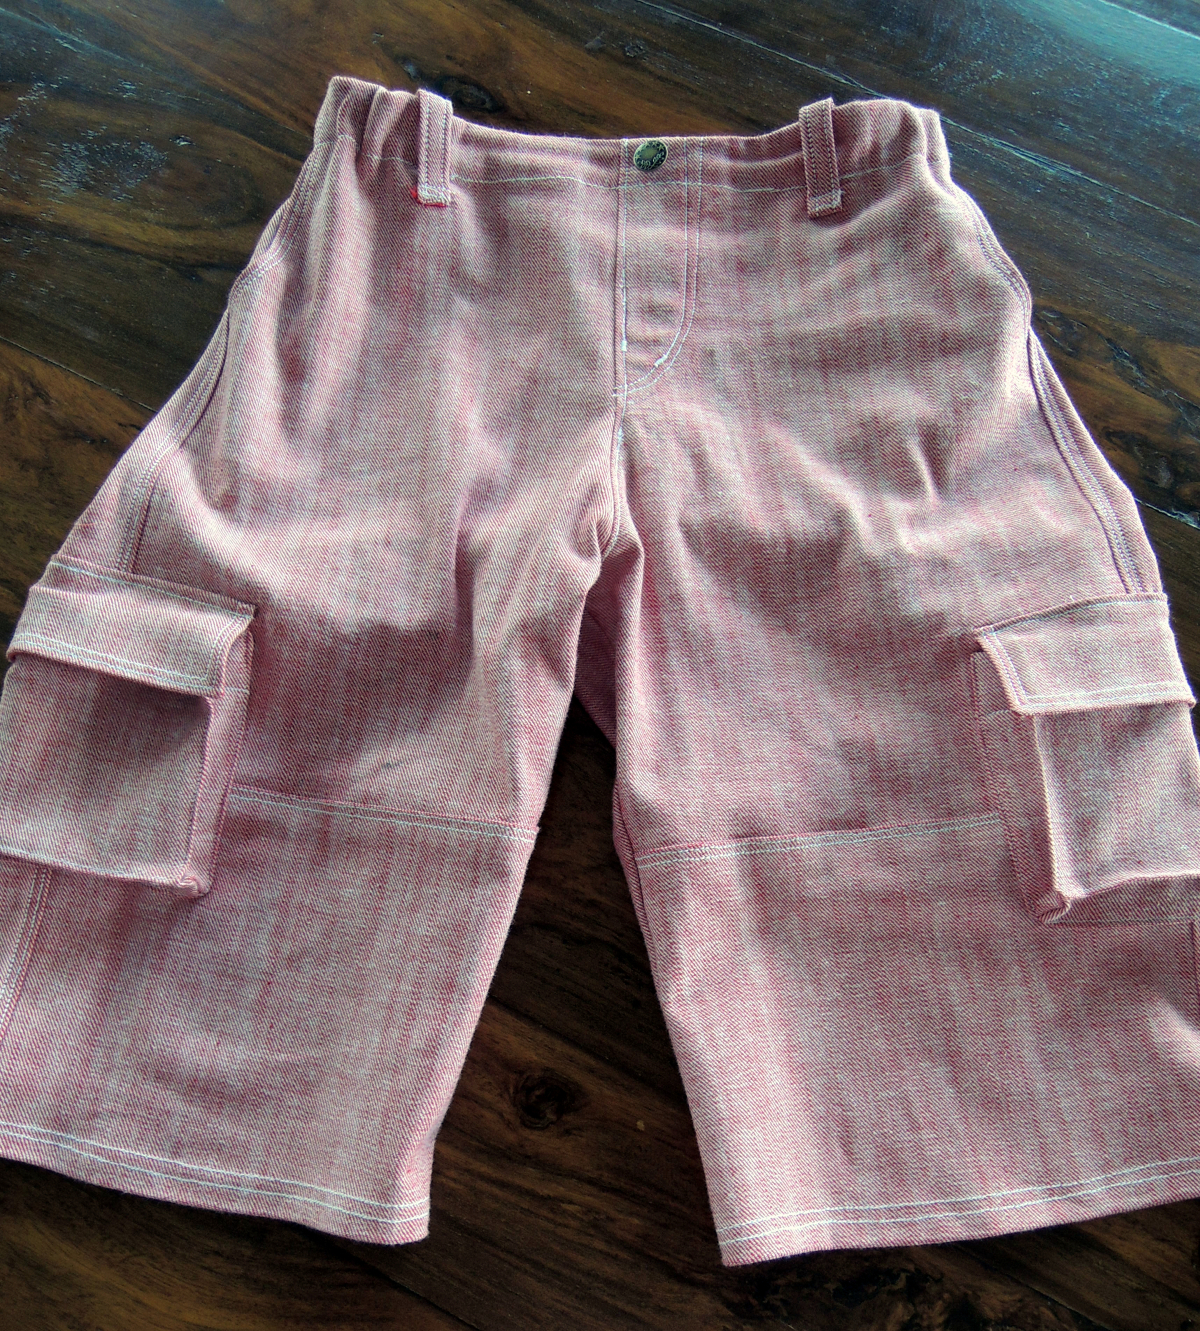
I also like the fact that by leaving off the bottom two front panels and shorting the upper back panel you can make a fantastic pair of shorts. The first time I made this pattern I made shorts because it was summer in the southern hemisphere. I was not overly happy with them as I felt there were a couple of bits I hadn’t done as well as I wanted. However I gave them to the boy and he wore them all that summer. The next summer I was at a party and I was admiring some shorts he was wearing, they had cargo pockets, front and back pockets in pale denim with yellow topstitching. I was admiring the yellow topstitching and how it accentuated the pockets and details and thinking I must remember these details. I then saw the underside of the cargo pocket flap and realised with a shock that these were the shorts I had made last year and had been a little disappointed with. I realised that the imperfection I was concerned about I couldn’t even recognize twelve months later and that the pattern made the most fantastic looking garment. It was also interesting to realise how consistent I was with my design decisions, that twelve months later I was admiring it to reproduce the look without realising I had made the design decisions originally. Unfortunately I have no pictures of the shorts.
The time taken to make the pattern is far outweighed by the end result. This is not a quick pattern to make, it has many pieces to put together and lots of topstitching, it takes time. But when the end result is so fantastic and looks so good, all the time is worth it. When the kids wear the pants for the next two winters and you see the knees not wearing through, the time and effort for this pattern is well worth it.
Some of the pairs I have made have been worn by the recipients for three winters, although by the third winter the knees were worn and they were getting a little short. With the girls pairs I made I expected her to be able to wear them for a couple of years as she doesn’t grow out much, but as she is quite tall I expected her to grow up significantly, I added a 4″ turn up to the bottom of the pant legs and folded it inside twice, 2″ each time, and tacked it down. This has worked really well, she is now wearing them for the third winter and I unfolded the second turn up in April. The fit on these pants is fantastic, great coverage well fitted, but lots of room to move.
These pants have a lot of topstitching included in the pattern, I love the profession and yet rugged feel it gives the pants. I really enjoy topstitching, although it goes much faster now that I use my coverstitch for most of it. I use two needles, my coverstitch has three needles, set in the outside positions with the longest stitch length. I use two threads in each of the needles to give me a more defined stitch that looks similar to using topstitching thread. By using the coverstich to do the topstiching it ensures perfectly parallel rows of stitiching and with each stitch having its perfect counterpart. I also like using the stitch in the ditch foot or my blind hem foot to get nice even topstitching by moving the needle and running the blade alongside the seam.
After repairing many knees on my nephews’ and nieces’ pants, I concluded that I needed to work out how to make double knees on these pants. This pattern lends itself easily to the modification. I cut two sets of knees and used the burrito method to join them. I have done this on every pair of field trip cargo pants I have made and none of them have worn through at the knees.
I’ve only made the cargoes seven times including two girly pairs, one knit pair and one pair of shorts. Unfortunately I missing pictures of the green ones I made.
I will leave you with my favourite cargo pants from the Flickr pool. I picked them due to their topstitching, that they were made into shorts, or they were made in bright colours.


Wow, Heidi! Well done!
This is also my favorite pattern. I love all the detail and the fit of the pants, and this pattern is actually the reason I started sewing with Oliver + S patterns in the first place! I’ve made two pairs for my son so far, and just purchased some black twill to make him another pair this fall. I haven’t made a pair for my daughter yet, but will likely do so soon.
Thanks for sharing all your versions! I love all the bright colors.
That was a lot of inspiration, thank Heidi! I just checked out your Flickr tutorial on double knees and am going to try this next. Thanks again!
Wow! Love all your different variations of each pattern. I love the field trip cargos for boys (thanks for including my version from Flickr…shorts with zippers on the little boy) I never thought of them as a girly option but yours are so cute! Thanks for the inspiration!
Whew… that made me dizzy with all the wonderful sewing. I also love this pattern and found it went to together easily and loved the results. Just go step-by-step and you will have a beautiful end product. Love it!
Oh, Wow! How exciting to see it up!
Thanks!
Heidi you are a sewing demon! You undoubtedly get value for money with the number of times you use a pattern.
I’m looking forward to summer, and instead of making more school shorts for the boy, I’m going to lop the too short, worn through lower legs of his Field Trip cargoes and call them shorts!
…. Meant to say: Thanks for the inspiration
(hit the enter button too soon)
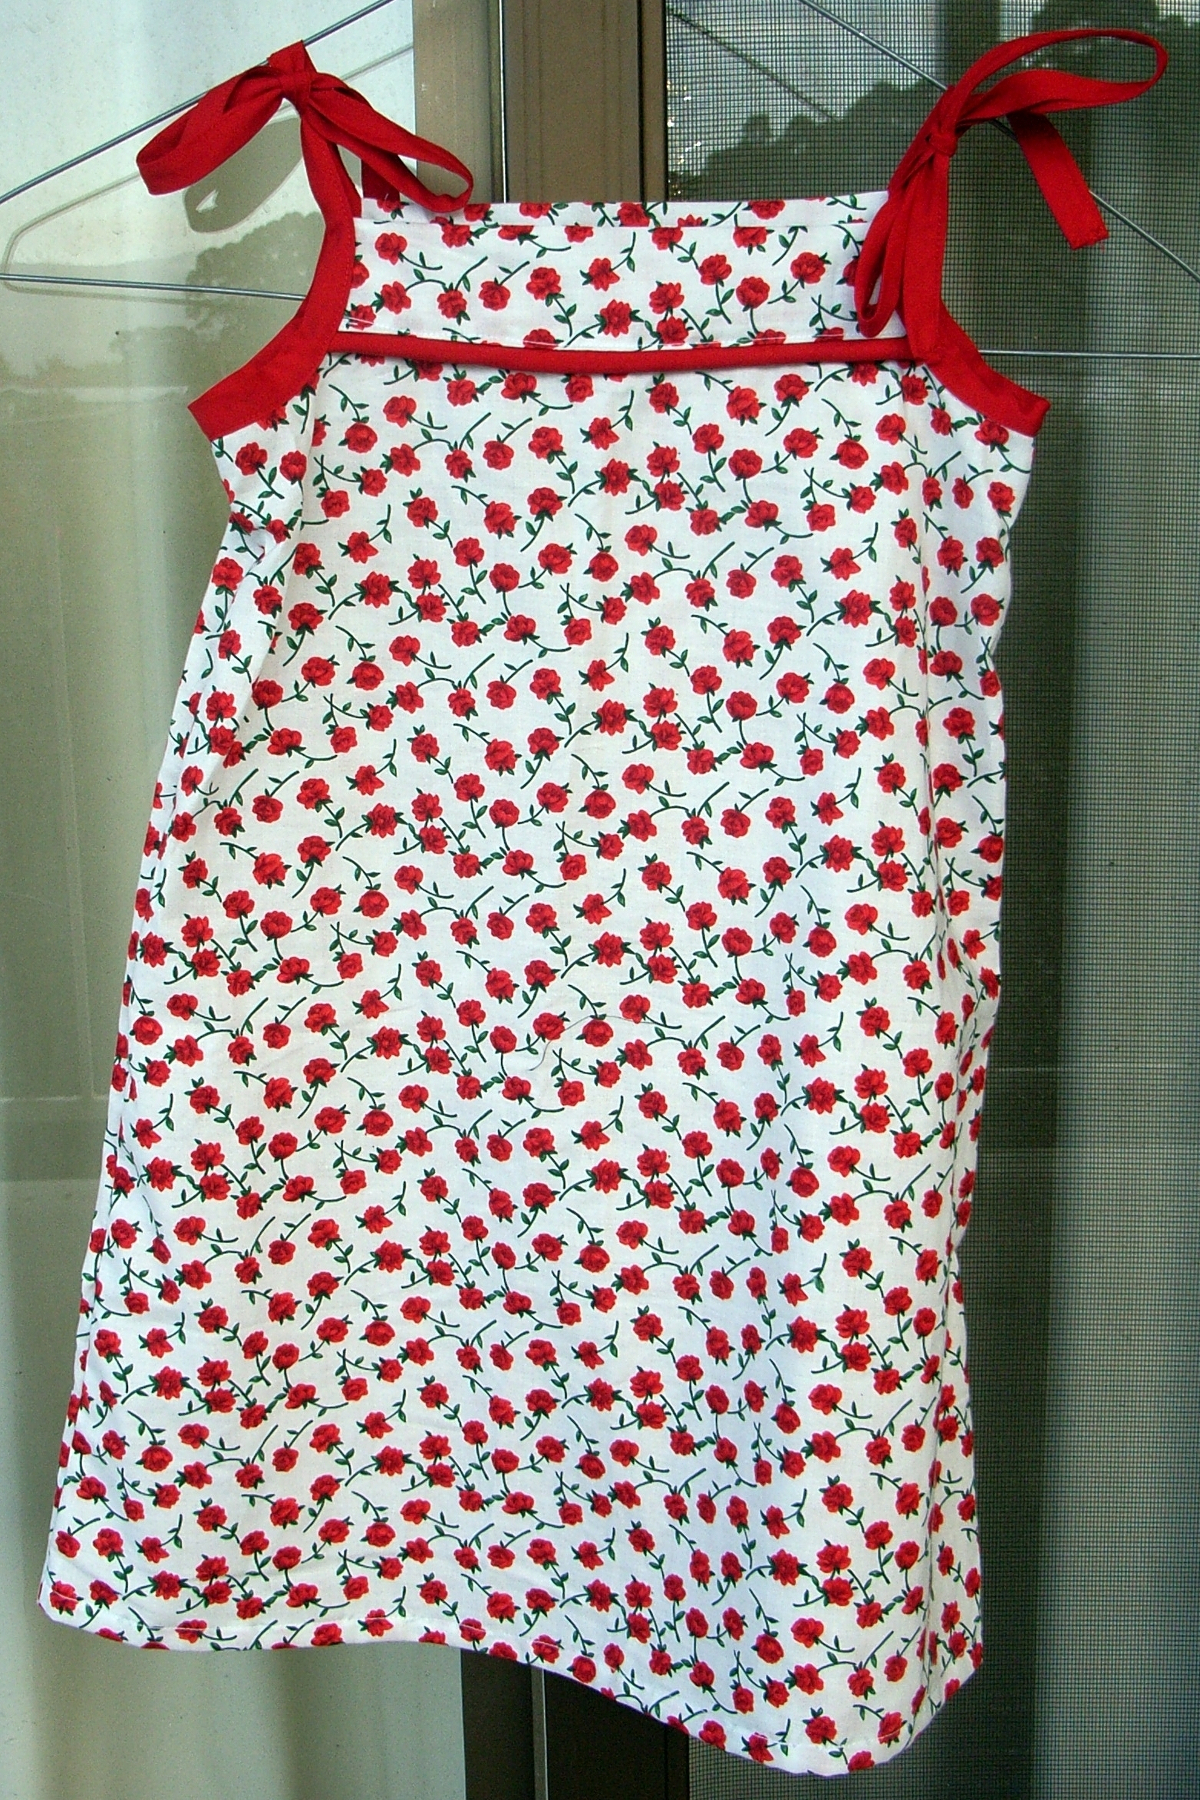
The red and white popover dress at the begining of the post was worn yesterday by the orignal recipient! It has been worn and worn and worn over the last 3 and a half years. It’s gettting a little tight but is still in fantastic condtion. When she initally wore it the straps had to be crossed at the back to make it stay on her shoulders 🙂
So worth making clothes that get so much wear!
Wow, you’re prolific!