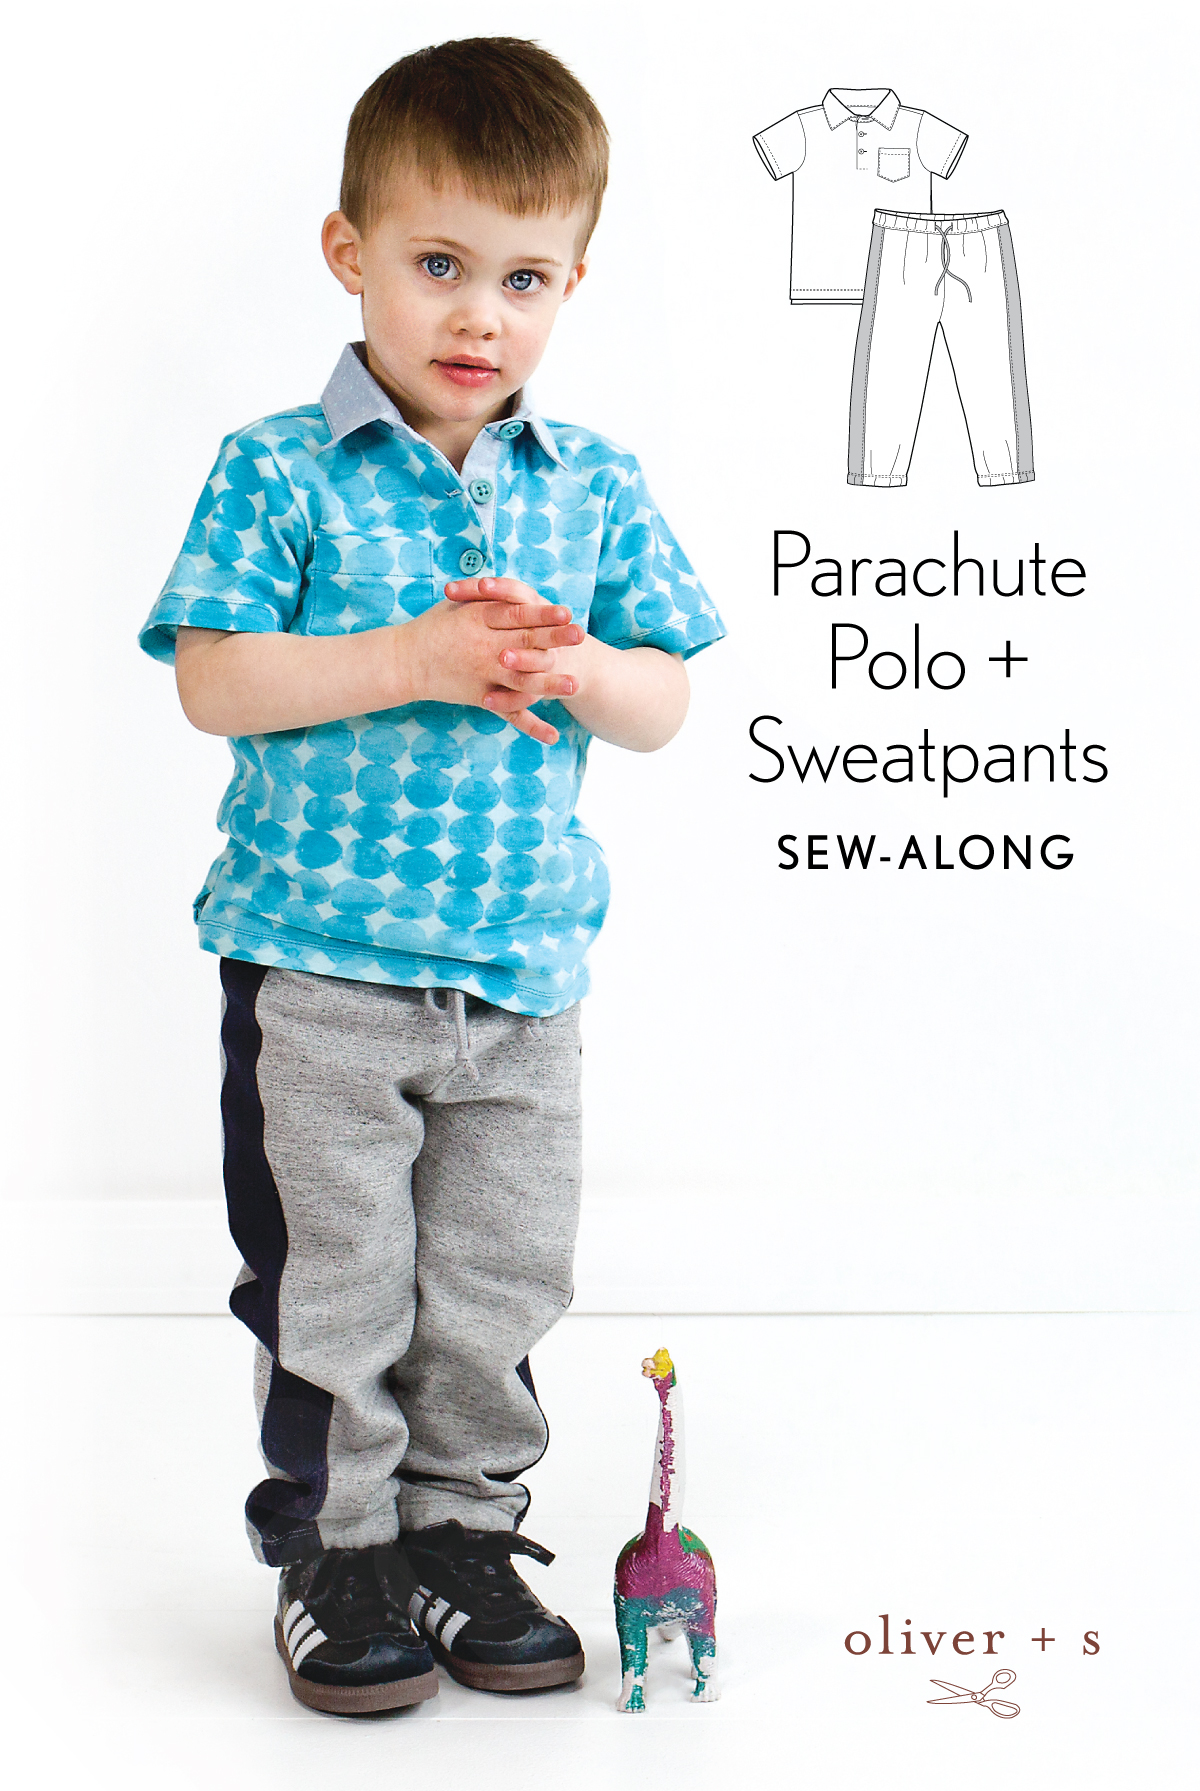
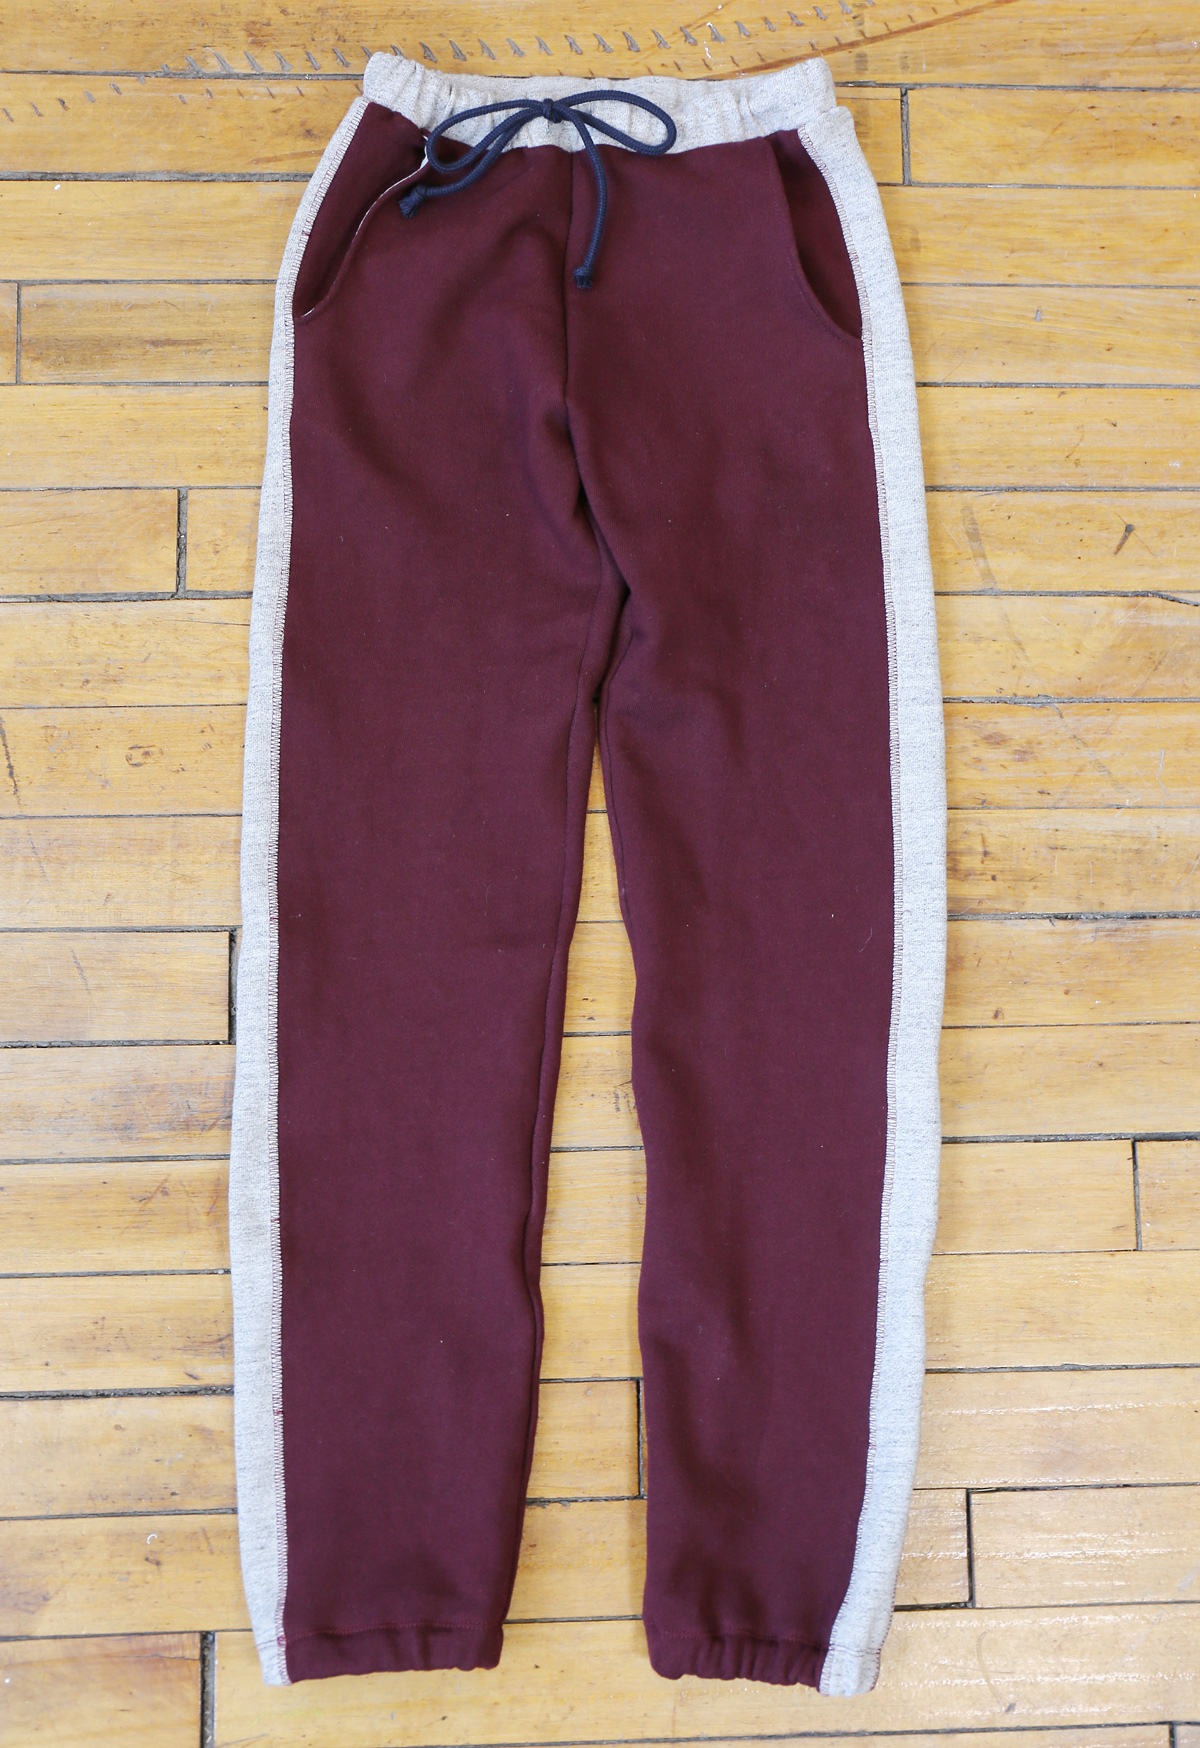
Are you ready to sew the Parachute Sweatpants? We’re so glad you’re here.
This morning on the blog Liesl shared her tutorial on adding pockets to the Parachute Sweatpants, so be sure to check that out if you are interested in adding pockets to your pair of sweatpants.
Here is the daily plan for this weeks Parachute Sweatpants sew-along:
- Day 1 (today): get ready and assemble the legs
- Day 2: assemble the pants
- Day 3: prepare and attach the waistband
- Day 4: hem the sweatpants
- Day 5: finish the sweatpants
Here we go!
Day 1
Get Ready
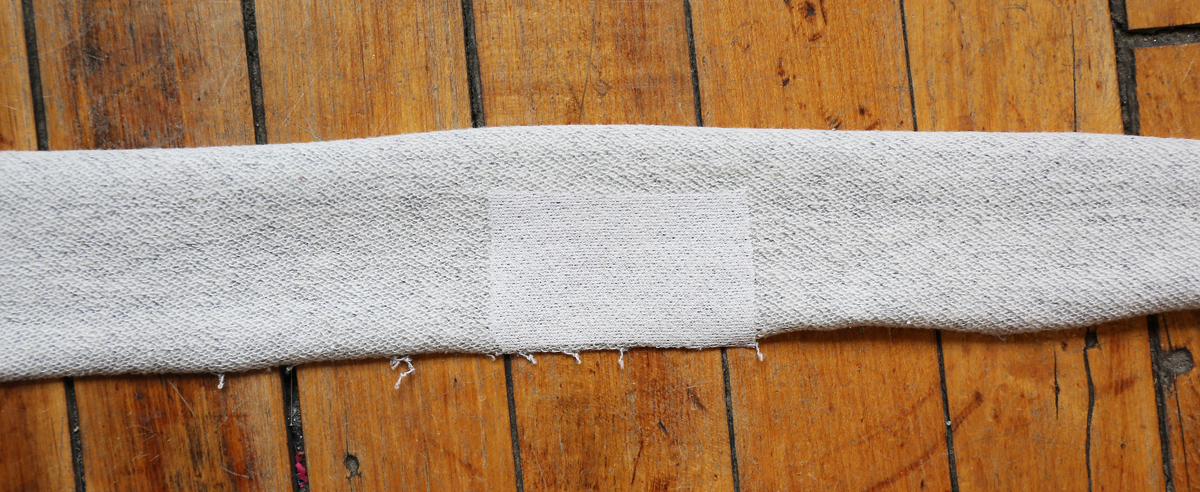
1. Cut a piece of lightweight fusible interfacing 1 1/4” wide by 2 1/2” long and set it aside for the waistband.
Assemble the Legs
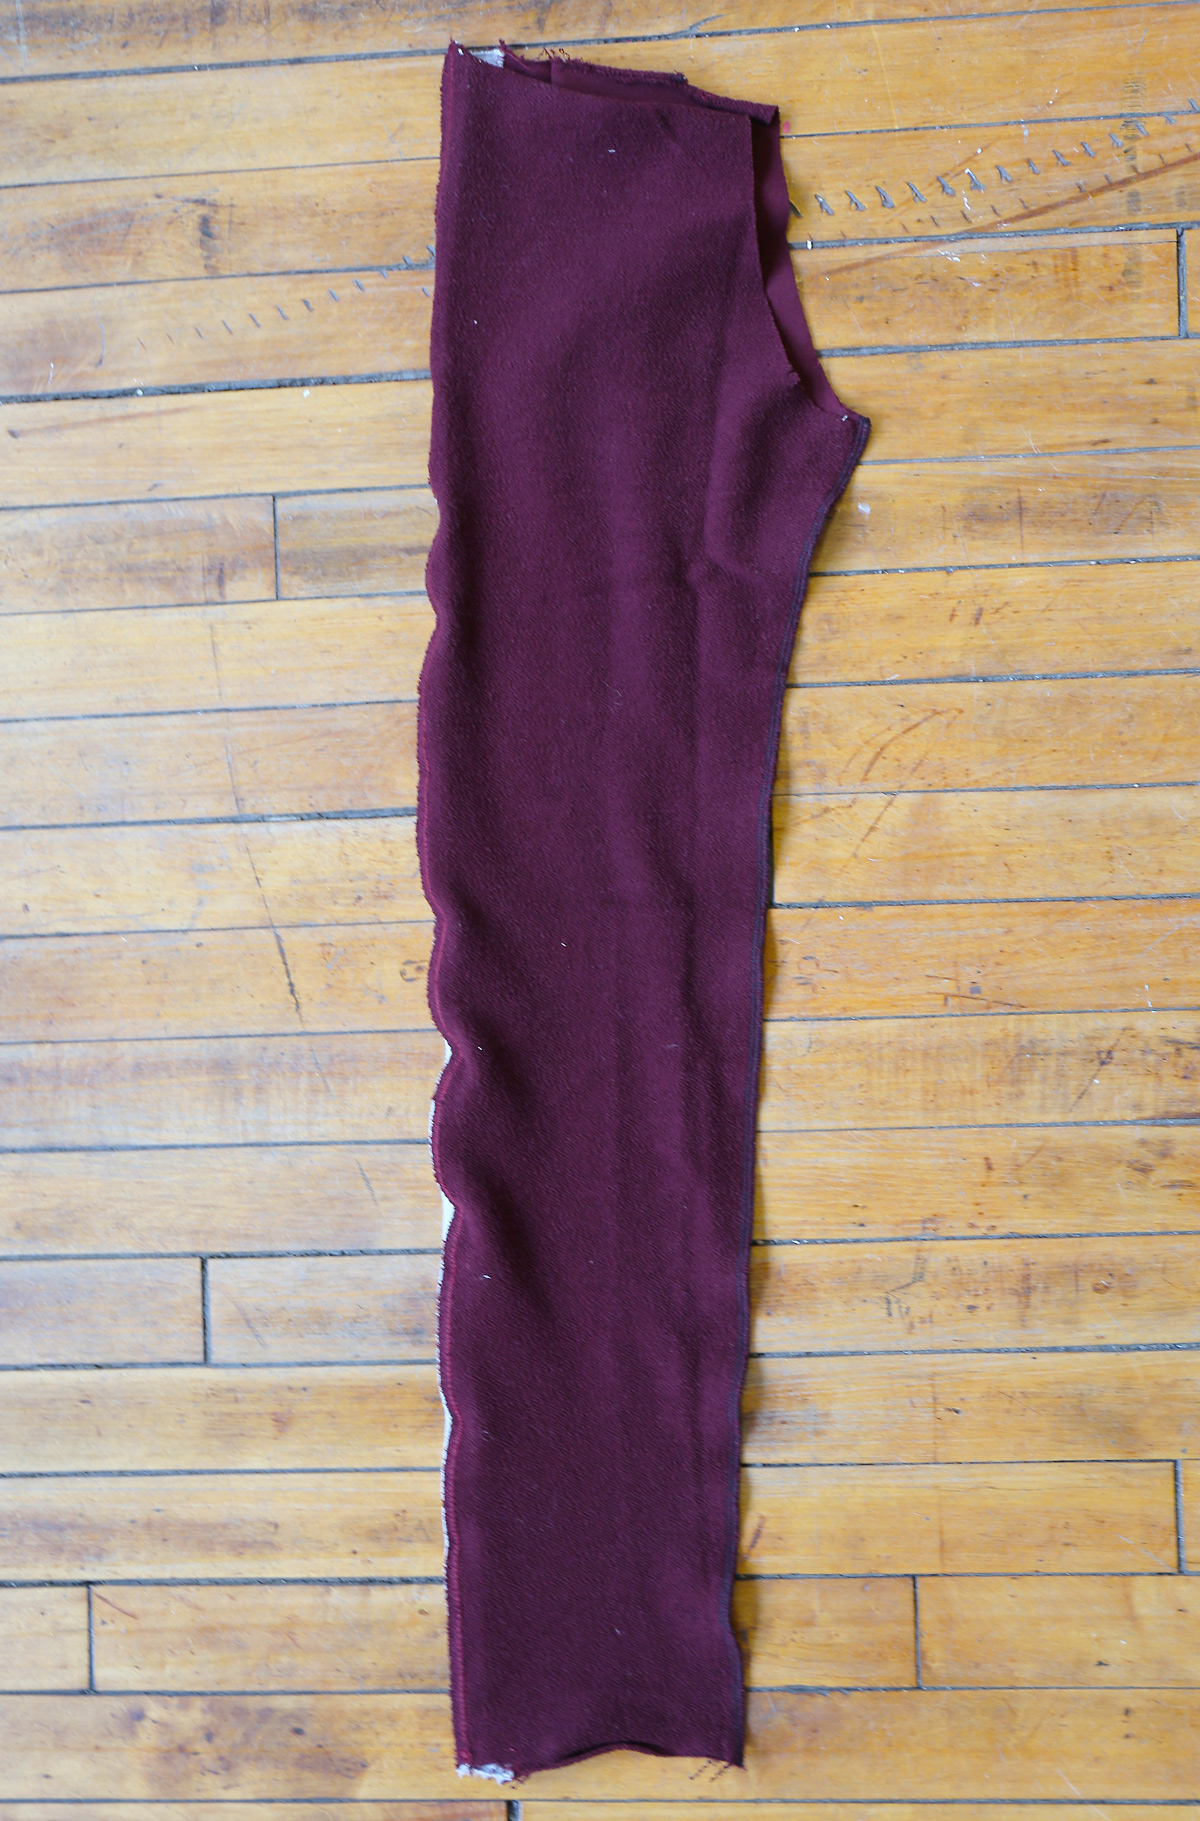
1. Pin one pants-front piece to its corresponding side panel, matching the notches, and stitch with a 1/4” seam.
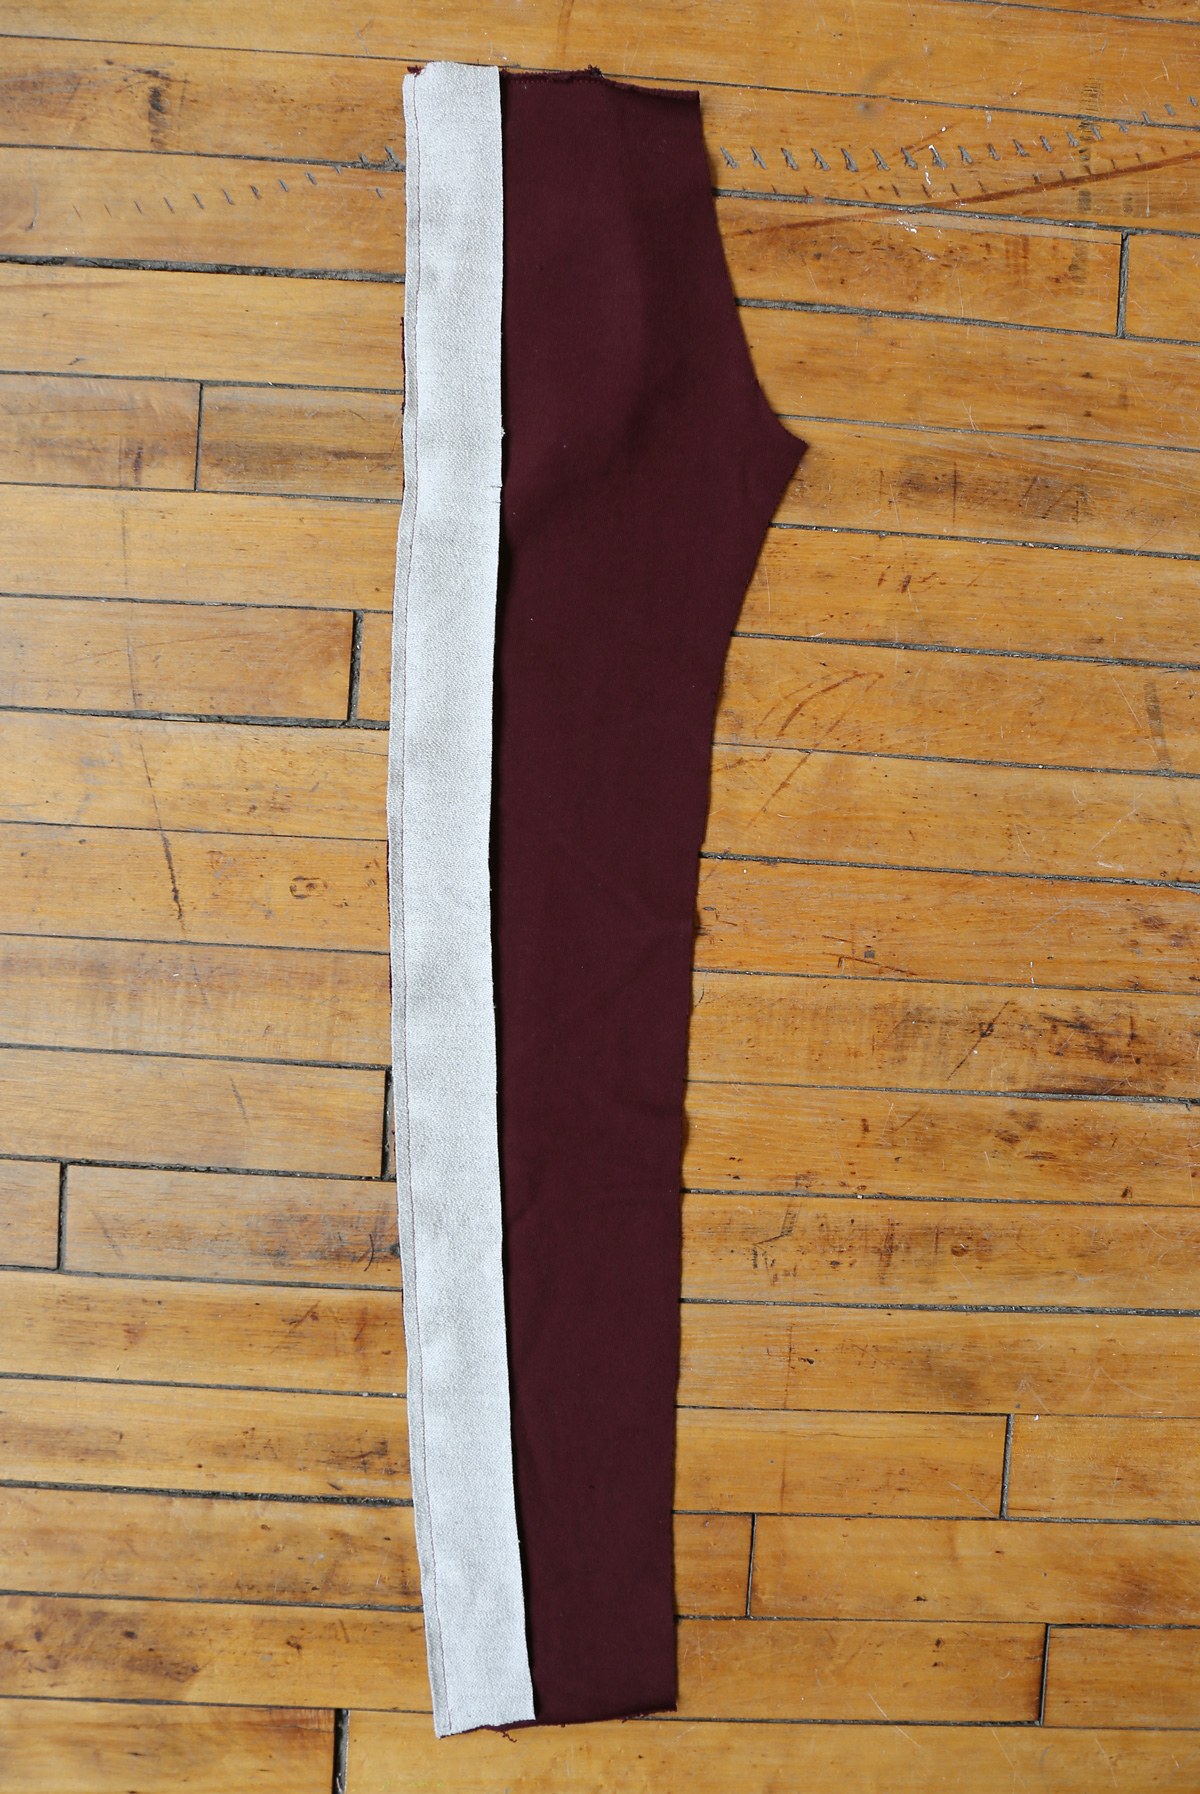
Press the seam allowances toward the side panel and finish them together. If desired, topstitch the side panel 1/8” from the seam. (Liesl will show you her little faux-coverstitch trick in a few steps, so stay tuned for that if you’d like to try it.)
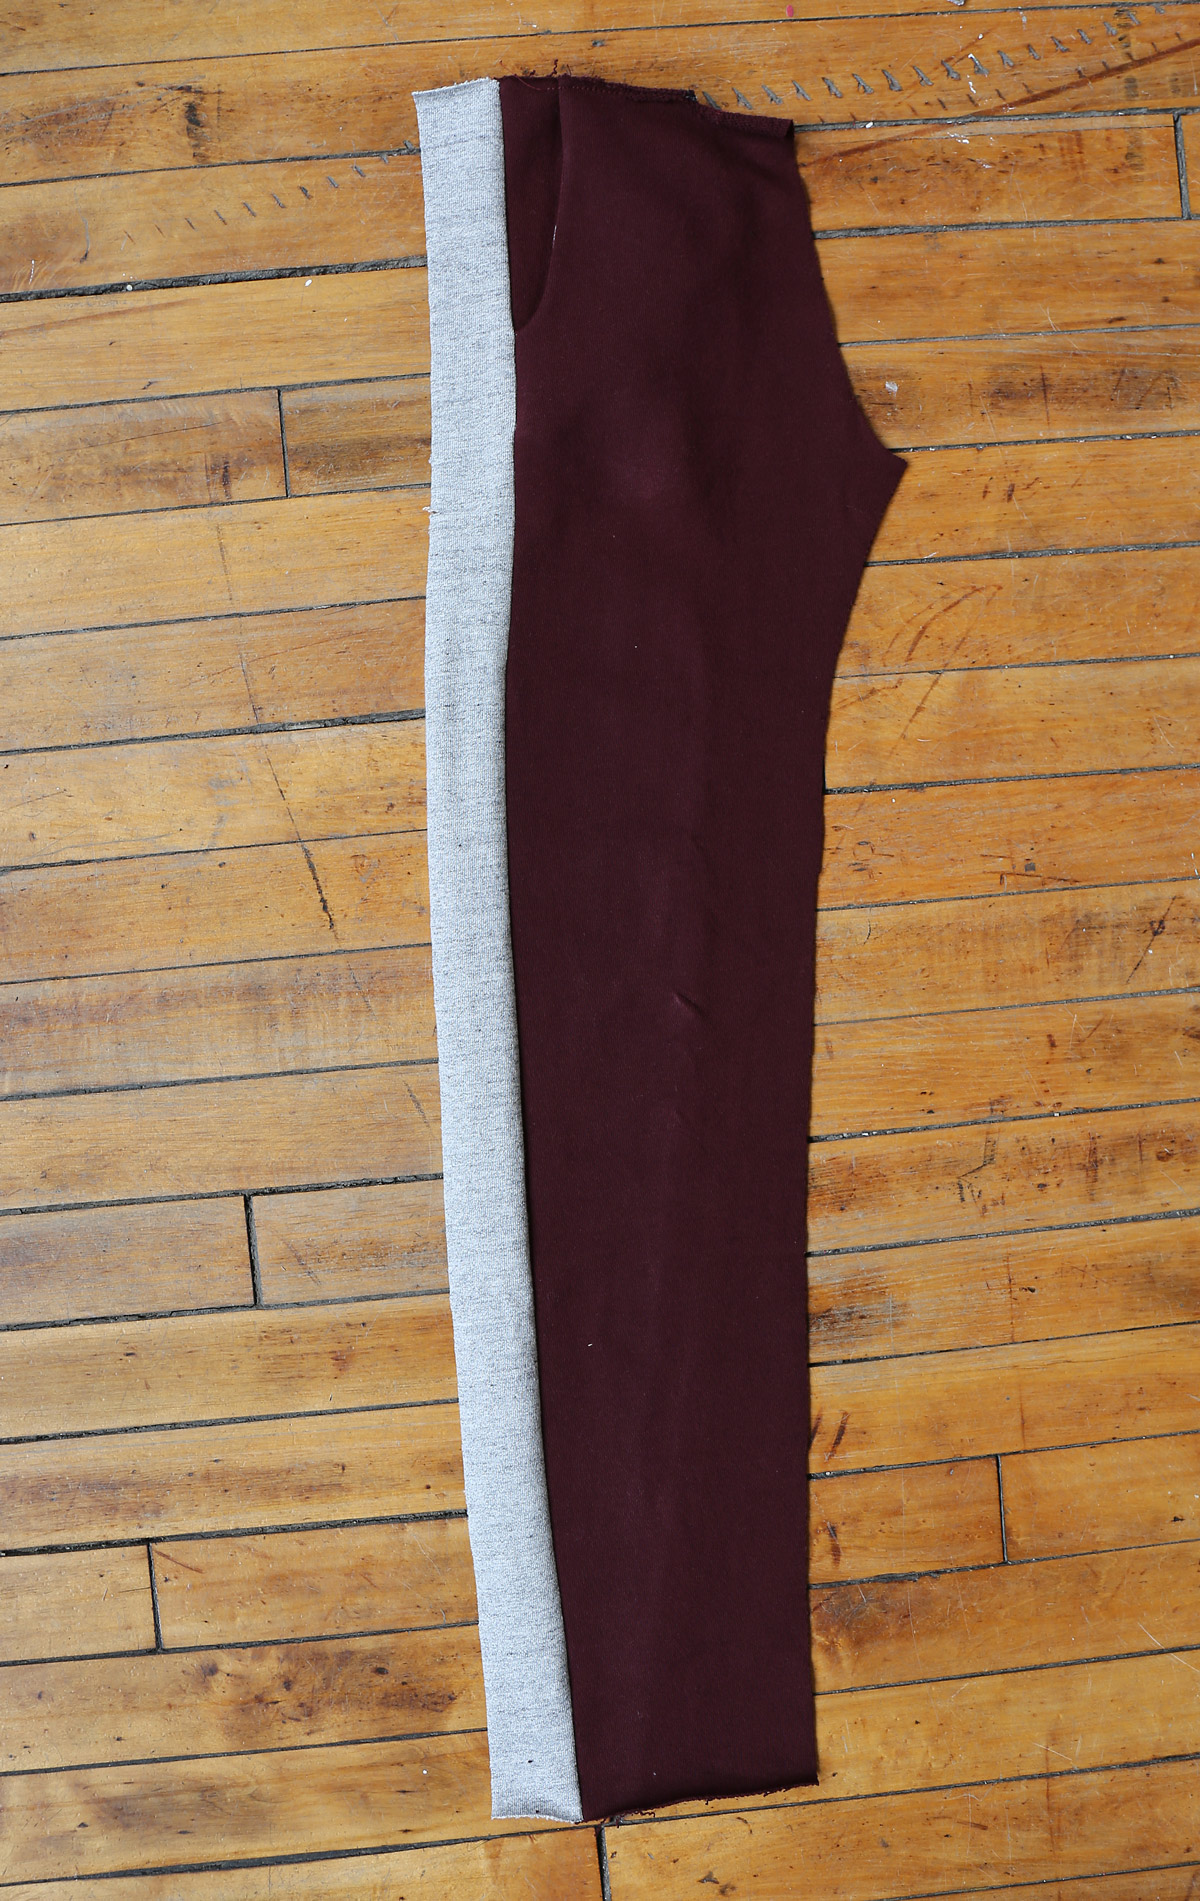
2. Pin one pants-back panel to its corresponding side and pants-front panel, aligning the notches, and stitch with a 1/4” seam.
Press the seam allowances toward the side panel. Finish the seam allowances together. If desired, edge stitch the center panel 1/8” from seam, catching the seam allowances in the process.
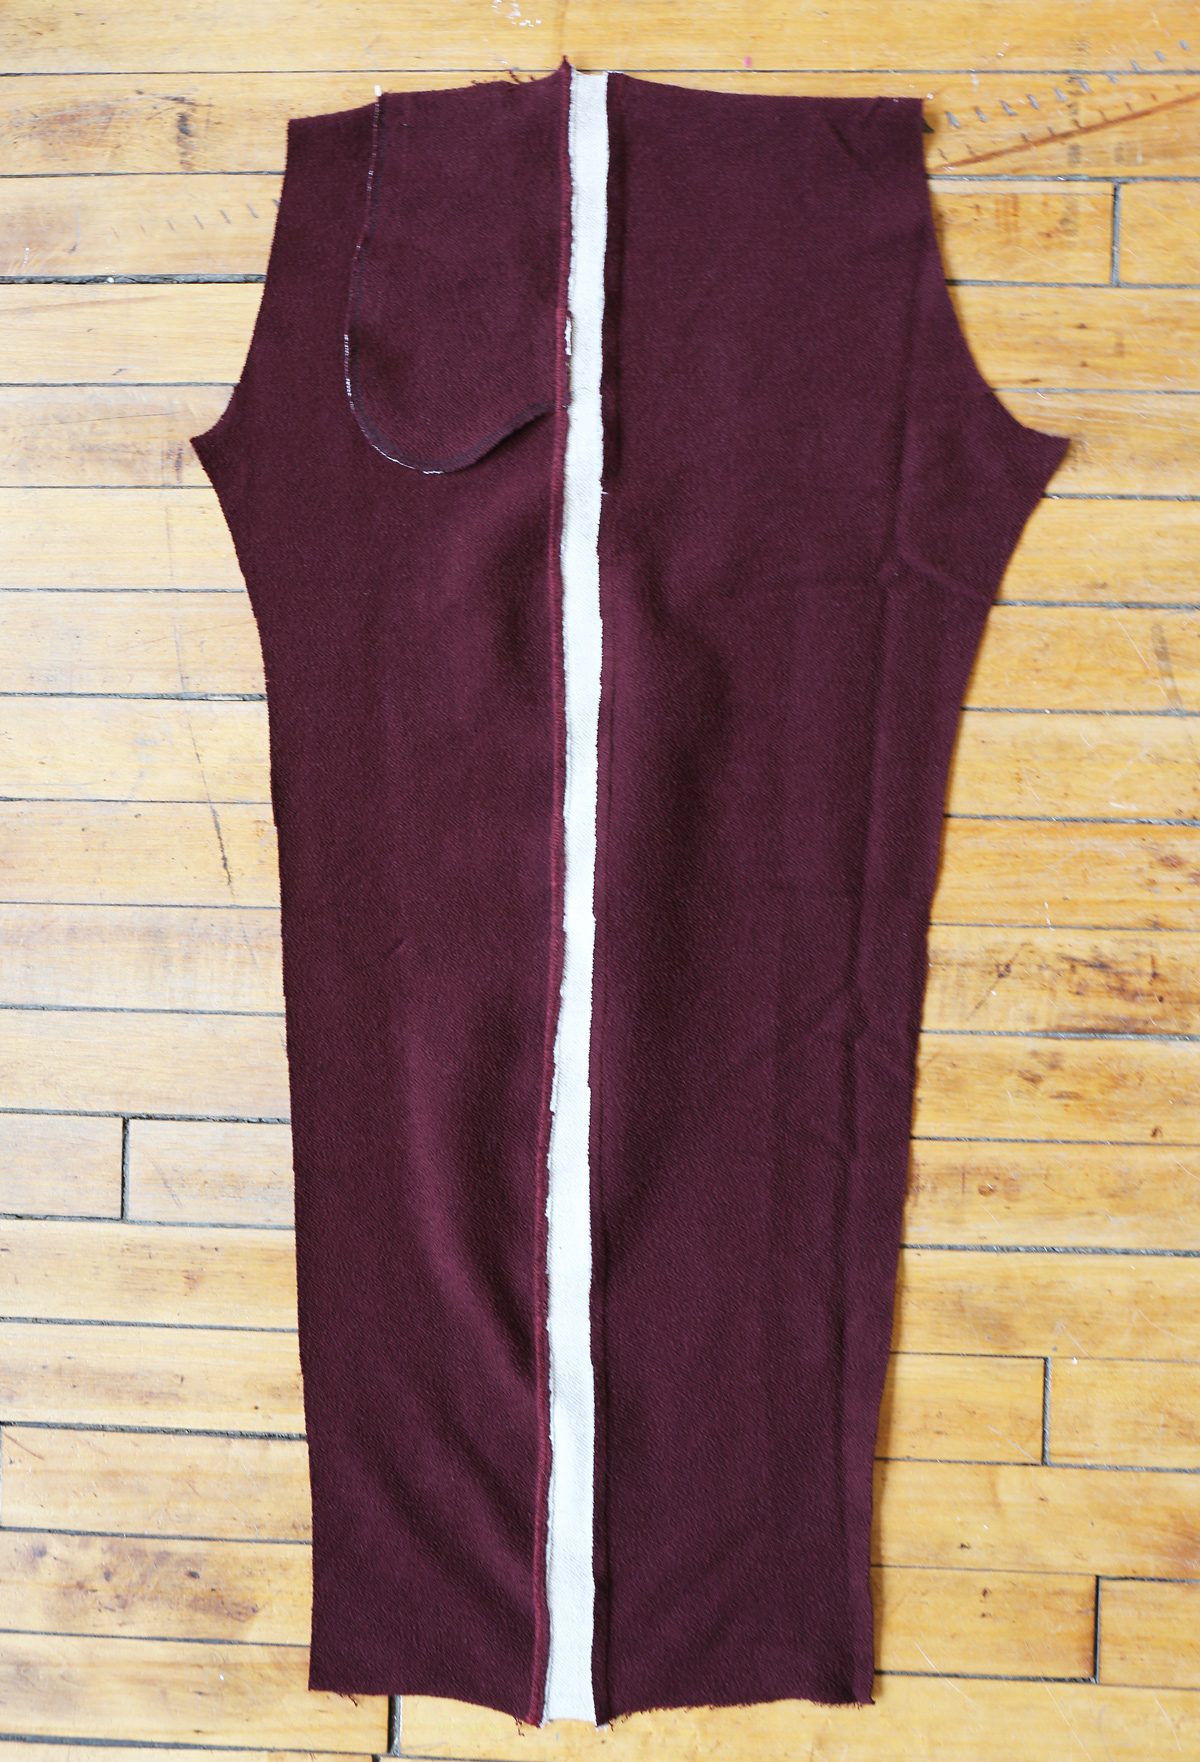
From Liesl: I have a fun little stitch on my machine that I use to fake a flatlock stitch on the sweatpants stripe. I used stitch #28 on the diagram below on my Janome 6600, but I think you could use other stitches as well.
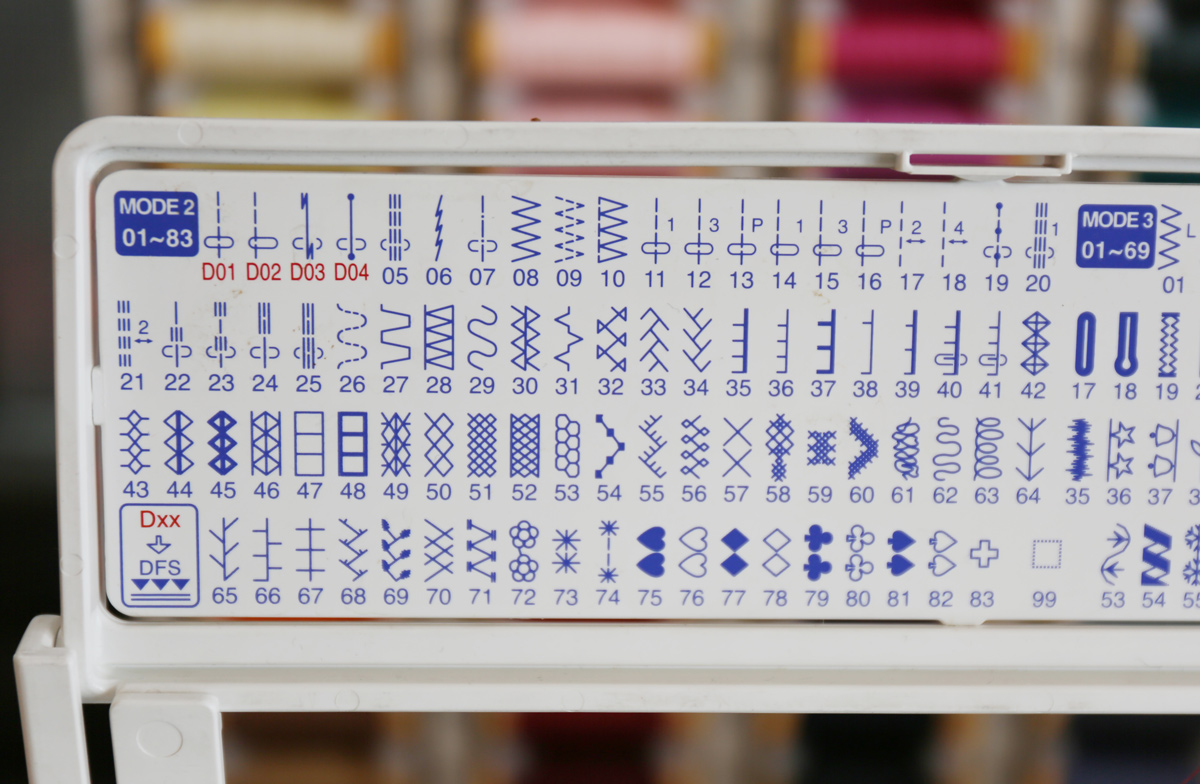 See stitch #28 above for the stitch diagram.
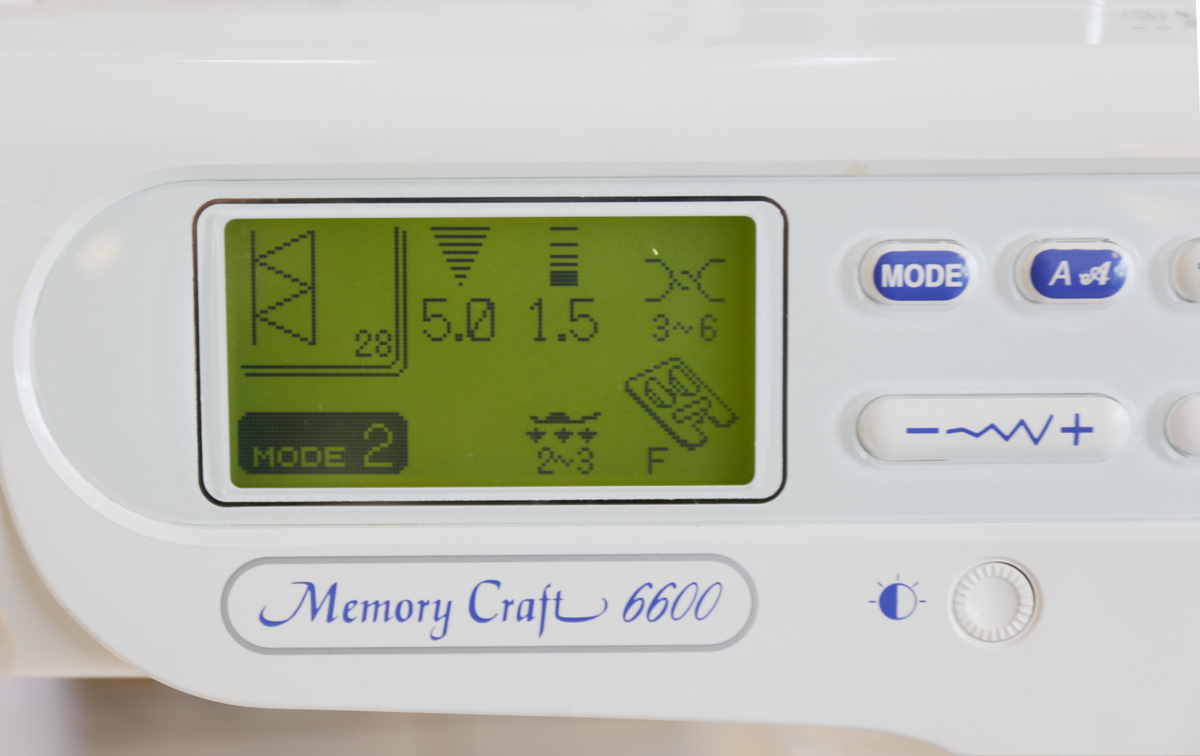 Here are the settings I use for the stitch.
To fake a flatlock stitch, I switch to the walking foot and carefully stitch over the edges of the stripe so my needle stitches in the ditch of the seamline on one side of the stitch. I would imagine that if you use Wooly Nylon or a similar fluffy serger thread you’d get an even better result. I think you could also get this effect with a regular zigzag stitch if you don’t have any fancy stitches on your machine, and the Wooly Nylon will fill in the spaces to make the stitching look even better.


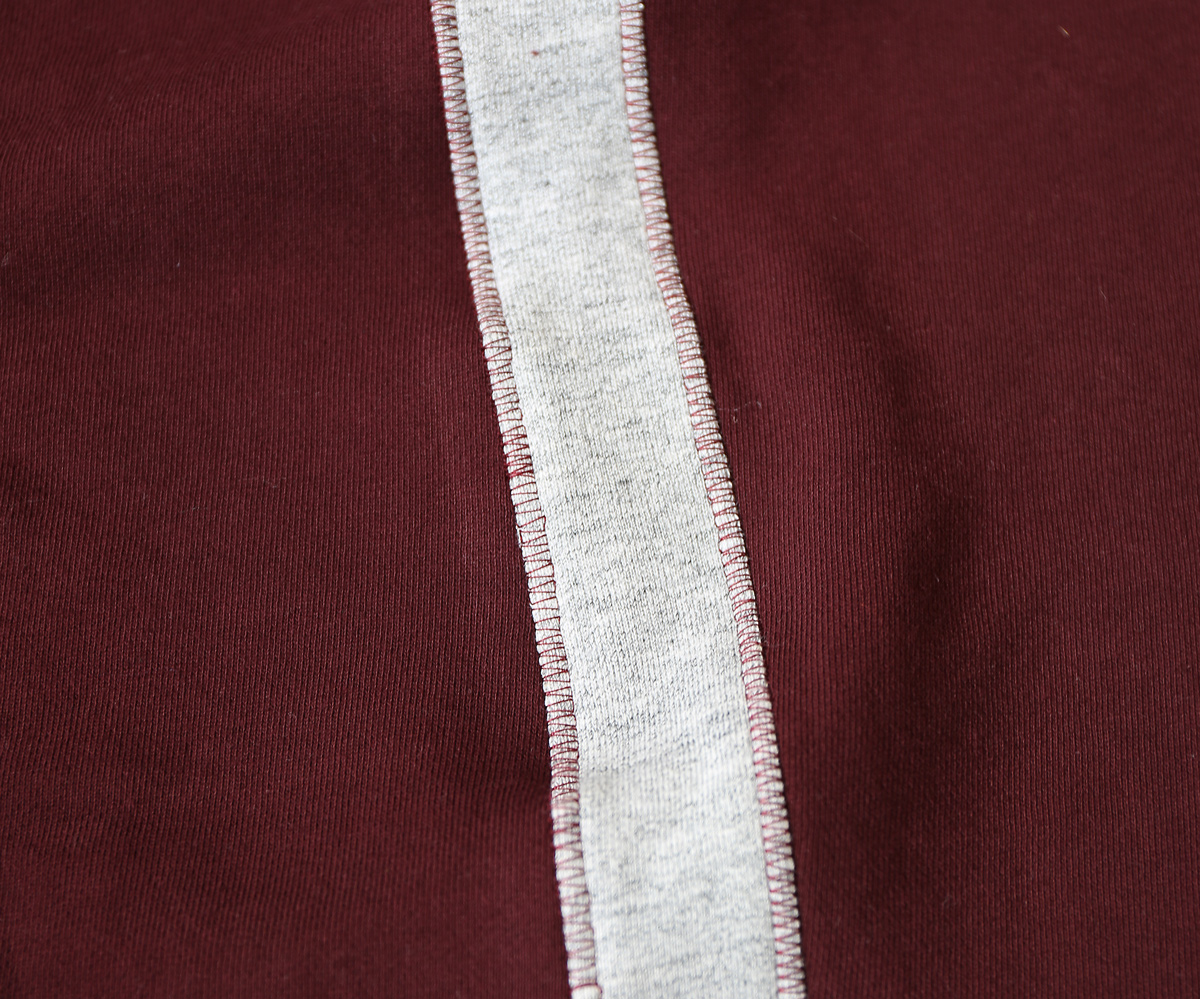
Play with a few scraps of fabric to see what works with your machine, and don’t be afraid to use a regular straight stitch if that’s what works best for you.
Note: Because of the bulk of the fabrics, you might want to use a walking foot for this step. Technically, you don’t need to use a stretch stitch for the edge stitching because knit fabric doesn’t have much stretch in the length, and if the fabric puckers or waves once the seam is sewn, a good steaming with the iron should shrink everything back into place.
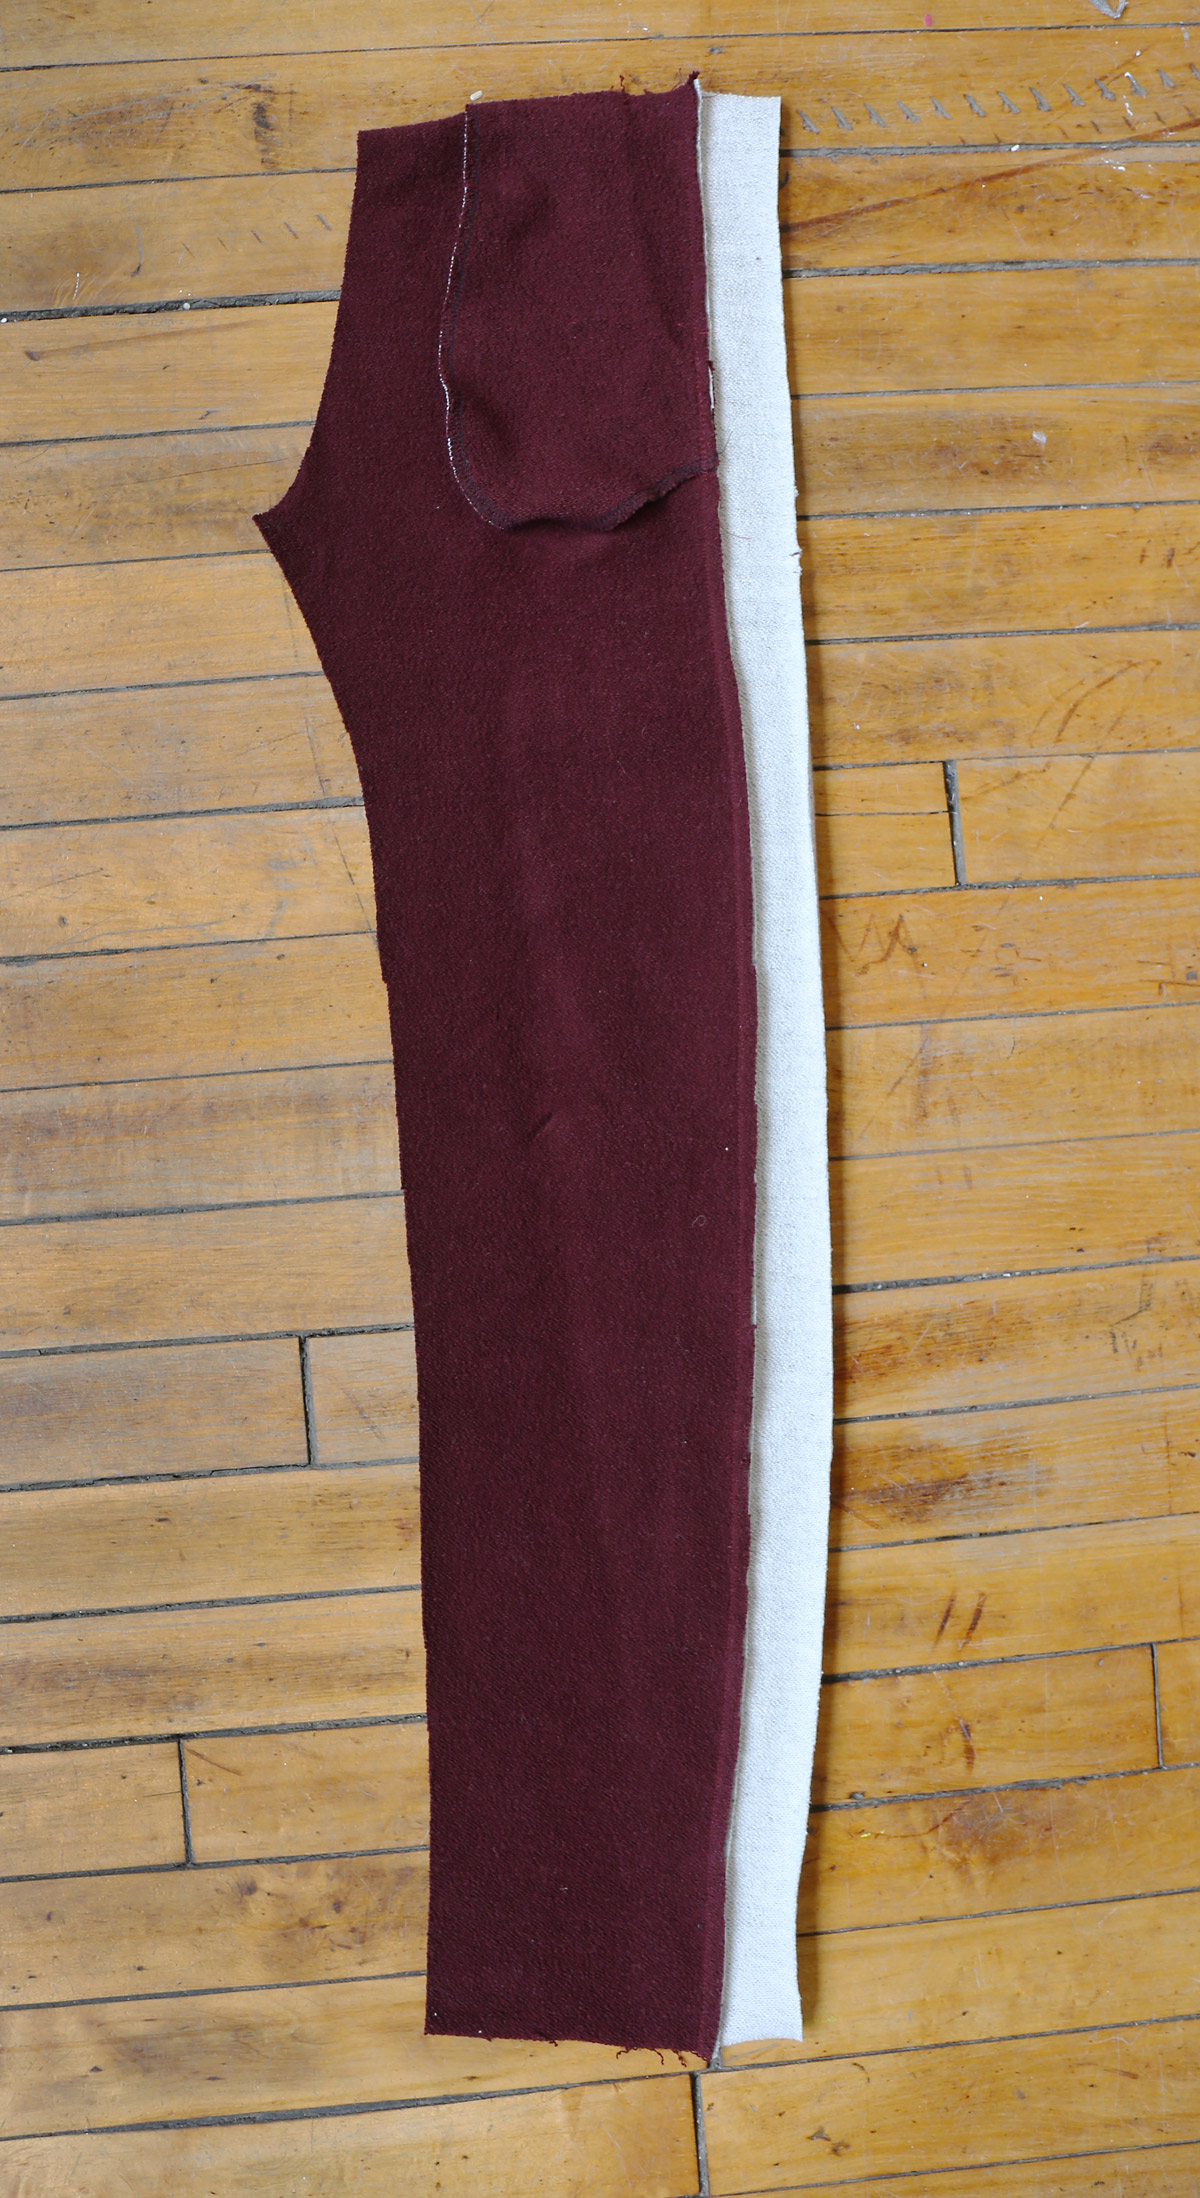
3. Pin the edges of the leg together and stitch the inseam with a 1/4” seam. Finish the seam allowances using your preferred method and press the seam allowances toward the back.
4. Repeat steps 1-3 for the second leg.
Day 2
How is the sewing going so far? It’s going to be short and sweet, as we have only one step today. For those of you who are adding pockets it gives you a chance to catch up.
Assemble the Pants
1. Turn one pants leg right-side out and the other leg wrong-side out. Slip the right-side-out leg into the wrong-side-out leg and pin the layers together at the rise (the crotch), with right sides together and with the edges, notches, and seams aligned. Stitch the rise with a 1/4” seam and finish the seam allowances together using your preferred method. Turn the sweatpants right side out so they’re ready for the waistband.

If you ever have any questions along the way about any of the steps, please let us know, will you? Come back tomorrow when we’ll be preparing and attaching the waistband. See you then!
Day 3
Welcome back. We have a lot of sewing to get done today, so let’s get started!
Prepare and Attach the Waistband
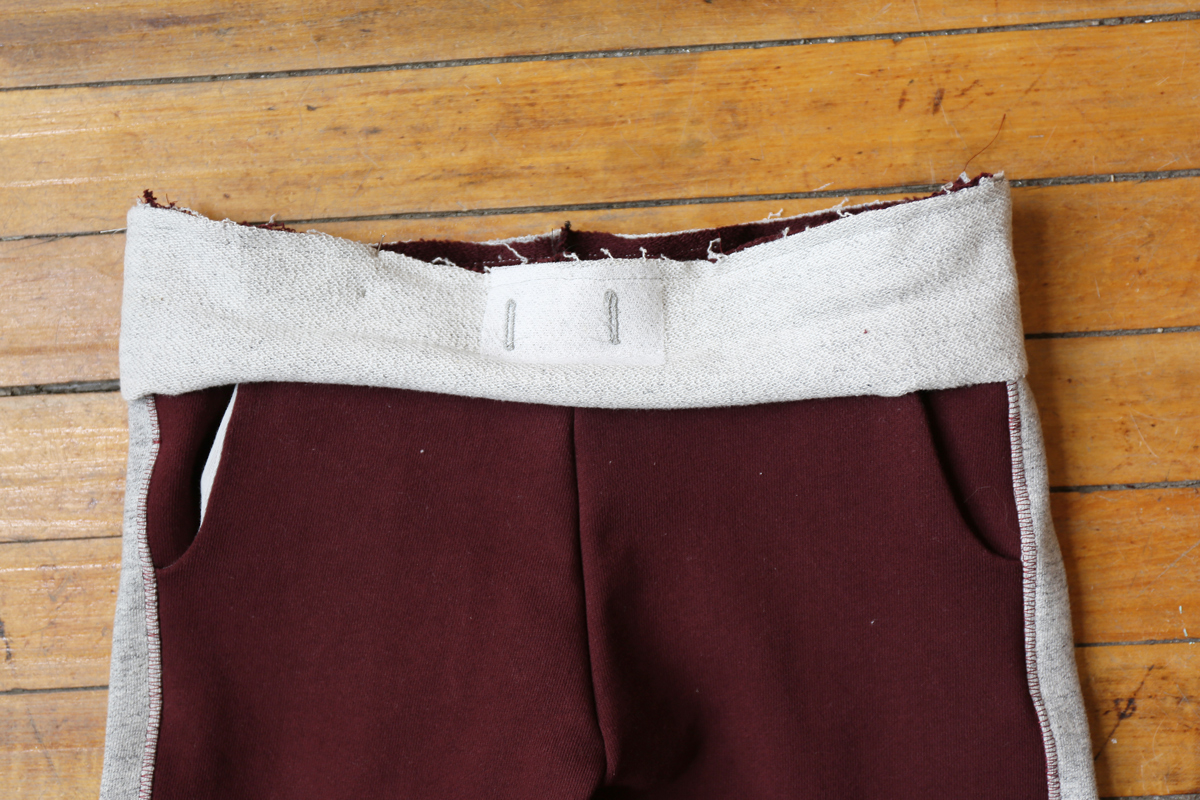
1. To reinforce the waistband, fuse the small piece of interfacing you prepared in Step 1 of the “Get Ready” section to the wrong side of the cut waistband behind the marked buttonholes that you transferred from the pattern.
2. Stitch each buttonhole where marked on the waistband. Cut the buttonholes open, being careful not to cut into the stitches themselves.

Hint: Use a seam ripper to carefully cut open the buttonholes, cutting from each end of the buttonhole toward the center. Visit the free videos section on the website for a demonstration.
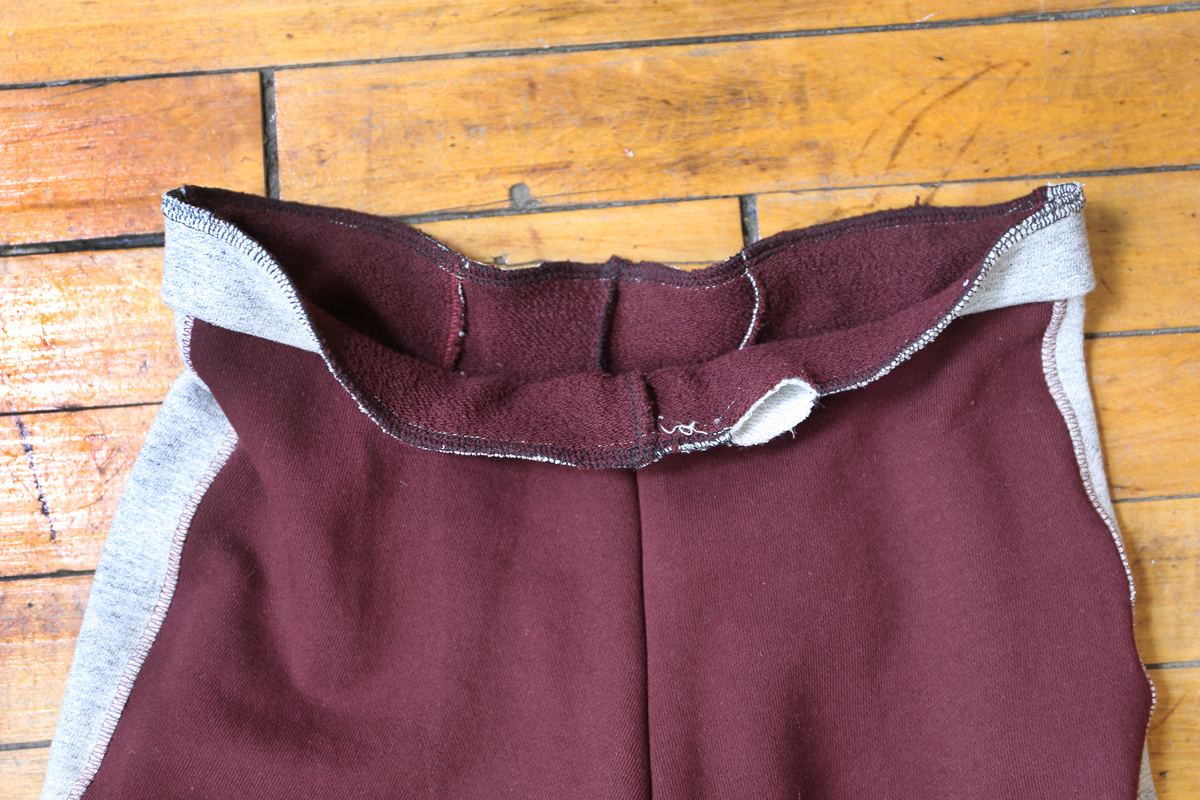
3. With the right sides together and the edges aligned, pin the waistband’s short ends together and stitch them with a 1/4” seam. Press the seam allowances open or to one side.
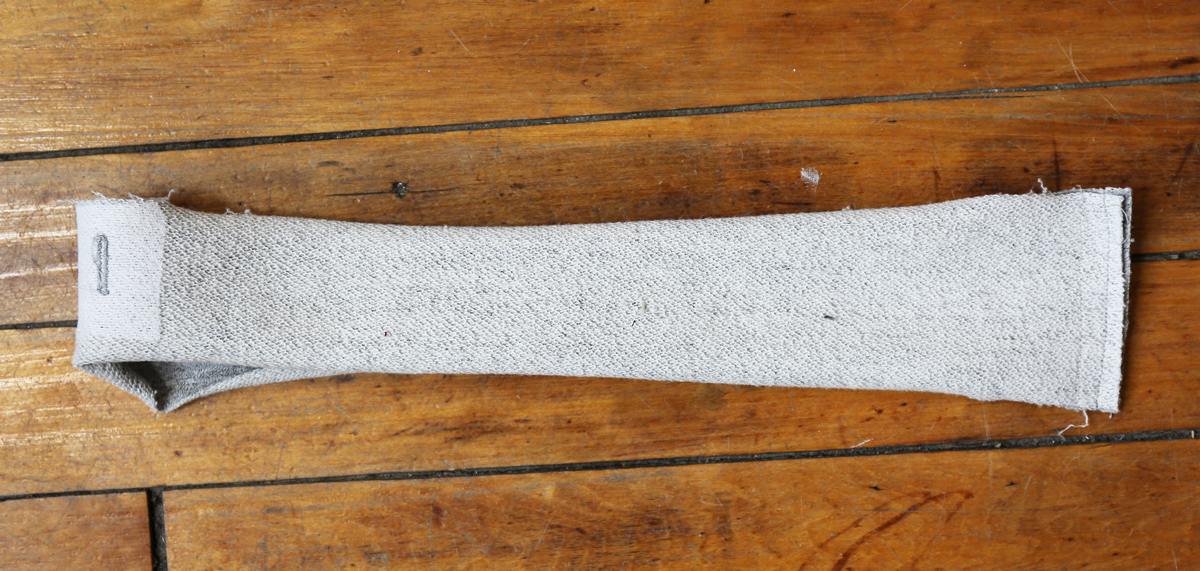
4. Fold and press the waistband in half lengthwise, with wrong sides together.

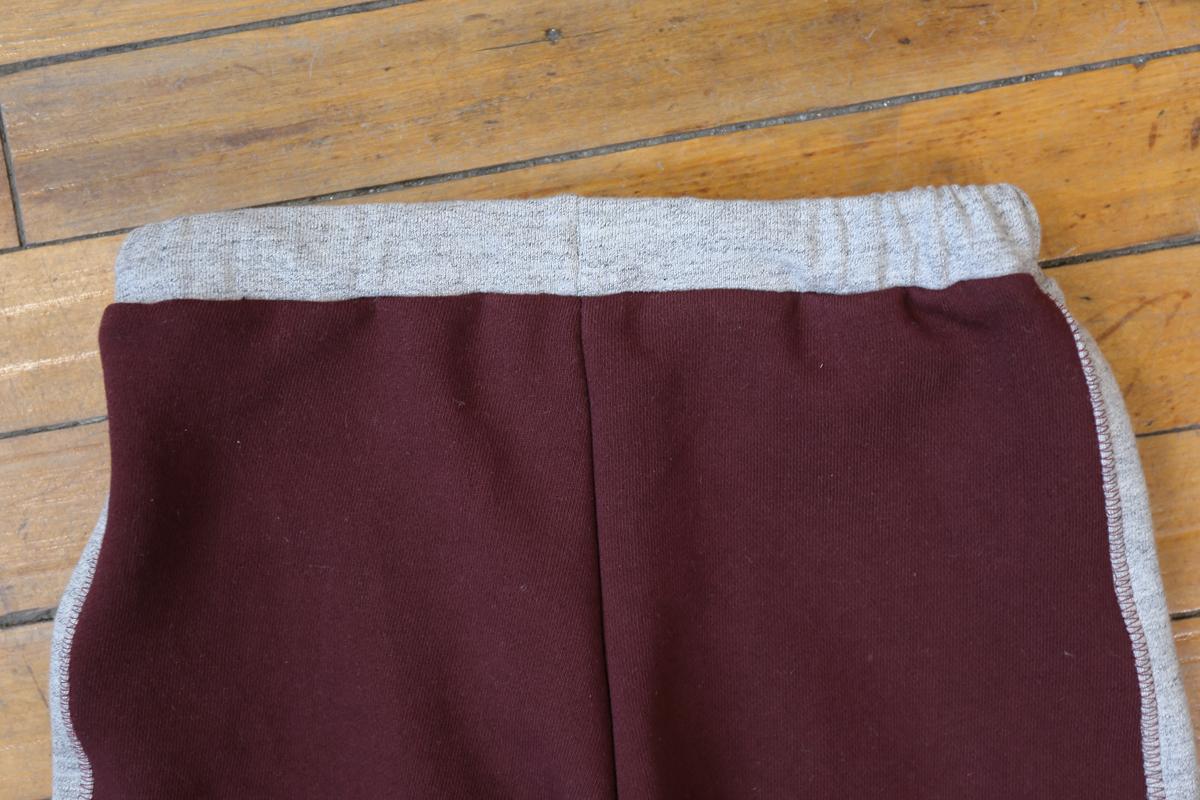
5. Unfold the waistband and then slip it over the pants with right sides facing. Pin the notched edge of the waistband to the top raw edge of the pants, matching the notches on the waistband to the center-front and side panel seams and matching the waistband’s seam with the center-back seam of the pants. (Note that you’ll want the buttonholes positioned at the top of the waistband as shown in the photo.)
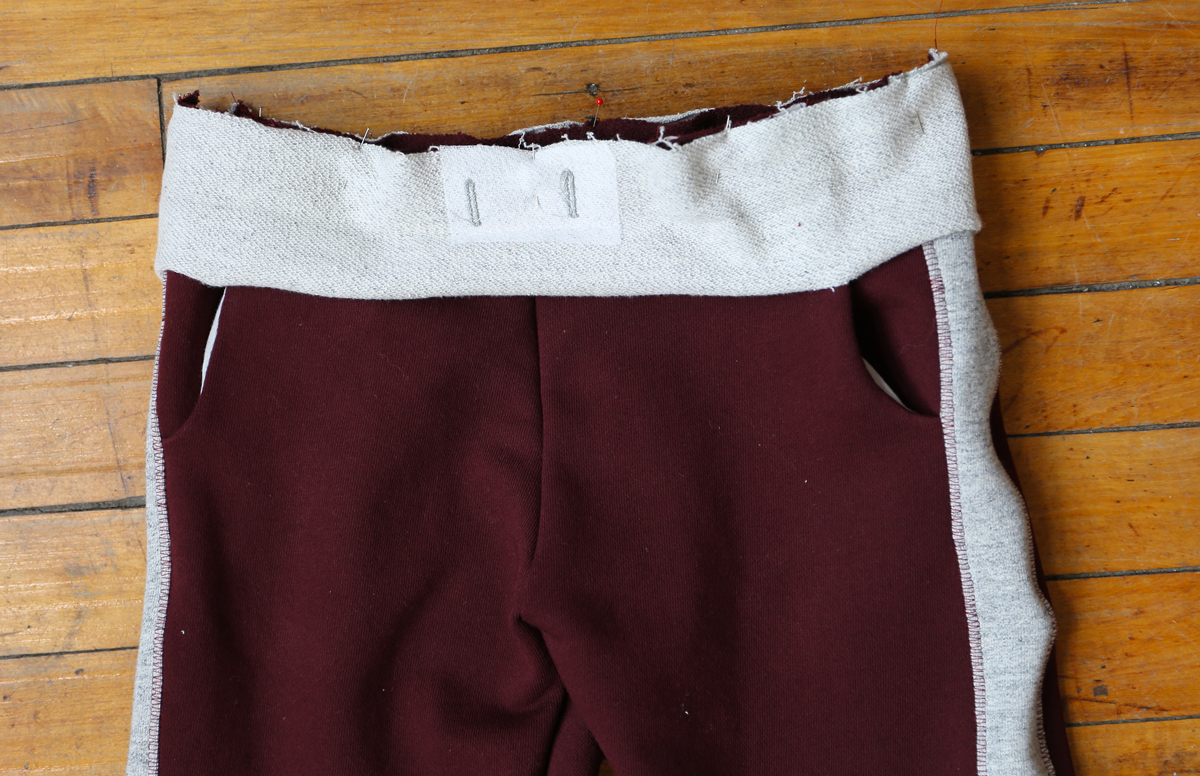
Baste the waistband to the pants with a 1/4” seam. Stretch the waistband a bit as you pin and stitch it so it will fit the width of the pants.
6. Fold the waistband in half again and pin it in place. This will create a casing for the elastic. Stitch both edges of the waistband to the top of the sweatpants with a 1/4” seam leaving about 2” unsewn near one side or near the back to make an opening through which to feed the waistband elastic.
7. Attach a safety pin or bodkin to one end of the elastic and feed the elastic through the opening left in the waistband casing. Adjust the elastic to fit the wearer’s waist and trim the elastic to the desired length. Next overlap the two ends of the elastic by about 3/4” and pin them together.
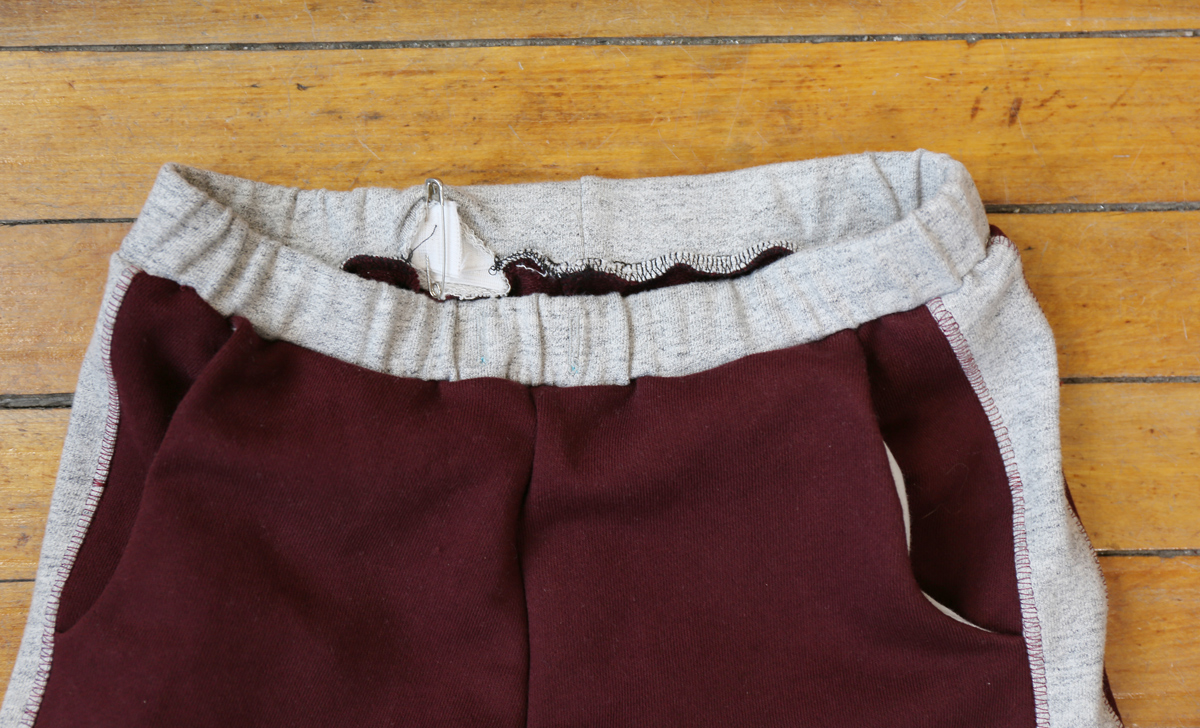
Then sew the pinned ends together by stitching a small rectangle on the overlapped edges, removing the pin as you sew and lockstitching at the beginning and end of the rectangle.
Note: Elastic can vary a great deal in the amount of stretch it has, depending on its quality. If you’re unsure of the length to cut the elastic, start by cutting it 1” smaller than the child’s waist measurement, then shorten the elastic as necessary.
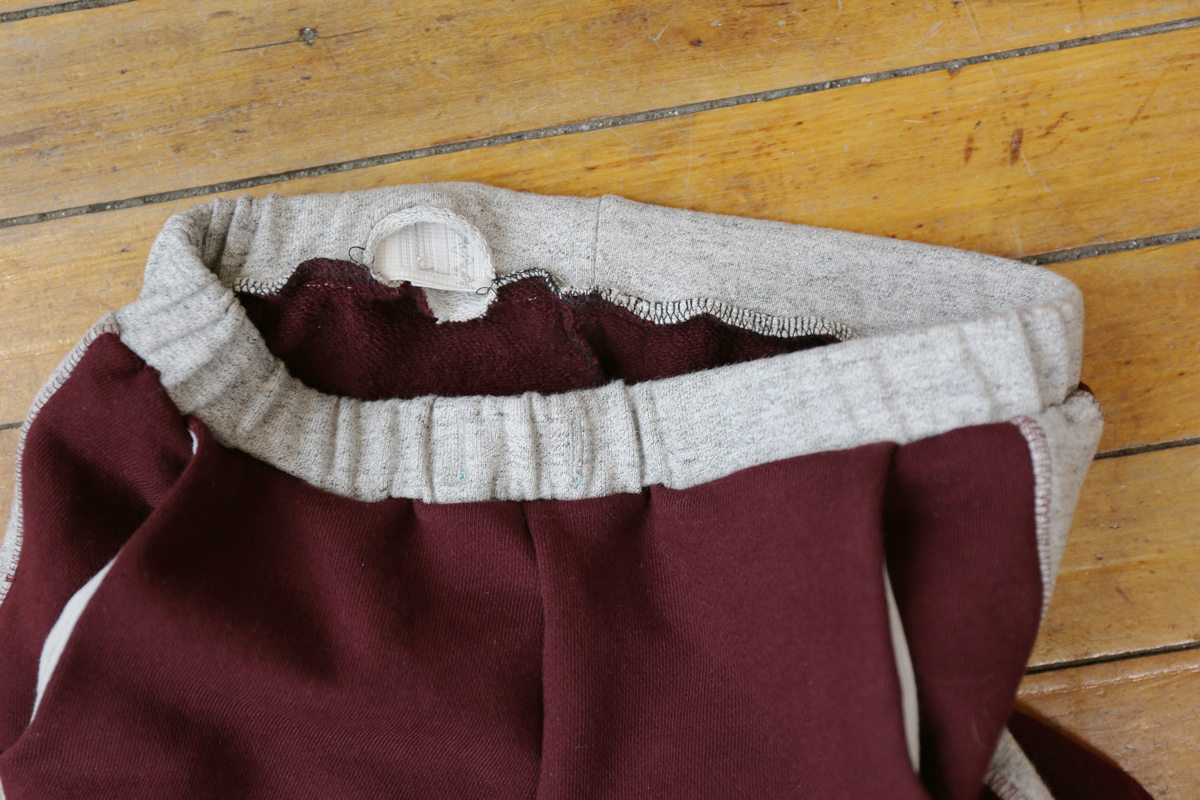
8. Stitch the opening closed with a 1/4” seam. If you aren’t using a serger, finish the waistline seam allowances using your preferred method. Press the seam allowances away from the waistband and, working from the fabric’s right side, edge stitch the waistband with a stretch stitch to finish it.

That’s it for today. We’ll see you back here tomorrow when we will be hemming the sweatpants.
Day 4
Good morning sewalongers! And welcome to day four of the sew-along where we will be hemming the sweatpants. Off we go!
Hem the Sweatpants
1. Finish the bottom edge of the sweatpants using your preferred method. Fold and press the finished edge to the wrong side by 3/4” and use a stretch stitch to stitch 1/2” from the fold, leaving and opening of about 2” to make an opening through which to feed the elastic.
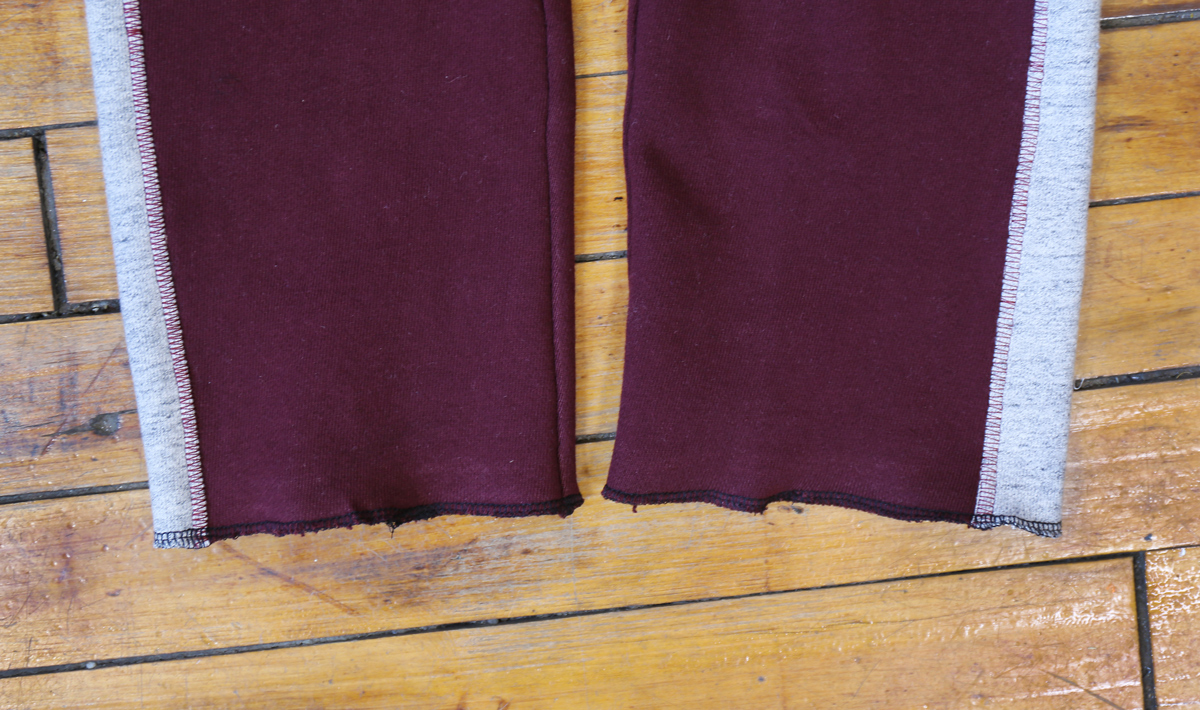
2. Cut a piece of elastic according to the chart. Attach a safety pin or bodkin to one end of the elastic and feed the elastic through the hem casing. Overlap the two ends of the elastic by about 3/4” and pin them together. Then sew the pinned ends together by stitching a small rectangle on the overlapped edges, removing the pin as you sew and lockstitching at the beginning and end of the rectangle.
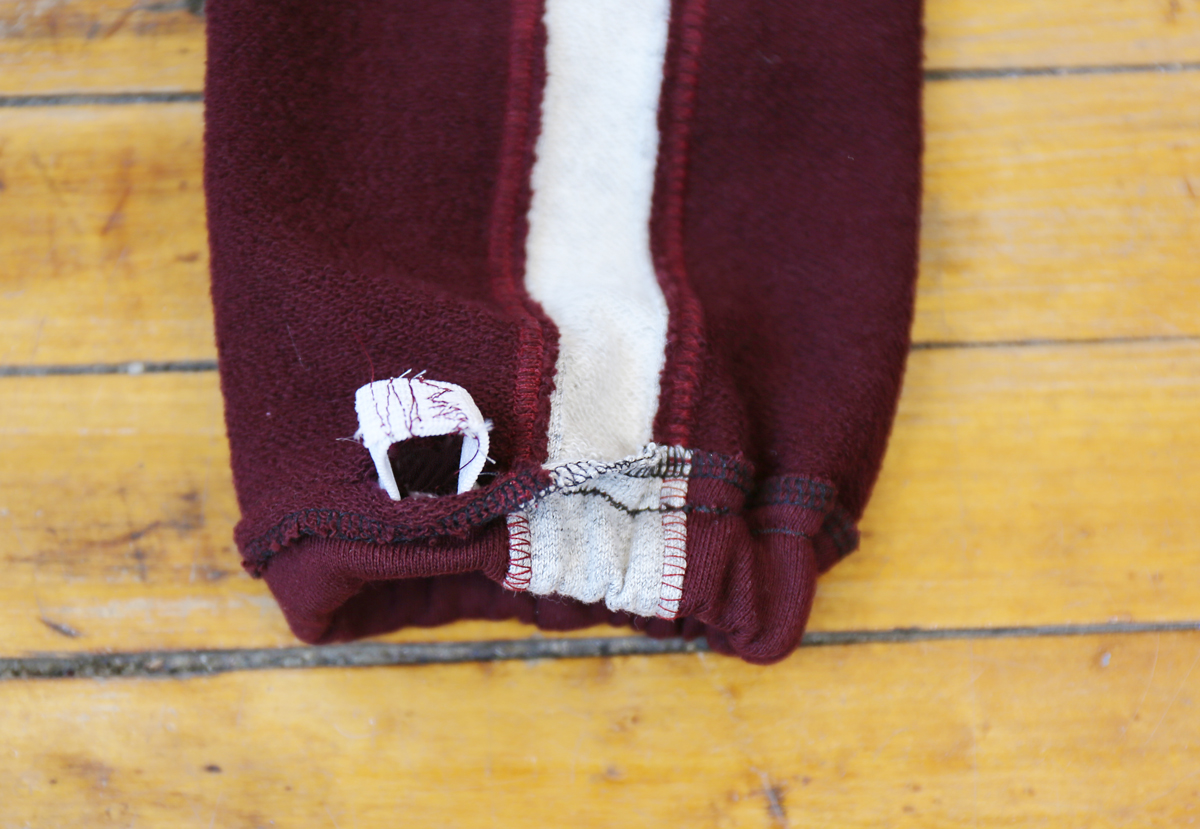
Note: Use the chart in the instructions as a guide for the hem elastic.
3. Finish edge stitching the hem casing’s opening to close it, backstitching or lockstitching at both ends of your stitching.
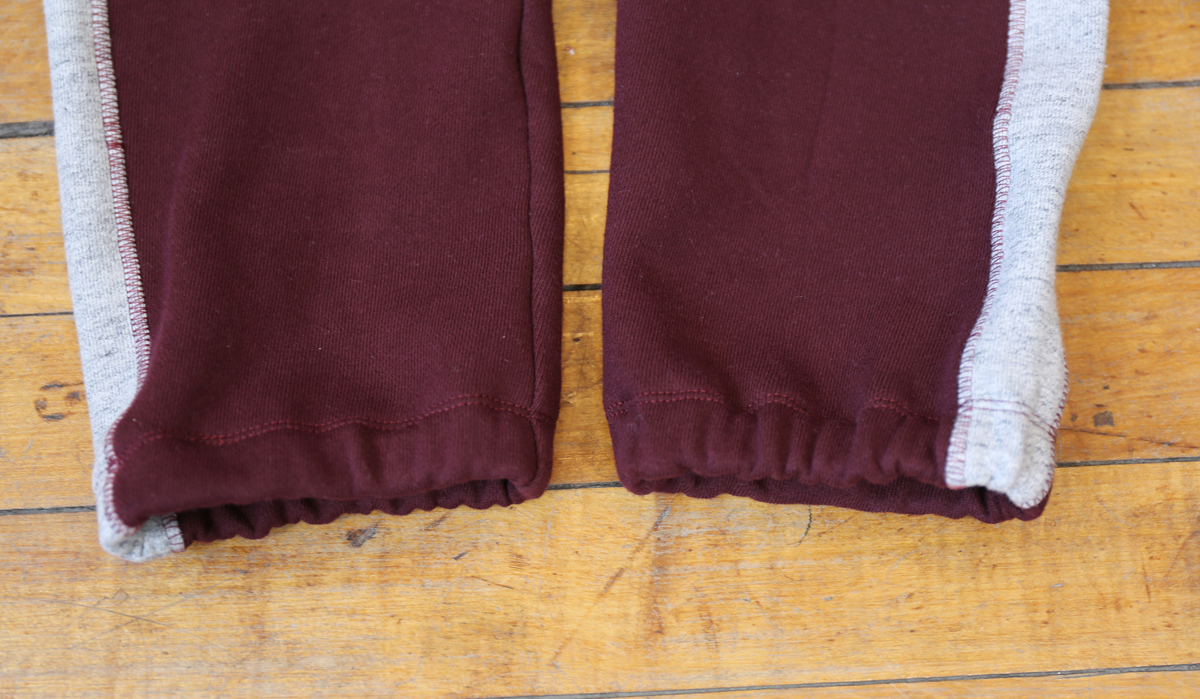
4. Repeat steps 1-3 to finish the hem of the second sweatpants leg.
We’re almost done! Join us tomorrow when we’ll be finishing up the sweatpants.
Day 5
Welcome to the fifth and final day of the sweatpants sew-along. It’s getting very exciting as we’re almost done sewing! Today we will be finishing up the sweatpants.
Finish the Sweatpants
1. Attach a safety pin or bodkin to one end of the drawstring and feed the drawstring through one of the buttonholes, around the waist, and back out through the other buttonhole.
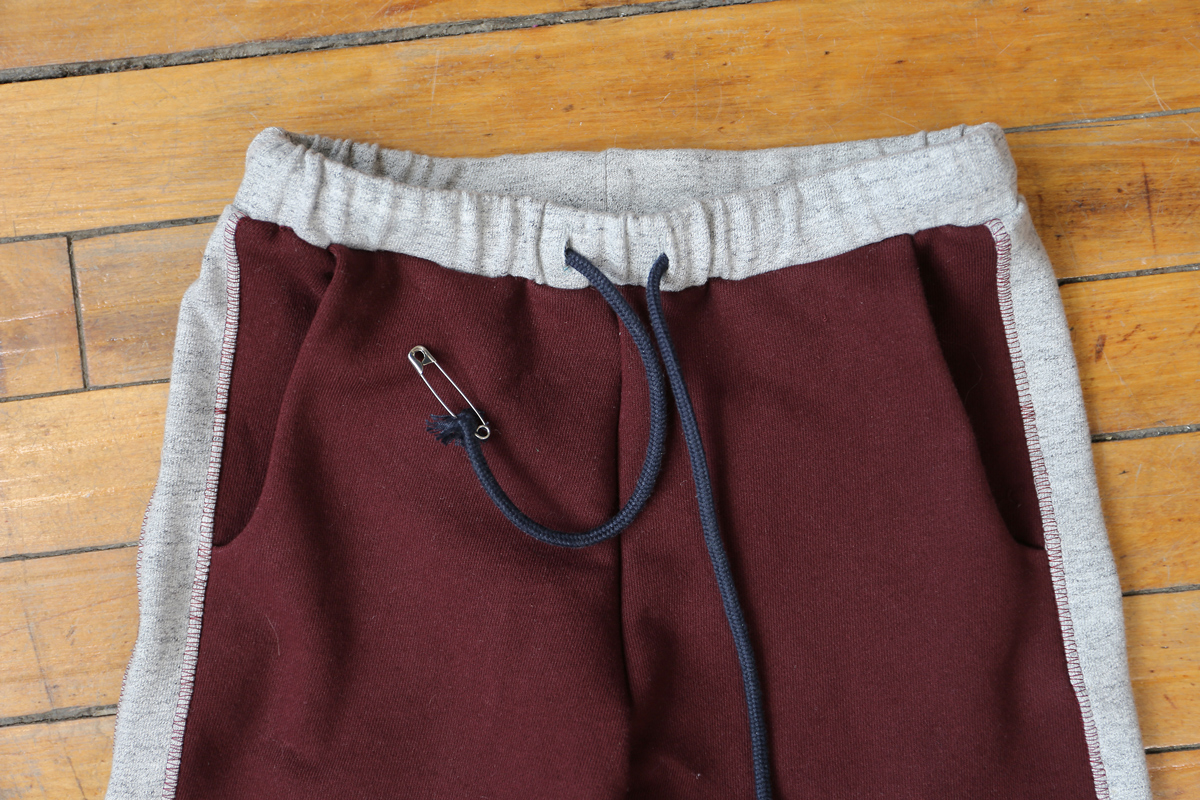
Adjust the length as needed and knot the ends or fold the ends under twice by 1/4” and edge stitch the innermost fold to finish them.
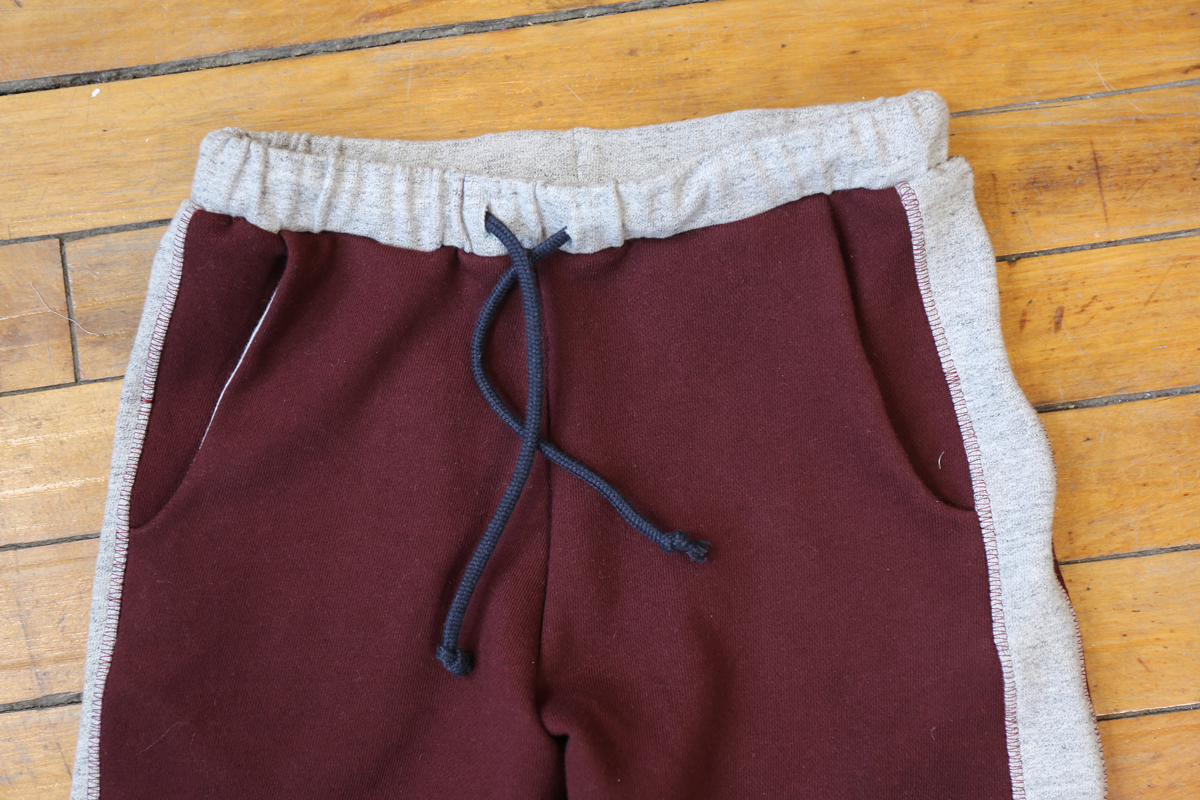
Hint: To prevent the drawstring from being pulled out of the casing, topstitch it to the center back waist as shown in the photo.
All done!
Please do share photos of your finished sweatpants in the Flickr group. And be sure to tag your photos with #oliverands if you use Instagram. Thanks so much for joining us this week. So, who’s going to sew another pair?
No Comments yet.