Please join me in welcoming Matt Chapple to the blog today! If you’re as big of a fan of the Great British Sewing Bee as I am then you know who today’s guest is. But just in case you are unfamiliar, here’s a little background for you. The Great British Sewing Bee is a TV show where amateur sewers take on pattern, alteration, and made-to-measure challenges as they compete to be named Britain’s best home sewer. Matt participated in season three where the final contained one female and two males. In the end, it was Matt who was declared the winner and crowned Britain’s best amateur sewer!
Matt blogs along with his wife, Gemma at their creative lifestyle blog called Sew What’s New. Together they blog about sewing, baking, as well as crafting with their two children: daughter Evie and son Max. Matt just recently tested out his very first Oliver + S pattern! He sewed up a pair of super cool camouflage Field Trip Cargo Pants that he already posted about on his blog. He was kind enough to share it, here, too. He’ll be walking us through the pattern and telling us how the sewing went. Now I’ll hand it over to Matt.

I make a lot of garments for Gemma and Evie, and a few for myself, but I very rarely make stuff for Max.
There’s a couple of reasons for that, one because he grows a centimetre overnight, I’m sure of it. The other is that some very kind friends of ours, in the village, often donate to us a huge bag of fantastic boys clothes.
Anyway, I decided all that was to change when I had a look through my fabric stash and found some military camouflage material. I thought what could be more fitting for a pair of boys cargo trousers from Oliver + S. They have some really sweet kids patterns. In fact Evie and I are beginning to tackle some projects from their “Little Things to Sew” book; she loves it.

I think this make has to be one of the cutest ones I’ve ever done.
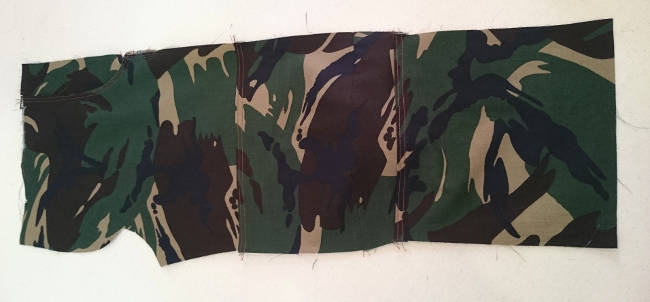
The pattern itself has 10 panels (6 front and 4 rear), and a total of 6 pockets (2 patch rears, 2 billowed side and 2 inset fronts). Max was so chuffed to have all those pockets…it’s the simple pleasures when you’re a 3 year old boy huh!
The pattern was really easy to follow, basically you assemble the front top panels to the knees and then again to the lower panels. You dart the outer part of the knee panels which give them a great looking slightly curved shape.
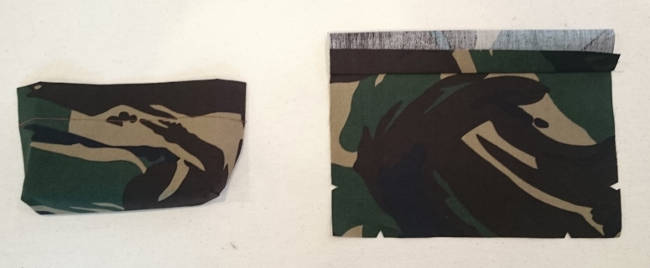
The front pockets are made from a single piece of fabric folded back on itself and basted in to the uppers and sides, don’t worry these get held securely in a bit with the waistband and side seams.
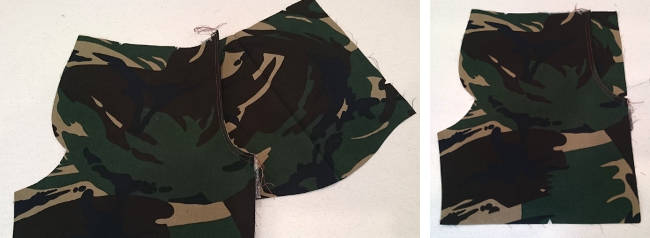
The back upper panels get the patch pockets applied to them before joining to the lower panels. Now I’m not necessarily someone who tends to put pockets into/onto garments, I don’t know why, I just don’t do that much. But I promise these are so easy and so sweet to look at, that I’m pretty sure it’s all I’m going to do from here on!! Although saying that I wonder how Evie will be if she finds a pocket on the front of a pink party frock?

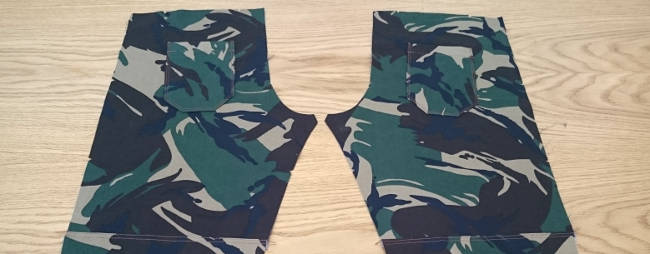
Next up, joining the fronts to the backs, simple really and very little to it. Once these are together you can start applying the side pockets.
If you’ve ever made a tote bag with the flat base and billowed corners you’ll find these a breeze. If you’ve no idea what I’m on about then don’t worry, the instructions are quite clear and it makes perfect sense.
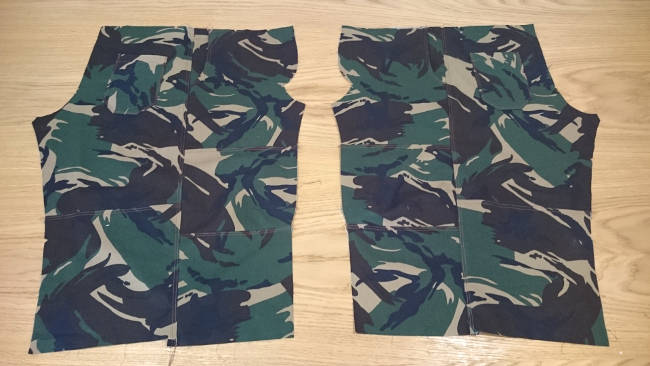
After this, I’m left with hemming the bottoms with a simple double turn and top stitch. Making the faux fly and finally attaching the waist band with facing and elastic inner to allow for growth and comfort.

OK looking back on it there are a fair few pattern pieces, but there’s not masses of stitching, it’s just short bursts and then a change of direction.
I did give myself a little more work to do by strengthening the seams, I did this by joining them as normal, then pressing the allowance down, top stitching and then following up with a second line of stitching 1/4” away from the first row. It results in a fab and detailed look, but is a little more time consuming. Bearing in mind we all know, boys clothes need to be quite hard wearing and be able to take the odd spell of rough treatment, so I think it will have been time well spent.

I know I’m perhaps a little bit biased, but I really do think these are possibly the best thing I have made to date!
Well, what do you think, will Private Max pass inspection on parade?

You can read about Matt’s journey on the Great British Sewing Bee and see what’s he’s been up to since winning over at Sew What’s New. If you haven’t taken the opportunity to congratulate him yet on his win, please do. Besides his blog, there are several other ways of keeping it touch with him, you can follow him on: Twitter, Facebook, Pinterest, and Instagram.

Matt, a huge massive thank you! We appreciate that you took time out of your busy schedule to visit us!
Very cute! Have you made the shirt? It’s cute and easy, and you can sew an extra pocket onto the sleeve at the shoulder, if you have a pocket enthusiast.
Ha! My 6 year old looked over my shoulder and exclaimed “it’s Matt!”
I have only made these once (recently) after making many of the tops. It is a brilliant pattern and yours are great in the camouflage!
Thanks for a very sweet post and what fun cargoes for a little guy. And big congratulations for your win!
Love those cargos in the camouflage! The top stitching looks great.
Matt, thank you so much for this! The trousers look great, and it’s so fun to “meet” you!