I’m so pleased to finally introduce you to the spring Oliver + S patterns! We have two new styles this season, and many of you will be thrilled to discover that the first one is for boys as well as girls.
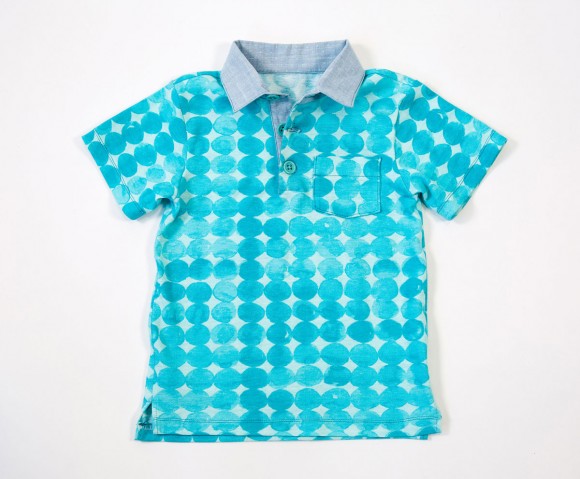
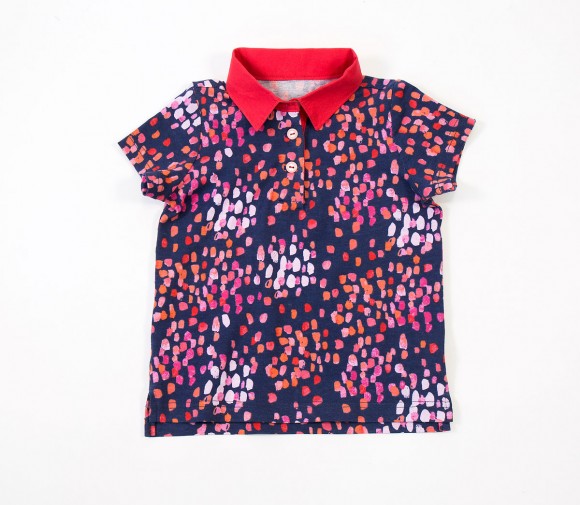
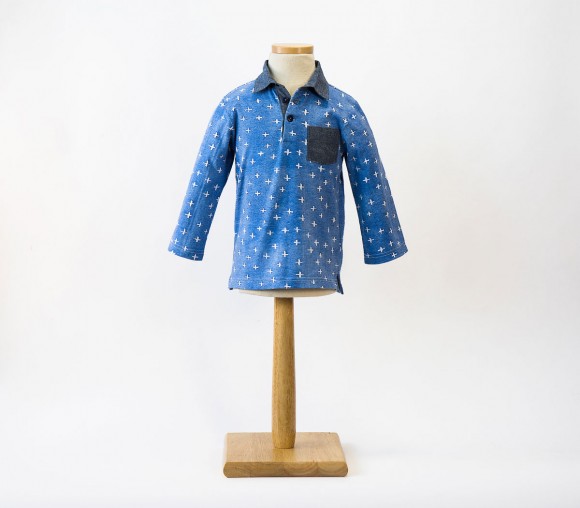
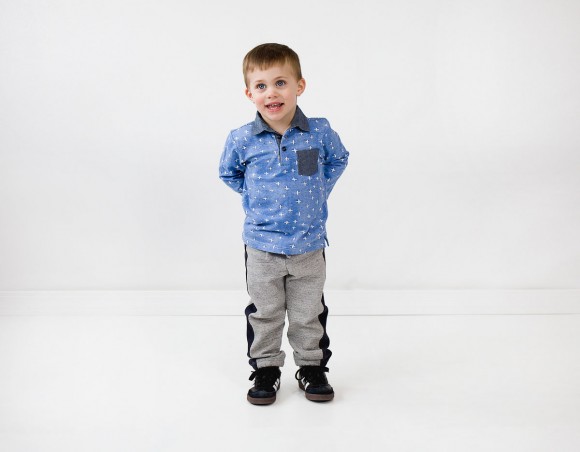
The Parachute Polo + Sweatpants pattern is packed with options. It includes pattern pieces for a boy’s polo shirt in both short and long sleeves as well as a girl’s polo shirt with short and long sleeves. And it includes some great sweatpants, too.
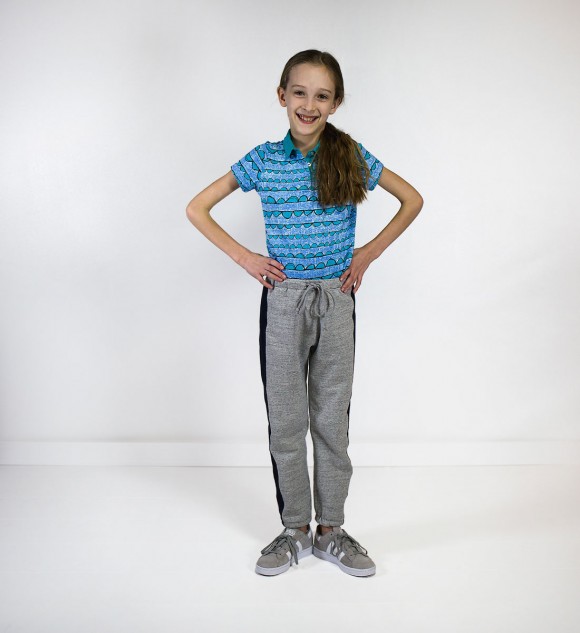
What’s the difference between the girls’ and the boys’ polo shirts? The boys’ shirt is a little longer, and the sleeves are wider and less fitted. The girl’s style has a smaller armhole and a more fitted sleeve, and the short sleeve is shorter than the boy’s style, with a more feminine shape.
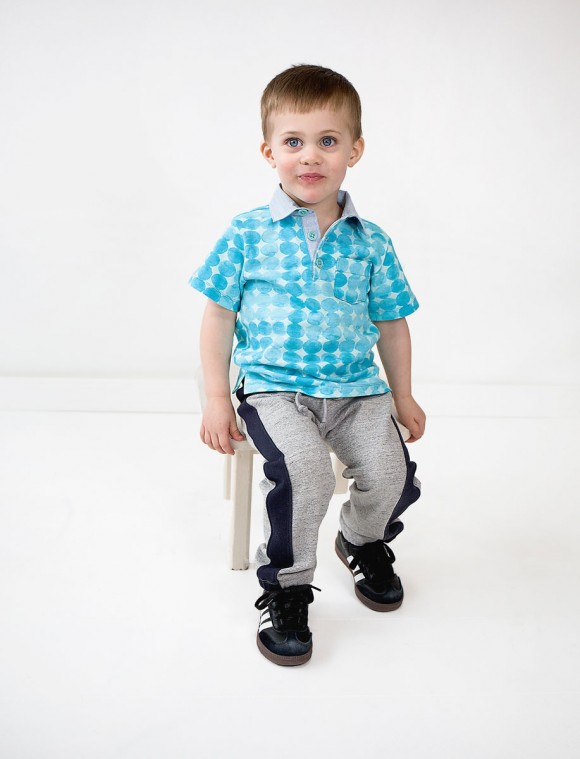
This pattern has lots of terrific details, too. The continuous inset woven button placket, one-piece woven collar, optional chest pocket, and side vents will give you a really professional-looking shirt when you’re done. And I think you’ll be surprised at how easy this is to sew, too!
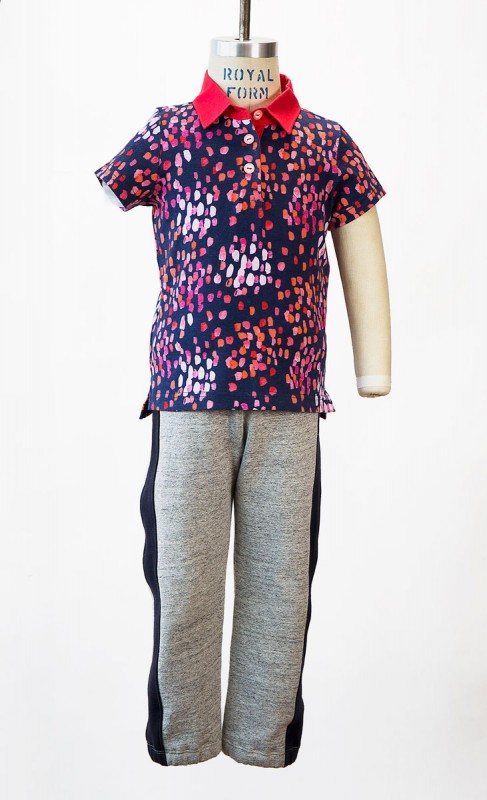 the girl’s polo has a more fitted sleeve
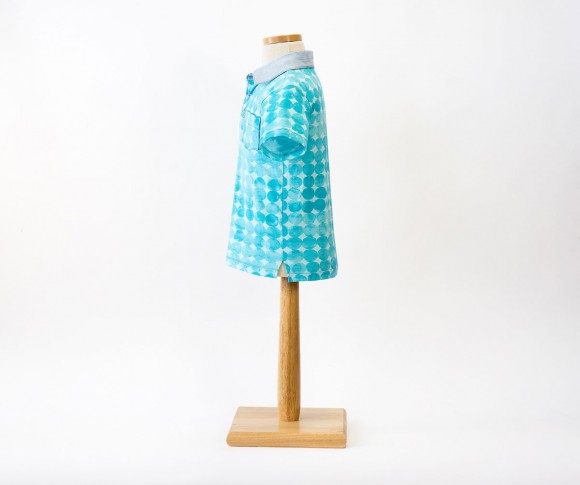 the side seam has a little vent for extra movement (and style!)
The sweatpants also have lots of wonderful details, including a contrast-color side panel. I think it looks like a racing stripe. You can do all sorts of fun things with this side-panel detail: add a ribbon or cut it from a piece of woven fabric for extra design options. The sweatpants also have an elasticized waist (of course), with an optional drawstring and elastic at the ankles.
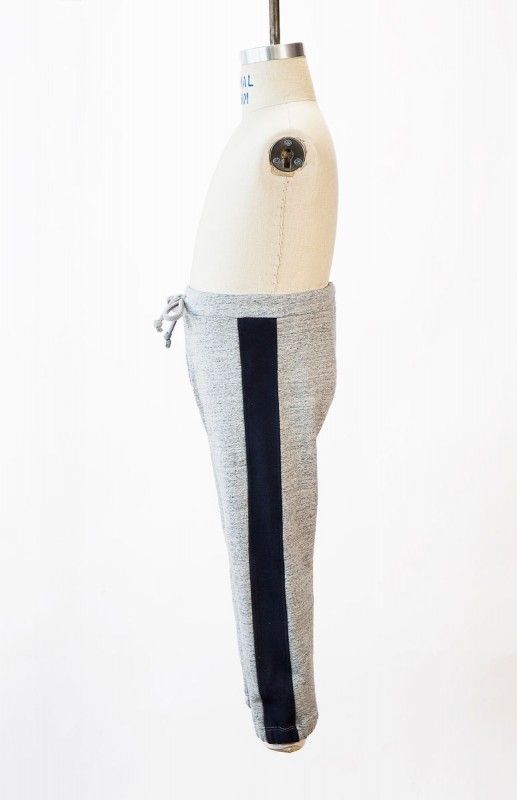 the side view with “racing stripe”
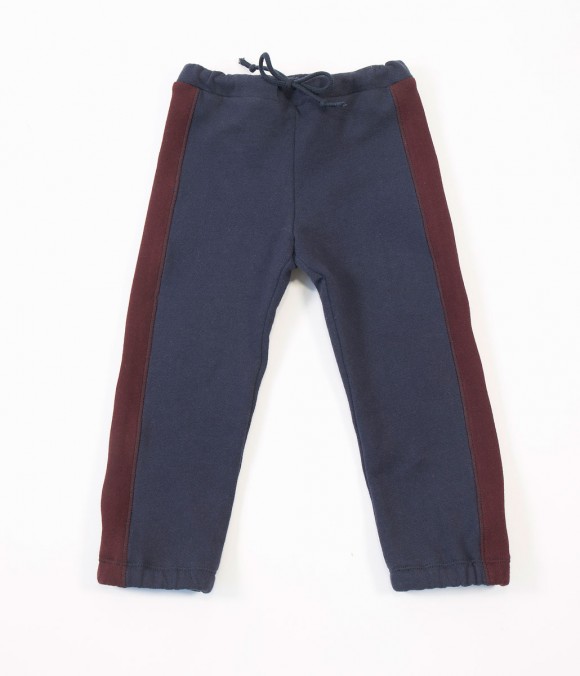 an alternate colorway, because sweatpants don’t have to be gray
More photos? OK, I can do that.
S is rather obsessed with her Parachute ensemble. She’s getting so tall, I’ll have to make her another longer pair soon! (We added length to the size grading after I saw how these fit on her.) S has been wearing hers to get to and from ballet class, and she practically lived in them this winter. They’re great for gym class and look nice enough for school, too. I like it when she wears them with her patent leather school shoes because I occasionally wear dressy sweats with men’s brogues. Today we were matching.
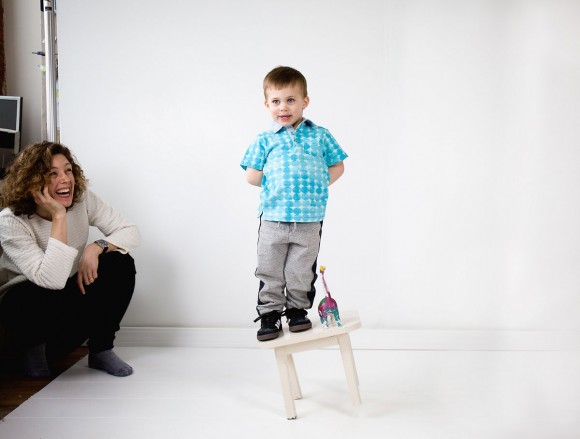
I think we need to show you this outfit in action, don’t you? Wow, it is so challenging to photograph three-year-old boys. But those of you with active boys don’t need me to tell you that.
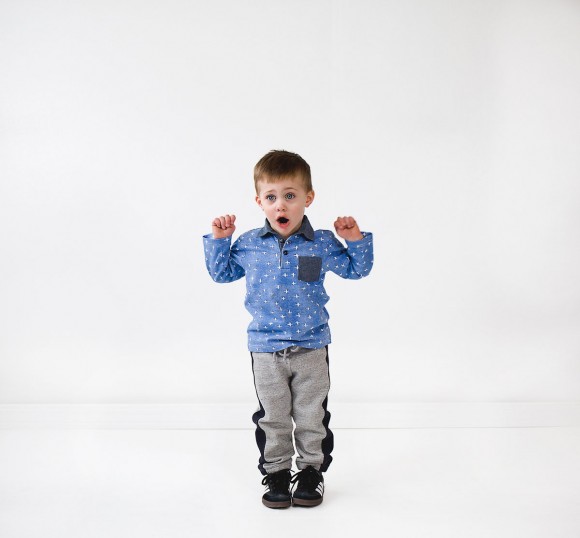 Pretending to land the parachute jump? I feel like I should add to this photo a bit. OK, maybe I will.
Hold, please…
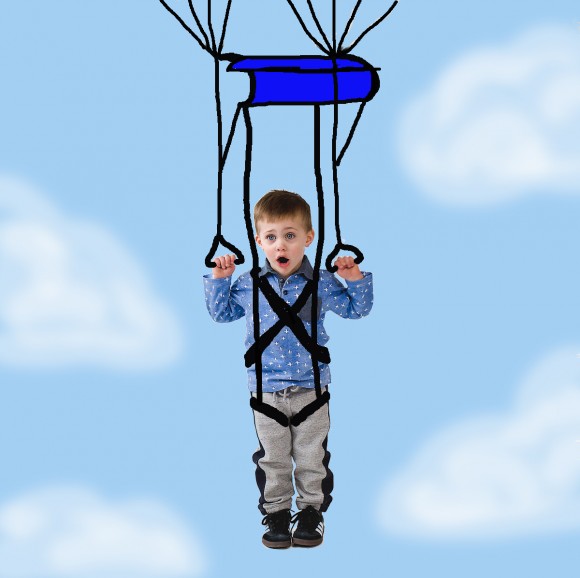 I think it goes something like this, right?
And just for good measure, an outtake from one of the photo shoots. He has incredible balance, doesn’t he? (Just kidding, but I did manage to catch him a fraction of a second later. Which is why I was crouching in the corner in the first place.)
As far as fabric suggestions go, you’ll want to sew this pattern in knits. Jersey or interlock would be the obvious choices for the polo, of course, and french terry or cotton fleece for the sweatpants. We recommend a lightweight woven for the placket, collar, and pocket, and I know some of you will want to sew those details with knit fabric instead. That’s perfectly fine, but I selected woven because it’s easier to work with and because it’s less bulky. You know how we work around here–feel free to experiment and try different things. We try to give you a great pattern to start out, and you just make it even better when you make it your own.
I hope you’ll have lots of fun sewing this pattern! It will be available for purchase on the website early next week and will come in both paper and digital versions.
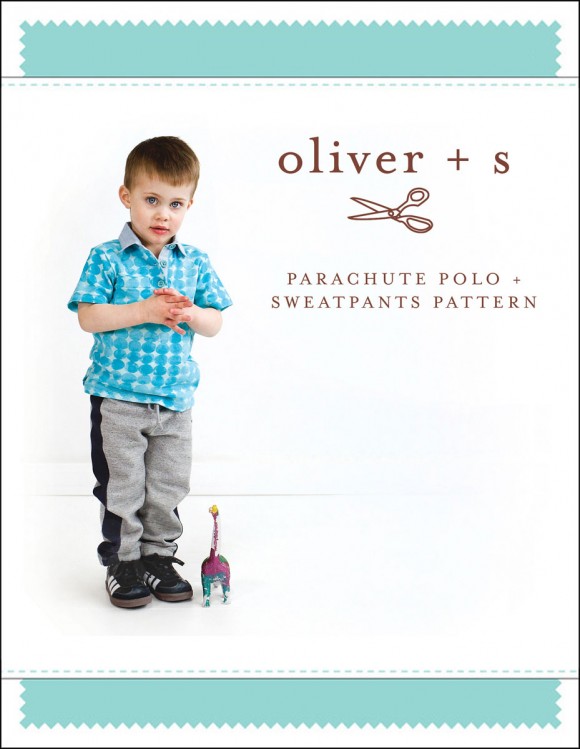
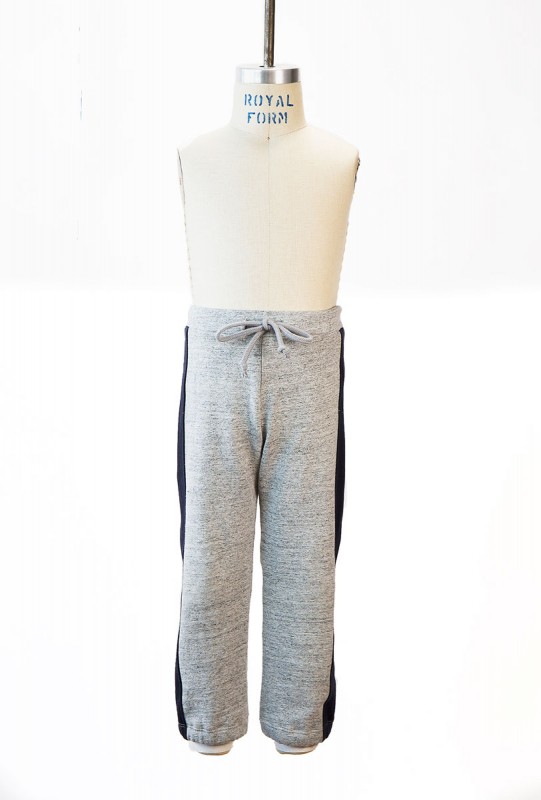
Oh yes yes yes!!! Thank you!! 🙂
Glad you’re happy, Emily! Cheers.
Great pattern!!!
Thanks!!!!
You are a genius! I absolutely love it and will definitely be purchasing this one asap. My big boy has recently decided he loves sweatpants and my baby boy had the cutest polo with a chambray collar I was dying to try and recreate. This is perfect timimg!
Another wardrobe staple for boys- and perfect for those who have to make uniforms.
Thanks so much, Brittney! It’s always nice to get positive feedback on these styles when we’ve spent so much time developing them.
Wow!! I’ve been looking for a similar pattern everywhere 😉
This will be a great addition to my pattern collection (and will complement Shelley’s polo version of your sketchbook shirt so well).
Hooray! These will be great for my little guy!
Yes! Another boy wardrobe staple! My poor Sketchbook shirt pattern has been used to death and could use a little break 😉
I look forward to having this in my collection!
Oh, heck yes. You have my money! Thank you for continuing to make boy/gender neutral patterns! I know they don’t sell as well as the girl dresses, I think partly because they tend to be so versatile and you really only need a small handful to make a whole wardrobe. I’m pretty sure I’ve requested more knits and a henley/polo from y’all on several occasions, so I will happily take credit for making this happen 😉 … just kidding, but THANK YOU!!!!
My kids don’t really wear anything besides knits these days, so these are perfect! Looking forward to the pattern release.
Very cute. I’ll be trying the polo for sure. Can the sweatpants be done without the elastic at the ankle?
Oh, of course! You could just hem them normally and skip the elastic, no problem.
Yipee! The goodness begins… Wouldn’t it be fun to make a polo dress?
You could totally do that! I think it would be especially cute to add a dropped-waist skirt. I’ll talk more about that next week, too.
I second the polo dress idea – that was my first thought when I saw this! The sweatpants will be perfect for when we hit cooler weather again.
Schwing and a hit! Very excited about the polo! I may be able to con Mr. Character T-Shirts only to wear a mommy made shirt. He always feels left out but I don’t make character t shirts.
If you are going to be talking about modifications, can you perhaps talk about modifying the girl sleeve so it has a touch of puffiness/gathers at the shoulder to make it extra girly? I do love the drop waisted pique polo knit dress look.
Off to search for some pique knits… there goes today’s productivity! Good think I am my own boss. 🙂
Squee! THANK YOU for continuing to make boy-suitable patterns in boy-fittings that are adorable rather than modified bags.
I will definitely be buying this one! And I happen to have a whole bunch of green French terry in my a stash that I was not sure what to do with … This is perfect!
Awesome! So happy to see another knits pattern from O+S and I love the options to make these just right for the fabric and kid.
Liesl, a couple of my daughter’s favorite dresses when she was just beginning to walk were polo-style with gathered drop waists. I loved them too, especially with bloomers to coordinate.
Oh yes, looks like a must have! 🙂
🙂 fantastic, definitely worth the wait- I can’t wait for these to go on sale!!!
I love this pattern – just in time to start of school uniforms for the fall! Great job Liesl!!!
What seriously cute photos. I mean absolutely super adorable!! And the parachute picture just made my day! I was having a kind of cranky day–until I saw that photo and then all of my crankiness just melted away!! And, oh yes, of course the pattern is amazing too! Congrats on a great kick-off to the new pattern season. I can hardly wait to see what comes next!
Thanks, Diane! I had to chuckle when I was messing with the photo.
I can’t wait! So exciting!
YEA for the O+S spring pattern release!! What a cute model, wearing some obviously comfortable clothing!!
This is perfect! I’ve been wanting a polo for a while 🙂 I also third the idea of the polo dress!
The pants are what got me though, the racing stripe is perfect for a modification I was think of doing, adding snaps/zip down the side to allow it to fit over a leg cast, and here’s the perfect pattern with the perfect detail and placement of the stripe!
I was just thinking about polo shirts the other day when discussing the future uniform policy at my little ones future school (policy is they have to where polos pr button down, any color but has to be either a polo or button down). So happy to see this pattern!! Oh and who doesn’t love a pair of sweatpants!!! Next liesl and co….???!!! 😉
School uniforms just got more fun! Thanks for a versatile and gender neutral pattern! I can’t wait to have it in my hot little hands!
I just punched the air in delight! A polo shirt?! Excellent. I have been looking for a pattern to make as school uniform. Both girls can have new ones now!
And the sweat pants look great too. Thank you!
Great. I am looking forward to this one. It will also help me keep sewing my childrens’ uniforms (polo shirt is required). Thanks!
Wonderful – and great value with all three items included. Sorry to ask for more when you’ve worked so hard on this release but any chance of releasing this in adult sizes? I can just see a cute son and father combo…or maybe for the whole family so we can co-ordinate in a family portrait (he he)!
I love the polo shirt. My little boy looks so handsome in a polo shirt so I can’t wait to make him one to go with a pair of field trip cargo pants 🙂
yay, great choices! It will be a sad day when my 10 year old grows out of the size range. (It’s not happening soon, he is 10 and wears a lengthened 8 in o+S — all the food he eats seems to go to his brain.)
I wish this didn’t have to be public but I am making the parachute polo shirt-boy version, and I am attempting to attach the collar to the neck. It seems to me that there is a gross error in the application. The placket makes the opening of the neck bigger than the initial size of the opeining due to the way the fold is applied. In a traditional placket there is allowance for this, no matter what I do IF I attach the collar using the notches, the shoulder to the edge of the placket (on a boy version this is the right side) it is longer by the width of that placket. I notice on your pictures, one is obviously almost gathered. Could you invesitgate this? I am thinking that if I ignore the notches, the collar would be able to do what it’s intended to do but I think you need to make an adjustment to the collar notches OR instruct me in what my problem is.
I just made the parachute polo and I think there is a huge mistake in the placket and collar. I have checked and rechecked the pattern instructions as well as the pattern pieces. Two issues: #1. when the placket is in and the instructions say to attach the collar, the side that has the unfolded back placket is too long to fit (for the boys it is the right side. This brings me to the #2 issue-If you ignore the markings and just put the collar with the center in the center back, the collar comes out off center. Unless I have missed something and am totally an idiot. This pattern needs a major adjustment or reissue or I do! I have a photo but don’t know how to put it in this blog.
We’ll be holding a sew-along for this pattern very soon. I think the placket is going to confuse a few people. I’m guessing the issue is this: the V that you cut is off-center, and the placket needs to be pressed in the proper direction in order for the two halves of the shirt to come out even. Does that make sense? If you press the placket toward the “shorter” half of the shirt the placket will be off-center, but if you press it toward the “wider” side of the shirt the two sides of the shirt will be equal and the collar will sew in smoothly. I’m not sure which size you’re making, Janet, or whether you’re making the girls shirt or the boys, but if you take a look at Page 2, column 3, step 3 of the instruction you can see that the slash line is on the left side of the shirt for the boys, which means that the placket needs to be pressed to the right side (viewer’s side, not wearer’s). you can see the placket pressed toward the viewer’s right side at column 4, step 3. Does that make sense? Feel free to post further questions in the discussion forums; I think you’ll get faster replies there, too, since I’m not always checking email during the weekends.
Well, since there is no discussion link for this, I will continue to comment here about the parachute polo. You are saying then that on the pattern the line that says placket placement line is not a placement line but a slash line that should either be to the left or to the right of center. I get that. However, the collar will still not fit because the side that has the placket is wider than the front side that doesn’t or did I miss something else. There is a picture of the boys long sleeved polo that shows this well. That right side of the collar looks awful-very scrunched up to fit. Again, am I missing another marking?
Janet, the two fronts will be the same length once the placket is sewn and pressed into place. Both sides will be equal, which is why the collar works.
If you’d like to post photos or get additional help on this, here is a link to the place on the discussion forums for the Parachute Polo. http://oliverands.com/community/forums/forum/parachute-polo-sweatpants
I hope that helps!
It sure helps-I LOVE this pattern and all your patterns. My most favorite of all are the cargo pants-I think I’ve made about 7 pairs of them and love the pattern more each time. I will be more careful when I make the next polo as I trust your skills more than my own! Thanks for being so gracious!
I’m sorry for the frustration, Janet! It sounds like your polo will be ok if you just press the placket in the opposite direction from where it is at present. But do catch us on the sew-along so it all becomes more clear!
So I posted somewhere in this blog or discussion or something about this shirt (which I think is the cutest thing since the cargo pants!) I was really careful and when the sides weren’t even I decided to do the math. Here we go: You cut the shirt (bor a boy) 1/4″ to the right of the center mark, then you add the placket. The left side has 1/4″ more because the offset cut, but that disappears when the placket is stitched on. The right side is different, it is 1/4″ shorter already and when you add the placket seam, it makes it 1/4″ shorter BUT you are adding the placket which adds 1″ minus the 1/4″ taken off for the seam. The placket was cut at 2 1/2″ take away 1/2″ for the two seams and make it one inch due to the fold of the placket but that leaves 3/4″ extra on the right side because the placket isn’t folded under the shirt but extends from it. I have measured and measured and checked the pattern and every time I do I cannot come up with “both sides being even” it seems impossible with the measurements I just described. In the sew along it doesn’t address this either. Liesl?
Janet, you posted over in the discussion forums, which is a great place for questions like this. The simple answer to your question is that the 1/4″ off-set placket location moves one seam line for the placket 1/2″ to one side, and it positions the other side of the placket at the center of the shirt. This positions the placket itself right in the center of the shirt. The two extensions of the placket (one in front–made of the shirt fabric itself-and the other in back–made of the placket fabric)overlap each other and are both the same length, which is why the collar is the same length on both sides. I hope that helps!
I must be really dense( although from the posts, I’m not alone) but forget for a moment that it’s a shirt and think about 2 halves unequally halves- you make the cut 1/4″ from the center line (you mention 1/2″ but I measured the pattern and its 1/4″) then on the side there the 1/4″ was added, you reduce by 1/4″ thereby nullifying the added 1/4″. However on the other side, you’ve added the fabric of the placket so each half of the front can’t be equal. I’m not talking about whether it’s centered or not,i’m simply explaining that because the two sides are unequal, they won’t fit the collar piece which is equal from the notches to the front edge. I think you’re missing my problem- it isn’t about centering it is centered but the two front halves are unequal. Am I making sense and what am I missing- or are you? I have checked and rechecked this and am driving myself crazy. Hmm, maybe that is my problem- I’m crazy?