Our friend, Catherine, is back to continue with the Size 5 Project. Yesterday she shared a Bubble Dress round-up, and now she’s kicking off a Bubble Dress sew-along. Today is day one. Be sure to stop by tomorrow for day two.
Thanks for having me back for more about the Bubble dress and the Size 5 Project. Did you feel inspired by all those beautiful bubble dresses yesterday? Do you need to use the pattern quickly before someone in your life turns five?
Let’s start sewing….
Choose your fabric and cut your pattern pieces, remembering also to cut two strips of interfacing 1 1/4” wide for the bodice plackets (and 6 3/8” long for size 5). I’m using needlecord with for both the bodice and bodice lining, with a softer, silkier lining for the skirt.
Iron on your interfacing to the wrong side of back bodice pieces – the pattern has a shaded area to show where the interfacing needs to go.


Pin and stitch the front bodice to the two back bodice pieces at the shoulders, right sides together, with a 1/2” seam allowance as usual.
Sew the lining pieces in the same way.
Trim the seam allowances at the shoulder seams and press open – there’s no need to finish the edges as they won’t show once the bodice is lined.
Stay-stitch the neckline of the outside bodice – this is the piece with the interfacing attached to it – with a line of stitching 3/8” from the raw edge, taking it very gently around the curves so as not to stretch the fabric.
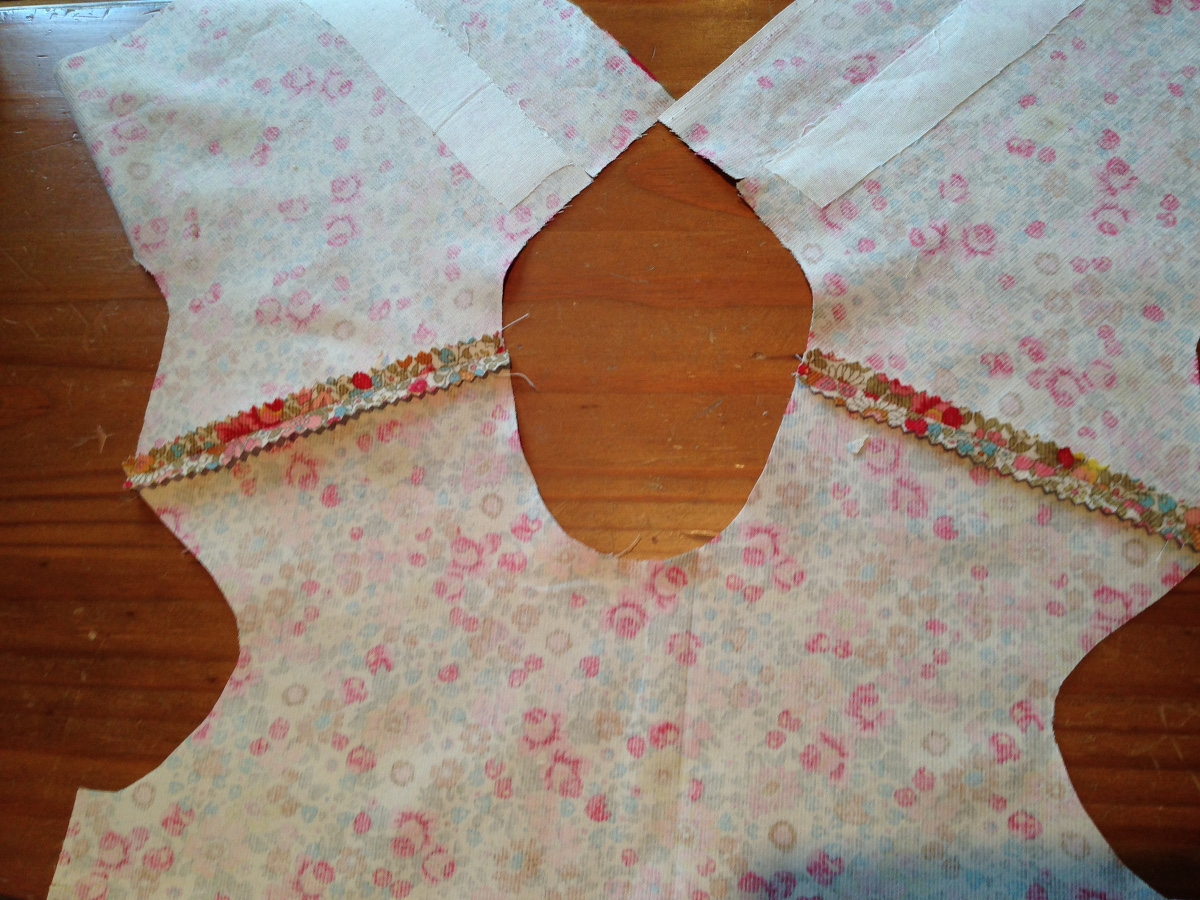
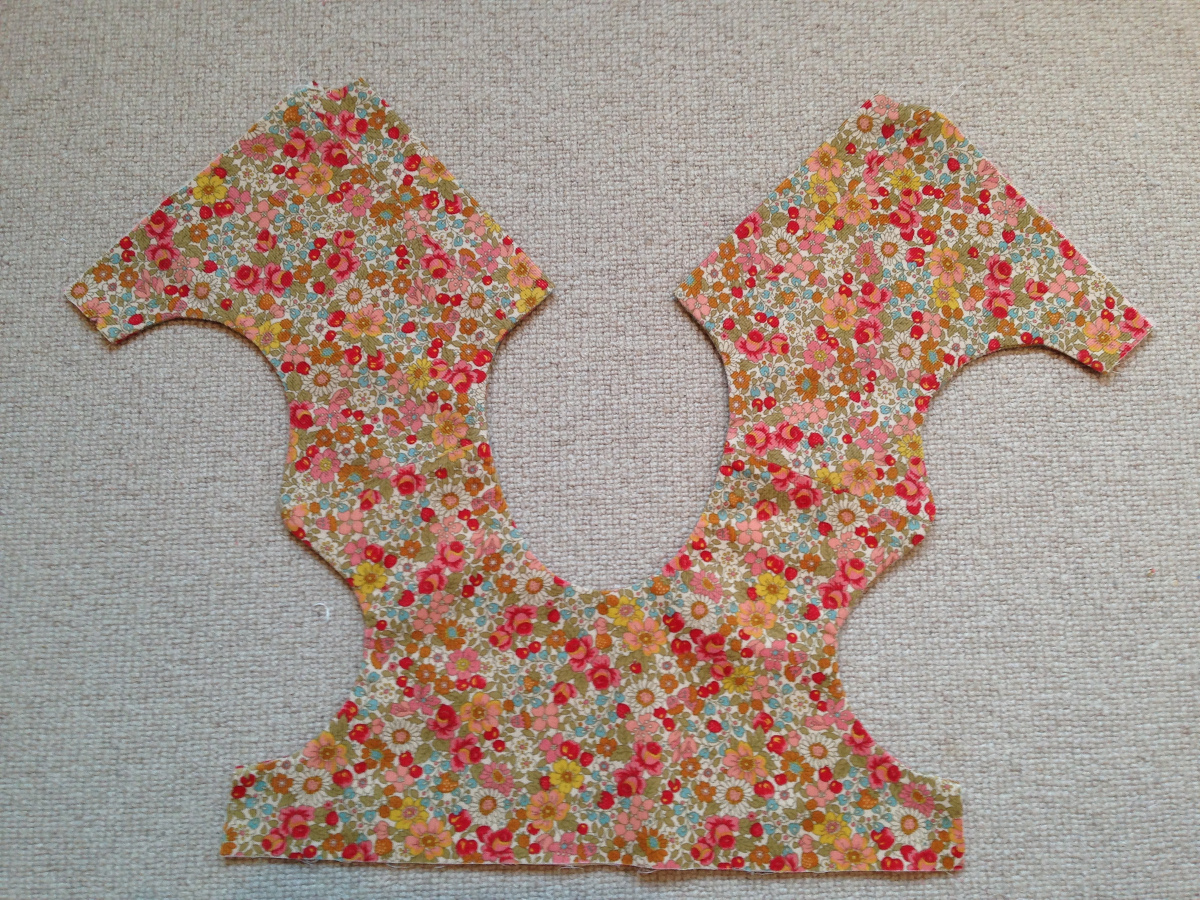
Sew the outside bodice and the bodice lining together at the back edges, right sides together. These are nice straight seams with a half inch seam allowance. The outside bodice and lining won’t align at this stage, and won’t lie flat. Don’t panic! This is how it is meant to look at this stage.

Press the seams open. You will have a full circle of fabric with a hole in the middle.
Find the extension notches on your back outside bodice – these are aligned with the edge of the interfacing.

Refold the outside bodice, still with right sides together, along a fold line running between the extension notches and along the edge of the strip of interfacing. Now the lining and bodice will match along all their edges, and the excess length of the outside bodice forms a facing for the button placket at the back. (My son calls these transformational sewing moments ‘sewing magic’ – and the Bubble dress construction is full of them!)

Match the seams at the neck and armholes, then pin the rest of the way around – those curvy seams need lots of pins to make them behave! Stitch slowly and carefully around the neck and armholes, lifting the presser foot to pivot on the needle around around the curves. The stay-stitching at the neckline will be hidden in the seam allowance.

At the lower back edge of the bodice, with right sides together, stitch up to the dots – I like to stitch from the fold to the dot and then backstitch to the fold again to keep everything secure.
Clip the curves and trim the seam allowances at neck and armholes to 1/4”.

Now for the fun bit – this is where at gets really magical! With the bodice lying flat, reach up in between the right sides of the bodice front and lining, through the tunnel at shoulder seams, and pull the back bodice pieces through the opening, one side at a time.
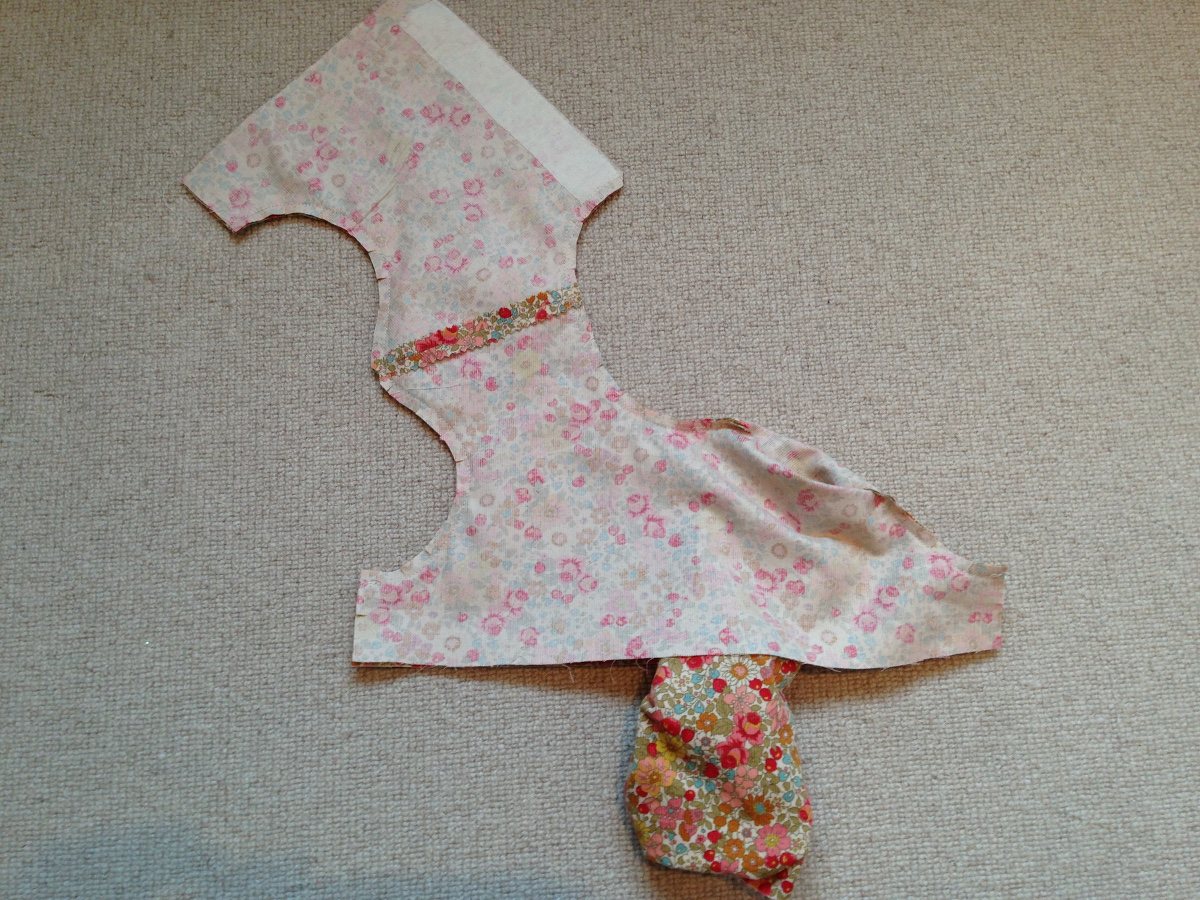
And the bodice is right-sides-out. Finger press the edges and then press very gently with an iron, coaxing those curves out so they lie flat
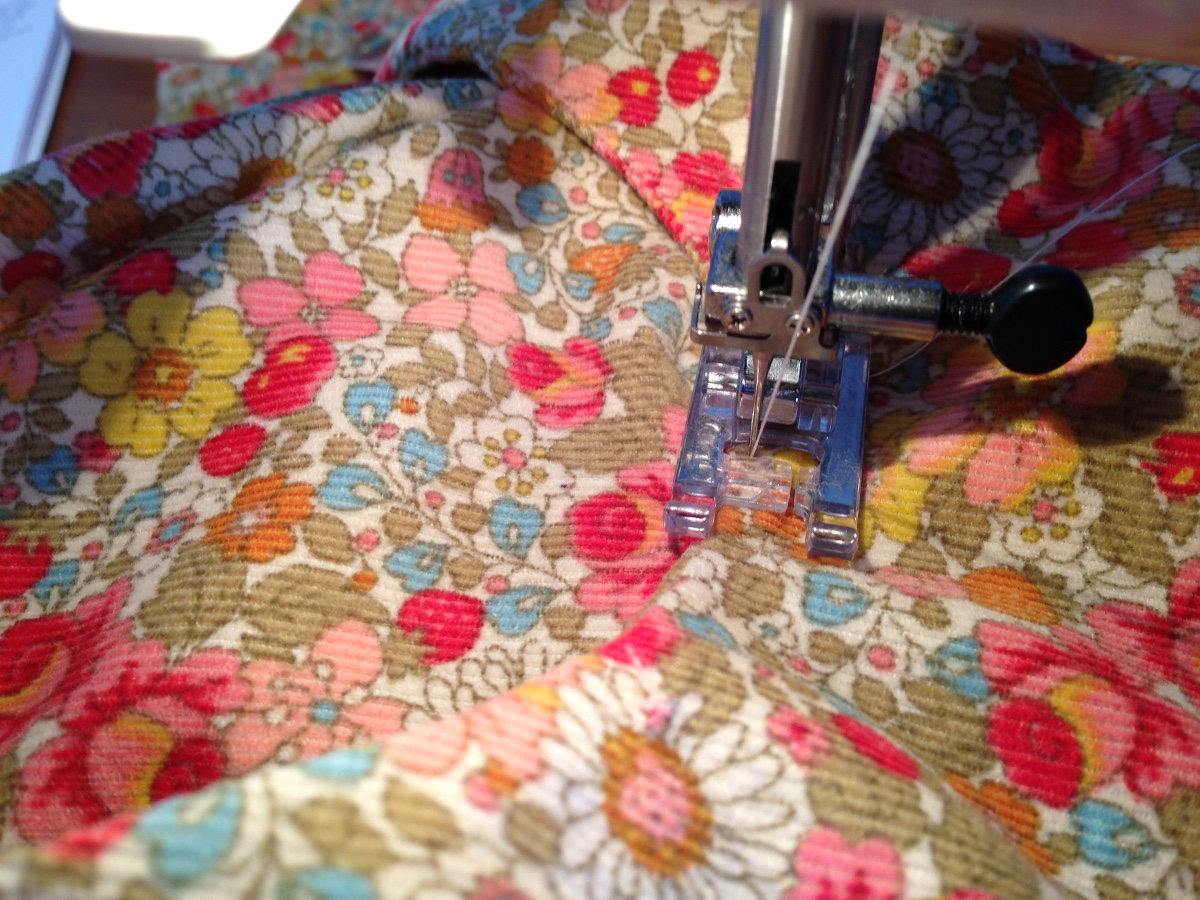
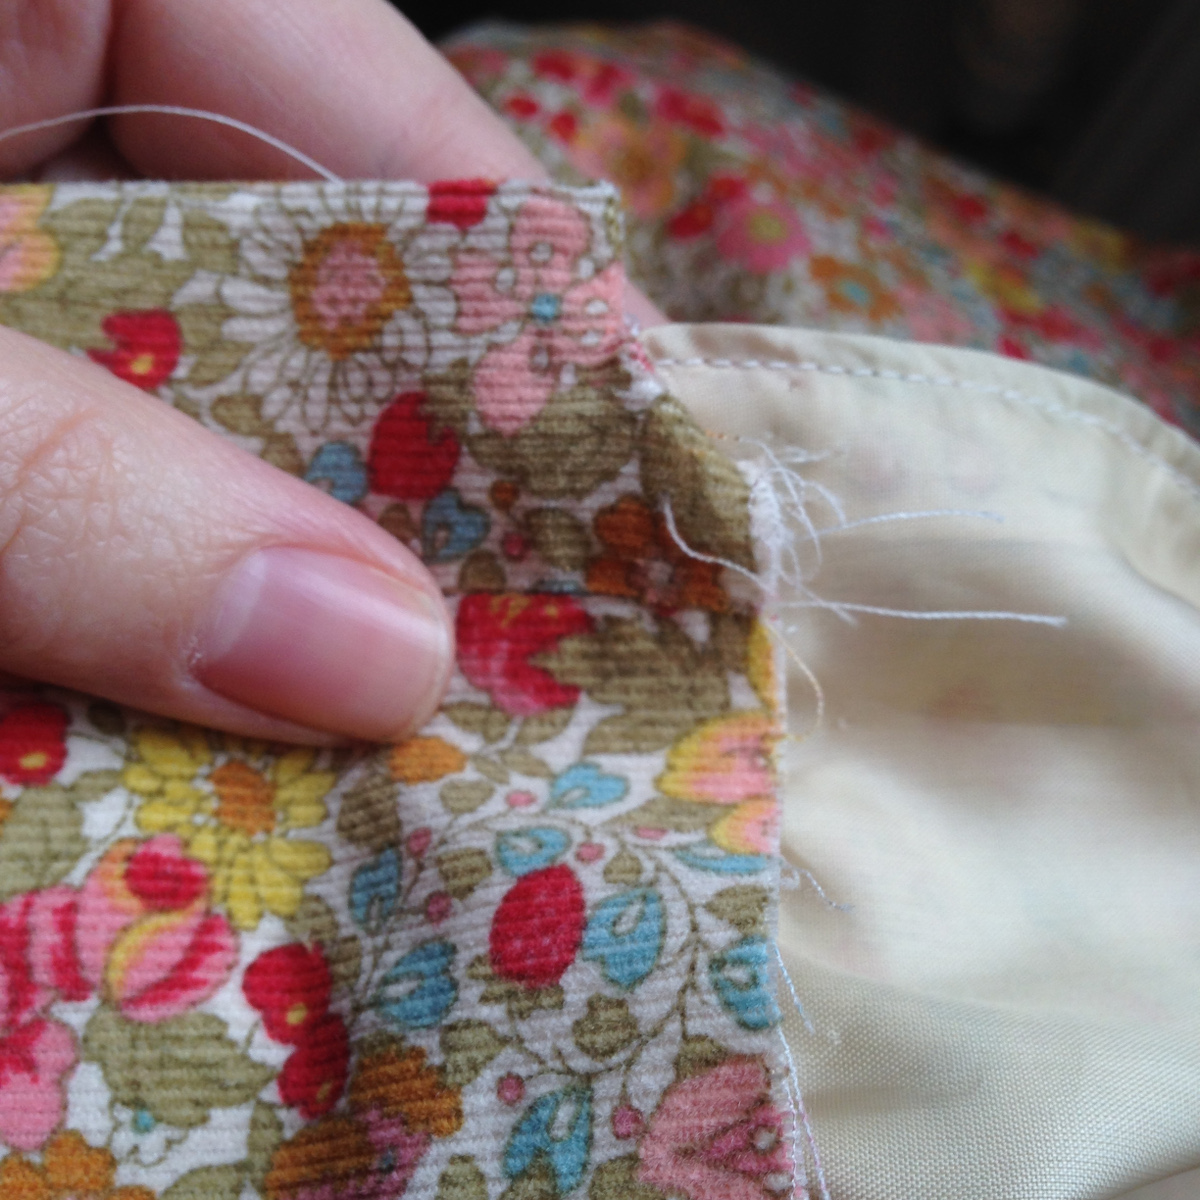
Understitch the neckline – it’s worth doing, even if it looks a bit fiddly. Follow the pattern instructions and have faith! If you are using the same fabric for lining and outer (like me) make sure your under-stitch the correct piece – the lining side is the one with the placket seams visible at the back.
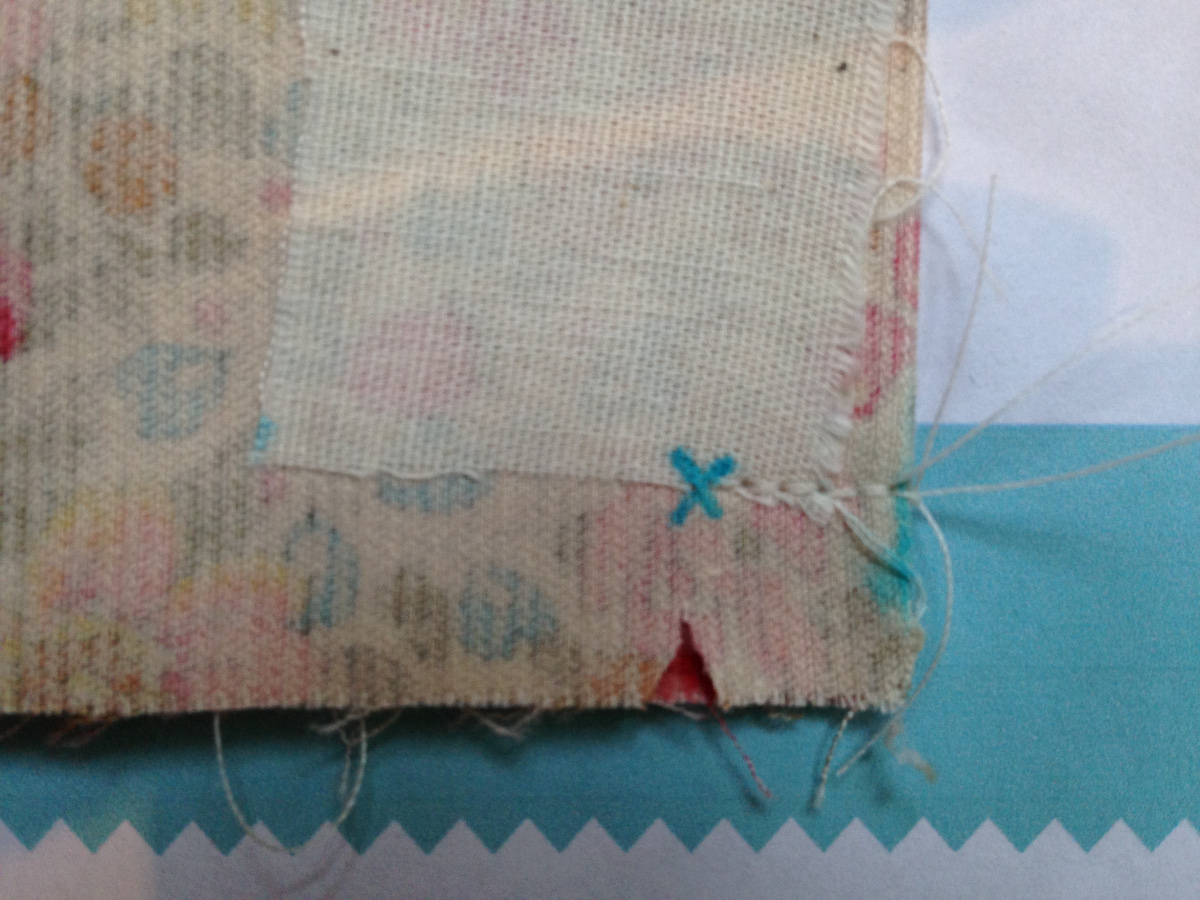
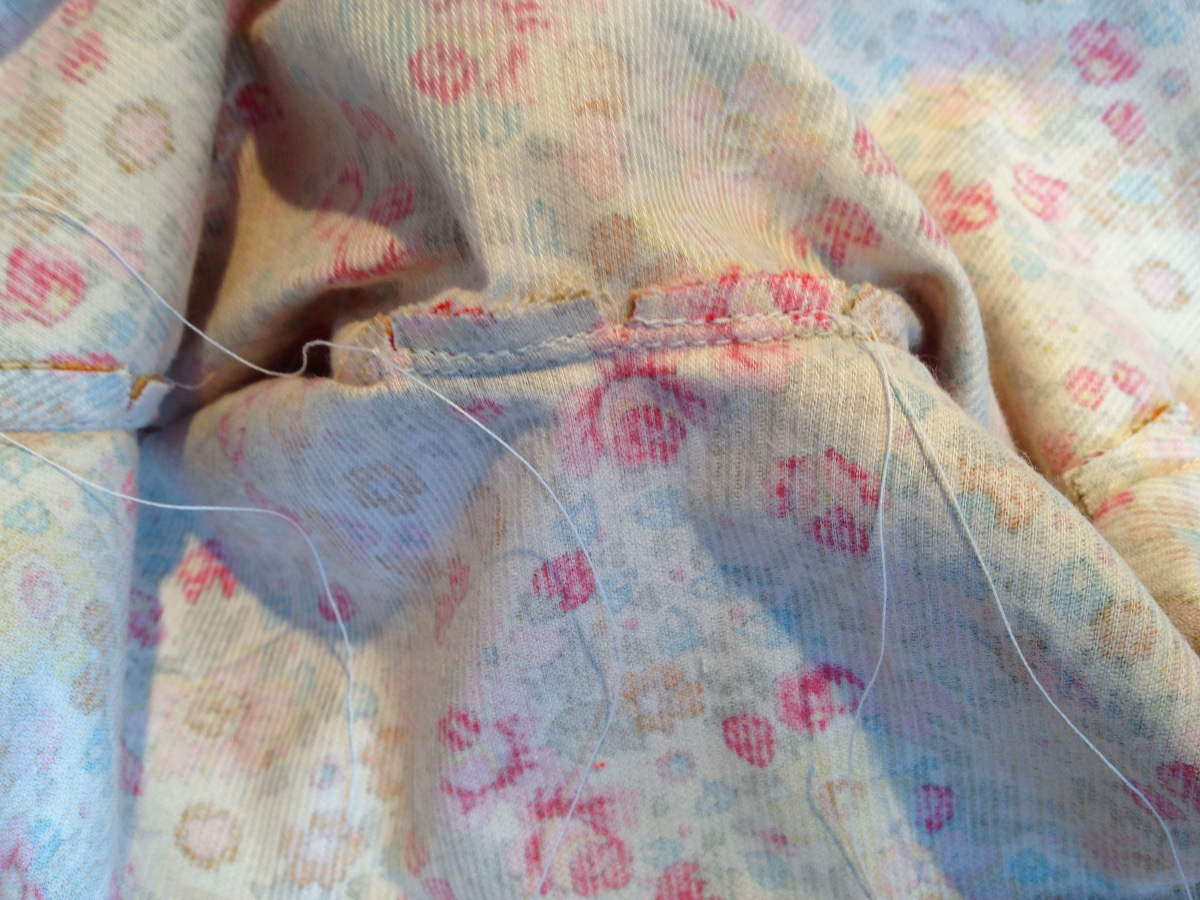
I like to pull the ends of the threads to the wrong sides afterwards so they are encased in the lining and give a lovely neat finish.
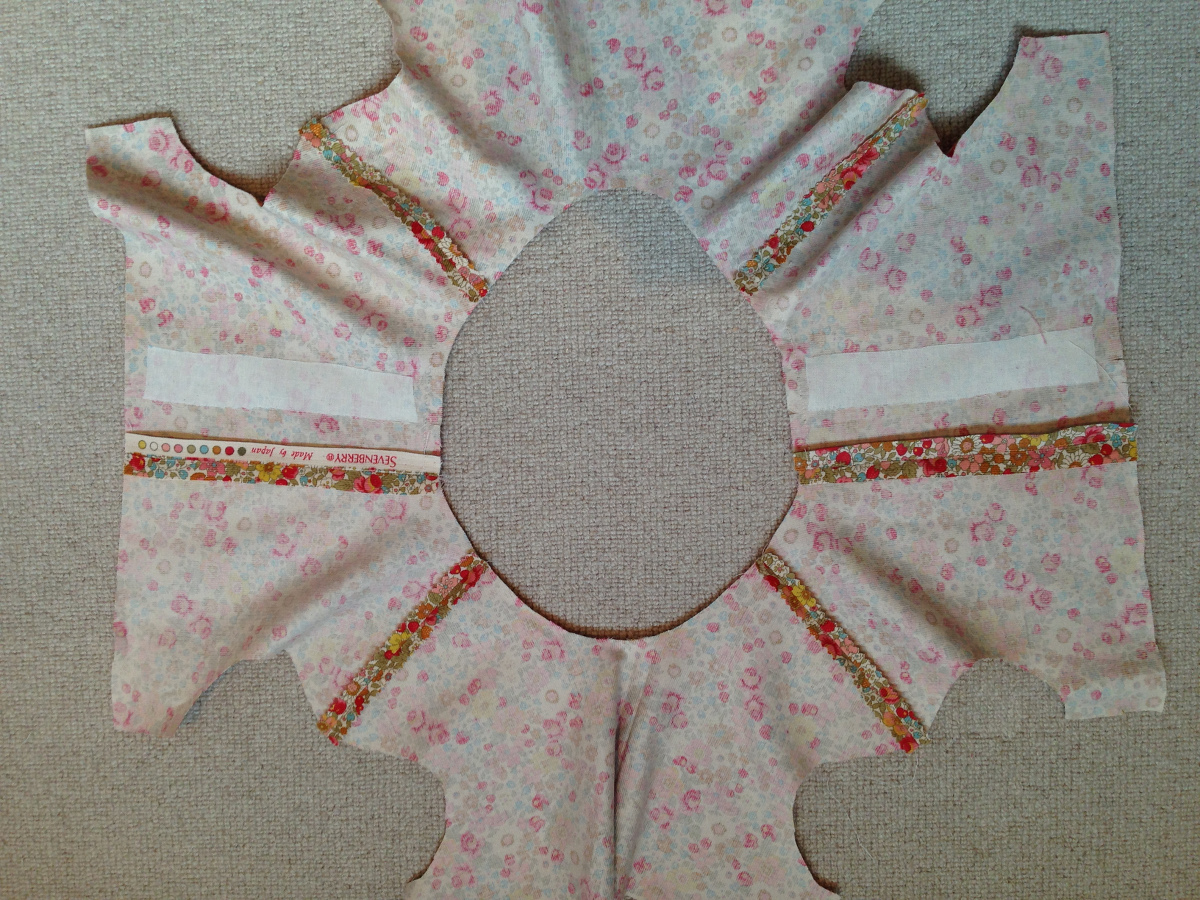
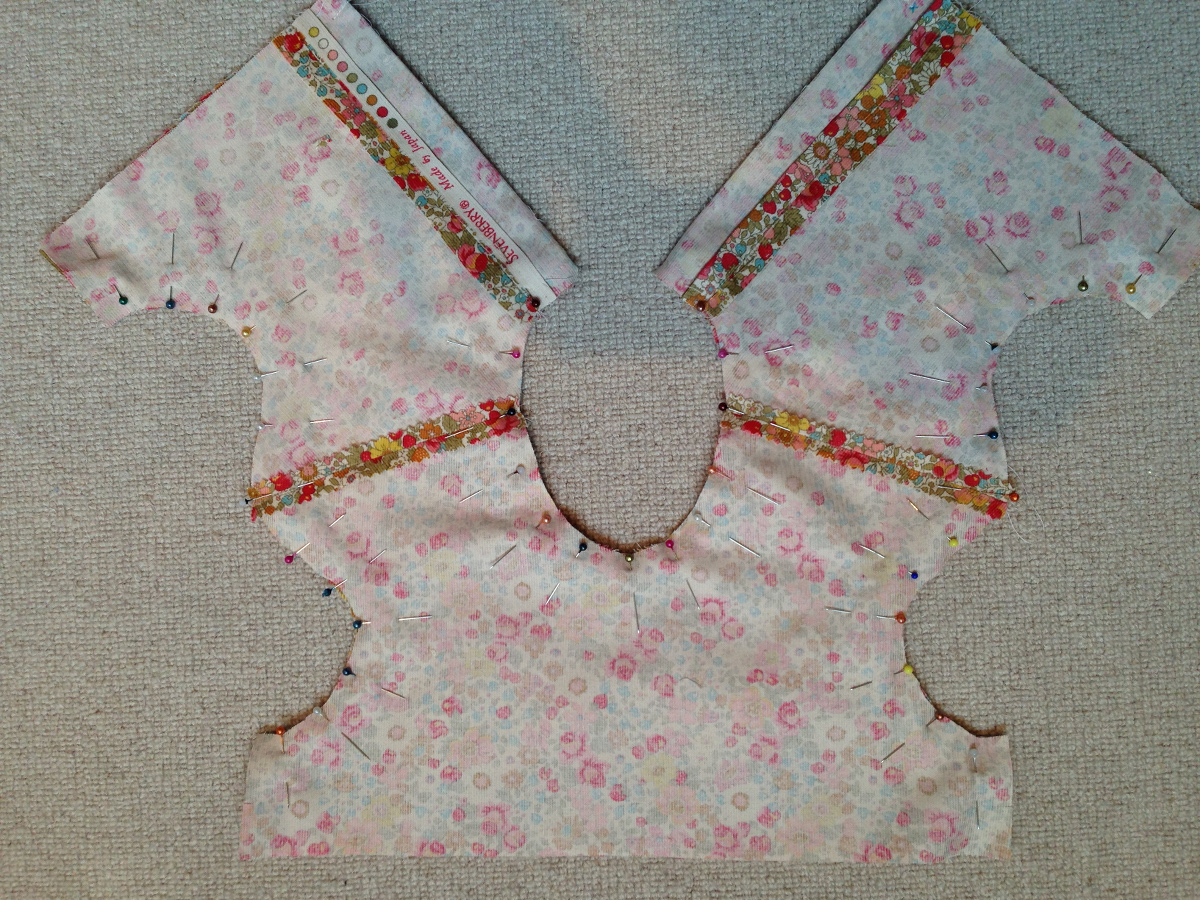
Now for the underarm seams. Before stitching, I lay out the bodice to check that I’m attaching the correct sides together. It should look like this:
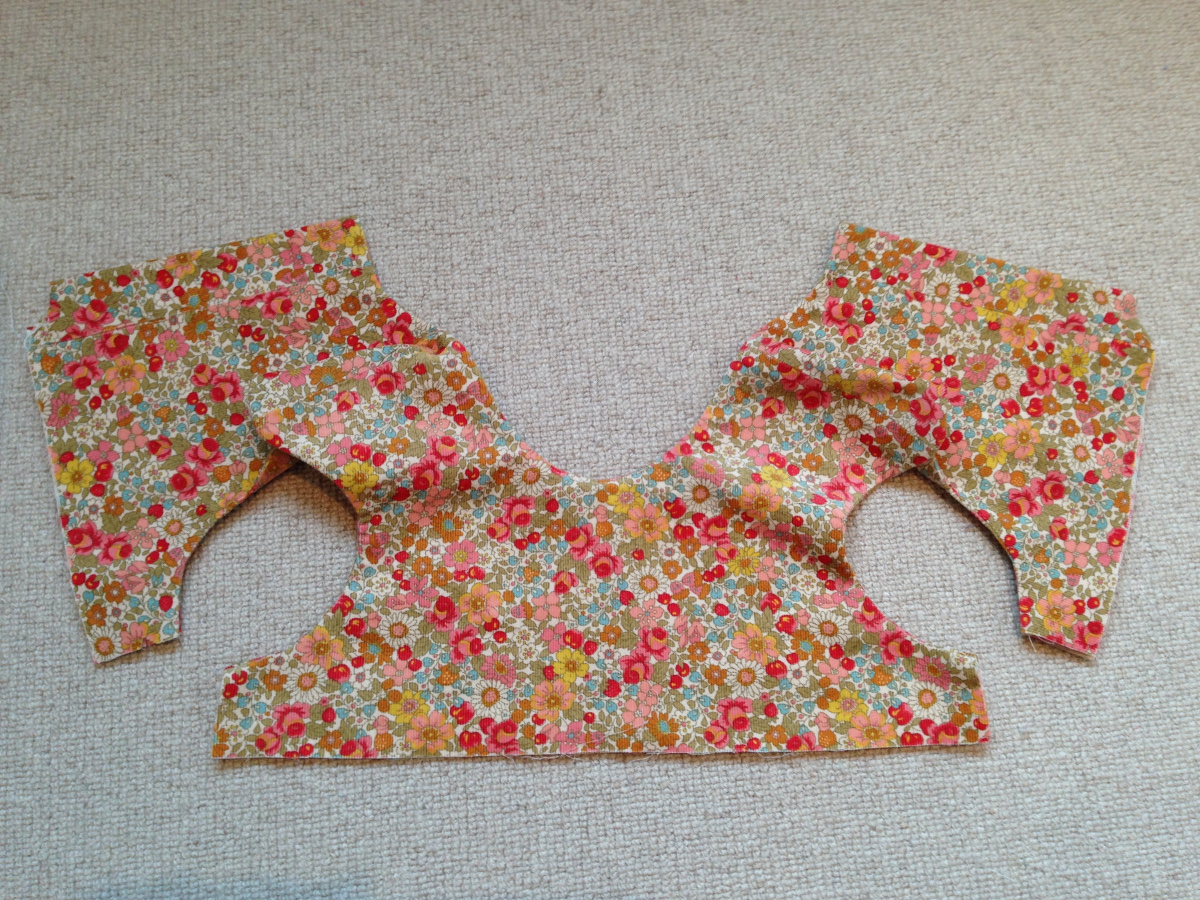
Open out the bodice from the lining at the underarms, and pin the front and back pieces together with right sides together matching the raw edges and seam lines, and stitch using a 1/2” seam allowance.
Press the seam allowances open, fold so the wrong sides are together, and press gently around the armholes so that they sit nice and flat.
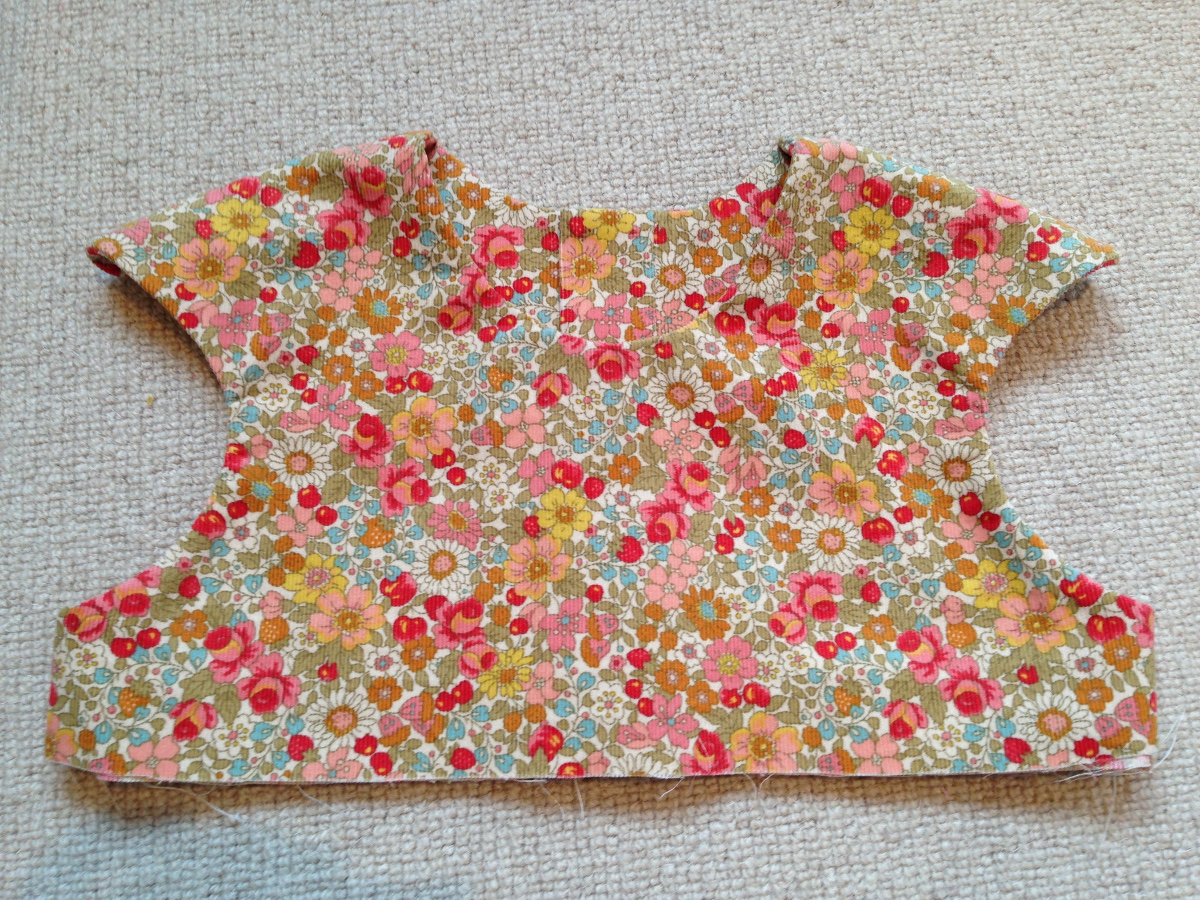
Ta-da! A properly magical sewing moment–the bodice is beautifully lined, with perfect plackets and sweet little cap sleeves.
Time for a cuppa, and then on the the skirt.
A small Bubble dress confession: there’s another step in the pattern, which is the topstitching around the arm/sleeve line. I’ve never done it. It looks so good without, and that cup of tea is calling quite strongly by this stage. On a busy print like this, I think the stitching would probably get lost in the pattern. But if I were using a plain fabric – like the sparkly denim which is stashed away for winter – I’d go for some bold top-stitching to emphasize that lovely shaping which creates the little cap sleeves.
Yesterday was day one of the Bubble Dress sew-along. Today is the second and final day where Catherine will be showing us how to finish up the dress. Thanks so much for being here, Catherine!
Welcome back to the Bubble dress sewalong! This is the exciting bit where we get to make the actual “bubble.”
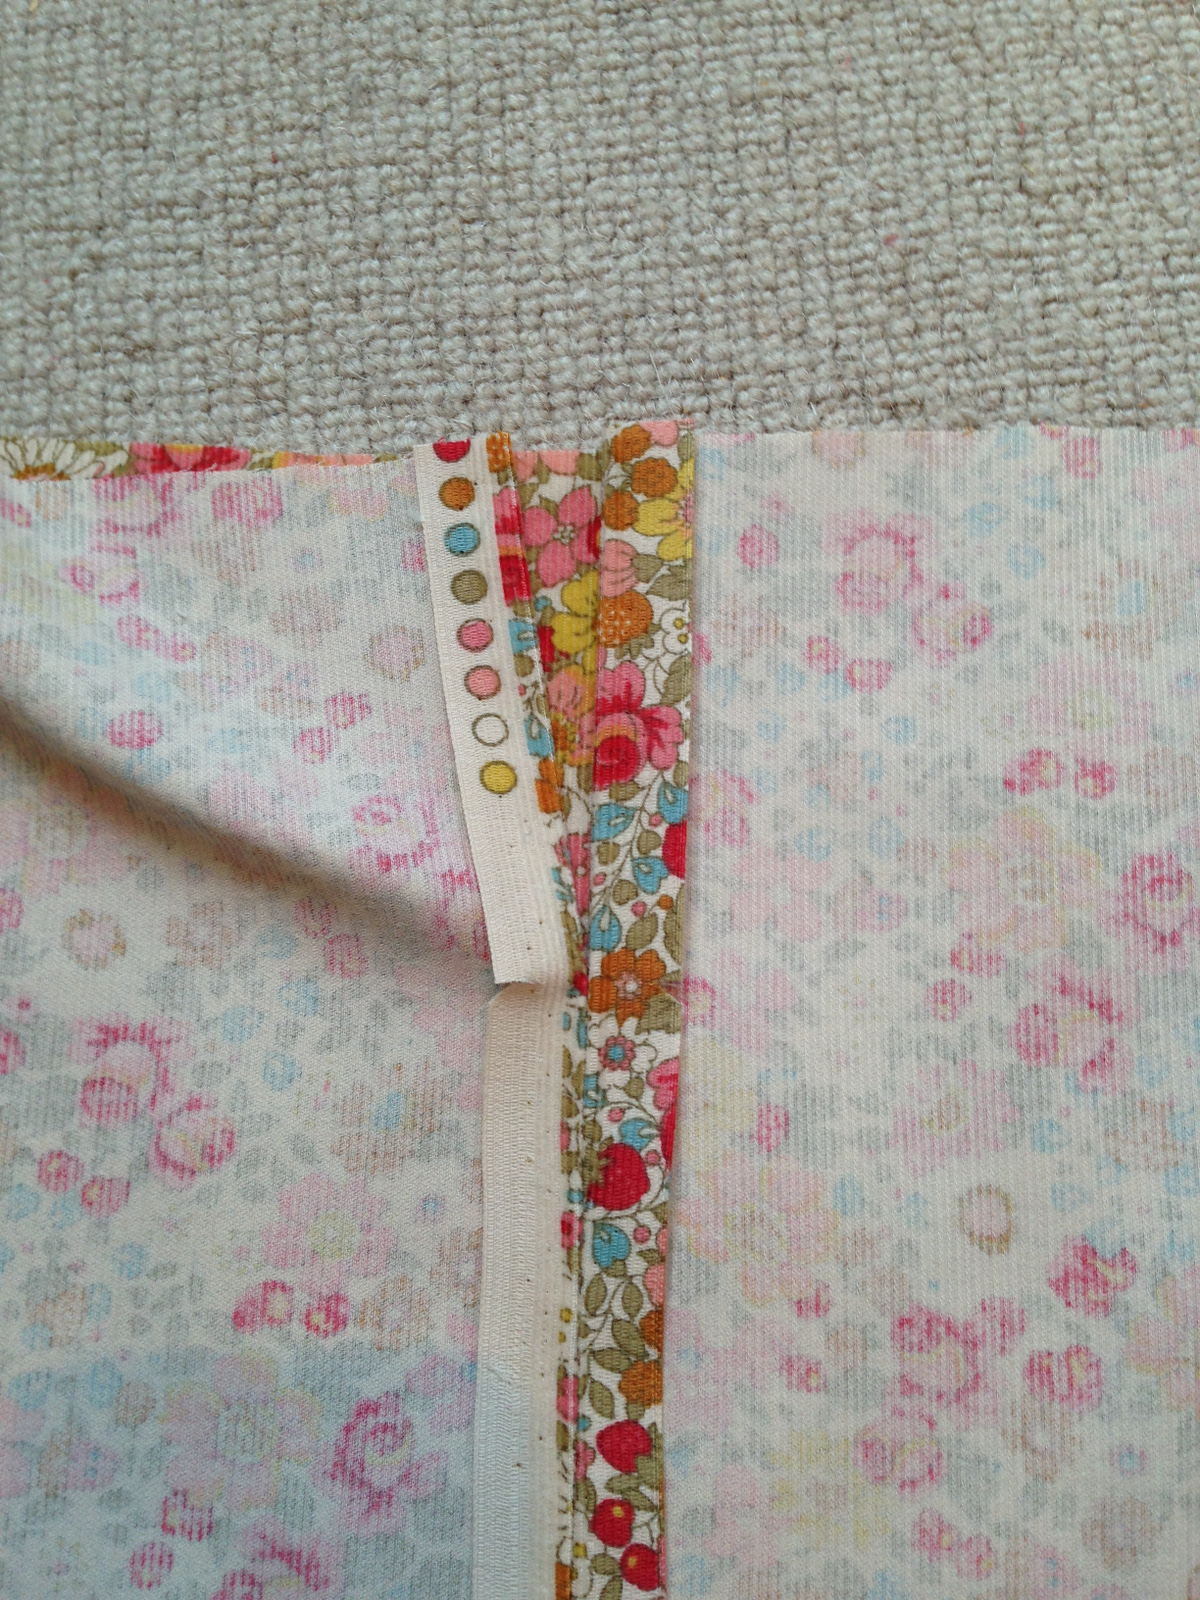
First take the skirt back pieces and make sure you’ve marked the dot on back centre seam. The stitch them, right sides together with 1/2” seam allowances, up the back seam of the skirt, finishing at the dot. Leave the seam open above it.
Press the centre back seam open, and carry on the press the edges above the dot so that they continue the 1/2” seam allowance.
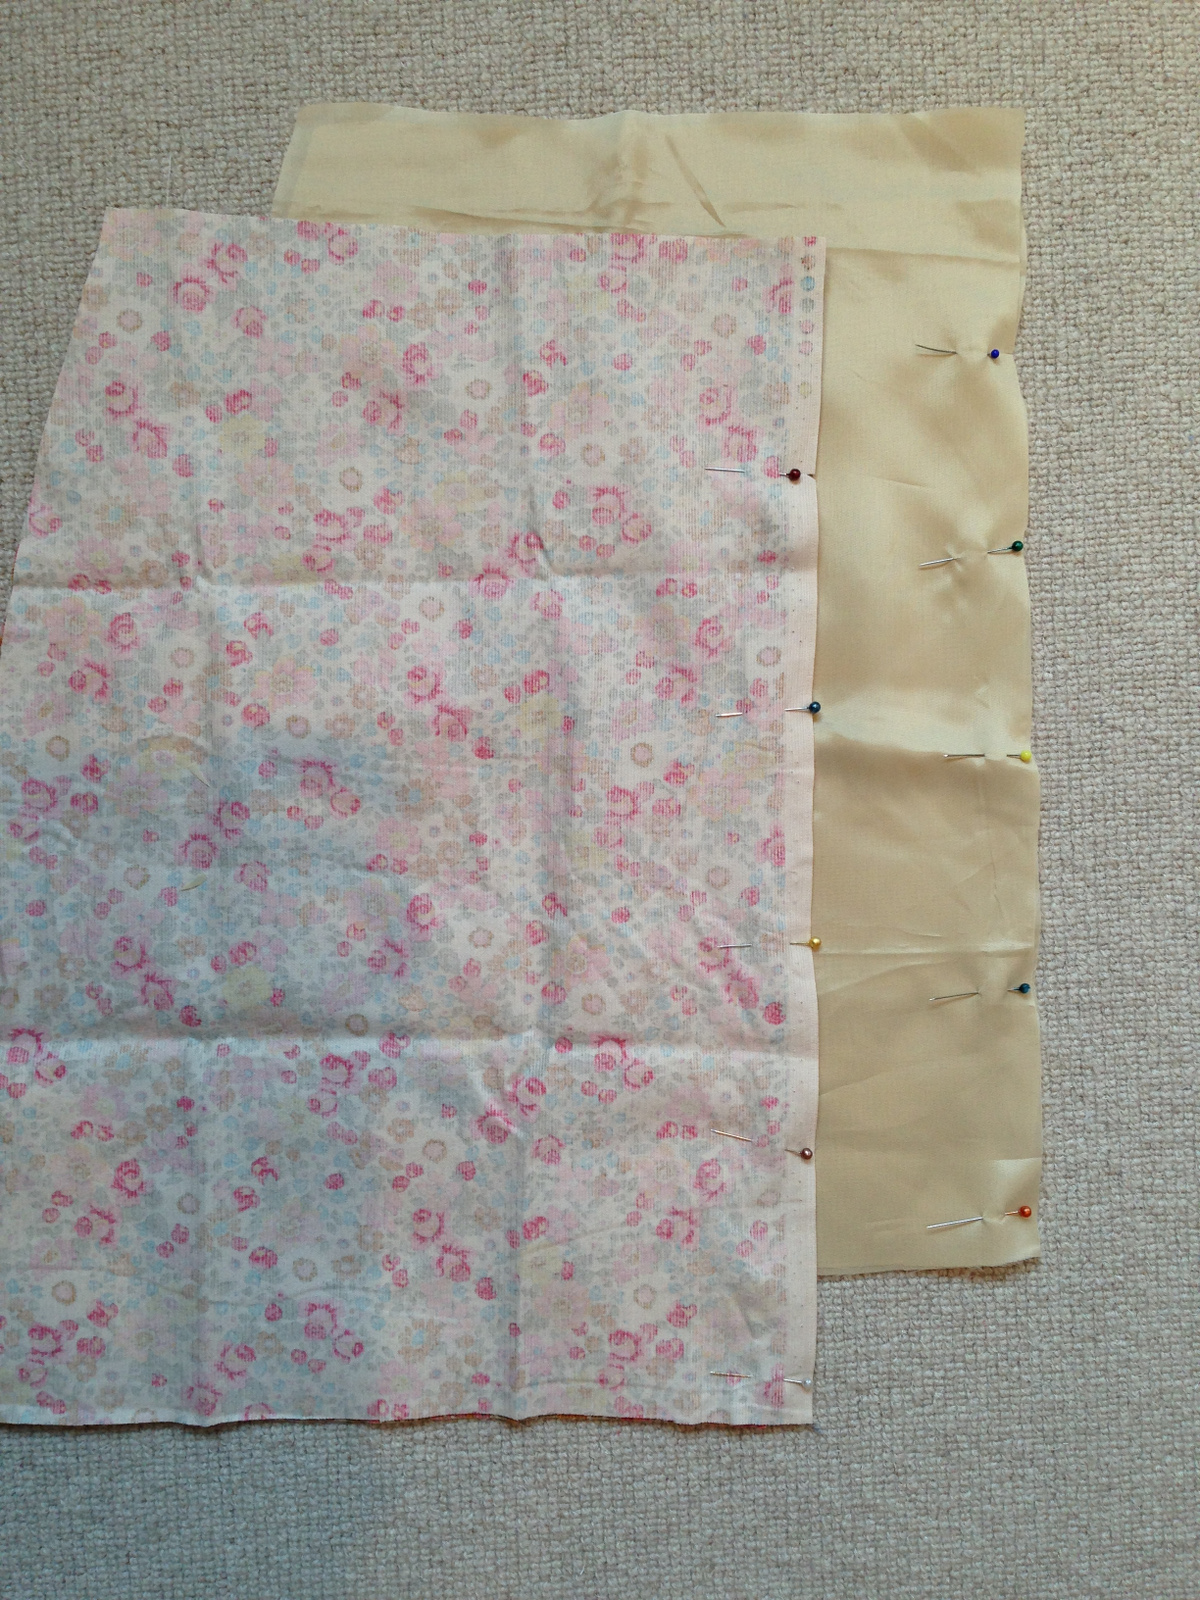
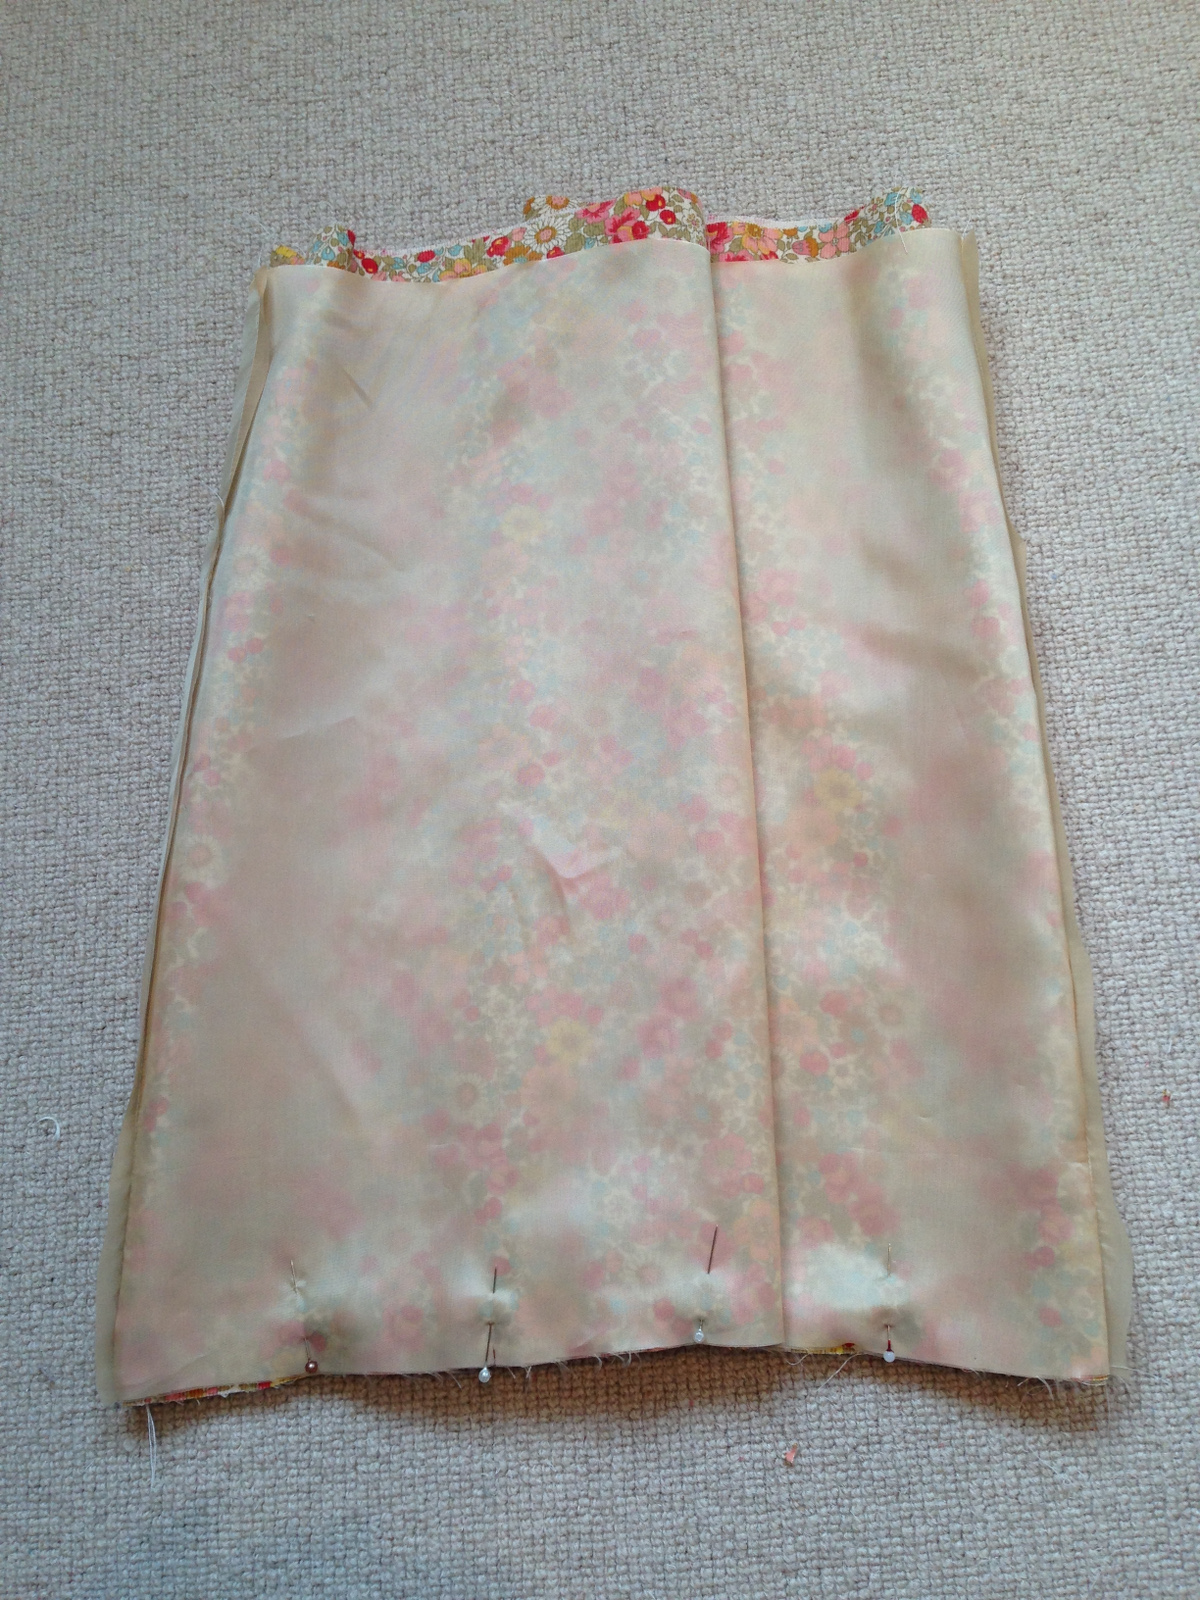
Now pin and stitch the front and back skirt pieces together along the side seams. I’ve made the non-scalloped version, but the pattern has very detailed scallop instructions if you chose to go for that option. For this version, just stitch and press the side seam open.
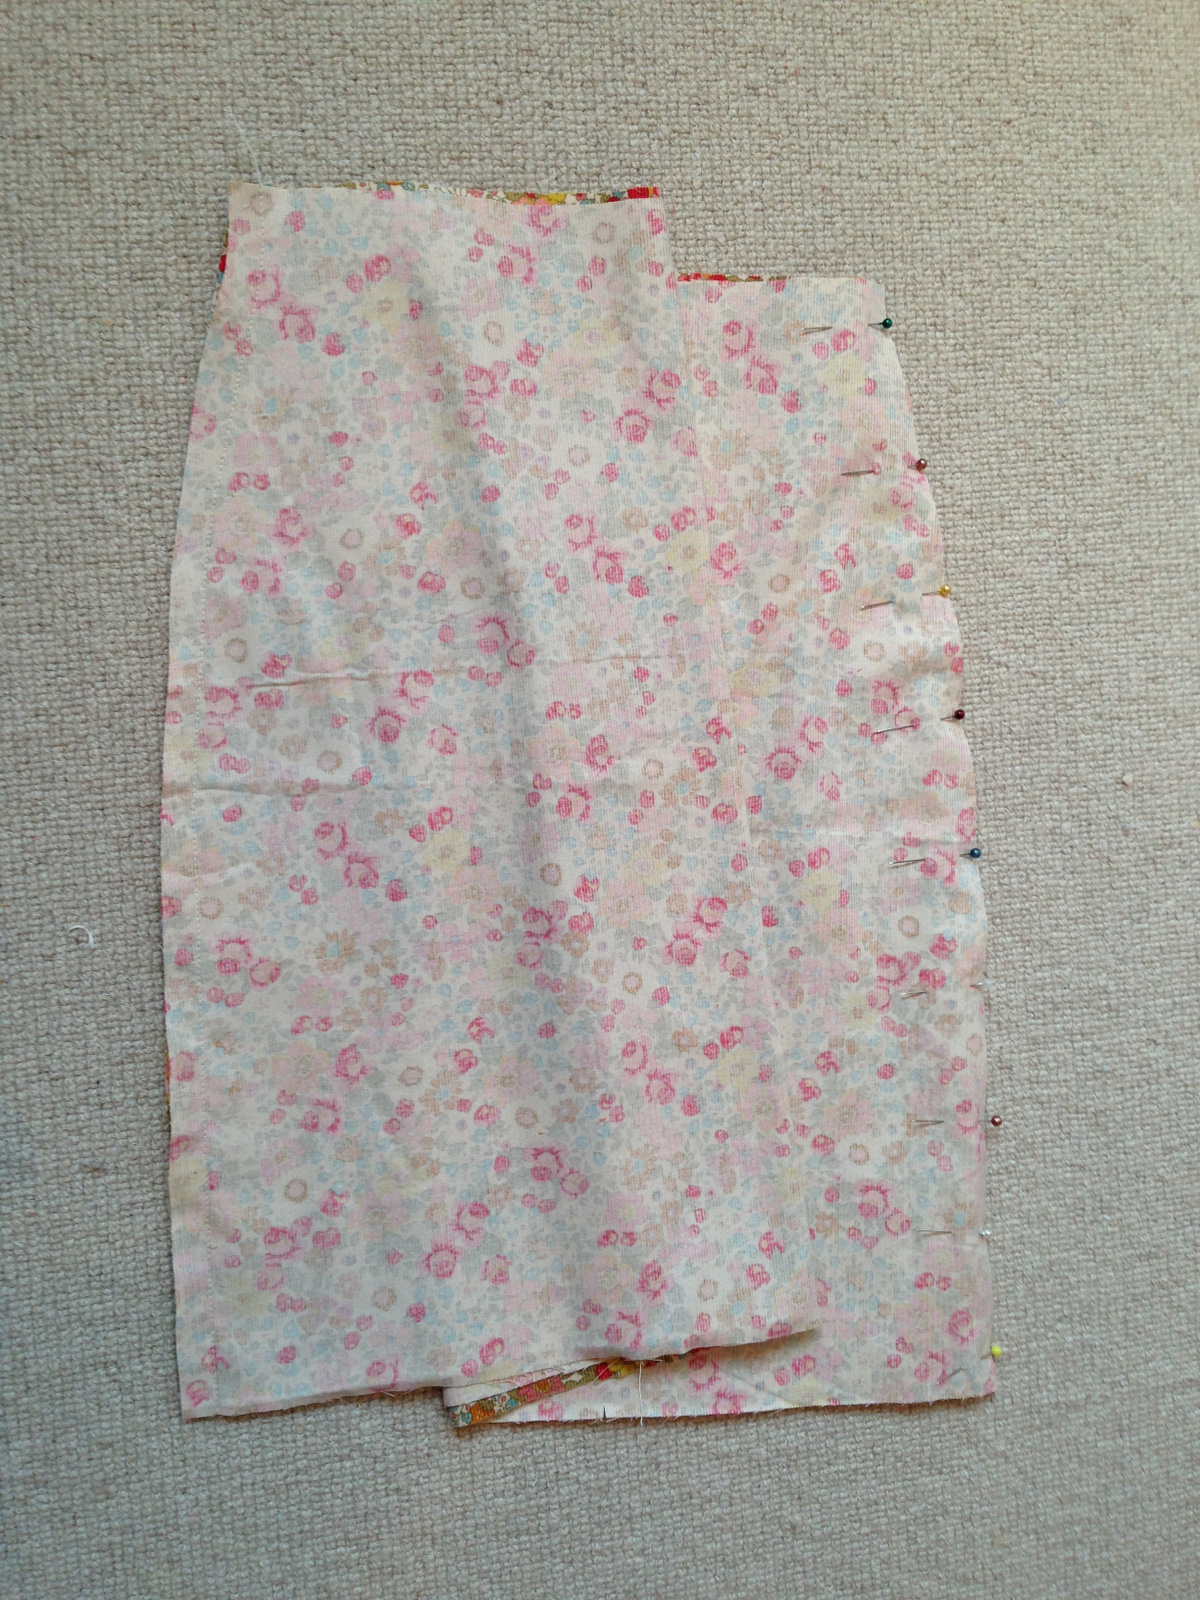
Sew and press the lining pieces in exactly the same way.
Turn the outer skirt so its right sides face outwards, and the lining so that its right sides face inwards. Slip the skirt inside the lining so that their right sides are together, matching the side and centre seams around the bottom edge. Don’t worry about the top edges – they won’t align at the stage. Pin and stitch around the lower edge of the skirt and lining.
Fold the front piece to find the centre and mark this or make a notch to help with placing the elastic at the next step.
Cut your elastic according to the size chart on the pattern – 33” for size 5. Form a loop with the elastic and stitch the ends together with a narrow zigzag.
Mark the elastic loop in quarters, by folding it in half and marking the folds, then matching these and marking the new folds. It’s easier it you make sure none of the folds fall on the join in the elastic, so this will end up mid-seam.
Pin the elastic to the seam allowance at the the side seam, centre back seam, and centre front, matching the marks on the elastic to each seam.The elastic will be shorter than the lower edge of the skirt, so don’t try to pin in between the seams.
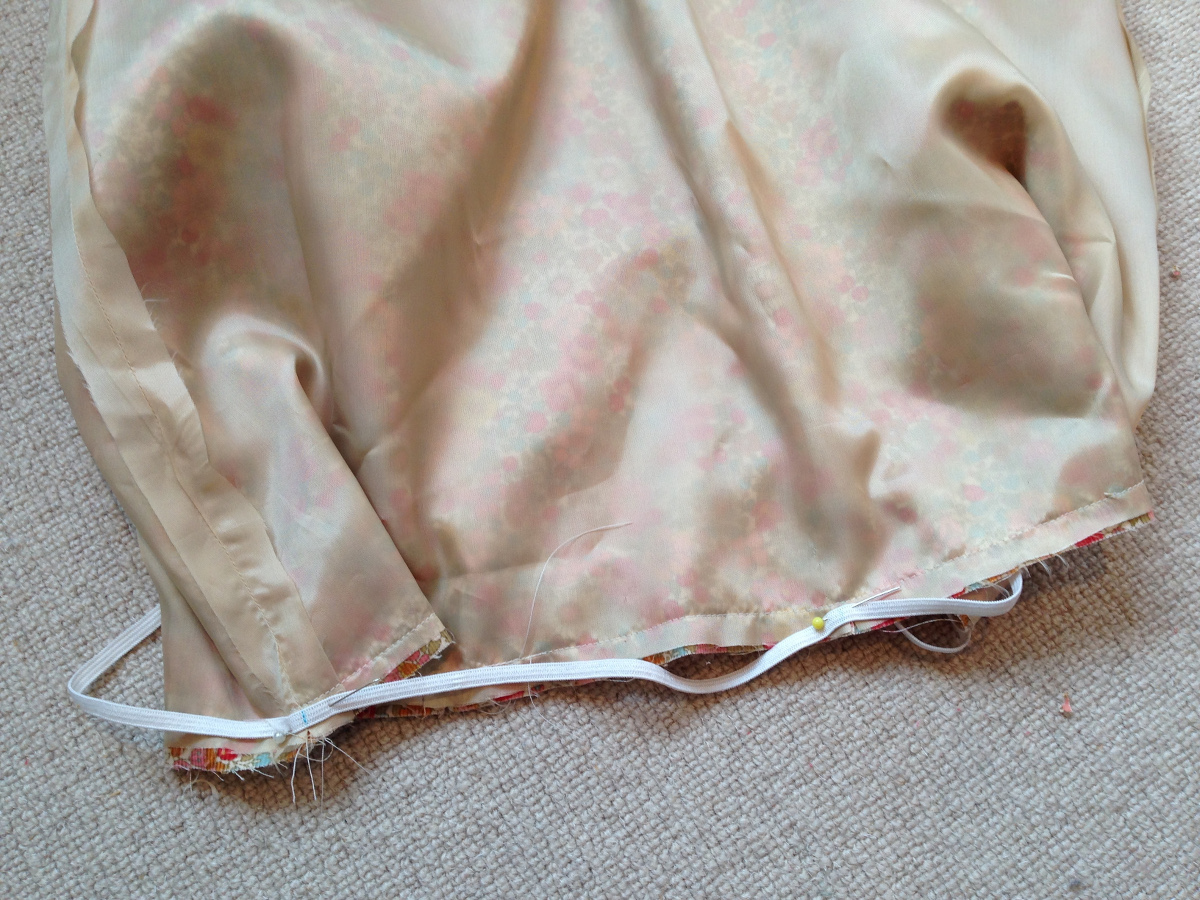
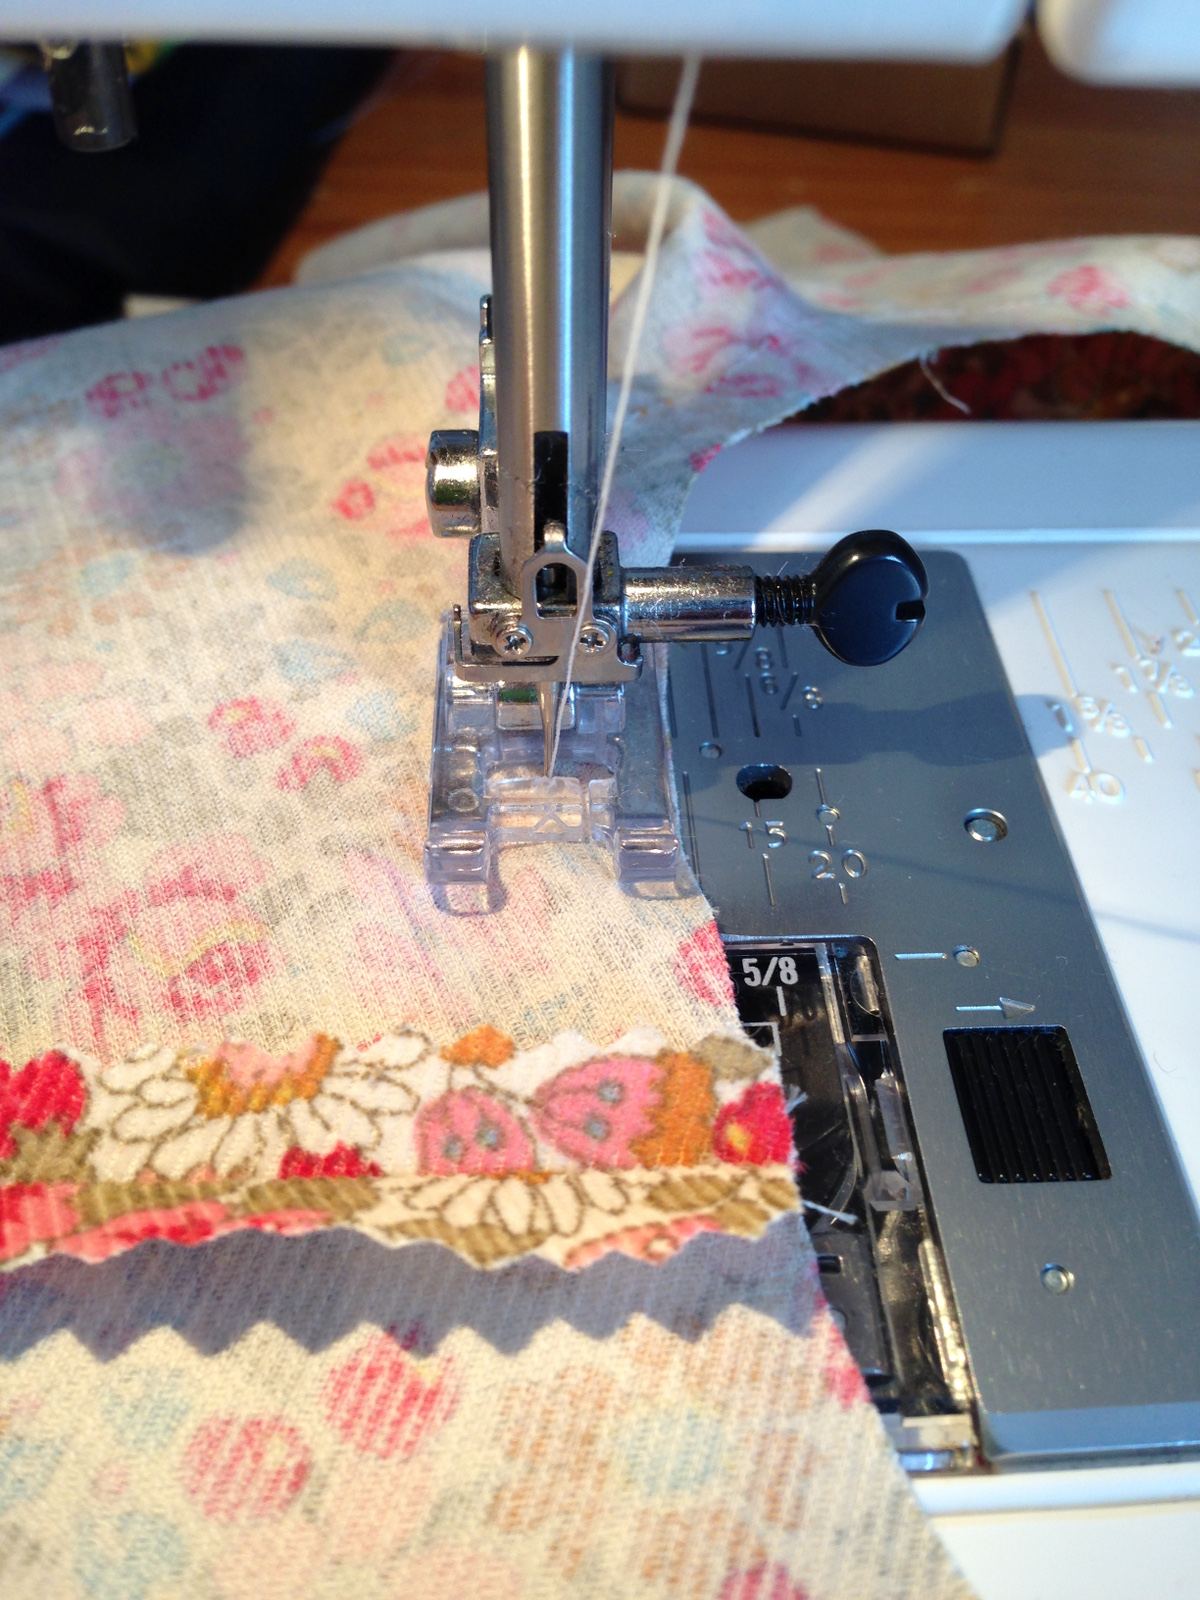
The next step is hard to photograph as it needs both hands! Set your machine to a narrow zig zag, and get ready to sew, placing your presser foot just before one of the points where the elastic is pinned to the skirt. Lower the presser foot and needle. Now hold the elastic and the skirt, with your left hand behind the presser foot and your right hand in front, holding the next pinned seam. Stretch the elastic until it is the same length as this quarter of the skirt’s lower edge. It should sit nicely on the seam allowance once it is stretched.
Sew along the elastic, attaching it within the seam allowance. If you need to stop and reposition as you go along, make sure you leave the needle in the ‘down’ position.
Repeat around the edge of the skirt.

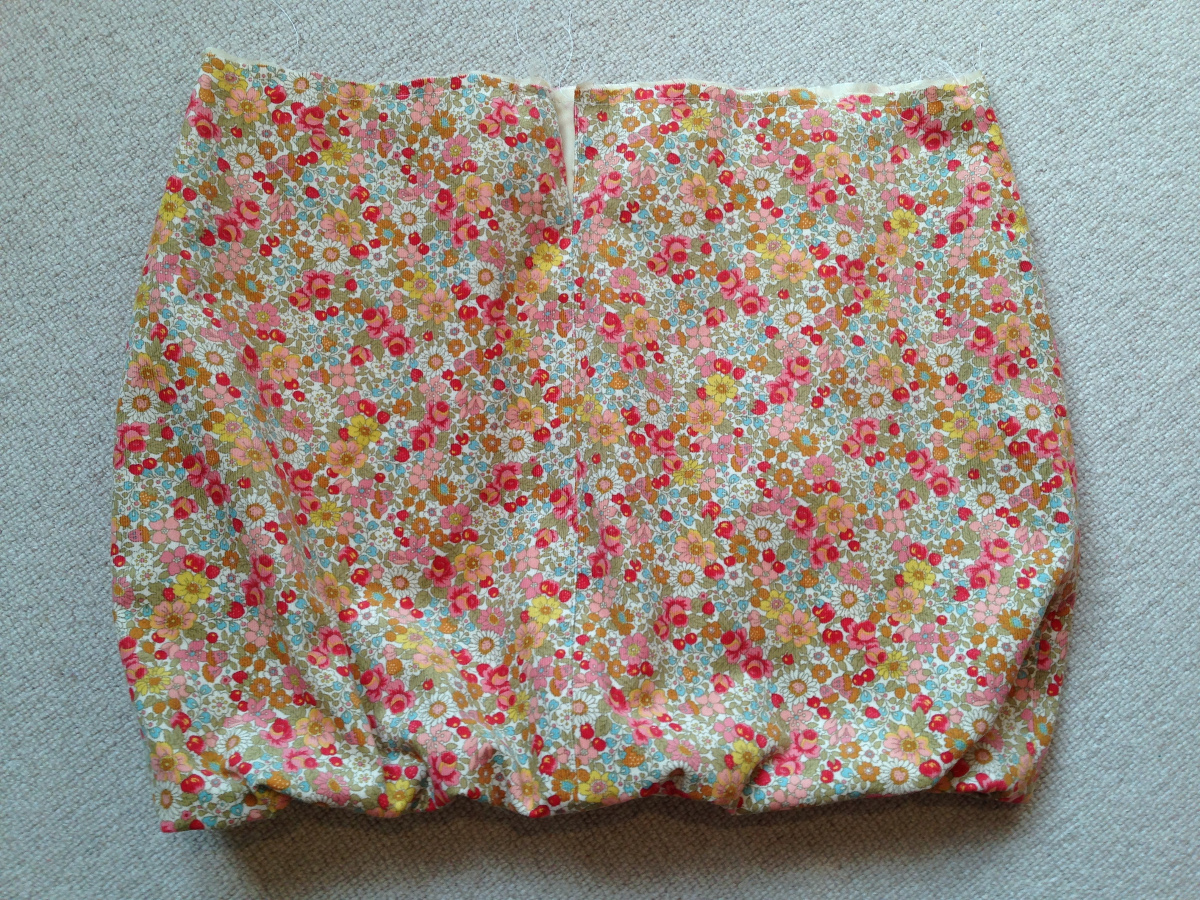
Ready for some more magic? Turn the skirt and lining so the right sides are outwards, and marvel at that beautiful bubble shape!
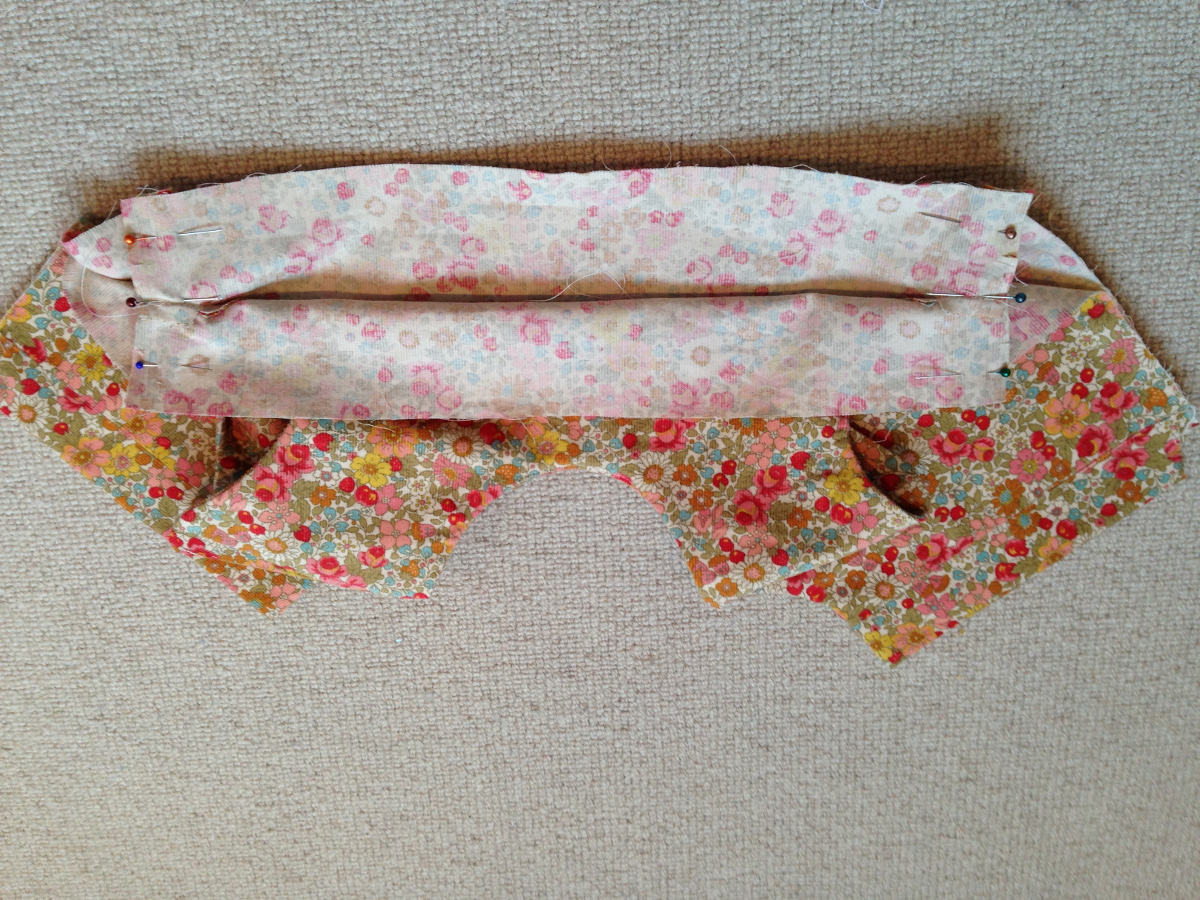
Match the top edges, and pin together the outer skirt and lining at the back centre seam, where you left the seams open above the dot, with the seam allowances sandwiched between the two layers. Carefully edge-stitch around the placket, with the outer skirt facing up, sewing down one side and up the other.

Baste around the top edge of the skirt and lining so that they can be gathered together as a single layer.
Before gathering the upper edge of the skirt, mark the centre front of the skirt so you can match to to the bodice later. I use a little notch; it won’t be visible on the finished dress.
Now sew two rows of gathering stitches around the top edge of the skirt and lining, and it’s time to attach the skirt to the bodice.
Find your bodice piece, which is nicely pressed with the right sides facing out. Now find the little seam you stitched at the bottom of the back placket on each side of the back bodice, and fold it out to the wrong side again, which will reveal the dot (or cross, in my case) which we used when we stitched it yesterday.
Now match the centre back edges of the skirt (where the outer and lining have been edge-stitched together) to the dots on the outside back bodice. The skirt placket needs to sit right up next to the end of that little line of stitching on the back bodice. I use a lot of pins for this corner, and I find the fabric can slip very easily.
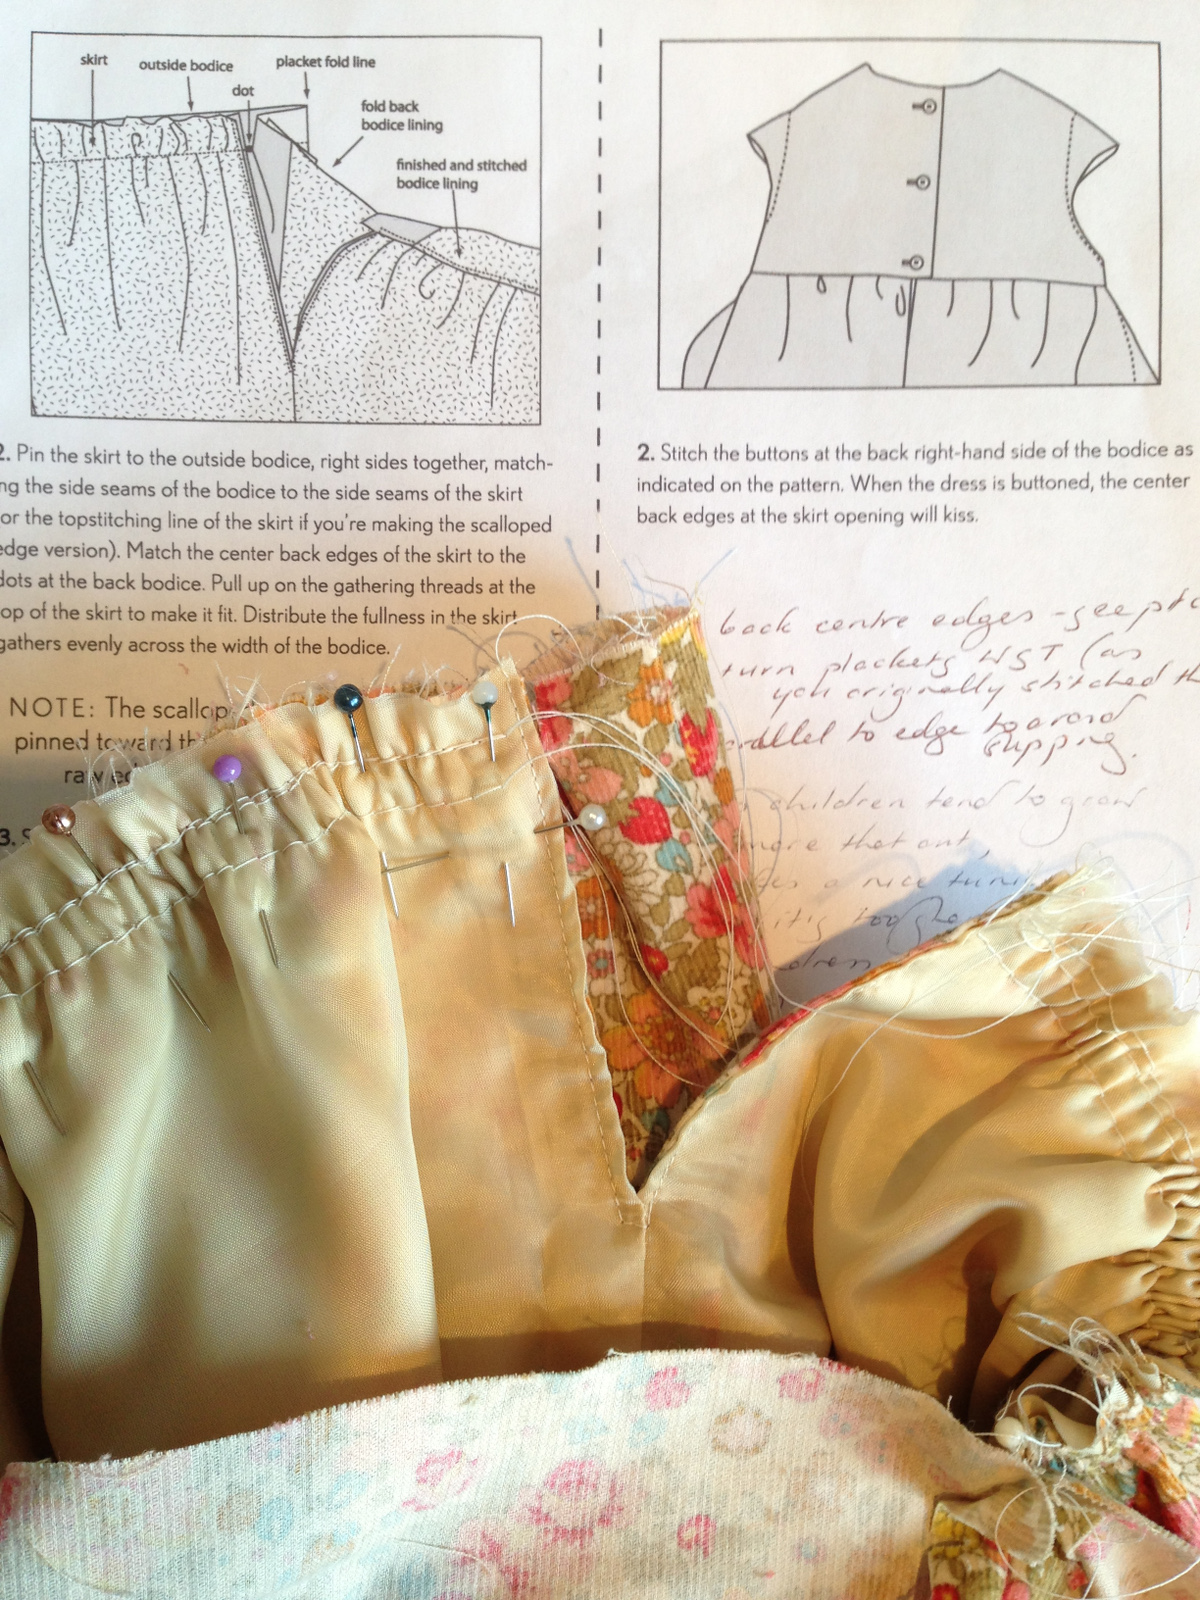
Now gather the top edge of the skirt, matching the side seams and centre front, with the right side of the skirt to the right side of the outer bodice.
Stitch the skirt to the outside bodice at a half inch seam allowance, starting and stopping precisely at the dots where the placket seams begin (and remember – pins are your friends!).
Fold the bodice plackets back into place. The centre back seam of the skirt should be sandwiched between the bodice and bodice lining, just next to the back placket.
Magic? I think so!
Fold the bottom edge of the bodice lining, pin and handstitch or edgestitch it in place.

Time for buttonholes already! I love having a chance to mix and match some pretty buttons.
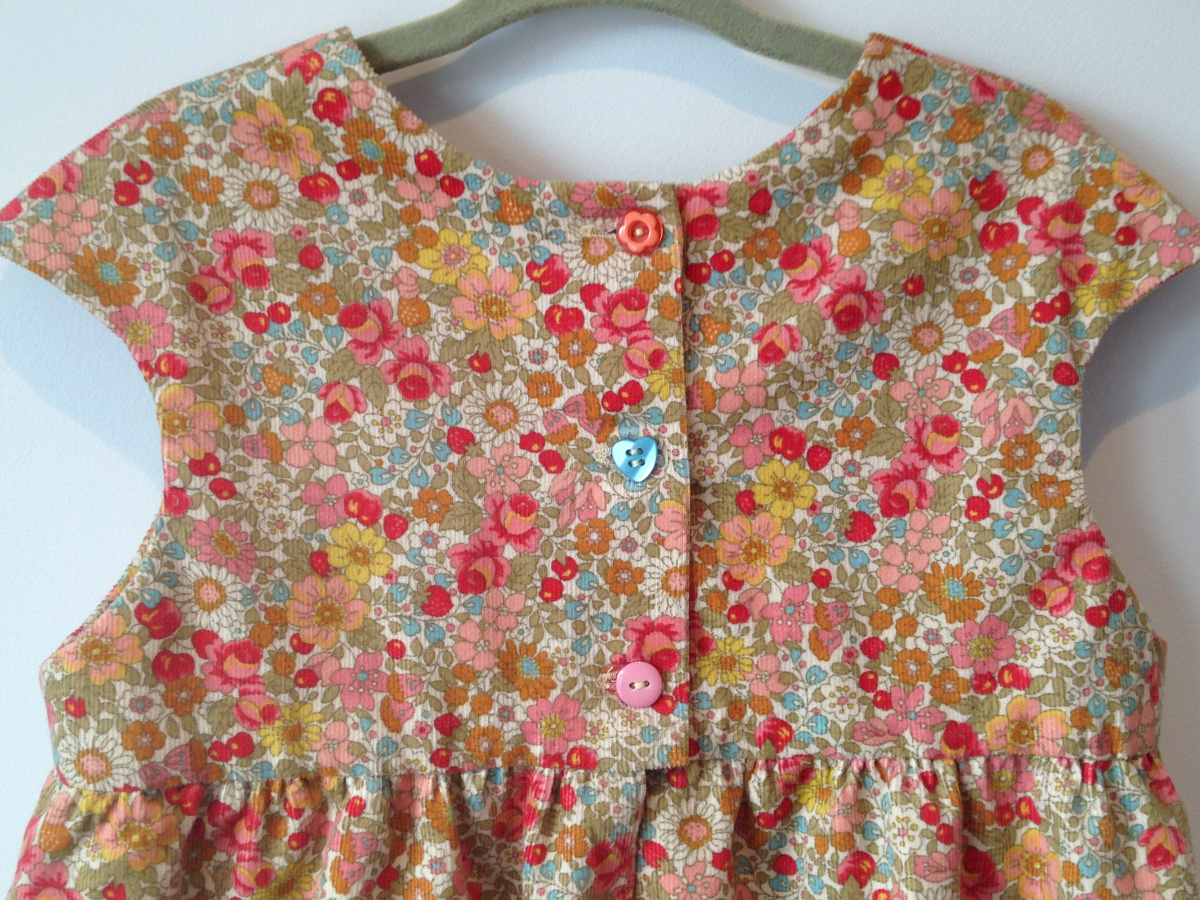
Sew the buttonholes on the back left-hand placket. I sew the top button first to match the neck edges, then the bottom button to match the placket edges, and then the middle button goes in last.
And we’re done!

I hope you’ve enjoyed sewing the Bubble dress as much as I have, and that your size-five will have lots of fun wearing it!
I am thinking of sewing the bubble dress for my little grand daughter, who will be 3 years old at the end of May. Do you think the bubble hemline will look ok on a small child?
Thanks,
Lisbeth.
I think it’s beautiful on little ones, Lisbeth! And when they grow it still looks good as a shorter tunic.
Lisbeth, I made the Bubble dress when my littles were two and it was a favorite of mine. The hem was really sweet and never got in the way of their play. Here they are if you are interested in seeing them on littles: http://sewingforfour.blogspot.com/2013/06/birthday-bubbles.html?m=1
Beautiful job, Catherine! This is a favorite of mine, and though we already have one in rotation, I think we need one more;)
Great point about ‘sewing magic’ — it’s true, this dress is a wonderful example of them. Wonderful, clear photos!
How do you pull the threads through to the wrong side?
After you do the understitching (the photo where you see the right side of the fabric) you take the bodice out from under the presser foot and turn it over so that you are looking at the wrong side of that fabric – essentially, looking between the bodice and lining. At each end of the row of understitching the long bobbin thread will be visible on the wrong side – just tug on this to pull the other thread through from the right side and tie them both off (as in the second photo which shows the wrong side of the fabric).
Hope that makes sense!
Great post, Catherine! I love the fabric you’ve used. This pattern is my go-to baby gift. Just love it; and it’s so darn adorable in any size!
Do I need to sign up for this?
Rita, no you don’t. Feel free to follow along at your own pace.
So grateful being able to follow your step by step instructions. I was quite nervous about attempting this-but am delighted with the results and will make several , experimenting with diff fabrics and colours. Sure to please my granddaughter, who will be 4 in Sept. Thank u again Magda
Thanks for the clearly detailed directions. Any chance I can get larger size? I need a seven.
can i use this for the building block dressing the book page 41 I am staring very simple .I am struggling with the placket for the skirt ao i though i would try the elastic instead