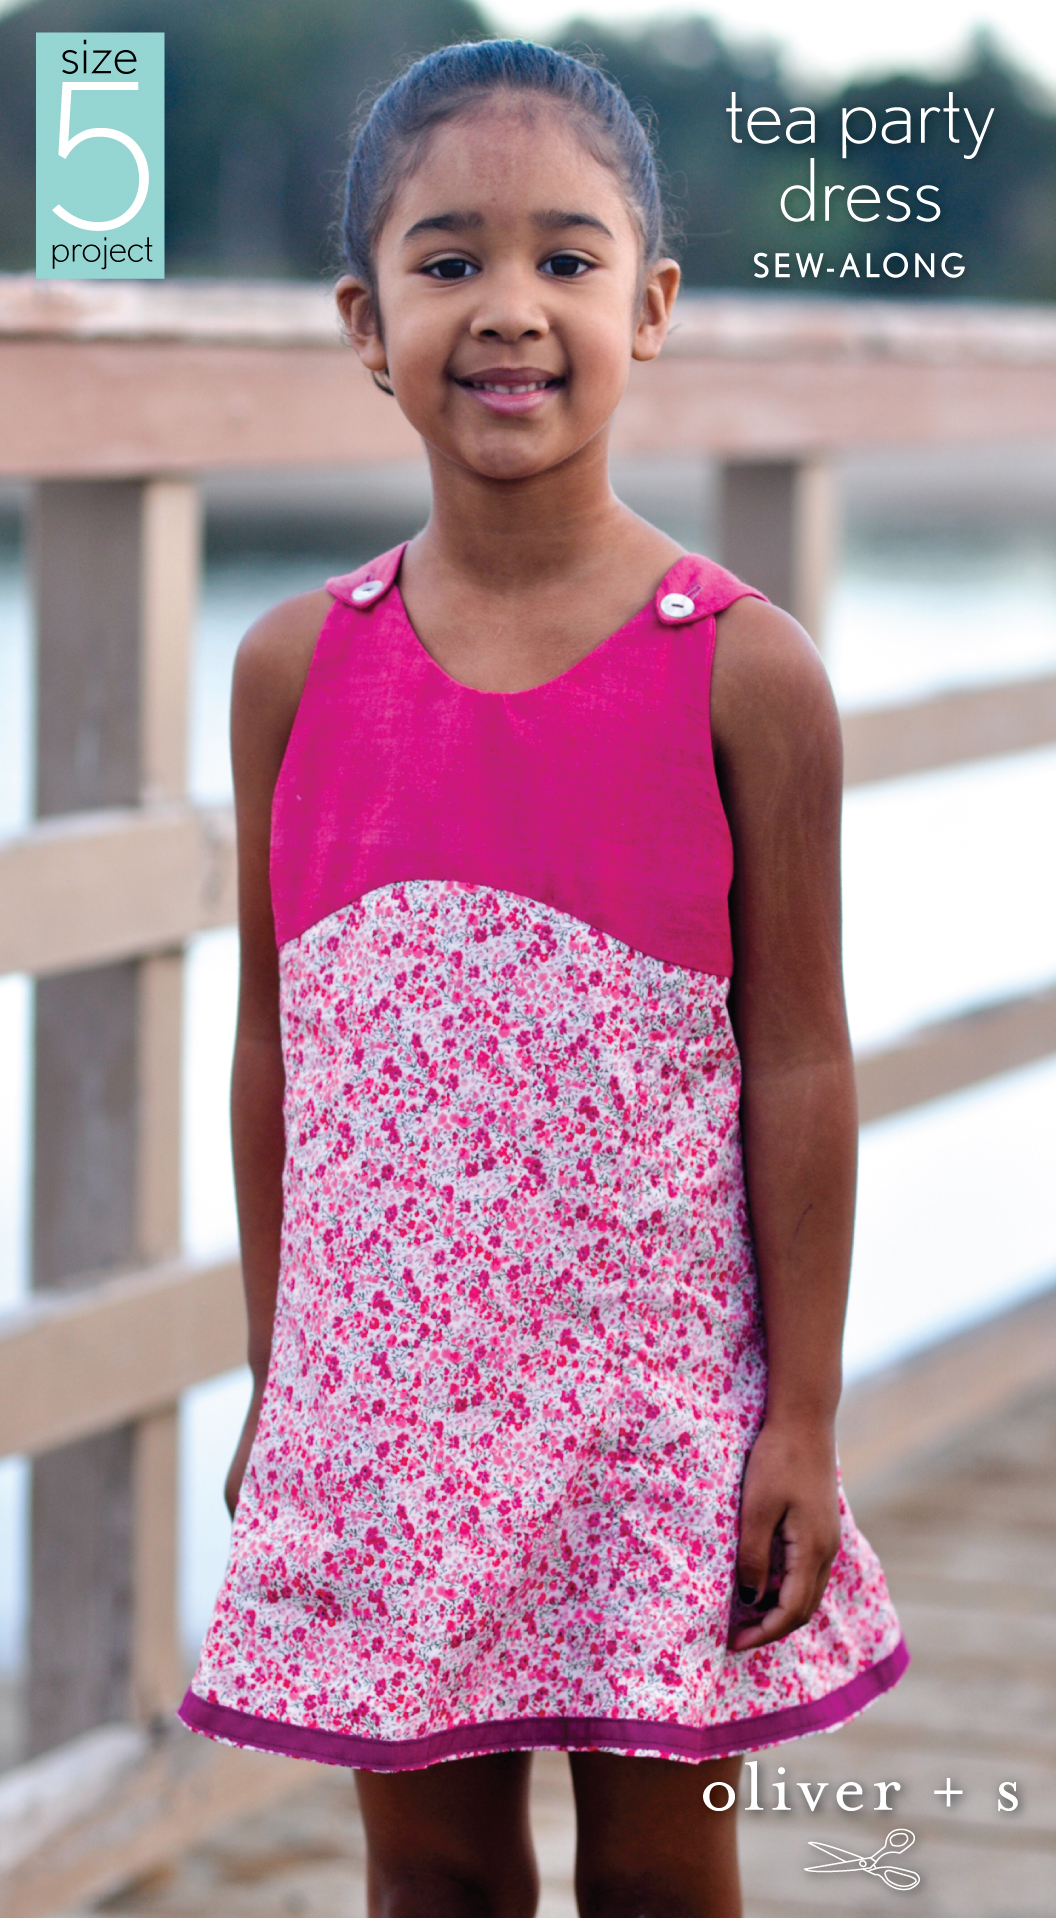
We are continuing with the size 5 project, and Sarvi is back with us. This morning she shared a Tea Party round-up, and now she’s kicking off a Tea Party Dress sew-along. Today is day one. Be sure to stop by tomorrow for day two.
The Tea Party Dress is pretty straightforward in its construction. Unlike some of the harder patterns that are a bit trickier to understand (but easy to sew), the Tea Party is easy to understand, but that curved bodice can be a little tricky to sew, especially in the smallest sizes. I’m going to leave you in Liesl’s capable hands for most of the construction and focus instead on a few tweaks I like to implement.
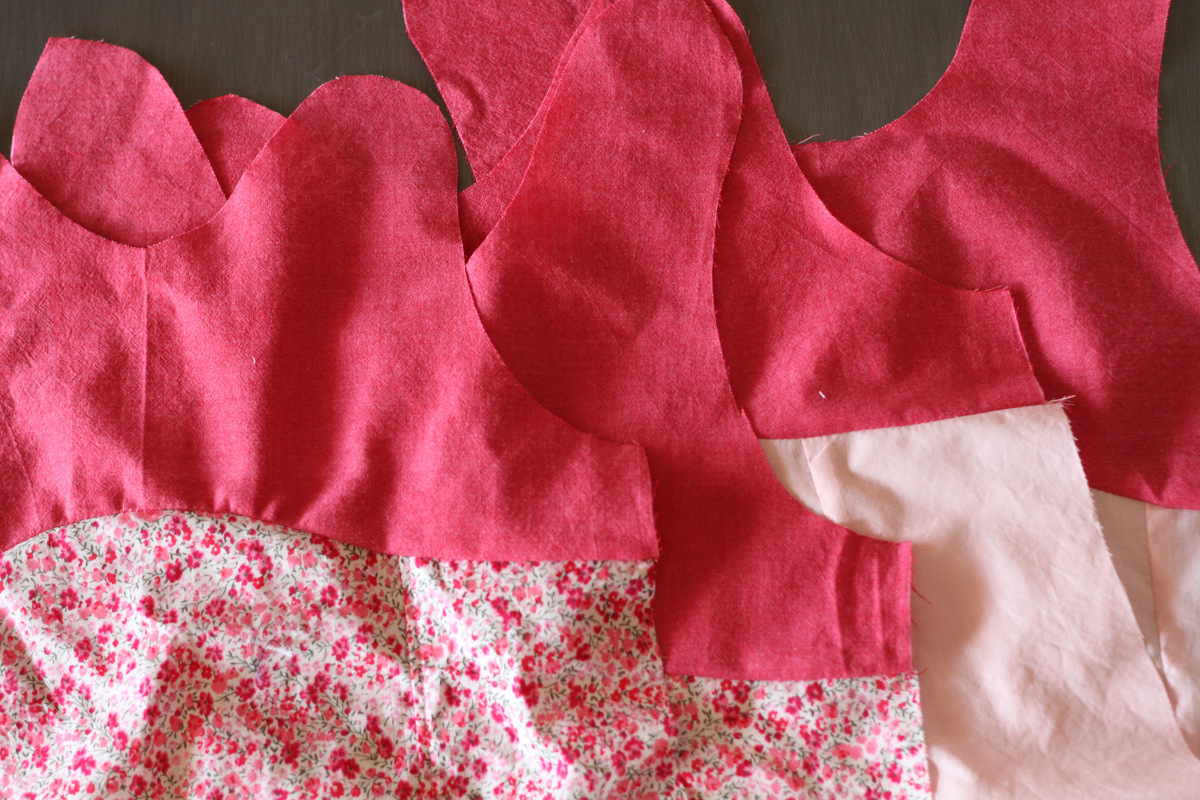
First, I find it a little tricky to maintain perfect accuracy across all the seams, and tiny mistakes can add up (there are six seams in the skirt). I like to borrow this bit of the construction from the doll’s version of this dress in Little Things To Sew. I find it a bit easier to do work in batches, so I’ll pin everything I can sew in one go, and then finish and press all those seams.
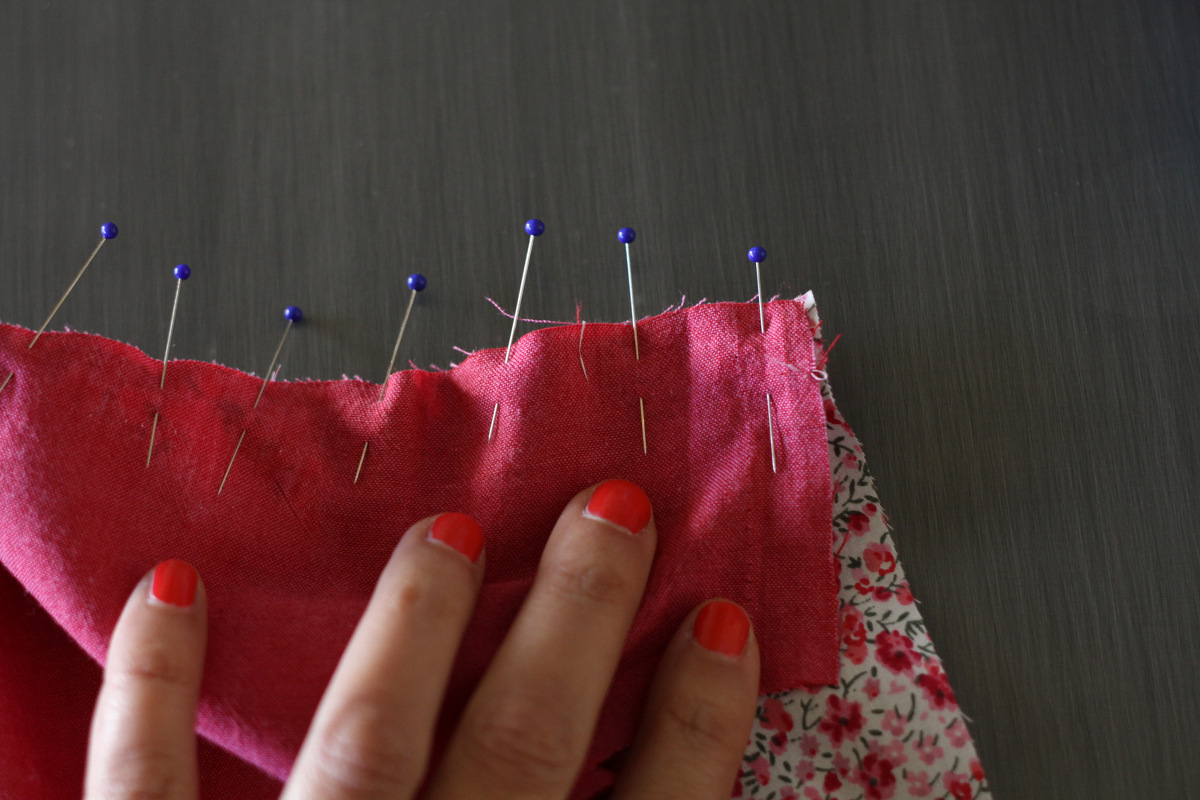
I want to make my dress fully lined since I’m using a lightweight cotton lawn print that can be a bit sheer, so I’ll cut a second set of the skirt pieces from a plain lawn. First, I’ll assemble the front and back skirts with their corresponding side panels. I topstitched mine. Next, I’ll tackle the curved seam between the skirt and bodice. When sewing opposing curves, I find I’m tempted to use few pins, if any, so I have a lot of freedom to shift the fabric around to make the edges meet, but since the fabric will want to stretch, it’s better to use plenty.
In this video, you’ll see me doing a few different things as I sew (it’s in real time, so no need to watch the whole thing if you’re already comfortable with this bit).
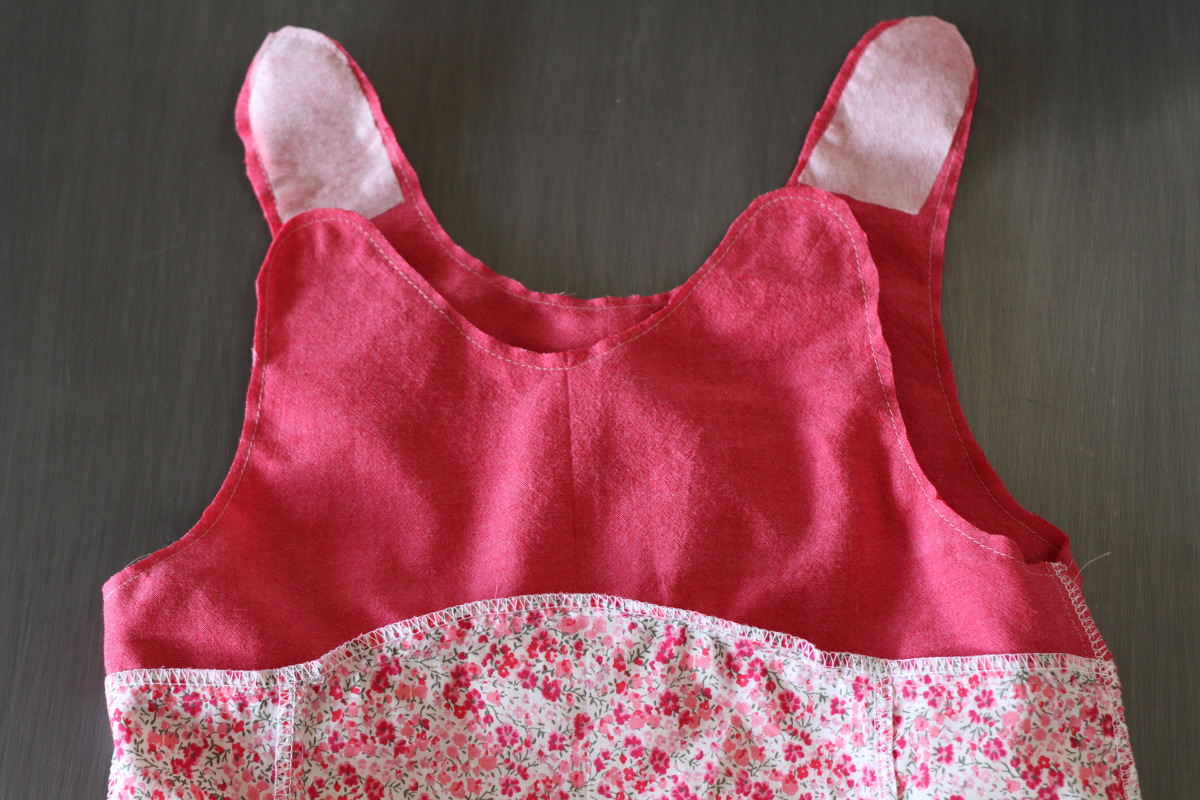
First, I’m stitching a bit slowly, so I can assess each stitch. If I see the fabric bunching on top, I can stop with the needle down and shift the excess back. If I can feel it bunch on the lower layer, I can reach under and move just that layer back. I can also hold the fabric both behind and in front of the needle, holding a small section taut as it moves under the foot (but not fighting the feed dogs or tugging the fabric against the needle). I preferred not to topstitch the bodice.
Our last step for today will be to stitch the side seams. Pin the outer front to outer back, right sides together, and the same with the lining. Finish and press seams. Done for today, see you tomorrow!
Yesterday was day one of the Tea Party Dress sew-along. Today is the second and final day where Sarvi will be showing us how to finish up the dress. Thanks so much for being here, Sarvi!
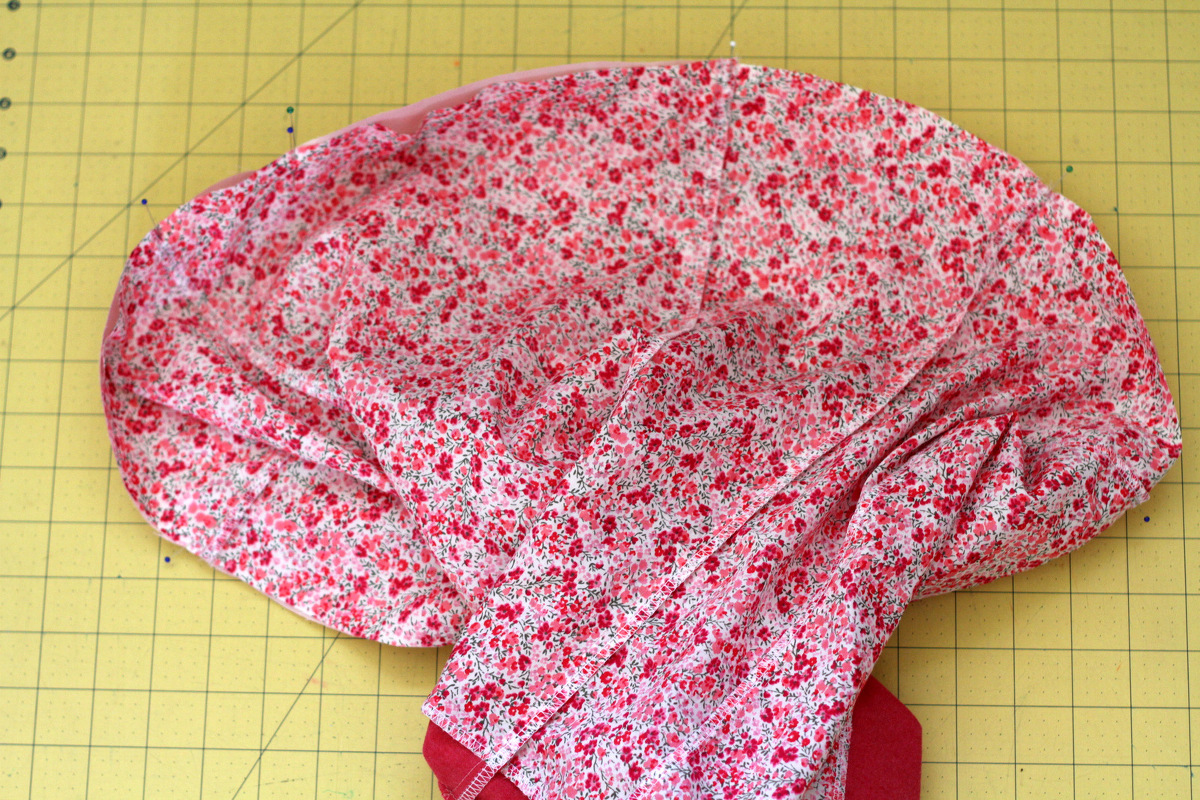
When we left off, we had an outer dress and inner dress, ready to be assembled together. To do this, we’ll put the dresses right sides together, one tucked inside the other, and match up and pin the straps. We’ll stitch all the way around top in one big circuit, going very slowly around the curves. I like to go one stitch at a time and stop with the needle down, lifting the presser foot, and adjusting the fabric around the tightest parts of the curves. When you’re done, trim the seam allowances closely to get a smooth edge.
Then, turn the dress inside out and push out the corners gently. Give it a good press and topstitch if you like. I chose not to topstitch mine.

You can hem the dress and lining separately, using the hem facing as instructed. Another option would be to cut the lining slightly shorter, and tuck it inside the hem facing for the outer dress before hand stitching or topstitching it down. I did something a little different. I decided to pin the skirt to the lining, right sides together, and stitch most of the way around, leaving a small opening to turn the dress right side out again.
It’ll look a little funny at this stage but have faith and carry on. I used two pins together to remind myself where to stop. I chose to leave an opening at the center back of the dress, where the curve of the hem is mildest, to make this bit easier to turn under and press in the next step.
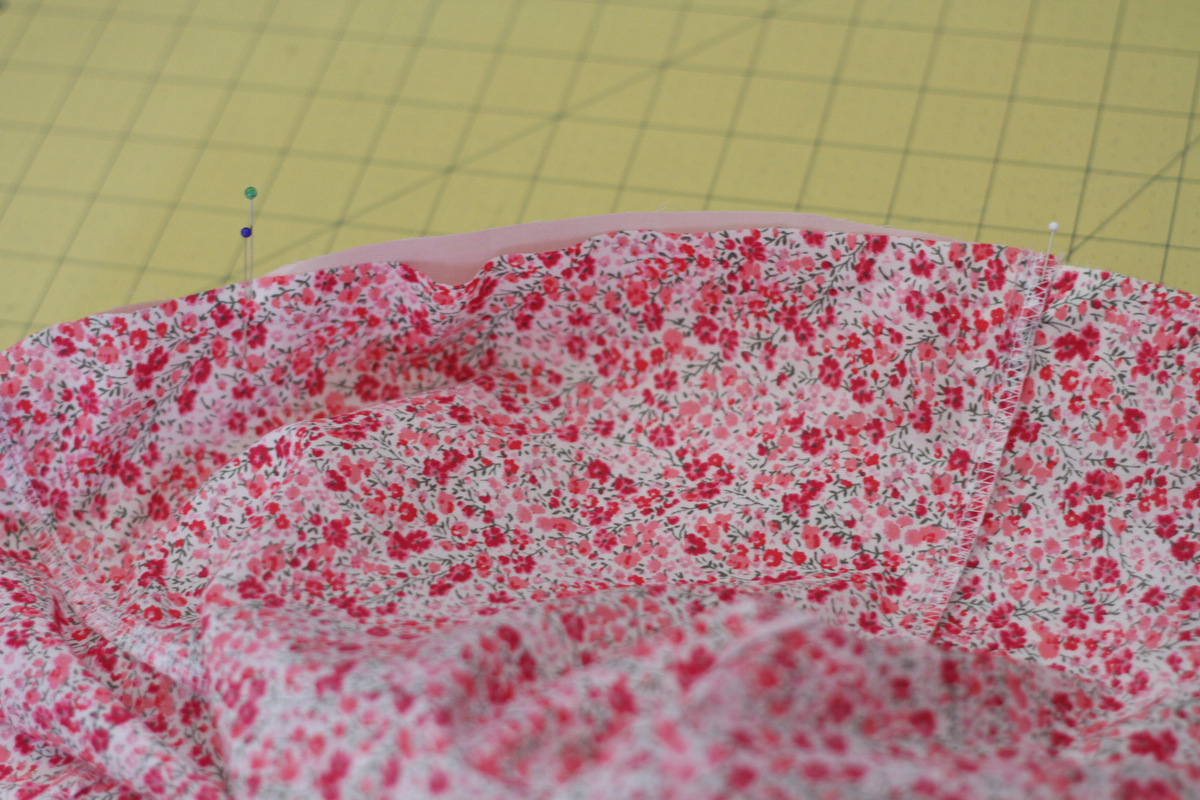
Next we’ll stitch around the hem, going slowly around the gentle curve of the hem and moving the fabric into place. When we’re done, we’ll turn the dress right side out through the opening. You can trim the seam allowance if you like, but don’t trim it at the unsewn part, to make it easier to fold under and press. I rolled the seam a little toward the inside of the dress to make sure the lining didn’t show when worn. Once it’s pressed, pin in place to hold it closed.

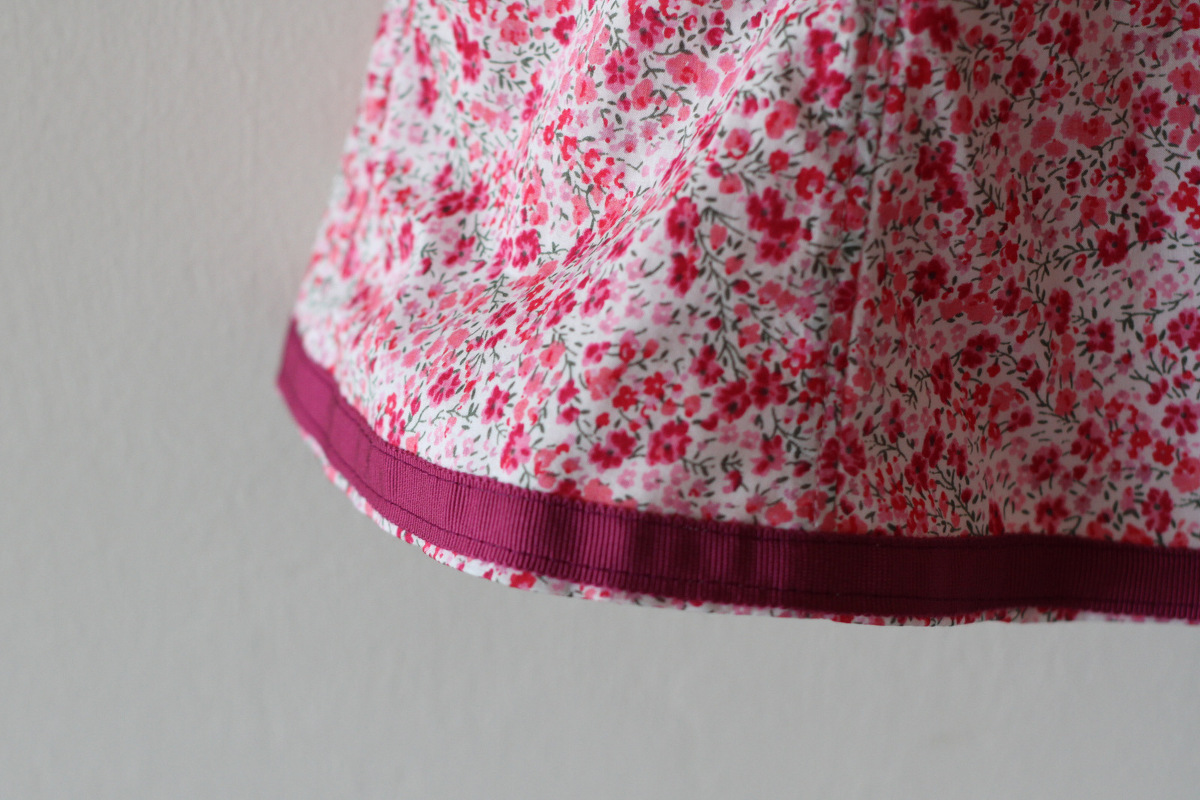
Again, you can hand stitch or topstitch it closed. I wanted to add one last level of pink to this dress, so I added a bit of silk grosgrain ribbon, topstitched on. This also closed the opening at the hem edge.
Add a few shell buttons and there you have it! One very pink dress, tidily finished inside…
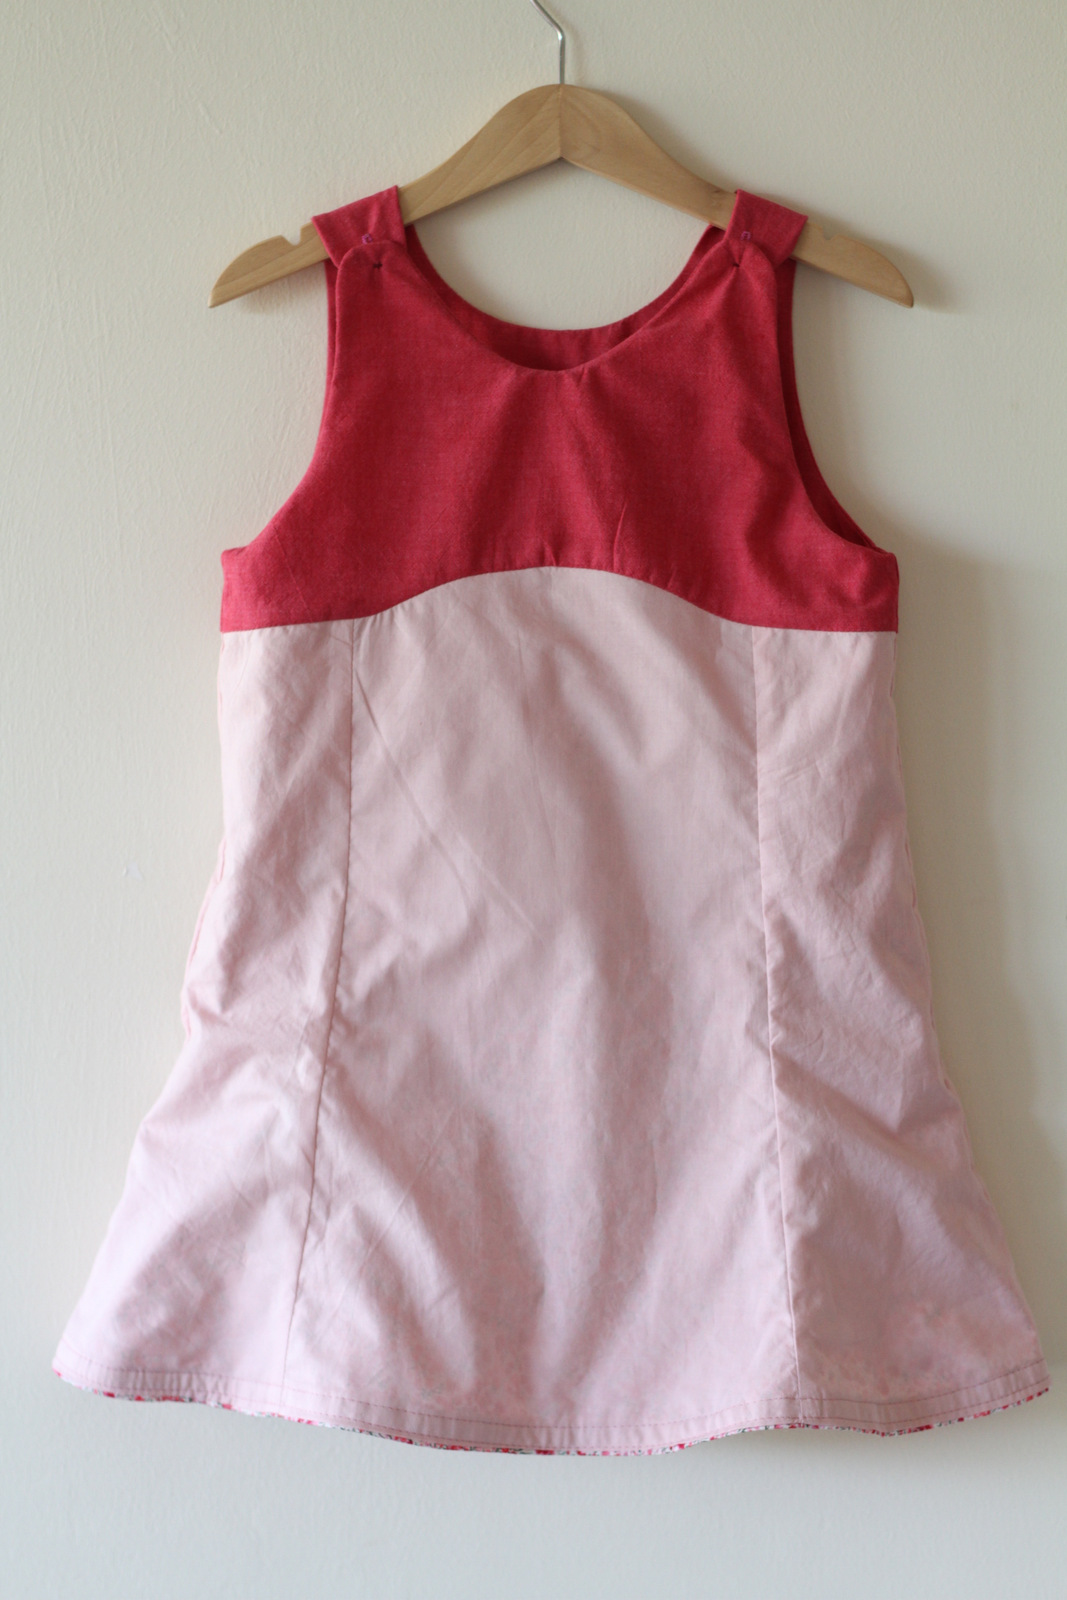
…and out!

We always love to see what you create. Please do add photos of your completed Tea Party dresses to the Oliver + S Flickr group.
What a helpful video! I find it fascinating watching others sew (does that make me wierd?) and J looks gorgeous in the dress. It is fun to see you go out of your normal color zone :).
Haha, Brittney, you know me very well 🙂 And no, it’s not weird at all, I find it strangely interesting too! It’s kind of soothing, in a way?