Are you ready to begin our B6169 sew-along? I’m really excited to sew this jacket with you! There are quite a few pattern pieces and steps for this jacket, but the finished jacket will impress you and everyone you know. It looks so professional that it will be worth the effort!

Before we start the sew-along, you’ll need to do the following:
- Pre-wash your fabric. I like to wash almost all fabrics before I begin, and that includes wool. In fact, I hand wash the wool in warm water, line dry it, and then I press the fabric with a lot of steam before I lay it out to cut it. The steam will shrink up the fabric a bit, which will help to stabilize and prevent shrinking of the finished jacket. I learned to do this when I majored in tailoring in school and learned the traditional tailoring methods like pad stitching, etc. Tailors have a giant steaming machine that forces steam through the fabric to help preshrink it. It’s a fantastic tool, but most of us will just need to use a regular iron and ironing board. Which works fine; it just takes a while longer.
- If you’re not sure of your size, I always recommend that you make a muslin to check it. This jacket is loose-fitting enough that it will accommodate a wide range of bust sizes, so if you’re larger than a B cup you may find that you don’t need to do a full bust adjustment for this style. If you do need a little extra room, however, the princess seams can really help with that; you can simply take a smaller seam allowance in the bust area or even add a little extra seam allowance at the bust area before you cut the pieces. Then you can pin the seam line to fit, so no fancy full bust adjustment techniques will be strictly necessary. We’ll call this the cheater full bust adjustment method, OK?
- Once you’ve got your fabric washed, dried, and pressed. You’ll be ready to lay out your fabric and cut it. Then you’ll need to transfer the markings from the pattern pieces to the wrong side of the fabric.
- It’s always a good idea to read through the instructions before you get started.
Also, please note: In this sew-along, I’m going to use a different technique to attach the lining and finish the jacket than the method used in the instructions. The method I’ll use is often called “bagging out” the lining, and it’s used in the industry to streamline the construction process and eliminate a lot of hand sewing. (We’ll still be doing a little bit of hand sewing, but not as much as called for in the instructions.) I’ll also be using a couple of other techniques and some materials that you may not have on hand. Feel free to skip these steps; I included them because I use them when I sew jackets for myself and thought you might enjoy learning them as well.
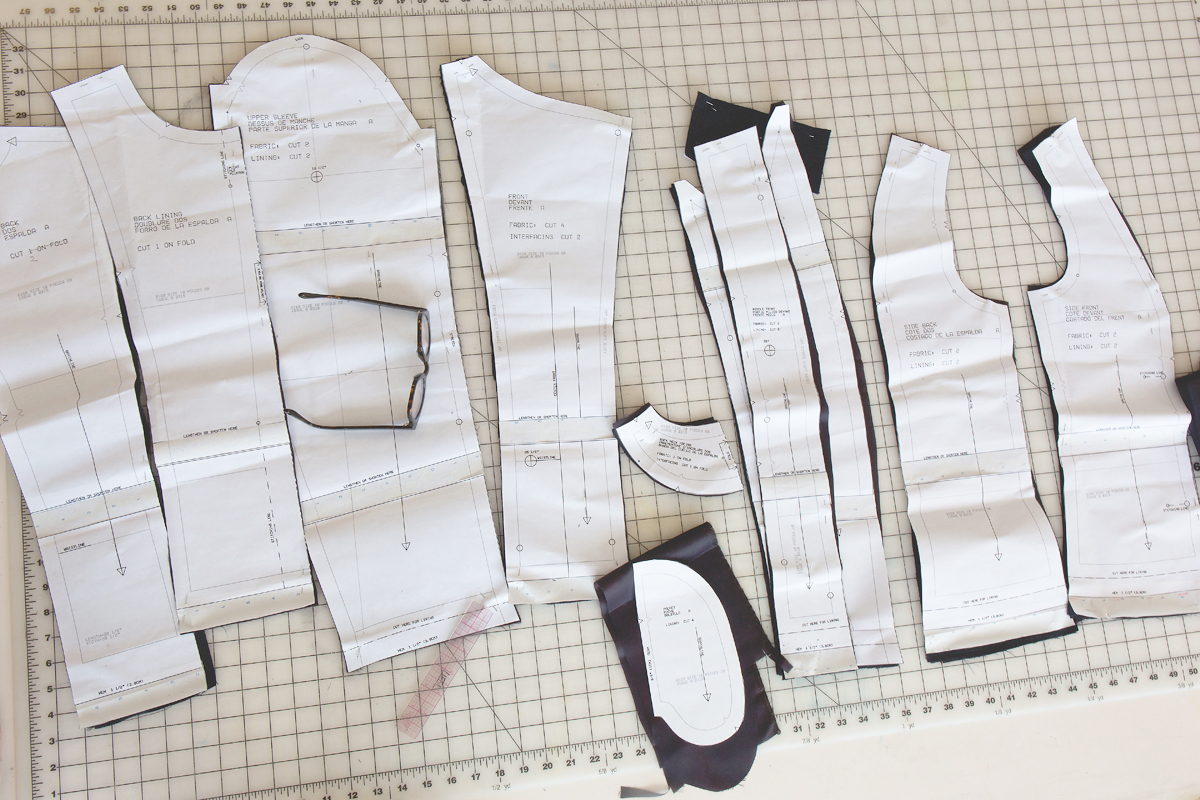
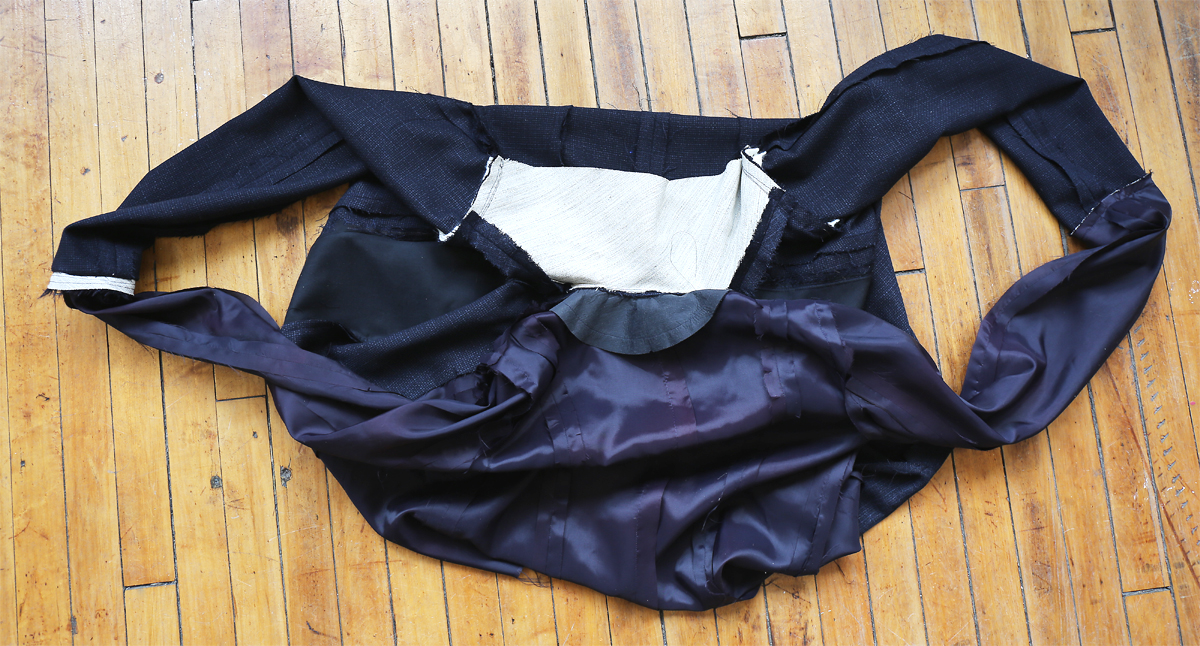
OK? Here are all my pattern pieces, cut out and with the markings transferred, waiting on the cutting table at the studio.
Here’s how I thought we’d structure the sew-along, if you want to plan ahead:
Day 1: Sew the zipper and assemble the center-front panels.
Day 2: Finish assembling the jacket front and jacket back.
Day 3: Assemble and attach the sleeves and add finishing details on the outer jacket. This is where I’ll show you a few special tricks I use which you might find useful.
Day 4: Assemble the lining.
Day 5: Bag out the jacket and finish the jacket. This is where I’ll be diverging from the instructions and will show you another technique with less hand sewing, but feel free to follow the written instructions if you prefer.
Also, a note on the numbered instructions: For most of the numbered steps, I’m following the instructions for the pattern exactly as they’re written. I’ll add my own hints and comments in parenthesis or in a separate paragraph as we go, OK?
Day 1
Interfacing
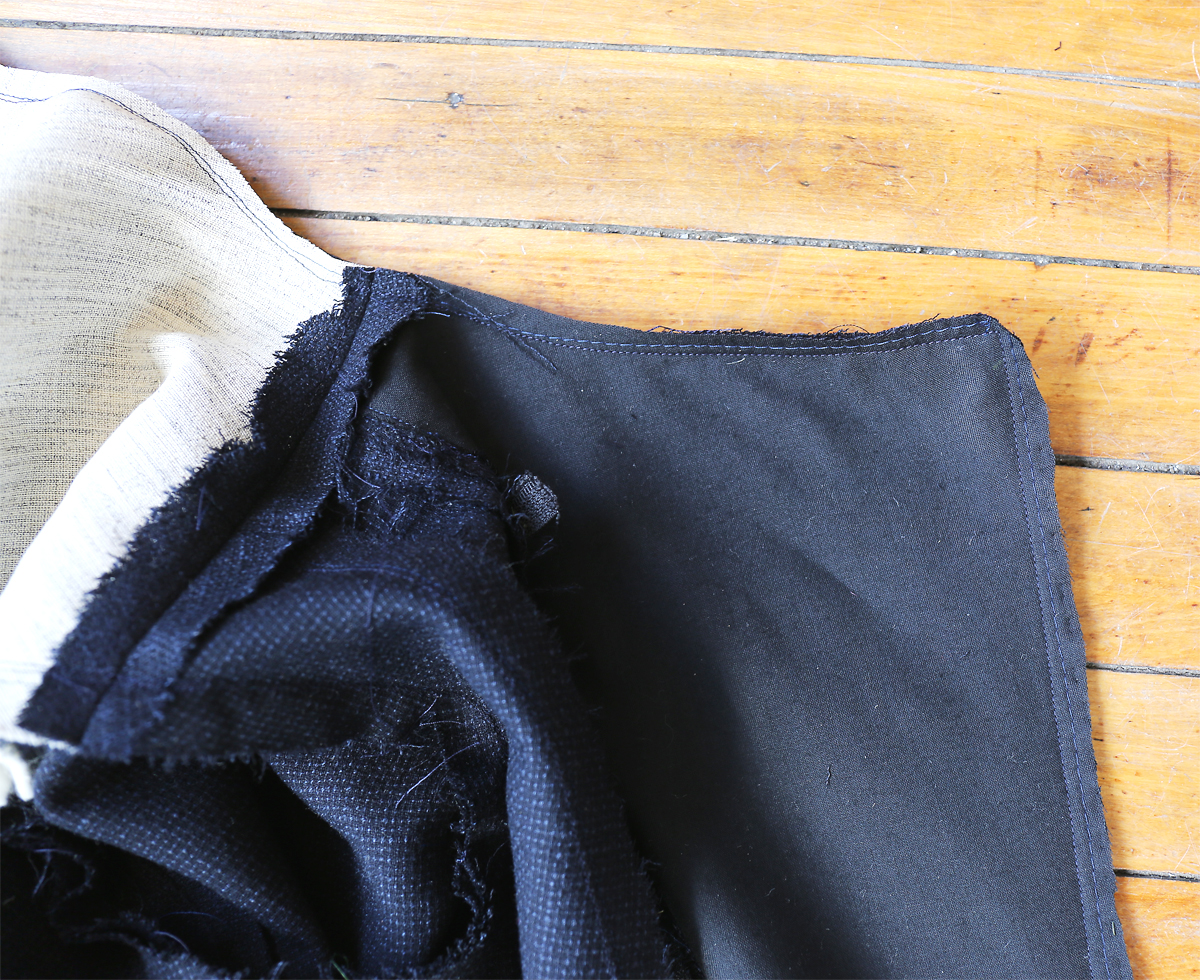
For some fabrics, I prefer sew-in interfacing. For the fabric I’m using, which has a slightly open weave, I purchased black featherweight fusible interfacing, but when it arrived it was just too stiff to be used with my fabric. White interfacing would have shown through the weave of the fabric, so I bought very lightweight black woven sew-in interfacing and used that instead. Do whatever feels right to you. If you use sew-in interfacing, instead of fusing in the first step, you’ll baste it to the fabric in the seam allowances to hold it in place.
1. Trim corners of INTERFACING, as shown. Fuse interfacing to wrong side of each matching FABRIC section, following manufacturer’s instructions. (For sew-in interfacing, I usually trim a bit of the interfacing from the seam allowances instead of just trimming the corners.)

Front
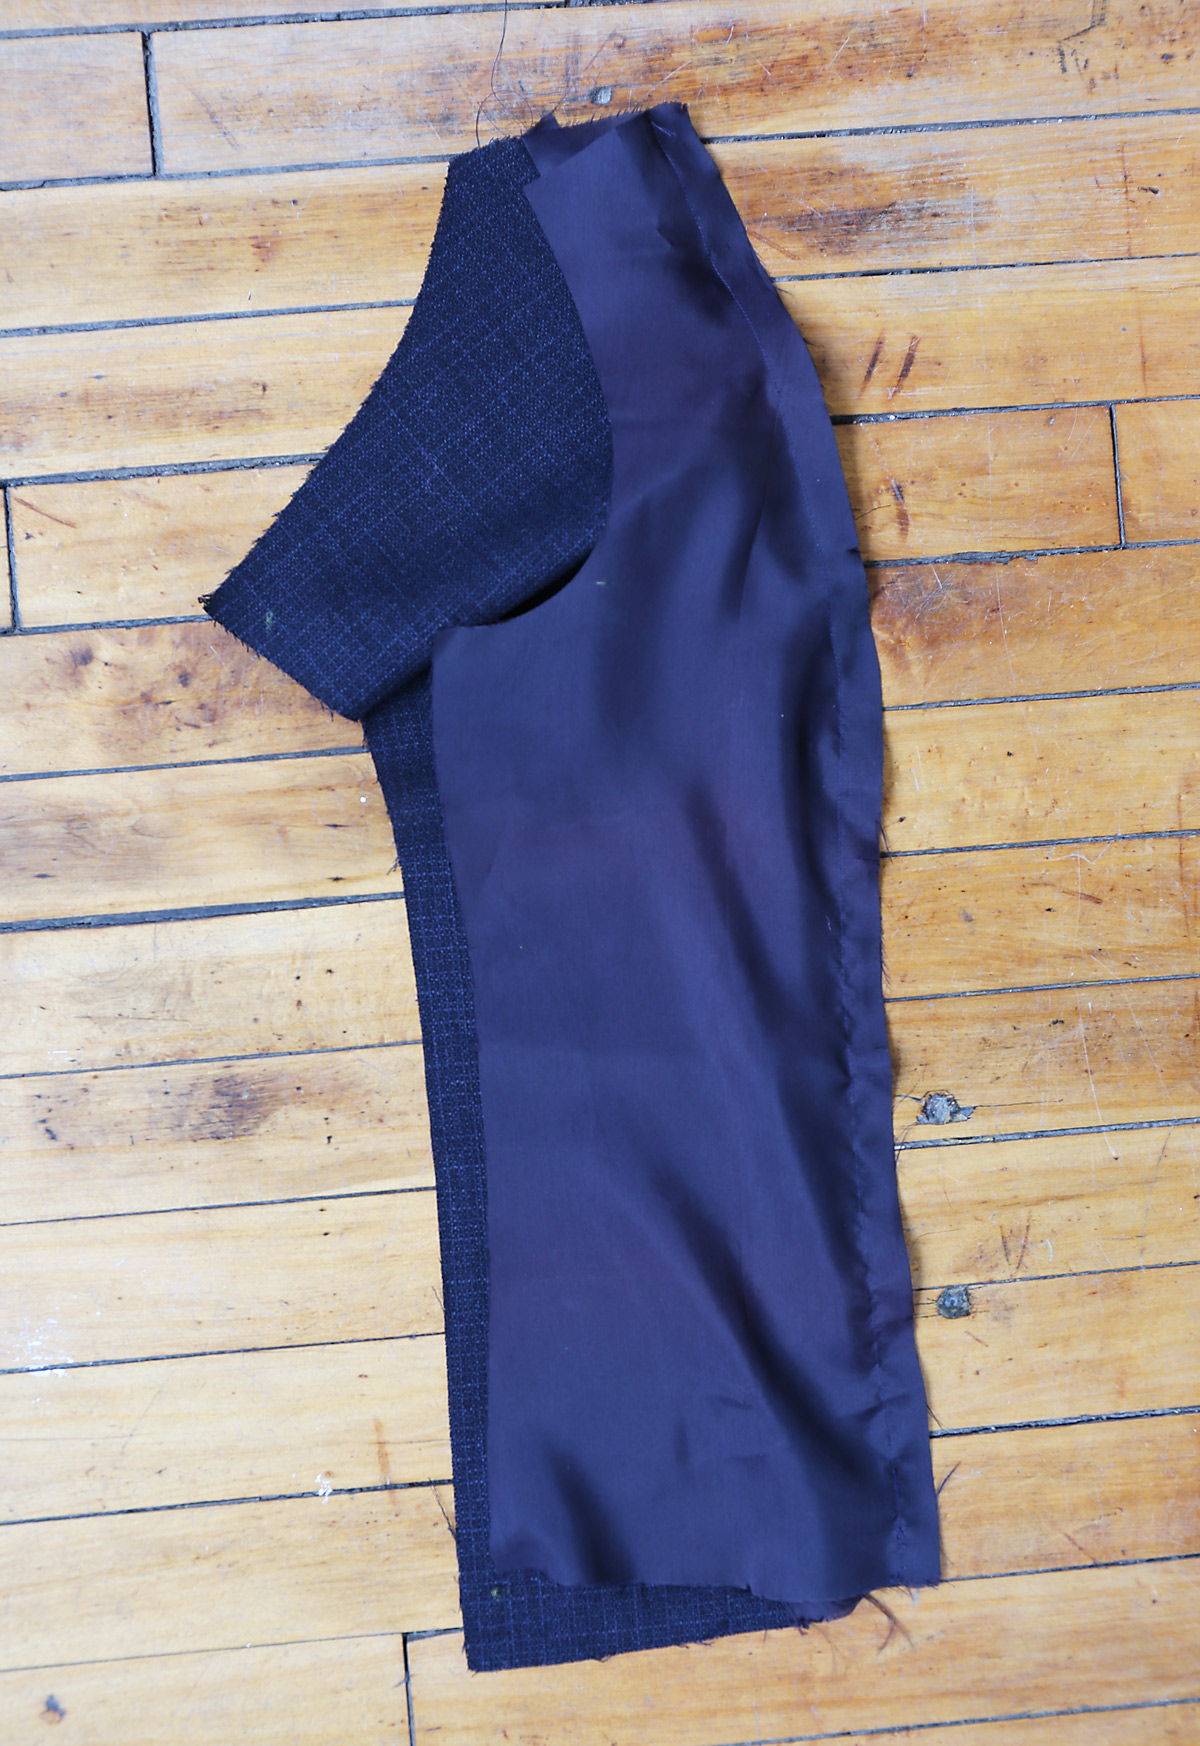
2. STAYSTITCH side edge of uninterfaced FRONT (1) sections above waist. (Interfaced front sections will be used as facing. Please note that I used the interfaced pieces as my jacket front and the non-interfaced pieces as my facing because I wanted to baste the zippers to a more stable fabric. Either way is ok, but I should point out that I reversed the pieces so you don’t get confused!)
(The staystitching will allow you to safely clip into the seam allowances later.)
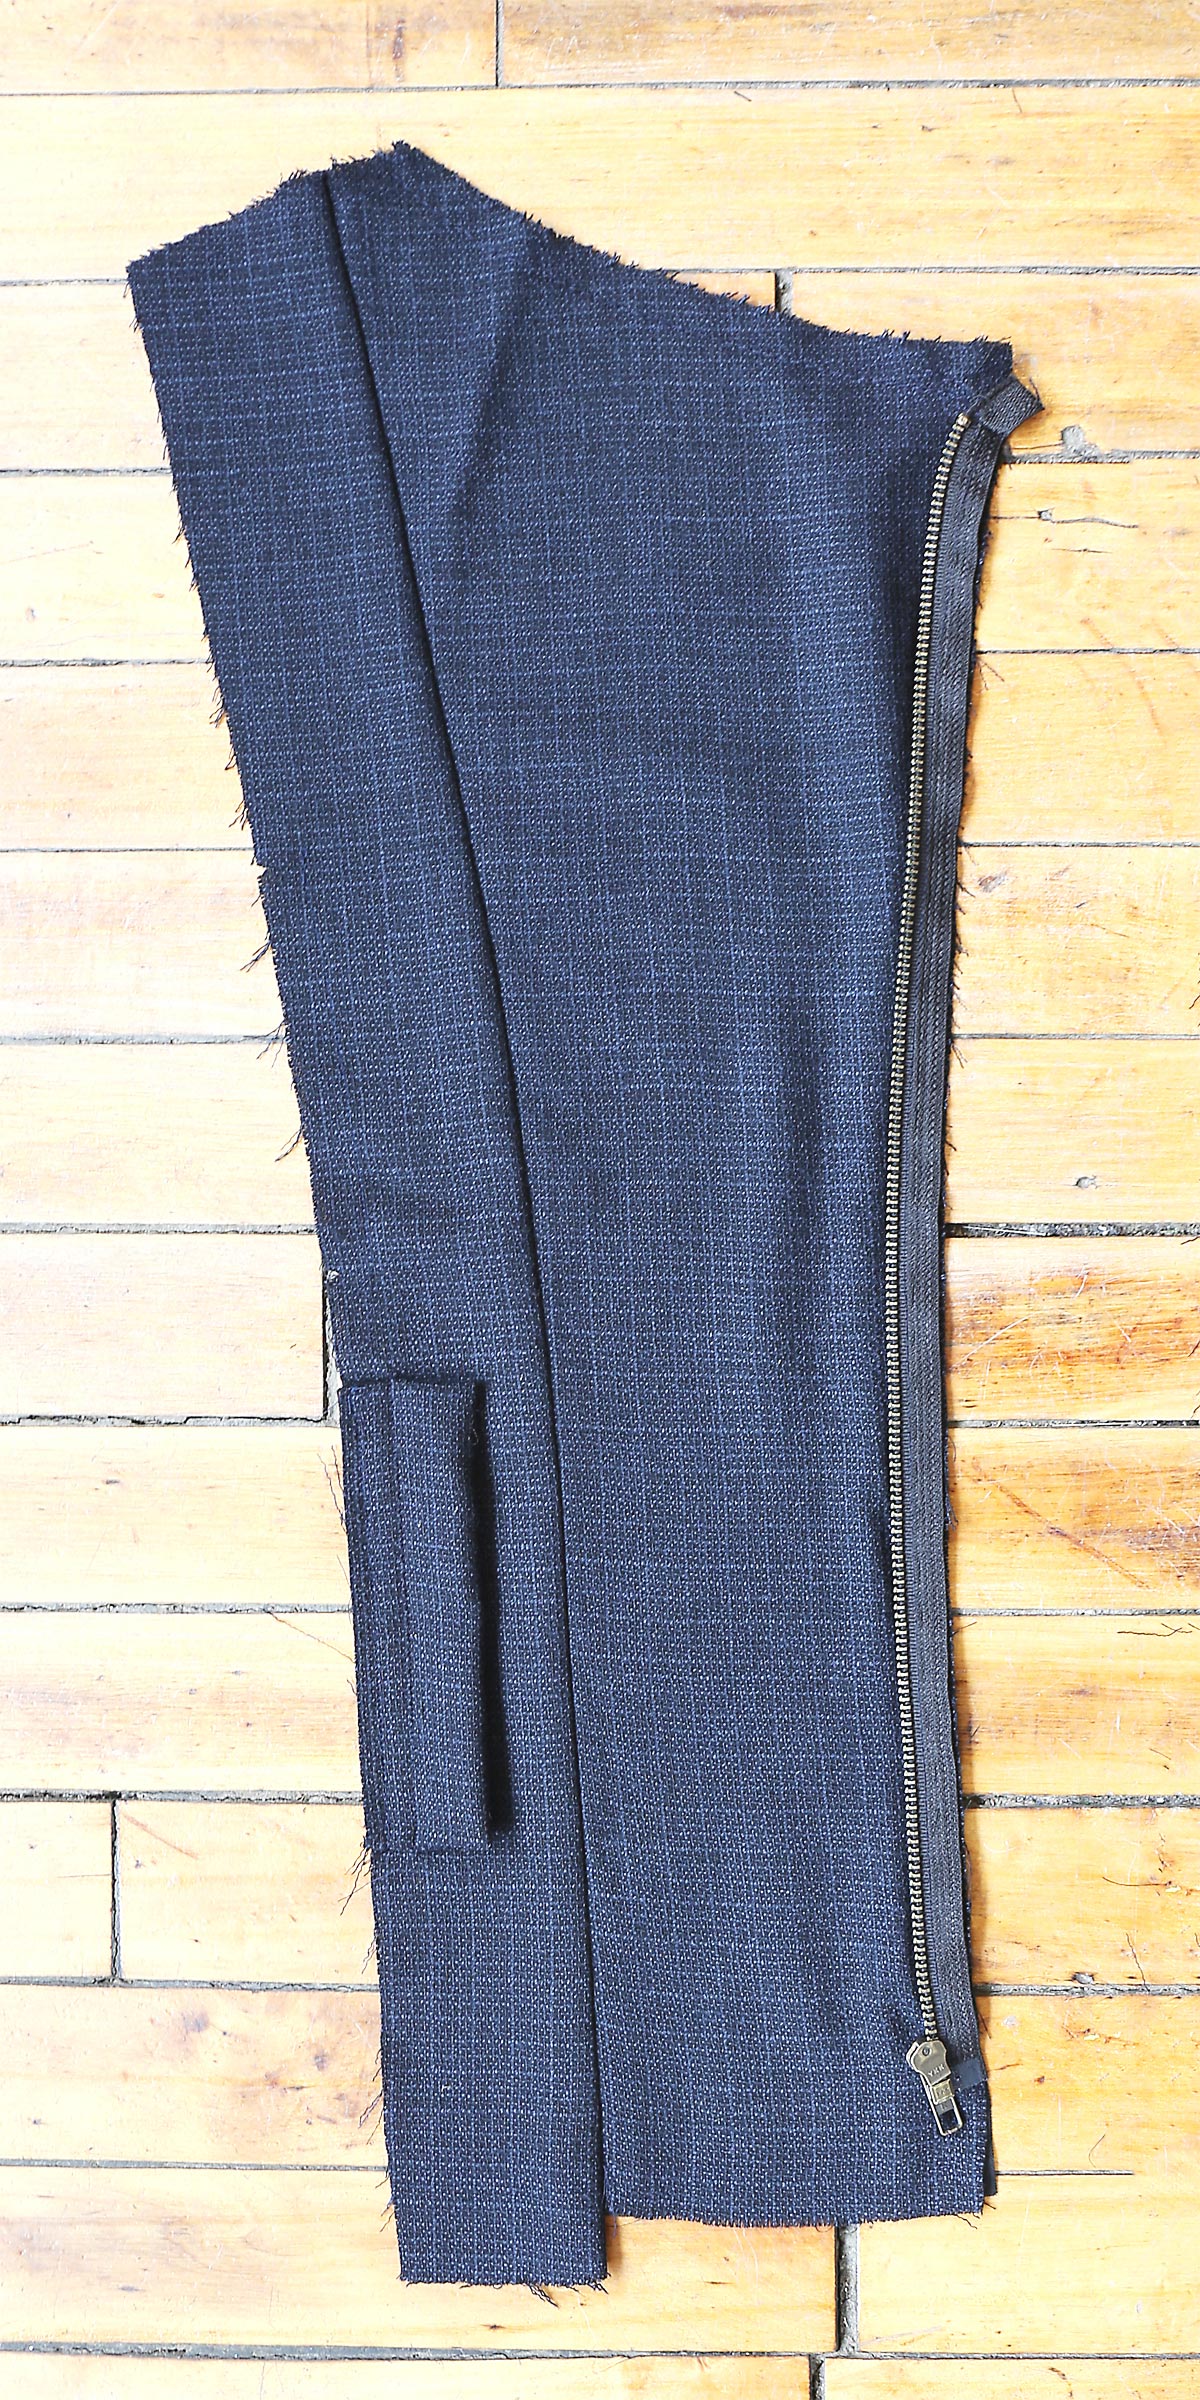
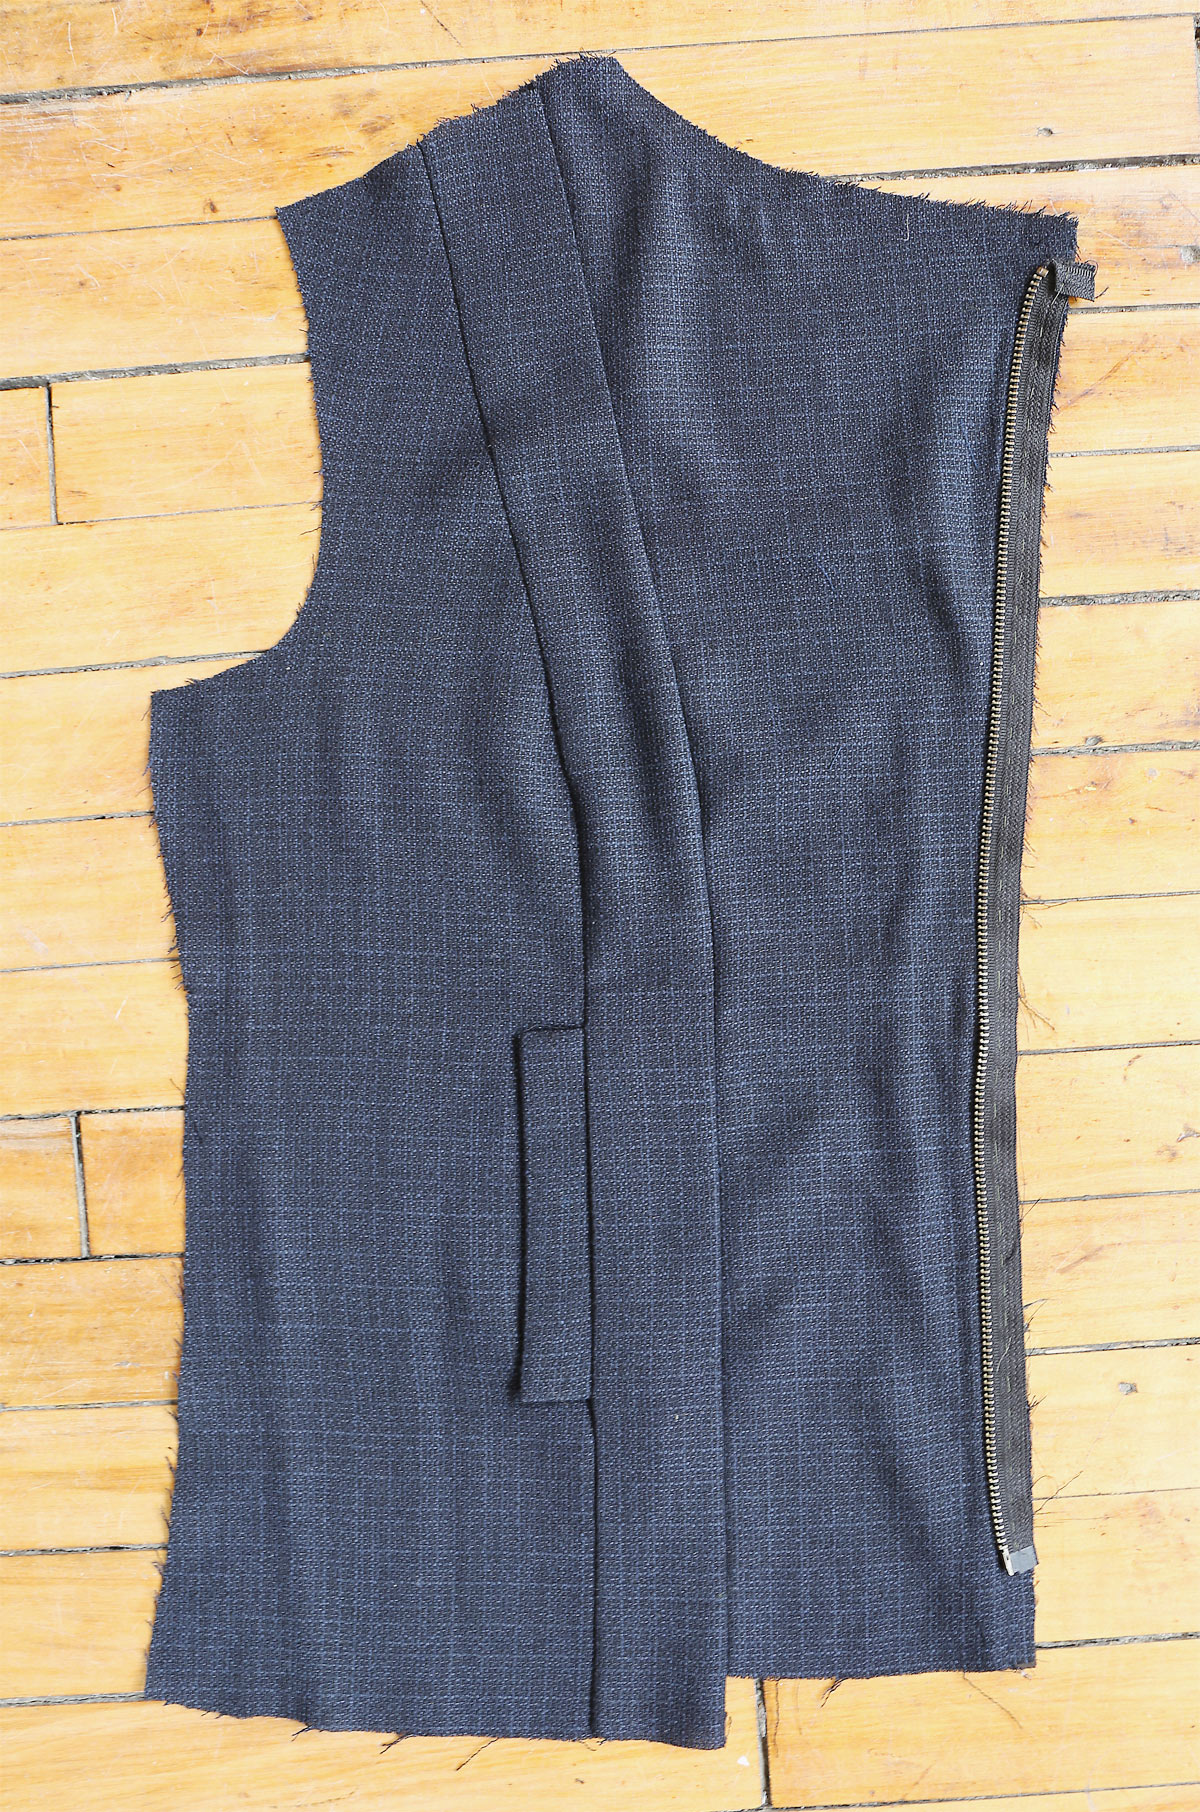
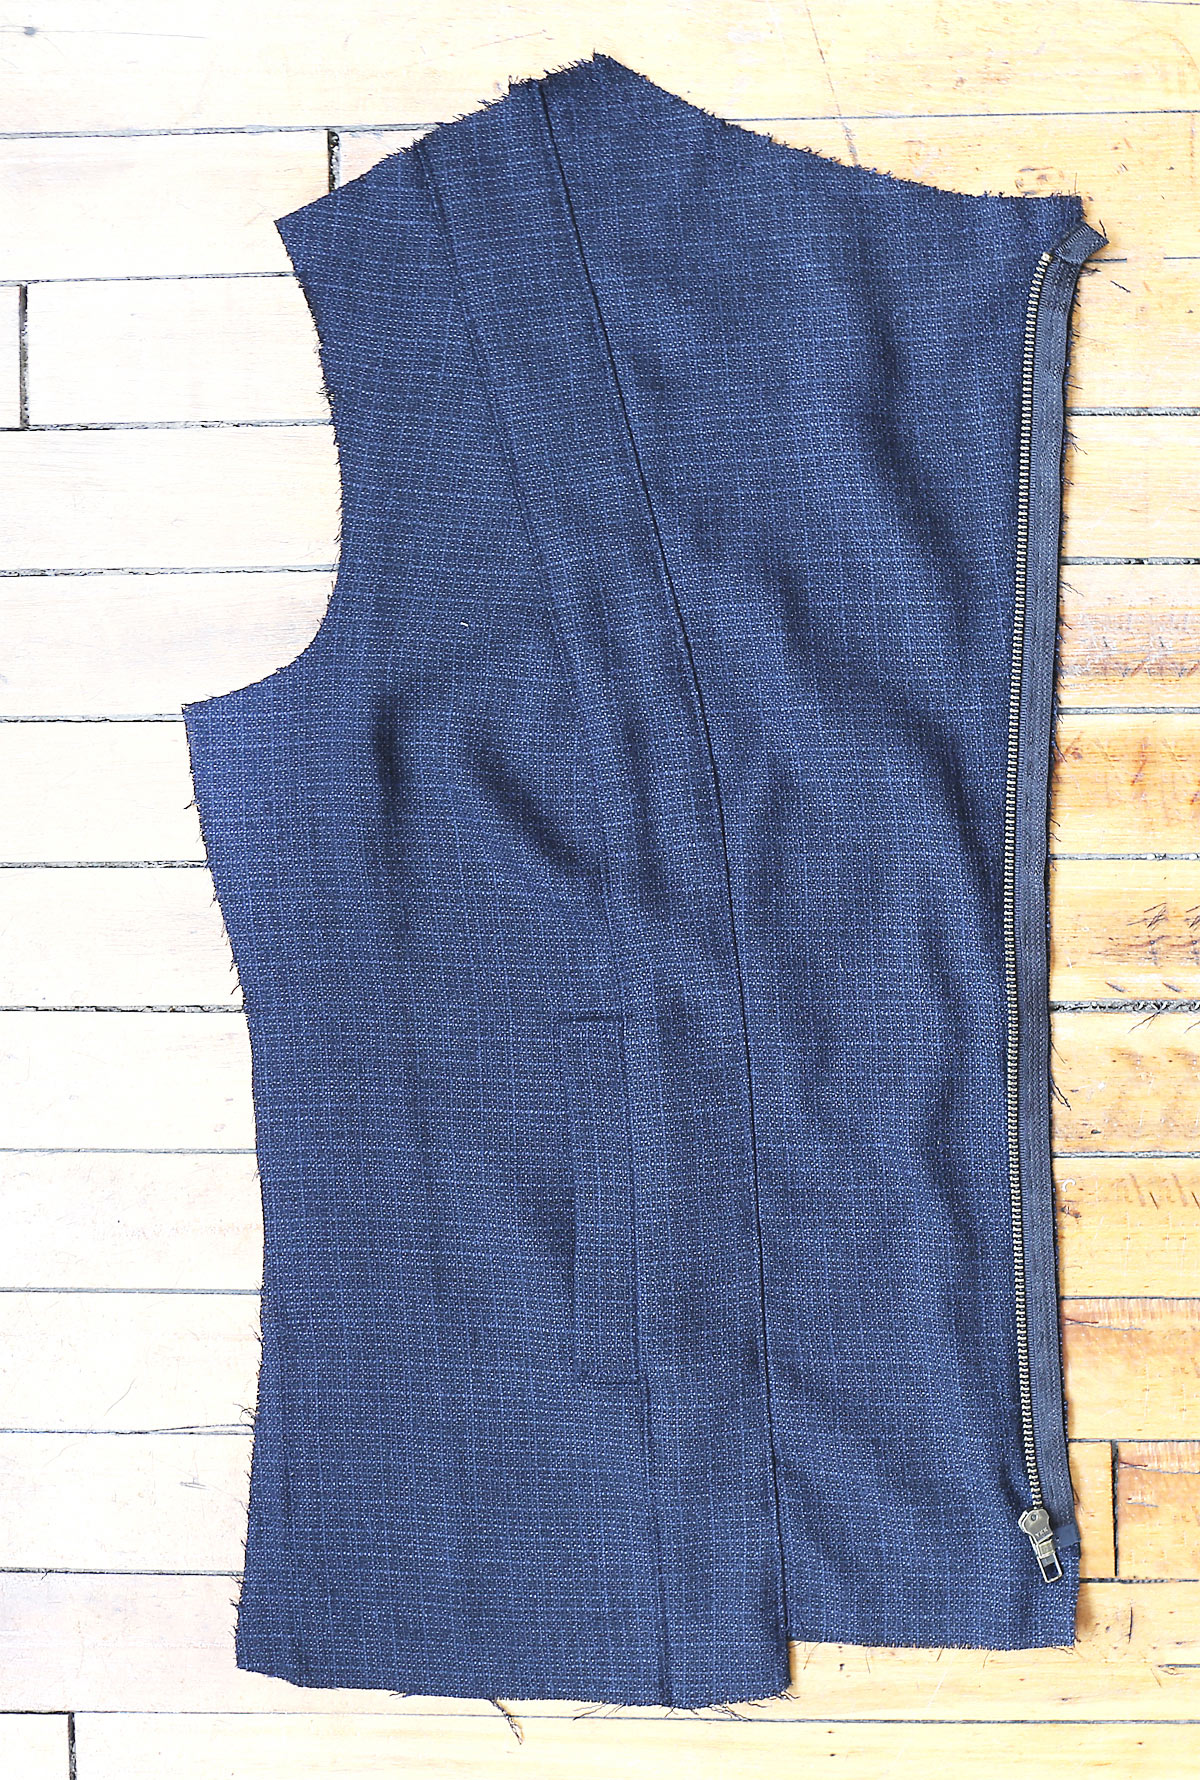
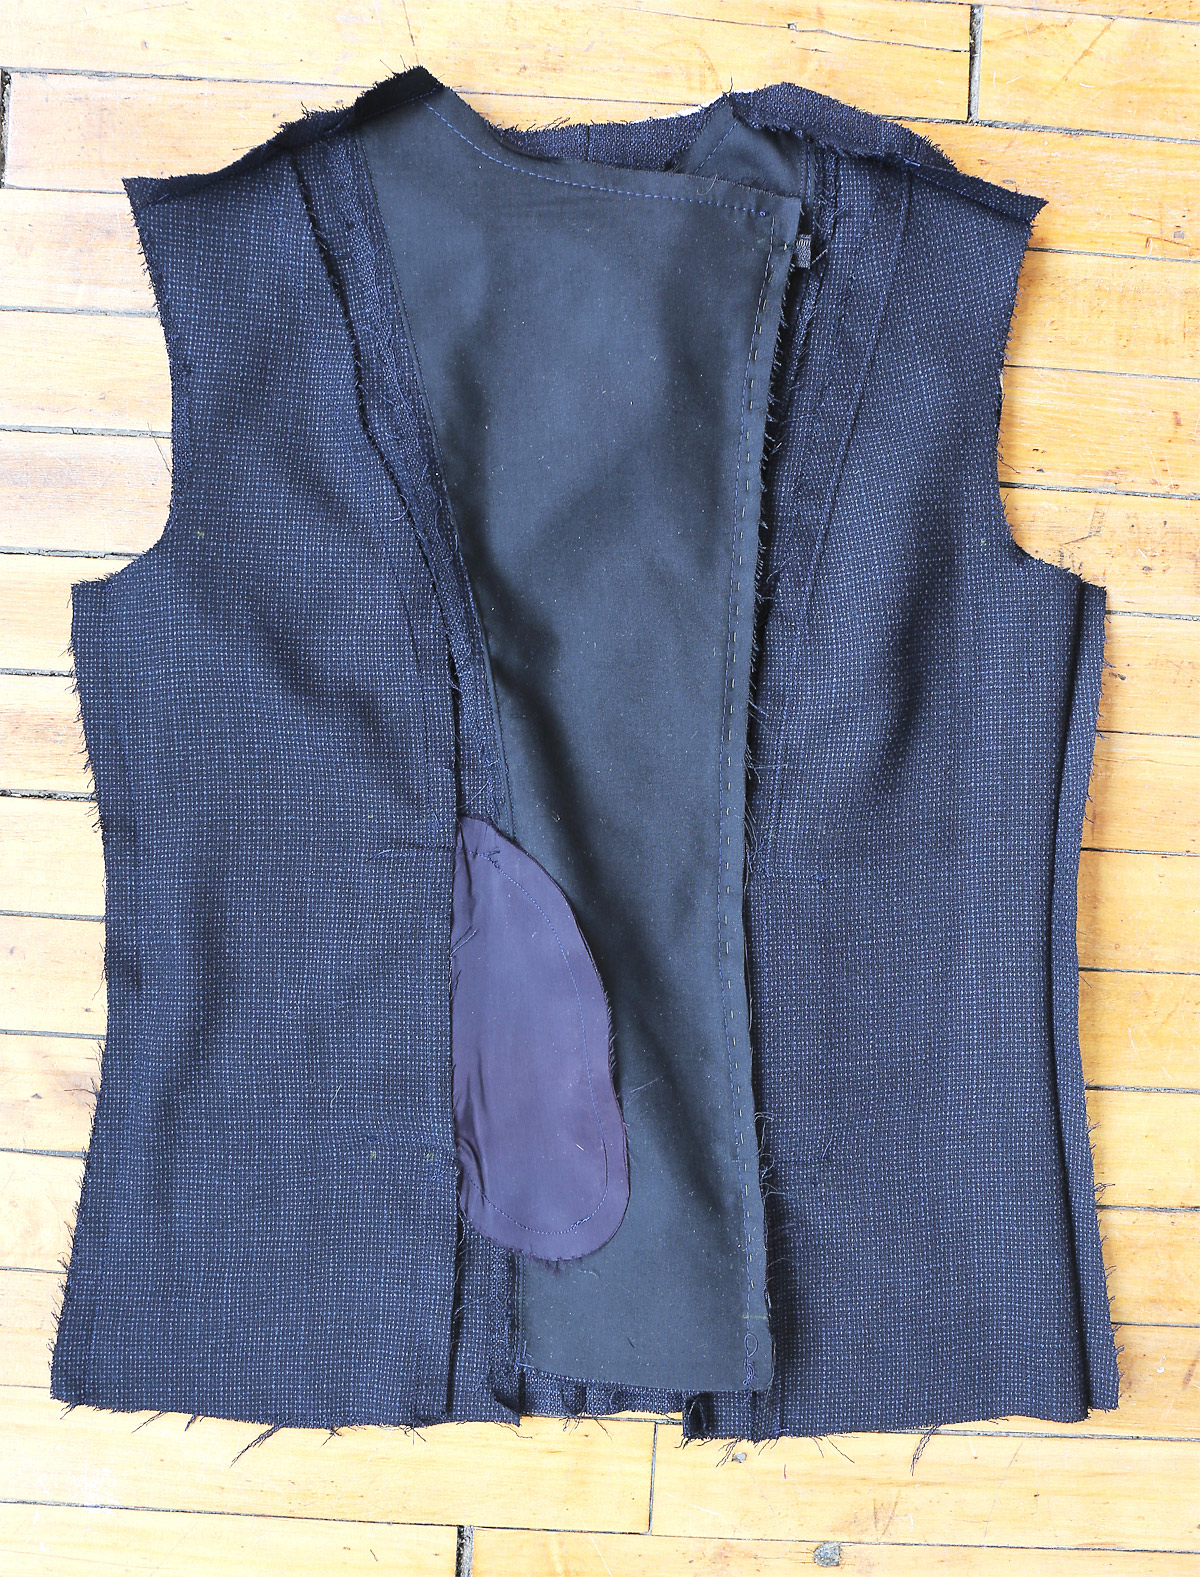
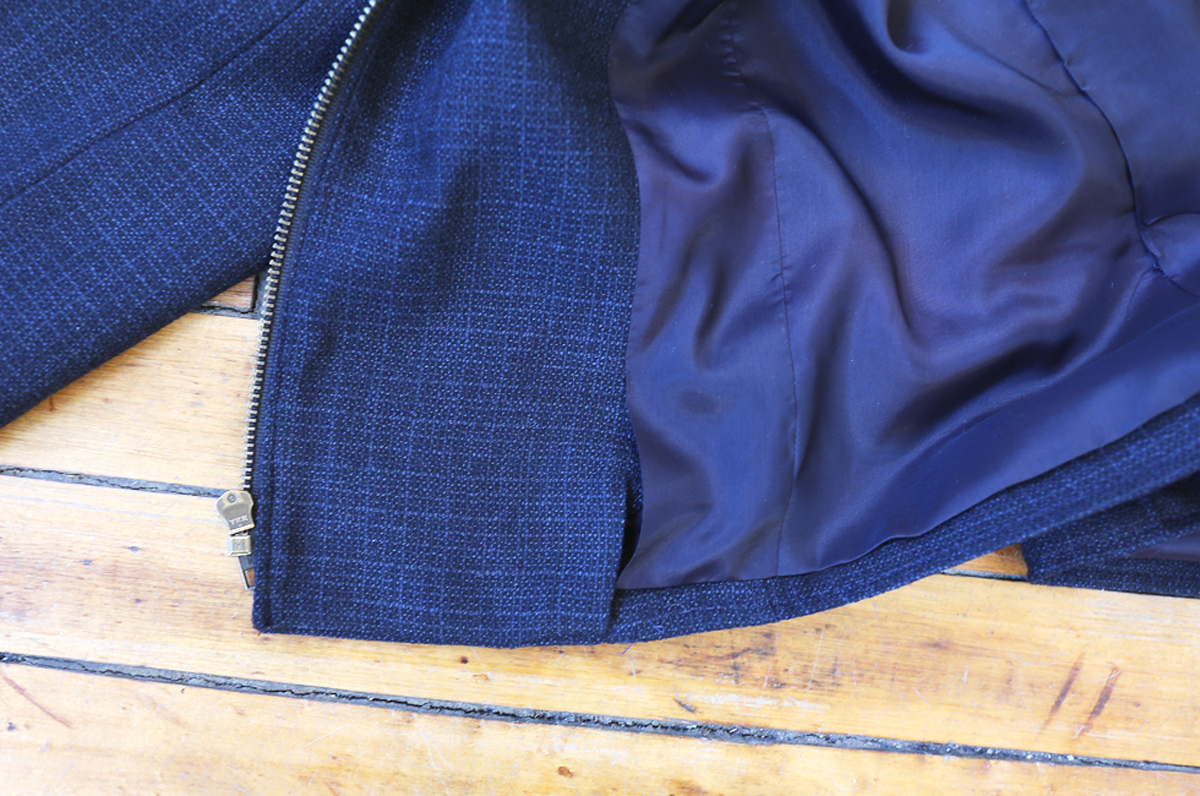
3. On outside, pin closed zipper (face down) to front edge of right front between large circles, placing zipper stop at lower large circle and zipper teeth just over the 5/8” (1.5cm) seam allowance, tapering upper end of zipper tape to nothing at upper large circle. Baste. (You can use a basting stitch or a chalk line to help line up the edge of your zipper with the seam line. I always hand baste the zipper before machine basting or stitching. This helps to prevent stretching the tape and puckering the fabric. It works every time and is worth the extra effort. Then you can just stitch along the side of the zipper with your zipper foot and it’s easy-peasy to sew with no worries. Also, note in the photo below how my zipper tape is angled into the seam allowances at the top of the zipper. This will prevent the zipper upper zipper tape from showing and/or getting in the way later.)
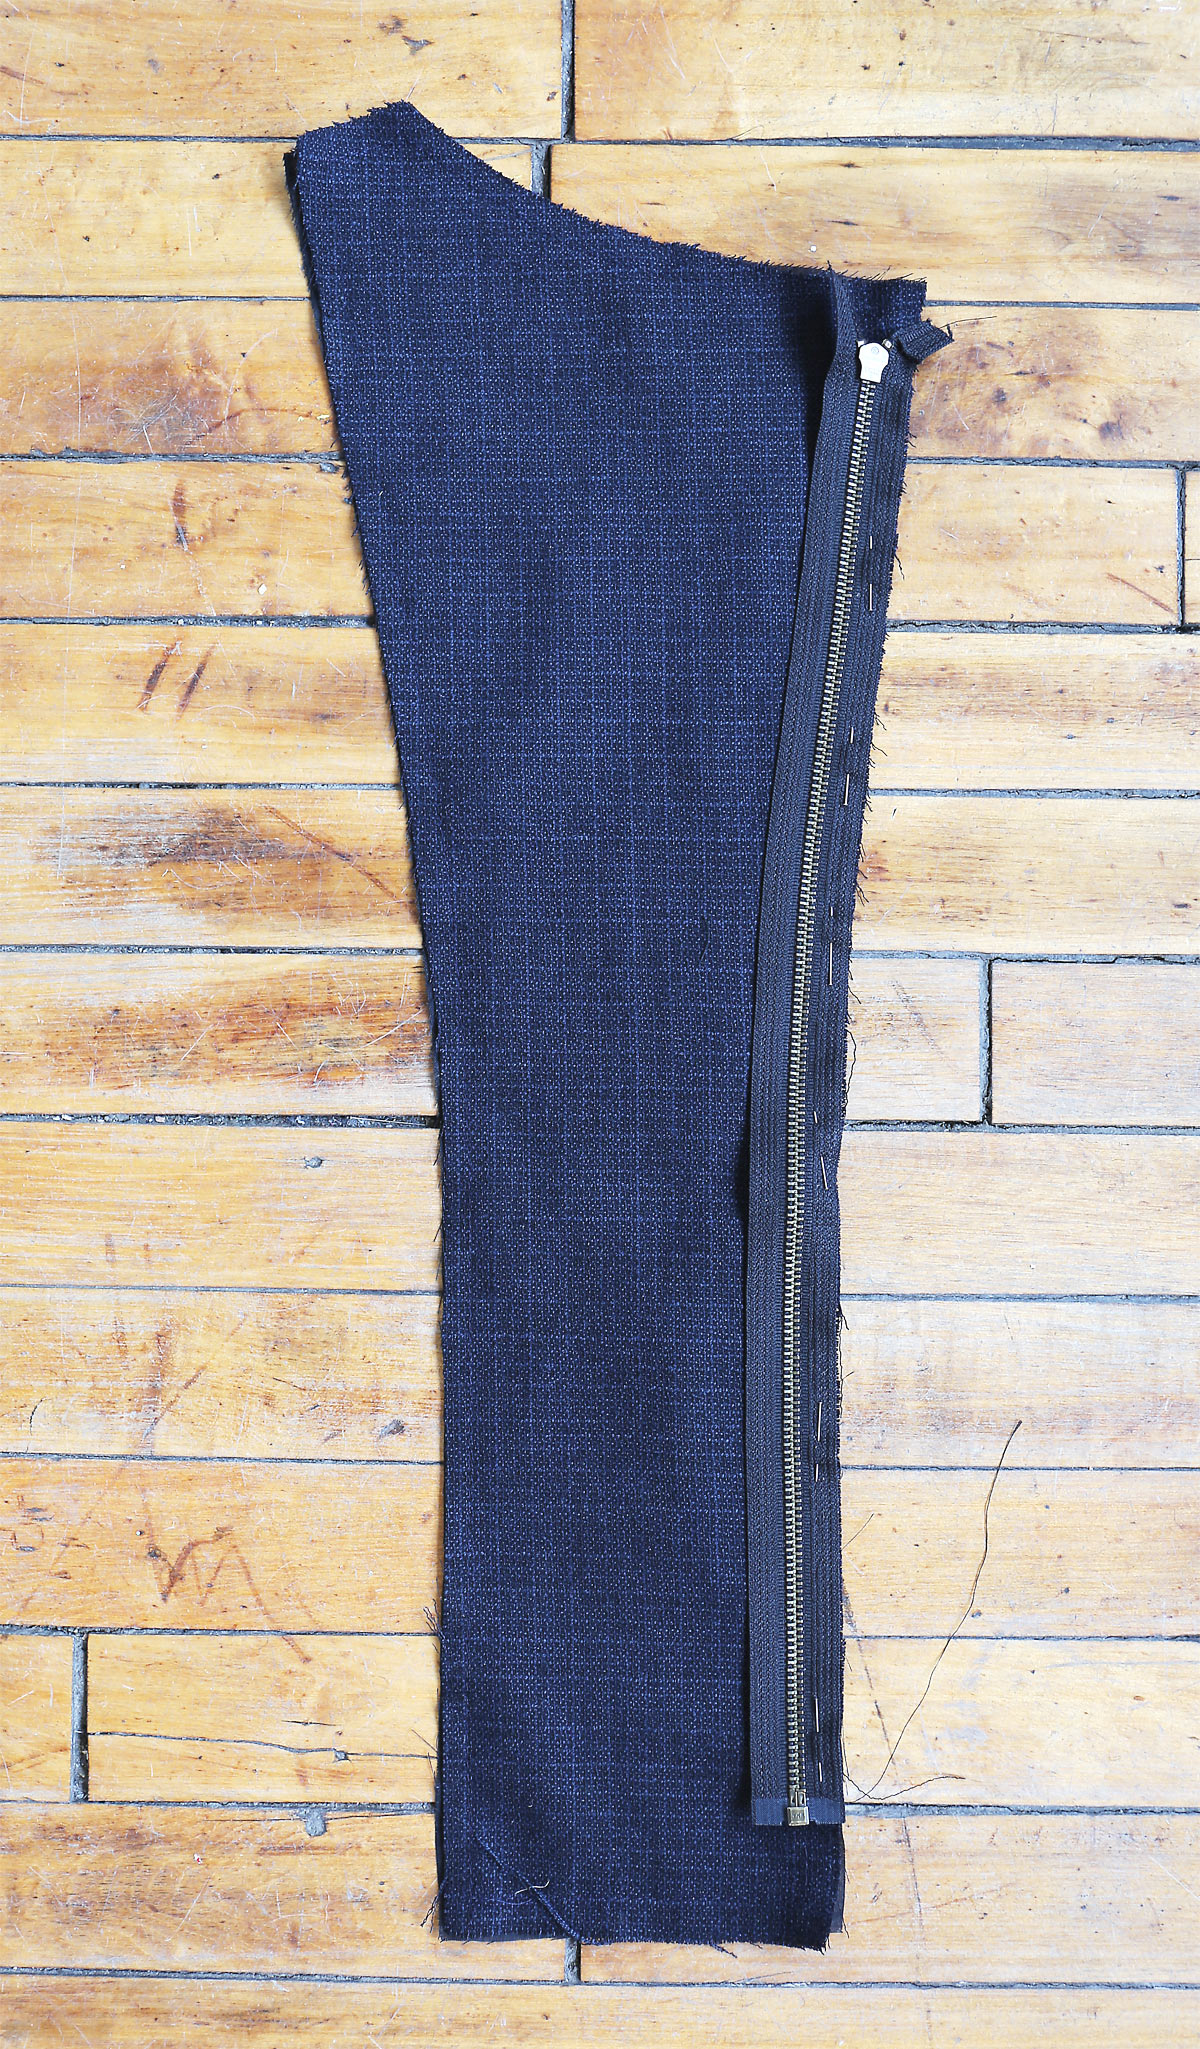
4. Pin right MIDDLE FRONT (2) section to right front, clipping front where necessary. Stitch. Press seam allowances toward middle front. (This pattern includes a lot of opposing curves. If you clip into the seam allowances of the shorter curve, the two pieces will fit together very nicely. This is why you staystitched the fabric in step 2. Now you can clip the seam allowances up to the staystitching safely without worrying about clipping into the jacket fabric.)
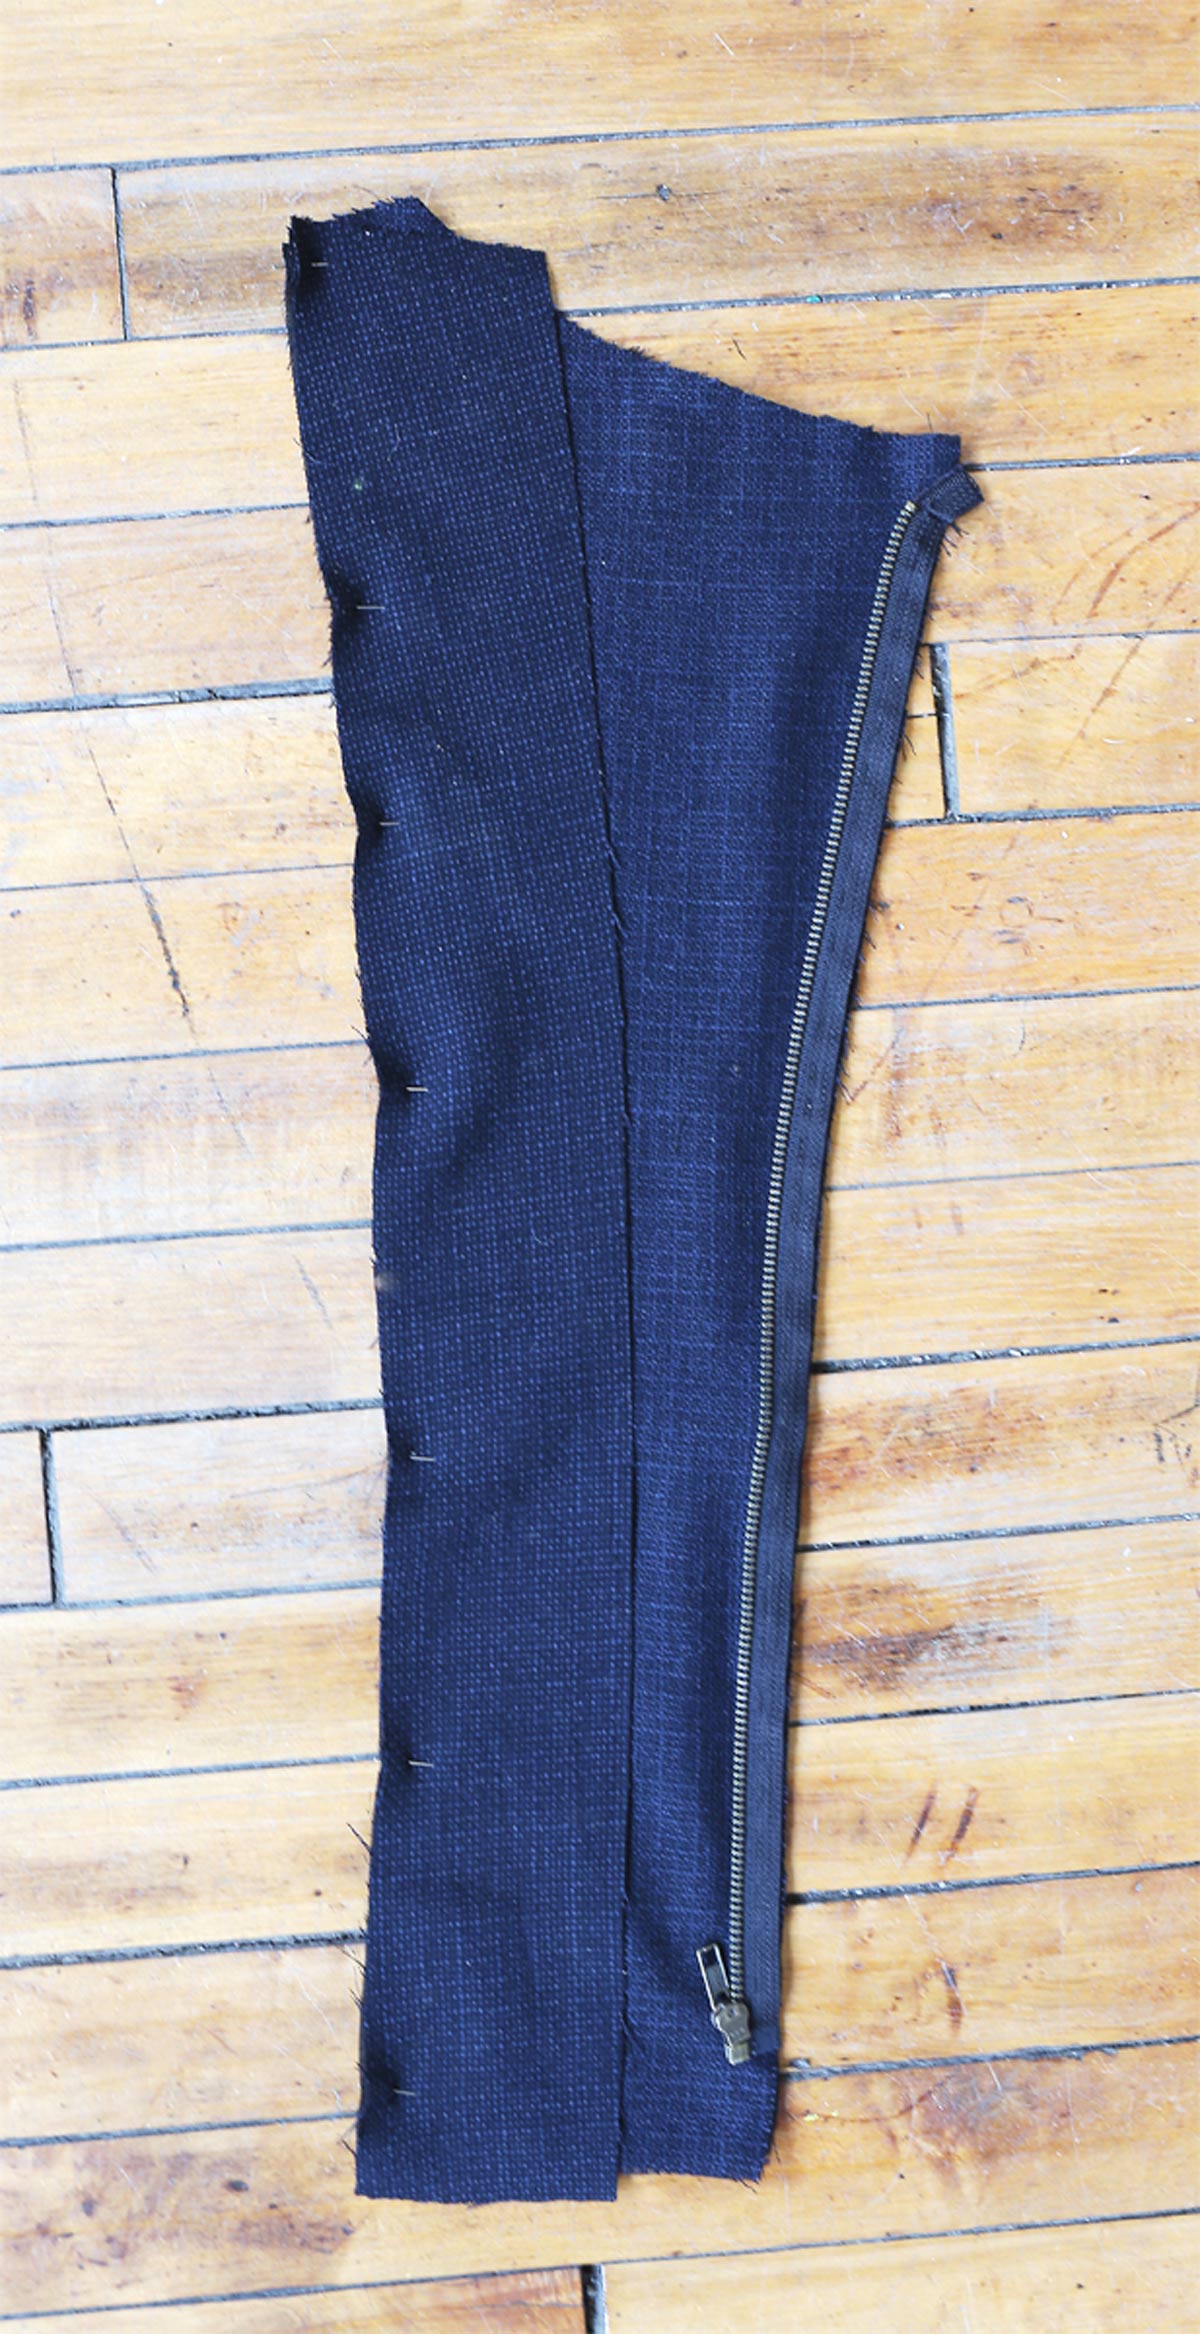

5. Separate zipper. On outside, pin remaining zipper tape (face up–not face down as stated in the instructions) to side edge of left front between large circles, placing zipper stop at lower large circle and zipper teeth just over the 5/8” (1.5cm) seam allowance, tapering upper end of zipper tape to nothing at upper large circle. Baste. (This is just like the first side of the zipper, but be sure you’re attaching the zipper to the correct side of the pattern piece here. It’s not getting basted to the center front edge, but to the inside edges. It will get sandwiched into the seam in the next step.)

6. Pin left middle front section to left front (over zipper), clipping front where necessary. Stitch, using a zipper foot when stitching. Press seam allowances toward middle front.
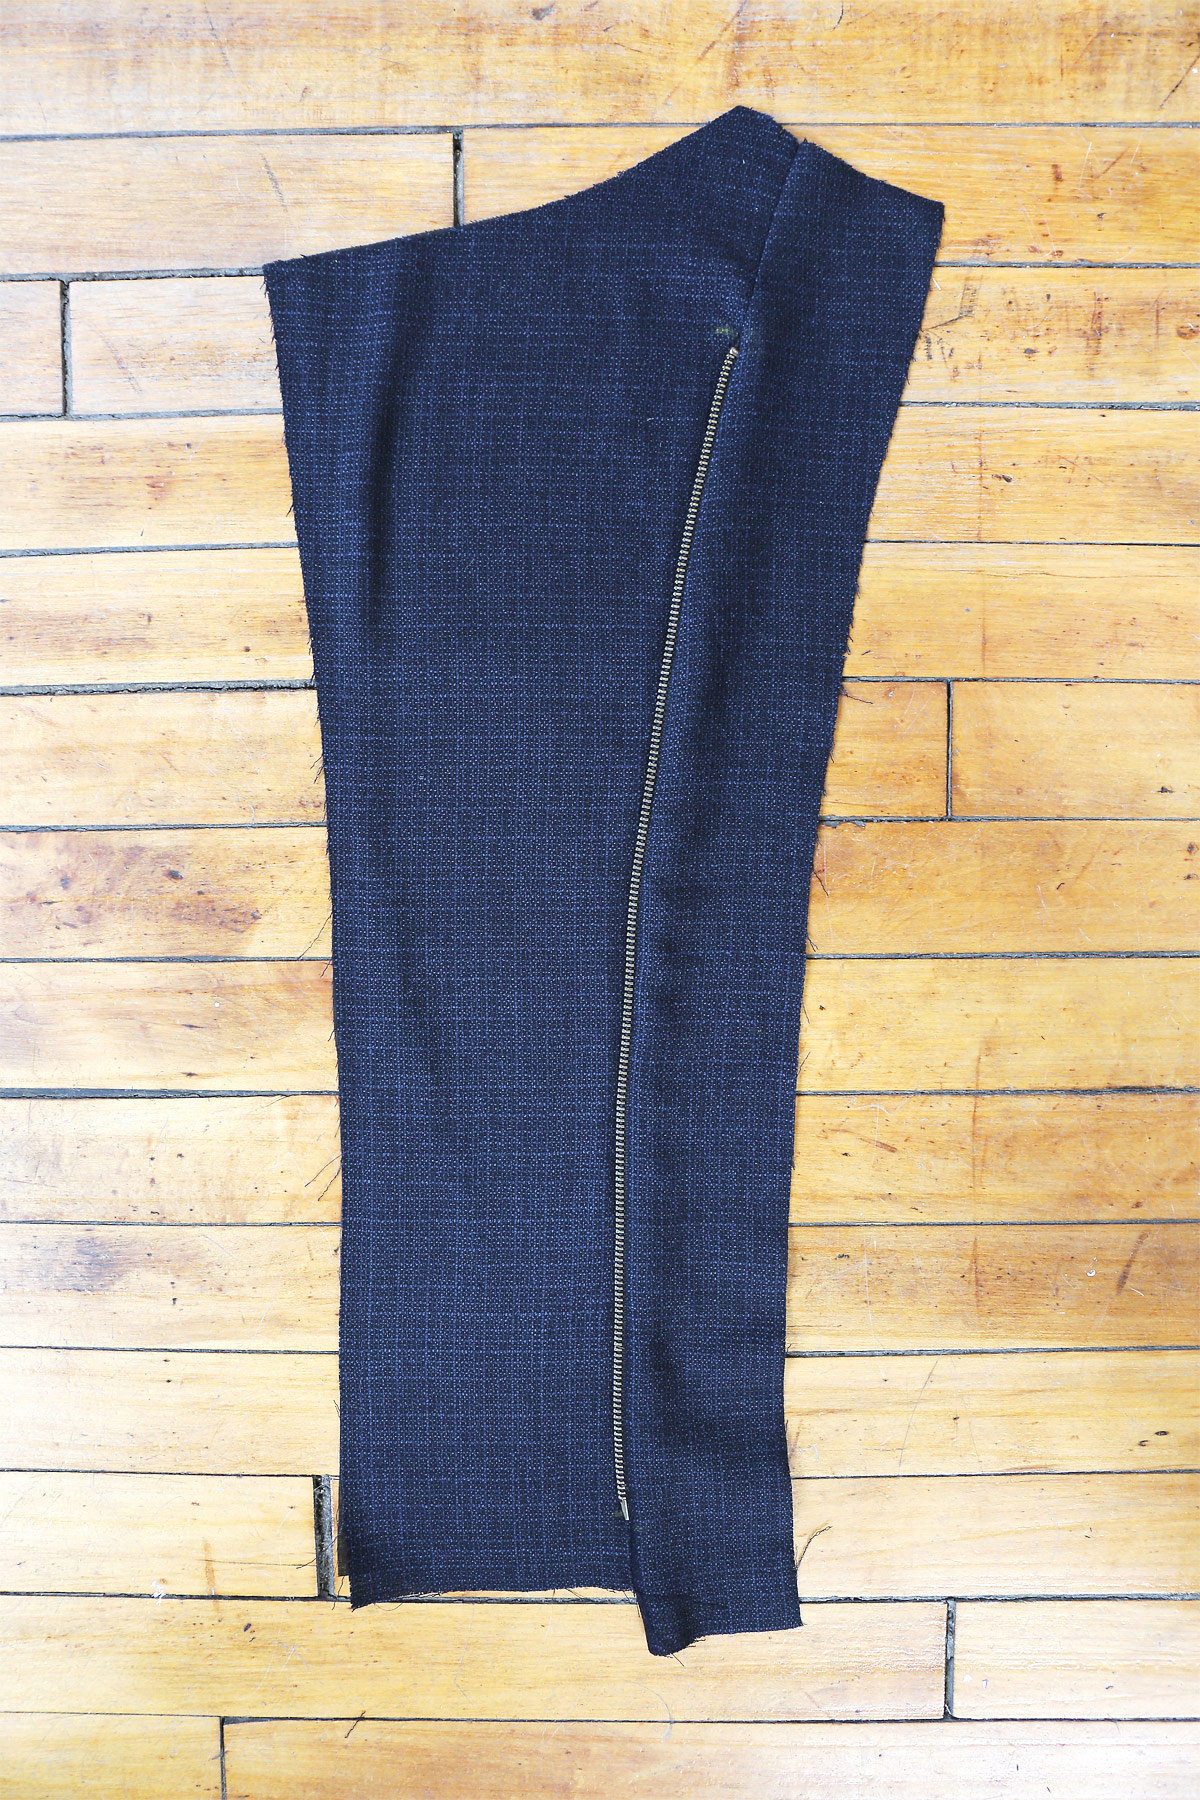
7. STAYSTITCH side edge of each middle front section between upper two notches.
And that’s it for Day 1 of the sew-along! Tomorrow we’ll tackle the pockets and finish assembling the front and back of the jacket.
Day 2
Today we’ll be tackling the pockets and assembling the front and back of the jacket.
Pocket and Side Front
8. With right sides together, fold WELT (3) along foldline. Stitch across ends. Trim seam allowances. (See the next step for the photo on this step.)
9. Turn right side out. Press. Baste raw edges together. (This is easy, right?)
10. Pin welt to middle front, matching lower notches and squares. Baste. Stitch. (Stitch this with your usual 5/8″ seam.)
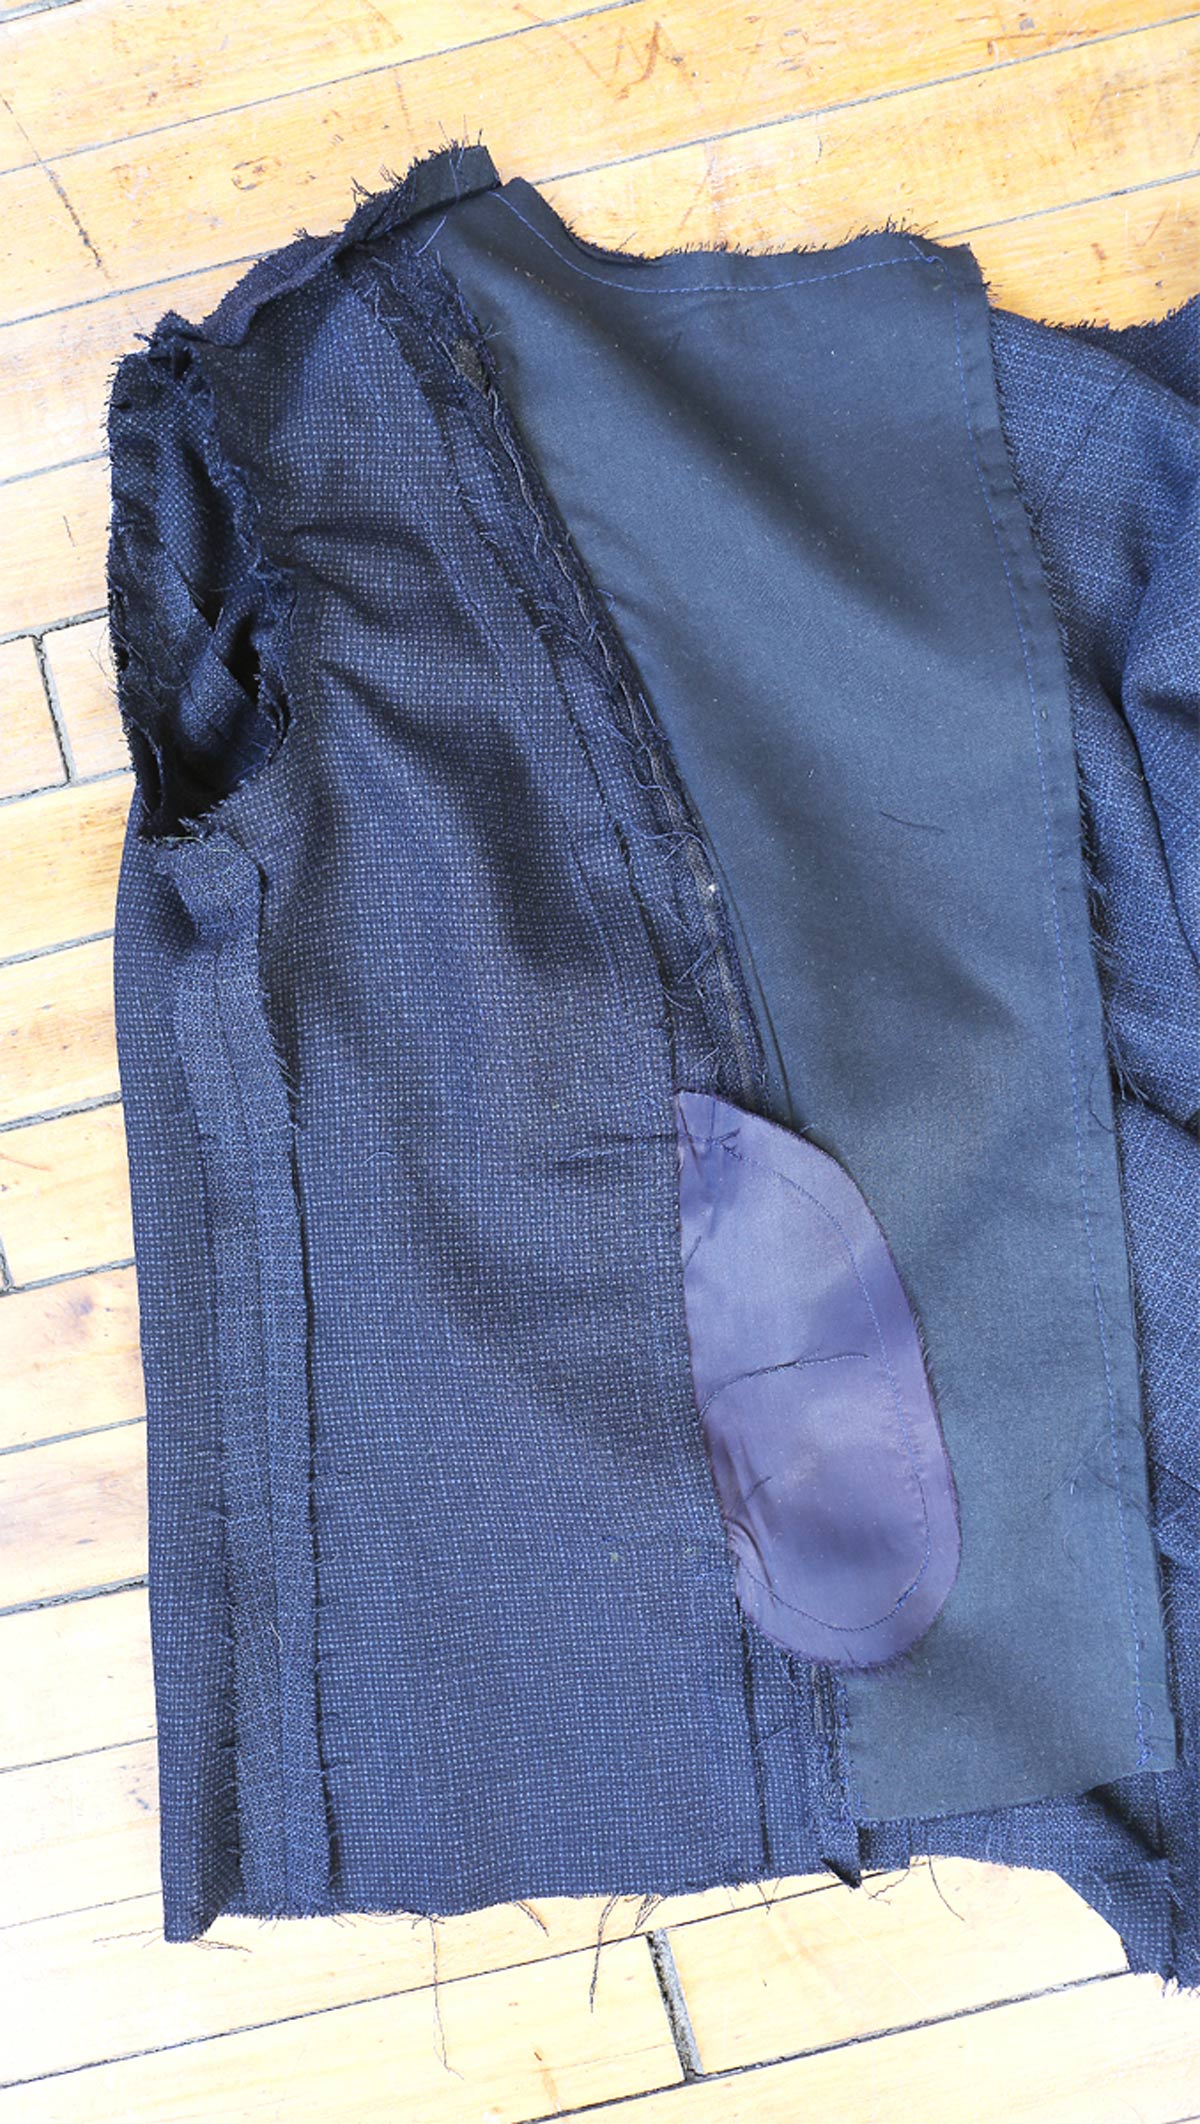
 11. Stitch one POCKET (4) section to each middle front (over welt) and SIDE FRONT (5) section at each side front, taking up a 3/8” (1cm) seam allowance. Press seam allowances toward pockets. (The 3/8″ seam will help to keep the pockets welt inside the seamlines of the jacket and prevent them from showing on the finished jacket.)
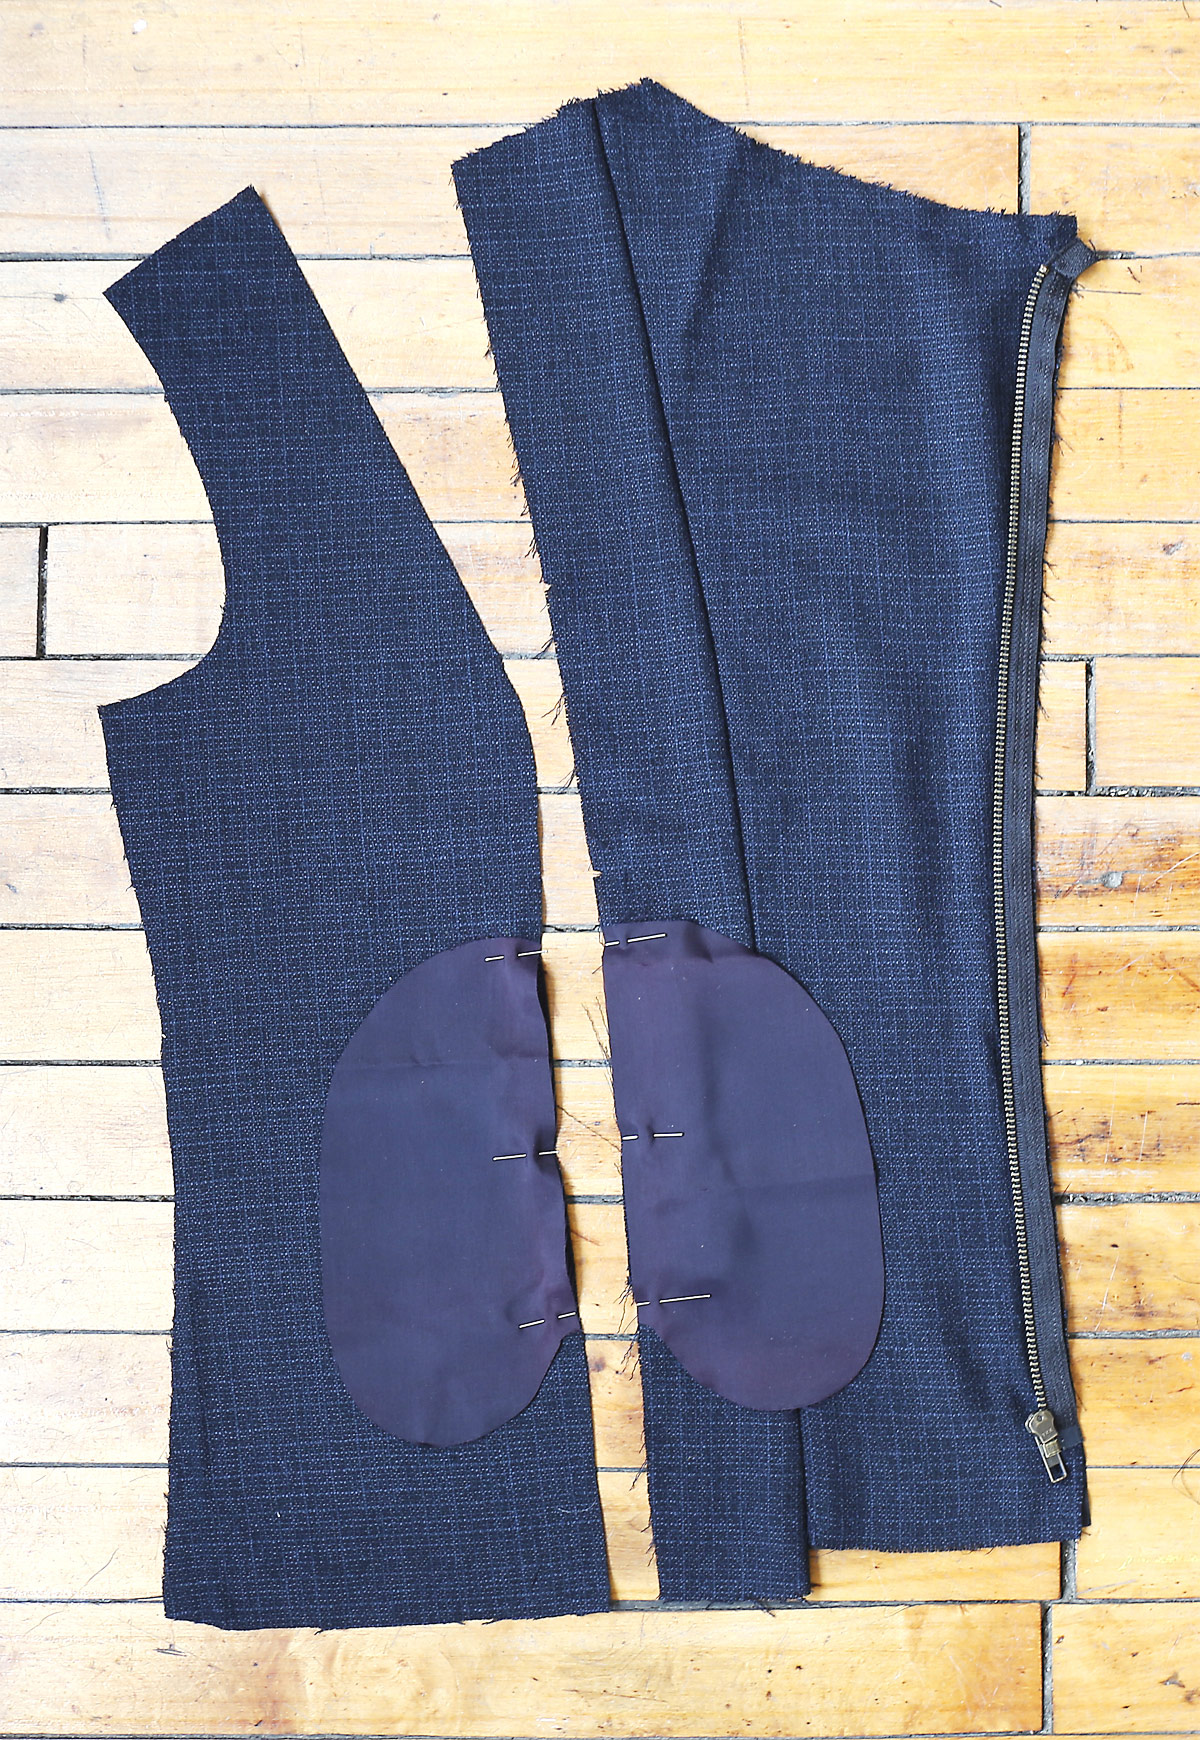
12. Pin middle front to side front. Stitch, leaving free between squares, clipping middle front where necessary. Stitch pocket edges together to side seams. (Again, there are opposing seams, so you’ll need to clip the seam allowances of the shorter curve. Once you’ve got everything pinned you can stitch the seam, pivoting at the squares to stitch around the pocket bag and then pivoting again at the second square to stitch the remaining seam.)
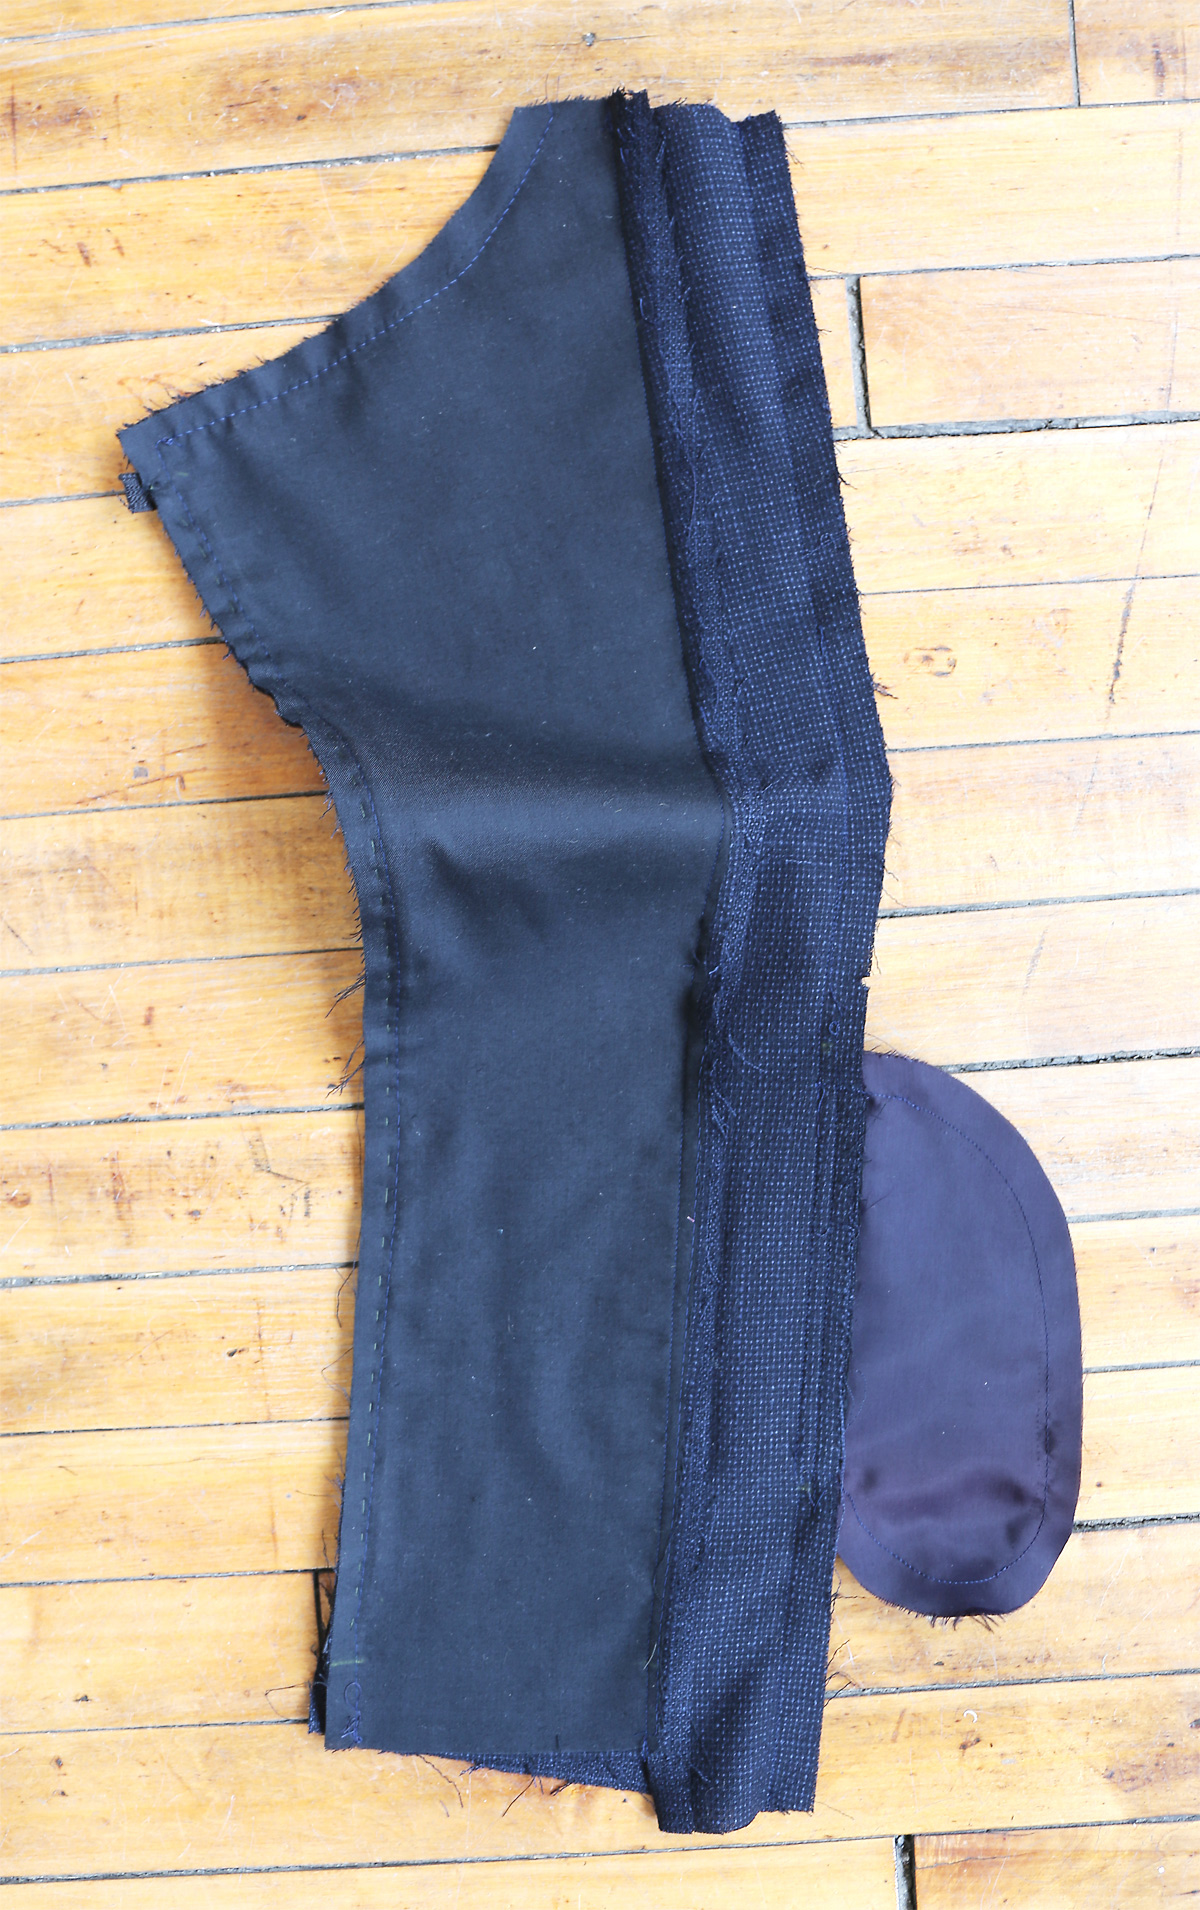
13. Turn pockets and seam allowances toward middle front along seamlines. Press.
14. Turn welts toward side front (not middle front as stated in the instructions), matching small circles. EDGESTITCH ends of welt in place, through all thicknesses.
(At this point, I edgestitched all my seams because my fabric is drapey and doesn’t hold a crease well. If you choose to edgestitch your seams as well, be sure to push the pocket bags out of the way before stitching each seam so you don’t accidentally stitch the pockets closed!)
Back
15. STAYSTITCH side back edges of BACK (6) above waist.
16. Pin SIDE BACK (7) to back at side back edges, clipping back where necessary. Stitch. Stitch center back seam.
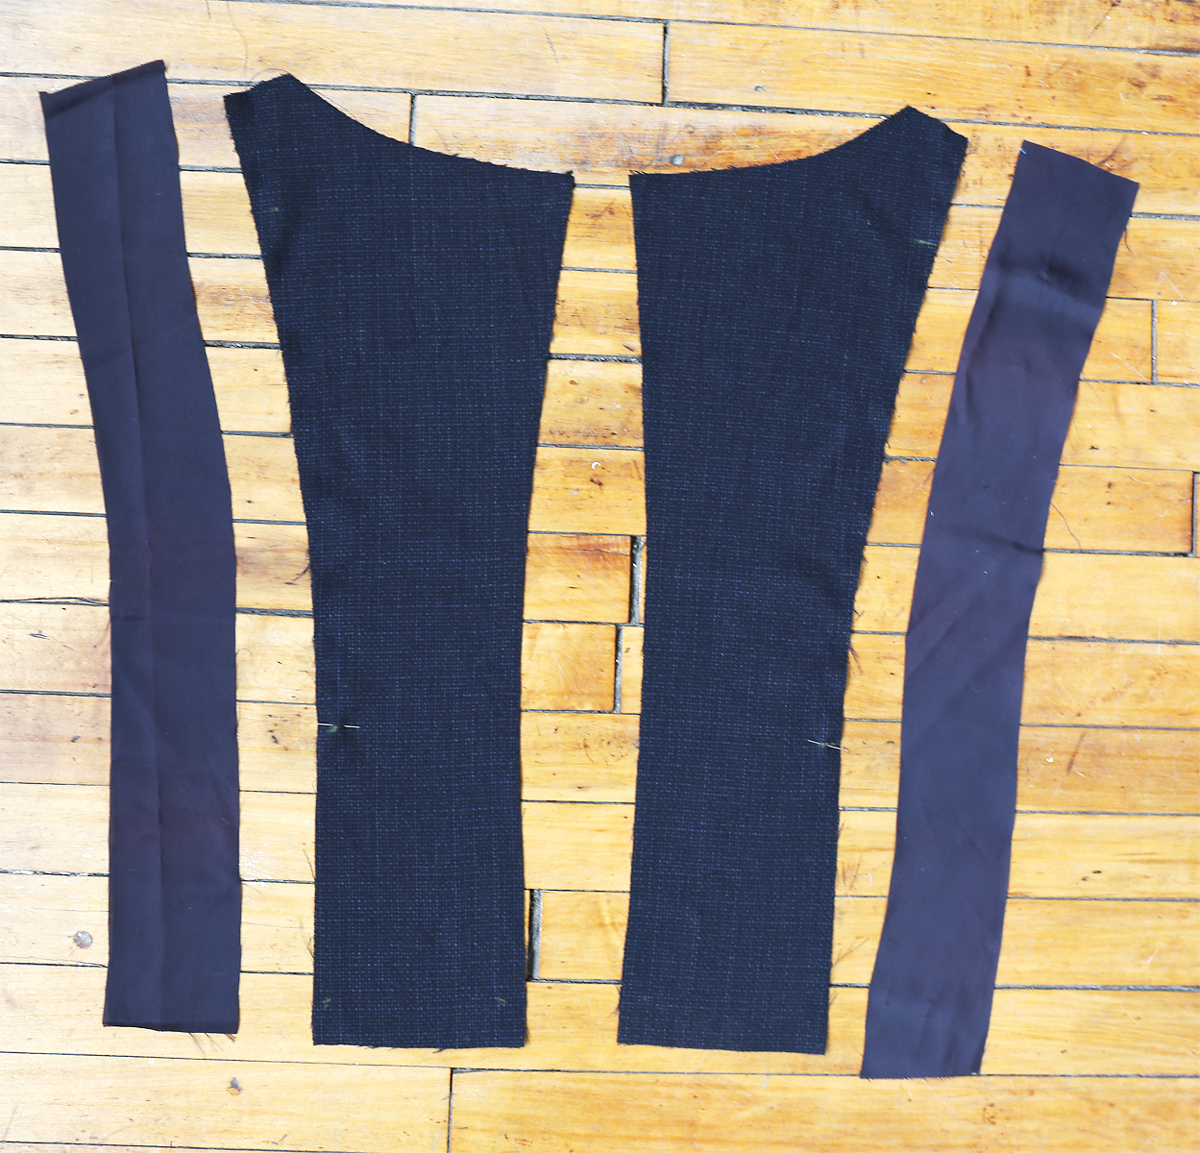
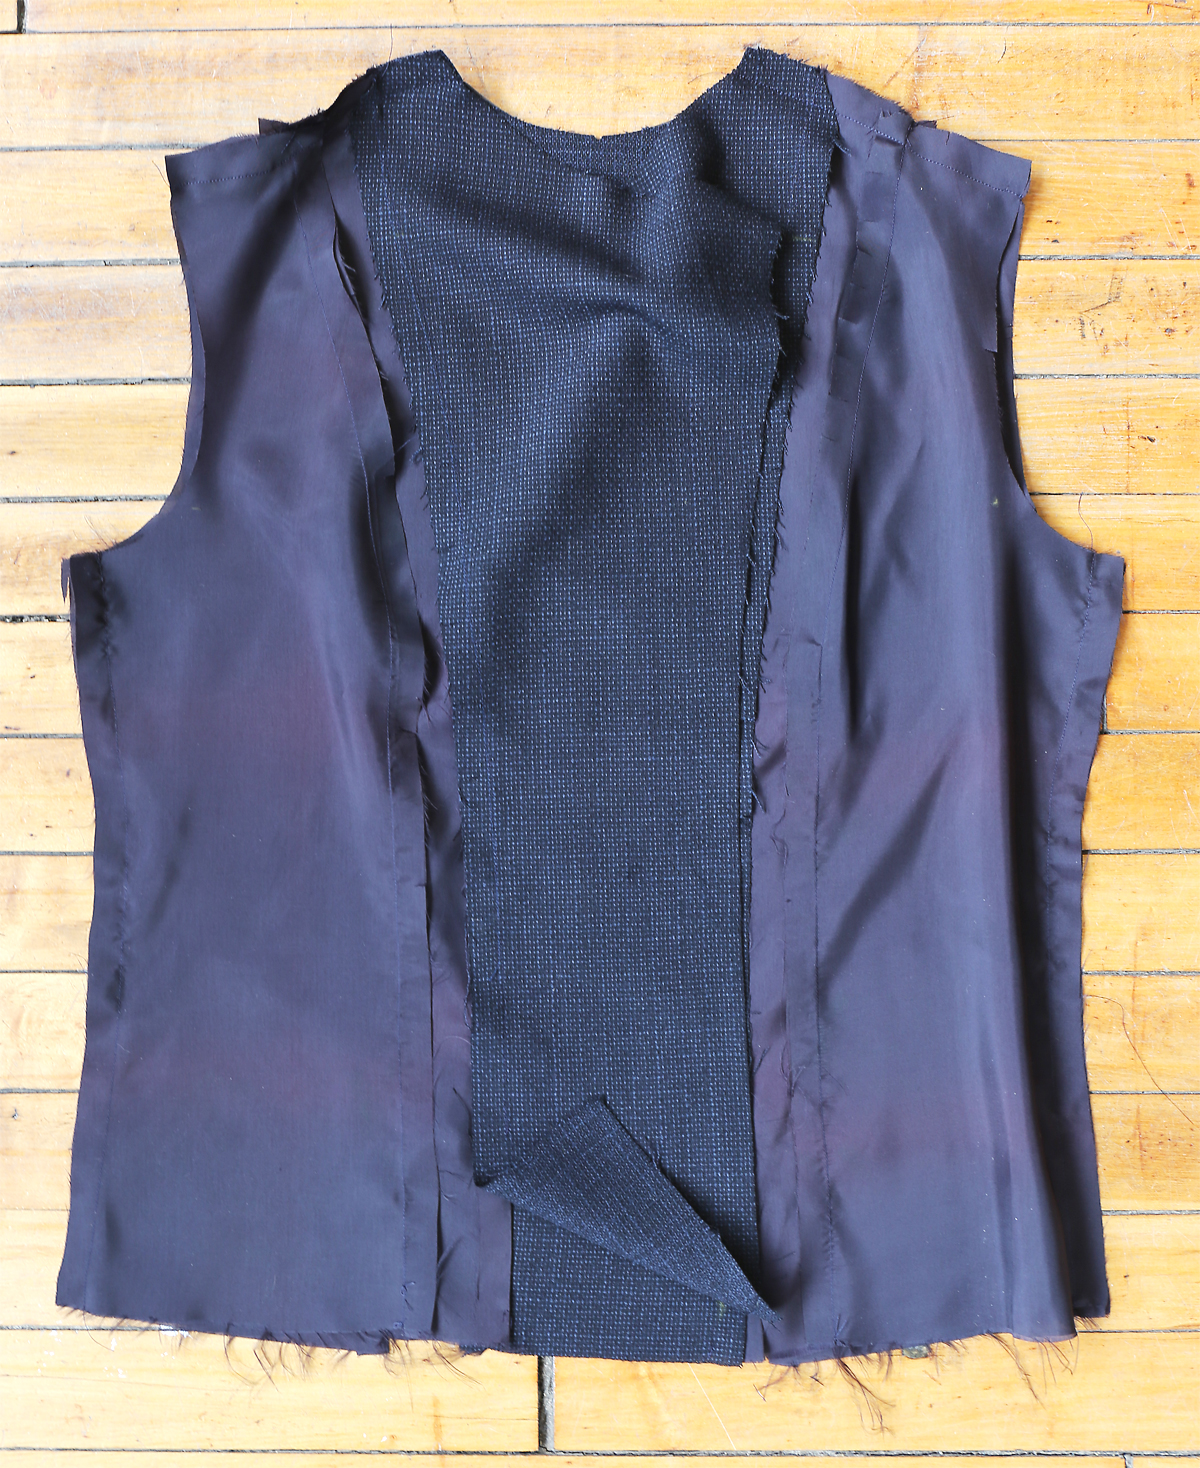
(This is your opportunity to edgestitch the back seams if you choose to do so. Also, you’ll notice in the second photo below that I stopped at this point and used my assembled jacket back to cut a piece of lightweight wool/hair canvas interfacing on bias. I did this to give a little more structure to my very drapey fabric and to help the jacket keep its shape. If you’d like to try this you don’t need hair canvas for this step; cotton canvas or sew-in interfacing would be fine as well. (Hair canvas is a traditional tailoring material also know as Hymo which can be found at specialty shops. I get mine at Steinlauf and Stoller here in NYC.) Once you’ve cut the shape of the back jacket, you’ll simply baste it to the wrong side of the jacket within the seam allowances, taking care to smooth the two layers in the process. But this isn’t absolutely necessary, so feel free to skip this step!)
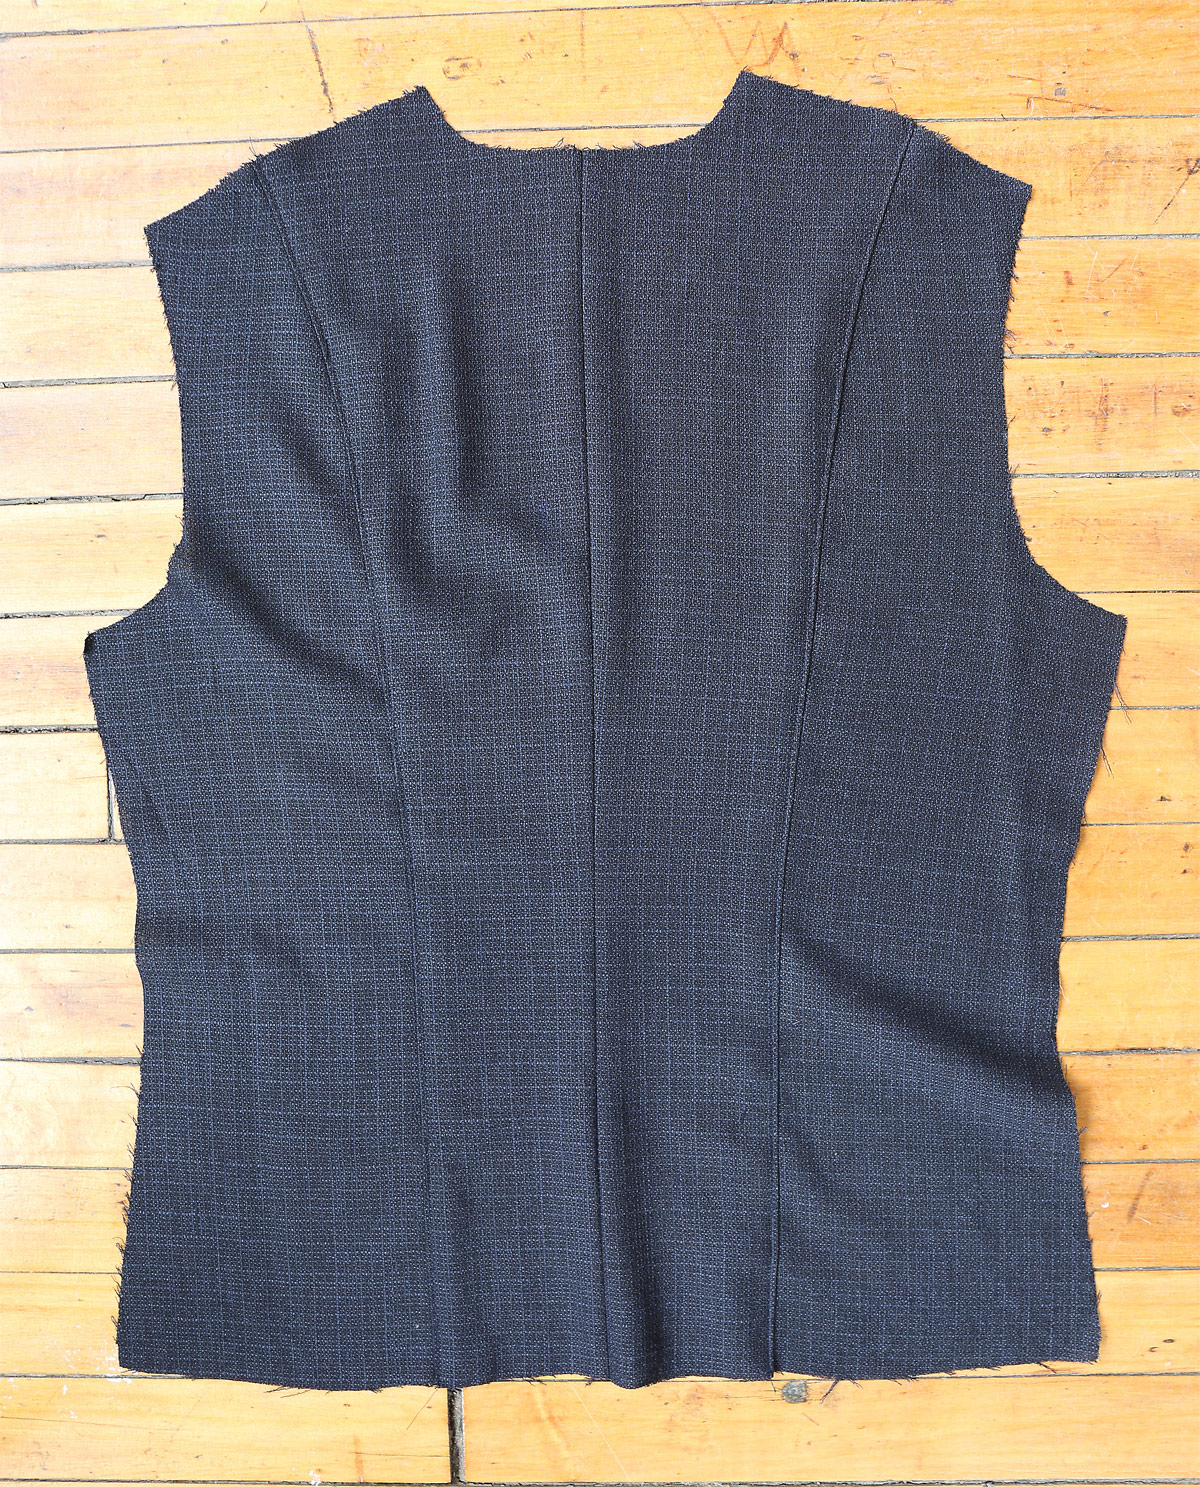

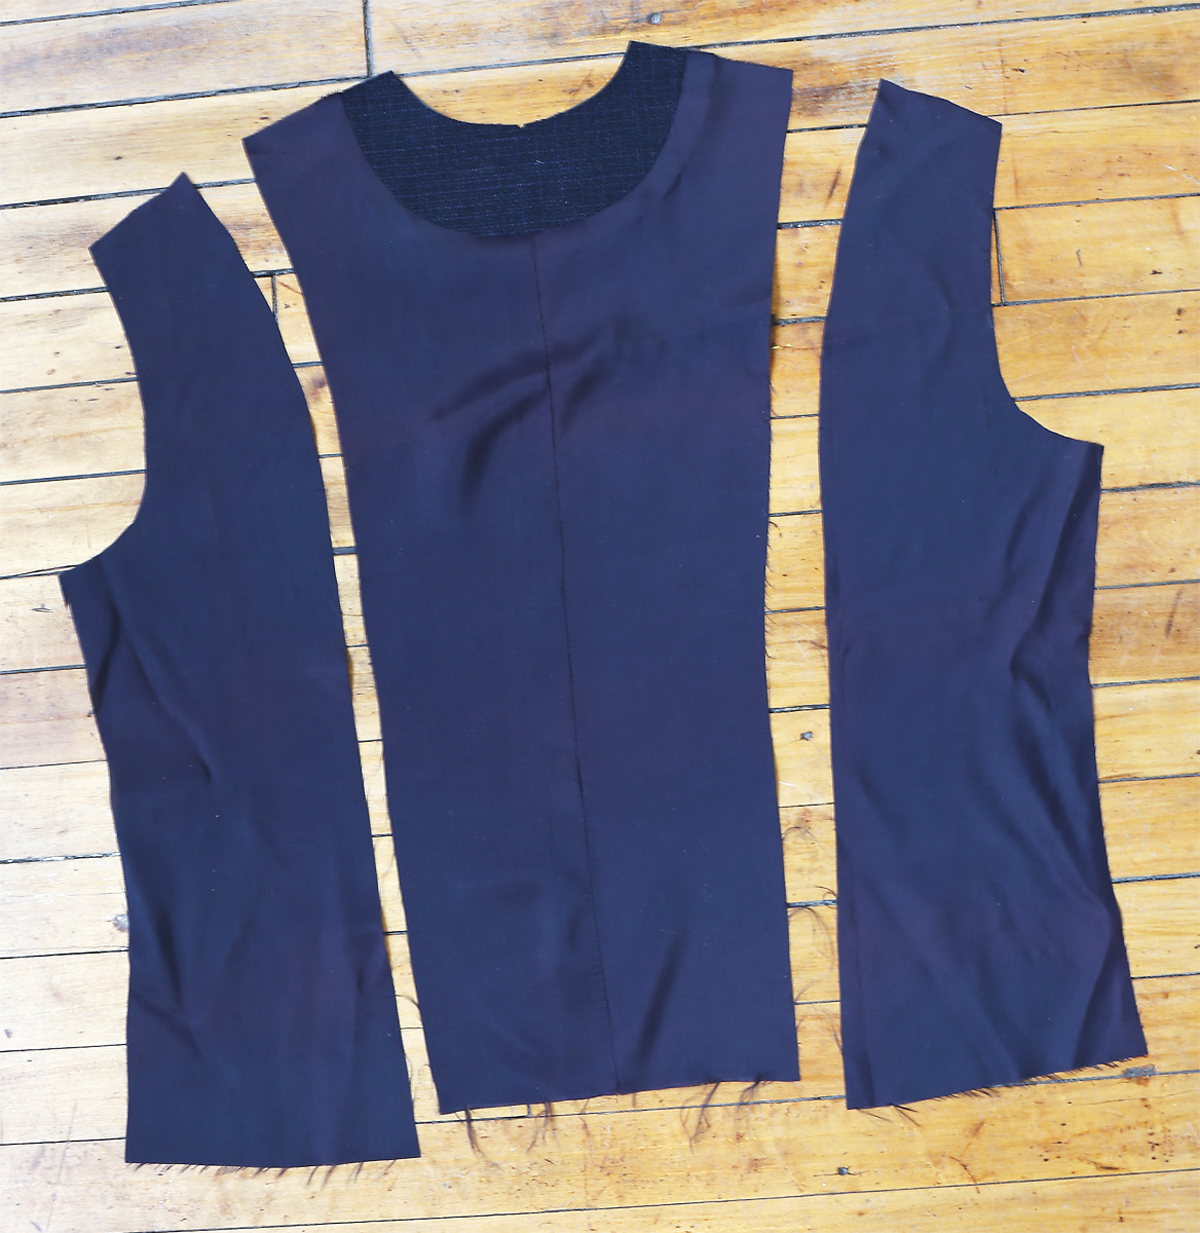
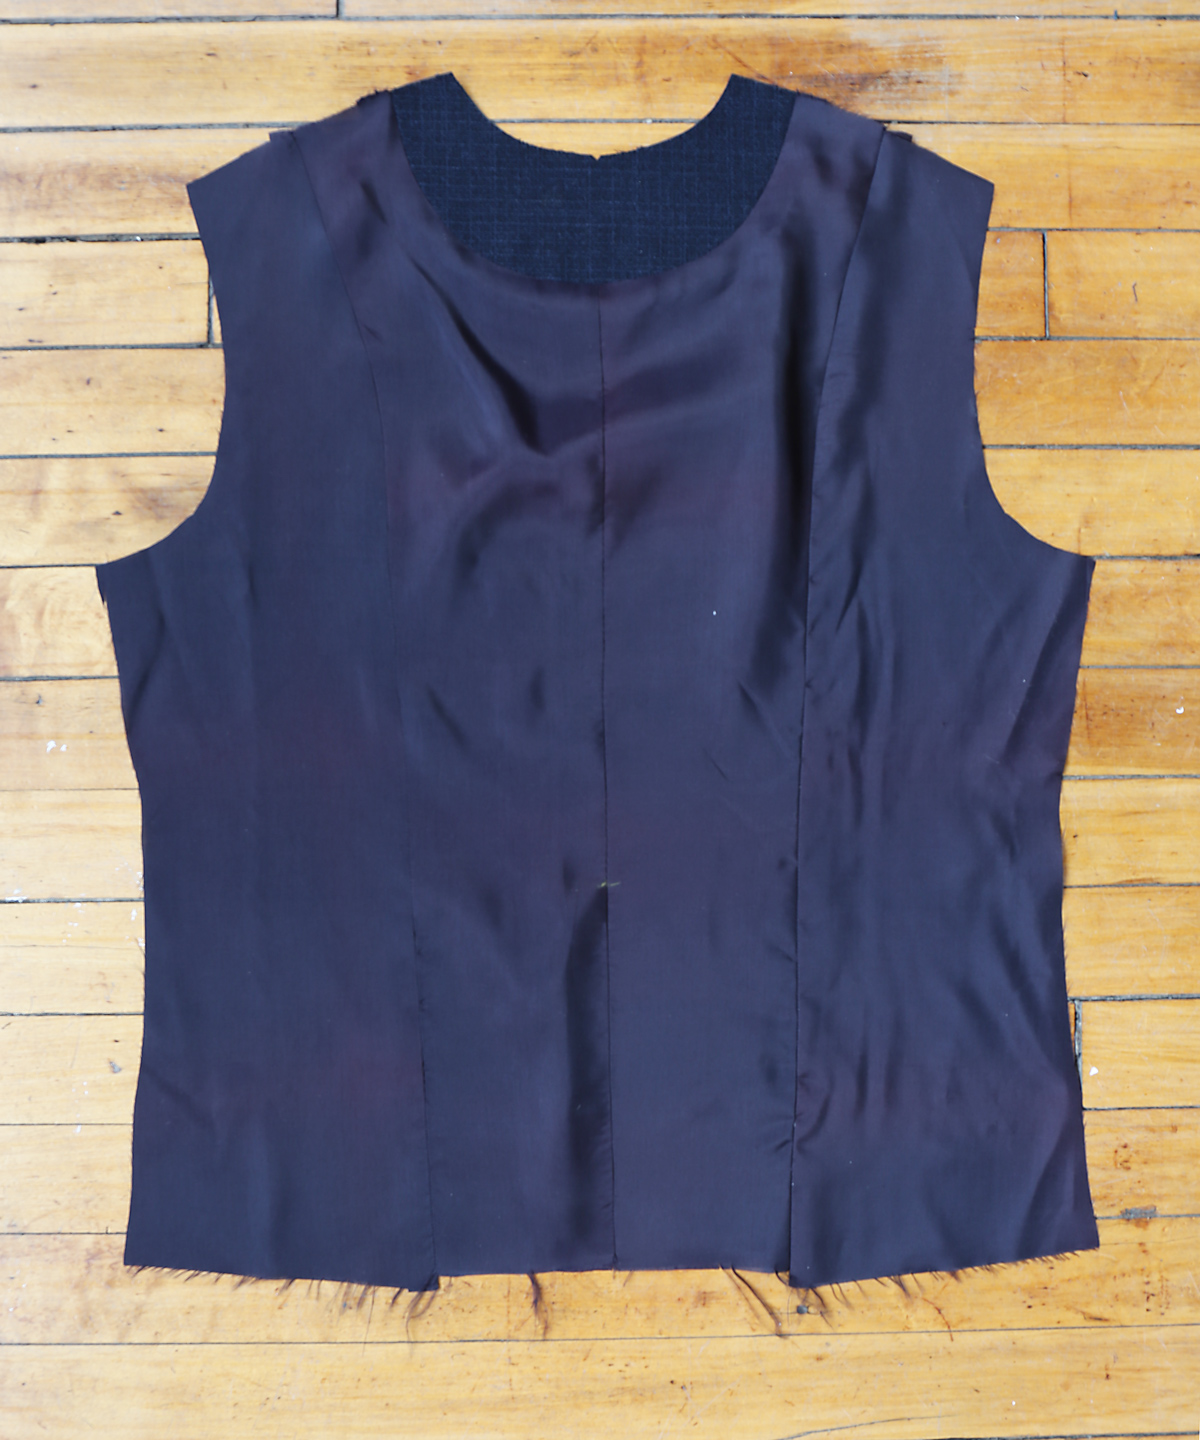
17. Stitch back to front at shoulders and sides.
And that’s it for Day 2! Our jackets are progressing nicely, aren’t they? Tomorrow we’ll add the sleeves and the shoulder pads as well as a few other optional details that can be nice to add but aren’t strictly necessary.
Day 3
So far we’ve got the front and back of the jacket assembled. Today we’ll assemble and attach the two-piece sleeves and finish the outer jacket. And I’ll show you how to make shoulder pads so you can customize them to suit your preferences. Ready?
Sleeve
I do love a good two-piece jacket sleeve! It gives such a nice shape and fit. If you’ve never sewn one before, it’s not difficult; there are just two seams instead of one.
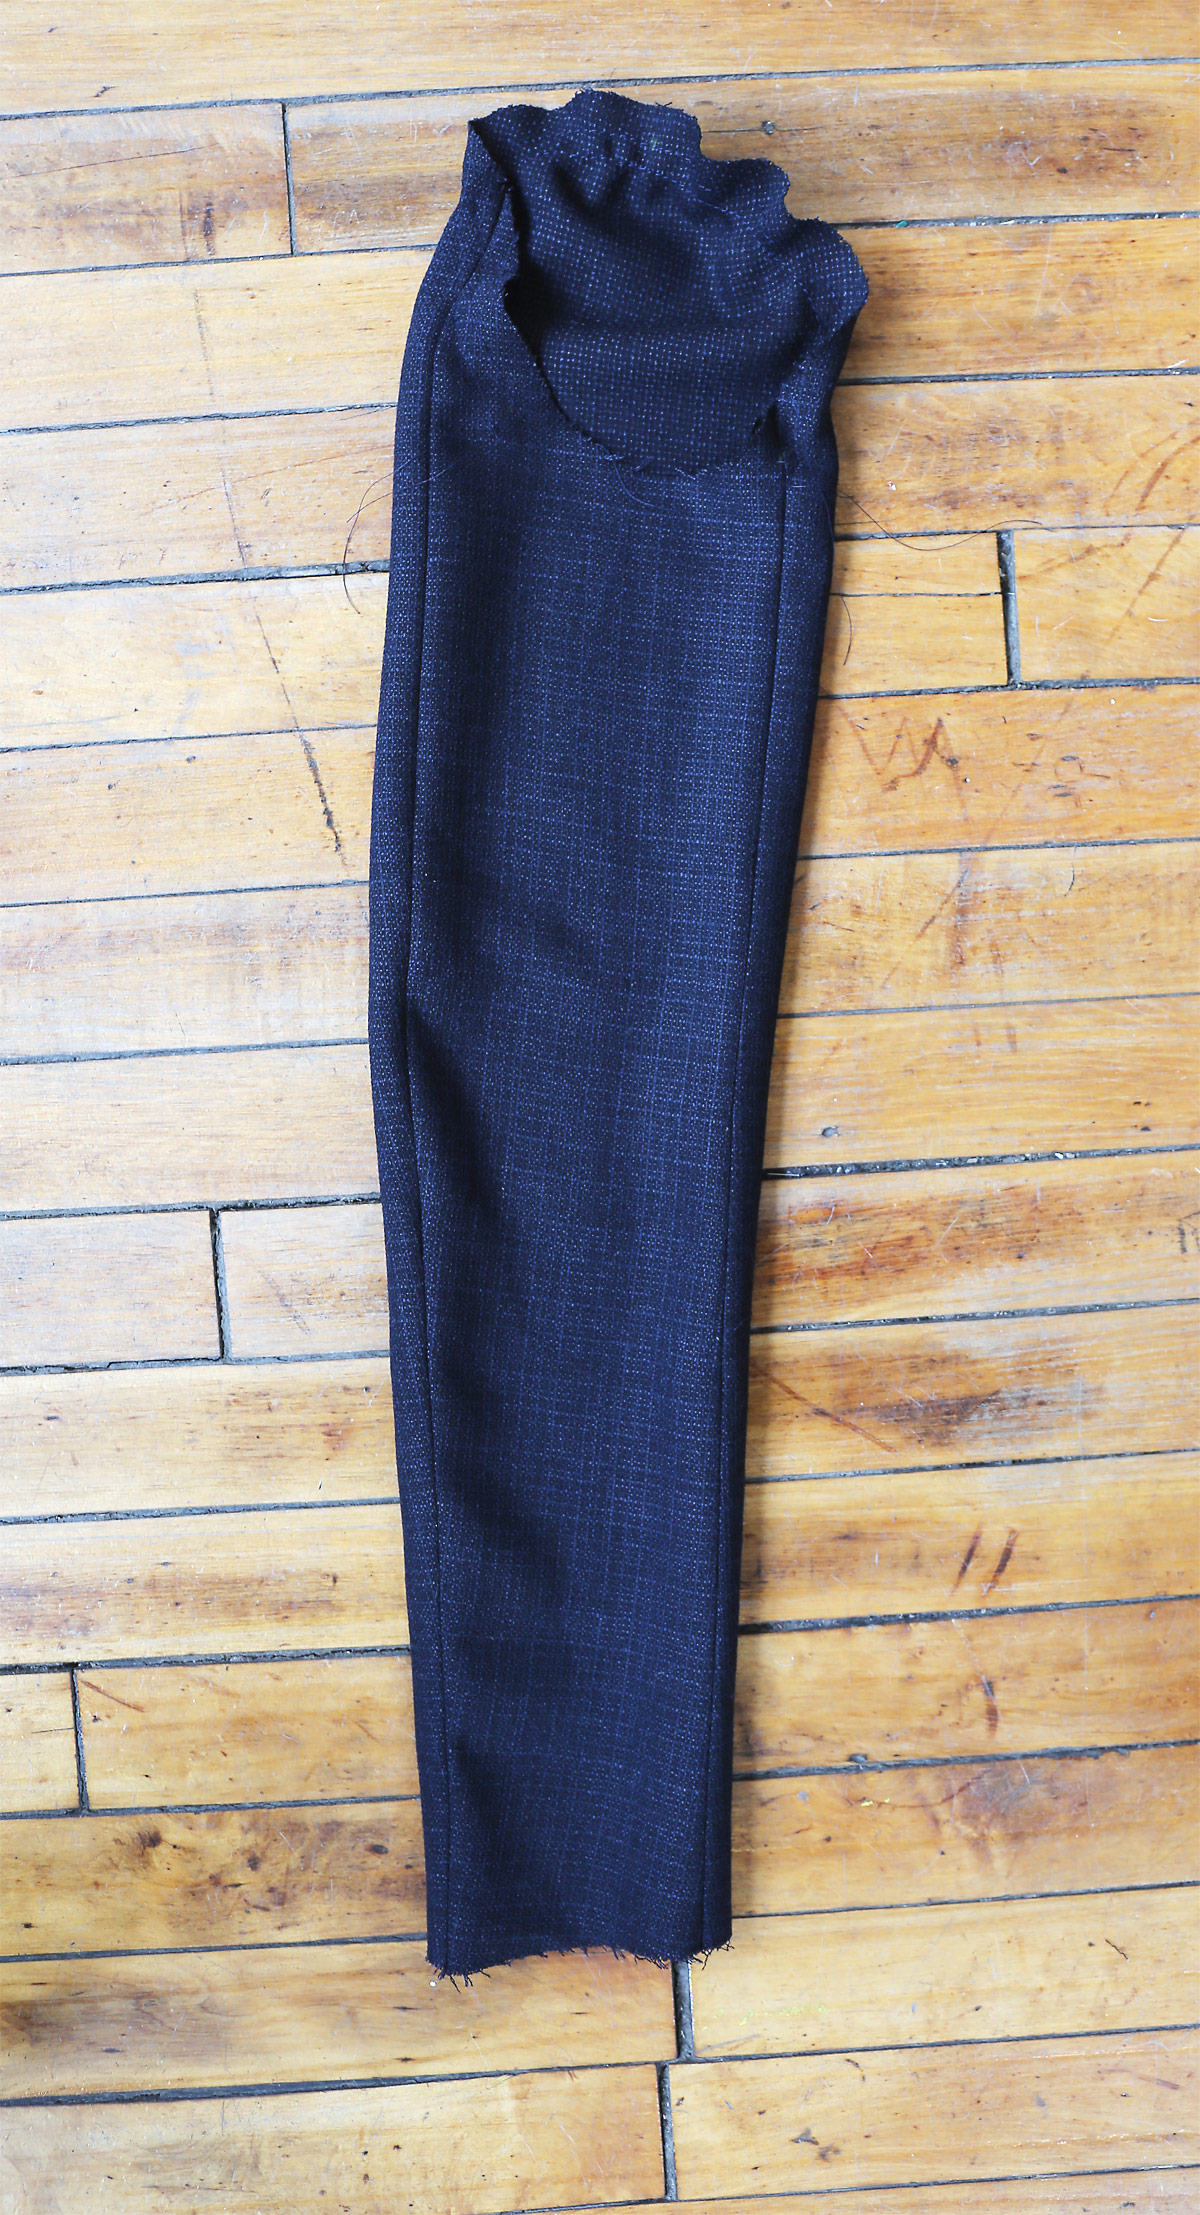
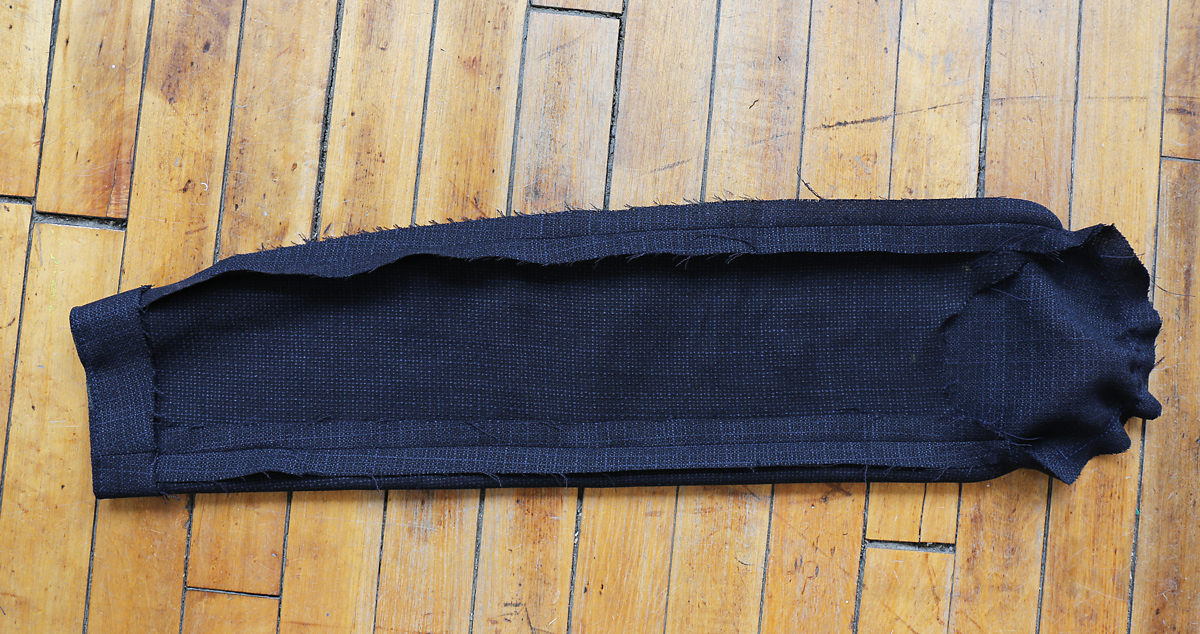
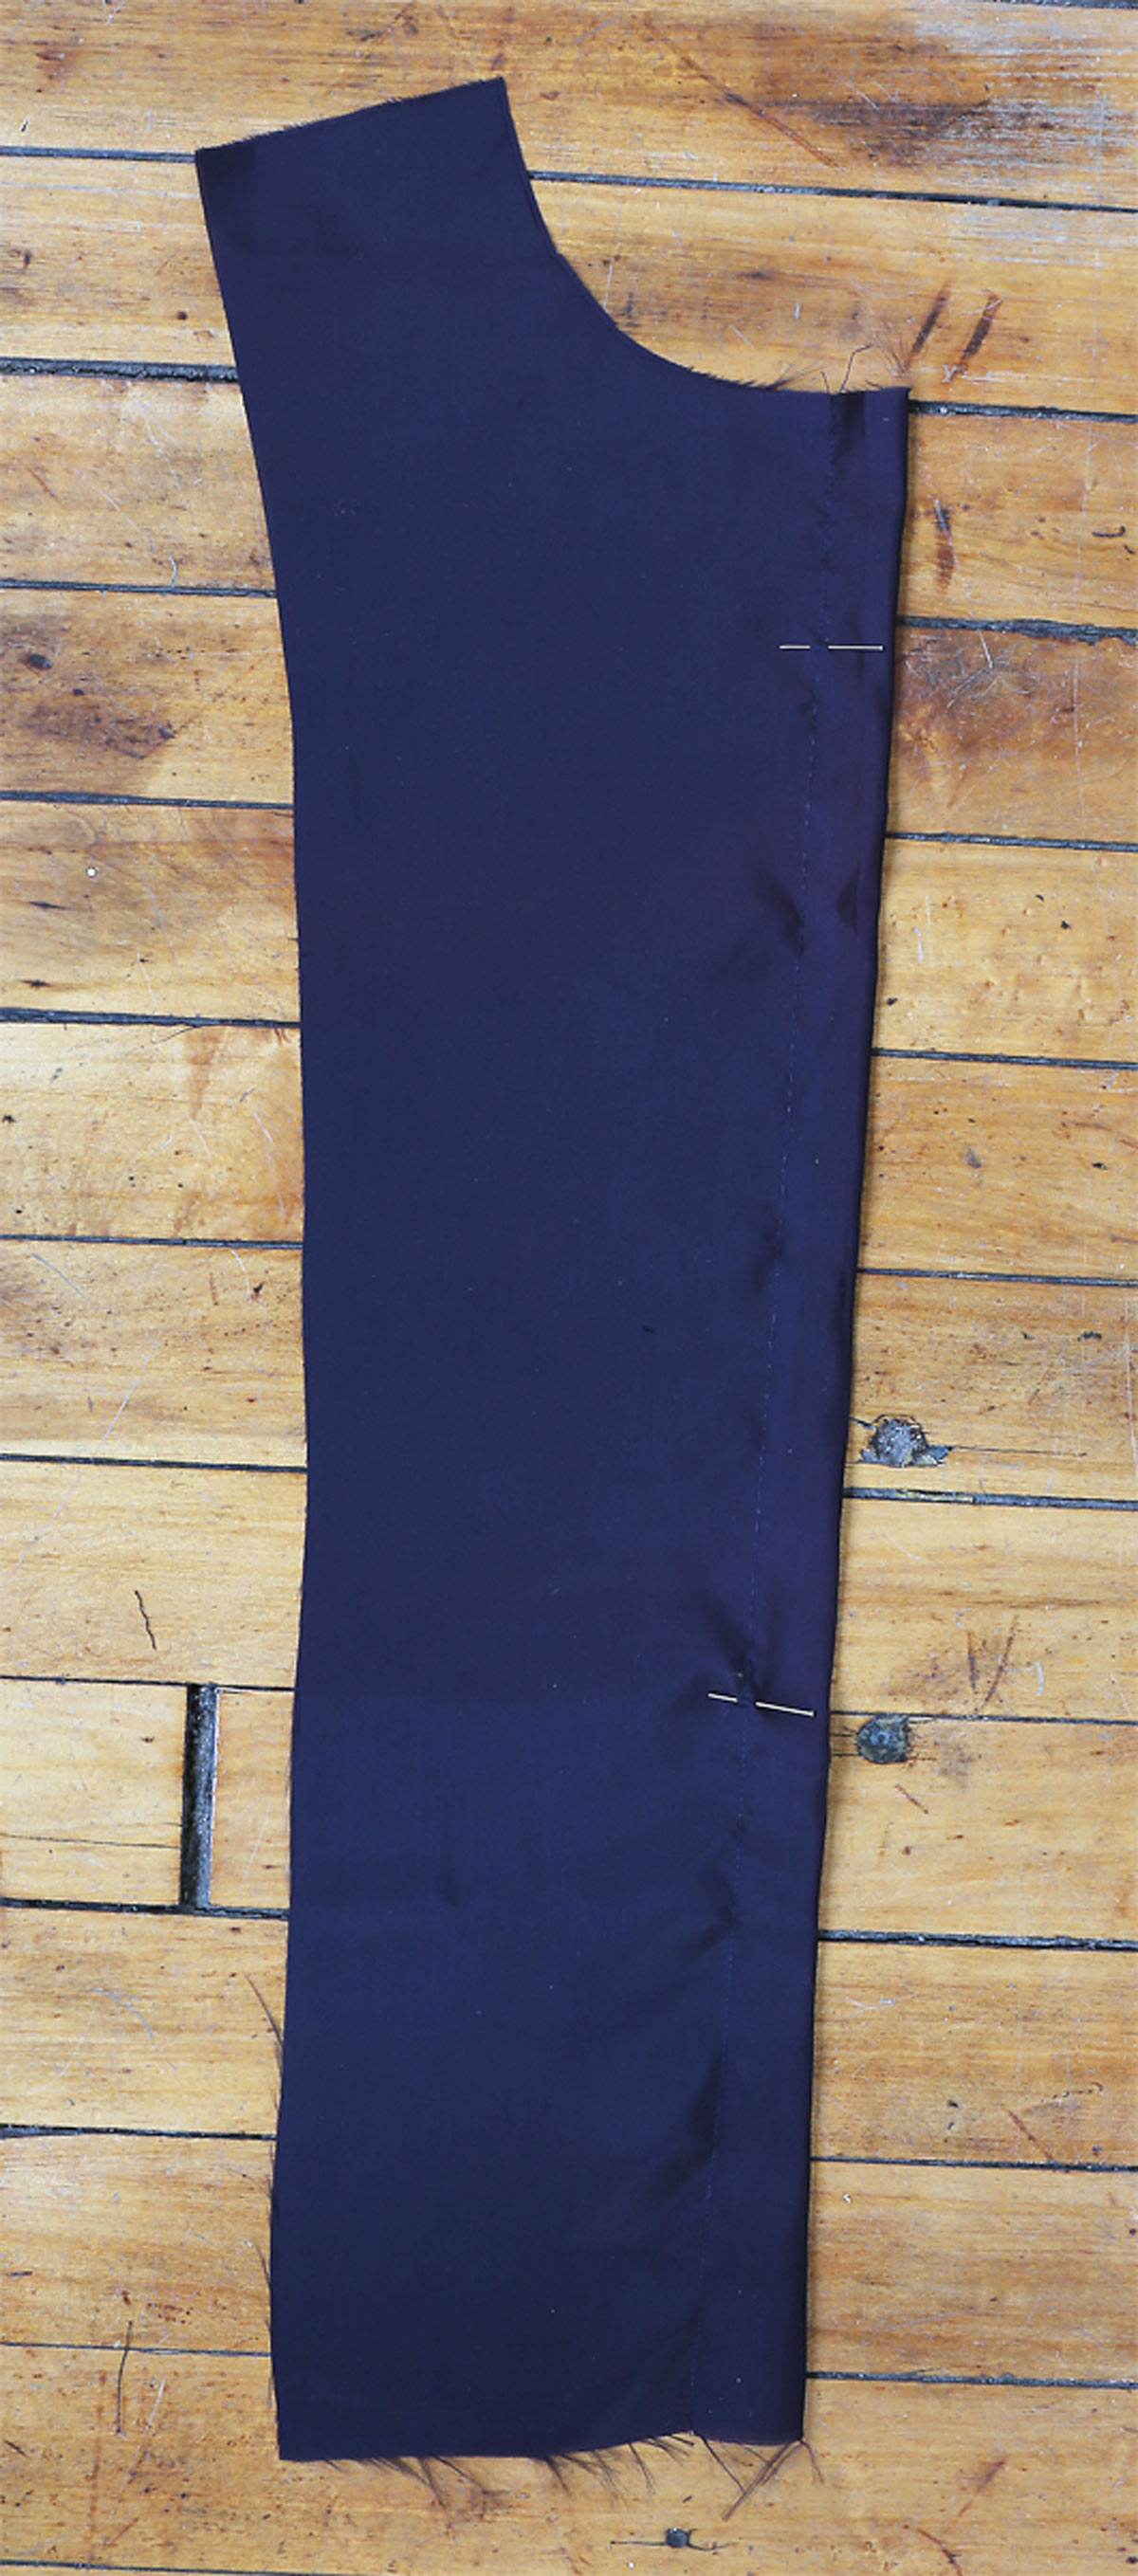
18. Pin UPPER SLEEVE (8) to UNDER SLEEVE (9) at front edge, right sides together, matching large circles, stretching upper sleeve to fit. Baste. Stitch. Stitch upper sleeve to under sleeve at back edge, matching notches. (The little bit of stretch on the first seam gives the sleeve a better drape and fit. Press the seam allowances open or to one side when you’re done.)

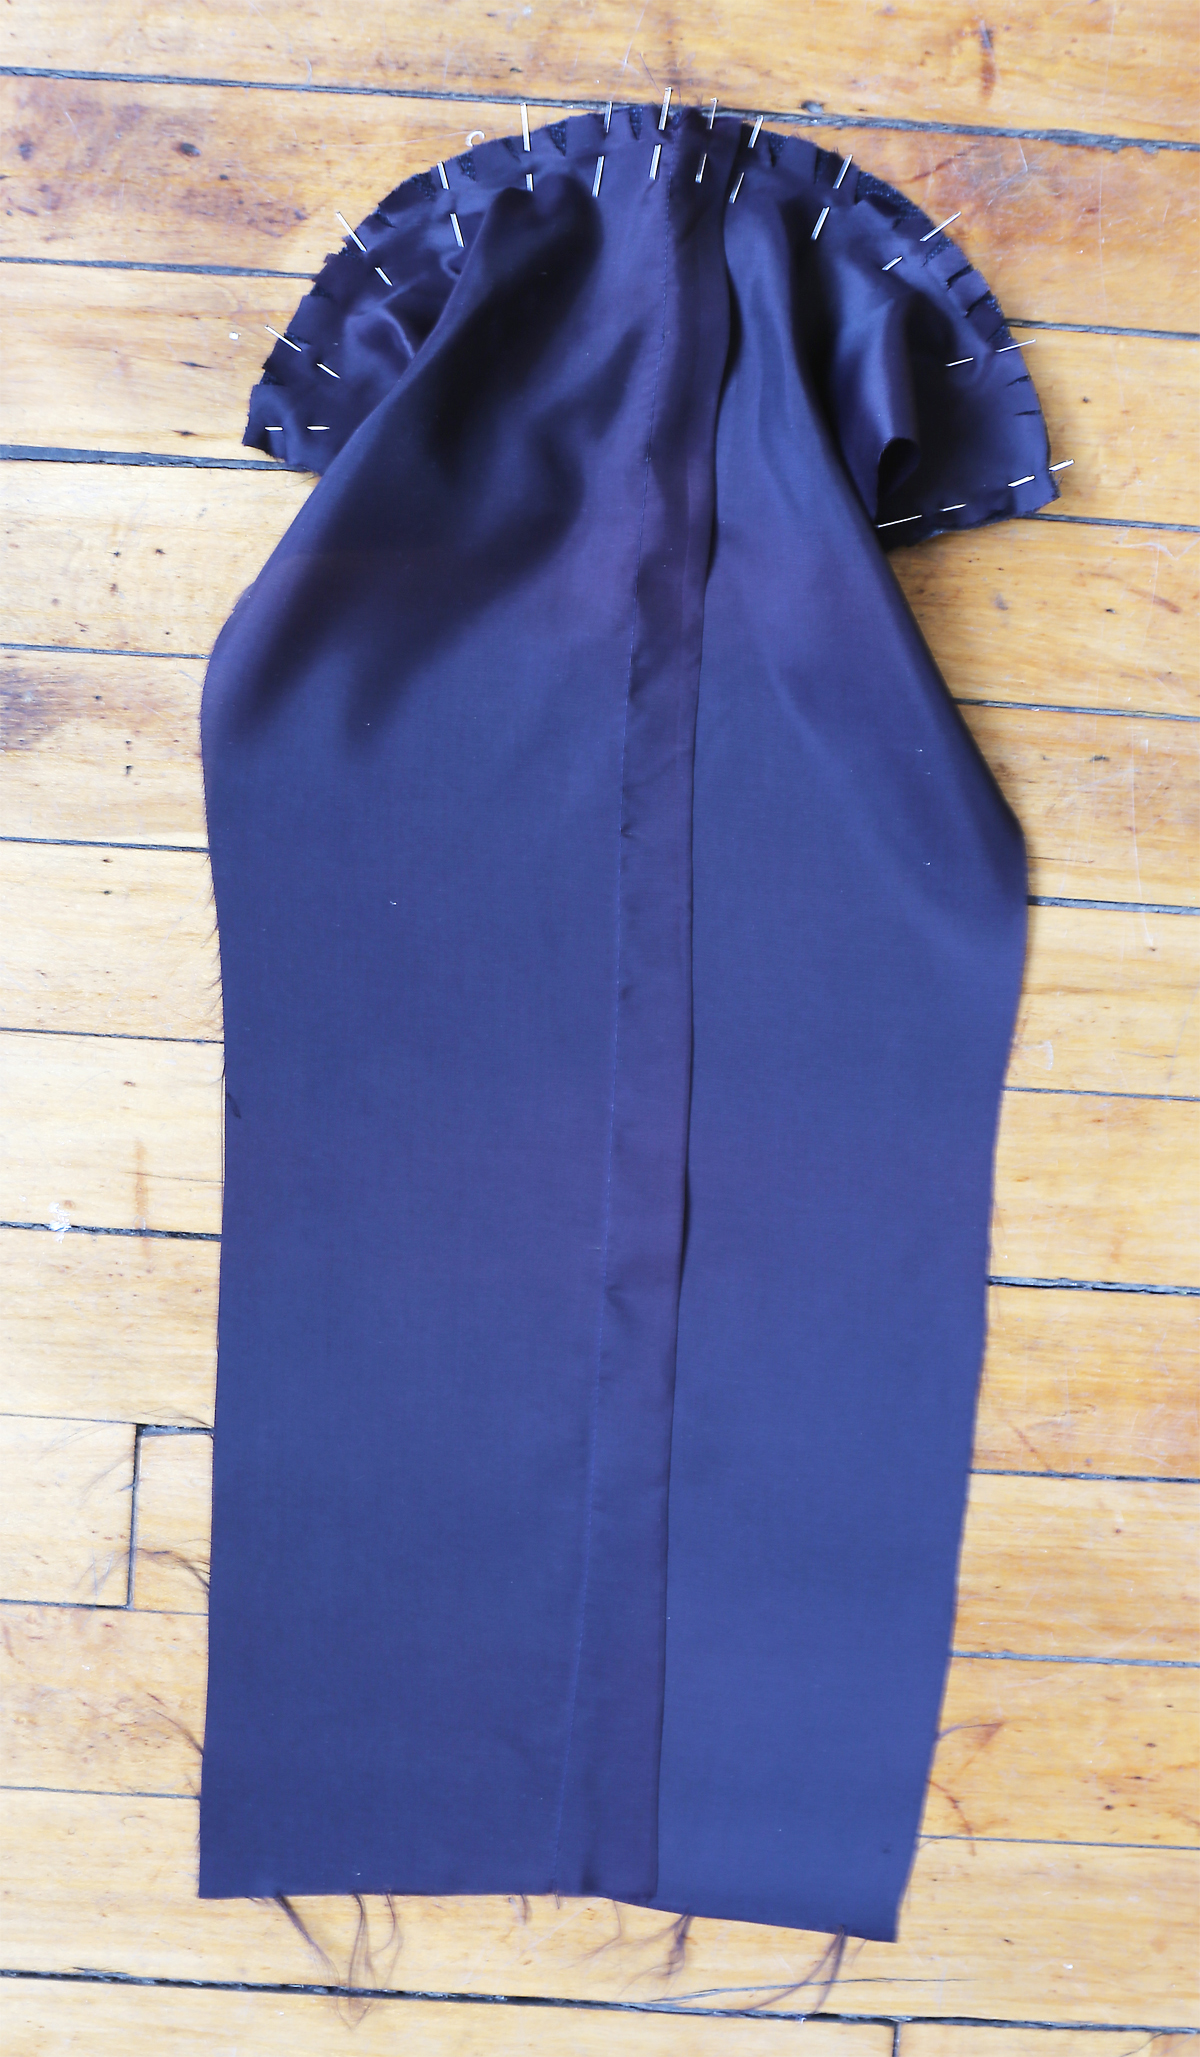
19. EASESTITCH cap of sleeve between small circles. (I always use two rows of easestitching: one at 4/8″ and one at 6/8″ so there’s a row of easestitching on either side of the seam line. It helps to control the fullness and makes it easier to remove the stitches after you insert the sleeve. Leave nice long thread tails so you can pull them and anchor them as you’re fitting the sleeve to the armhole.)
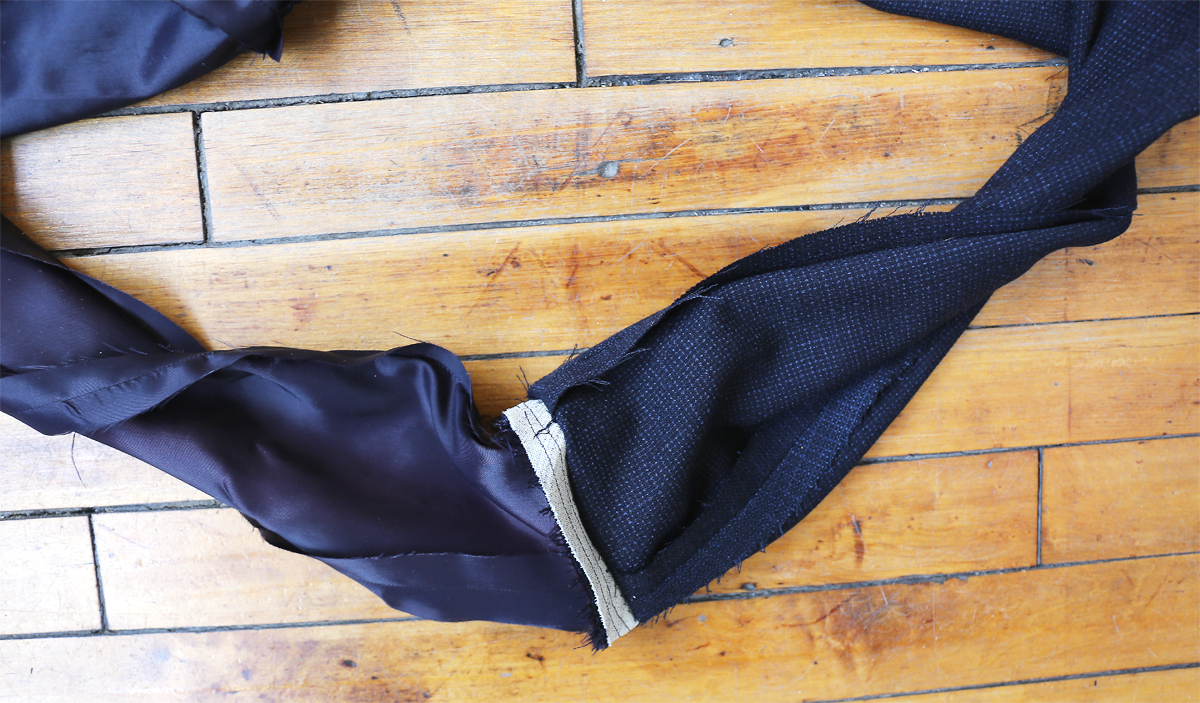
20. Turn up a 1-1/2” (3.8cm) hem on lower edge of sleeve. Baste close to fold. Hand-sew in place, easing in fullness, if necessary. Press. (If you’d like to “bag out” the lining with me later, skip this step for now. If you’re bagging out the lining you’ll want to hem the sleeve leaving the top 3/4″ of the hem edge free so you can machine-stitch the lining later. Stick with me and I’ll cover this on Day 5. Otherwise, if you’d prefer to follow the instructions and assemble the jacket the more traditional way, hem the sleeve as written.)
21. With right sides together, pin sleeve into armhole edge, matching notches, small circles, large circles to shoulder seams and square to underarm seam. Adjust ease. Baste. Stitch. Stitch again 1/4” (6mm) away in seam allowances. Trim close to second stitching. Press seam allowances flat. Turn seam allowances toward sleeve. (I nearly always hand baste the sleeve into the armhole before machine stitching it so I can carefully control the fullness of the sleeve cap ease. When you go to machine-stitch the sleeve, I sew it with the sleeve fabric facing down. That way the feed dogs will carry it along and the armhole fabric will be dragged a bit by the foot. The sleeve and armhole rarely pucker this way.)
Extra credit #1: At this point, I usually add a thin strip of quilt batting to fill in the sleeve cap a bit. This is called a sleeve head. If you choose to do the same, cut two strips of lightweight quilt batting to be about 7′ x 1 1/2″. Find the center of each strip, and pin one long edge of one strip to the seam allowances of the sleeve cap, matching the center to the shoulder seam. Stitch the batting to the sleeve cap at the seam allowances, stitching as closely to the seam line as you can. This little bit of batting will help to keep the sleeve cap filled in so it doesn’t collapse on itself. Once the batting is in place, trim the ends a bit to round them (not shown in the photos).


 Extra credit #2: How would you like to learn how to make shoulder pads? It’s very easy. You’ll need a few scraps of woven fabric (I like to use a stiff sew-in interfacing for the underside of the shoulder pad and a lightweight woven fabric for the top.) You’ll also need some scraps of thin quilting batting.
 a. Start by cutting a circle of batting about 6″ in diameter. Cut another circle 5 1/2″ in diameter. If you want a thicker shoulder pad, cut another circle 6 1/2″ in diameter. The idea here is to cut each circle a different diameter so the shoulder pad gradually gets thinner at the edges rather than having a sharp edge.
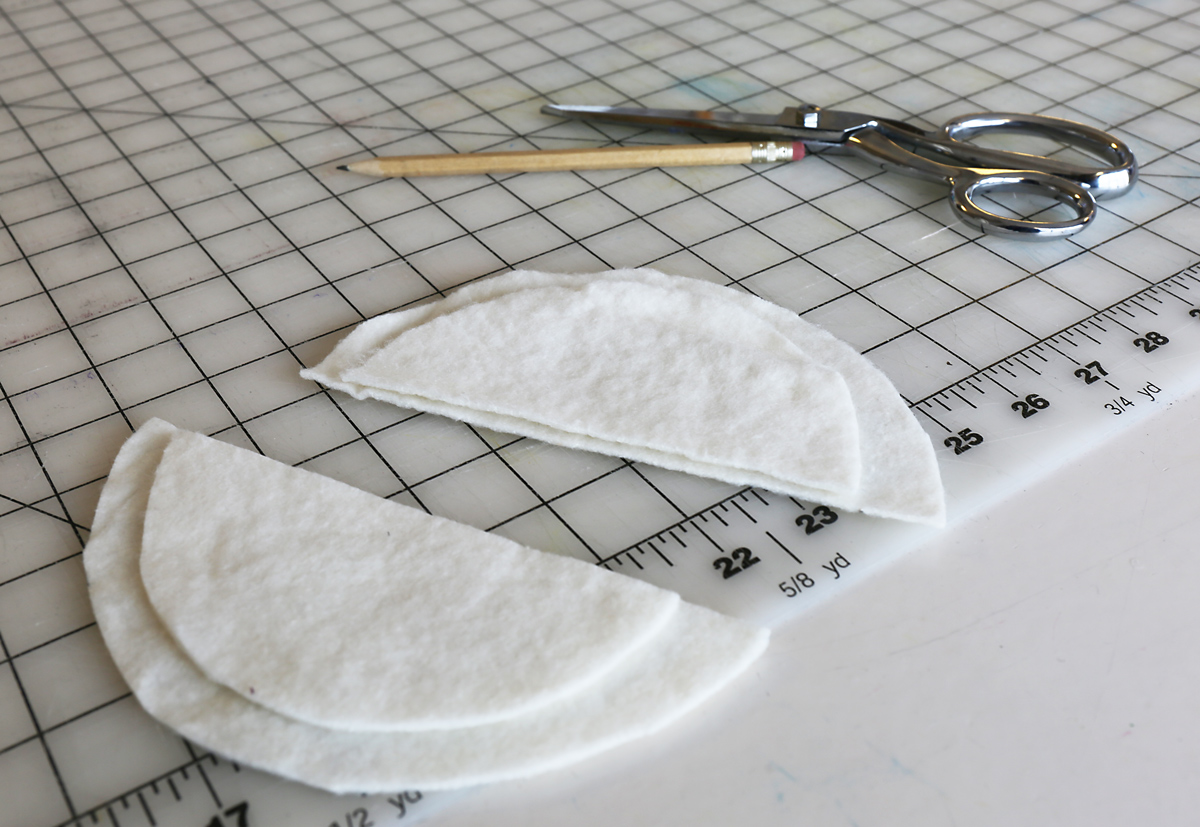 b. Stack the circles on top of each other largest to smallest. and cut them in half down the center. You now have matching batting for two shoulder pads.
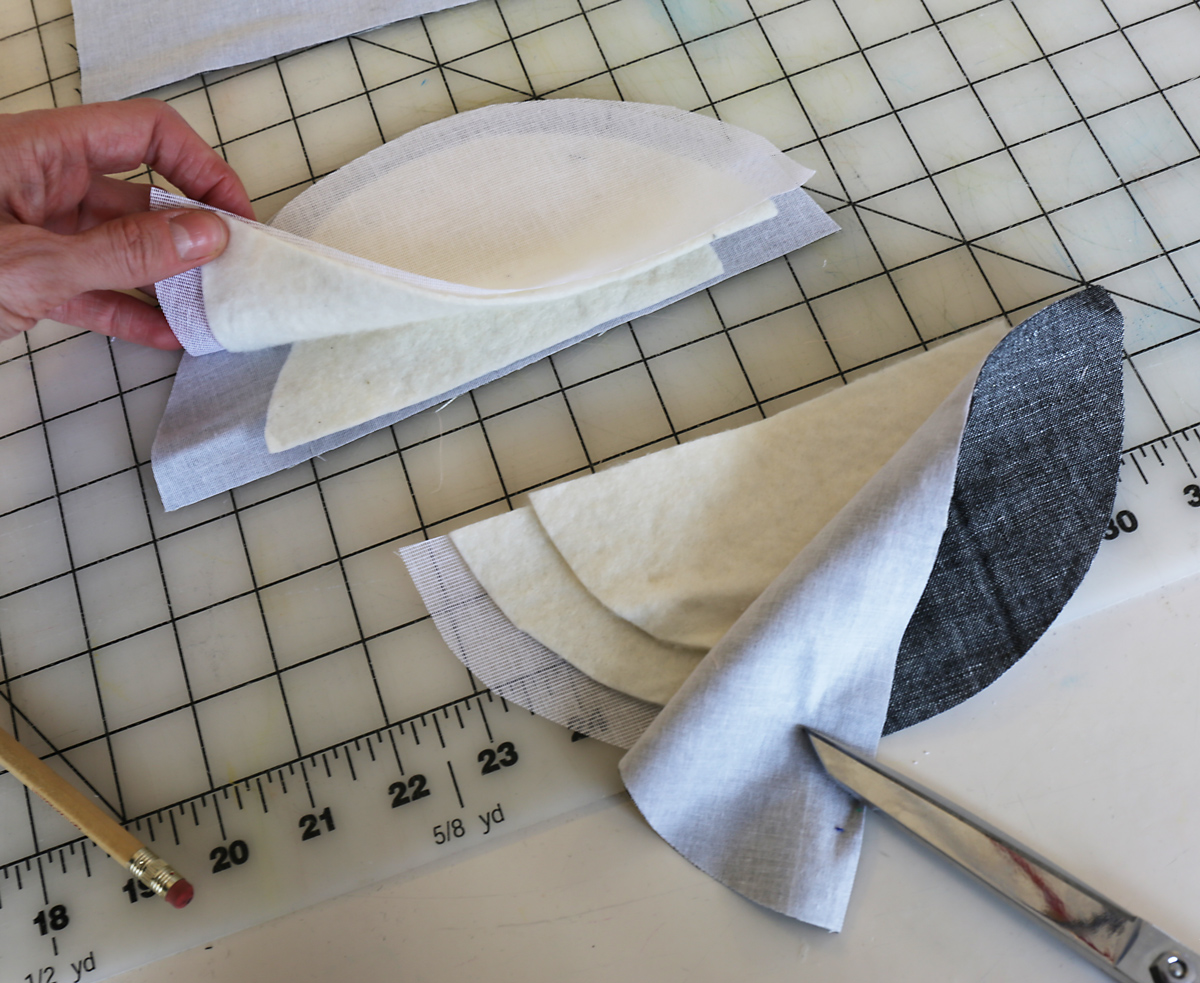 c. Cut two 7″ circles from your woven fabric. Cut these circles in half like you did with the batting, and sandwich the batting between two half-circles of woven fabric as shown, with the layers of batting layered from largest to smallest.
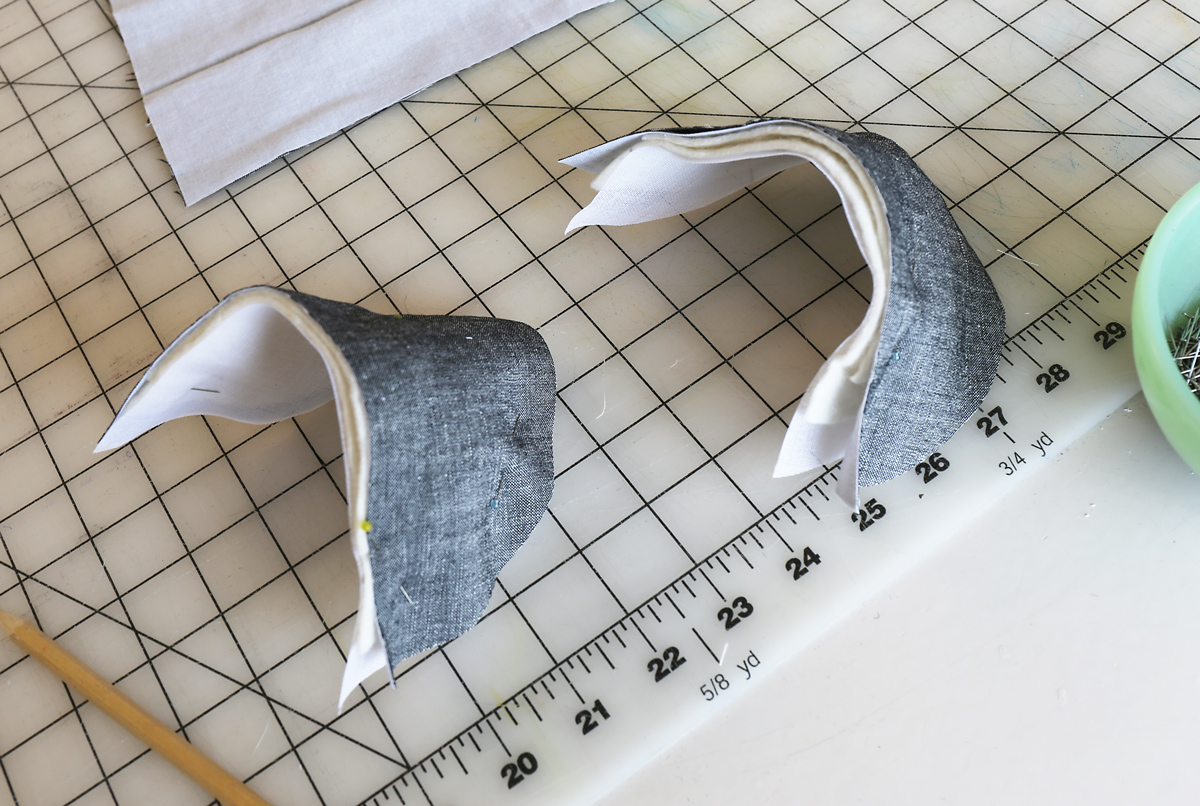 d. The trick to a nice-looking shoulder pad is to mimic the shape of the shoulder itself. Start by pinning all the layers together near the center of the semicircle, and then gradually manipulate the layers to form a gentle curve. Once the layers are pinned you can hand-baste them together. Machine basting draws the layers together too closely and forms a ridge, so hand basting is the way to go. If you want, you can also zigzag the outside edges to finish them and to keep them together, but secure hand basting is usually enough and allows the shoulder pads to mold to your shape as you wear the jacket.
 e. Here is the finished shoulder pad, ready for positioning in the jacket.
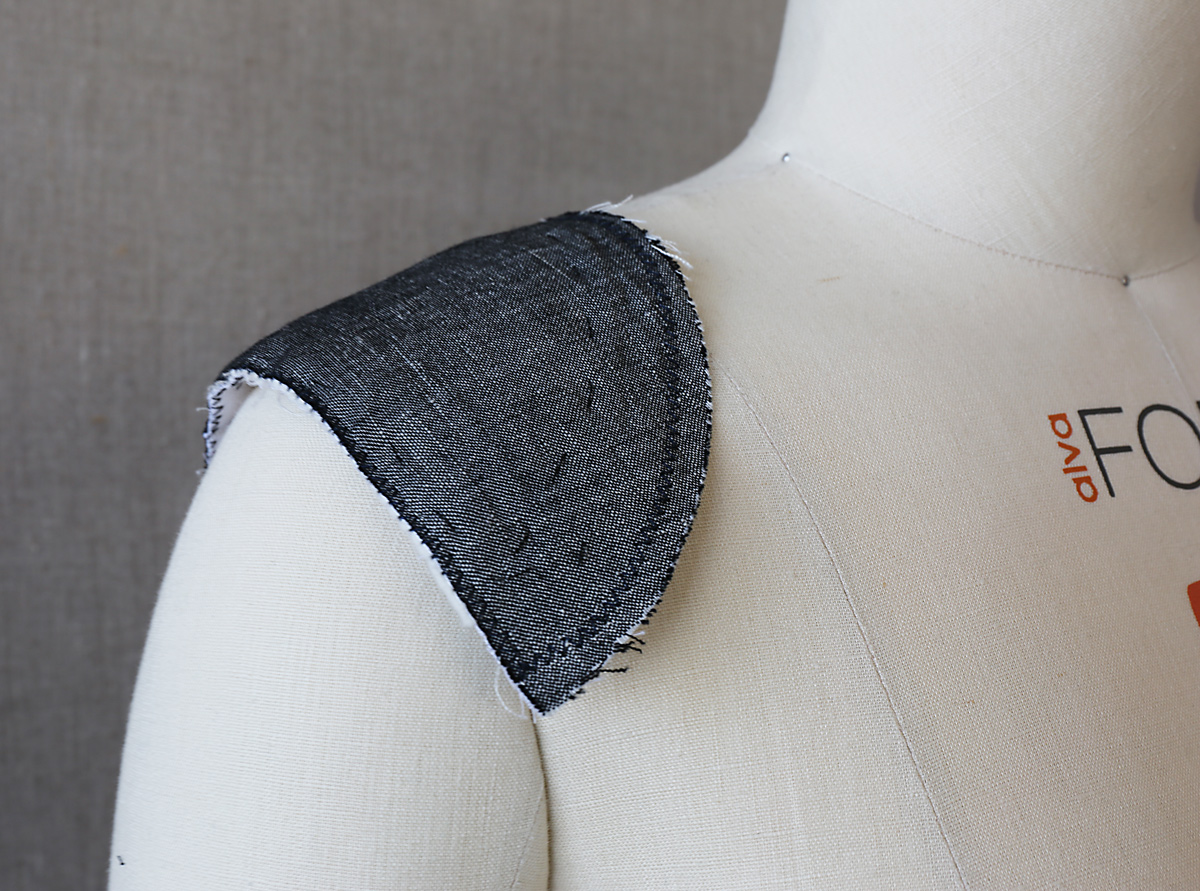
22. (A) Try on jacket for shoulder pad placement. Pin pad to jacket, extending outer edge about 5/8” (1.5cm) beyond armhole seam. (B) Sew pad to shoulder seam allowance. Tack ends to armhole seam. (I usually leave my shoulder pads for the very end, so I’m afraid I don’t have any nice photos of this step for you. But the illustrations make sense, right? Keep in mind when you’re pinning your shoulder pads in place that the straight edge of the shoulder will extend beyond the shoulder seam and a little bit into the sleeve cap, as stated in the first sentence of this step, above. This will make the shoulder look much more natural.)
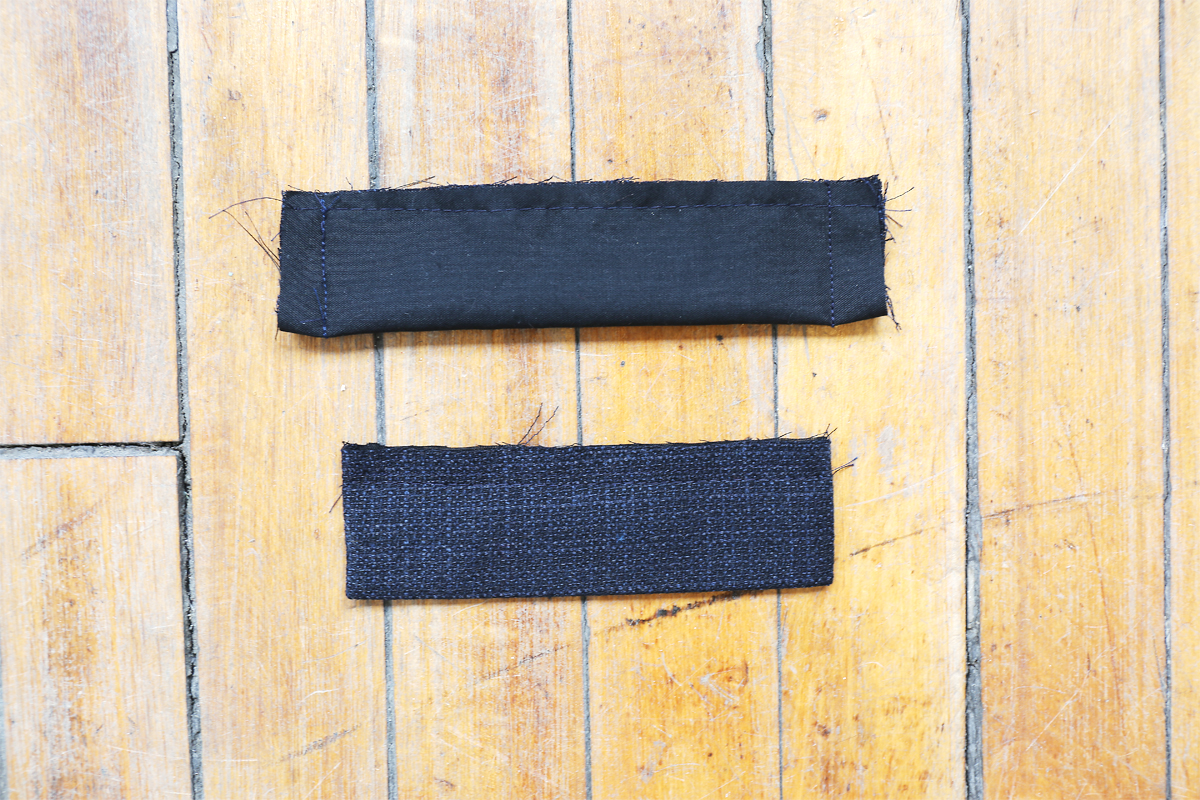
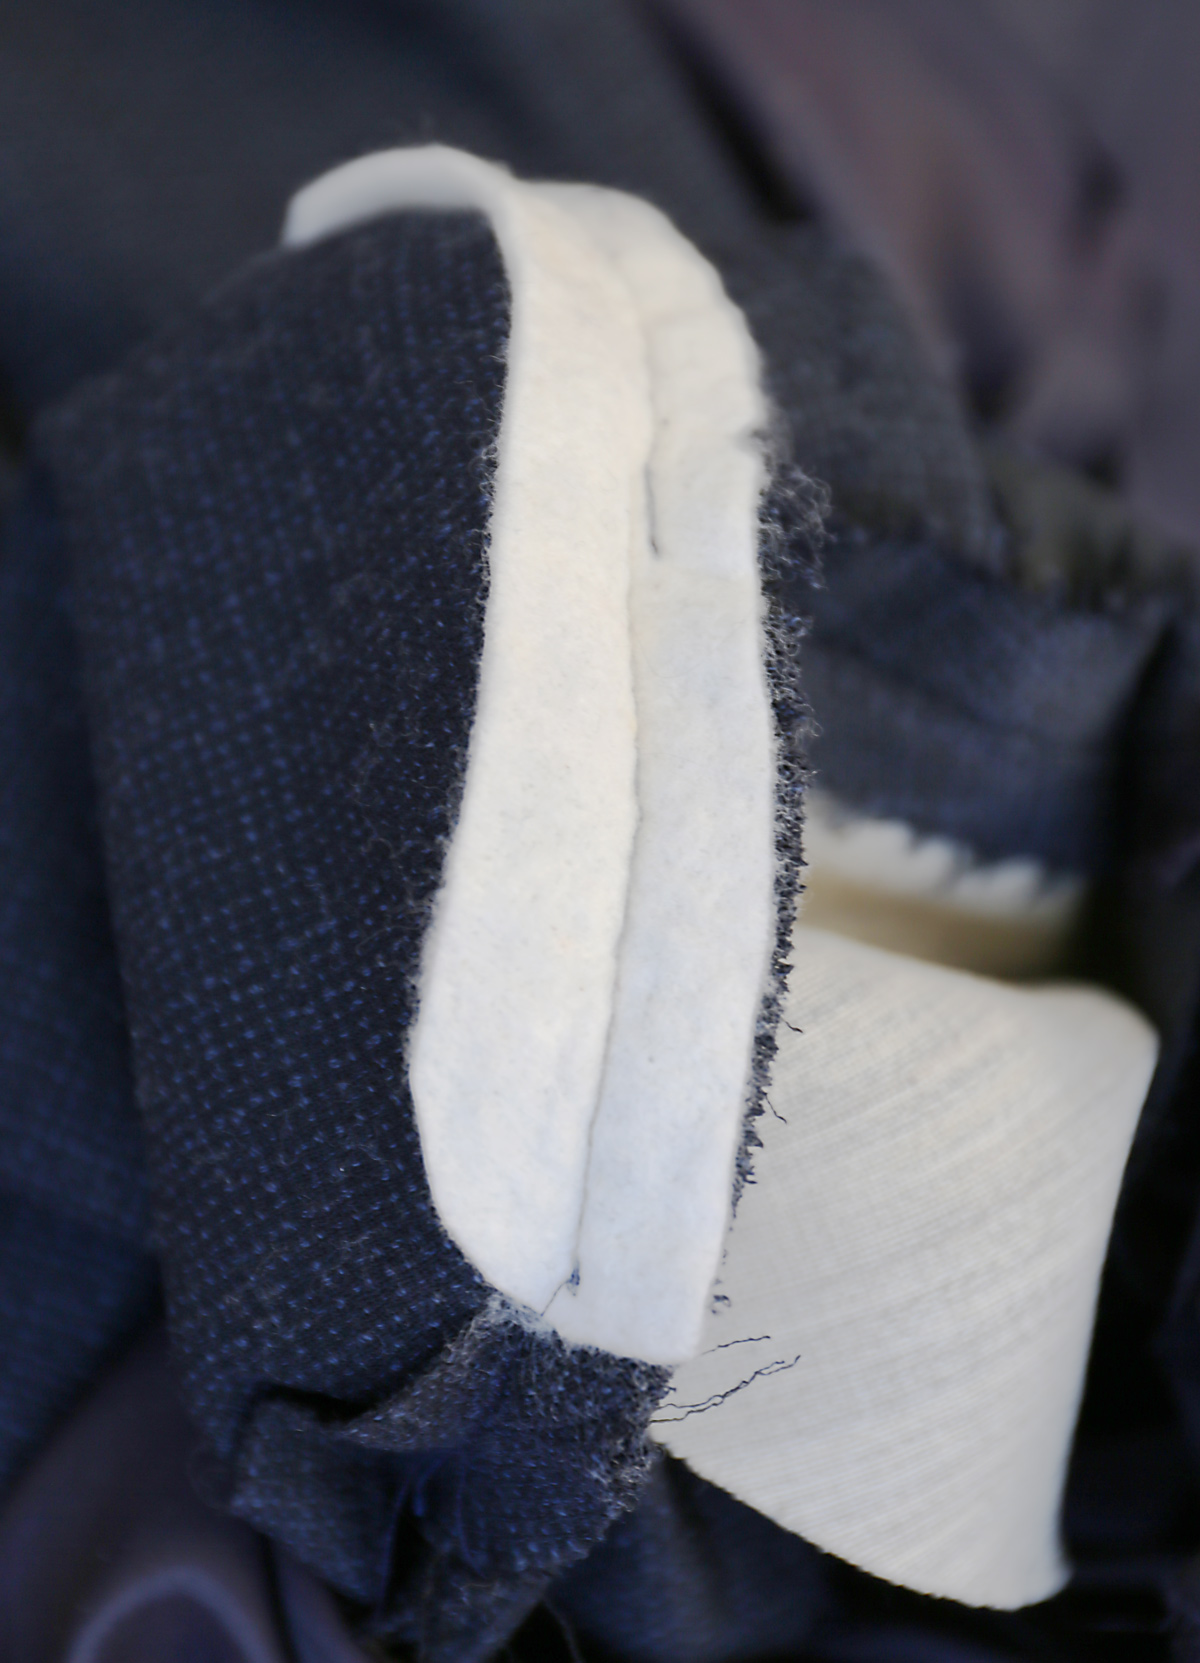
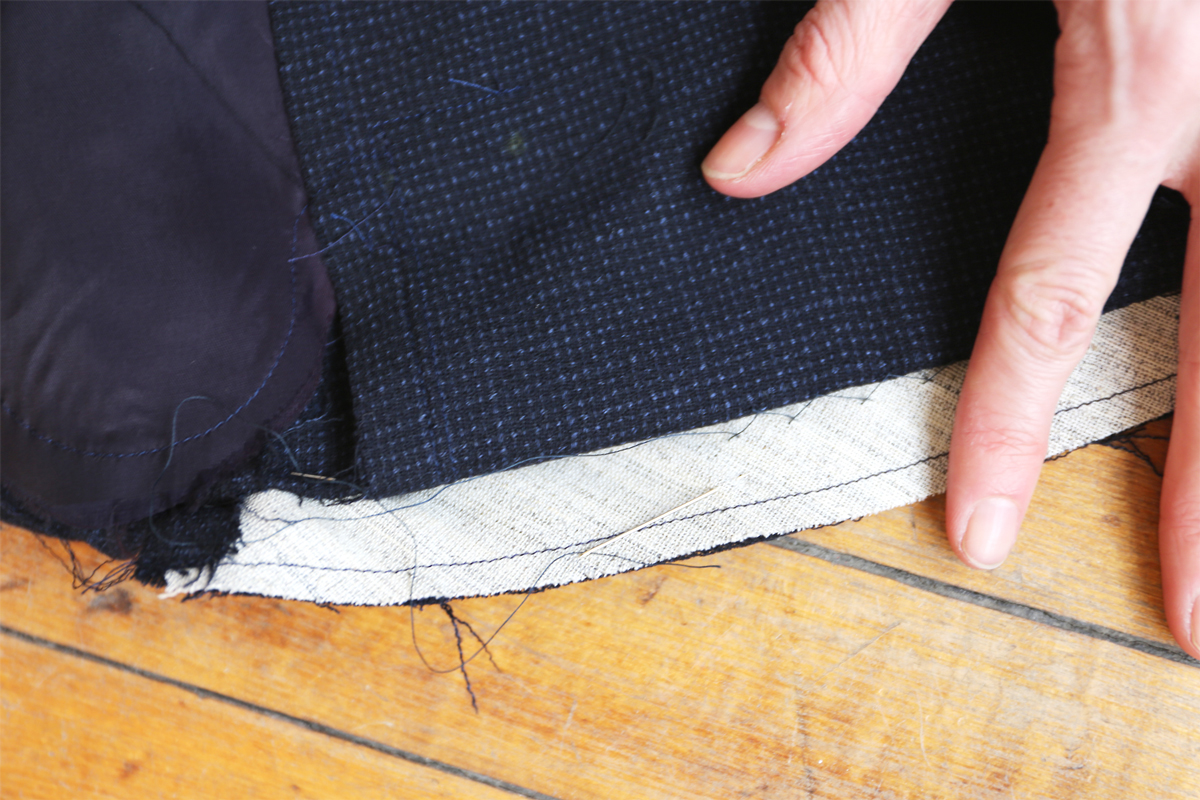
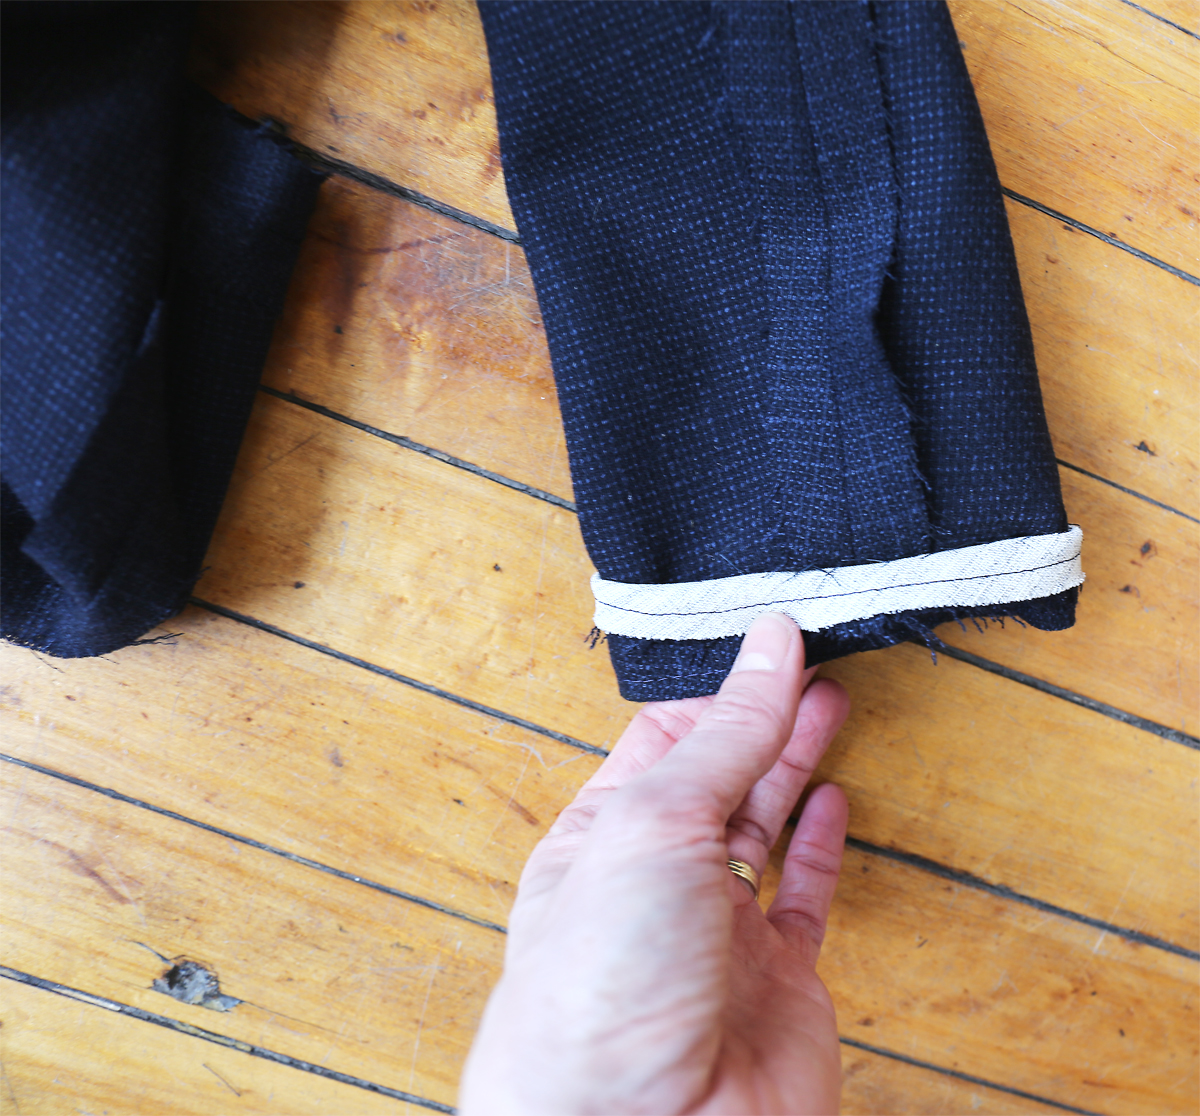
 Extra credit #3 (just for the fun of it): I trimmed the seam allowances at the hem edges to reduce bulk and add bias-cut strips of wool canvas to the sleeve and jacket hems to give them a little extra stability. First, I measured 1 1/2″ from the hem edge and trimmed the seam allowances just just above this point.
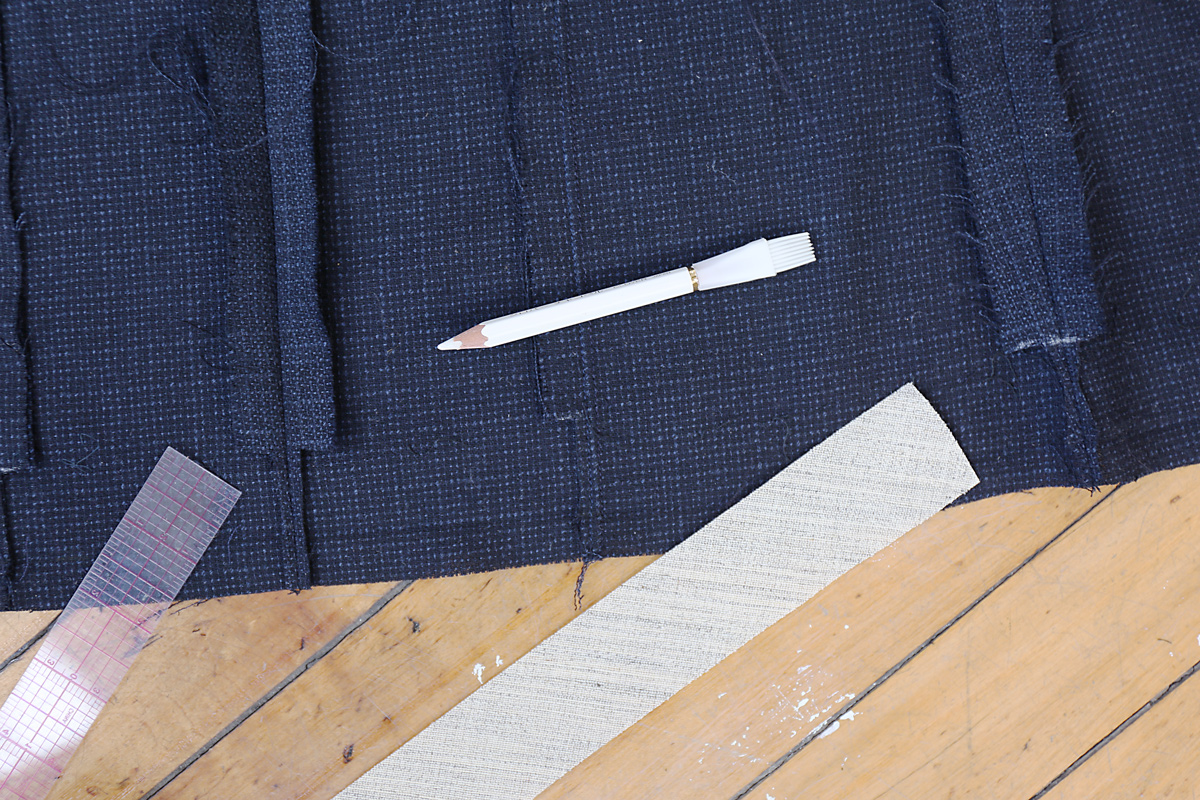 Then I cut strips of 1 3/8″ canvas on bias and stitched them to the wrong side of the hem edges with a 1/4″ seam. I overlapped the ends at the sleeves–this isn’t a really fancy process. Again, feel free to skip this step. It helps to give the hems a little extra structure but is not strictly necessary. My fabric was really drapey, so I wanted the extra structure.
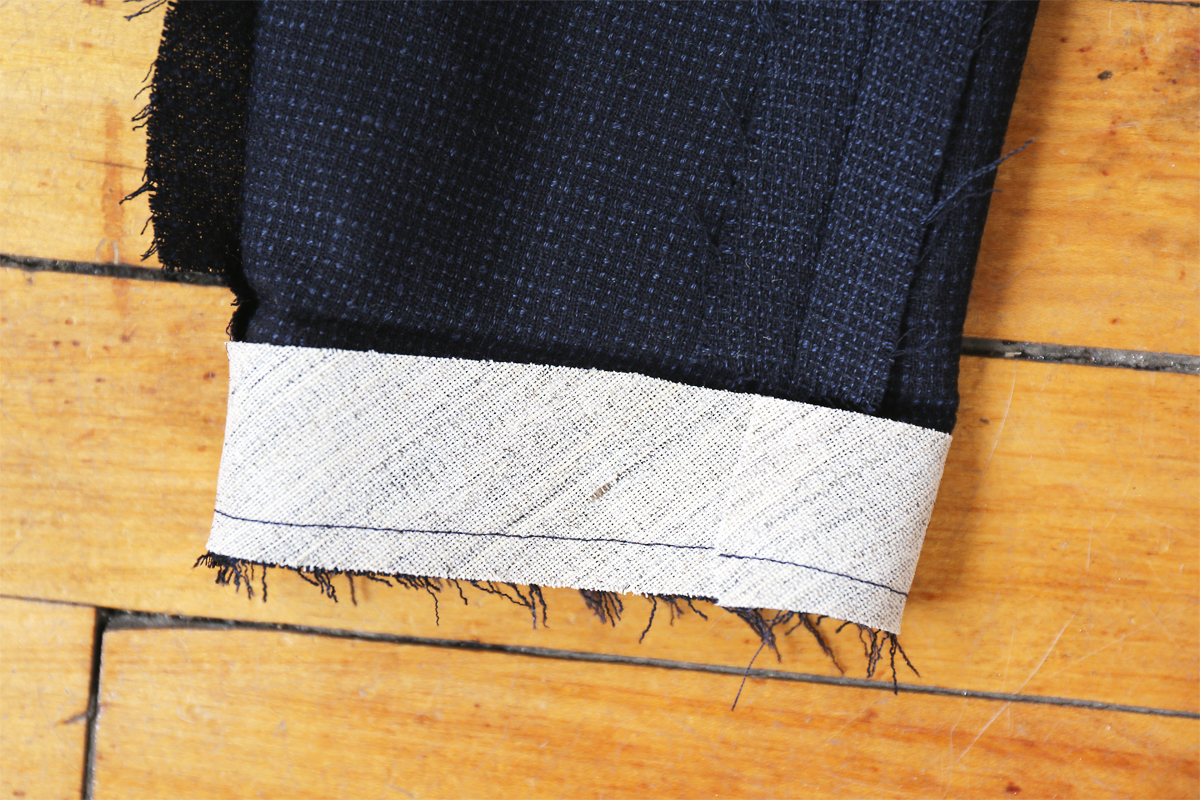 Bias-cut canvas added to the sleeve hem.
 Hair canvas added to the jacket hem.
 Bias-cut hair canvas added to the jacket hem.
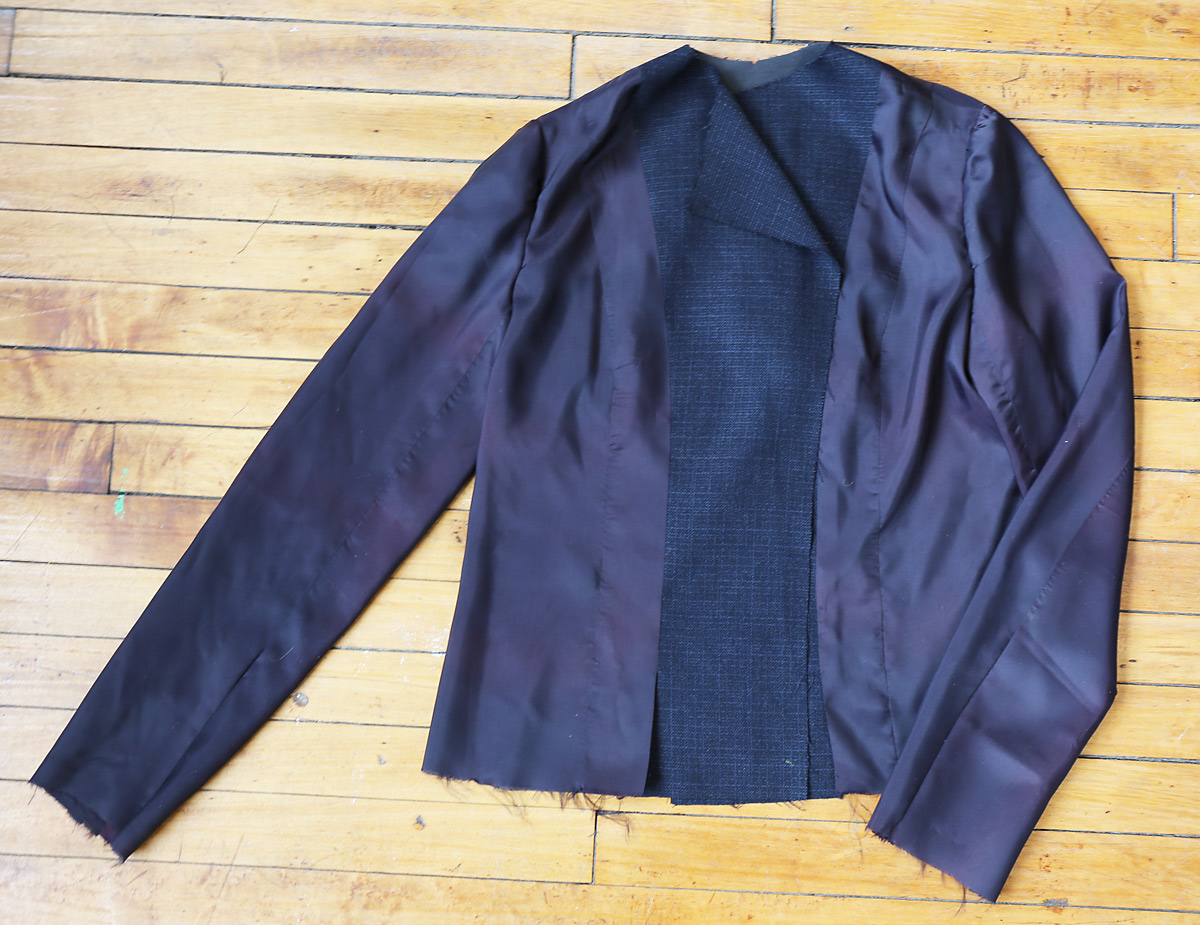
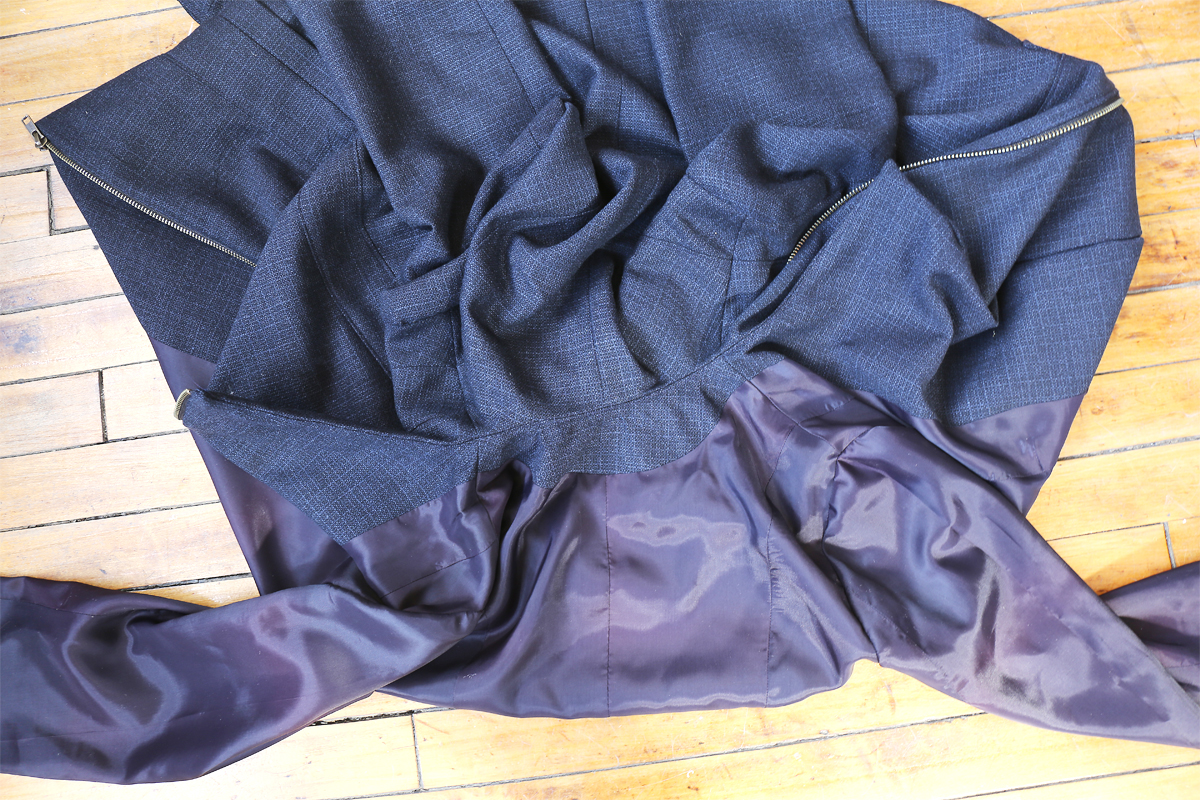
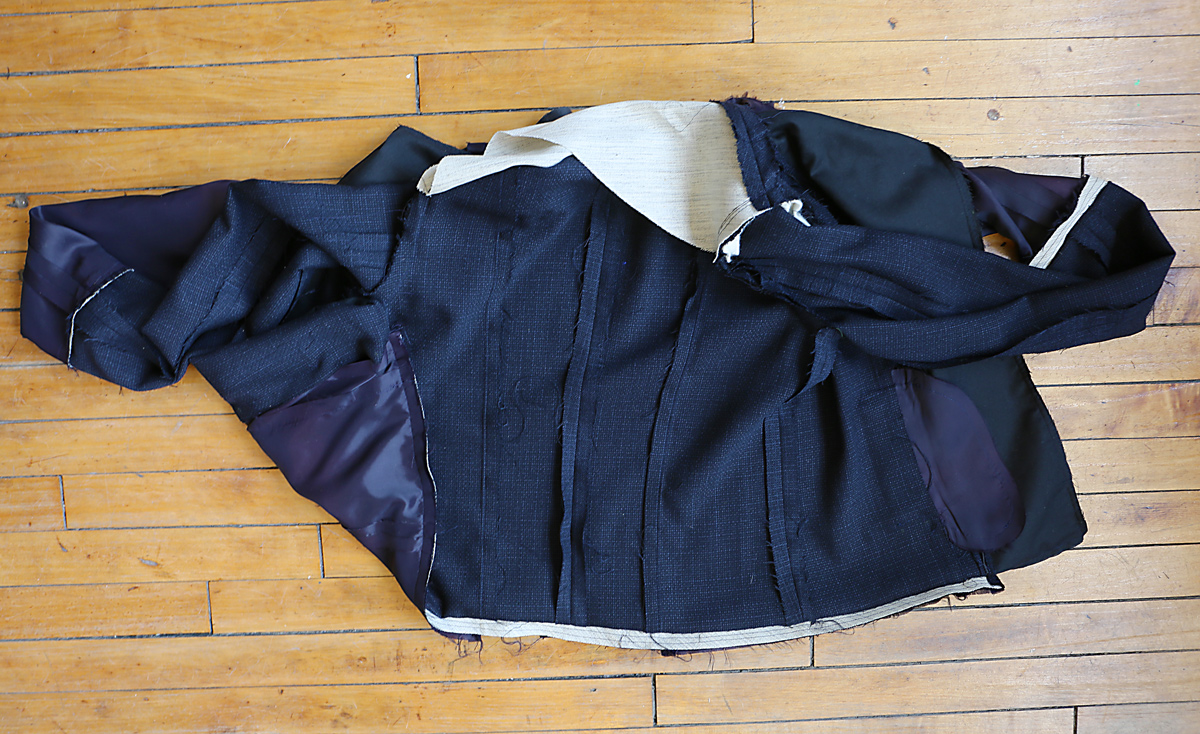
And here we are with a completed outer jacket! That wasn’t too bad, was it? It already looks pretty impressive, and we haven’t even added the lining, which is what makes it look really professional. And that’s the easy part, so you’re nearly finished!
 Tomorrow we’ll pick up with the facing and the lining. But in the meantime, admire the outer jacket you’ve sewn!
Day 4
Today we’ll construct the lining, which is a lot like constructing the outer jacket but with a few small differences that make it much easier and faster. For example, no zipper or pockets. Hurray! Take note of the little differences in the instructions below, but this portion is all going to feel very familiar to you.
Lining and Facing
23. To make pleat in BACK LINING (10), on inside, bring center back pleat lines together. Baste. Stitch along stitching lines from upper and lower edges to circles. (The basted portion will be opened up at the very end to leave a little wearing ease in the jacket. In the photo below I placed pins where the stitching changes from regular stitching to basting stitches.)
 24. Press pleat toward right back. Baste across upper and lower edges.

25. STAYSTITCH upper edge of back lining. STAYSTITCH side back edges of back lining above waist. (Again for clipping the seam allowances of opposing curves.
26. Pin BACK NECK FACING (11) to back lining, right sides together, matching notches and centers, clipping back lining where necessary. (This is the trickiest opposing curve of the jacket. Be patient and clip into the seam allowances of the back lining frequently to help it fit. If you start pinning at the outside edges and then pin at the center back, the rest of the lining will gradually fall into place. Use lots of pins to help you! You can see all the clipping I did to get my pieces to fit together below.) Stitch. Press seam allowances toward lining.
27. Pin side back LINING to back lining at side back edges, clipping back lining where necessary. Stitch. Press seam allowances toward back lining.
28. STAYSTITCH side front edge of front FACING above waist.
29. Pin middle front LINING to front facing, right sides together, clipping front facing where necessary. Stitch to within 4” (10cm) of lower edge. Press seam allowances toward lining, pressing in remainder of middle front lining seam allowance. (We’re leaving the bottom 4″ open because the lining will have a little pleat at the bottom, allowing the jacket to move with you.)

30. STAYSTITCH side edge of middle front lining between upper two notches.
31. Pin middle front lining to side front LINING, clipping middle front lining where necessary. Stitch. Press seam allowances toward middle front lining. (This is all feeling very familiar, right?)

32. Pin back facing and lining to front facing and lining at shoulders, right sides together, matching notches, triangles and seams. Baste. Stitch. Stitch back lining to front lining at sides. (If you’d like to bag out your jacket, be sure to leave the middle of one side seam unstitched for about 6″ at this point. Otherwise, carry on as written!)
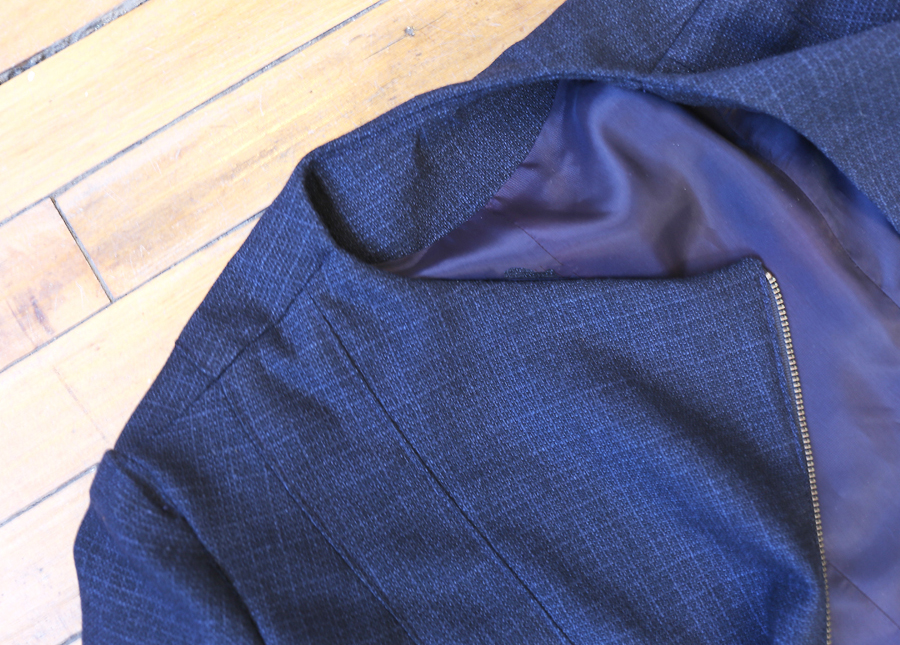
33. STAYSTITCH neck and armhole edges of facing/lining.
Now this is where I’ll start to diverge from the written instructions. If you prefer to follow the instructions as written, please feel free to do so. The method in the instructions is a classic fool-proof construction technique that will give you great results. But if you prefer to do less hand sewing (and who doesn’t?) and want to stick with me, I’m going to take you through the process of “bagging out” the lining and doing a lot less hand sewing. Ready? I’m going to move steps around a bit and alter things, so if you prefer to follow the instructions you may want to ignore the rest of the sew-along. But we’ll be here when you get back, we promise!
34. Assemble and attach the sleeve linings to the jacket lining as you did with the outer jacket sleeves. Refer to steps 18, 19, and 21 in yesterday’s post if you need a reminder.

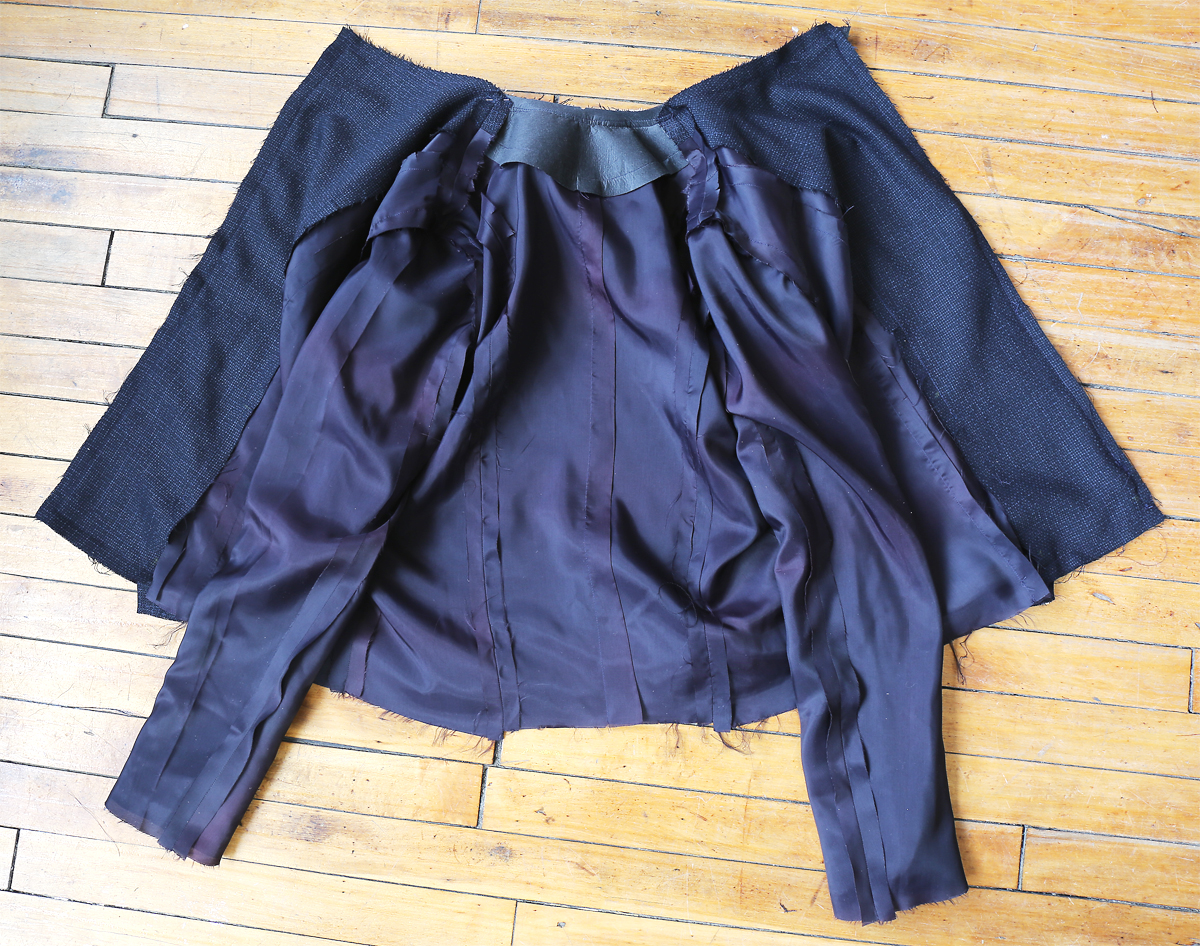
And here we are with a completed jacket lining! We’ll “bag out” our jacket lining tomorrow, and you’ll be surprised at how quick and easy it is to bring the outer jacket and the lining together to finish the jacket.
Day 5
Today we attach the lining to the jacket and finish a few remaining details. Remember that yesterday I started to diverge from the written instructions a bit? If you prefer to follow the instructions as written, please feel free to do so. The instructions will guide you through a classic construction method that will give great results. But if you prefer to do less hand sewing (and who doesn’t?) and want to stick with me, I’m going to take you through the process of “bagging out” the lining. It’s a fast and easy process, and it’s exciting to see the finished jacket come together so nicely.
Ready? If you decide to follow the written instructions you may want to ignore the rest of the sew-along. But we’ll be here when you return! Don’t forget to show us your finished jacket, too. See the very end of this post for details.
Bag out the Lining
35. Prepare and stitch sleeve LINING in the same manner as described for jacket sleeve, omitting sleeve hem. Easestitch the cap of the sleeve. Refer to steps 18 and 19 for details.
36. Stitch the sleeves to the lining in the same way as you did for the jacket. Refer to step 21 for details.

37. Pin facing/lining to jacket, right sides together, matching notches, center backs, seams and circles. Stitch lower front, front and neck edges using a zipper foot when stitching along zipper. Trim seam allowances. (For this step, stop stitching when you reach the inside edge of the front facings; don’t stitch the hem of the lining! Also, it’s a nice touch to fold the inside edge of the facing back by 5/8″ before you stitch it. This will give the inside of the jacket a clean finish.)
38. UNDERSTITCH back neck edge between shoulder seams. (Press the trimmed seam allowances toward the facing/lining and understitch the seam allowances to the facing/lining to give the finished neckline a clean edge. This will keep the neckline neat and clean so the facing/lining doesn’t roll out when the jacket is being worn.)
39. Turn facing/lining right side out. Press.
Then turn the jacket and lining inside out again for the next steps.
40. Turn up a 1-1/2” (3.8cm) hem on lower edge of jacket, keeping the lining free. Baste hem close to fold. Hand-sew in place, easing in fullness, if necessary. Press. Catchstitch inner edge of facings to hem. (As you hand sew the hem of the jacket and the sleeves, be sure to leave at least 3/4″ of the hem edge (seam allowances) unstitched. We’ll be machine stitching the lining to this edge so we’ll need enough leftover fabric to stitch!
 First I basted the hem near the fold.
 Then unfold them hem and hand stitch the hem about 3/4″ from the cut edge of the fabric. (A catch stitch is great for this part.)
 Do the same thing with the sleeves.
41. Separate the jacket from the lining as much as you can and find the matching fabric sleeve and lining sleeve. Turn the fabric sleeve right side out for a couple of inches at the hem and pin the lining sleeve to the jacket sleeve with right sides together. This will seem like a puzzle at first, but once you get the hang of it you’ll be so thrilled! Take care not to twist either sleeve and to match up the seams. Stitch the lining to the jacket at the sleeve hem with a 5/8″ seam (a 1/2″ seam is ok if you run out of room; you can also use your zipper foot if it’s difficult to stitch close to the handstitching.) Do the same with the opposite sleeve and sleeve lining. You’ll have a very strange-looking jacket at this point, but all will be ok very, very soon! And by the way, if this part completely befuddles you, skip it. You can always hand stitch the sleeve linings to the sleeve hems later if all else fails.
 Be sure both sleeves are aligned so they aren’t twisted as you pair them.
 Here is a close-up so you can see how the right side of the lining is pinned and stitched to the right side of the partially-unfolded sleeve.
42. Unfold the jacket the hem as much as you can and pin the jacket hem to the lining hem with right sides together. Stitch just the hem with a 5/8″ seam. If you haven’t got quite enough room for a 5/8″ seam because of the hand hemming, don’t worry! A 1/2″ seam will be fine, too.
43. Now, reach in though that nifty opening you left at the side seam of the lining and carefully–gently–pull the jacket through the gap. Presto, magic! Your jacket emerges as a fully formed, beautifully sewn creation! We have just a few little details to finish up, and you’ll be wearing this baby in no time!

44. Attach the shoulder pads, if you haven’t done so already. To do this, slip the shoulder pads into the jacket through the opening in the lining. Put on the jacket, adjust the shoulder pads to your liking, and pin them in place. The shoulder pads can be hand stitch to the seam allowances; you’ll can reach in through the gap in the lining to stitch them, or turn the jacket inside out if it’s really necessary. Just be sure to keep the shape of the shoulder when you’re stitching the shoulder pads so they look natural when they’re in place.
45. Hand stitch the openings at the edge of the facings closed. When you press the jacket, a pleat will form at lower edge for wearing ease. While you’re hand stitching, close up the gap in the lining side seam as well. You’ll notice that the lining will have a little pleat at the bottom for wearing ease.
 You’ll want to hand-stitch the little openings at the bottom edge of the front facings to close them.
46. Remove the basting stitches from the hems and the center-back lining and remove any visible ease stitches from the sleeve caps. Give the jacket a really good steaming/pressing. And then give yourself a happy pat on the back. You just sewed a really professional-looking jacket! Congratulations on a job very well done. Here’s mine, photographed after school yesterday by three giggling little girls.

Now before you go, I want to see your finished jacket too! And I’m sure your fellow sew-along-ers would like to see it as well. Will you post a photo or two to the SewLisette Flickr group? Or leave a comment with a link to your photo, wherever you choose to post it. Toward the end of next week I’ll post a collection of everyone’s finished jackets, so please share with us so we can all admire your lovely work!
No Comments yet.