Welcome to day one of the Girl Friday/Lunch Box Culottes sew-along!
Whether you are sewing up Girl Friday Culottes or Lunch Box Culottes, in this sew-along we will be sewing them by the pattern. Liesl’s patterns have been called sewing lessons in an envelope. If there is a sewing skill that you haven’t developed yet, there’s no need to worry. The instructions will walk you through it step by step.
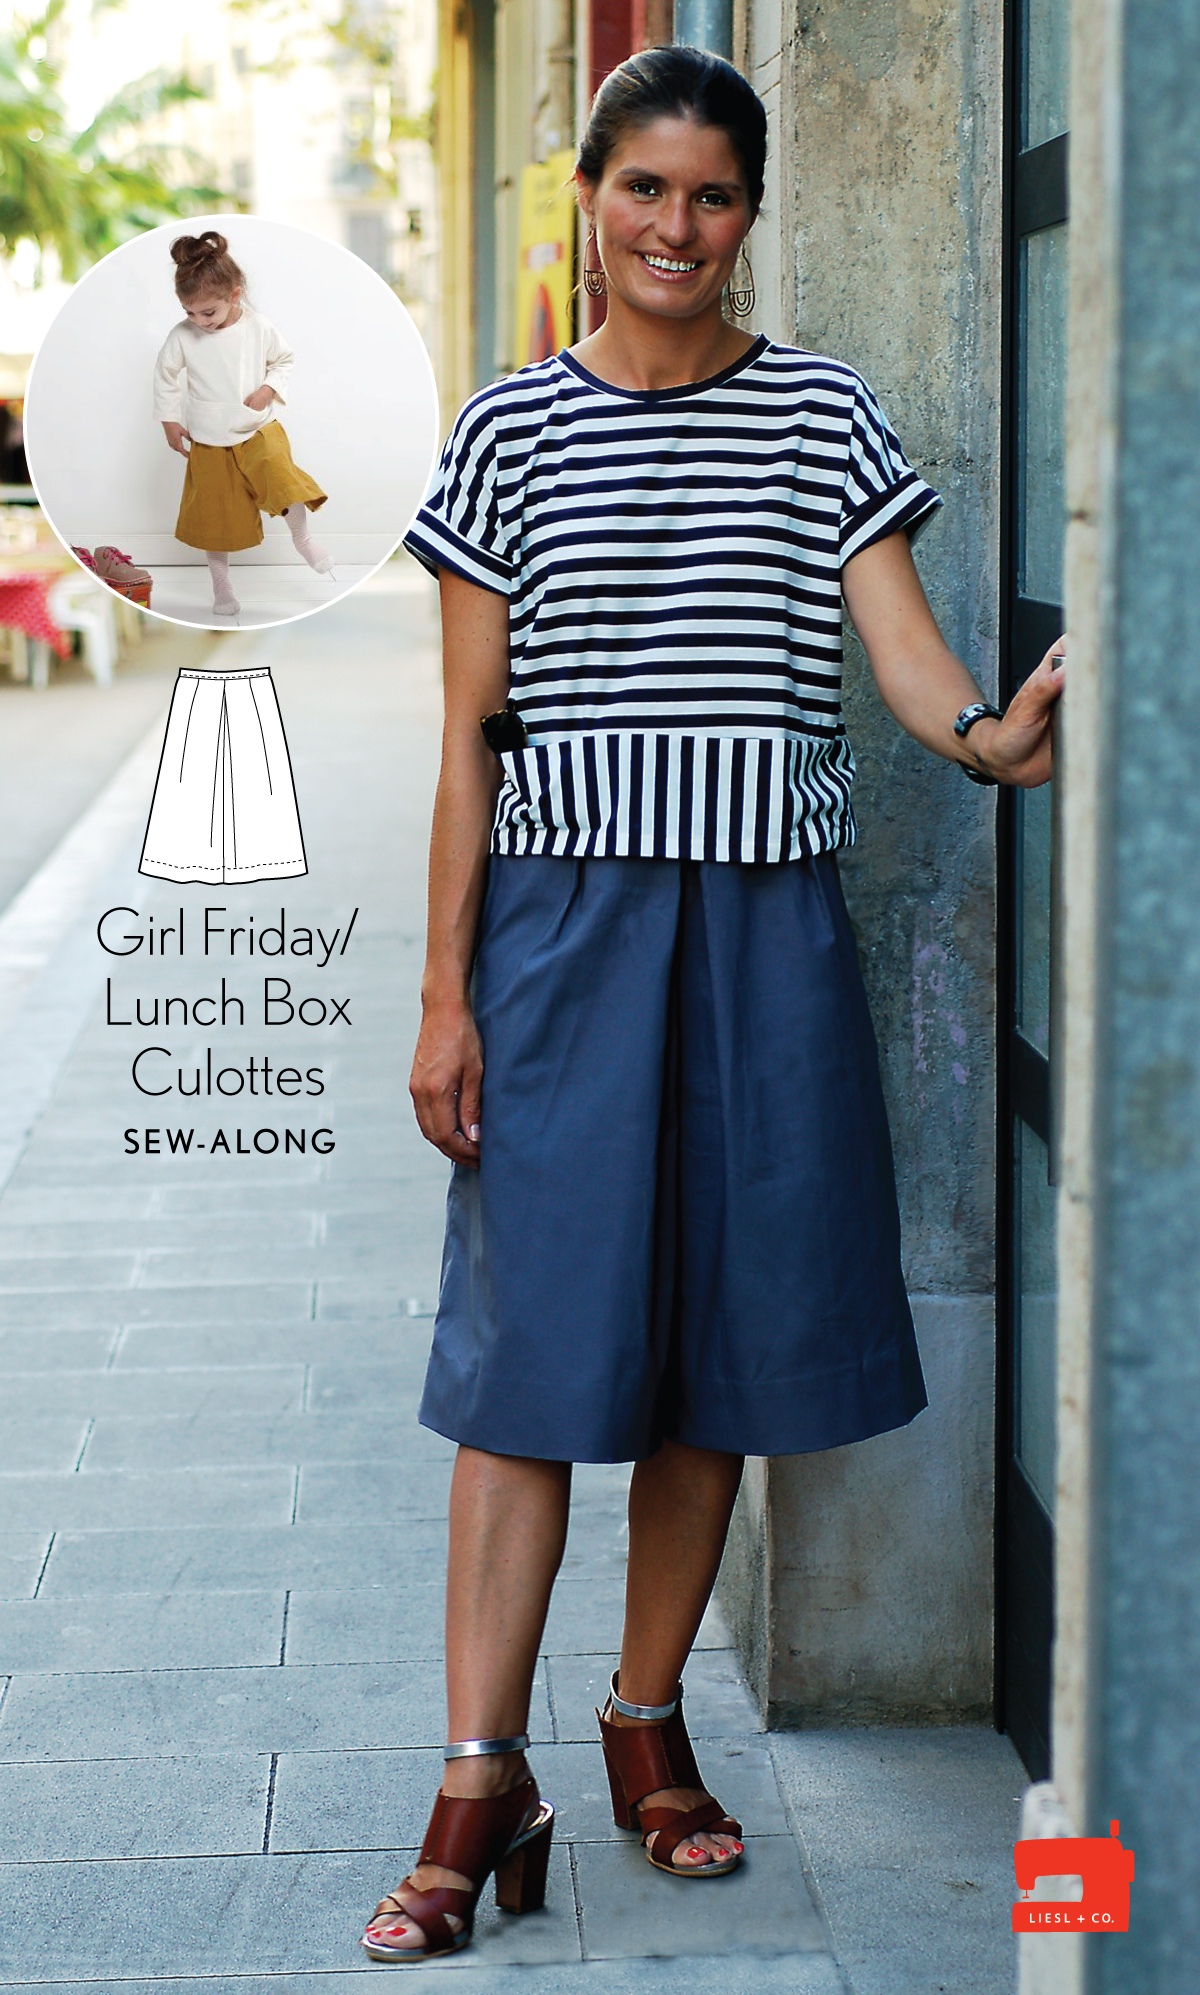
Today we will be stitching the darts, assembling the culottes, and making the pleats. So let’s begin, shall we?
Getting started
Transfer all markings and fuse interfacing to the wrong sides of the fabric pieces according to your pattern and instructions.
Stitch the darts (for Girl Friday Culottes only)
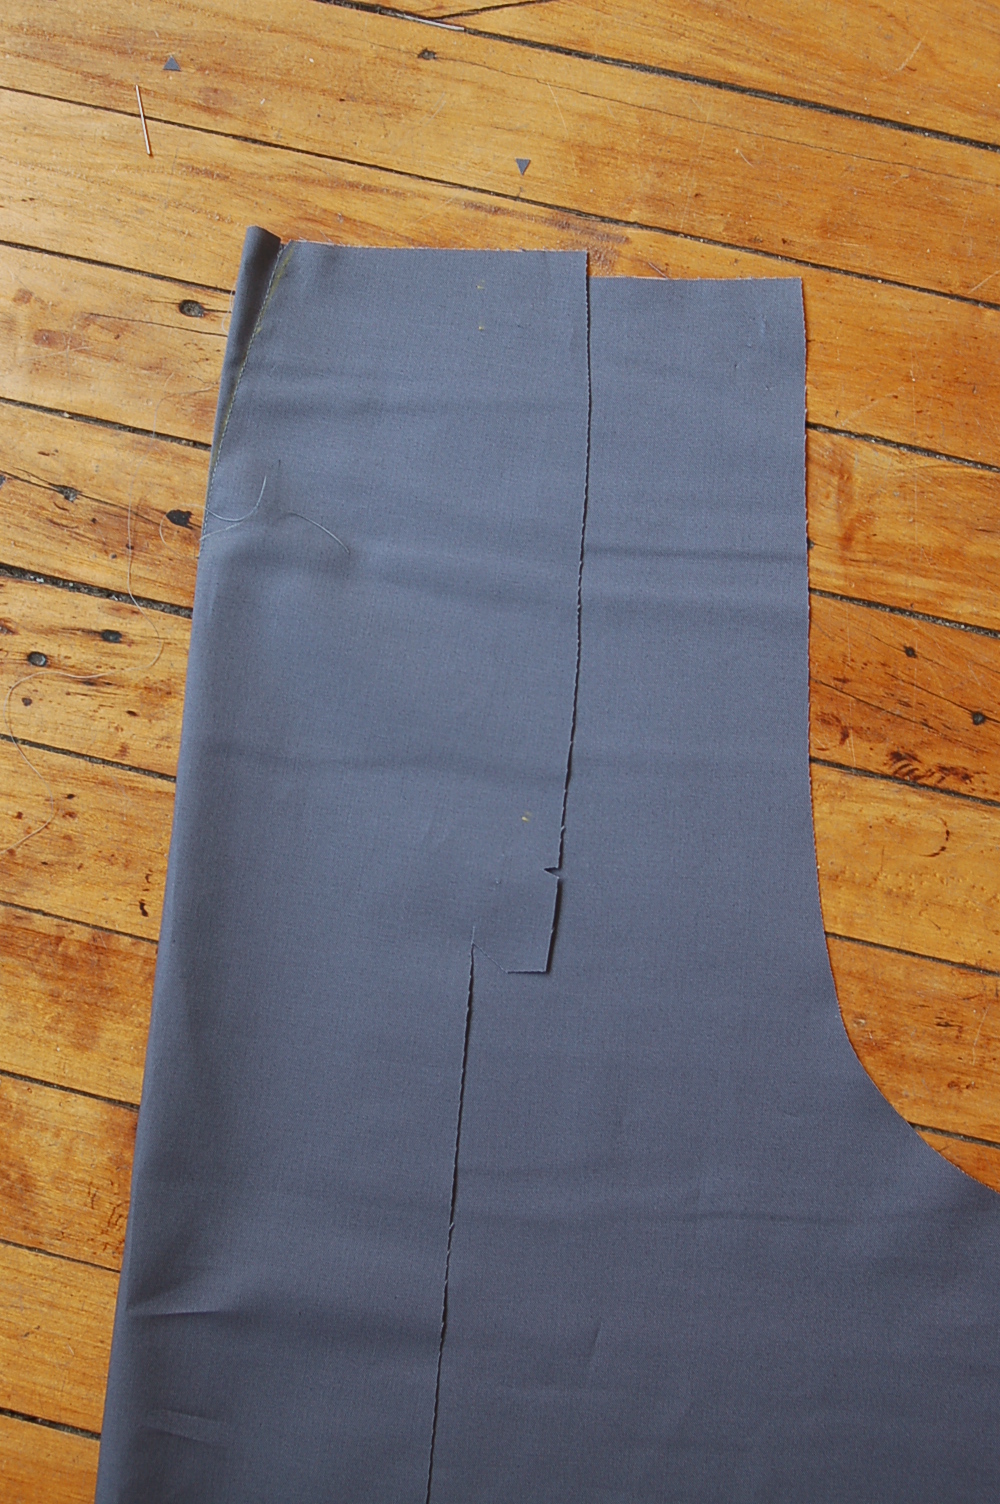
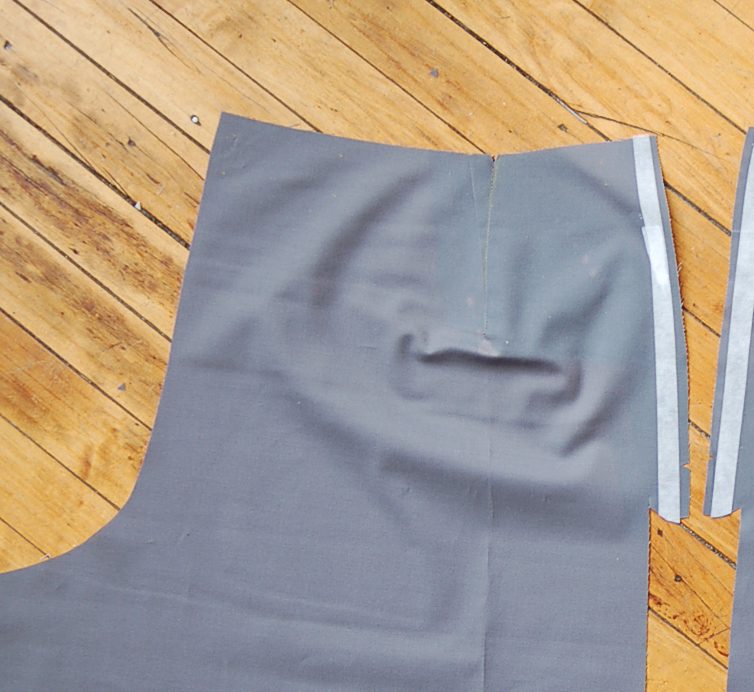
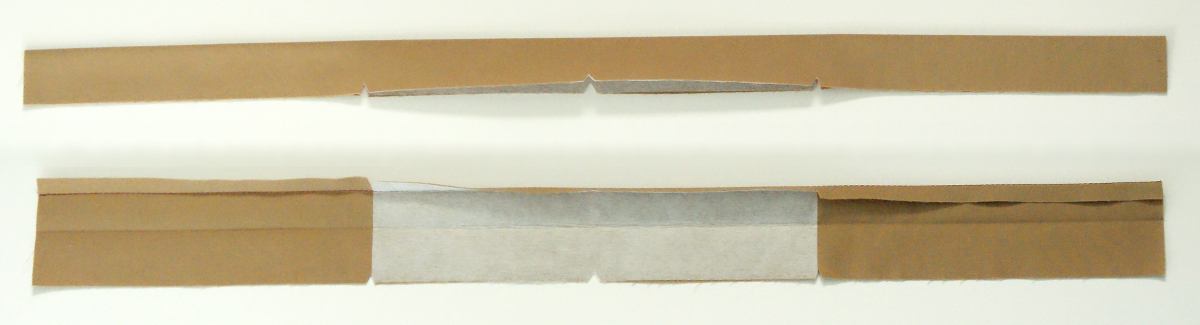
1. To close the darts on the culottes-back pieces, fold one culottes back along the dart’s center, with the fabric’s right sides together and the marked dart legs aligned. Pin and stitch along the aligned dart markings, backstitching at the widest part of the dart but not at its tip. Instead, at the dart’s point, leave thread tails several inches long and knot the thread tails together a couple times to secure the thread. This will reduce bulk at the tip of the dart and prevent it from puckering. Repeat this process with the dart on the second culottes-back piece. Press the darts flat to set the stitches, then press them toward the rise (the crotch curve).
Assemble the culottes
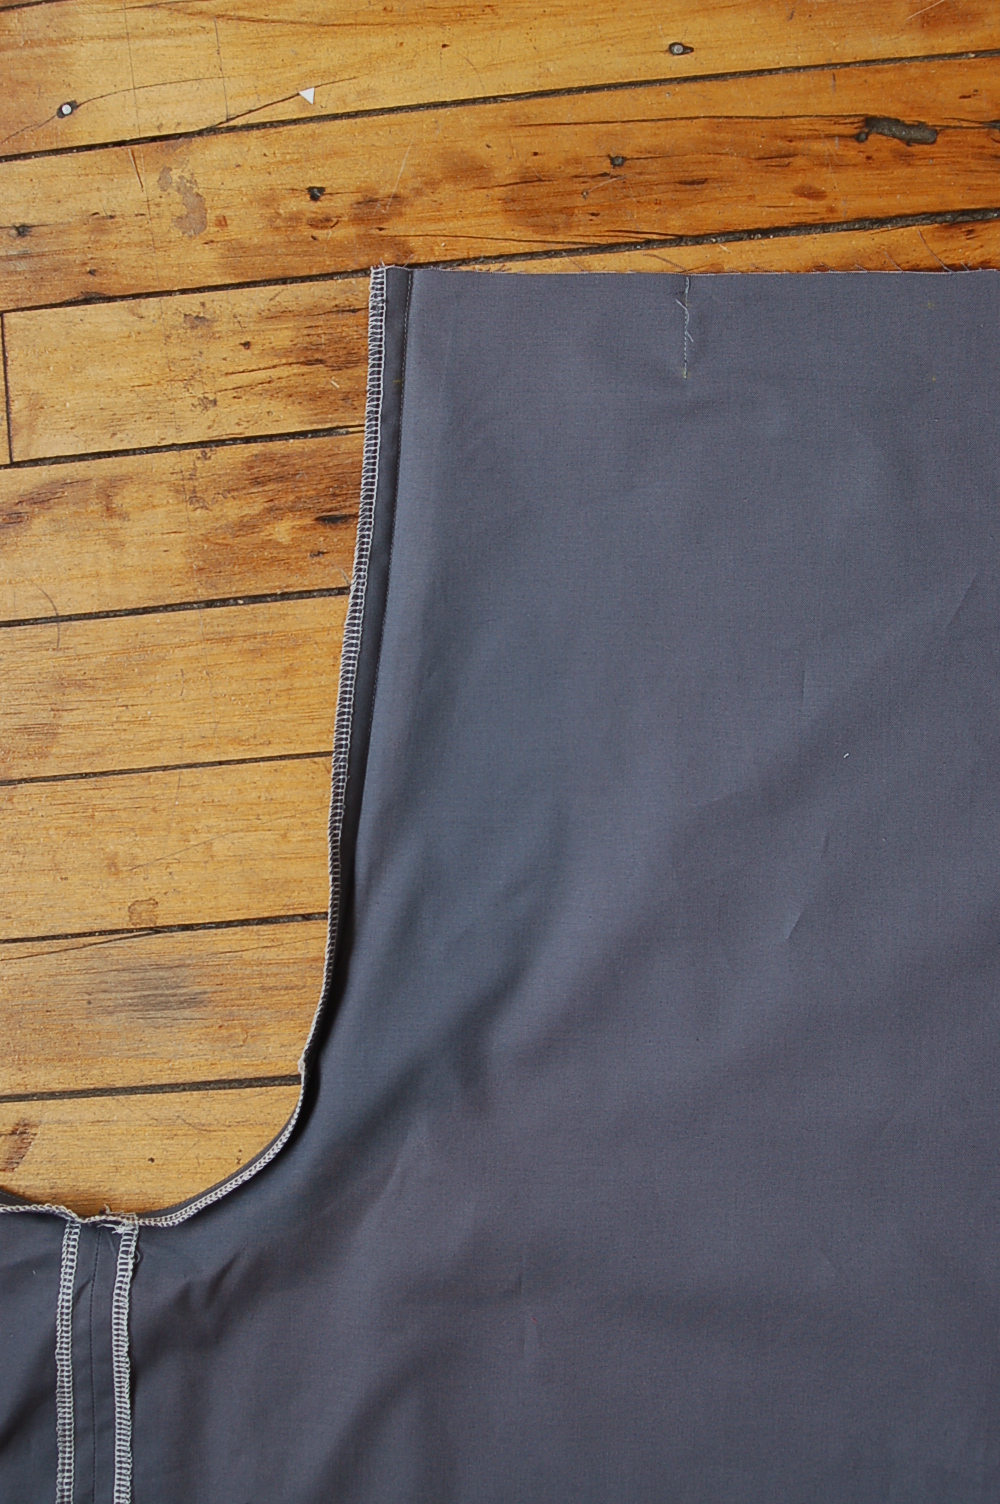
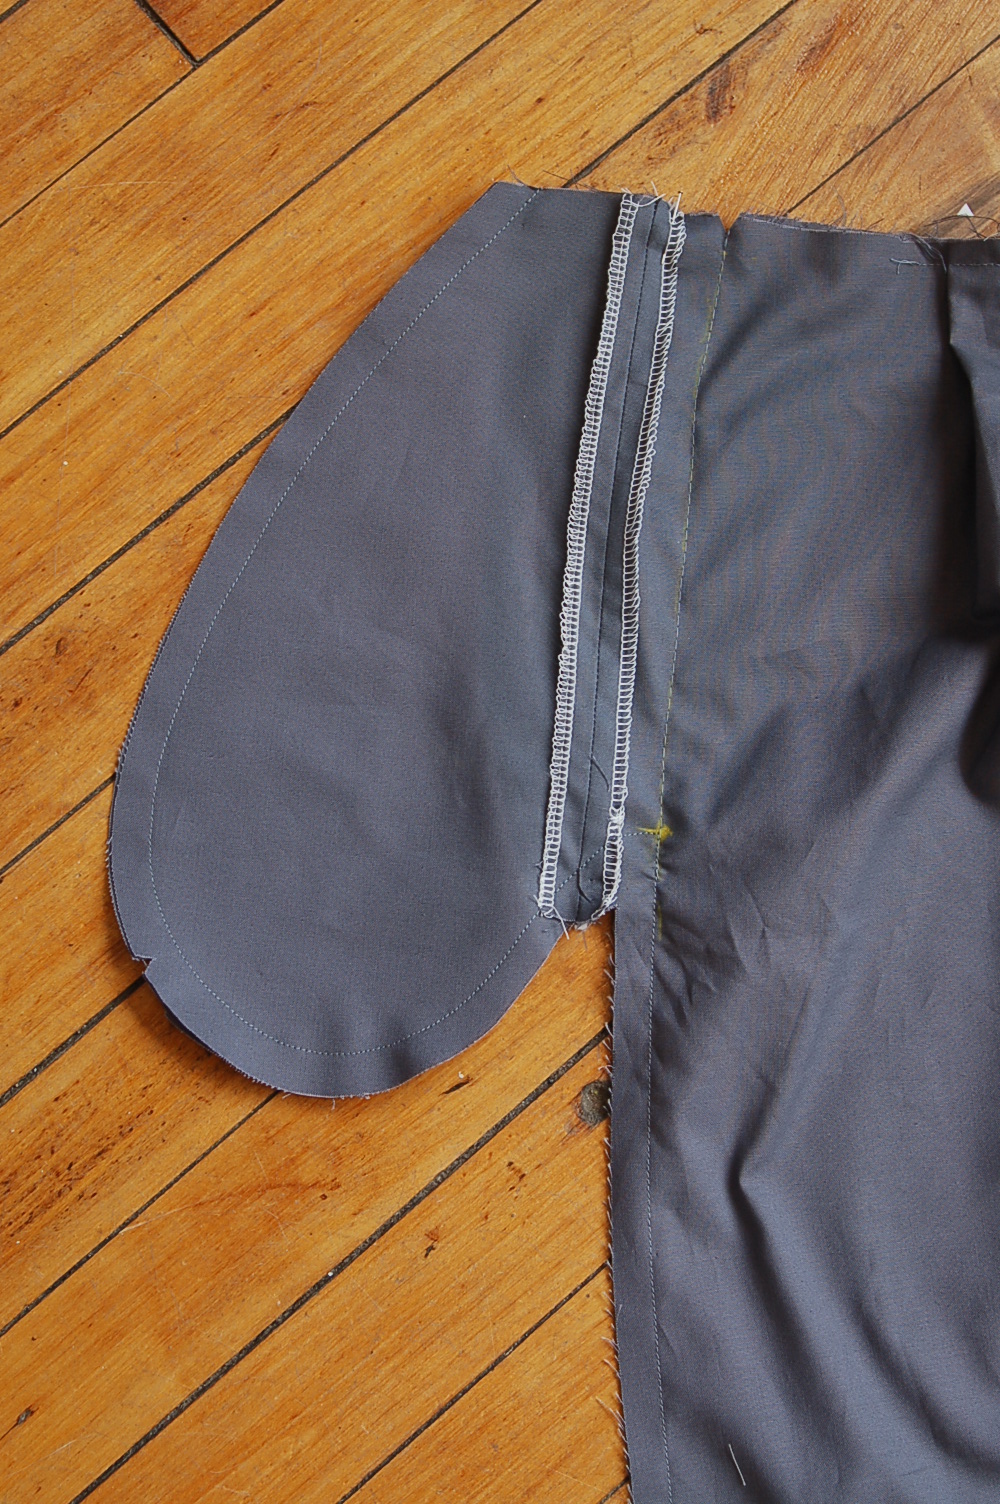
1. Align and pin one culottes front to one culottes back, with right sides facing, and stitch the inseam with a 1/2” seam. Finish the seam allowances using your preferred method and press the seam allowances open. Repeat this process with the second set of front and back pieces.

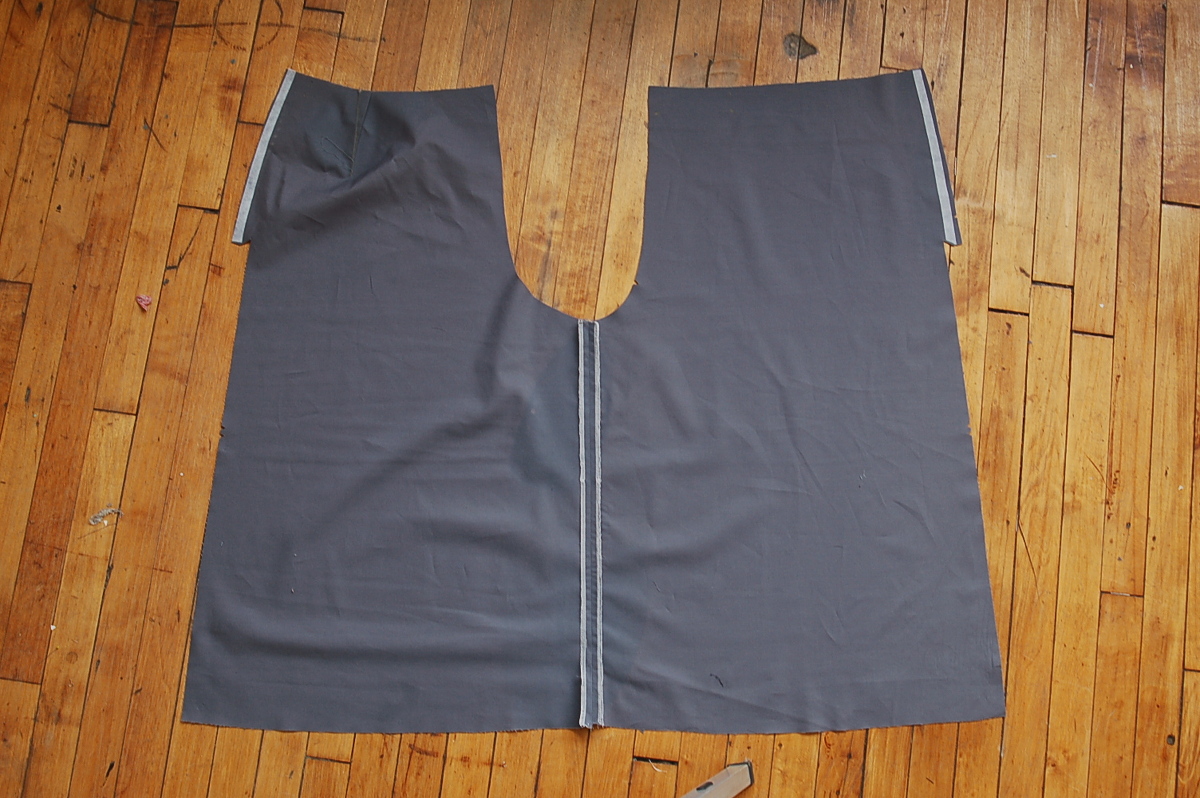
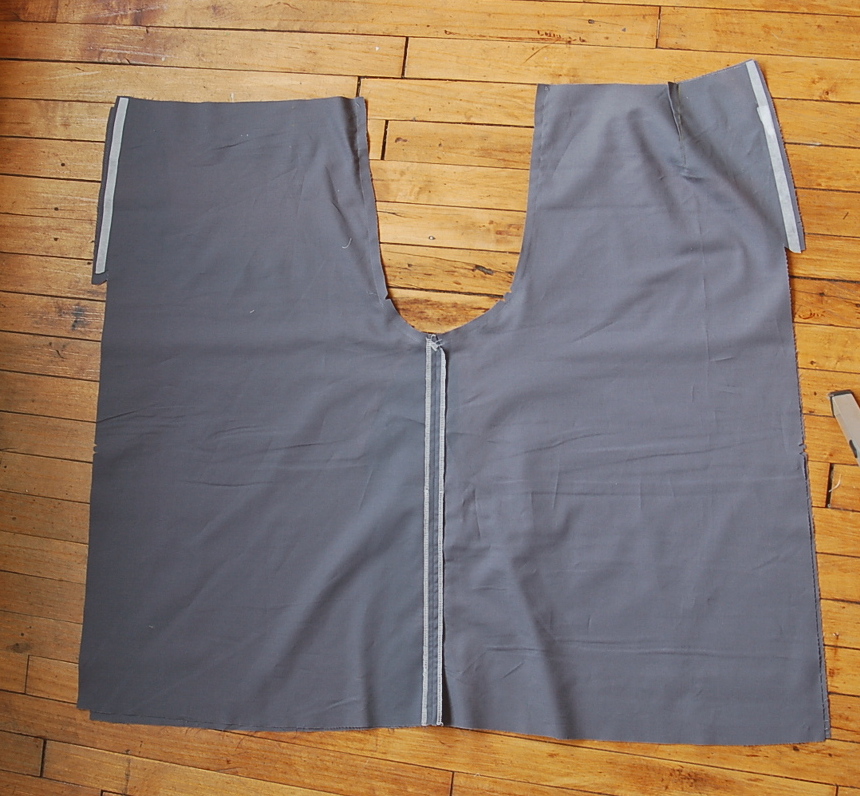
2. Pin the two culottes halves with right sides together, matching the raw edges, inseams, and notches. Stitch the rise (the crotch) with a 1/2” seam. Stitch the rise a second time just inside the first stitching line, starting at the front notch and ending at the double back notches. This will help to strengthen the rise at this stress point. Press the seams to one side (since the fabric is cut on the bias at the curved part of the rise, the seam allowances will stretch) and finish the seam allowances together using your preferred method.

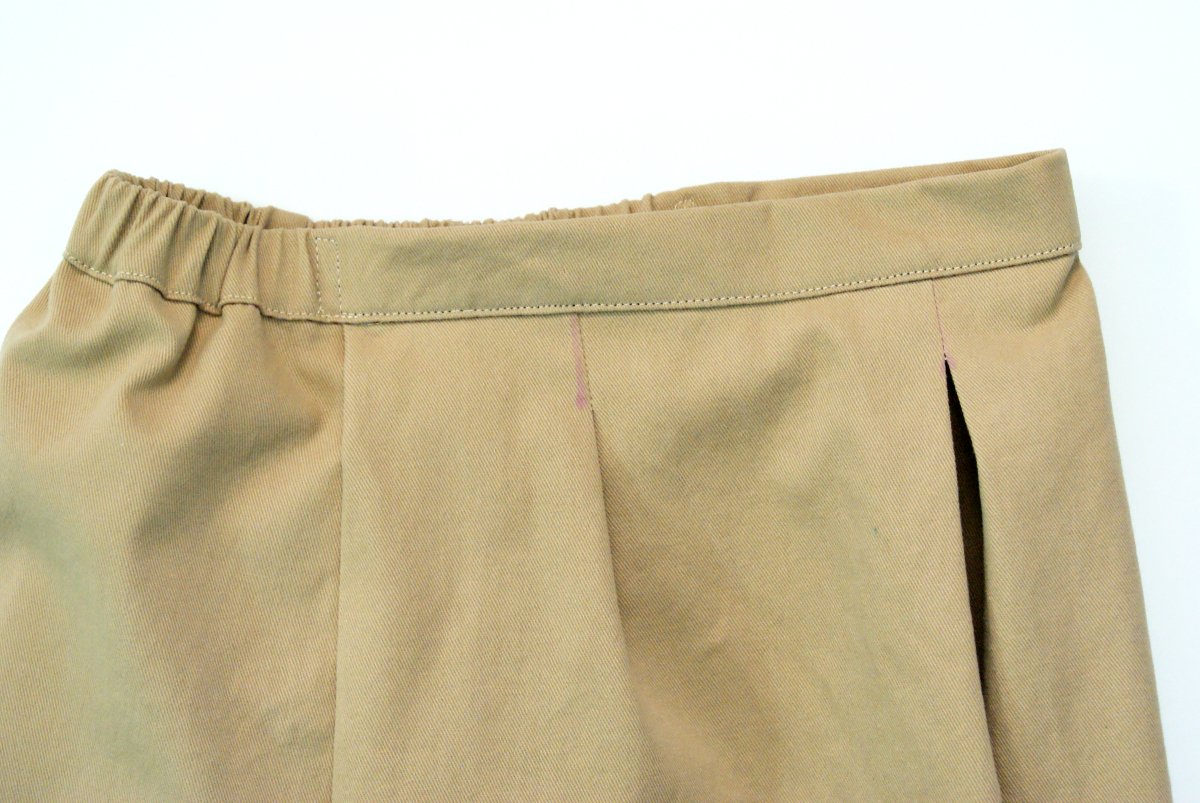
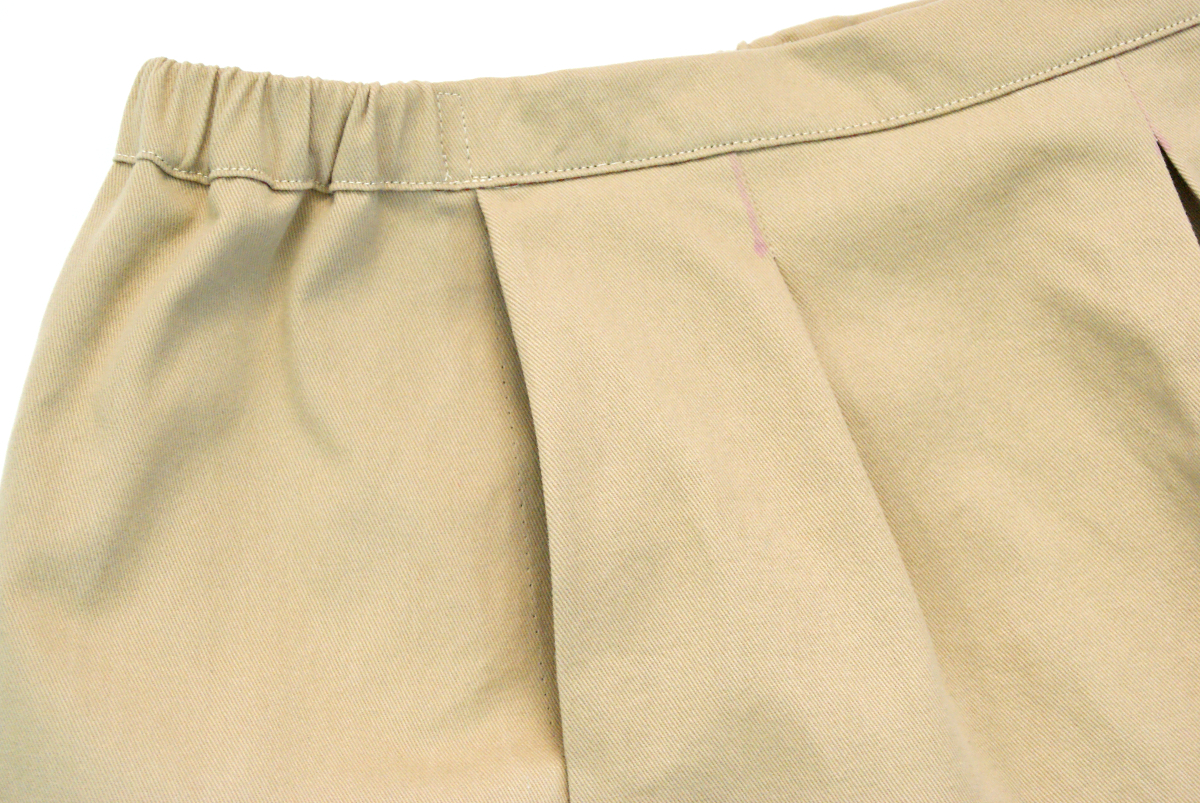
Make the pleats
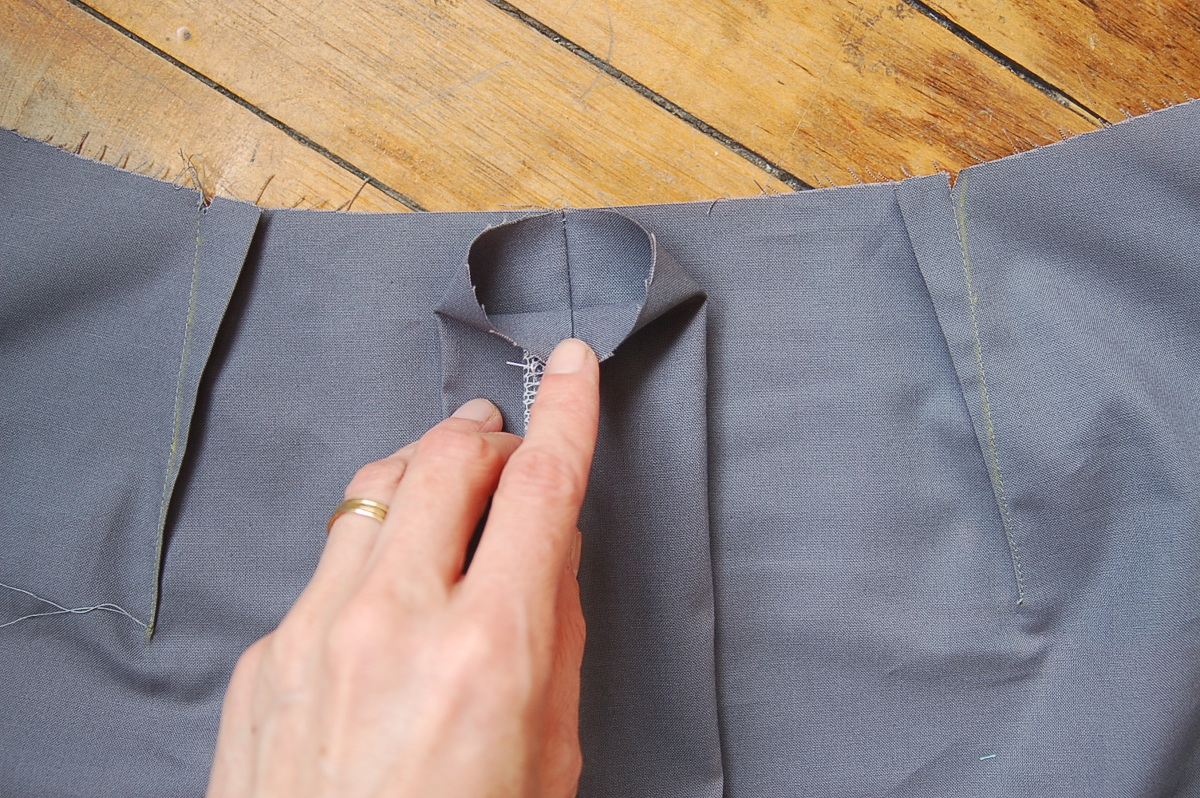
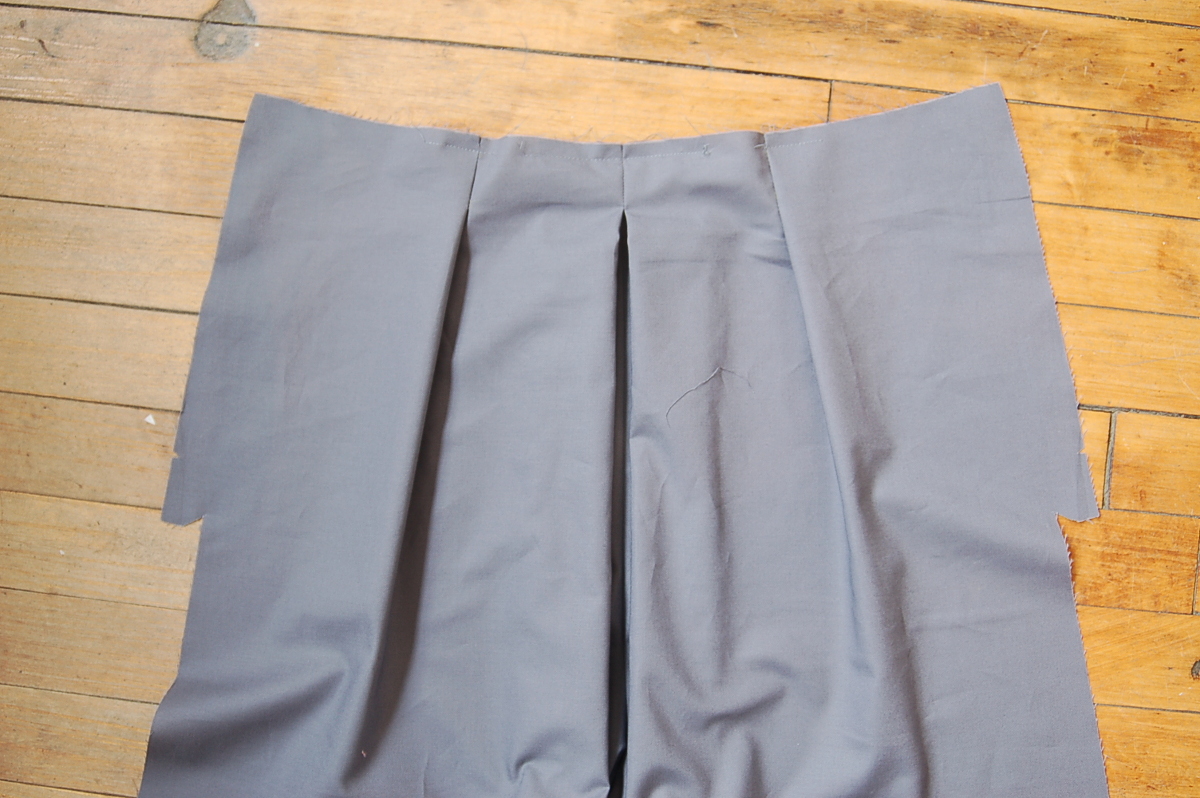
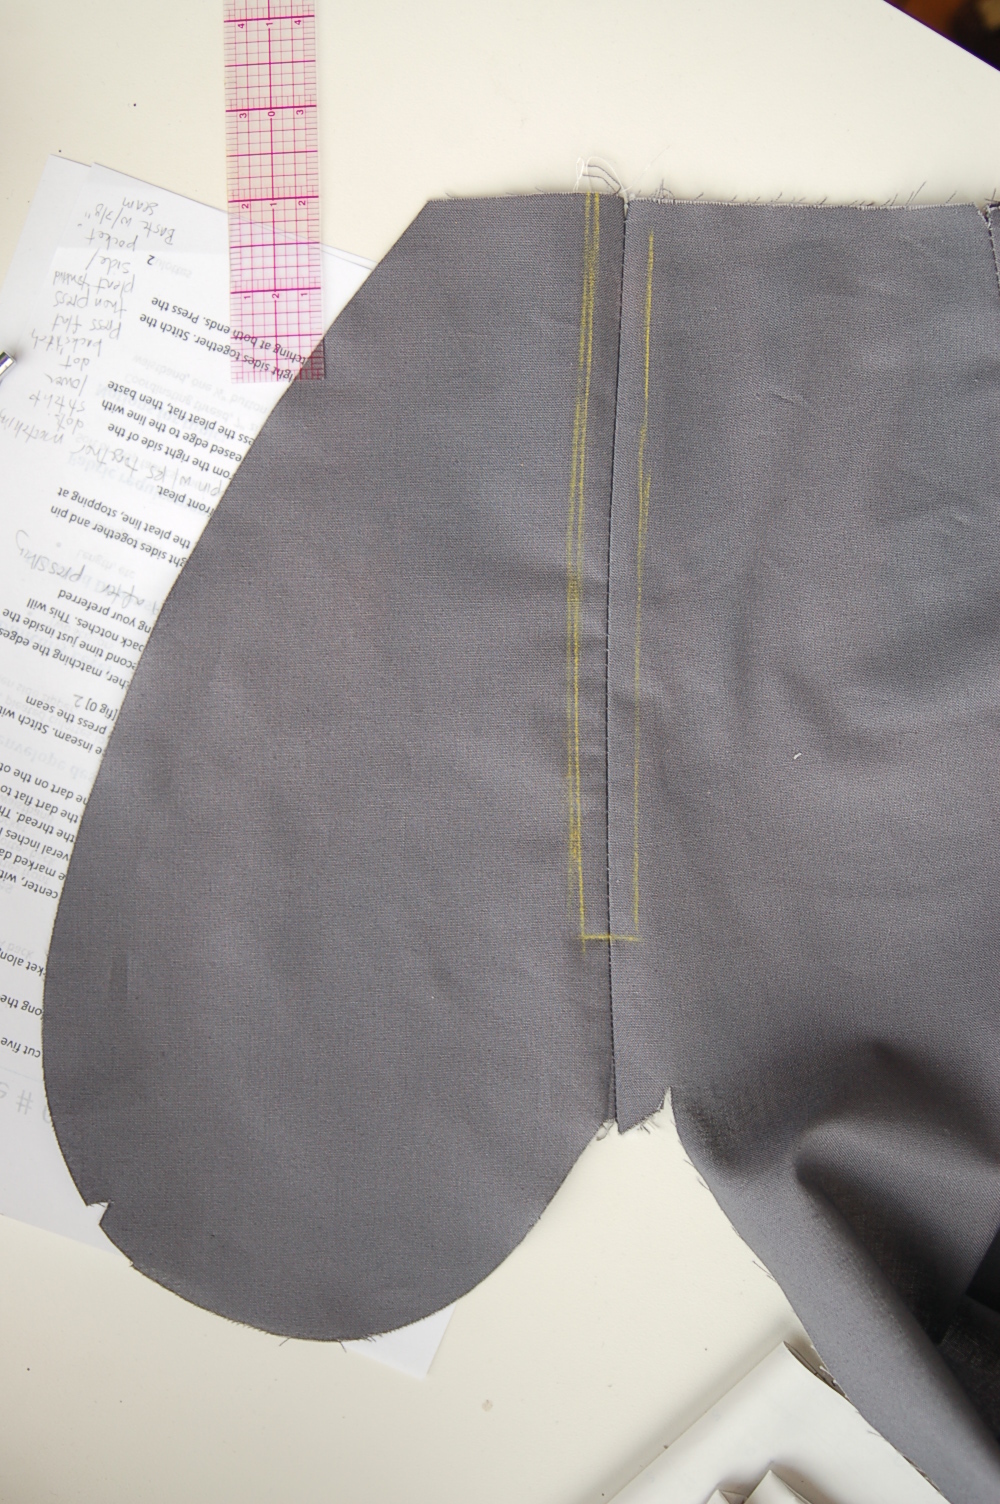
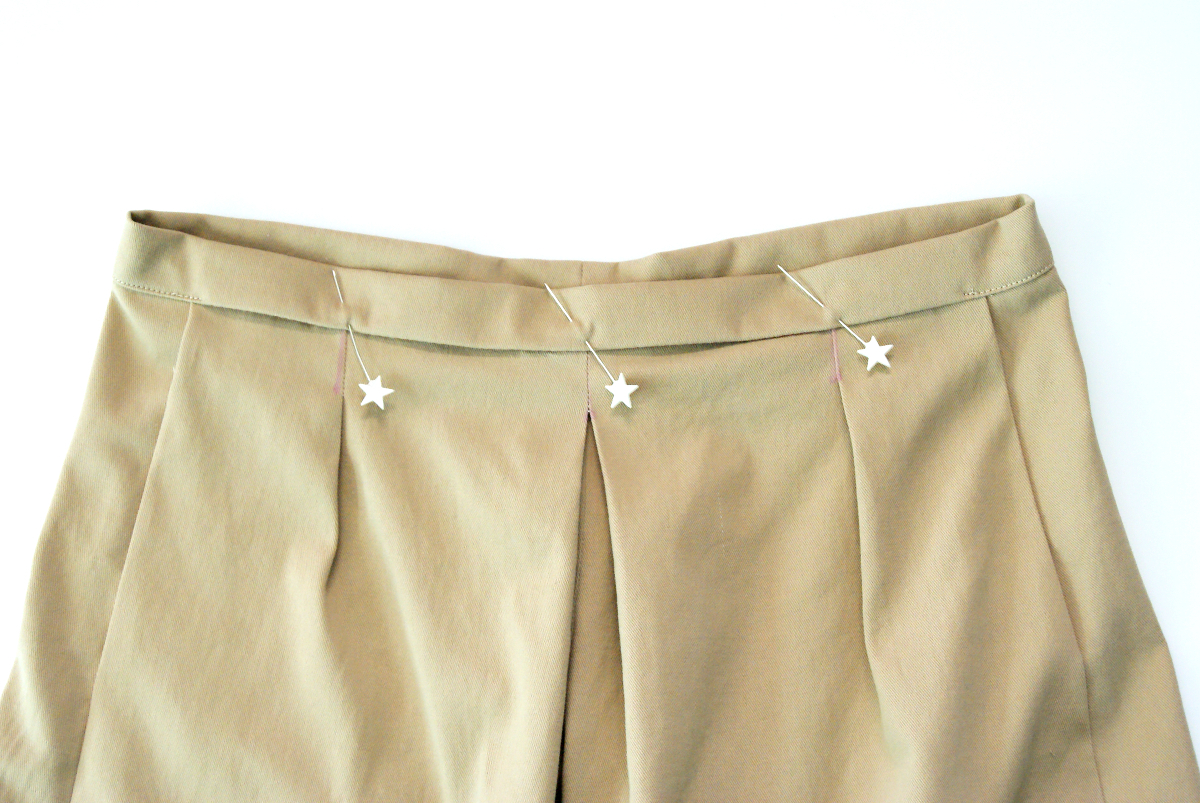
1. To make the center-front inverted box pleat, pin the two front halves of the culottes together at the waist. Match the set of pleat lines and dots closest to the sewn edge of the rise. Stitch the two fronts together along that pleat line, stopping at the end of the pleat line and lockstitching or backstitching at the lower of the two dots.
2. Separate the two fronts and pin the pleat-seam to the rise-seam to form the center-front inverted box pleat. Press, then baste the top of the pleat with a 3/8” seam to hold it in place temporarily.
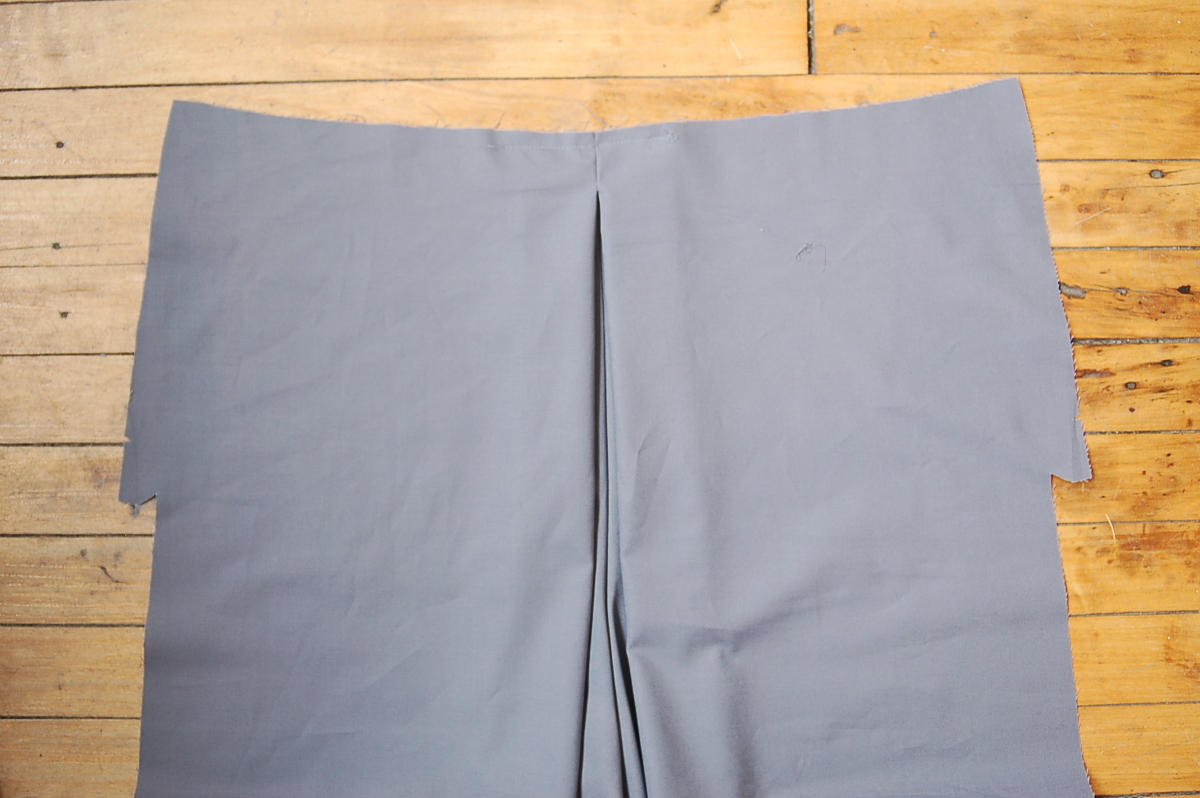
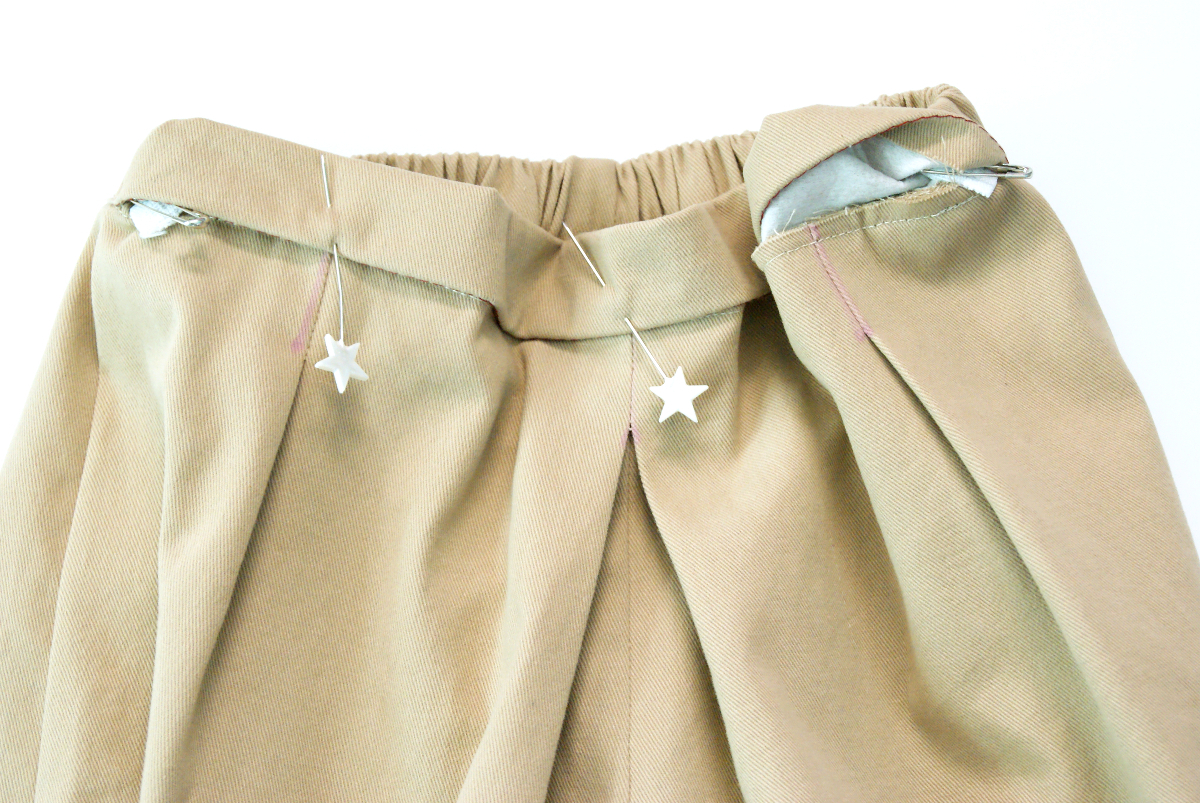
3. Form the center-back inverted box pleat in the same manner: Pin the two halves of the back culottes together at the waist, matching the pleat lines and stitch along the pleat line, stopping and backstitching or lockstitching at the lower of the two dots. Separate the two backs and pin the pleat-seam to the rise-seam to form the center-back inverted box pleat. Press, then baste the top of the pleat with a 3/8” seam to hold in it place temporarily.
4. To form the second set of pleats on the front of the culottes, match and pin the two sets of dotted lines that are to one side of the center-front box pleats with right sides together. Stitch along the pleat line, stopping and backstitching or lockstitching at the lower of the two dots. Press the pleat flat, then press the pleat toward the pocket extension. Repeat to form the pleat on the other side of the front culottes. Baste the pleats to the top of the culottes with a 3/8” seam.

Done for today! If you have any questions on any of the steps so far, please ask them in the comment section. See you tomorrow for day two when we will tackle attaching the pockets, inserting the zipper, stitching the side seams, and finishing the pockets.
Are you ready for day 2 of the Girl Friday/Lunch Box Culottes sew-along? Yesterday we began with the darts and pleats. Today we will be attaching the pockets, inserting the zipper, stitching the side seams, and finishing the pockets.
We have a lot of sewing to get done today, so let’s get started!
Attach the pockets
1. Pin one pocket to a pocket extension on the front culottes, with right sides together and matching the notches and aligning the raw edges. Stitch the pocket to the extension with a 1/2” seam, backstitching or lockstitching at both ends. Press the pocket away from the culottes and finish the seam allowances using your preferred method.
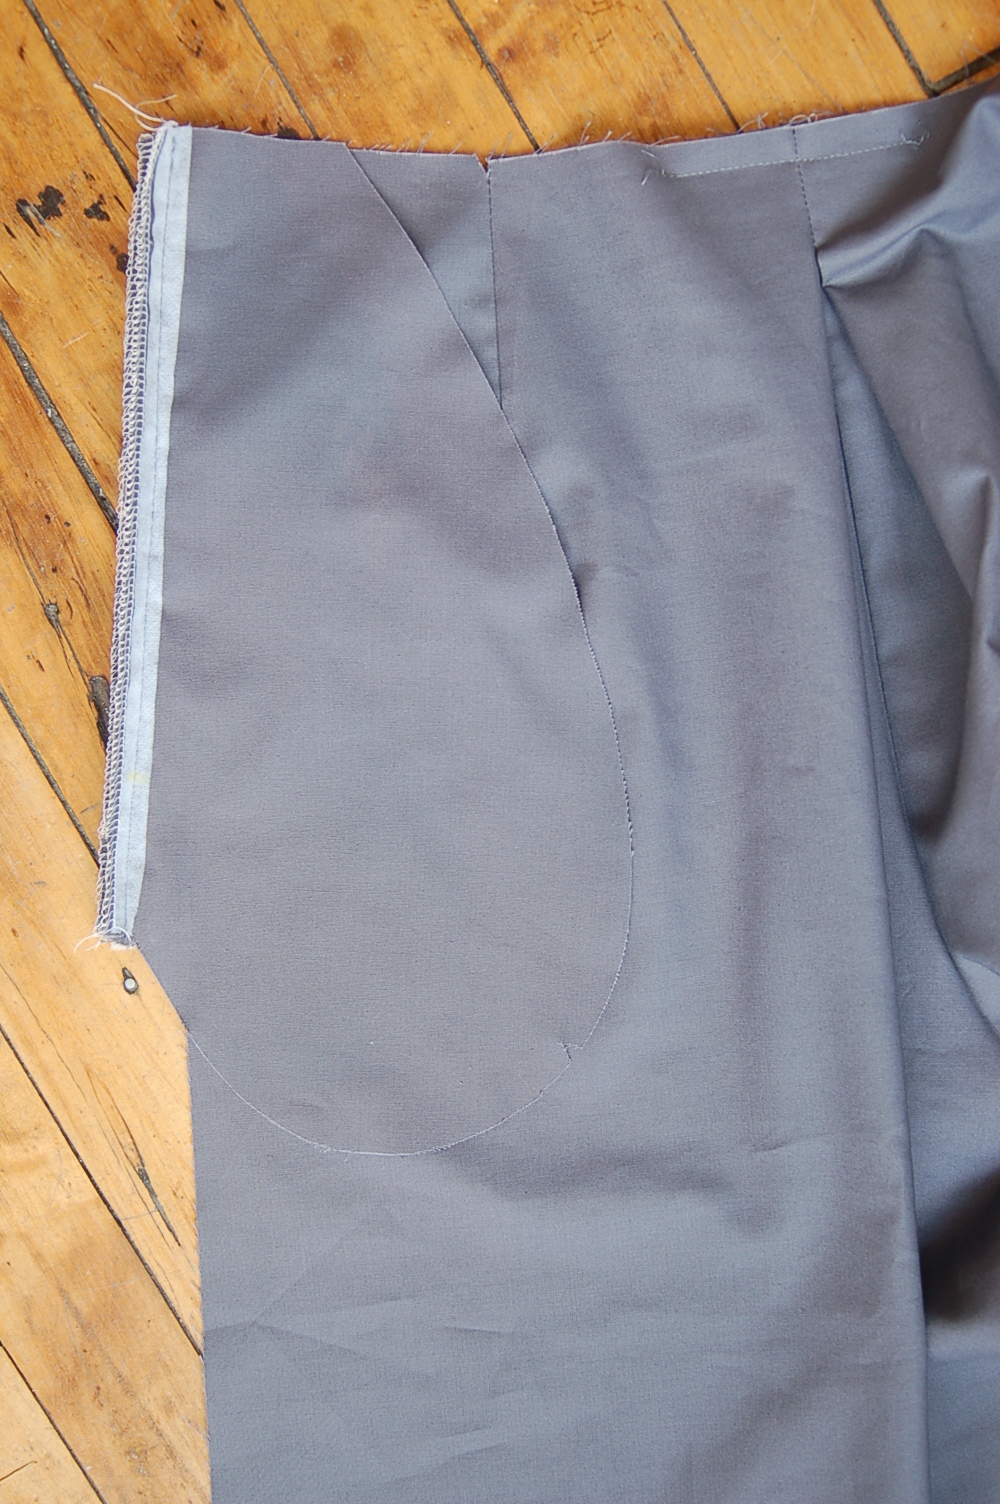
2. For the Lunch Box Culottes, repeat this process to stitch the second pocket to the other side of the front culottes and to attach the other two pockets to the back of the culottes. For the Girl Friday Culottes, repeat to stitch the second pocket to the other side of the front culottes and to attach the third pocket to the wearer’s right side of the back culottes in the same manner.

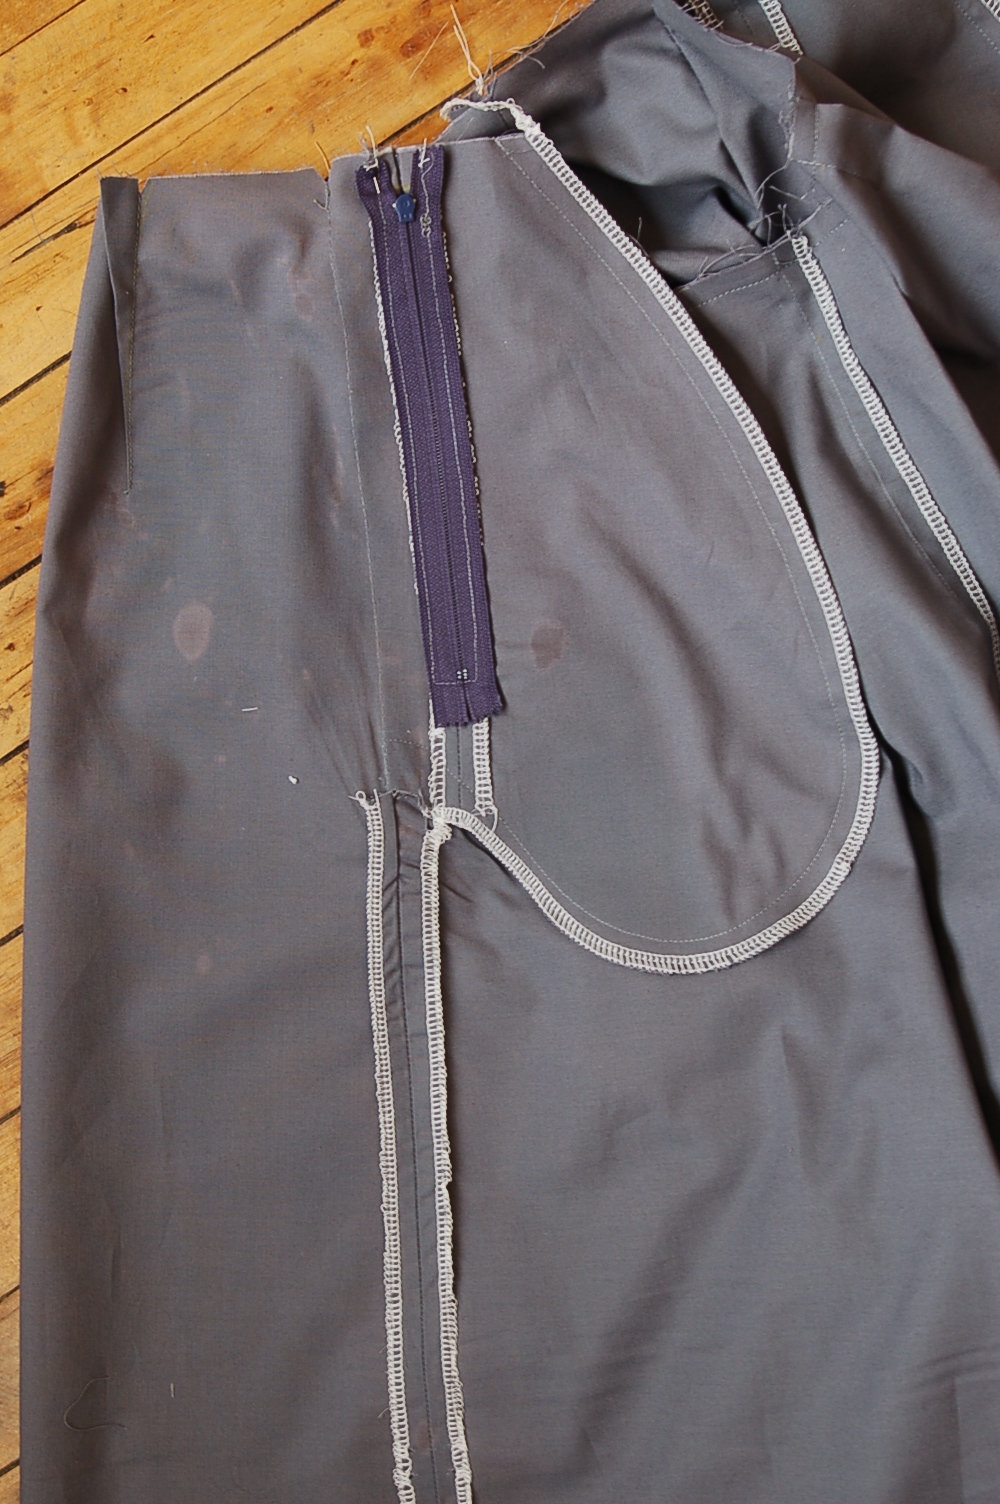
3. For the Girl Friday Culottes only, on the wearer’s left side of the back culottes, align and pin the fourth pocket piece (the one prepared with interfacing). Stitch from the bottom edge of the pocket extension to the dot on the pocket, backstitching or lockstitching at both ends. Baste the remaining portion of the pocket above the large dot to prepare it for installing the zipper. As with the other three pockets pieces, finish the seam allowances separately and press the seams open. Since you’ll be working with this section of the culottes for the next few steps, you may want to mark this pocket so you can find it easily.
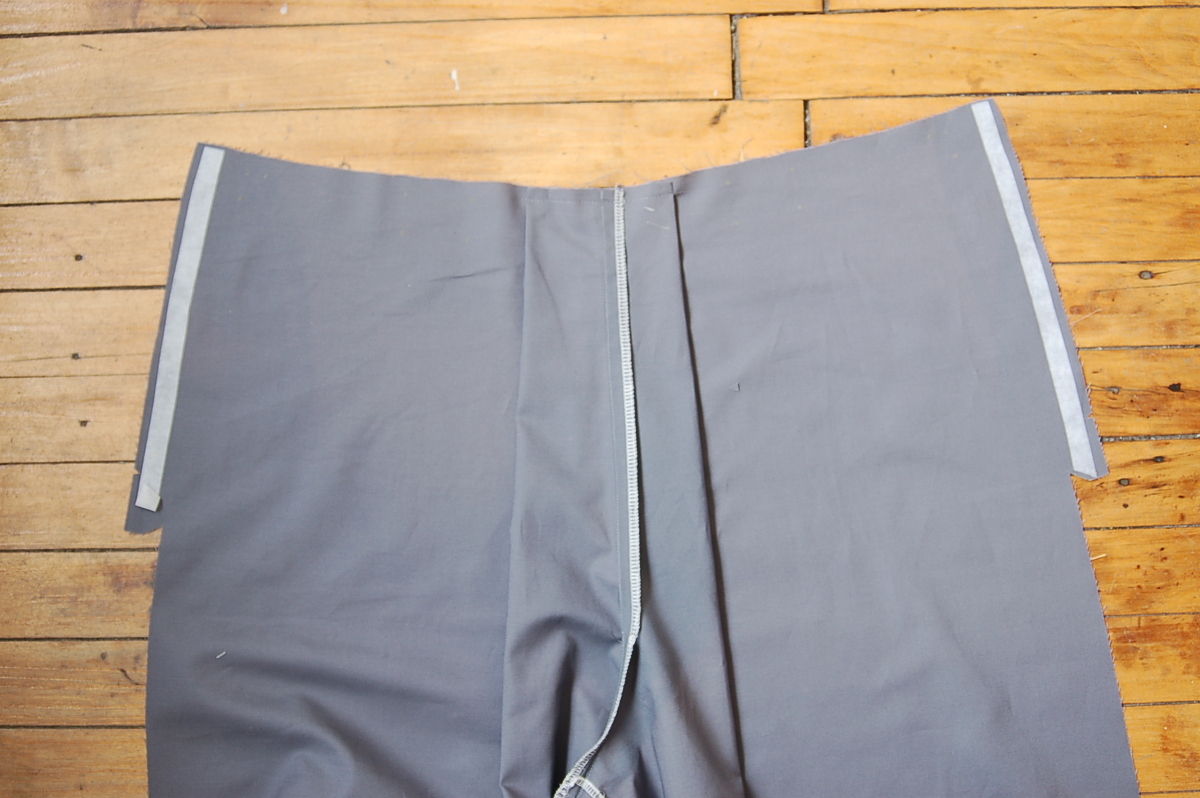
Insert the zipper (for the Girl Friday Culottes only)
1. Using tailor’s chalk or a water-soluble fabric-marking pen, make a horizontal mark across the seam allowances of the wearer’s back left pocket 1/2” from the top edge of the pocket extension as shown. This mark will help with positioning the top of the zipper slider.
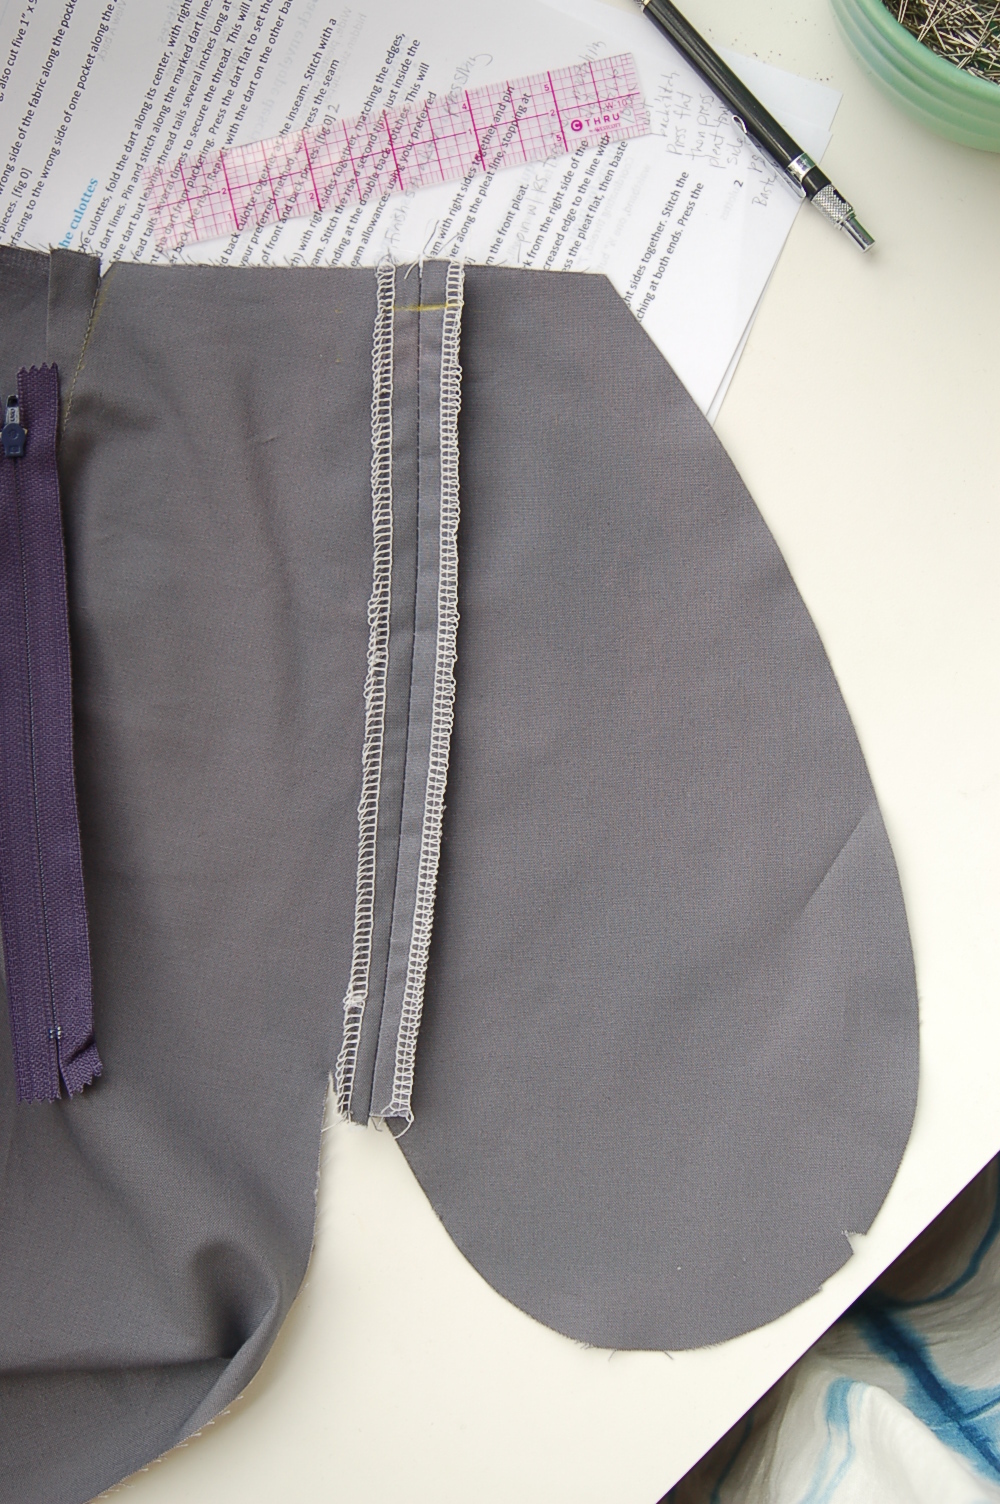
2. Turn the culottes to the right side and draw a line 1/4” on either side of the basted seam. Connect the two lines at the large dot. (Insert a pin through the dot on the wrong side of the fabric to help you locate the dot on the right side.) This will be the topstitching line for the zipper.
3. Turn the culottes to the wrong side again and center the closed zipper tape, face down, over the basted seam allowances. Position the top of the zipper slider (the part that moves up and down) just below the 1/2” mark that you dress. Machine-or hand-baste the zipper in place to hold it temporarily.
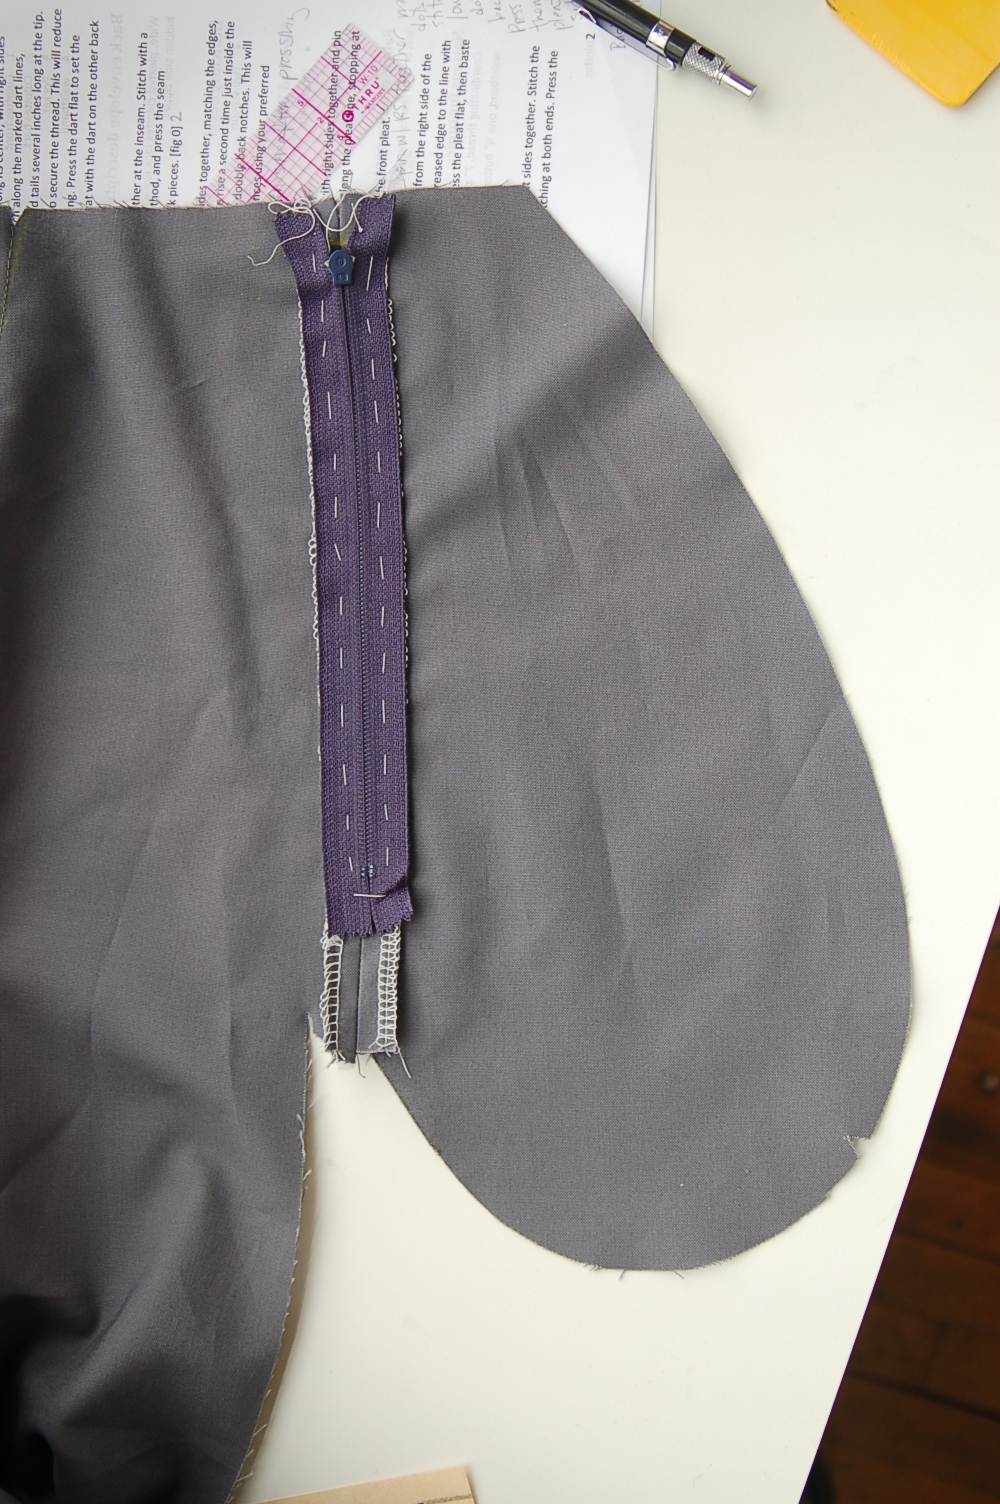
4. On the right side of the fabric, remove the basting stitches from the zipper seam, leaving the pocket sewn to the pocket extension just below the large dot. This will enable you to move the zipper slider out of the way as you topstitch the zipper. Using the zipper foot, stitch the zipper along the drawn 1/4” lines, pivoting at the bottom of the line to stitch across the zipper. Be careful not to stitch through the metal stopper at the bottom of the zipper, since it will break your needle. (If you need to do so, you can move the bottom stitching line a little higher in order to avoid the stopper.) Then pivot again to stitch up the 1/4” line on the other side of the zipper.
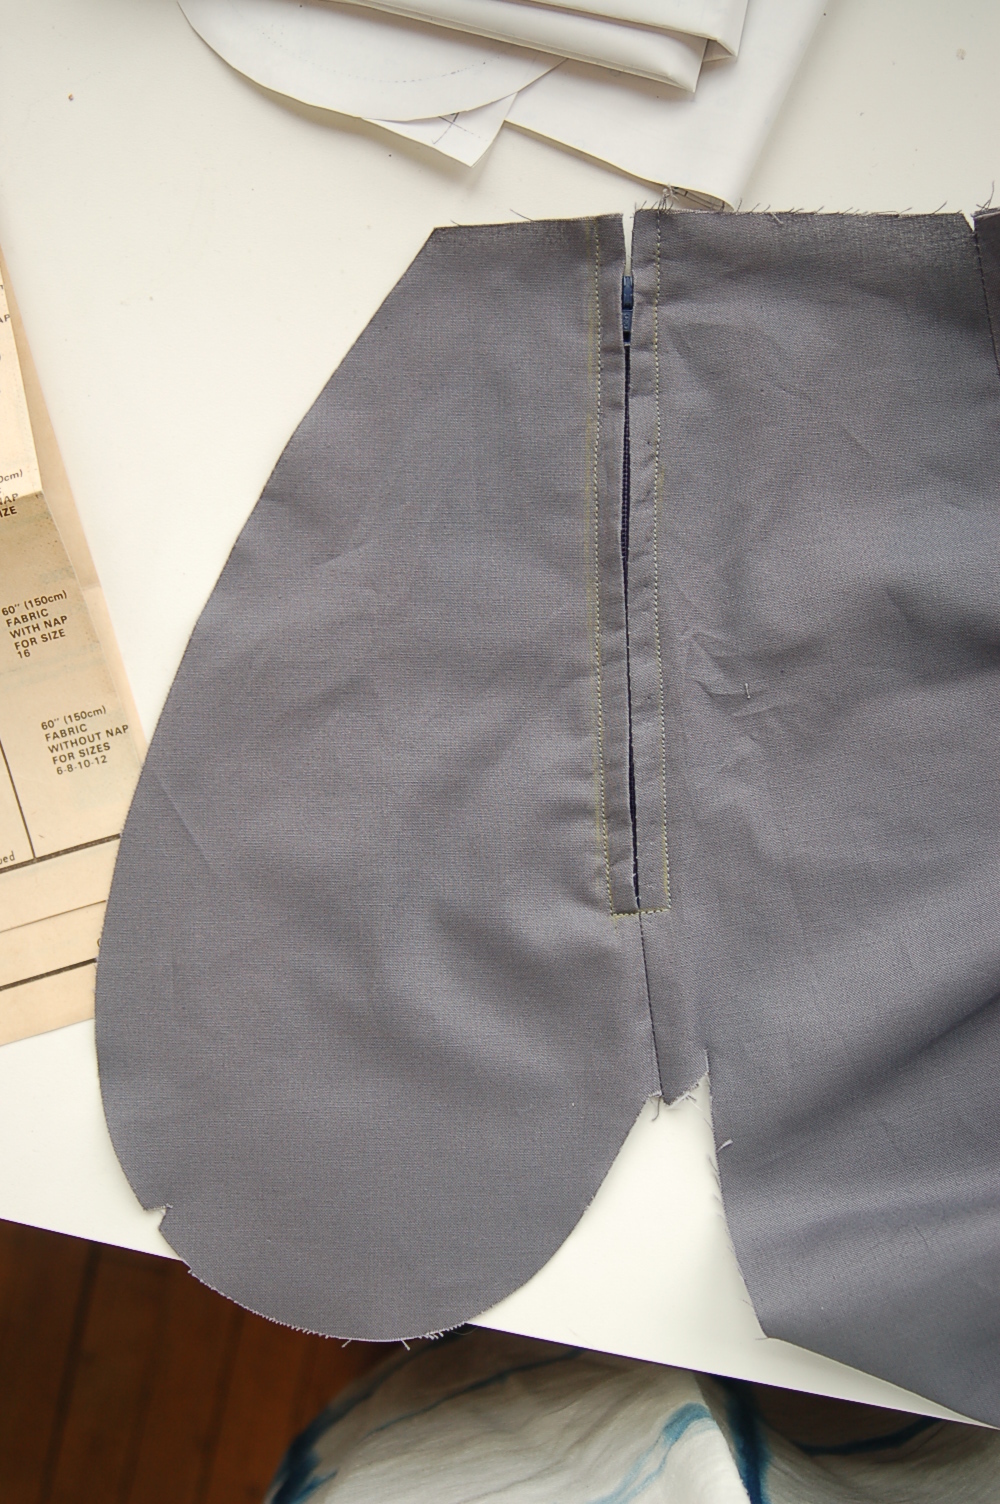
Stitch the side seams and finish the pockets
1. Pin the front and back of the culottes and the pockets together, with right sides facing and matching the notches and raw edges. Using tailor’s chalk or a water-soluble fabric-marking pen, draw a line on the front culottes to connect each waistband notch to its corresponding large dot (the dot near the pocket). Machine-baste the culottes front to the culottes back along these lines to temporarily keep the pockets together. This basting will form the temporary side seams, and it also forms a deeper pocket so the pockets and zipper (from the Girl Friday Culottes) won’t show when the culottes are worn.

2. Stitch the side seams with a 1/2” seam, pivoting at the interfaced dots to stitch around the pockets.
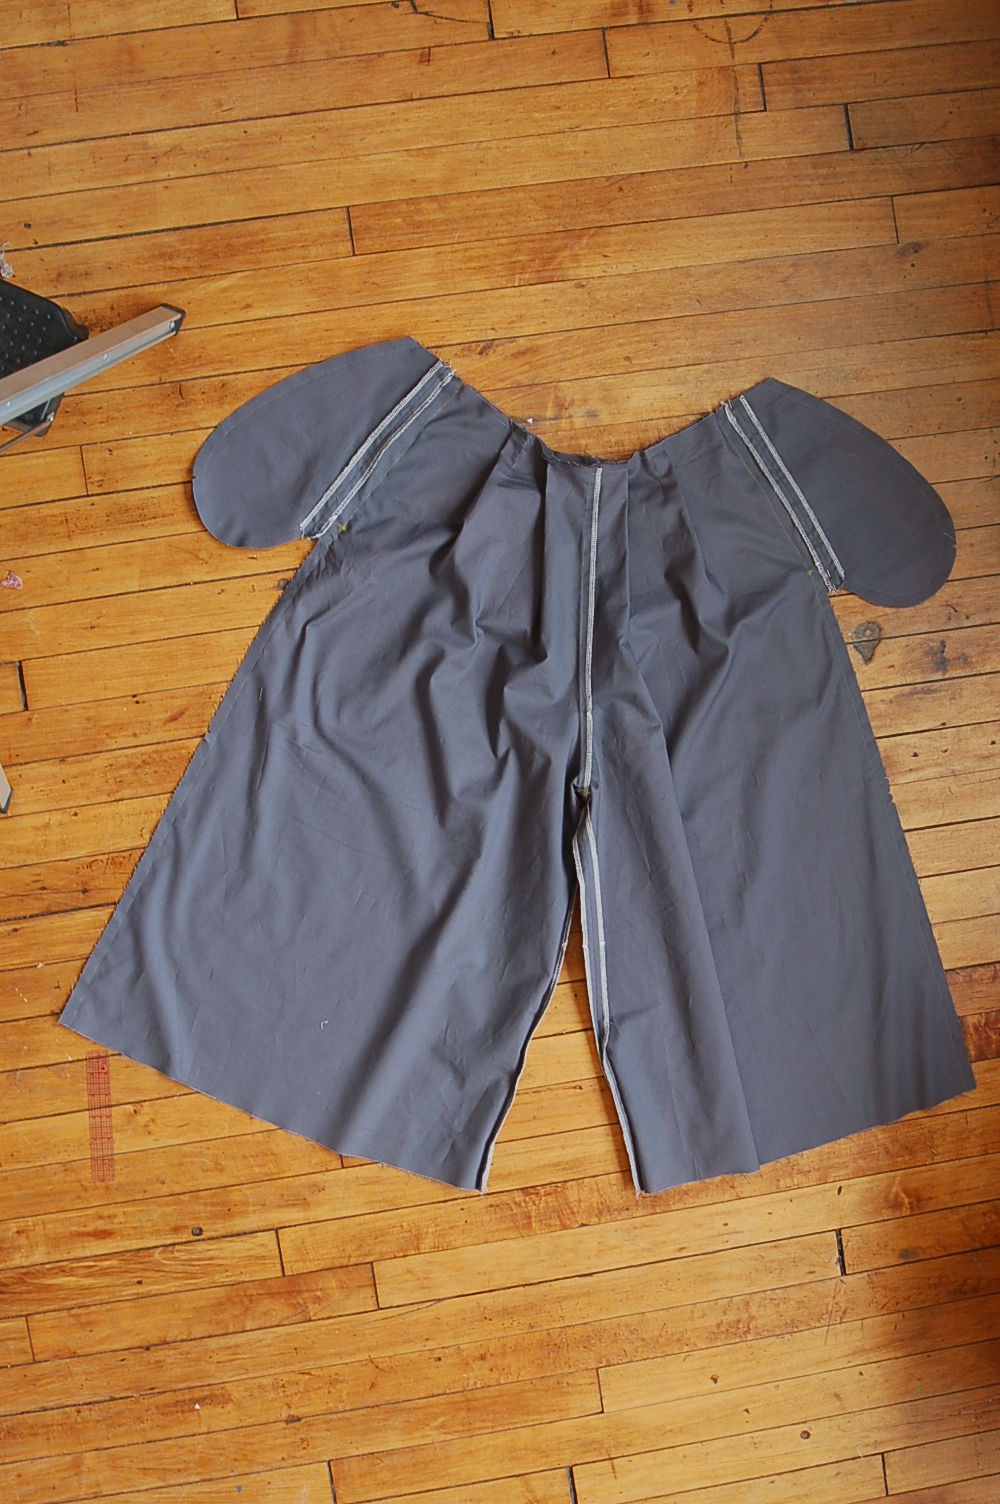
3. Clip just the seam allowances of the back culottes below the pockets (leave the front seam allowances unclipped) to allow the pocket to be pressed forward while still allowing the seam allowances to be pressed open. Press the pockets toward the front of the culottes along the basting stitches. Baste the top of the pockets to the front waist with a 3/8” seam. Remove the basting stitches from the pocket openings.
We’ll see you tomorrow for day three where we will be finishing up the culottes.
We have reached our third and final day of the Girl Friday/Lunch Box Culottes sew-along. Today we will be finishing up the culottes.
It’s getting very exciting because we’re so close to the end. Off we go!
Applying the waistband (Girl Friday Culottes method)
1. Sew a line of basting stitches 1/2” from the long, un-notched edge of the waistband. Fold and press the fabric to the wrong side along the basting line.
2. Fold the waistband in half with right sides together and stitch the short ends with a 1/2” seam. Trim the ends to 1/4”.
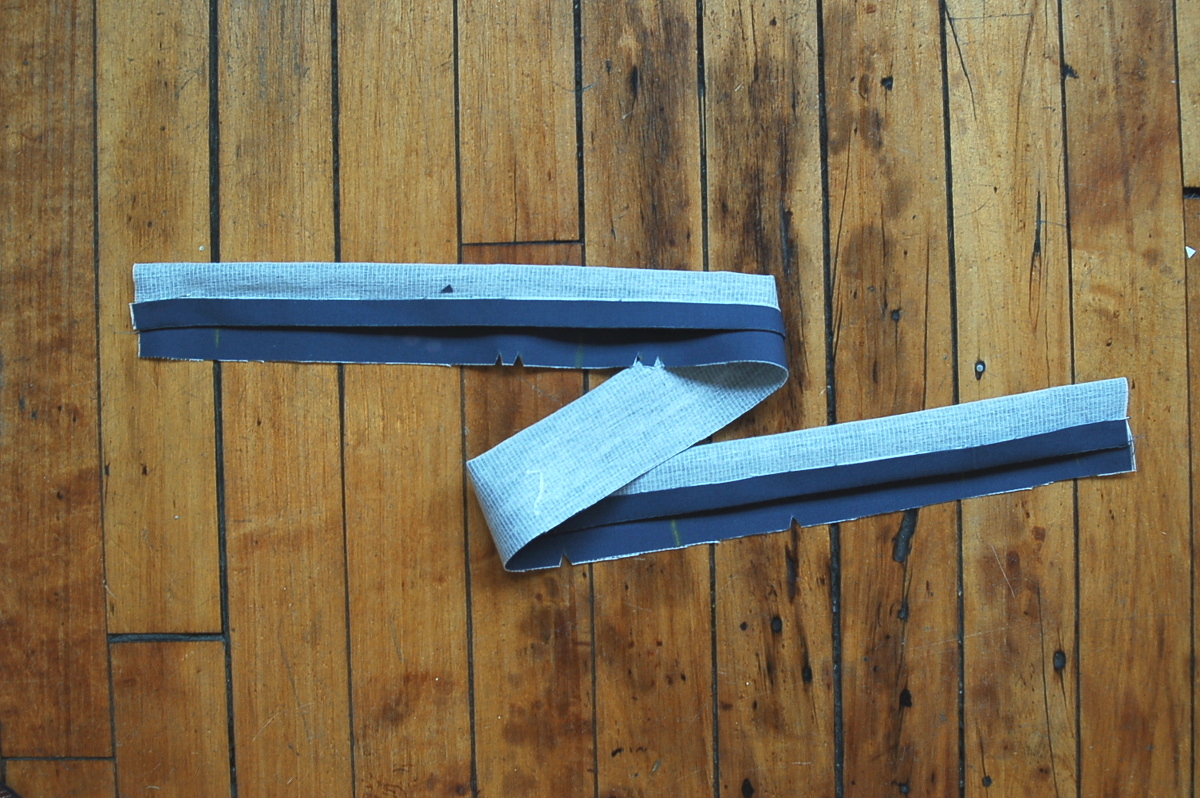
3. Turn the waistband right-side out, using a point presser or knitting needle to push the corners out. Press the waistband.
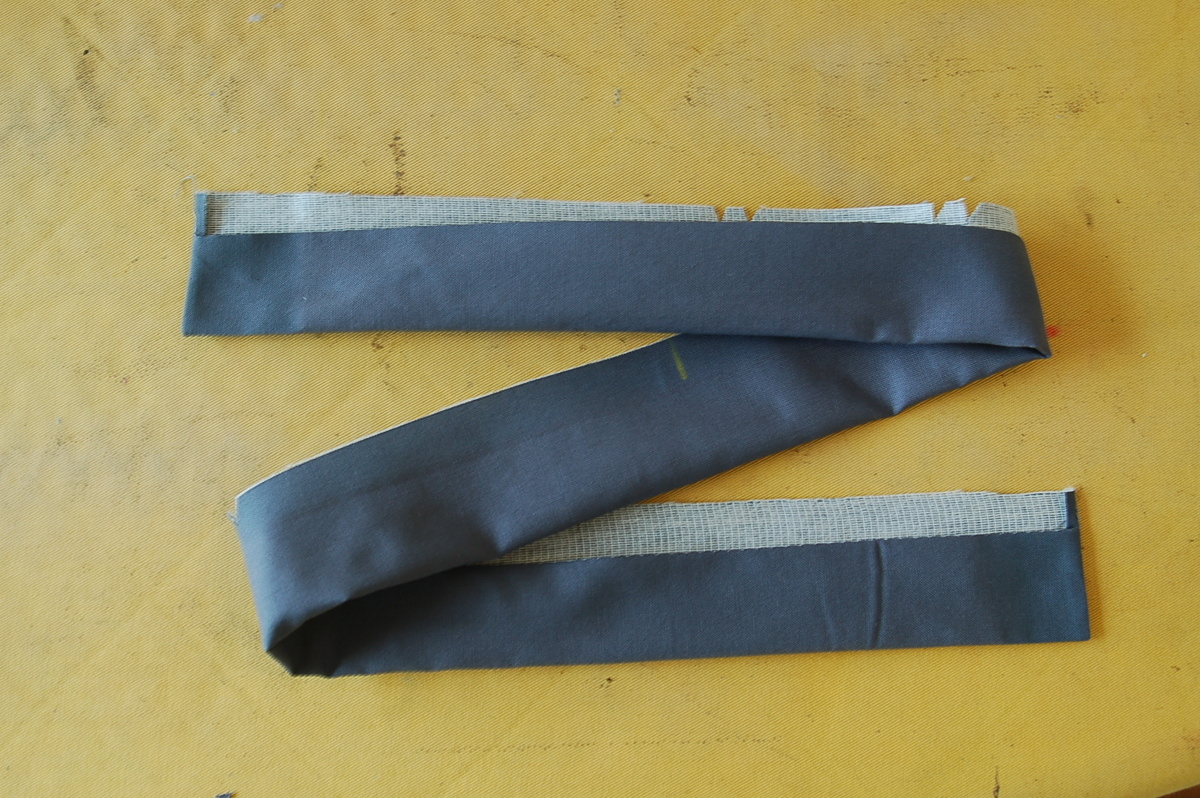
4. Pin the right side of the waistband to the wrong side of the culottes, matching the notches on the waistband to the notches and seams of the culottes. Pin the ends of the waistband to be even with the opening at the wearer’s left pocket. (Note that there is a bit of ease in the waist of the culottes, so the waistband may seem a bit shorter than the culottes waist itself. If you want to add a row of basting to help you ease the waistband you may do so.) Stitch the waistband to the culottes with 1/2” seam, backstitching or lockstitching at both ends.

5. Trim the stitched seam allowances of the waistband to 1/4” and press the waistband and seam allowances up, away from the culottes. Fold the waistband over the seam allowances to the outside of the culottes, and pin the waistband’s folded edge so it covers the stitching. Working on the right side (the outside) of the culottes, edge stitch the waistband at the fold.

Attach the waistband (Lunch Box Culottes method)
1. Fold the waistband in half lengthwise with wrong sides together and press a crease into the center. Unfold the waistband and sew a line of basting stitches 1/2” from one long edge. Fold and press the fabric to the wrong side along the basting line.
2. Unfold the pressed edge of the waistband and then, with right sides facing and the raw edges aligned, pin the waistband’s short ends together and join them with a 1/2” seam backstitching or lockstitching on both ends. Press the seam allowances open. Re-fold the previously pressed long edge.
3. Pin the right side of the waistband to the wrong side of the culottes, matching the waistband’s unfolded edge to the culottes’ top raw edge. Match the waistband’s seam with the center-back seam and align the waistband’s center-front notch with the center-front seam of the culottes. Match the waistband’s side notches with the basted closures of the pockets, which are the equivalent of the side seam. Stitch the waistband to the culottes with a 1/2” seam.

4. Turn the culottes right-side out and trim the stitched seam allowances to 1/4” to reduce bulk in the finished waistband. Press the waistband and seam allowances up, away from the culottes. Then fold the waistband over the seam allowances to the right side of the culottes along the original center crease and pin the waistband’s folded edge so it covers the stitching.

5. Working on the right side (the outside) of the culottes, edgestitch the folded edge of the back waistband to form a casing for the elastic, starting at the side seam and continuing around the back until you reach the opposite side seam, lockstitching or backstitching at both ends. Leave the front waistband open for the time being.
6. Measure the child’s waist and cut a length of elastic that’s about 1/2” shorter than half of the child’s waist measurement. Attach a safety pin or bodkin to one end of the elastic and feed the elastic through the waistband casing. Pin the ends of the elastic to the waistband at the location of the side seams and adjust the elastic to fit the child’s waist.
7. Trim any excess length from the elastic. Stitch one end of the elastic to the waistband with a rectangle, as shown. (The rectangle will help secure the elastic so it doesn’t unravel or come loose during wearing.) Continue the stitching across the front waistband, to close up the waistband, and finish by stitching the opposite end of the elastic with a second rectangle, backstitching or lockstitching at the end.
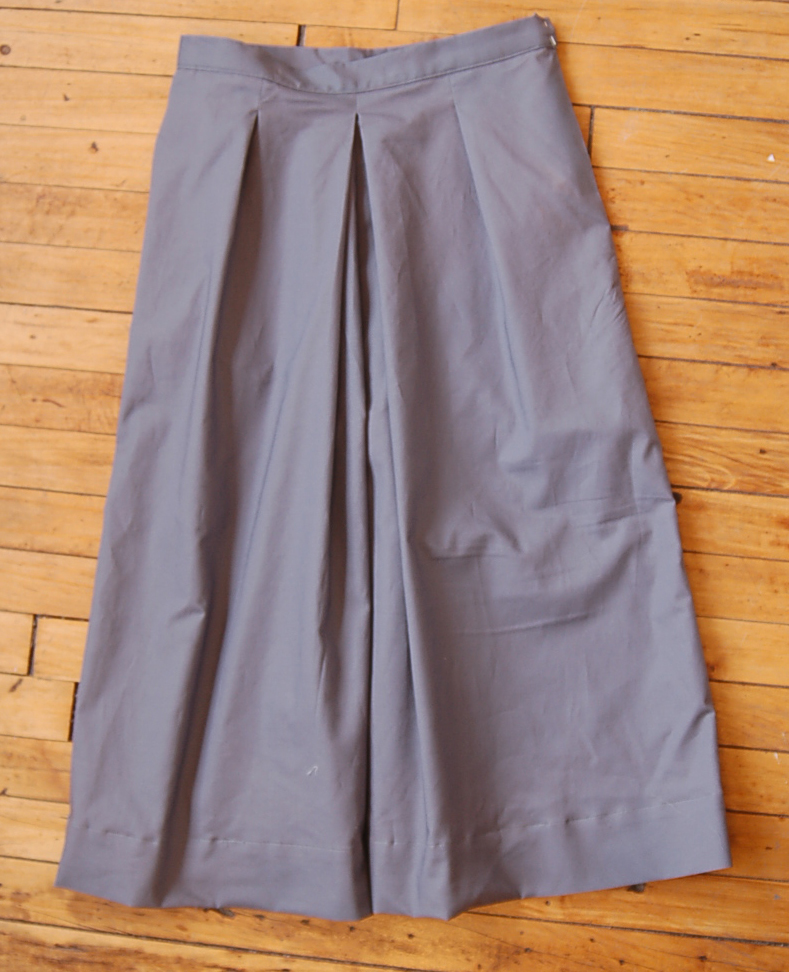
Finish the culottes
1. For the Girl Friday Culottes, stitch the buttonholes and button or attach a large hook and eye at the waistband markings to finish the waistband. For the Lunch Box Culottes, remove the basting stitches at the side seams that keep the pockets closed so the pockets can be used.
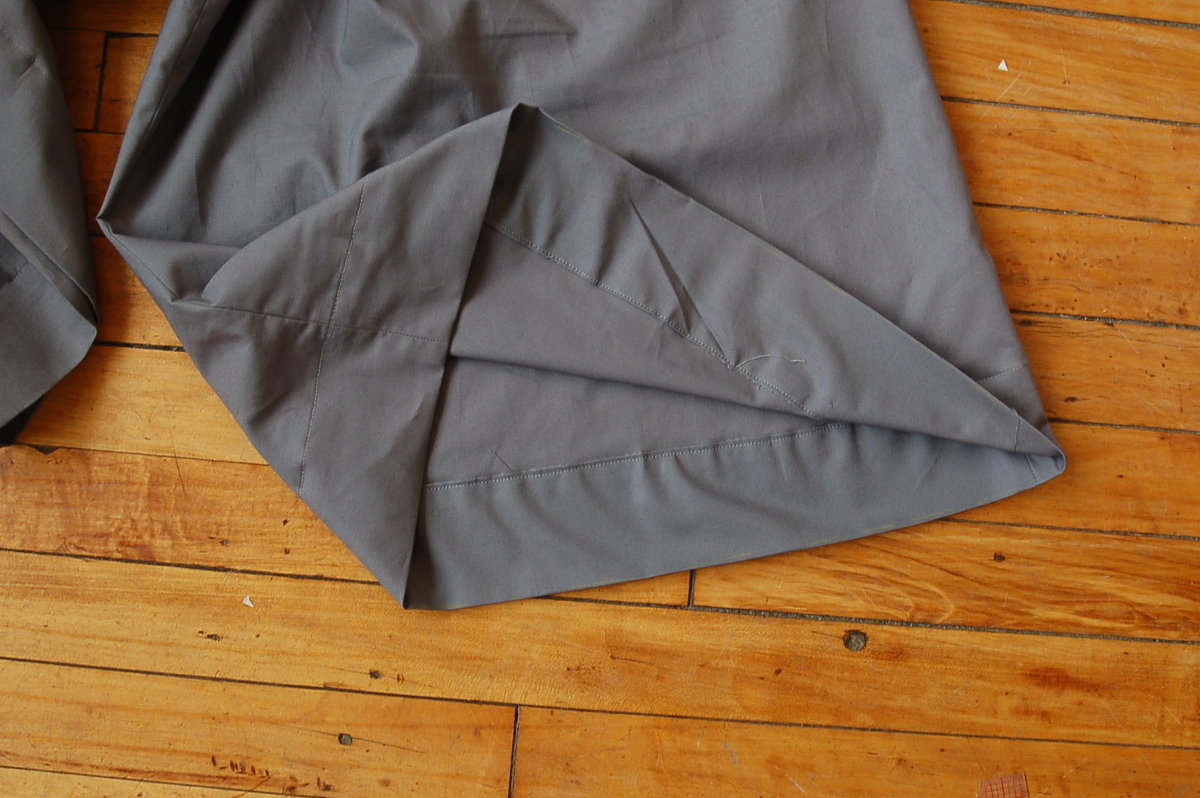
2. To hem the culottes, sew a row of basting stitches 1/2” from the bottom edge of one leg of the culottes. On the right side of the fabric, use tailor’s chalk or a water-soluble fabric-marking pen to mark a line 2 1/2” from the bottom edge. Fold and press the fabric once to the wrong side along the line of basting stitches, then fold and press the fabric again to the wrong side along the 2 1/2” line. Pull on the basting stitches to cinch up the fullness at the top of the hem. Edgestitch the innermost fold to finish the hem and press the hem again to finish it. Repeat to finish the second leg.
You are done! Thank you for joining us during the sew-along. We do hope you will add photos of your completed Girl Friday Culottes to the Liesl + Co Flickr group and Lunch Box Culottes to the Oliver + S Flickr group, we’d love to see what you’ve created.
Hi, my natural waist is 27″ and my hips 39″ which size would you recommend please? This will be my first garment for myself as I’ve had a fear of fit 🙂 I have about 9-10 Lisette and Leisl & Co patterns and I’m determined to get on and make them rather than continuing skill building sewing for GD. hmm though I must confess to starting O&S pjs for GS today