Are you ready for the Cinema Dress/Hide-and-Seek Dress sew-along? Let’s get started!
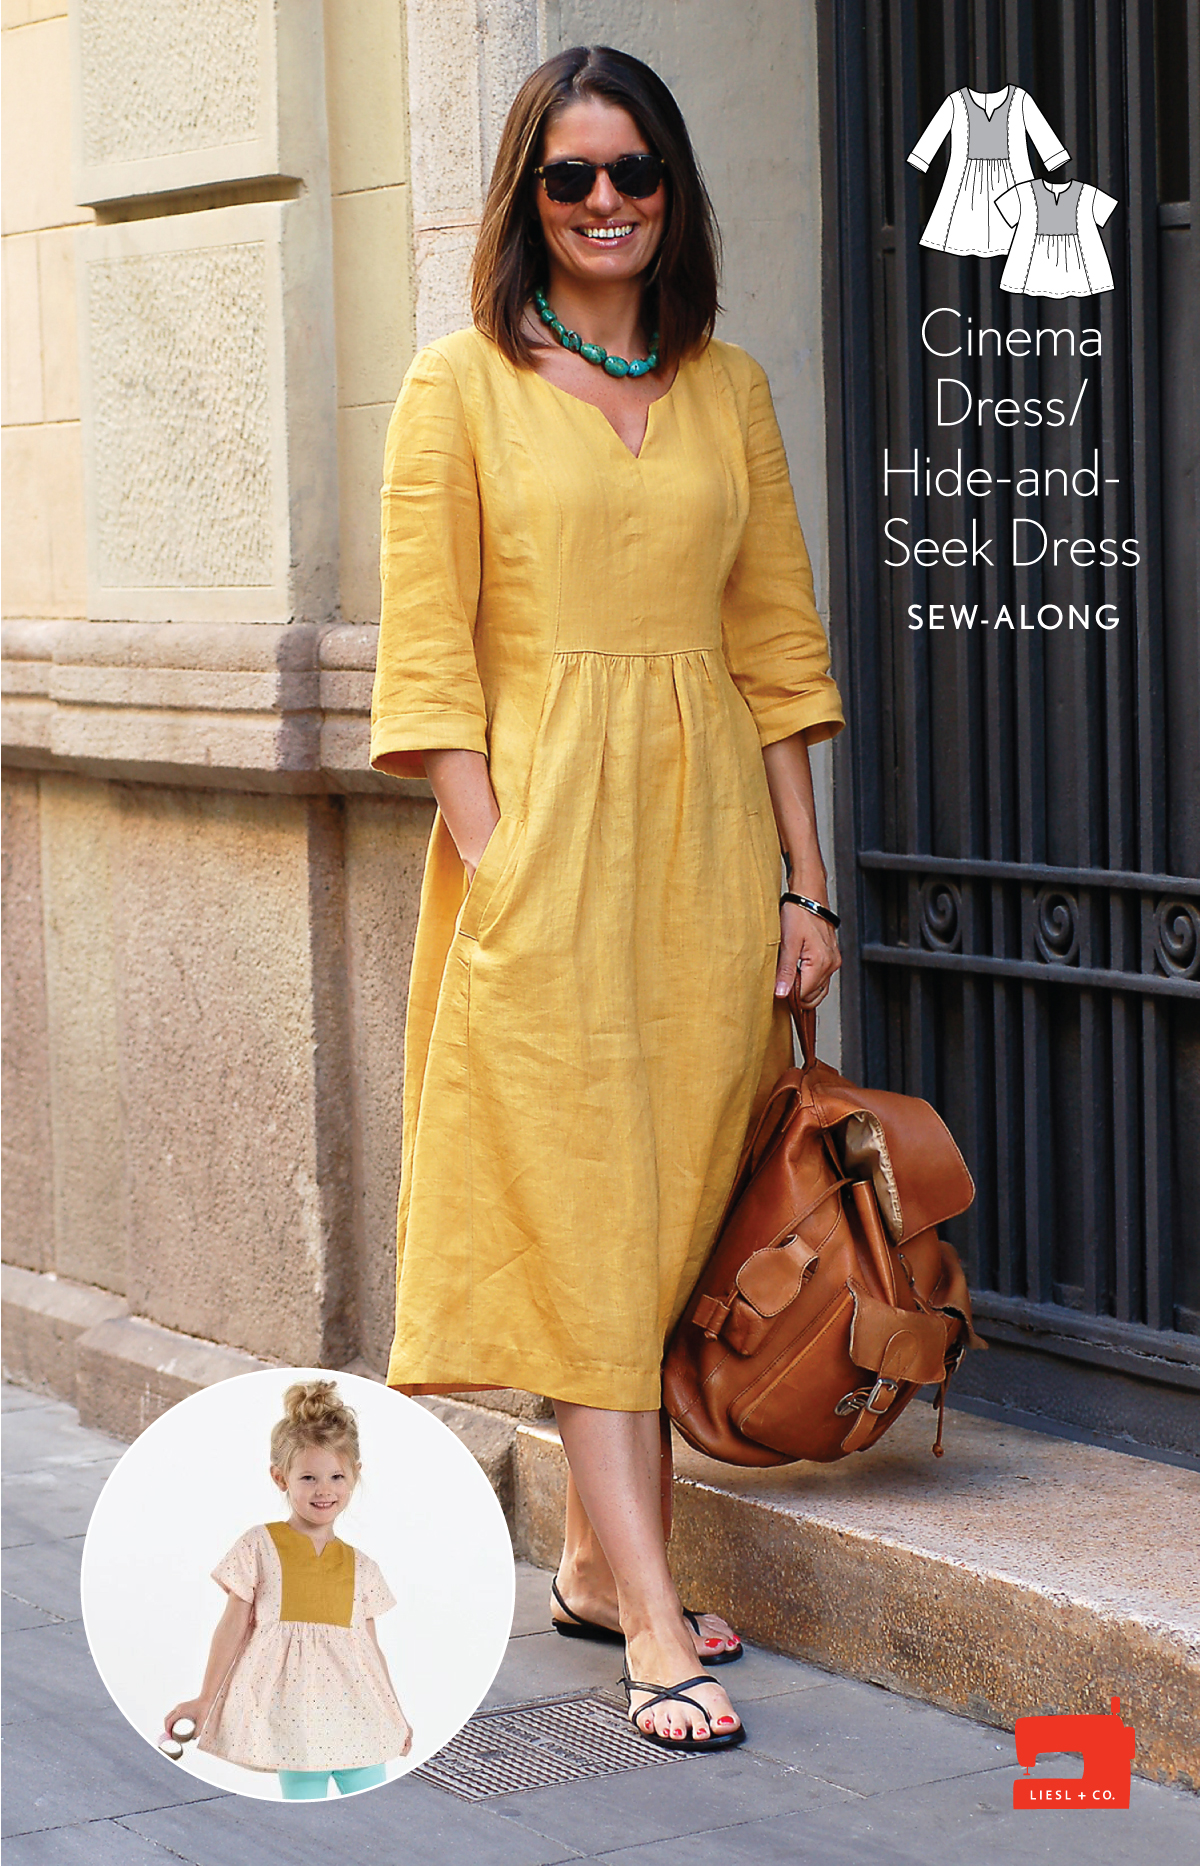
For those of you sewing the Hide-and-Seek Dress, you’ll get going tomorrow. Today I want to talk a little bit about adjusting the Cinema Dress pattern for a larger or smaller bust. I thought it would be helpful to give you a few pointers and show you some of the steps.
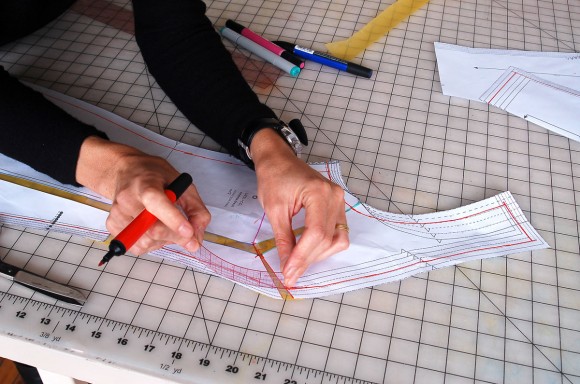
- I always like to get started by drawing in the 1/2″ seam lines on my pattern. You’ll especially need these seam lines at the armhole, side seam, and front edge of the Side Front pattern piece. Here is a quick video to show you how I use our 6″ ruler to quickly draw in the seam lines.
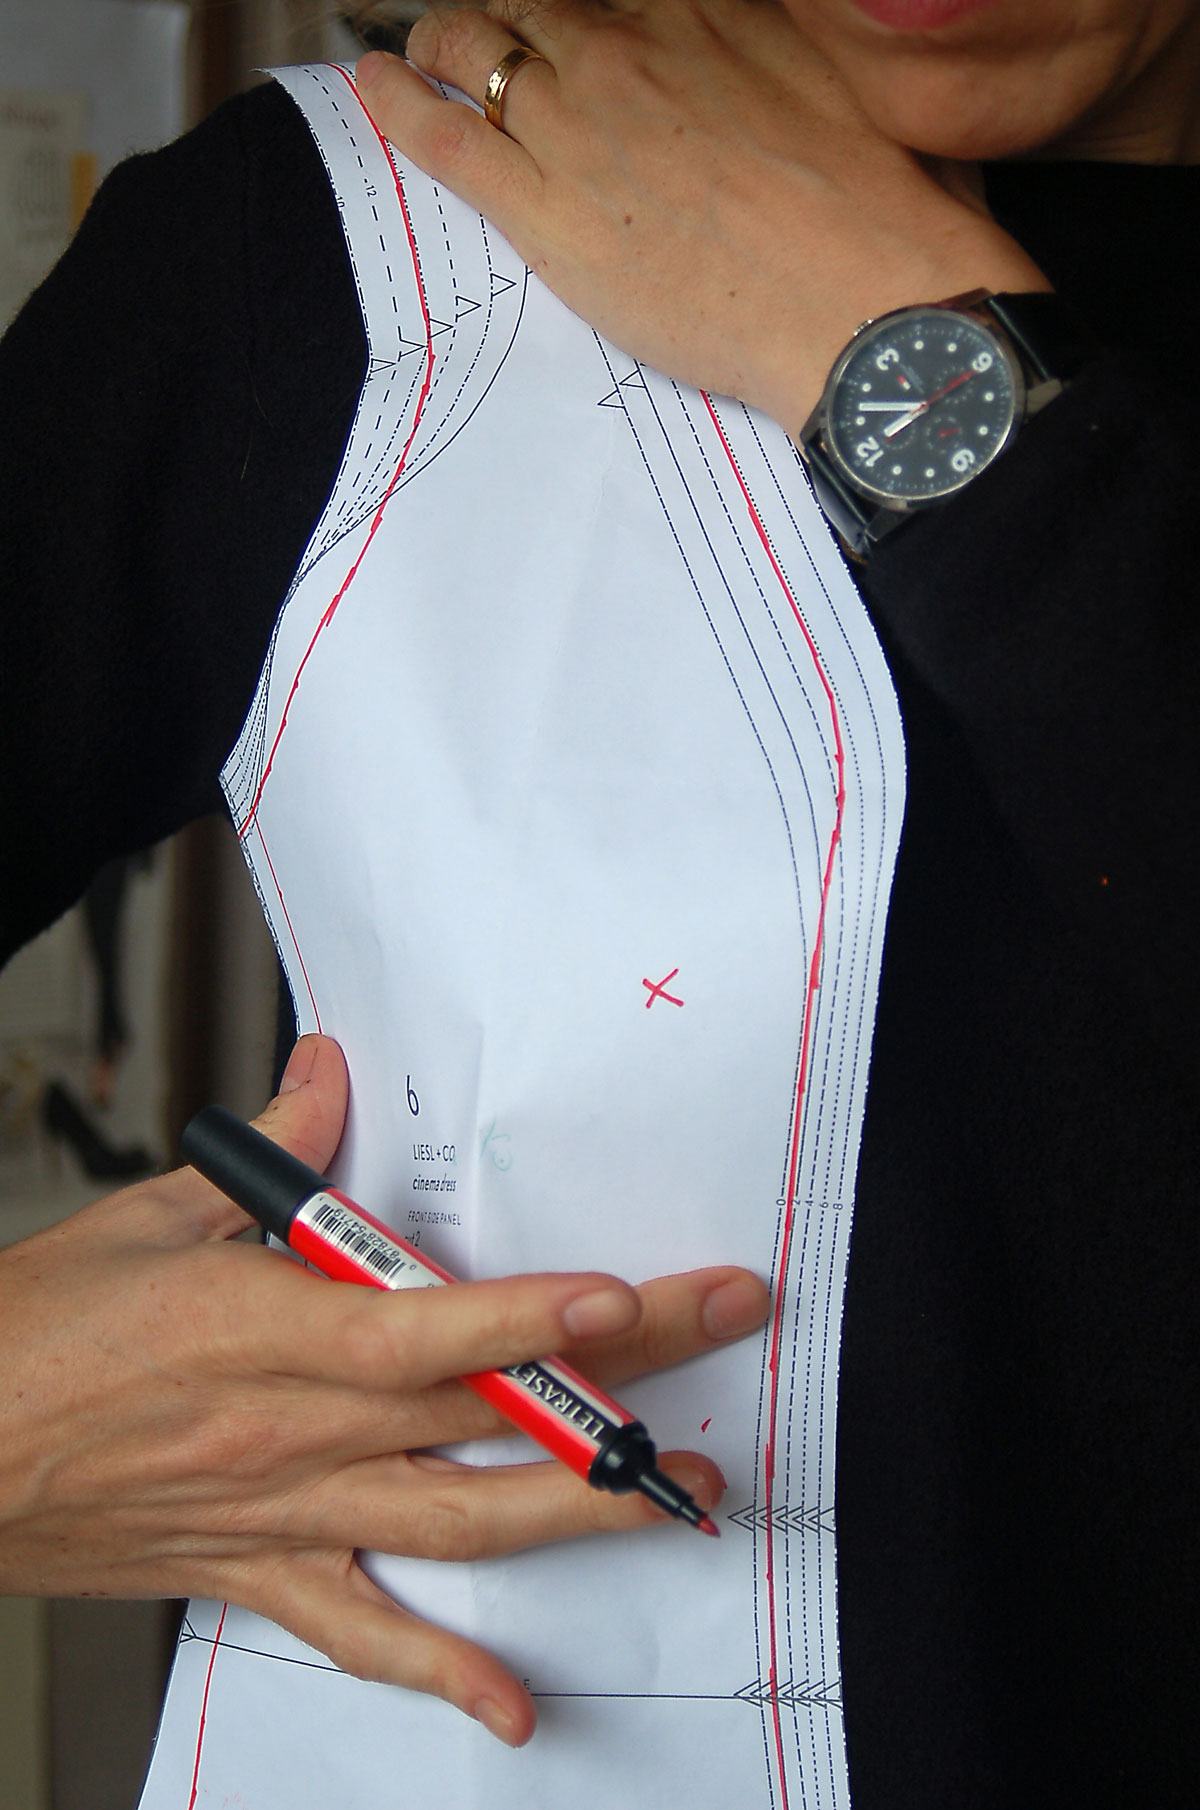
- Now we need to determine where the apex is so we can alter the pattern in the right place. Start by holding up the front side panel pattern piece against yourself, matching the shoulder seam and the side seam to your body, and put a mark on the pattern piece near the fullest part of your bust. For some women this will be very near the edge of the pattern piece and for others it will be well within the pattern piece. Do what seems correct for your body, but the adjustment will work best if the apex is at least 1″ from the seam line.

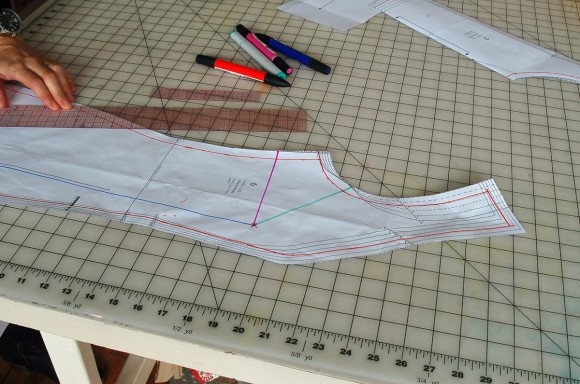
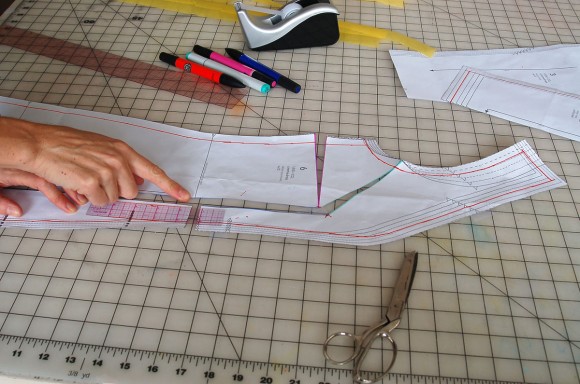
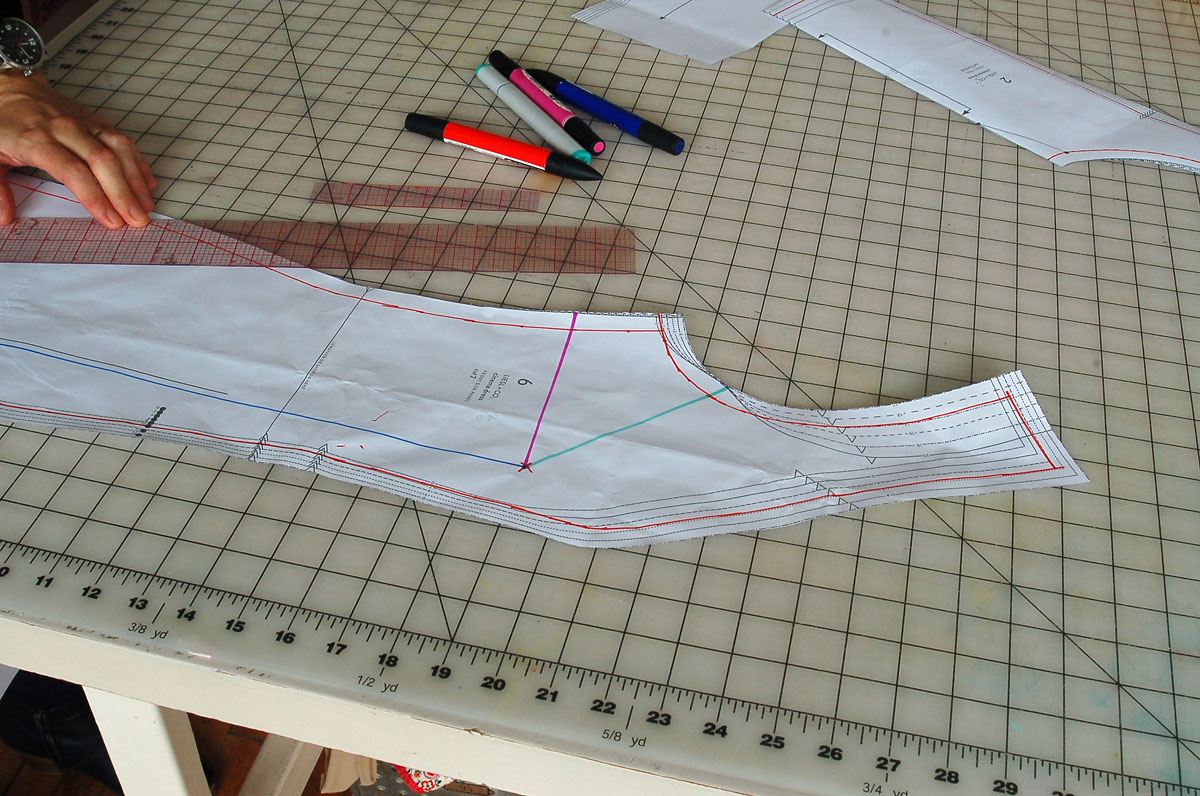
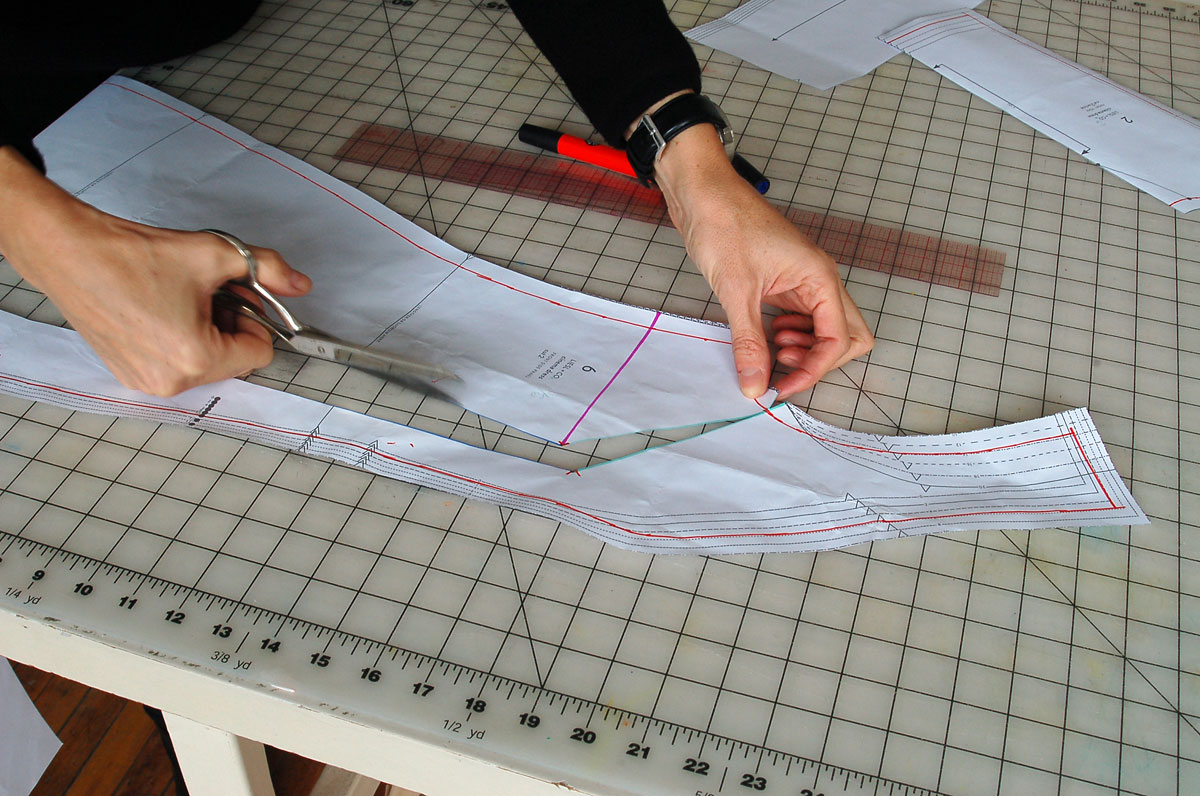
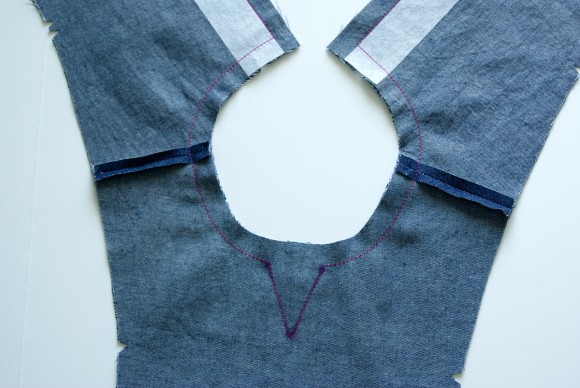
- We’ll draw three lines from this point. The first will be from the apex point to the armhole of the pattern piece, like the turquoise line. The second line will be from the apex to the side seam, approximately 2–3″ below the armhole, like the pink line. And the third line will be from the apex to the hem of the dress, staying parallel to the grain line for the pattern piece, like the blue line.
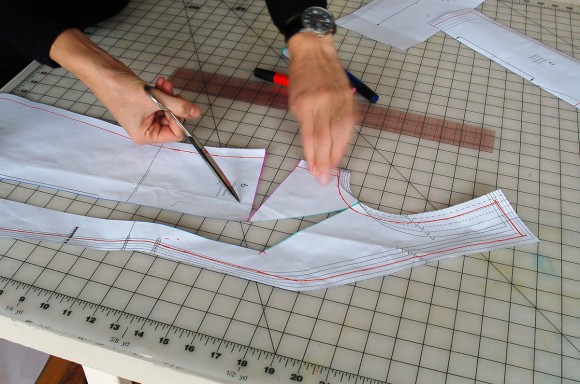
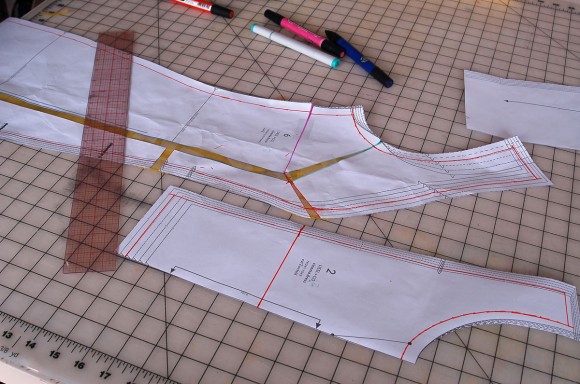
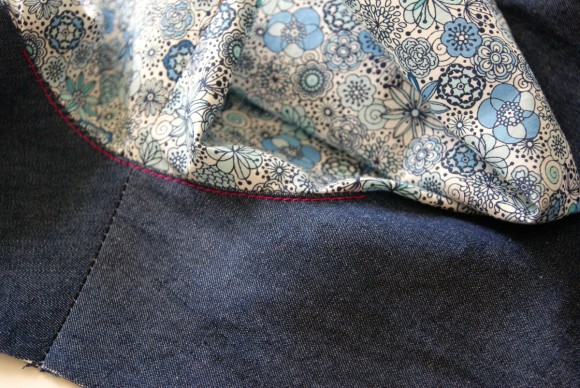
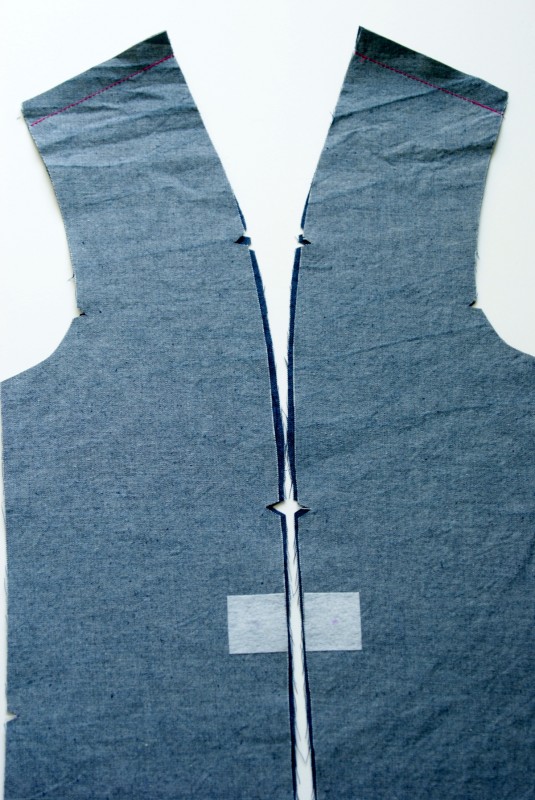
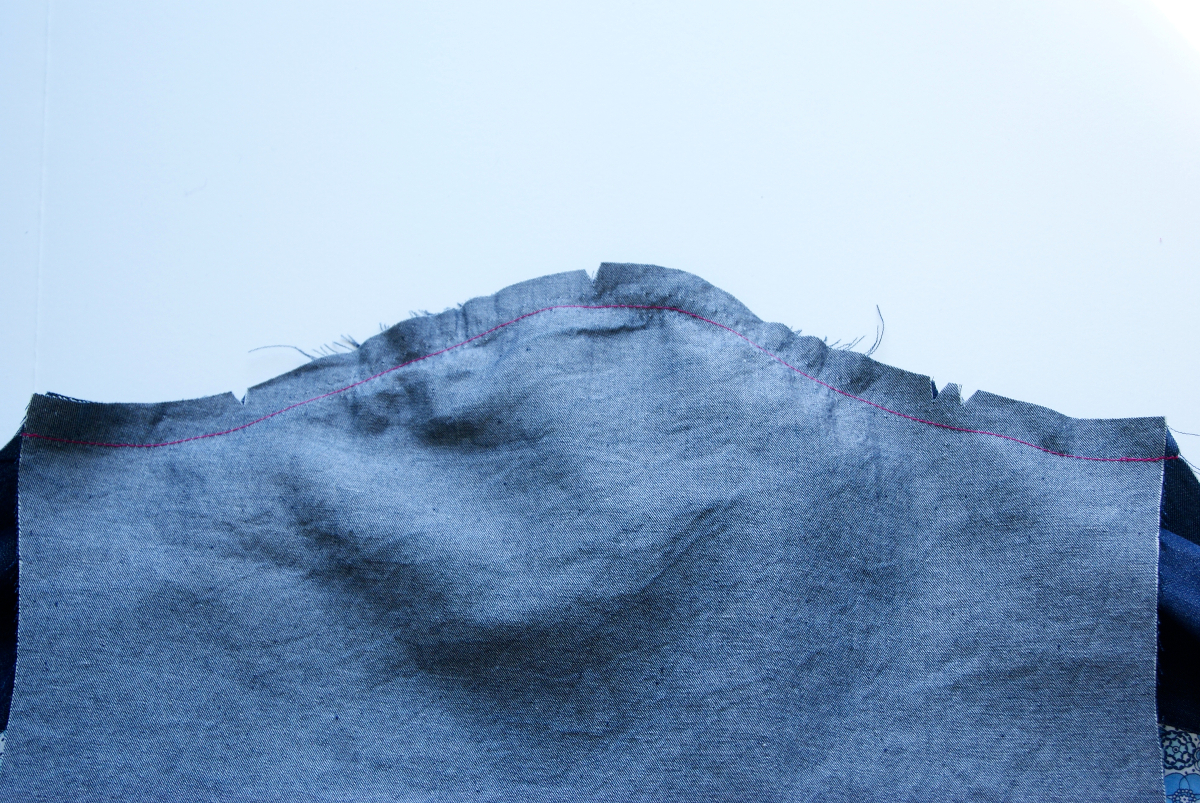
- Cut the pattern piece along line #3 from the hem to the full-bust point, then pivot and cut along line #1 to the armhole, leaving an uncut paper “hinge” at the armhole seam line. You can see the hinge at my left hand where the seam line is still intact.

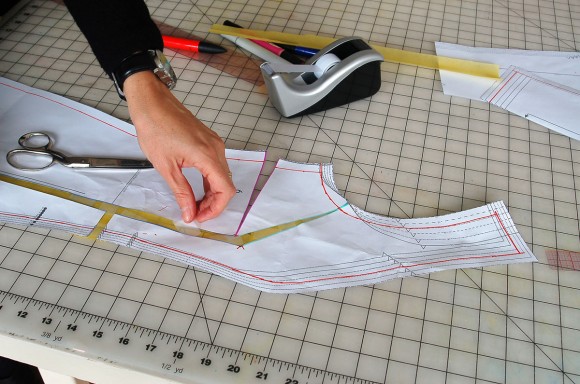
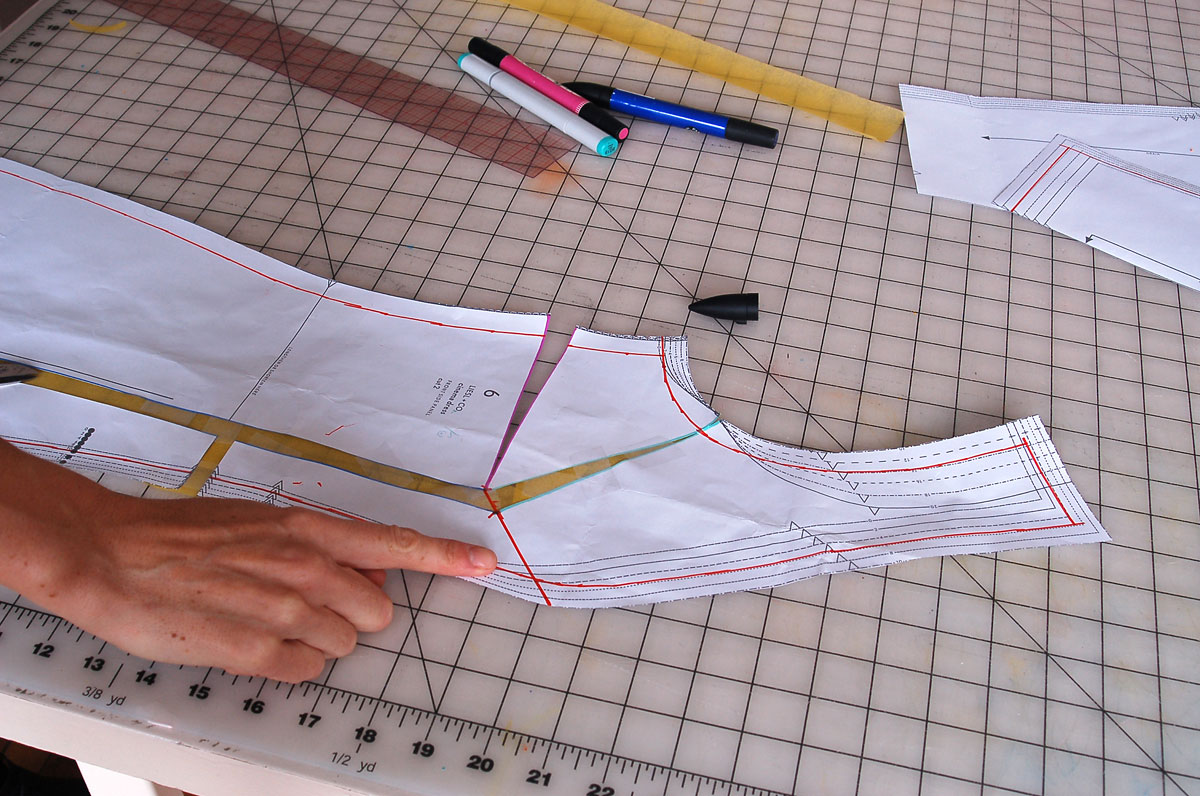
- Make another cut on line #2 starting from the side seam, leaving another paper “hinge” at the full-bust point, like this. You can see the hinge at the end of the pink line where the paper is still connected.
- Spread the pattern piece at the vertical cut (line #3), keeping the two vertical cut edges parallel to each other. If you’re a C-cup, spread the cut line by 1/2″. For a D-cup, spread the cut line by 3/4″.
 And if you’re smaller-busted than a B-cup, overlap the two edges by 1/2″ for an A-cup.
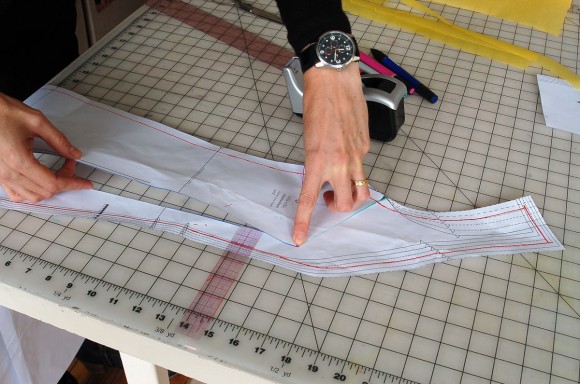
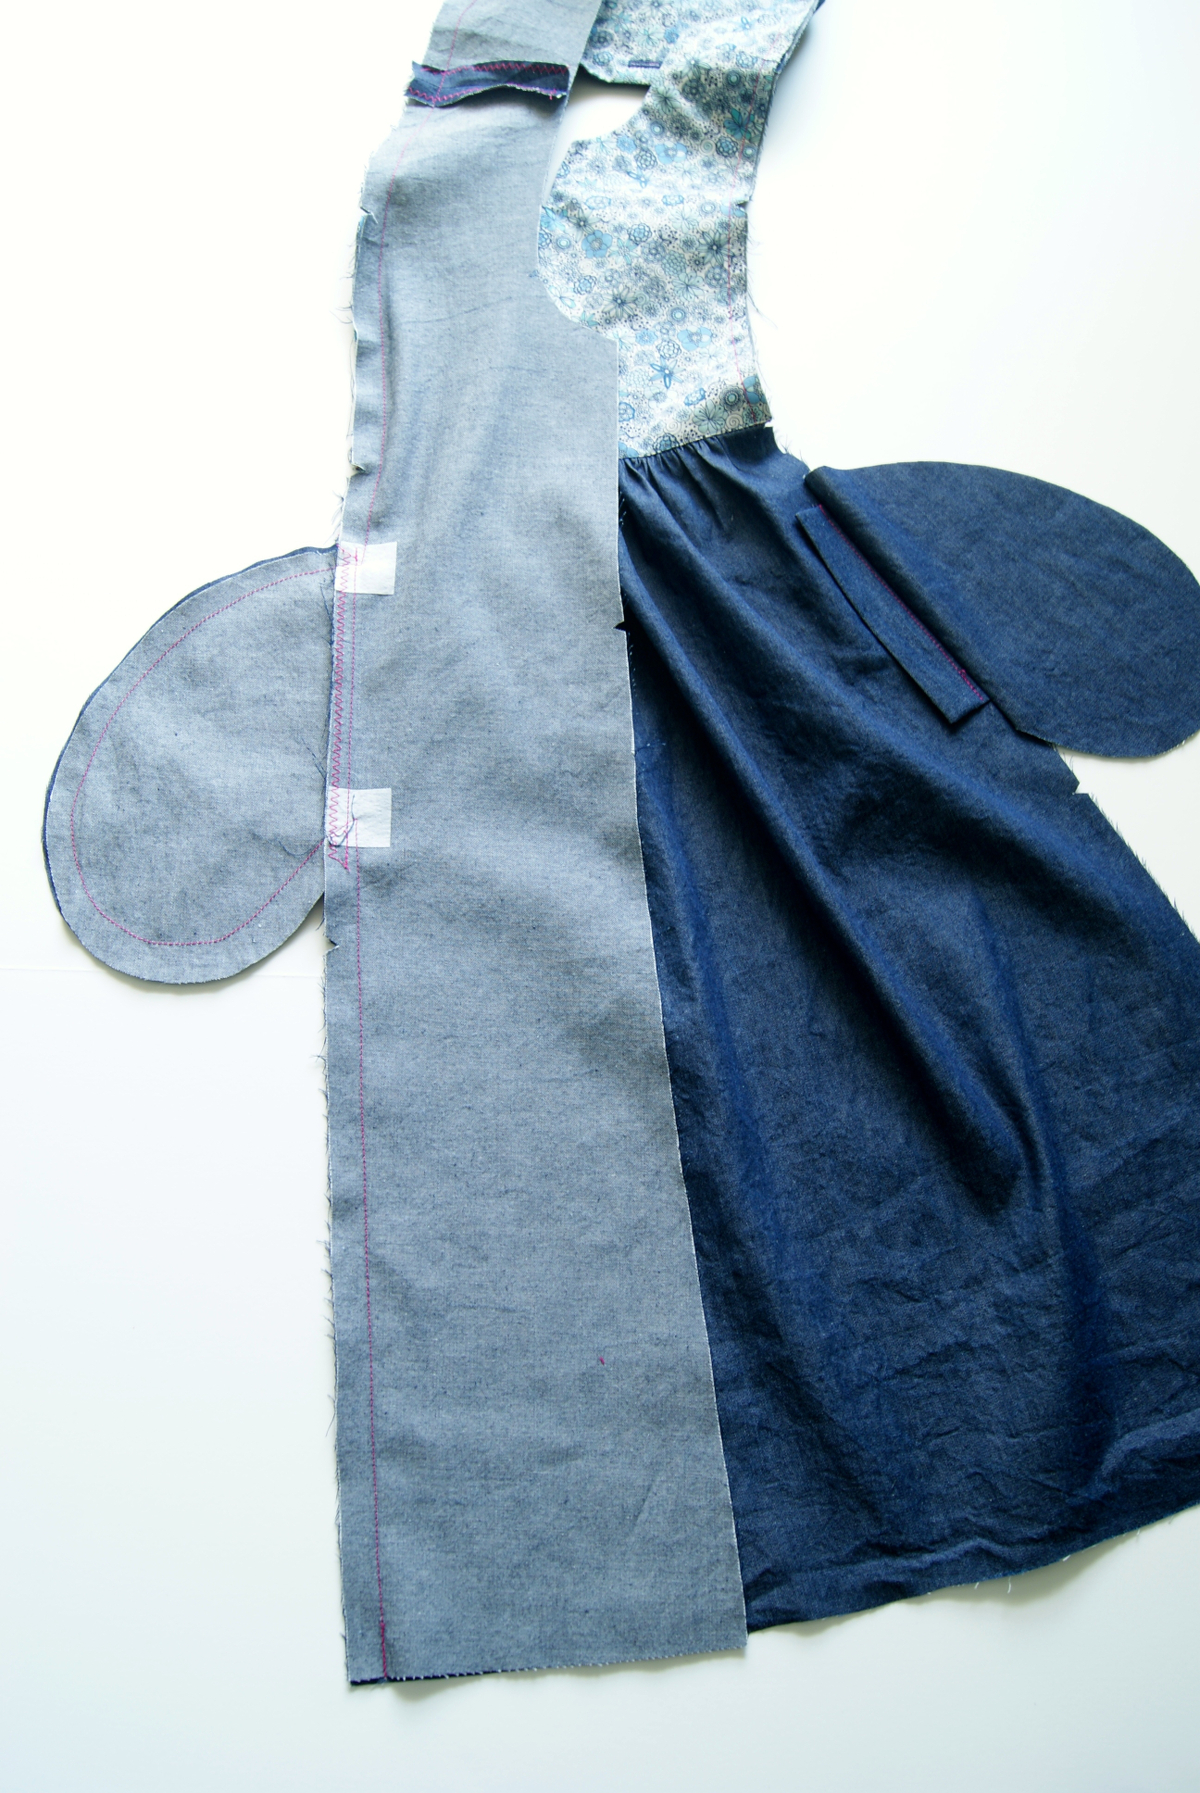
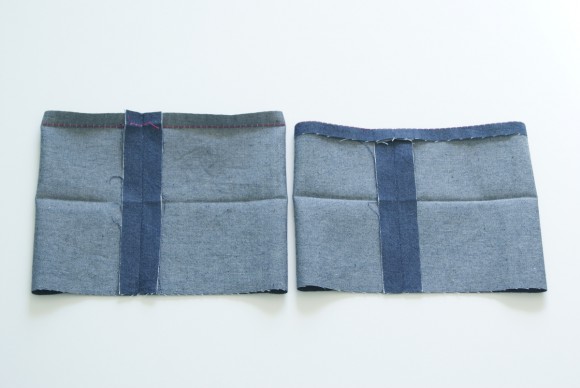
- Cut the center-most portion of the pattern piece on the lengthen-and-shorten line at the waist, as shown, and move the skirt portion of the pattern piece down so the hem of the skirt is even. Keep the pattern pieces parallel to each other and at the same spread distance selected (e.g. 1/2″ for a C-cup).
- Then tape a little paper or tissue paper to fill in the gaps, as shown. Don’t fill in the gap along cut line #2 because we’ll be closing that gap next. (If you’re small busted, we’ll be opening it so leave it un-taped.)
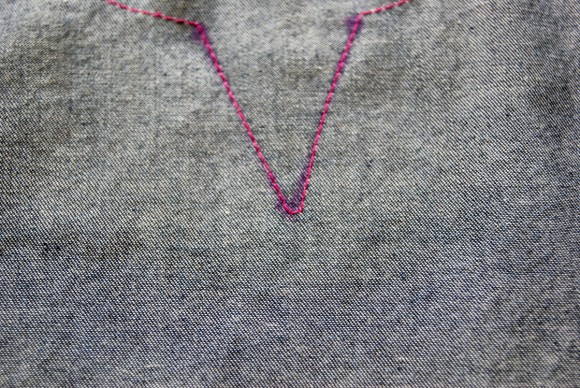
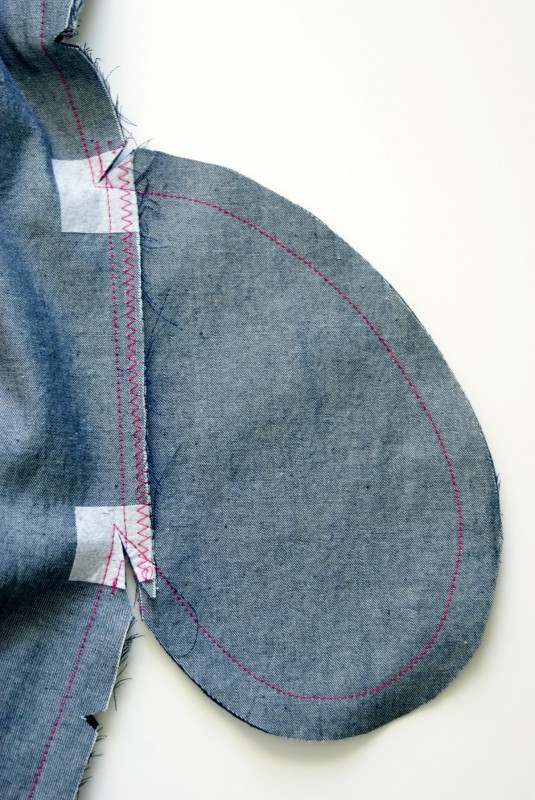
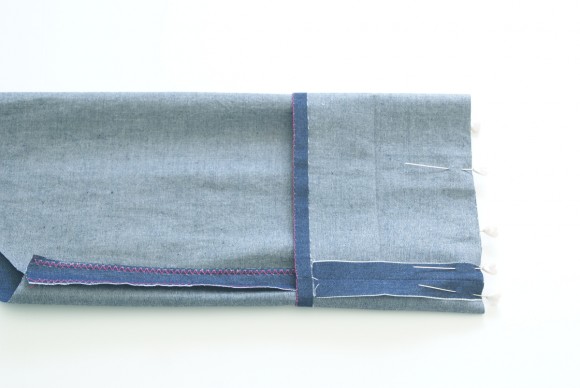
- Draw a line from the tip of the hinge at the end of line #2 to the curved front edge of the pattern piece.
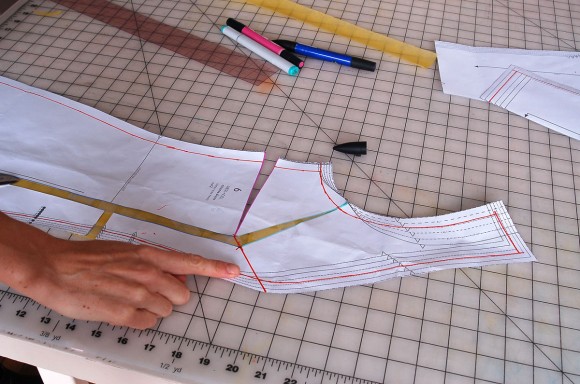
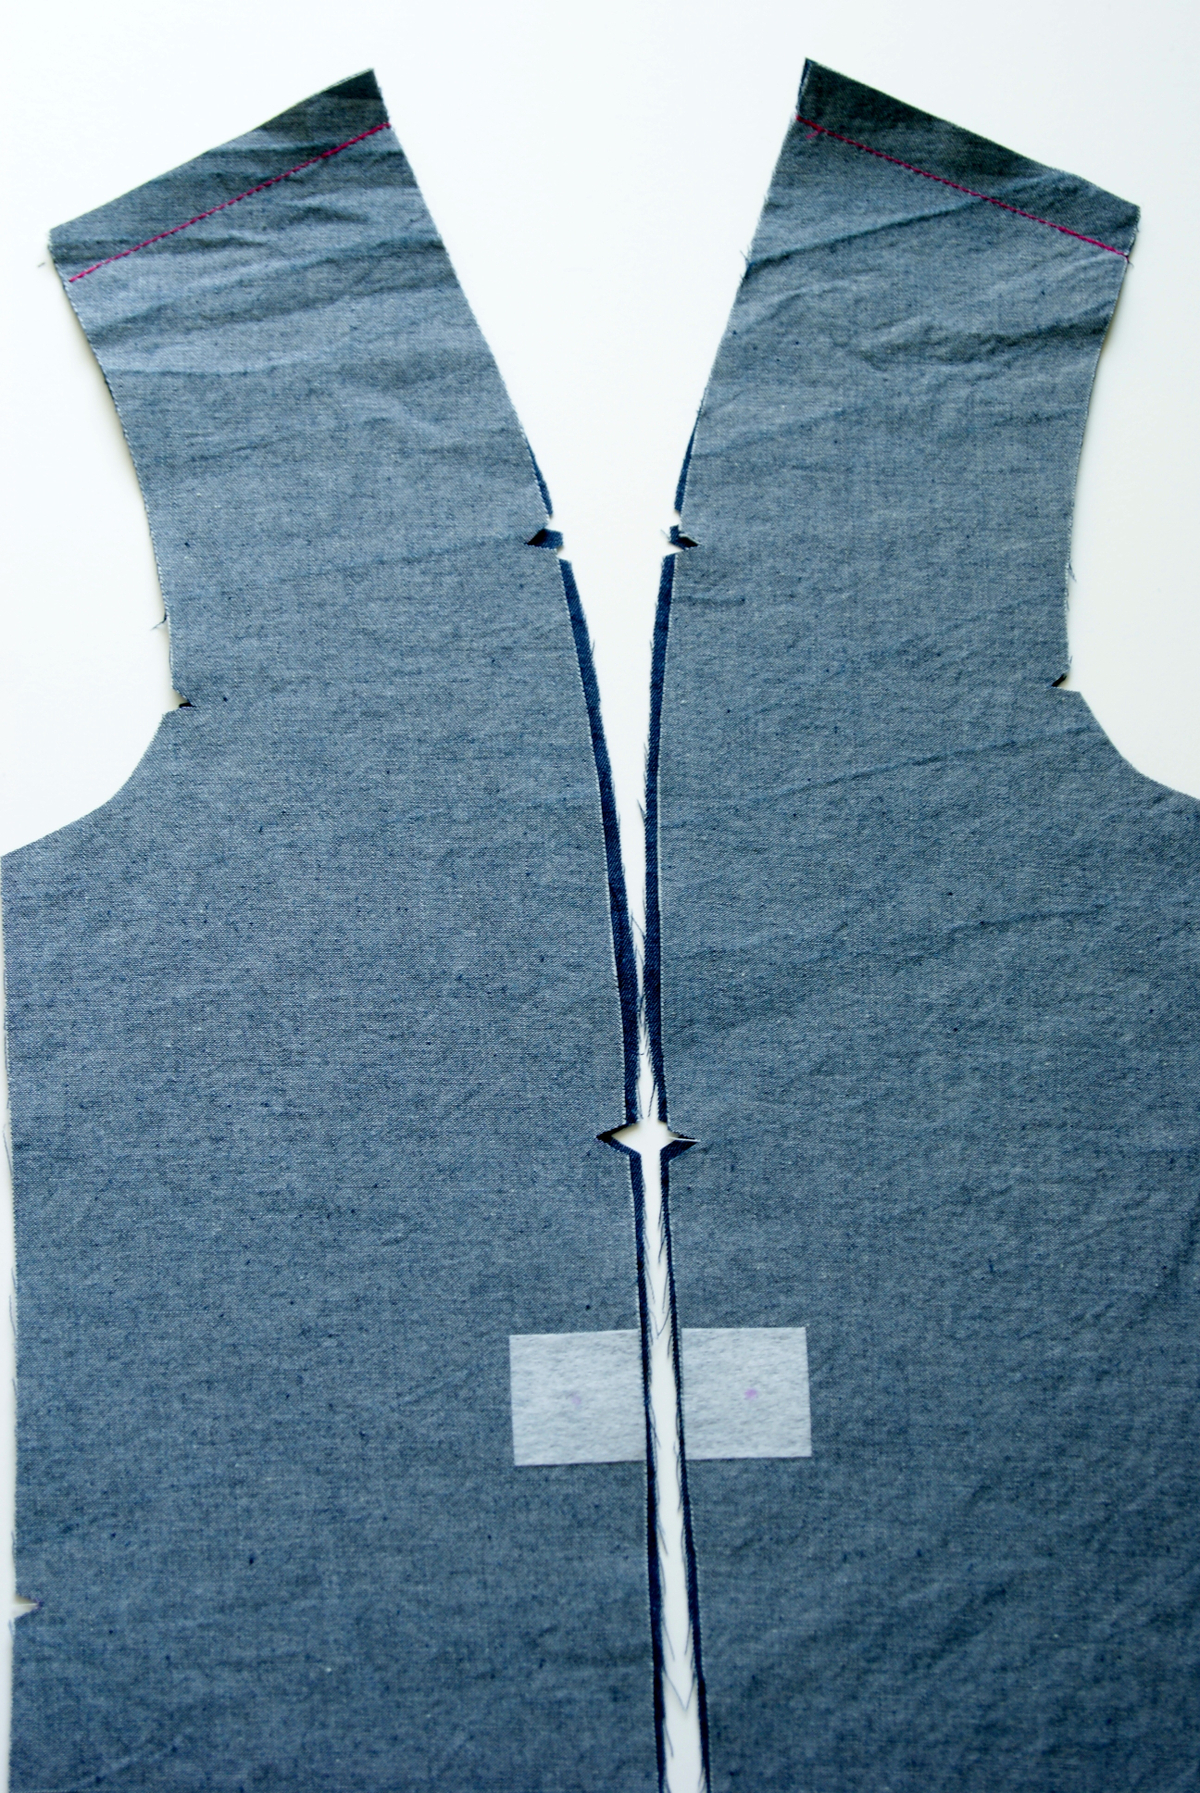
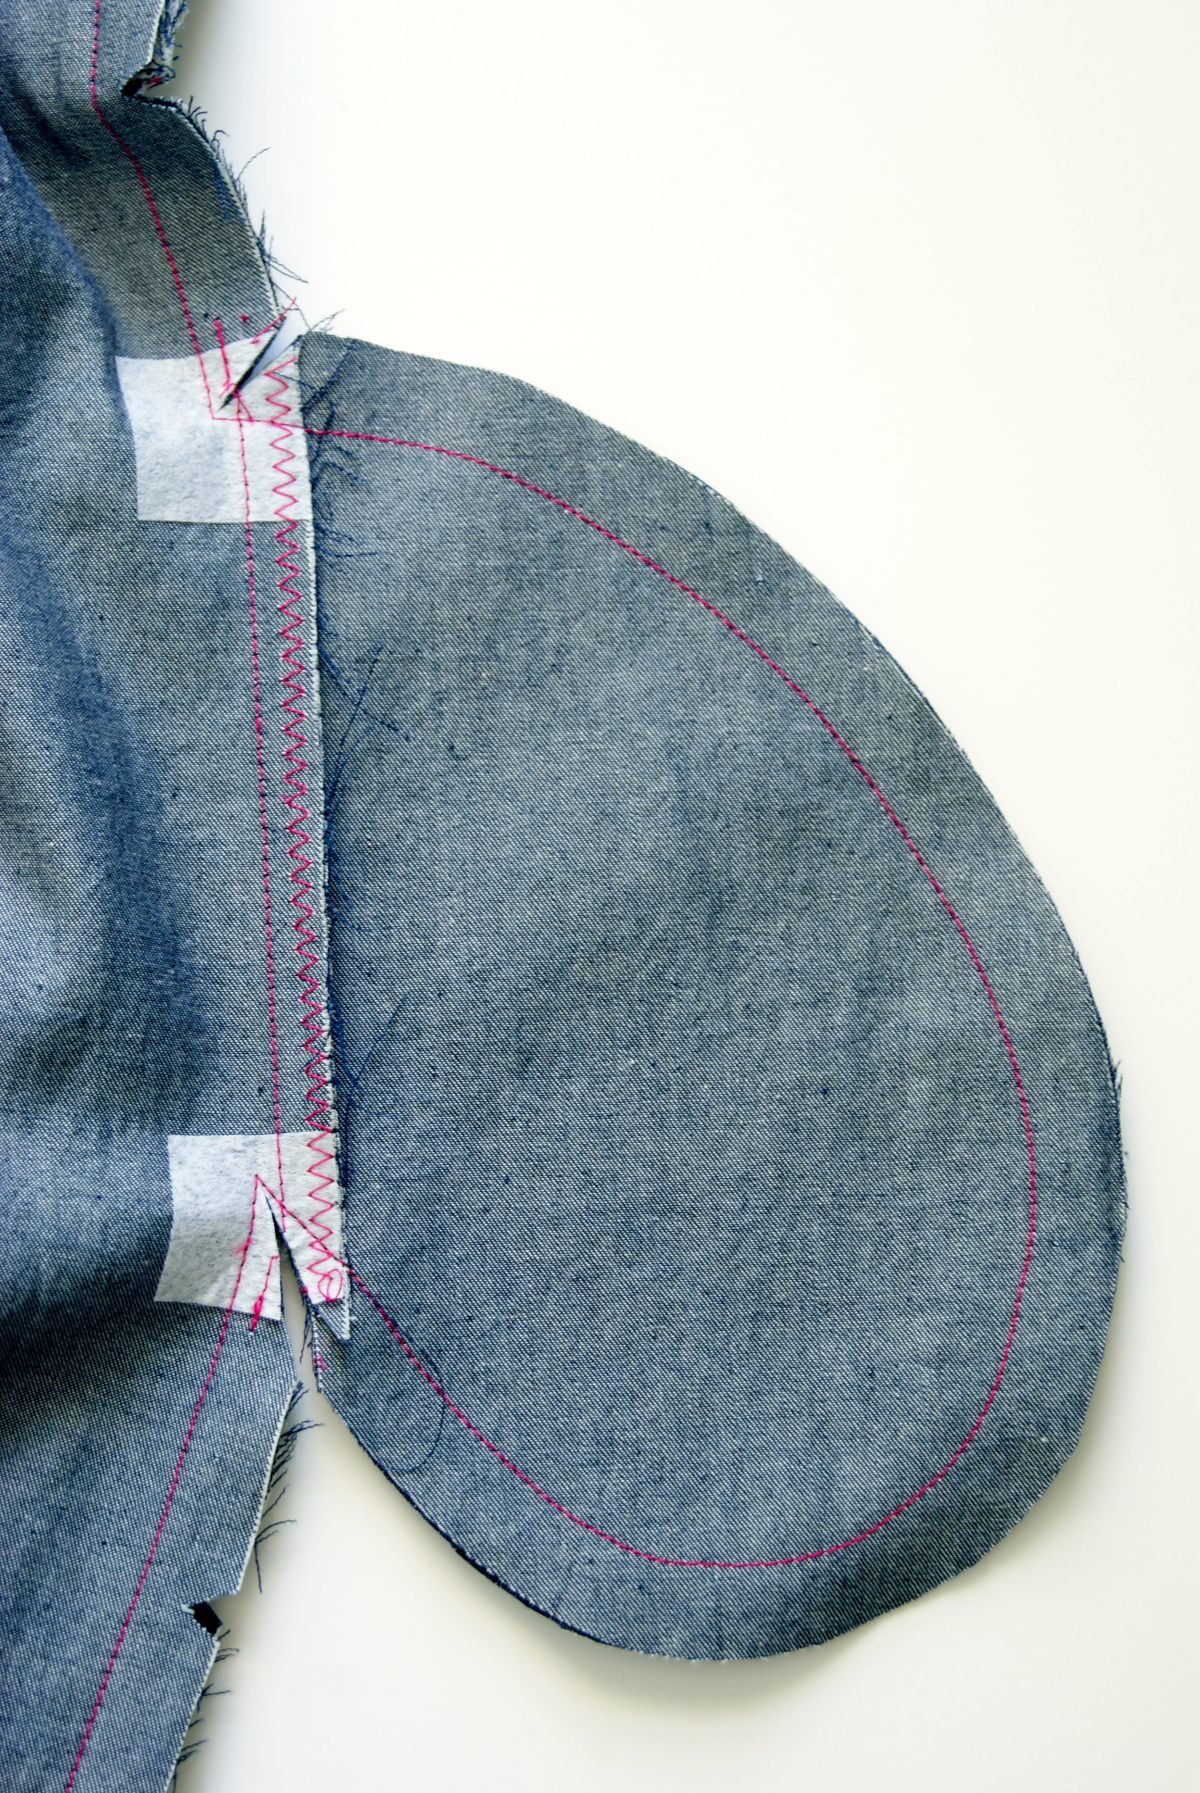
- Cut the pattern piece starting from the curved front edge along the marked line, leaving another paper hinge at the apex. Close up the gap along line #2, taping it shut and pivoting the top of the pattern piece in the process. The front edge of the front side panel will open up, leaving a new gap along the center-front edge of the pattern piece. By doing this, you’ve lengthened the front edge for a fuller bust.
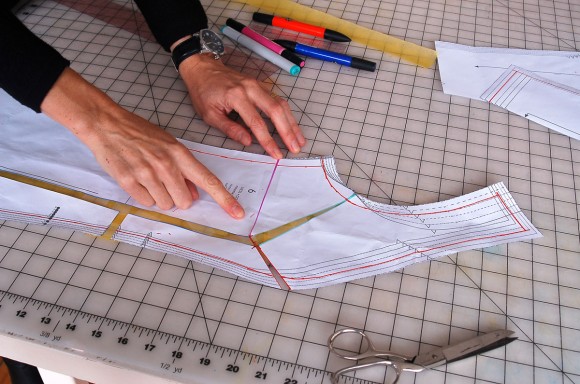
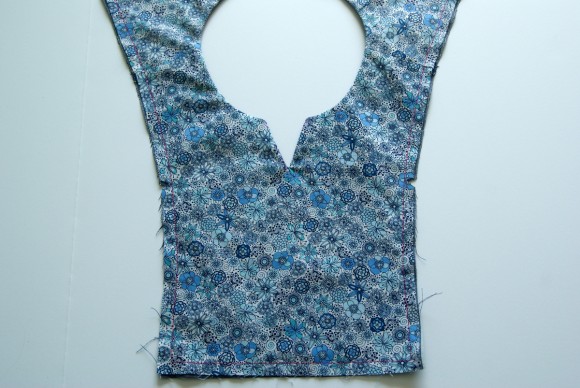
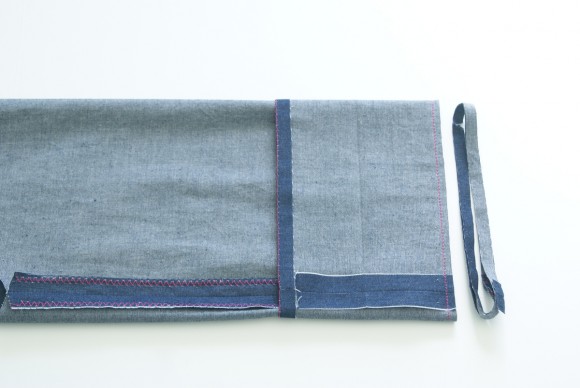
- Tape a piece of tissue paper to fill the gap and draw a curved line, connecting the two edges. (If you’re small busted, you’ll do the same thing, except instead of closing up the gap at line #2 you’ll open up the overlap, which will cause the curved edges at the curved center edge to overlap slightly.) Measure the added length of the seam line along the front edge of the front side panel to determine the new length.
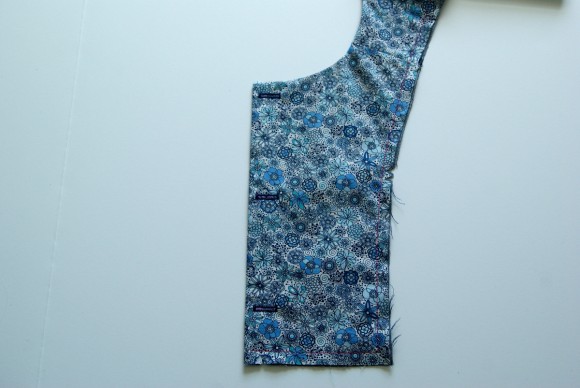
- Cut the front-yoke piece perpendicular to the fold line and add an equal amount of length to the front yoke (in approximately the same location as the additional length on the front side panel) so the two seam lines will be equal lengths. (If you’re small-busted, measure the overlap and shorten the front yoke piece by the equivalent.)


And that’s it! The full bust adjustment allows extra room at the width of the bust as well as the length of the dress, so you’ll have a better fit and can further tweak it later according to your specific needs.

Tomorrow the sewing begins! We’ll start with the yoke and the pocket welts.
Welcome to day two of the Cinema/Hide-and-Seek Dress Sew-Along.
Whether you are sewing up a Cinema Dress or a Hide-and-Seek Dress, in this sew-along we will be sewing it by the pattern. Liesl’s patterns have been called sewing lessons in an envelope. If there is a sewing skill that you haven’t developed yet, there’s no need to worry. The instructions will walk you through it step by step.
Today we will be sewing the pocket welts and the yoke. So let’s begin, shall we?
Getting started
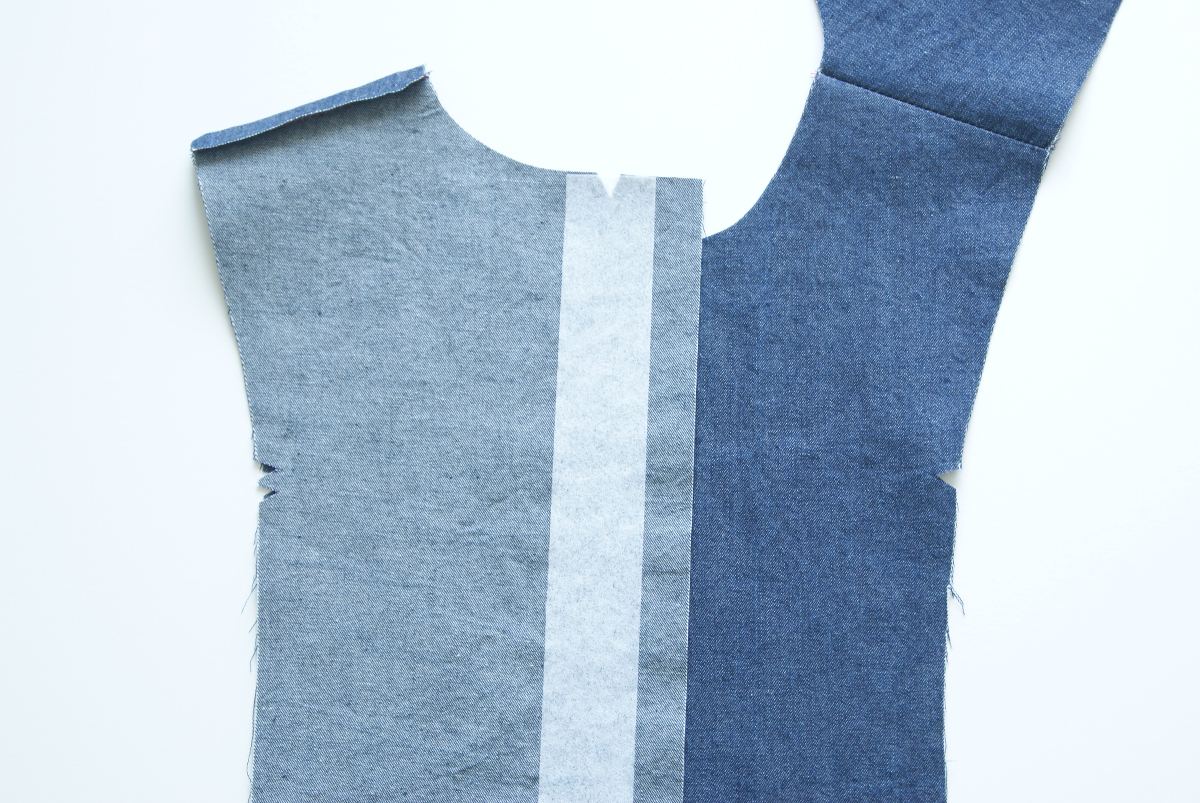
Transfer all markings and fuse interfacing to the wrong sides of the fabric pieces according to your pattern and instructions.
Make the Welt Pockets
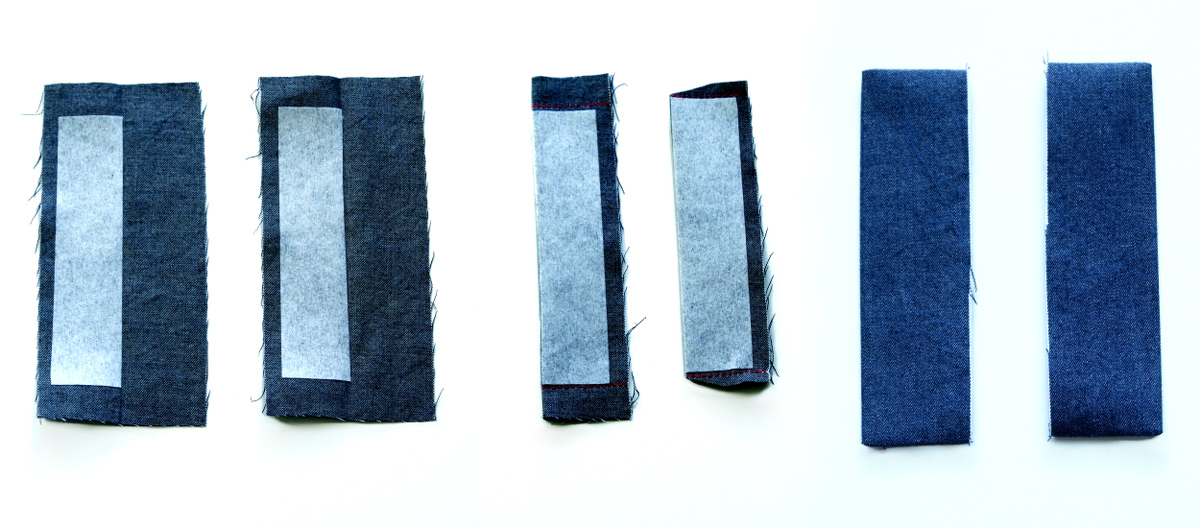
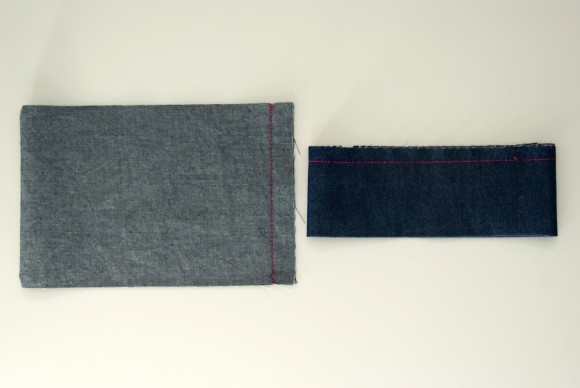
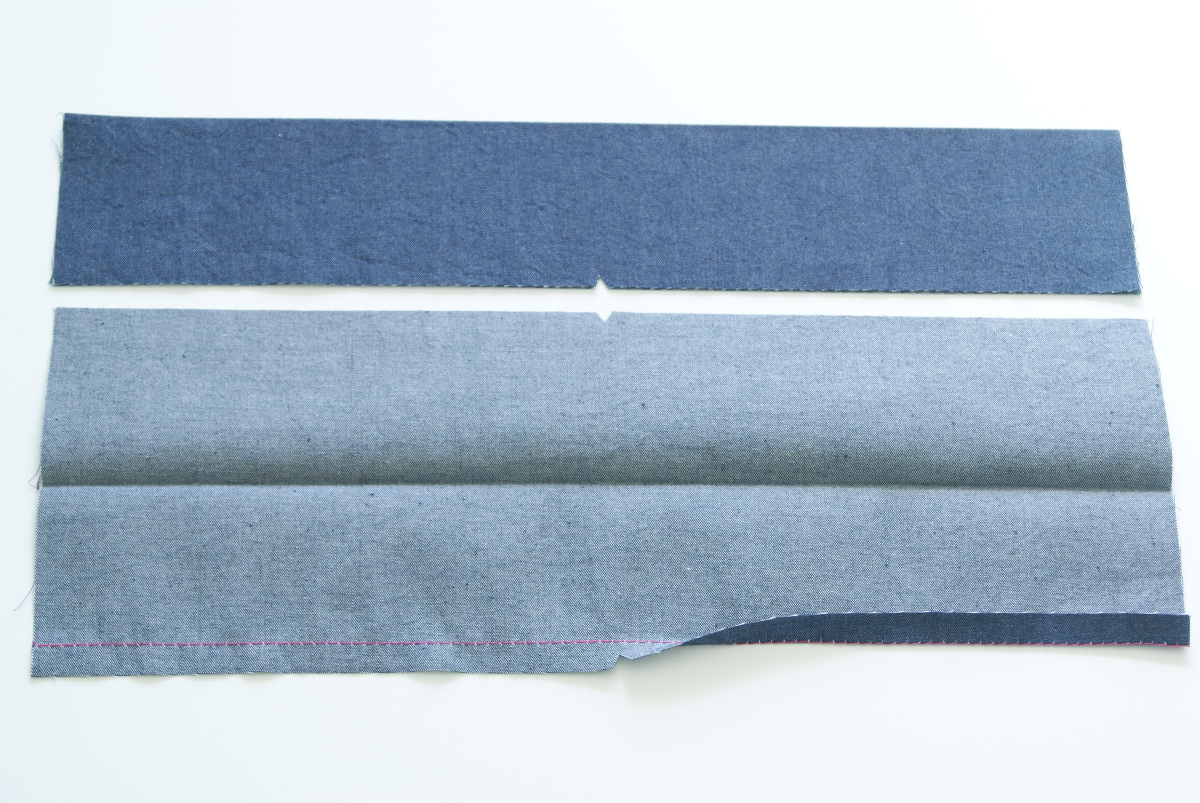
- Fold one pocket welt in half on the fold line, with right sides together, and stitch the short edges with a 1/2″ seam, backstitching or lockstitching at both ends. Trim the seam allowances to 1/4″ and trim the corners. Repeat to sew the second welt.
- Turn each welt right-side out, gently pushing out the corners with a knitting needle or chopstick. Then press the welts.

Prepare the Yoke
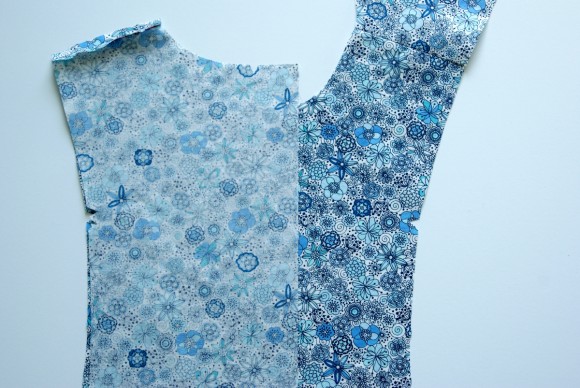
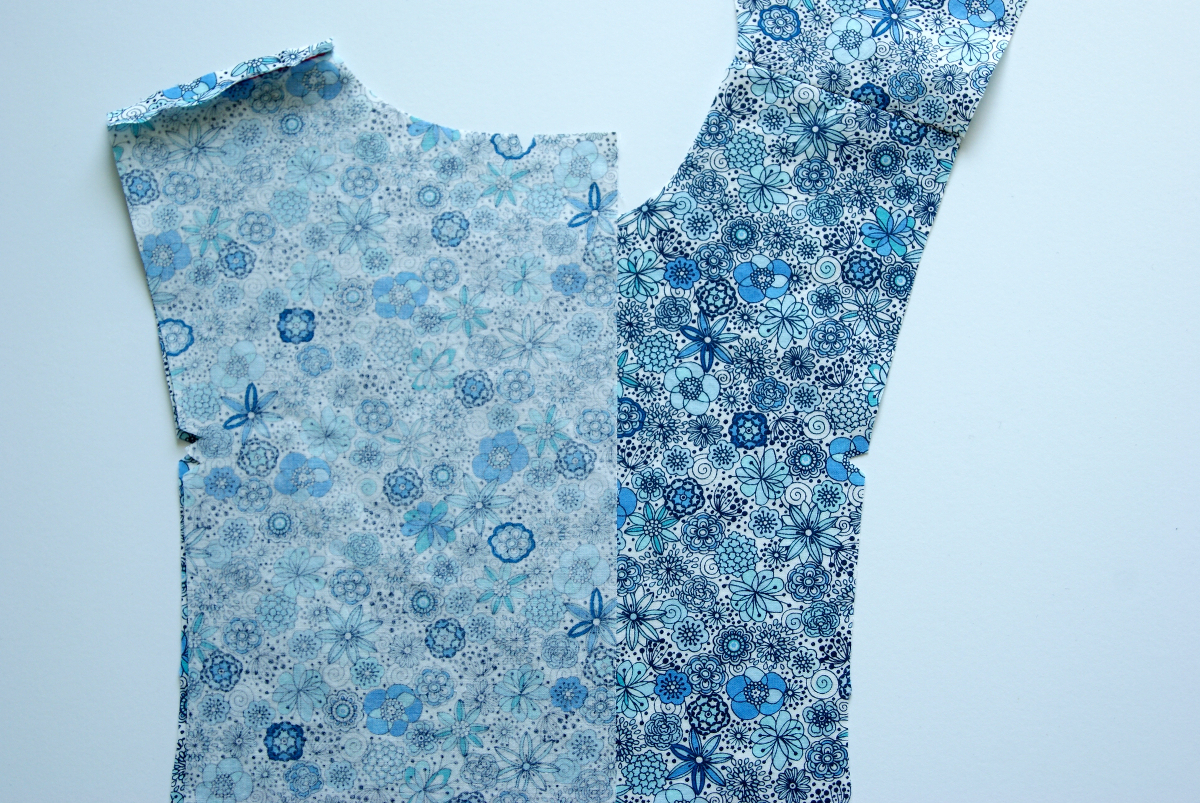
- Align and pin two opposing back-yoke pieces to the one front-yoke at the shoulders, with right sides together and raw edges aligned. Stitch just the shoulders with a 1/2” seam, backstitching or lockstitching at both ends of the seam. Trim the seam allowances to 1/4” and press them open. Repeat with the second set of yoke pieces (the yoke facing).

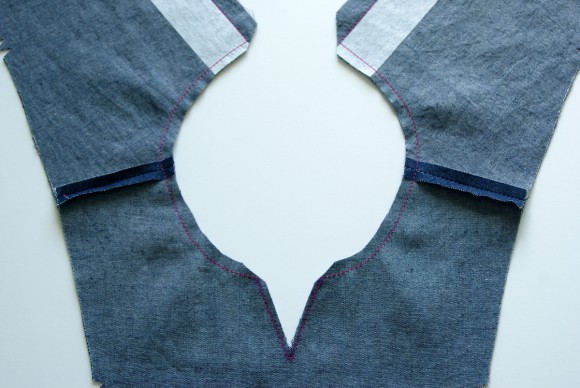
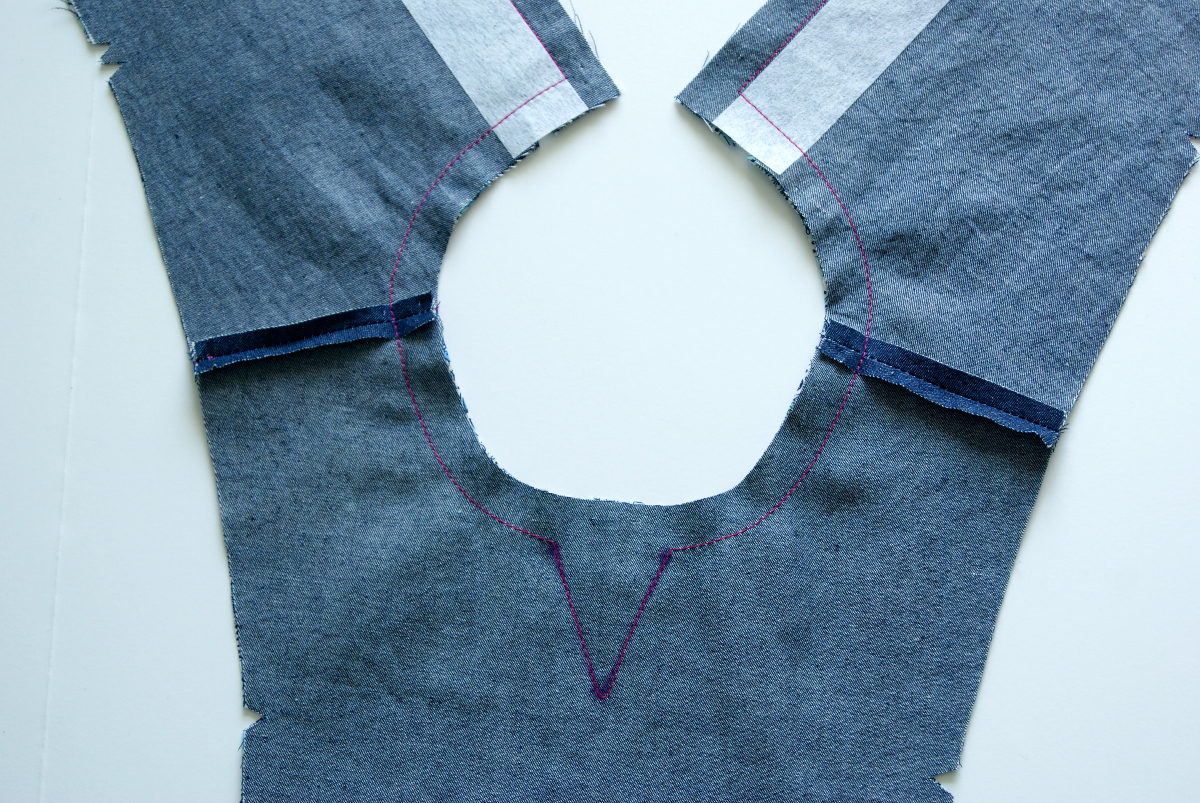
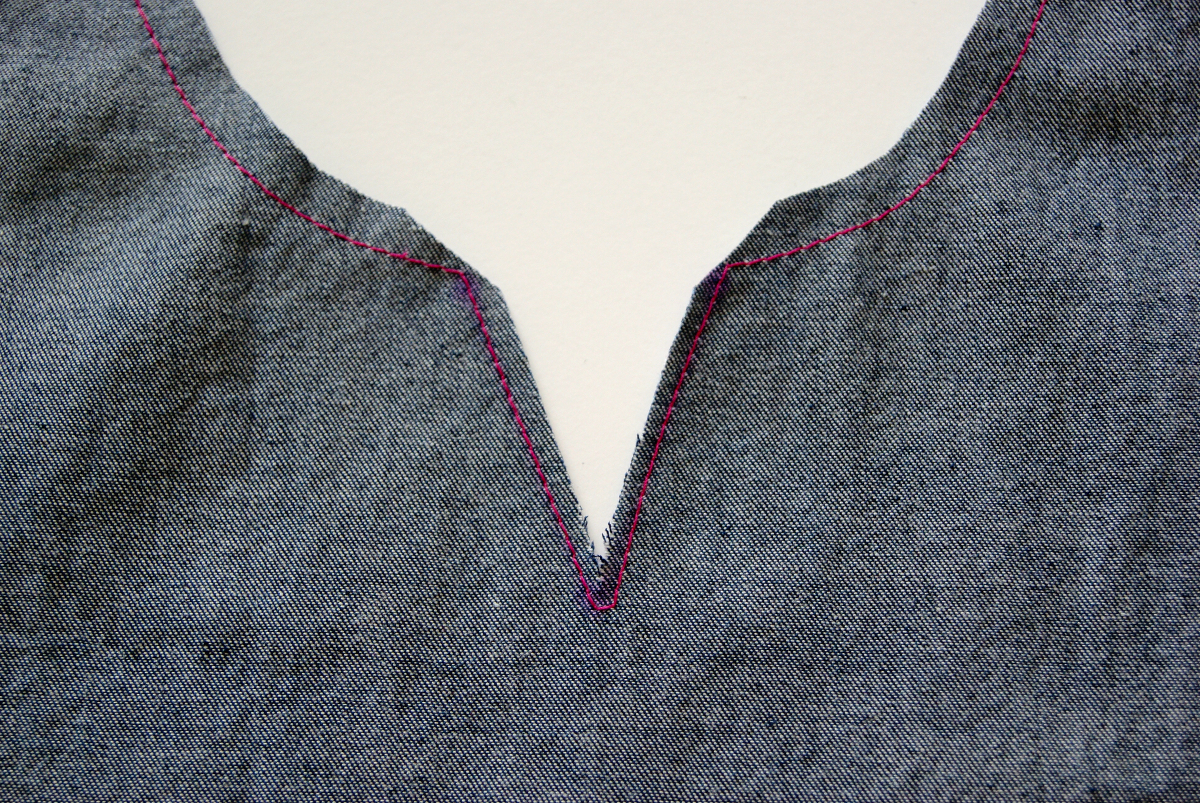
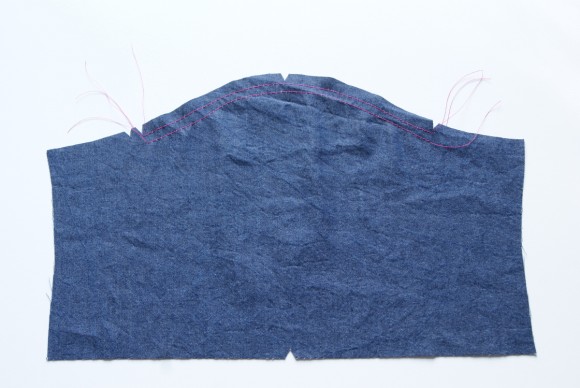
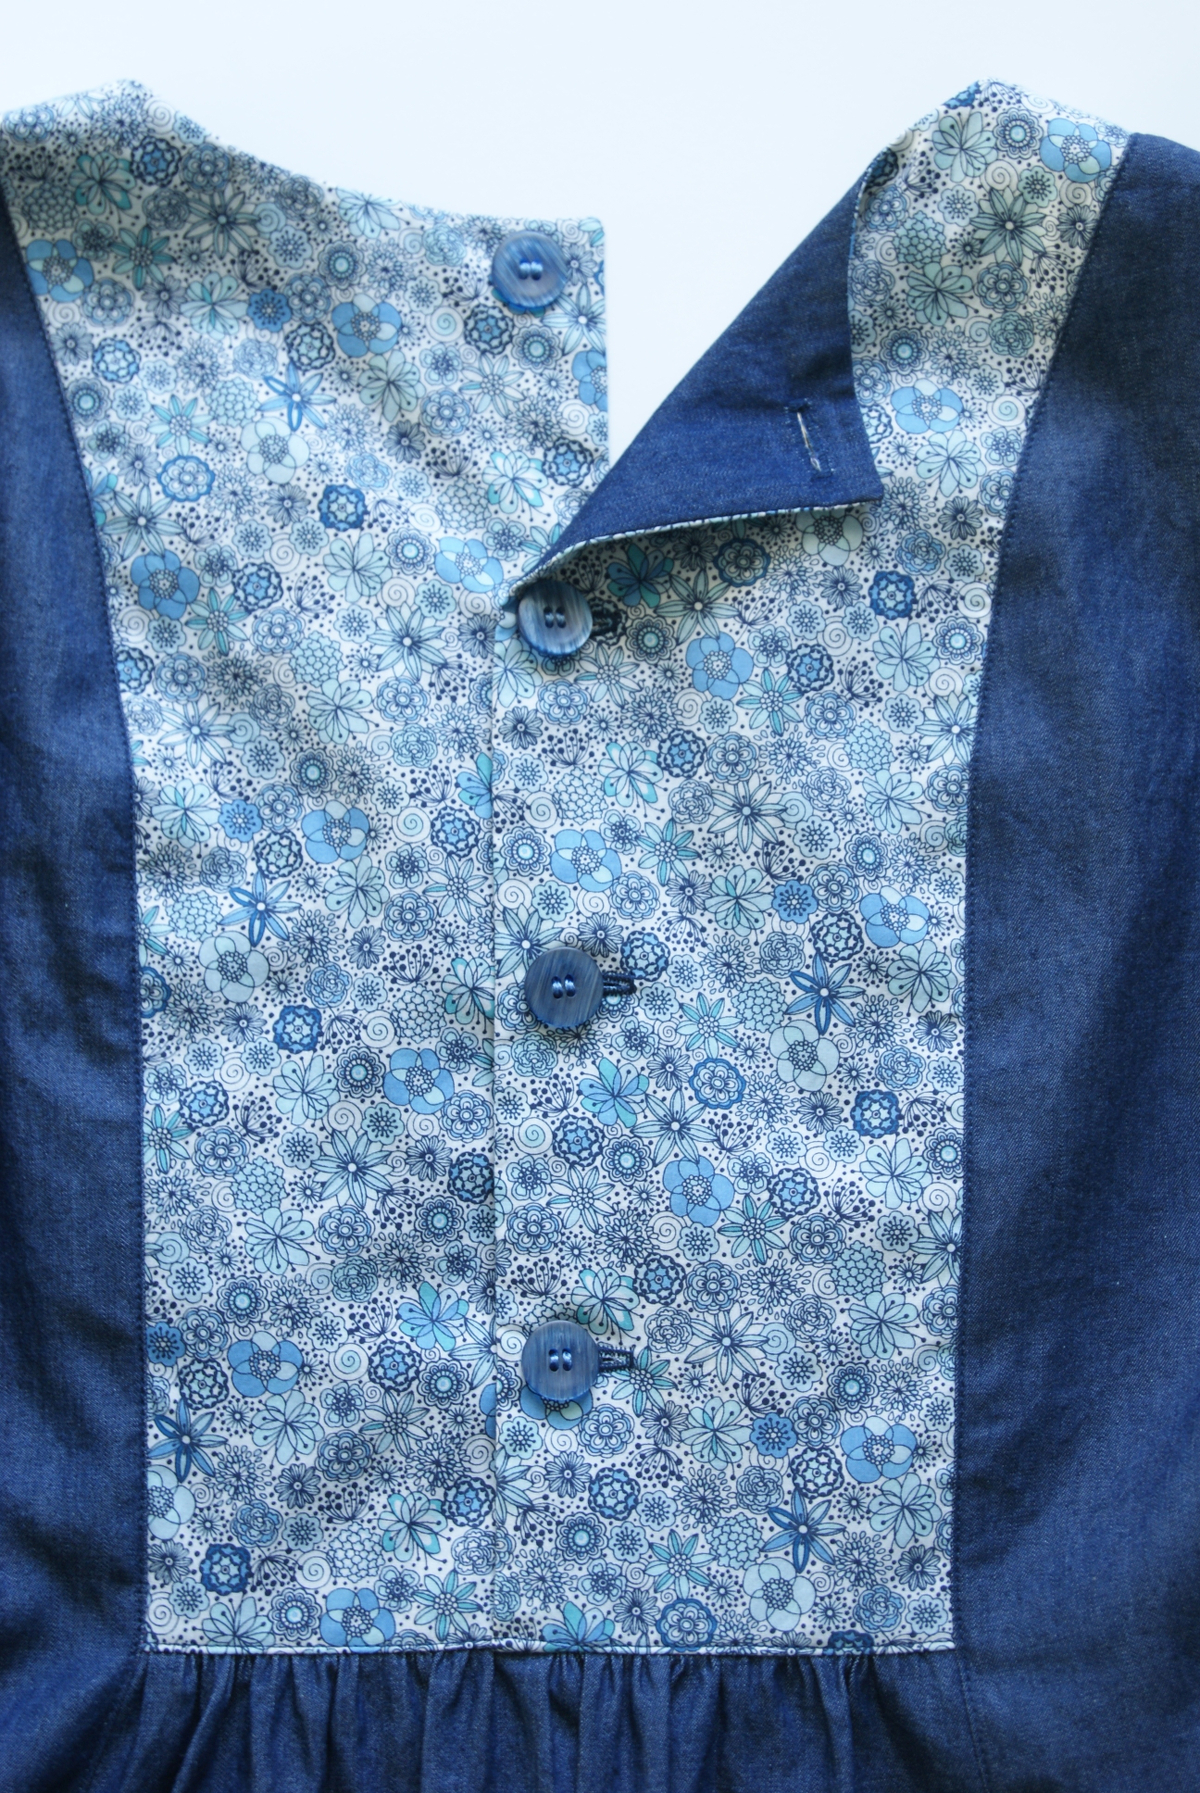
- Pin the yoke and yoke facing together along the neckline and the center-back edges, with right sides together and matching the shoulder seam. Stitch the center backs and neckline together with a 1/2” seam as follows. Start stitching at one center-back edge, pivot at the corner of the neckline to start stitching around it, pivot at the corner of the center-front V-notch, stitch down one side of the V, pivot at the bottom of the V to sew one stitch across the pint, pivot again to stitch back up the V, pivot again to stitch around the other side of the neckline, and finally pivot once more to finish sewing the remaining center-back edge.
- Trim the seam allowances to between 1/8” and 1/4” at the neckline and the V-notch, and clip into the seam allowances as necessary to release them at the curved areas. Clip very close to the stitching line at the V-notch dot without cutting into the stitches themselves. Trim the back corners, but don’t trim the center-back seam allowances.

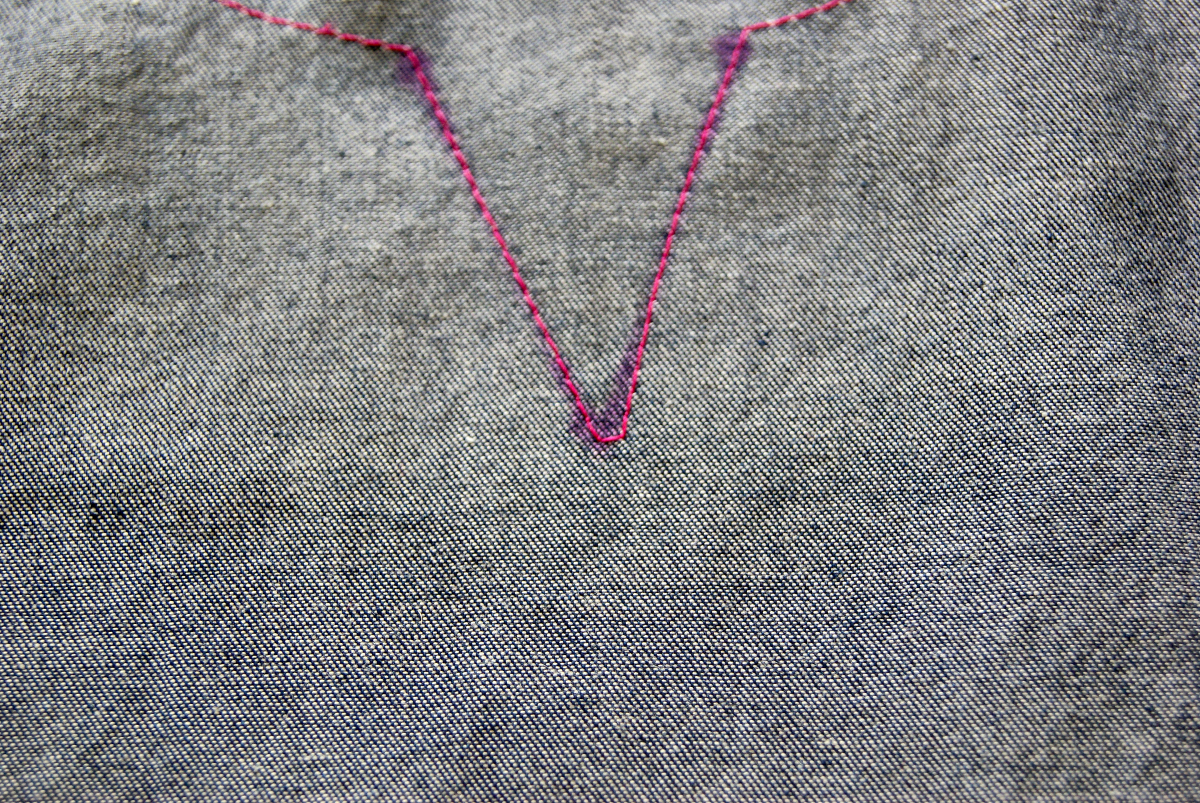
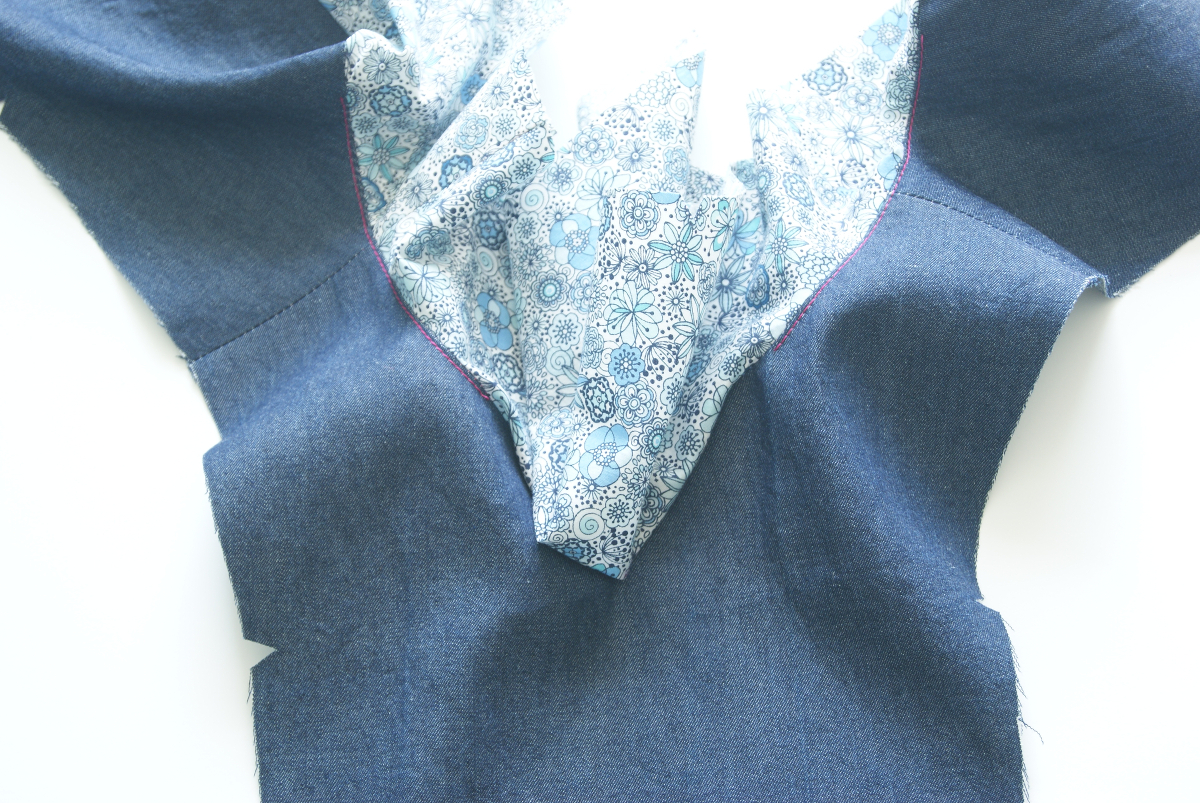
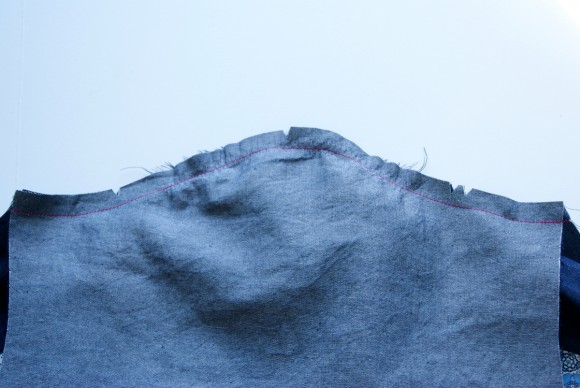
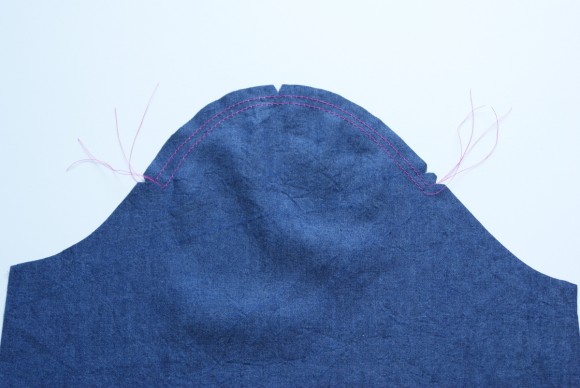
- Press the neckline seam allowance toward the yoke facing as far as you can reach with the iron. Understitch the curved parts of the neck, stitching the seam allowances to the facing as far as the sewing machine can reach. (You won’t be able to stitch all the way to the corners.)
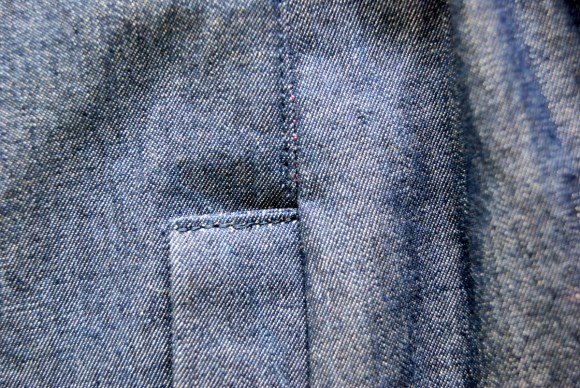
(This is what the understitched, curved parts of the neckline look like from the wrong side of the fabric.)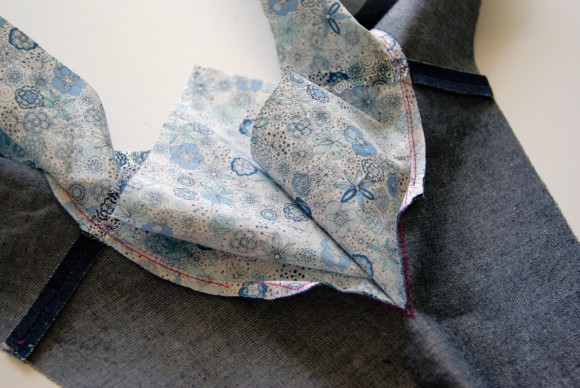
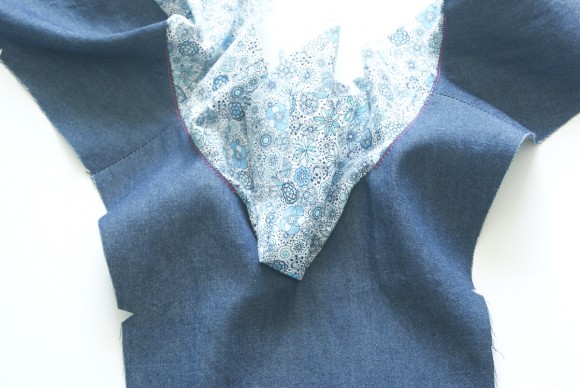
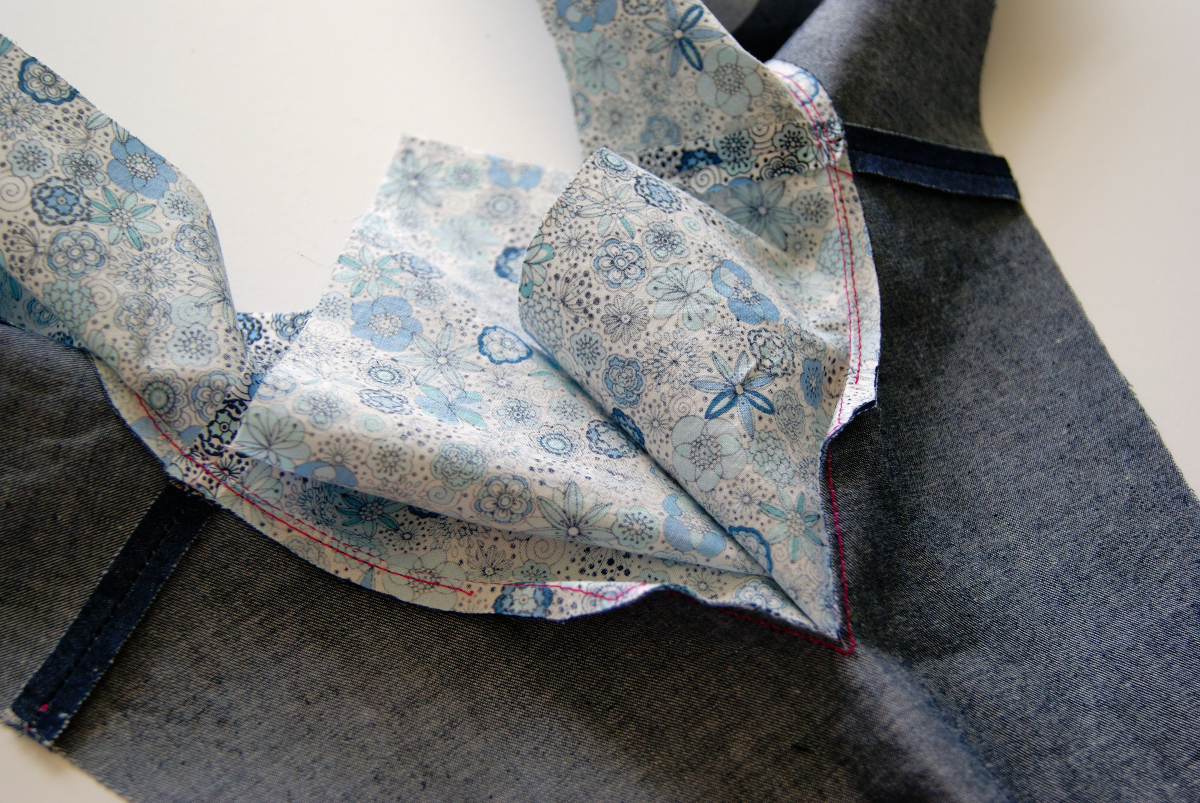
- Turn the yoke right-side out and press the neck and back edges, rolling the seam slightly toward the facing side so it won’t be visible when the dress is finished. (If the V-notch puckers or doesn’t lie flat, you may need to clip a little closer to the stitching line.) Press the yoke flat, pin and baste the raw edges together with a 3/8” seam, and trim off any facing seam allowances that extend beyond the yoke’s outer edges.
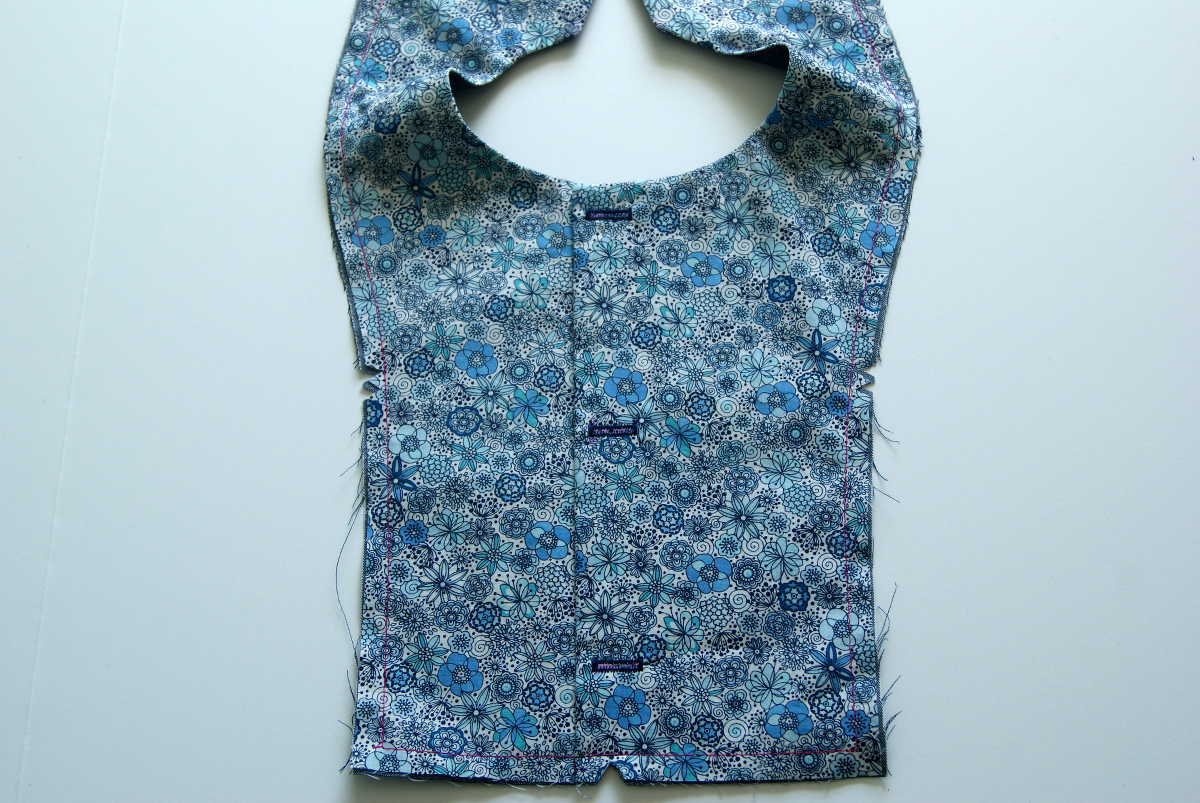
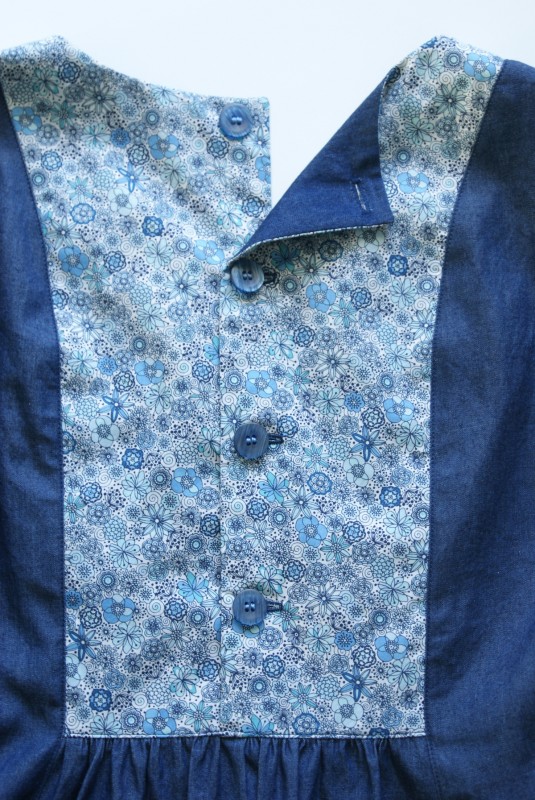
- Stitch the buttonholes on the wearer’s back right side, as marked on the button placement template.
- Overlap the back edges of the yoke so the wearer’s right side is over the left, matching the notch at the bottom edges and baste the layers together along the bottom edge with a 3/8” seam.


Done for today! If you have any questions on any of the steps so far, please ask them in the comment section. See you tomorrow for day three when we will tackle attaching the skirt, assembling the side panels, attaching the pockets, and assembling the dress.
Day three of the Cinema/Hide-and-Seek Dress Sew-Along is now here! Yesterday we got started with the pocket welts and yoke. Today we will be attaching the skirt, assembling the side panels, attaching the pockets, and assembling the dress.
We have a lot of sewing to get done today, so let’s get started!
Attach the Skirt
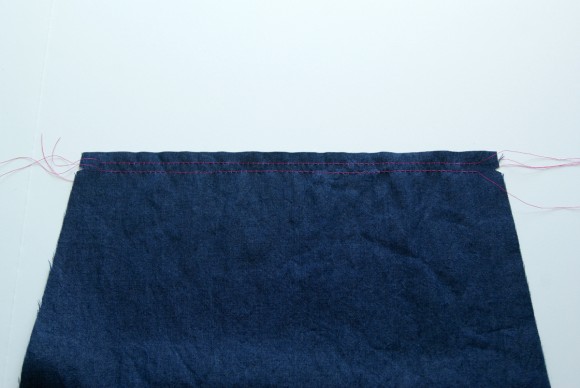
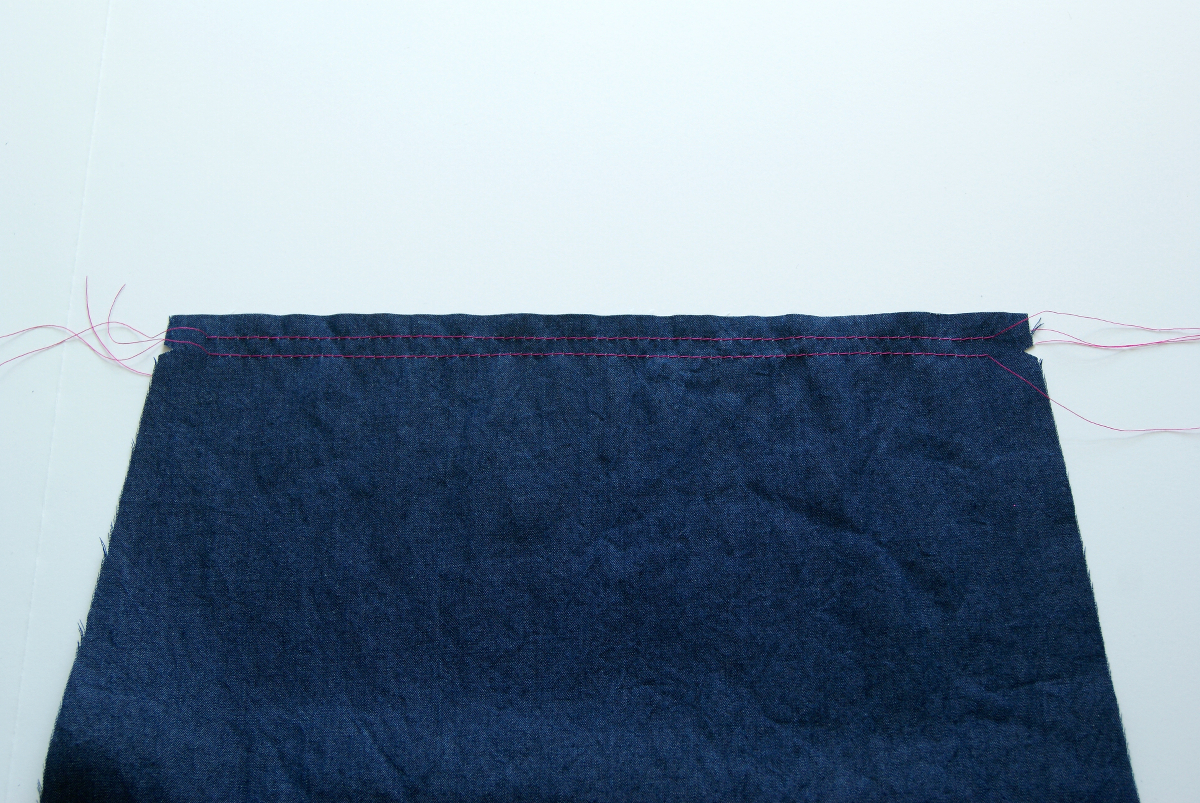
- Stitch two rows of gathering (basting) stitches along the top of the front skirt 3/8” and 5/8” from the raw edge, starting and stopping about 1/2” from the skirt’s side edges and leaving thread tails several inches long for pulling. Repeat with the back skirt.
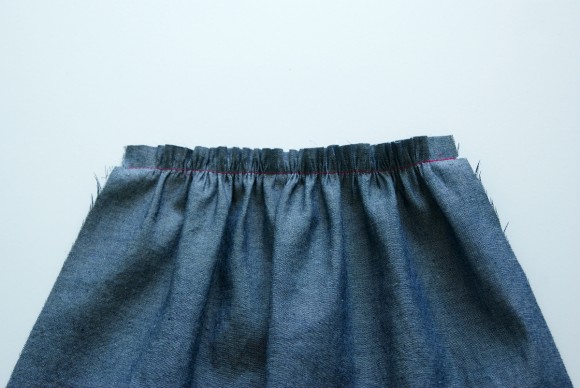
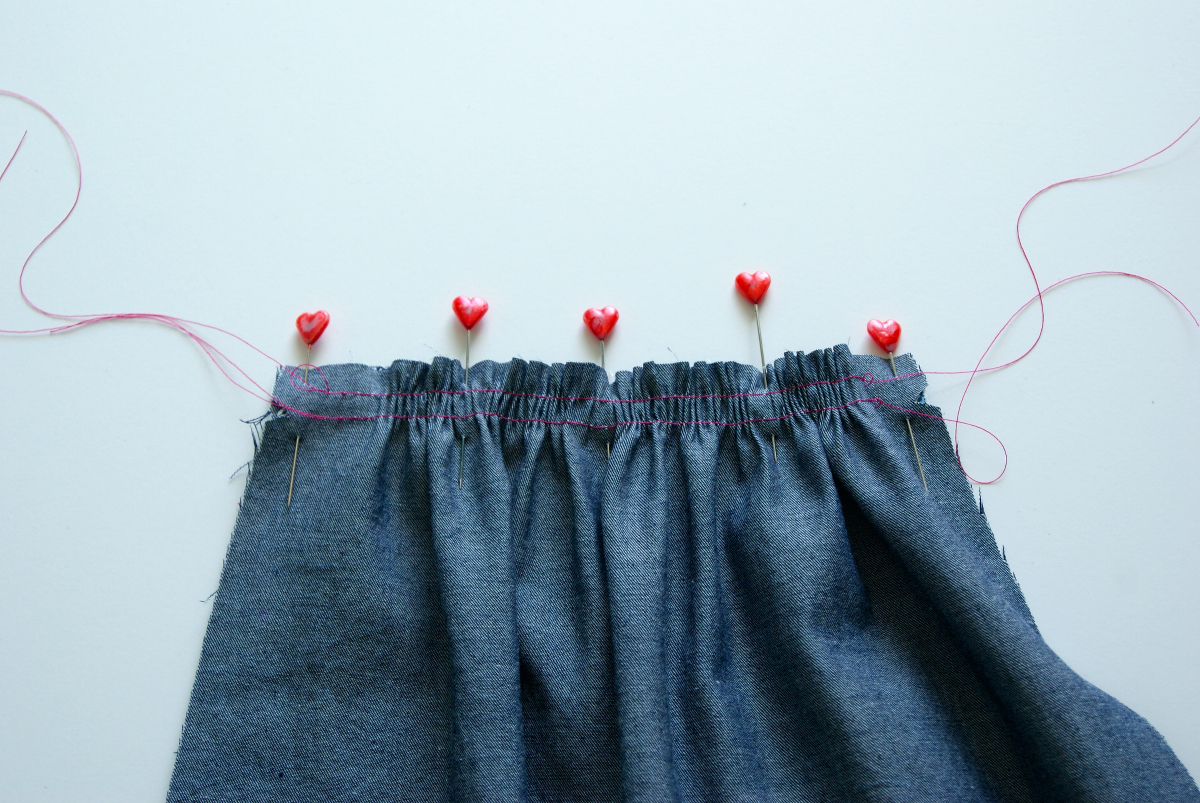
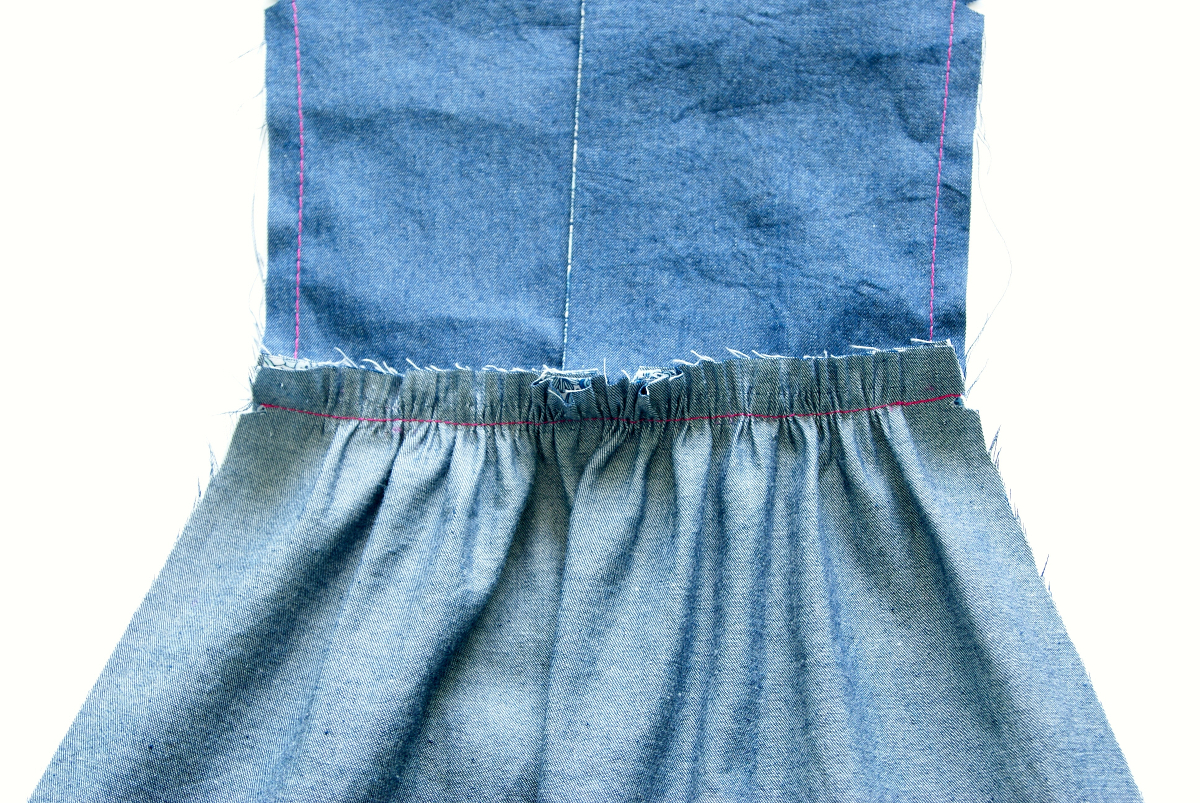
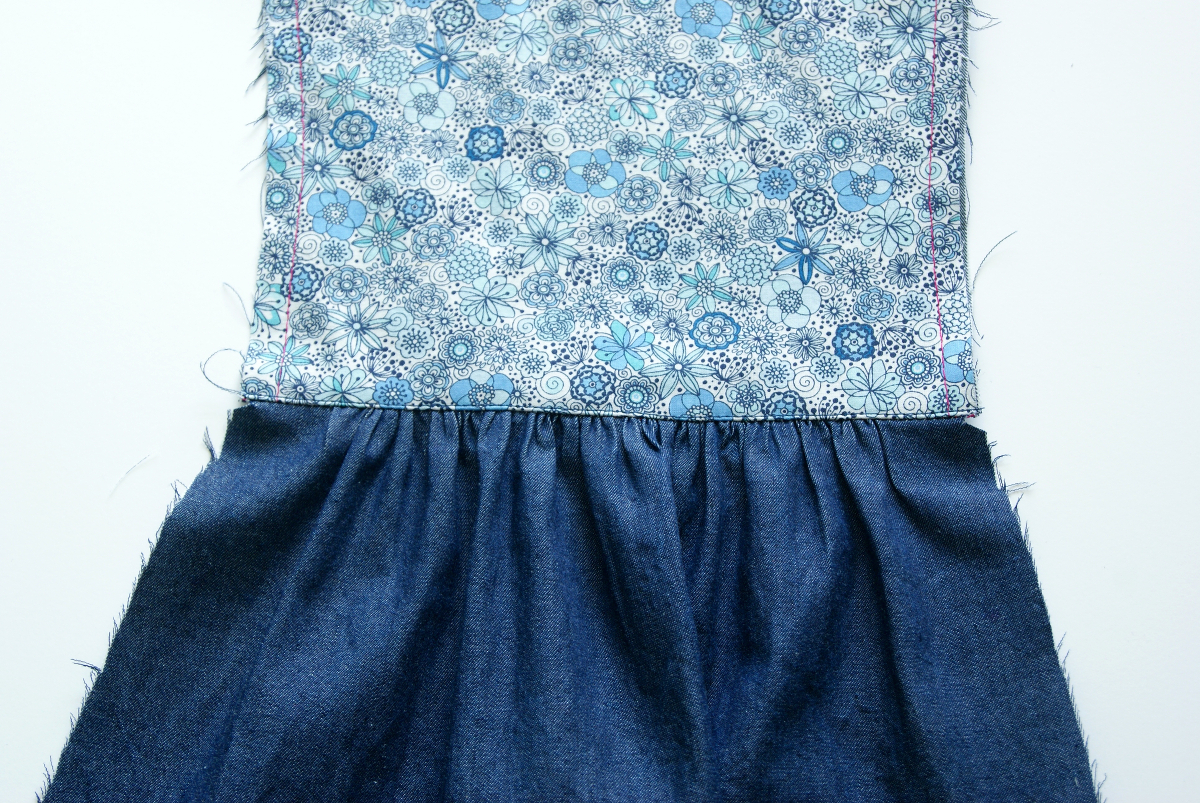
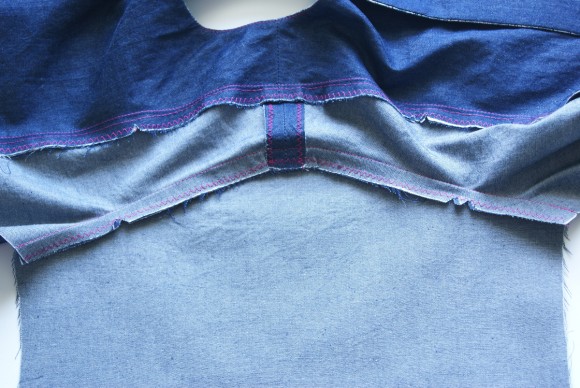
- Pin the back skirt to the back yoke, with right sides together, matching the center notches and the raw edges. Pull the gathering threads to cinch up the skirt to match the width of the yoke. Distribute the gathers evenly, then pin and stitch the skirt to the yoke with a 1/2” seam, backstitching or lockstitiching at both ends. Attach the front skirt to the front yoke the same way.

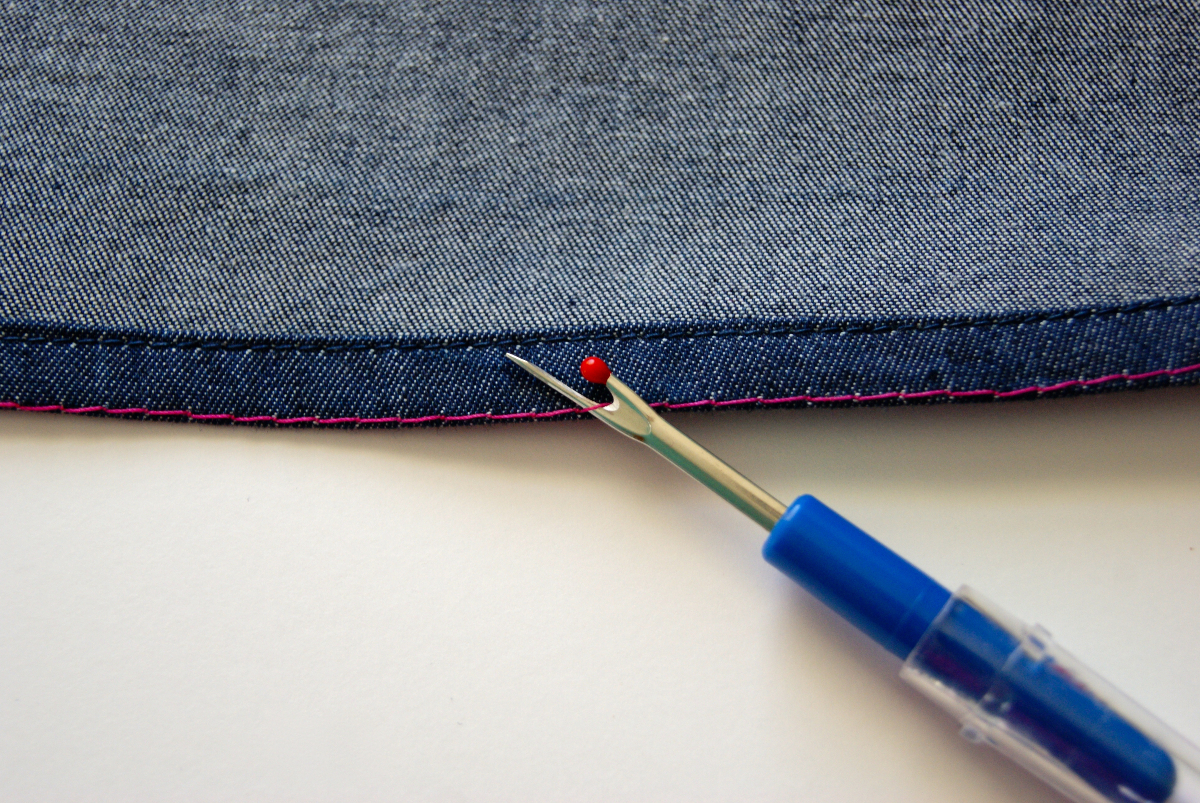
- Finish the seam allowances together, using your preferred method, and press them toward the yoke. Remove any visible gathering stitches from the top of the skirt. Edgestitch the front and back bottom edge of the yoke to finish it, catching the seam allowances in the topstitching to secure them.


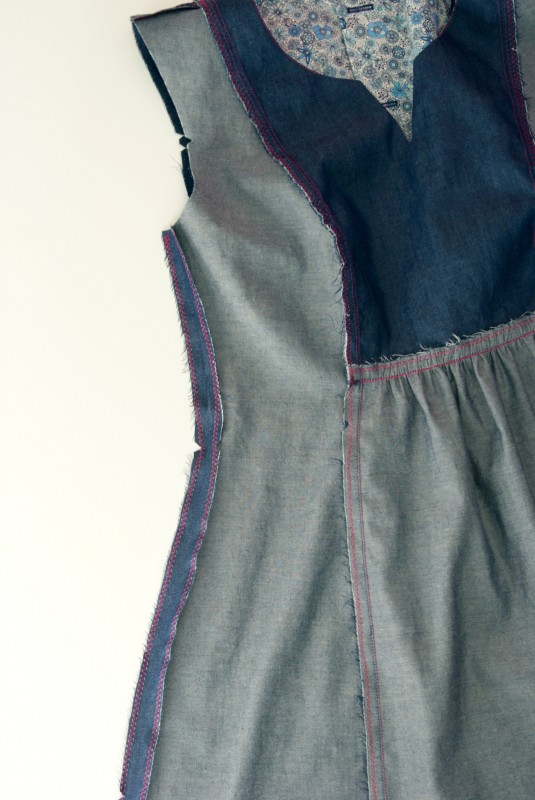
Assemble the Side Panels
- Pin one front side panel to its corresponding back side panel at the shoulders, with right sides together. Stitch the shoulder with a 1/2” seam, backstitching or lockstitching at both ends. Press the seam allowances open and finish them using your preferred method. Assemble the second set of side panels the same way.


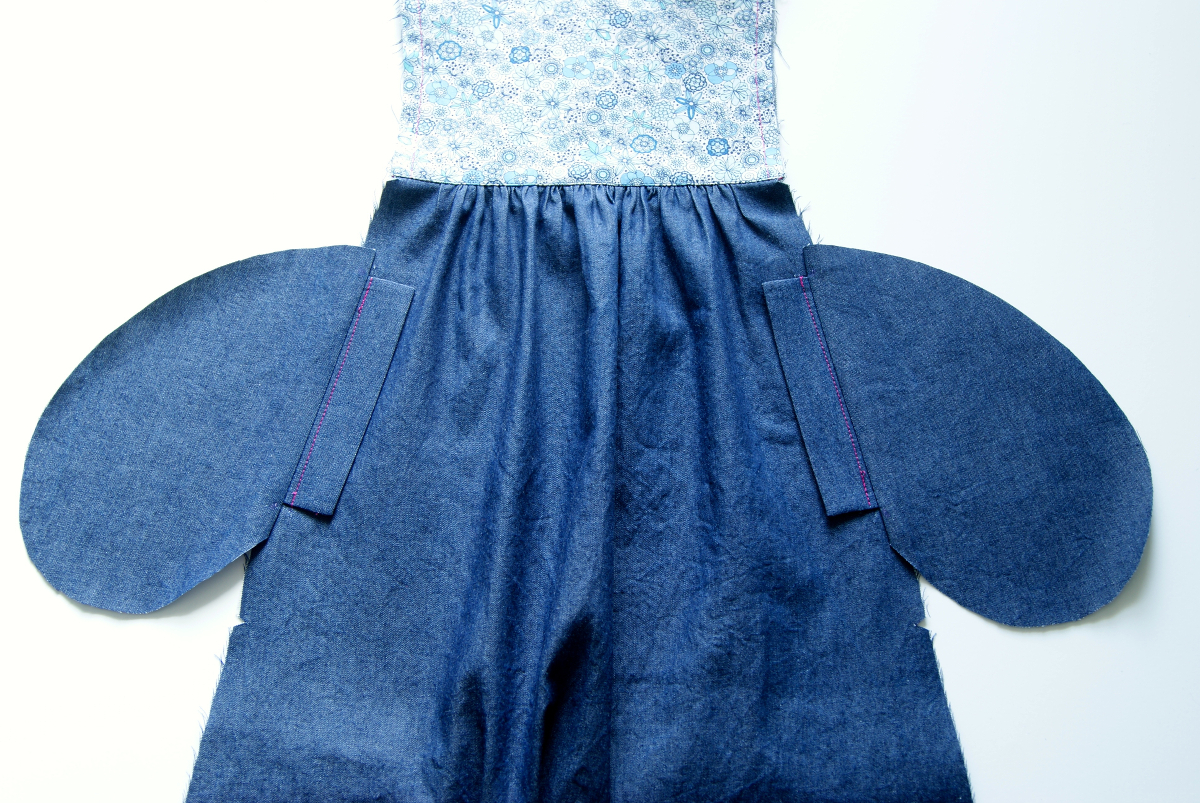
Attach the Pockets
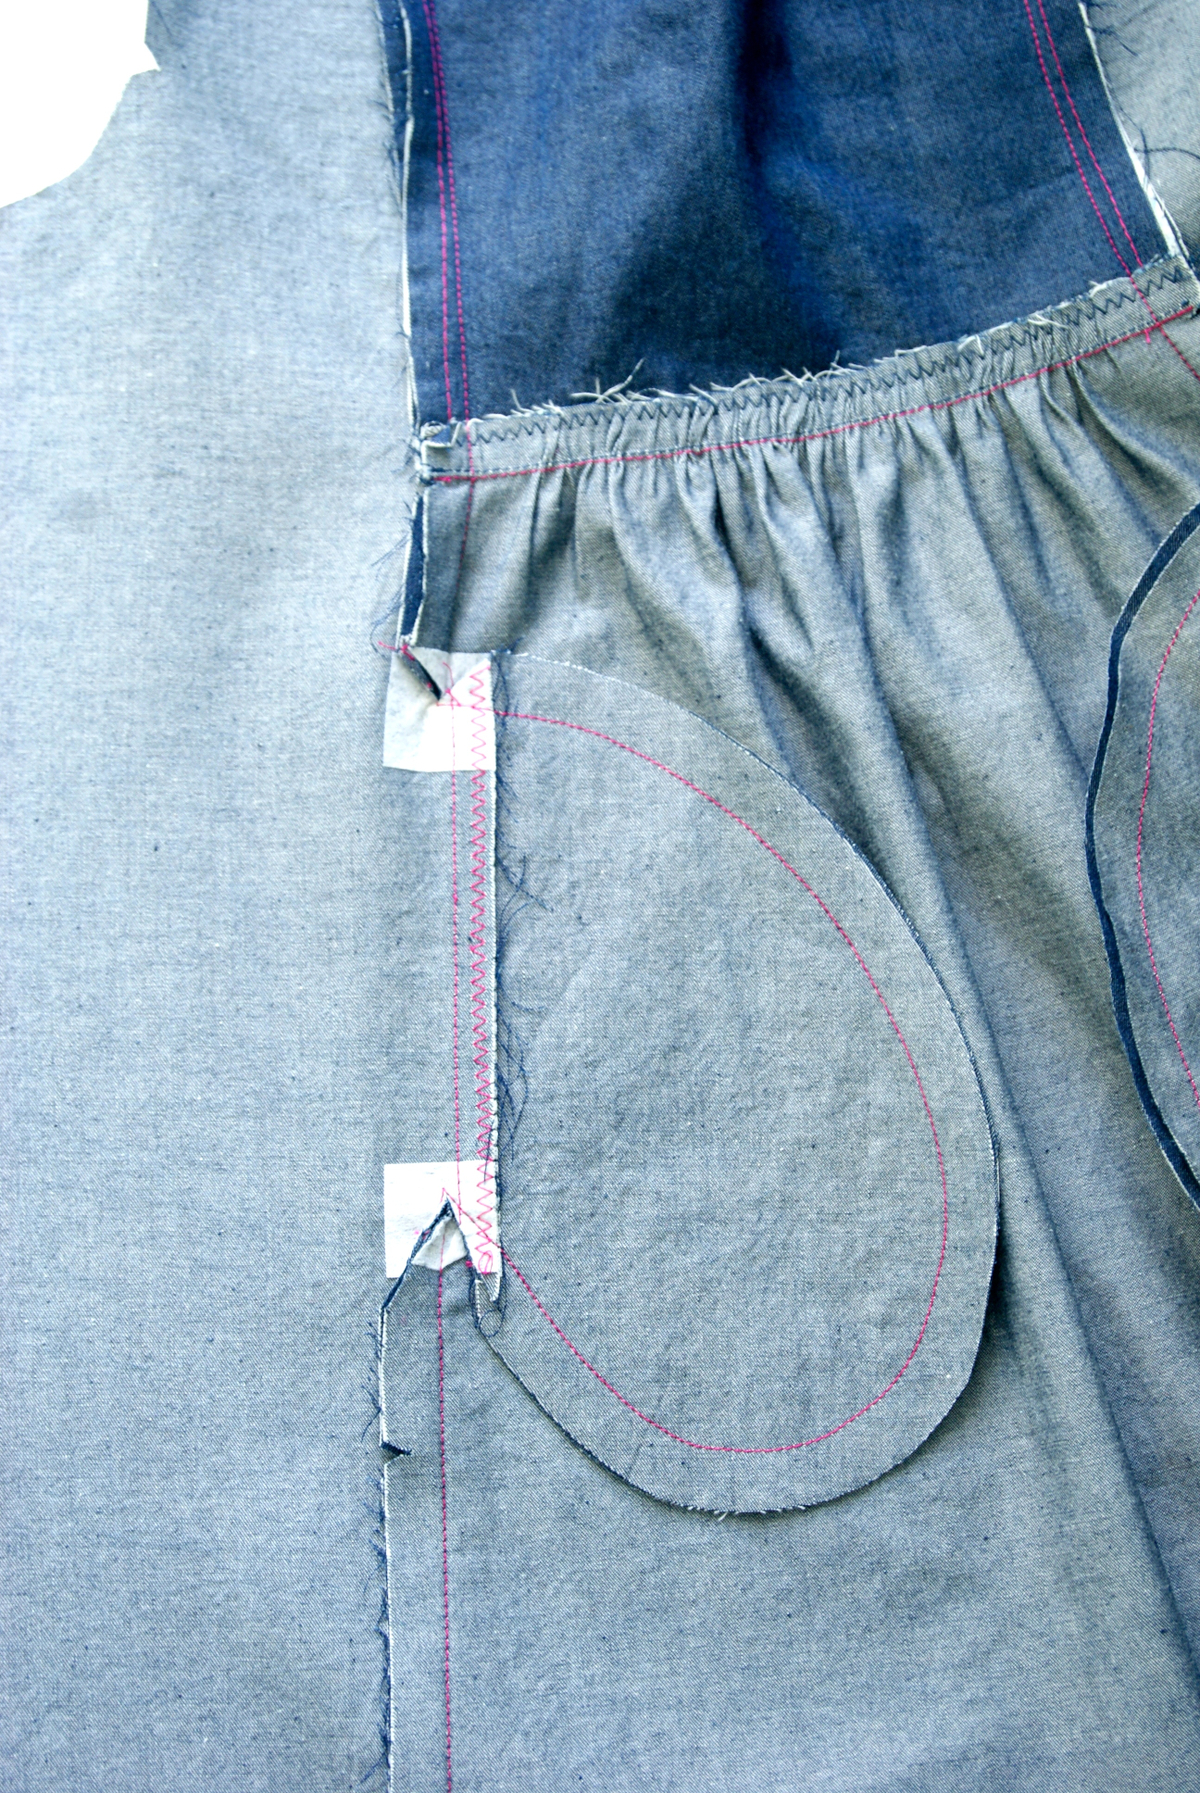
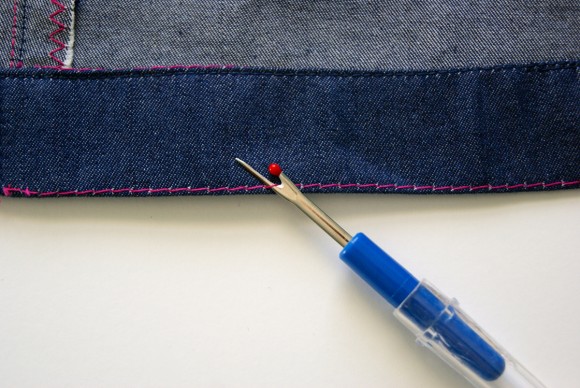
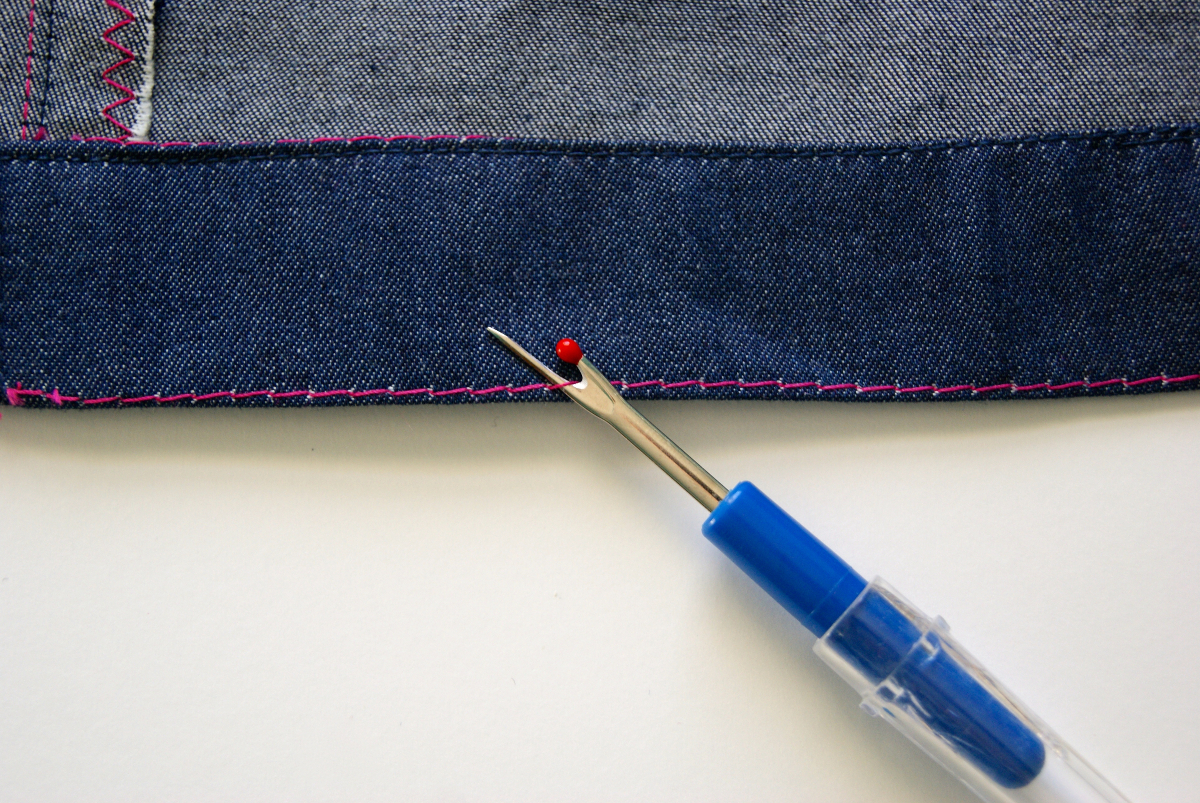
- Pin one pocket welt to one side of the front skirt, positioning it between the two dots, with the welt’s folded edge facing center front and the welt’s and skirt’s raw edges aligned. Stitch the welt to the front skirt with a 1/2” seam, backstitching or lockstitching at both ends. Repeat the process with the second welt on the opposite side of the front skirt.
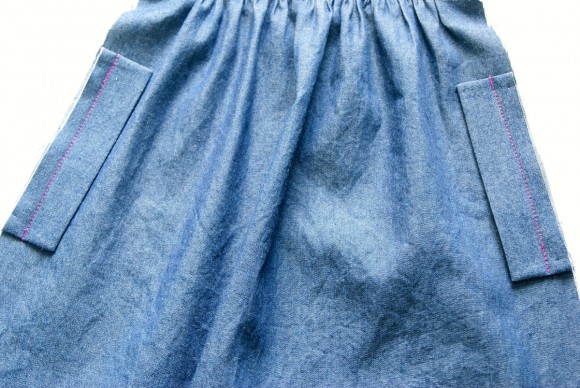
- Pin one pocket to cover the welt, with right sides together and matching the dots, and stitch through all the layers along the edge with a 3/8” seam, starting and stopping at the pocket piece’s top and bottom dots, and backstitching or lockstitching at both ends (stitching near, not through, the dots). Press just the pocket away from the front skirt, leaving the welt against the skirt panel. The stitching for the welt pocket will be visible next to the pocket crease. Repeat the process with the second pocket on the opposite side of the front skirt.
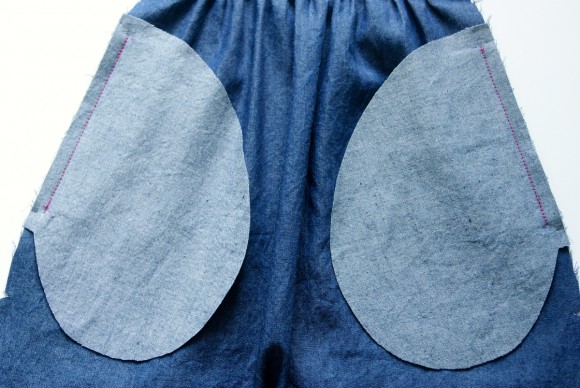

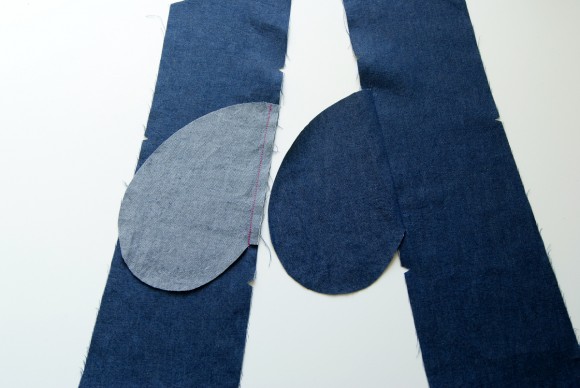
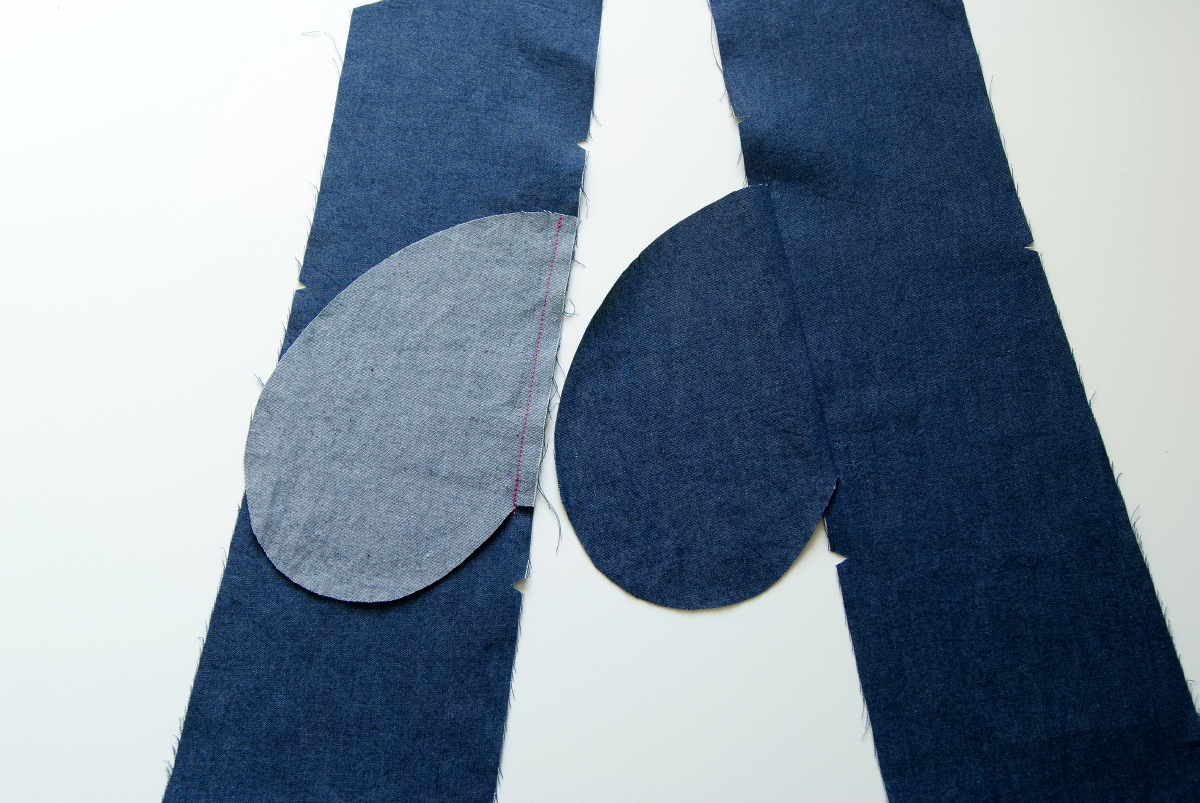
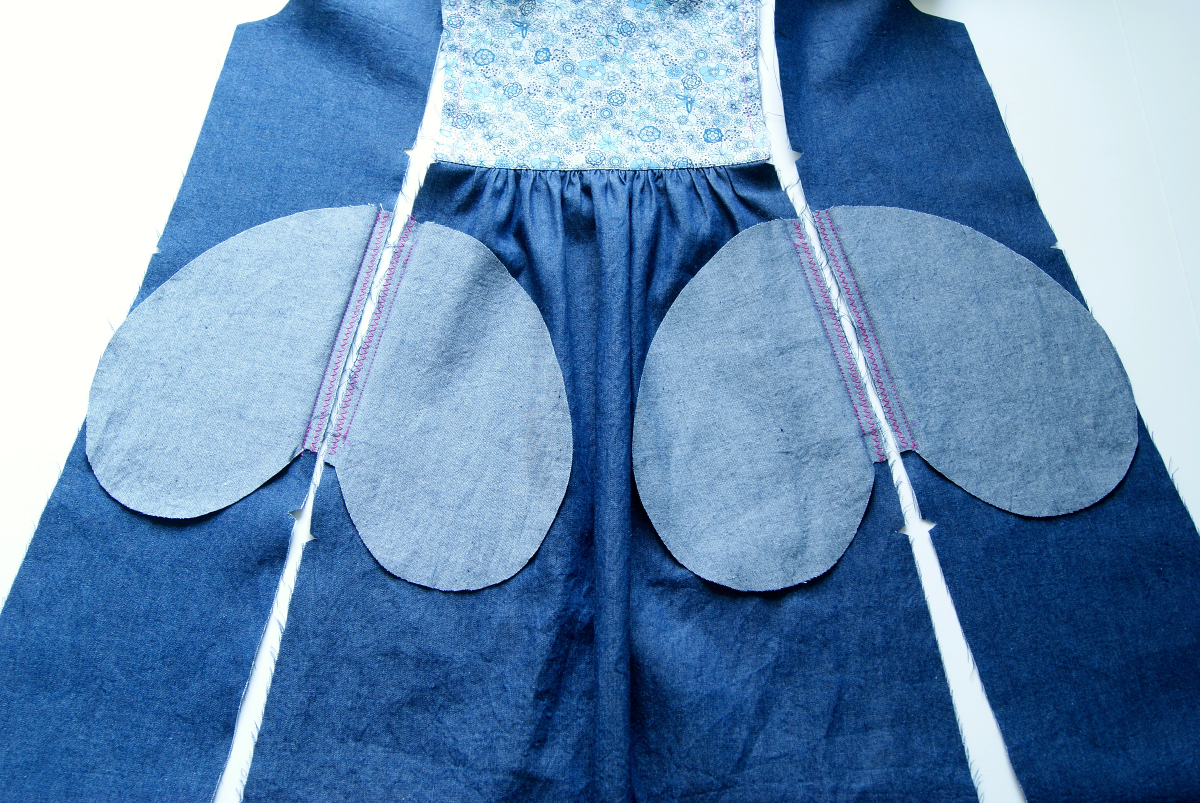
- Pin the second set of pockets to the front panels, with right sides together and matching the dots and the raw edges. Stitch the pockets in place with 3/8” seam, matching the dots, starting and stopping at the top and bottom edges of the pocket, stitching near but not through the dots, and backstitching or lockstitching at both ends. Press the pockets away from the side panels.
- Finish the sewn seam allowances just at the seams where the pockets are sewn to the front panels and front dress, leaving the pocket bags’ remaining unseen seam allowances unfinished for now.


Assemble the Dress
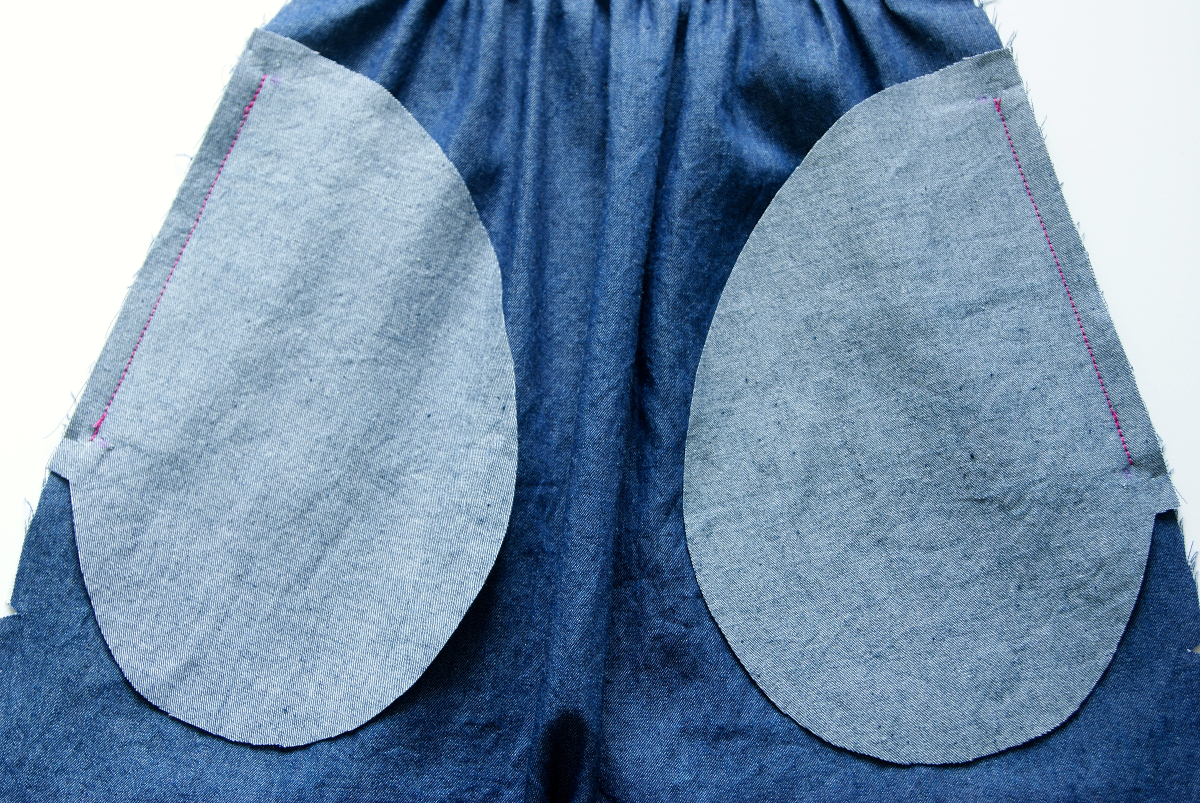
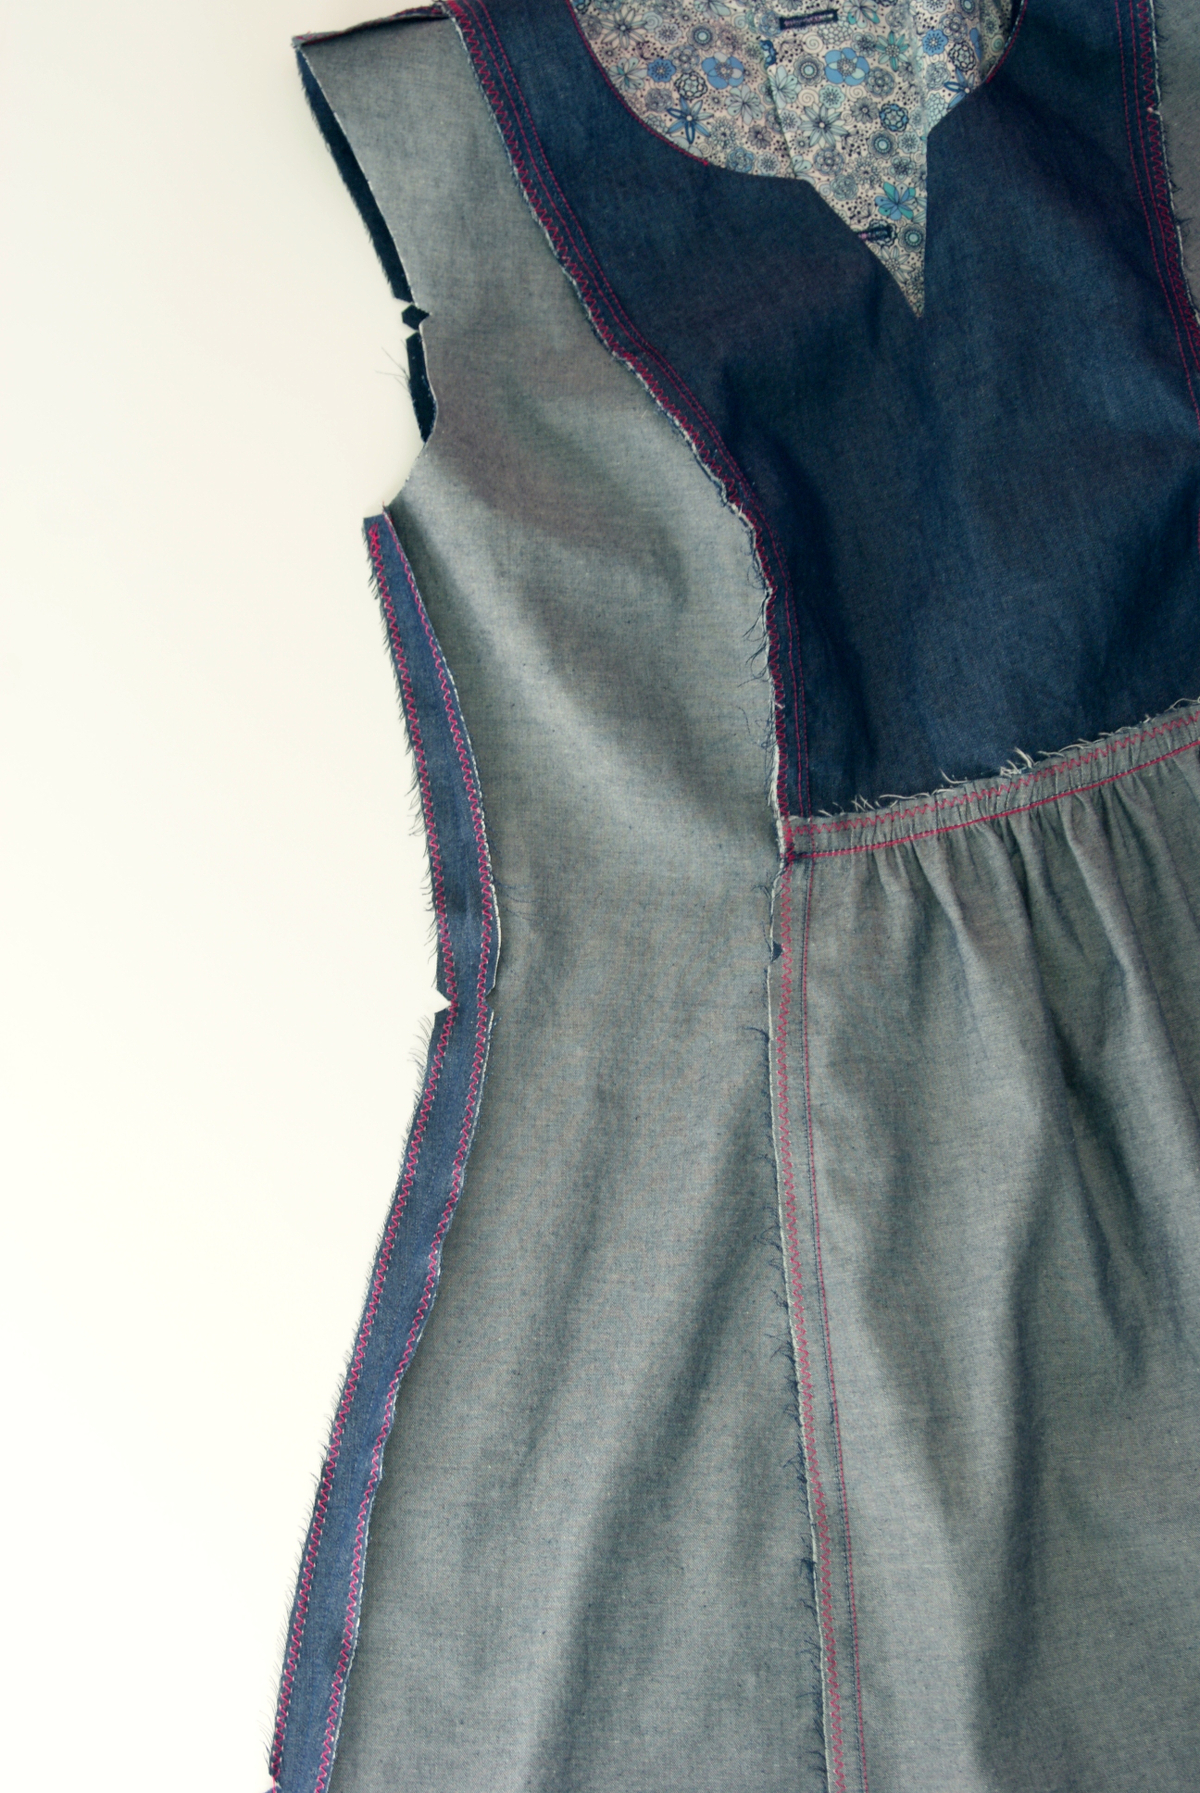
- With right sides together, pin one side panel to the center dress, matching the shoulder seams, notches, pocket and pocket-placement dots, and hems. If necessary, clip into the seam allowances of the yoke to release the seam allowances and to help match the opposing curves. Stitch the center dress and side panel with a 1/2” seam, pivoting at the pocket dots to stitch around the pocket bag. Pin and stitch the second side panel to the opposite side of the center dress the same way.
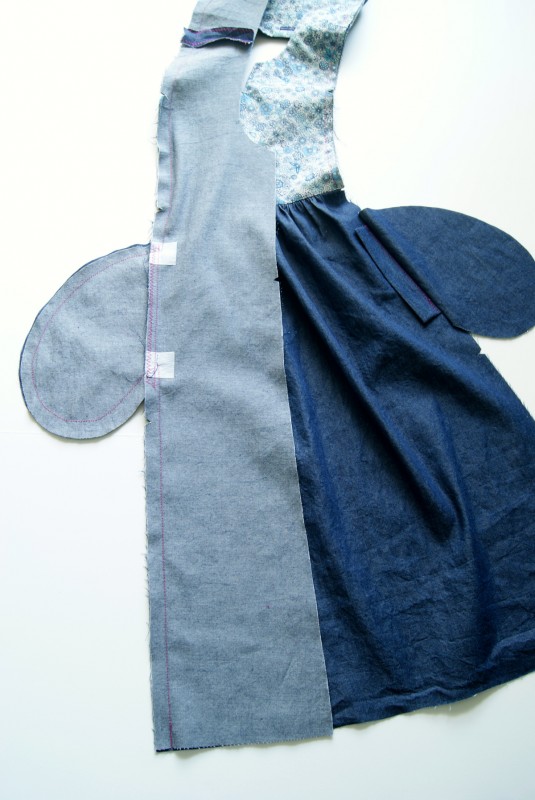
- Carefully clip into the seam allowances at the pocket bags’ corner pivot points, clipping through all layers up to the dot and being careful not to cut into your stitches. Press only the pockets toward the side panels. Press the welts toward the side panels and finish all seam allowances together using your preferred method.

- If desired, edgestitch along the side-panel seam, pivoting to stitch down the short end of the pocket welt and stopping there, backstitching or lockstitching to secure the stitching. Then start stitching again at the other short end of the welt and pivot to stitch down the remaining length of the side-panel seam, again backstitching or lockstitching at both ends of the seam. Alternatively, you can edgestitch only the top and bottom edge of the welts on both sides, backstitching or lockstitching at both ends.

That’s all for today! If you have any questions on any of the steps, please ask them in the comment section. See you tomorrow for day four.
Welcome to day four of the Cinema/Hide-and-Seek Dress Sew-Along where we will be finishing up the Hide-and-Seek Dress.
Attaching the sleeves and finishing the dress is done a little differently for each of the two dresses. So today we will cover only the Hide-and-Seek Dress method. Come back tomorrow for the Cinema Dress method.
Prepare the Sleeves
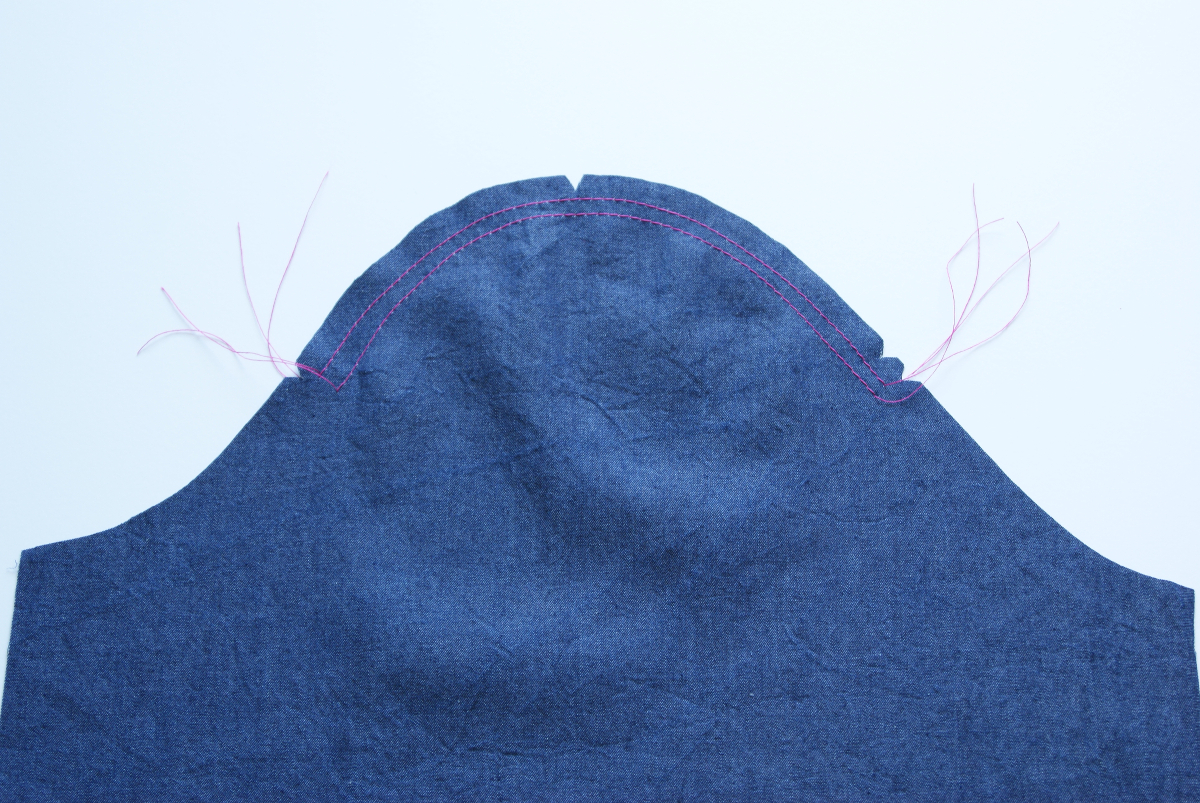
- Sew a row of gathering stitches 3/8” from the raw edge of one sleeve, starting and stopping at the sleeve cap’s side notches and leaving thread tails several inches long on both ends of the gathering stitches. Then sew a second row of gathering stitches 5/8” from the row edge. (Note that the sleeve cap also has a center notch, which you’ll use later to help align and pin the sleeve and armhole to sew them together.) Repeat to prepare the second sleeve.

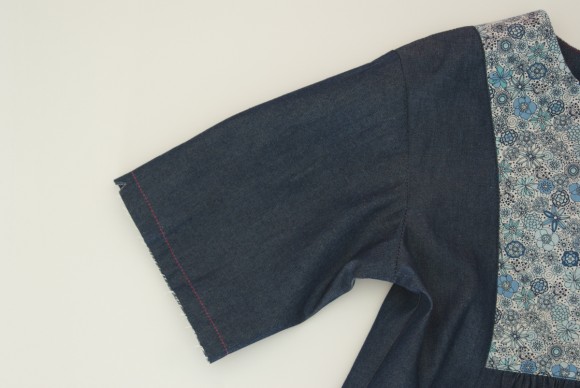
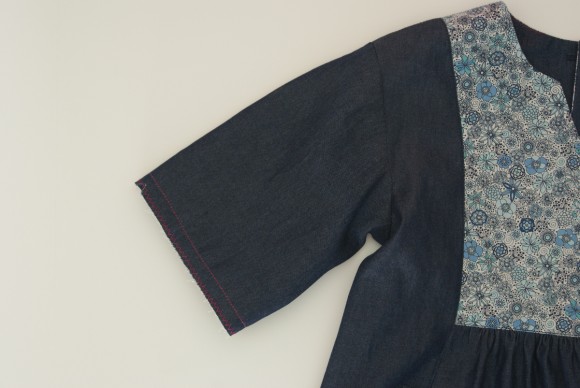
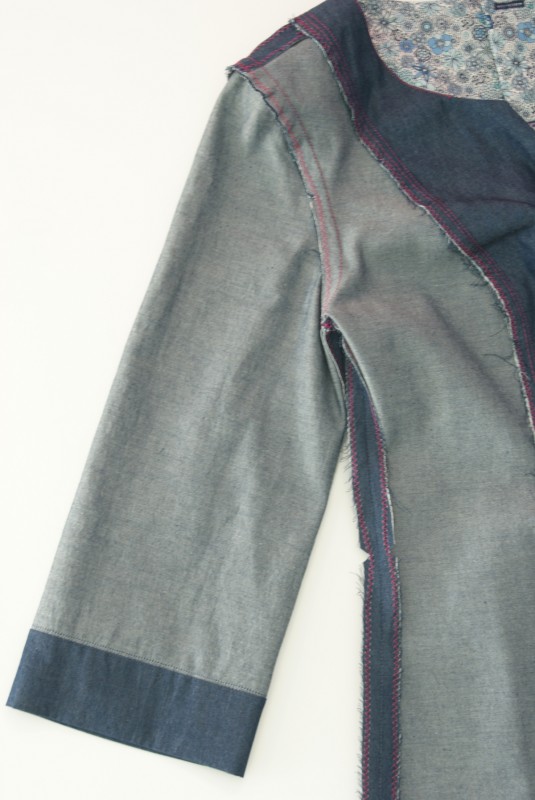
Attach the Sleeves and Sew the Side Seam
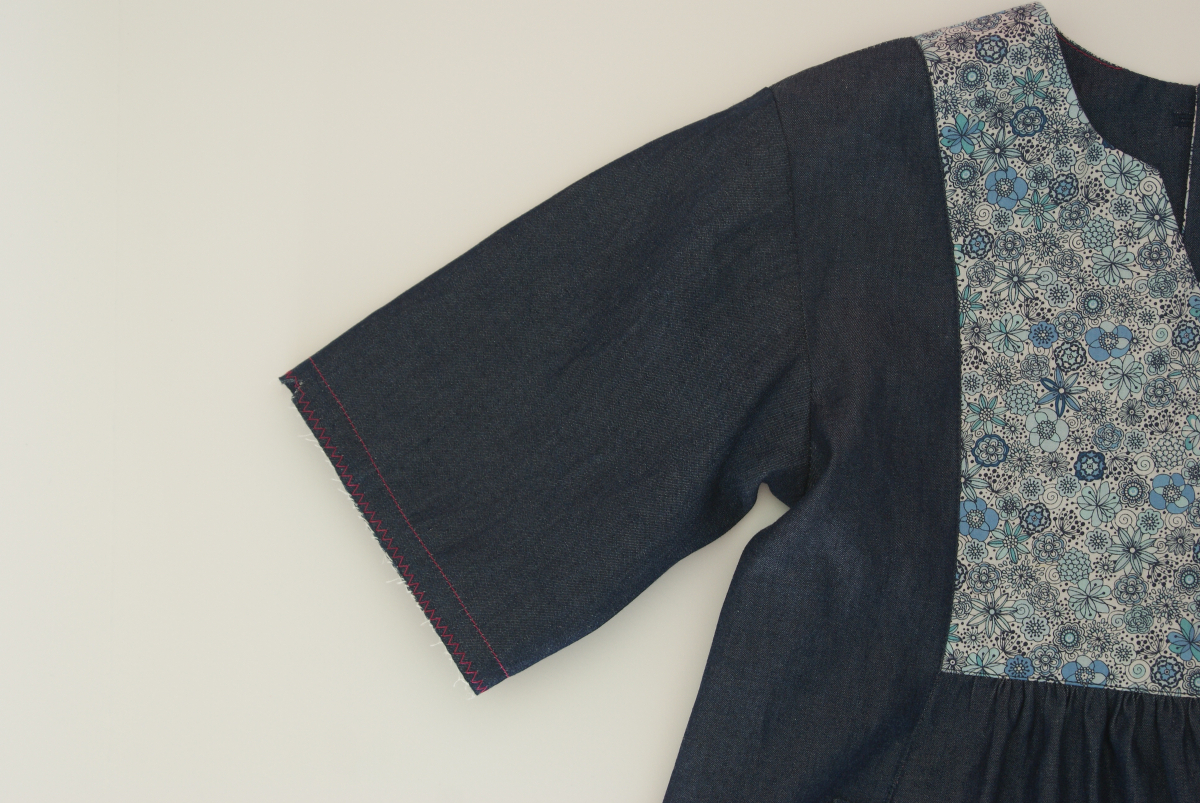
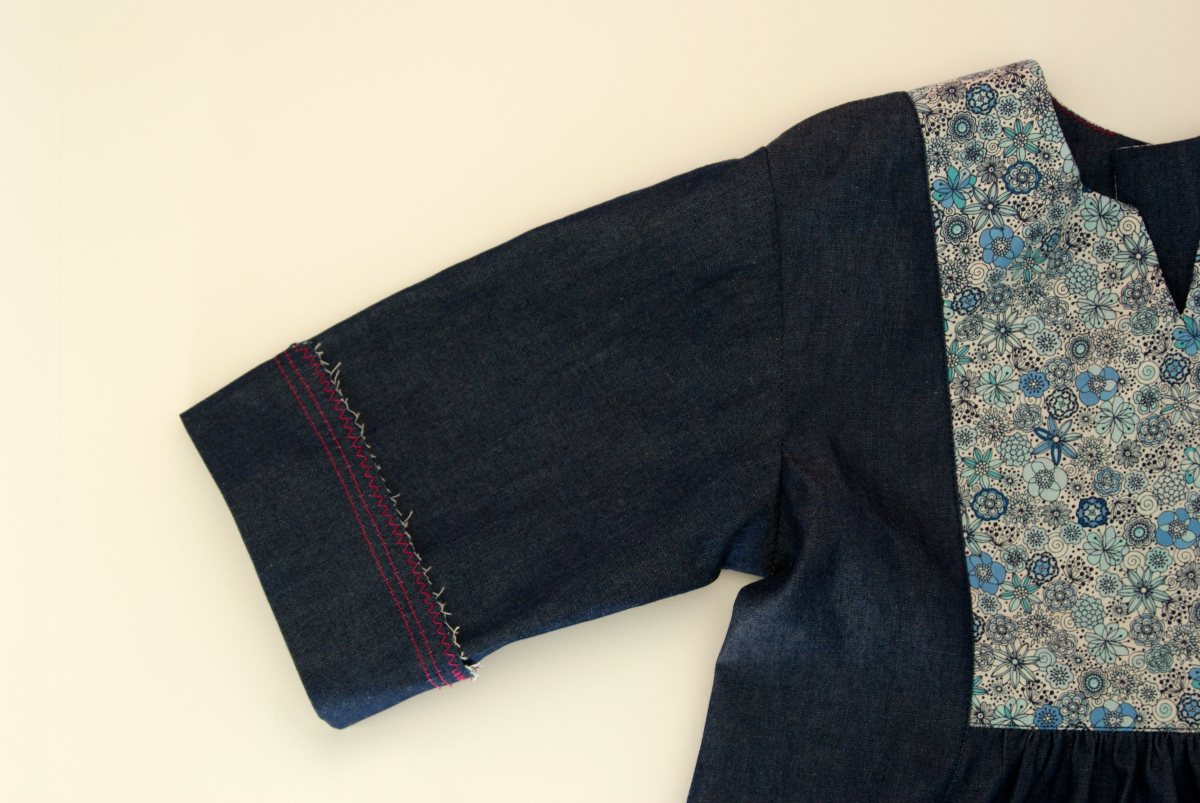
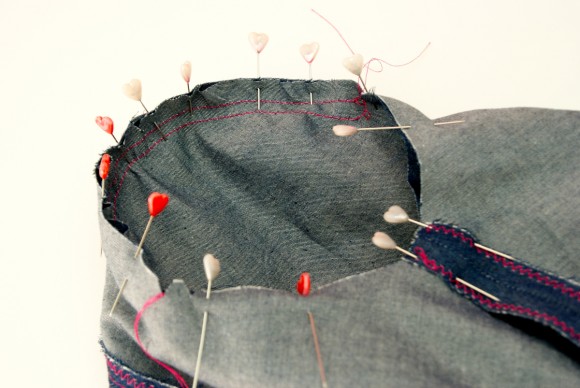
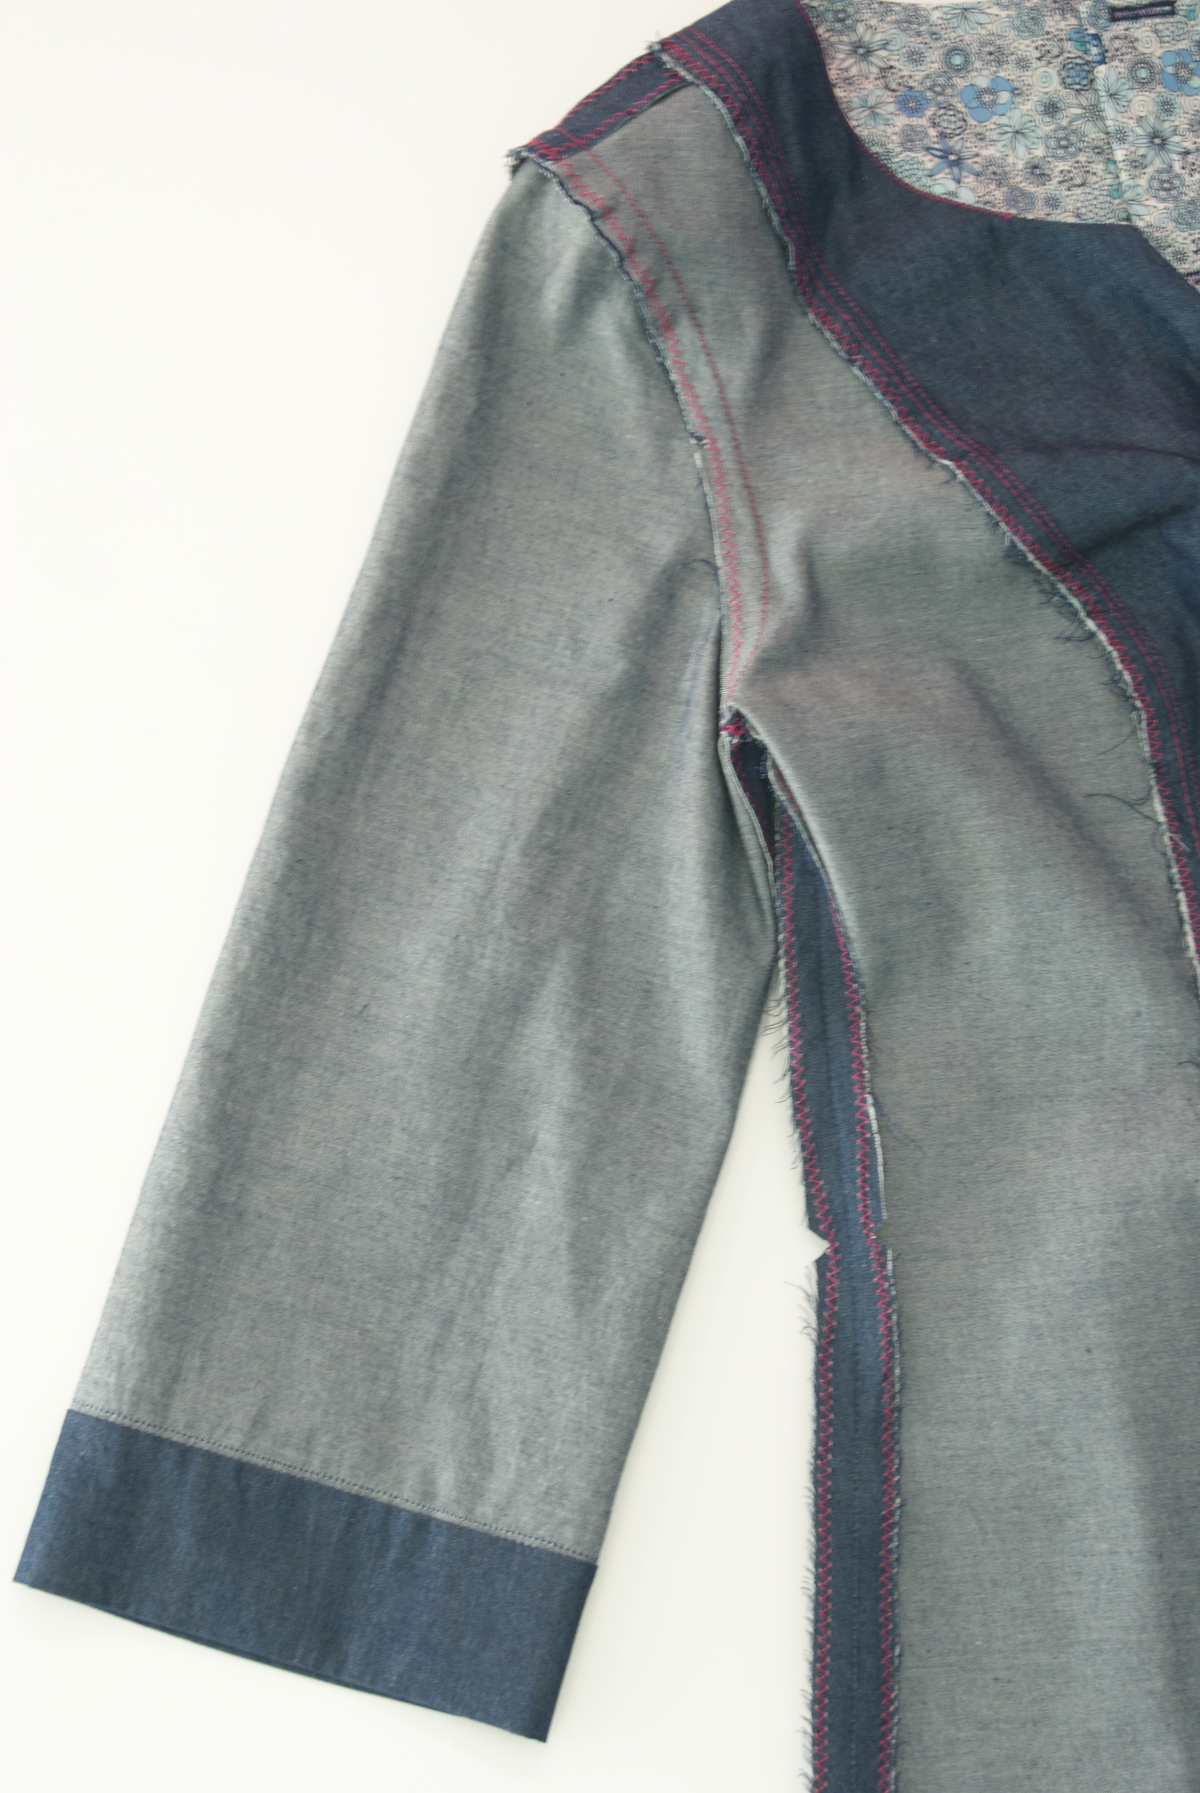
- Align and pin the sleeve’s raw edge to the raw edge of the dress’s armhole, with right sides together and matching the sleeve’s and armhole’s notches. Pull on the tails of the gathering threads to make the sleeve fit the armhole, adjust the ease evenly across the top of the sleeve, and then finish pinning the sleeve’s cap. (With most fabrics you’ll find that very little easing needs to be done.) Stitch the sleeve to the armhole with a 1/2” seam, backstitching or lockstitching at both ends. Finish the seam allowances together using your preferred method and press them toward the sleeve. Attach and finish the second sleeve the same way. Once the sleeves are sewn, you can remove any visible basting stitches from the sleeve caps.

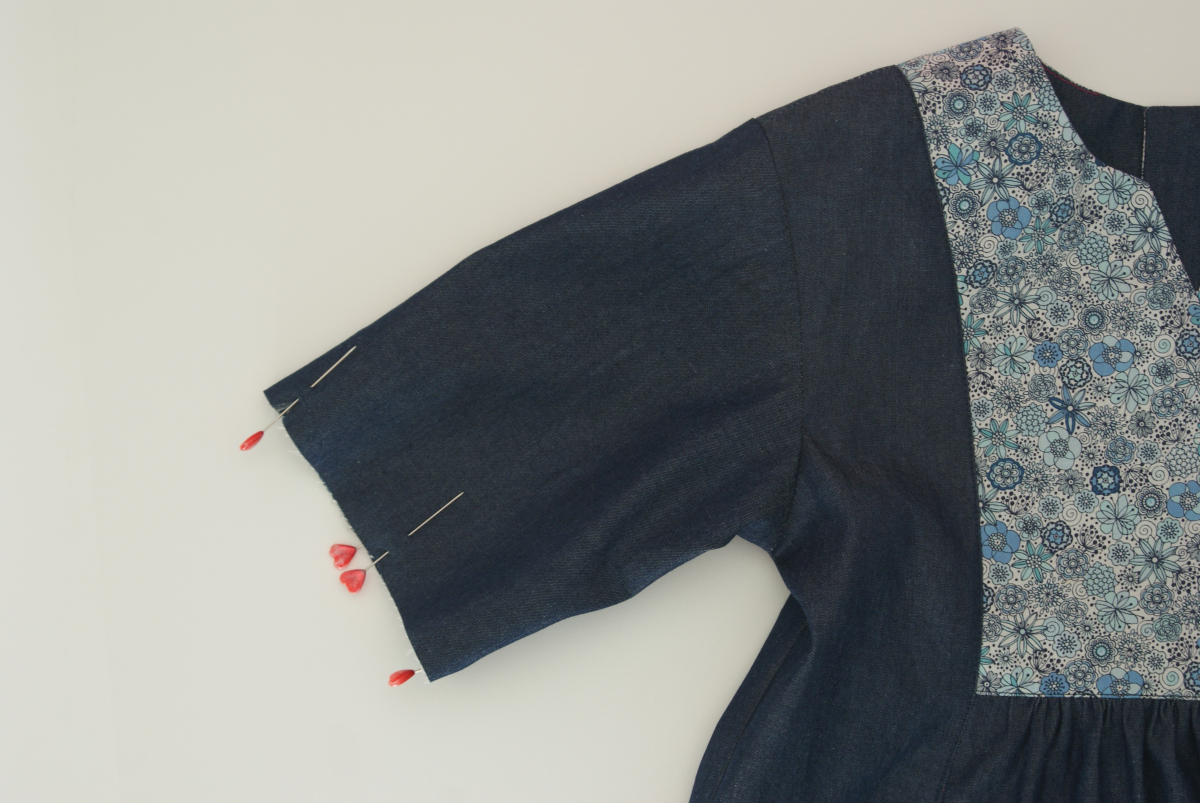
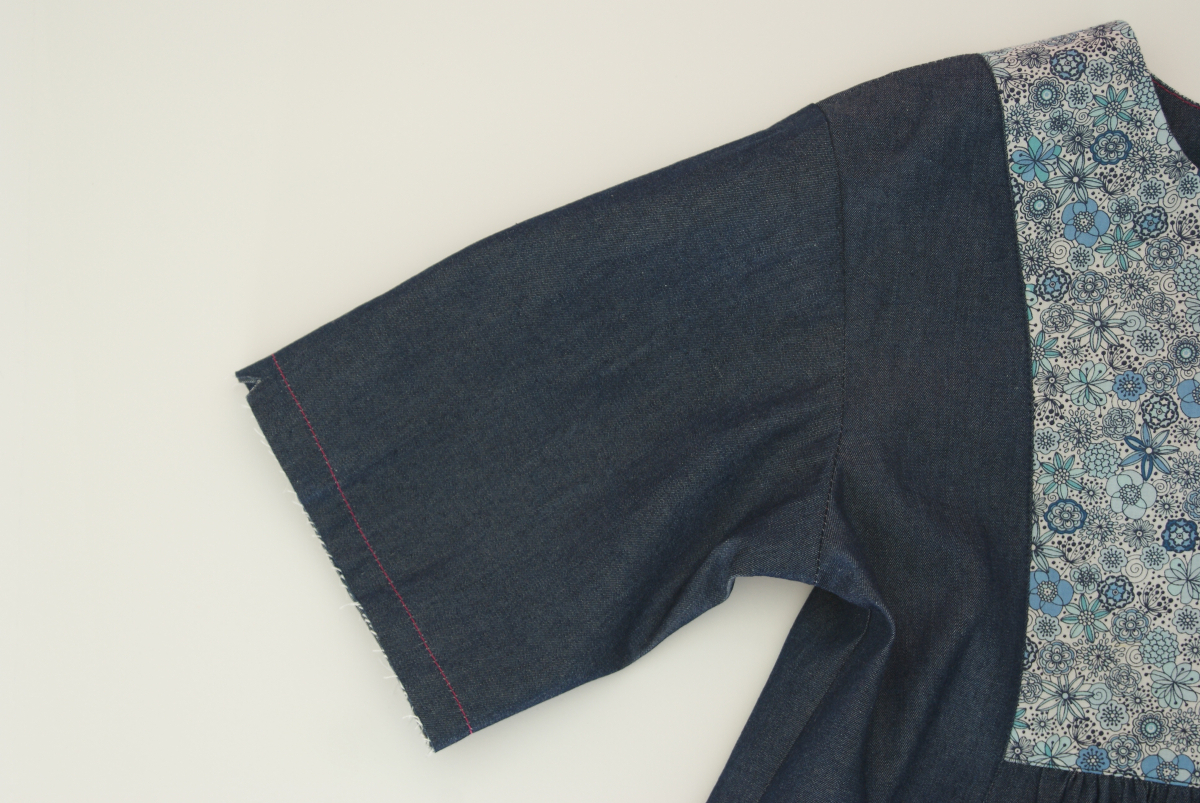
- Position the dress front and back together, with right side facing and the edges aligned, and pin the side seams, matching the underarm seam, the notches, and the hem edges. Join the side seam and sleeve with one continuous 1/2” seam. Press the seam allowances open and finish them using your preferred method. Repeat to sew and finish the opposite side seam.


Finish the Sleeves
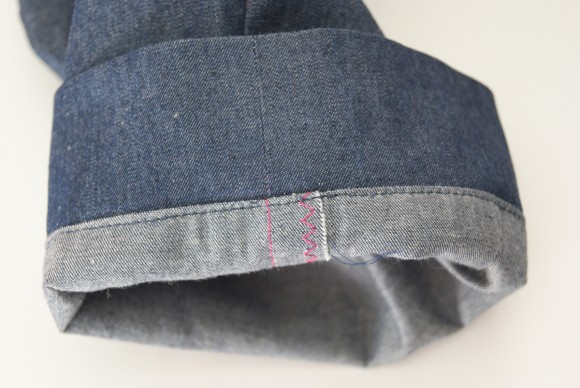
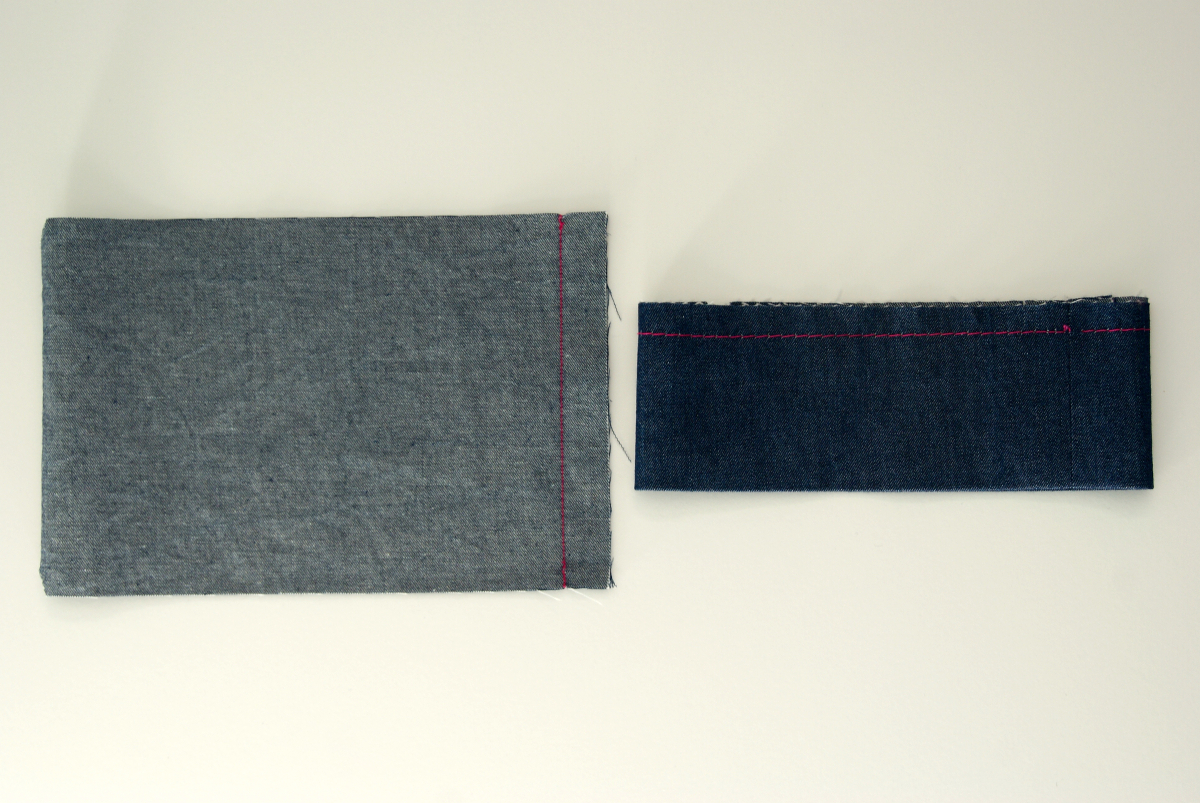
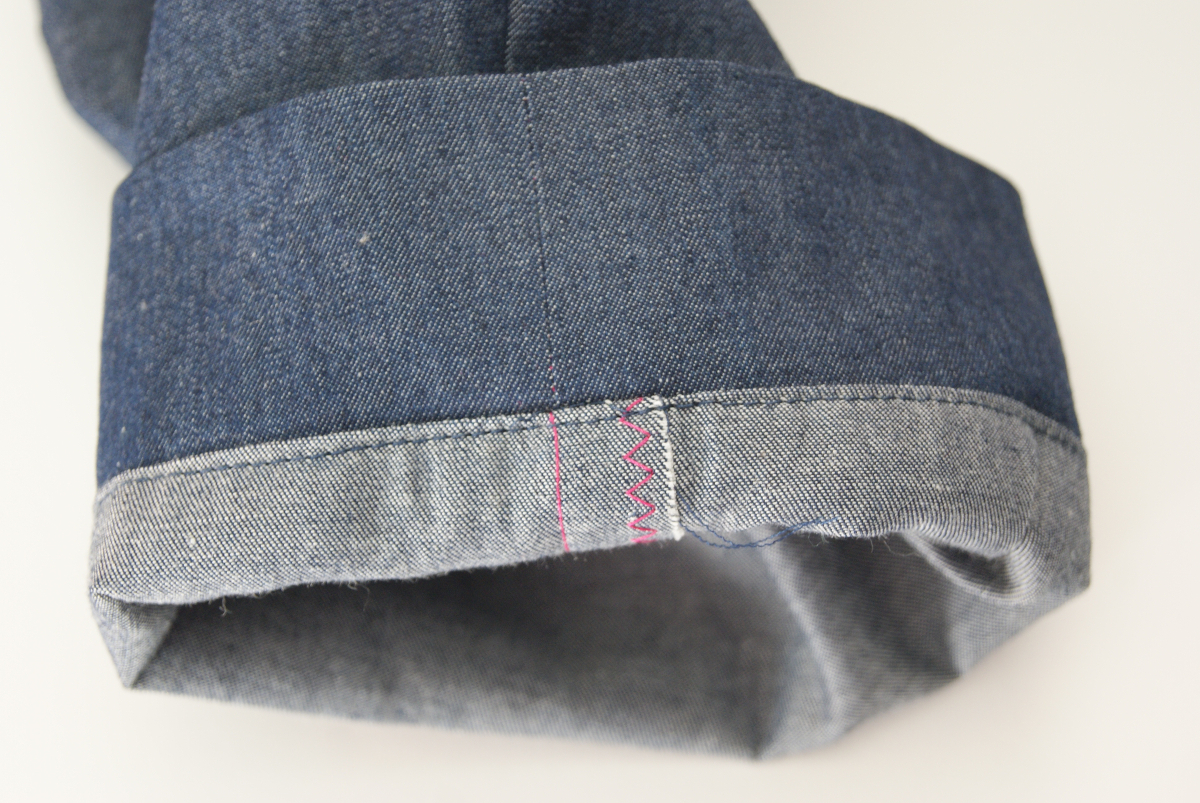
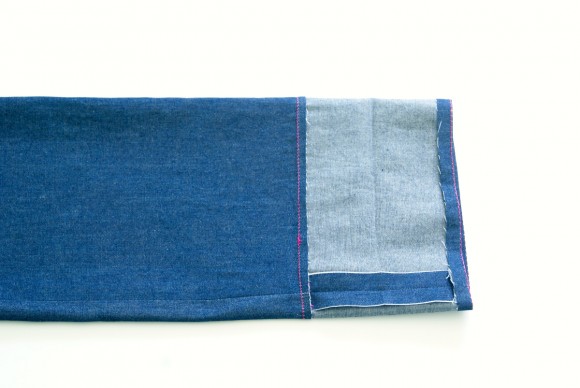
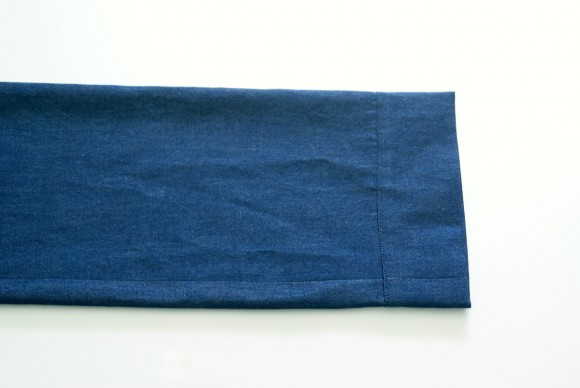
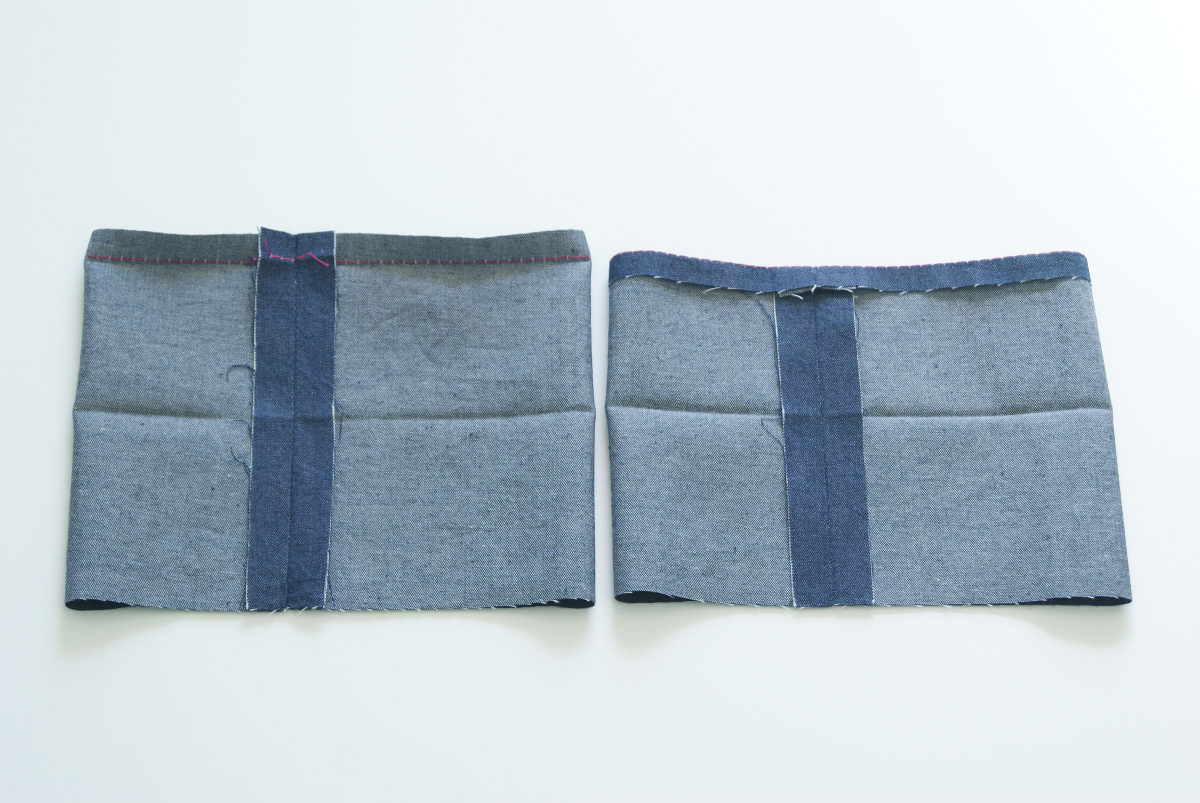
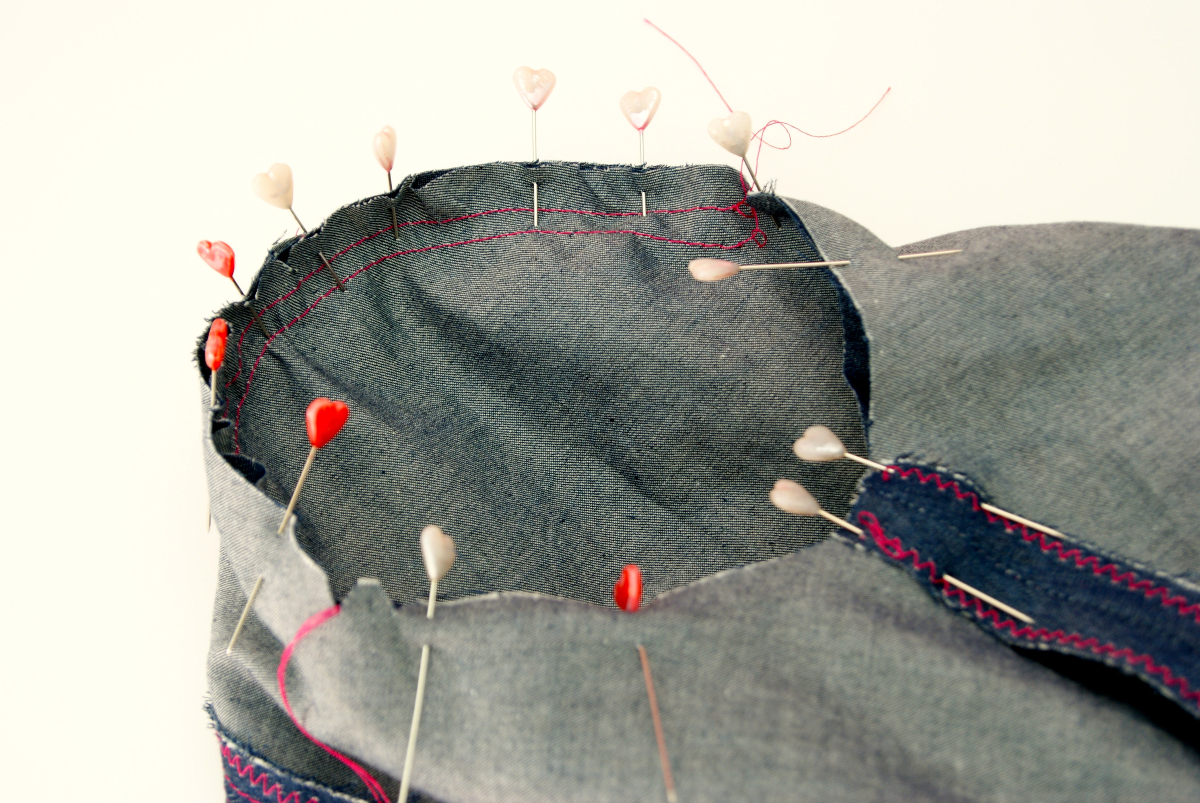
- Fold the cuff in half, with right sides together, and pin the short ends. Stitch along the raw edges with a 1/2” seam to make a tube, then press the seam allowance open. Open the tube and fold it in half lengthwise, with wrong sides together. Baste the raw edges of the cuff together 3/8” from the edges.
- Turn the dress right-side out and slip the cuff inside the sleeve, with the raw edges aligned and matching the side seams and notches. Pin the cuff to the sleeve’s wrong side along the hem’s raw edges and attach the cuff with a 1/2” seam.
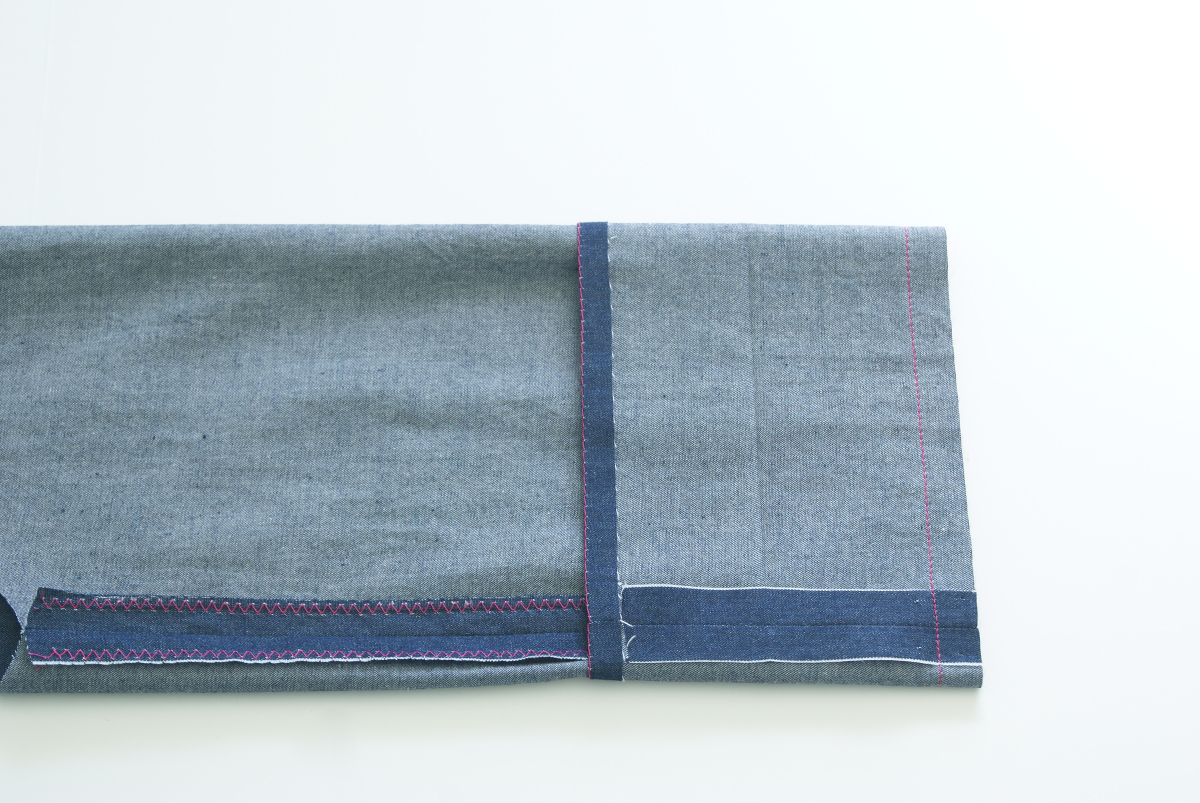
- Finish the seam allowances together using your preferred method.
Pull the cuff away from the sleeve and press the seam allowance from the wrong side of the sleeve.
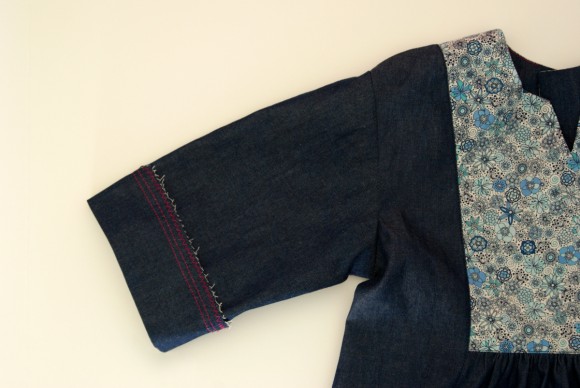
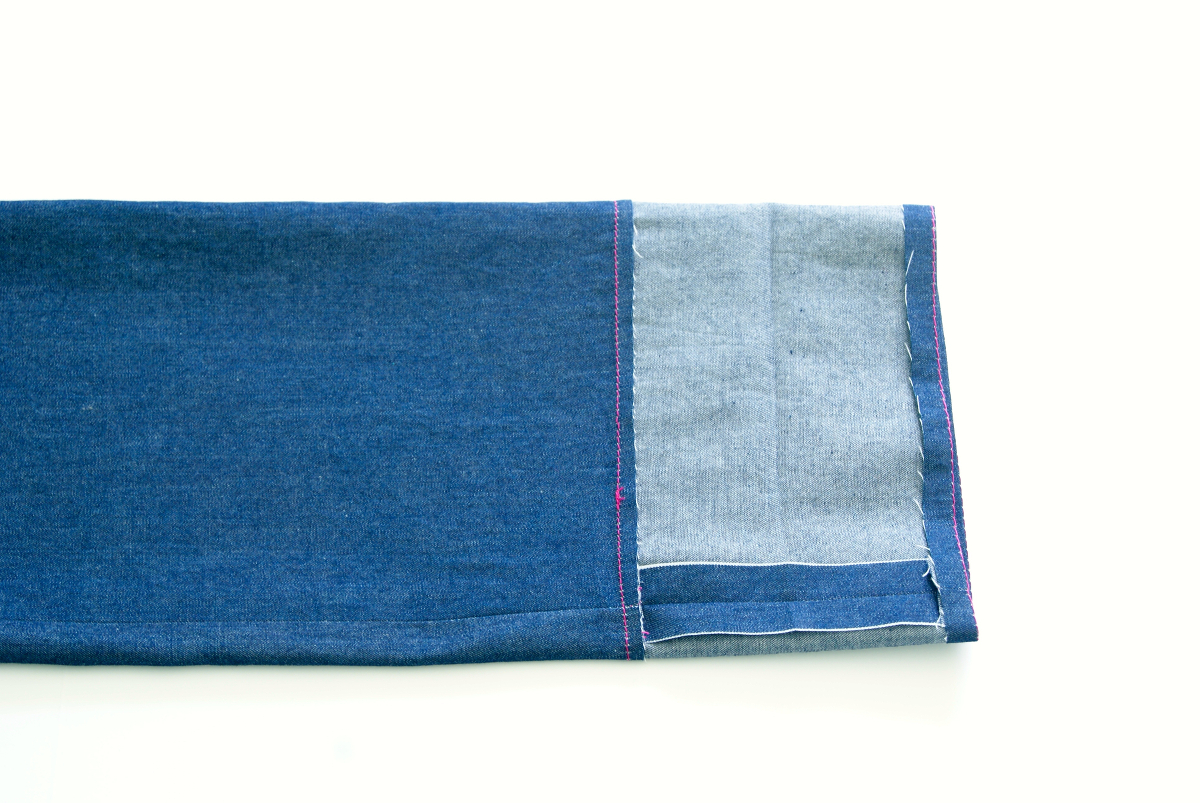
Understitch the seam allowance from the wrong side of the sleeve. Fold and press the cuff to the sleeve’s right side.
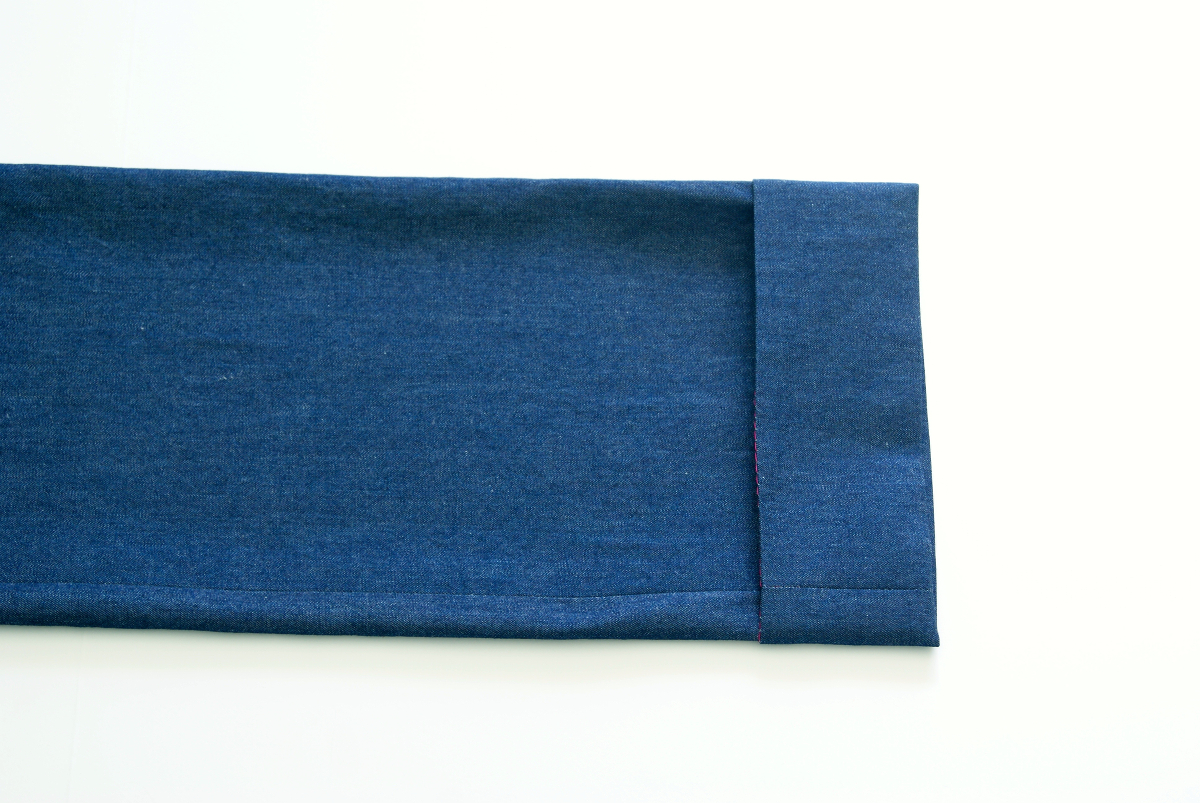
- Tack the folded edge of the cuff to the sleeve at the underarm seam by hand or machine to hold it in place.

- Repeat steps 1-4 for the second cuff.

Finish the Dress
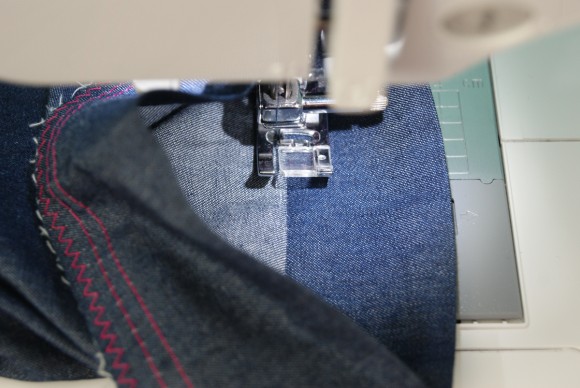
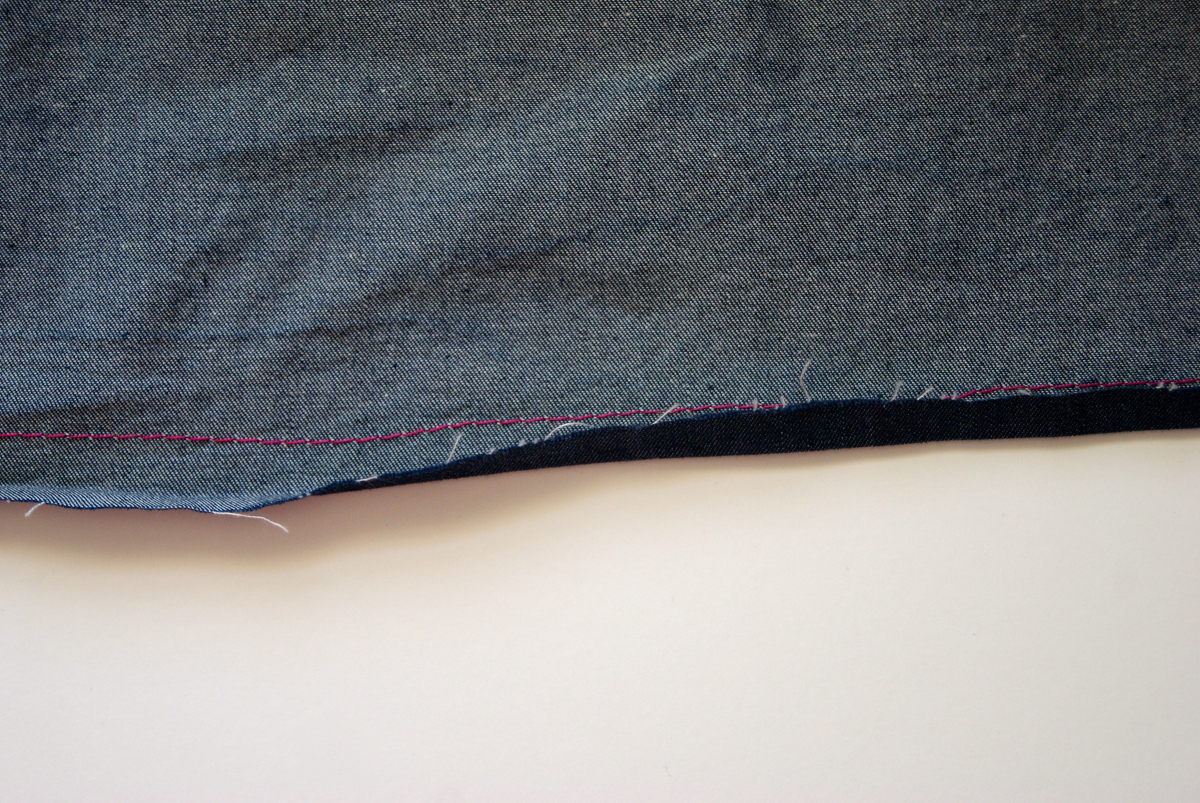
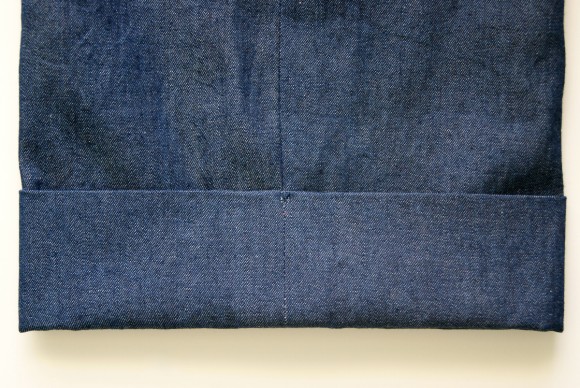
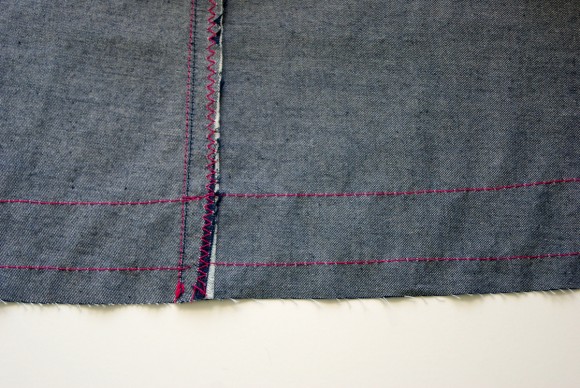
- To hem the dress, sew a line of basting stitches 5/8” from the garment’s bottom edge, which will become the fold line for the hem.
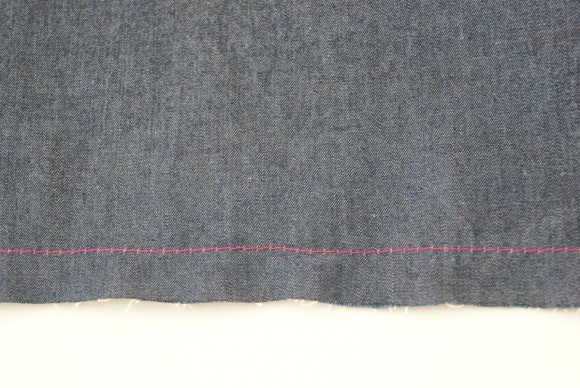
Fold and press the fabric’s bottom raw edge to the basting line on the wrong side.
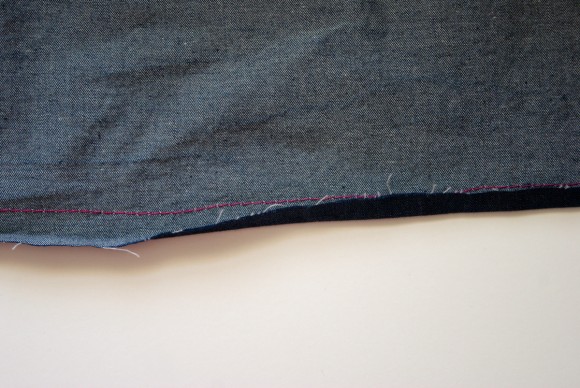
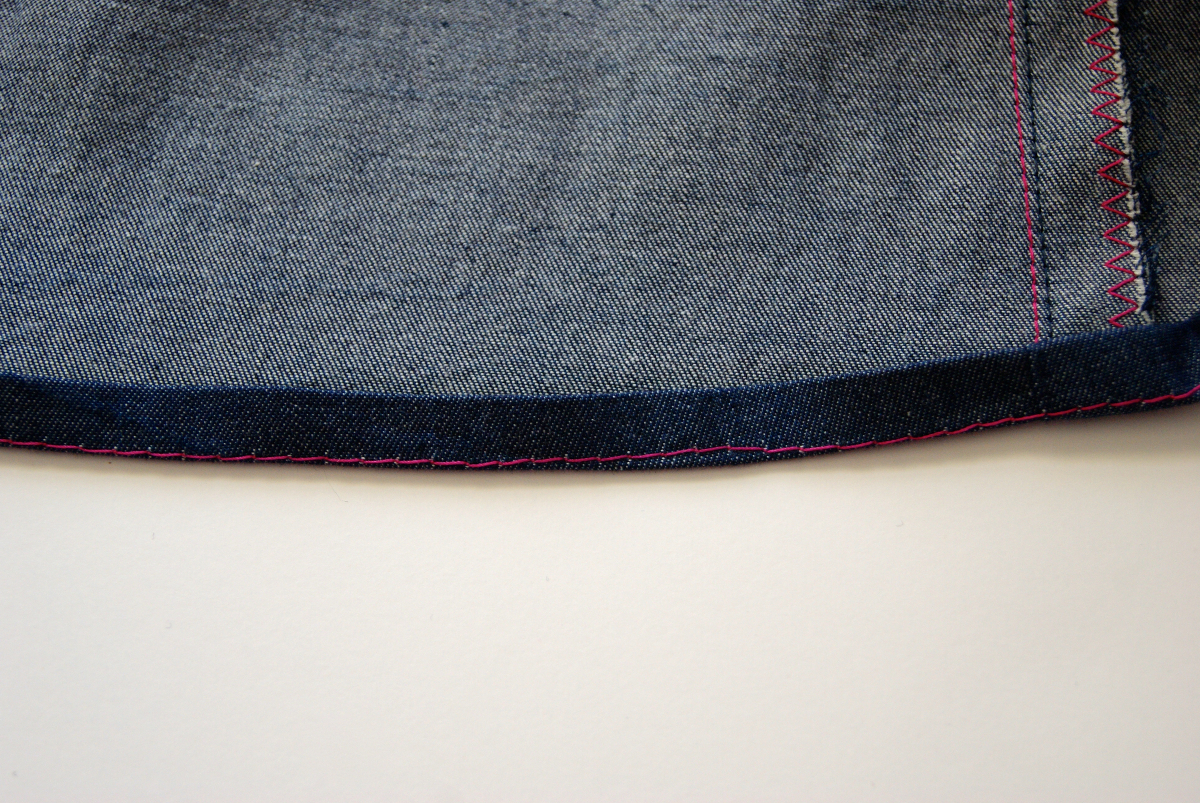
Then fold and press again along the basting line to enclose the raw edge and create a narrow hem.

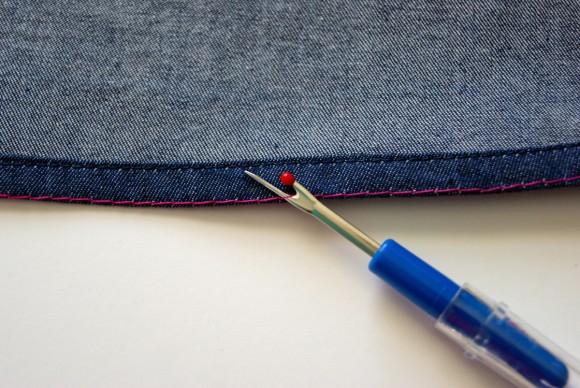
Remove basting stitches.
- Sew buttons on the wearer’s left yoke at the marked positions.


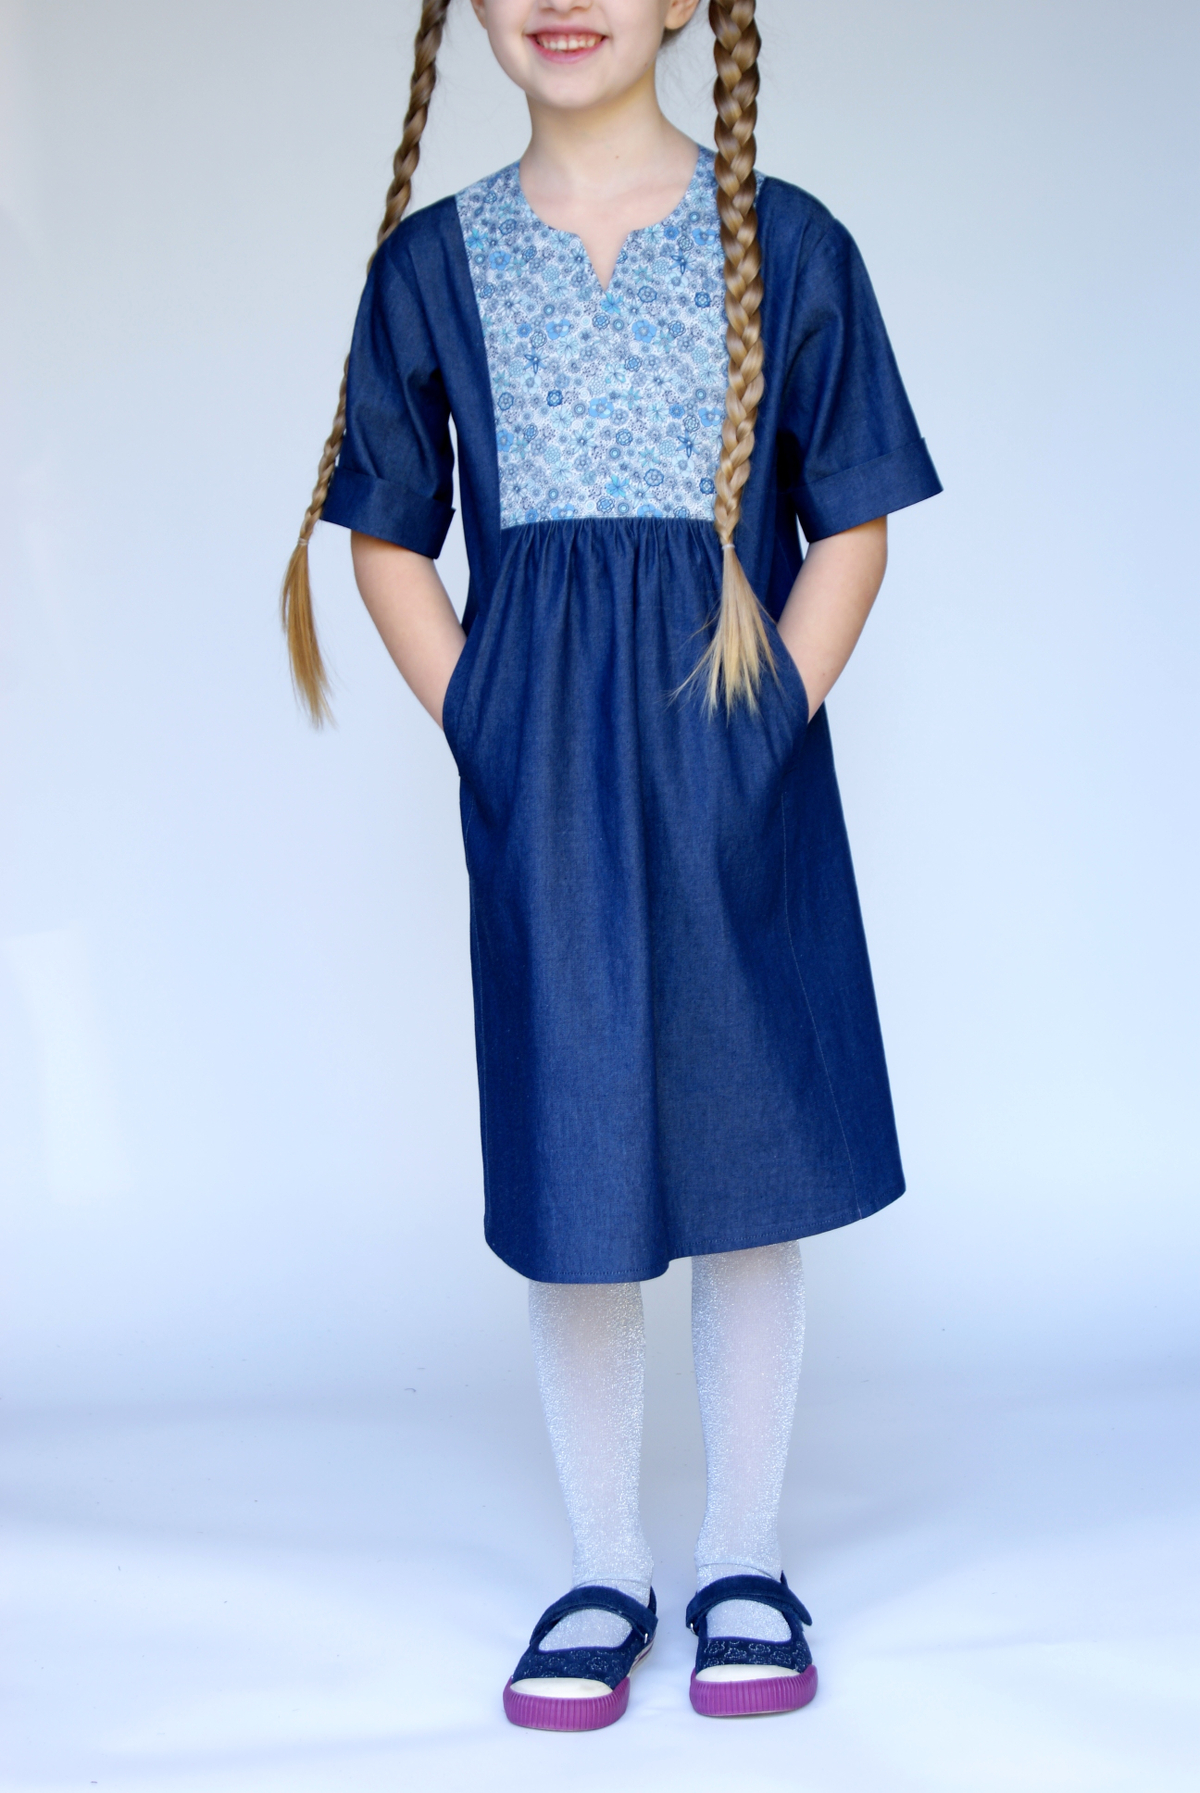
If you were sewing a Hide-and-Seek Dress for this sew-along, you are now finished and have made a girl very happy! Please do share photos of your completed Hide-and-Seek Dresses to the Oliver + S Patterns Flickr group, we’d love to see what you created!

We’ll see you tomorrow for day five where we will be finishing up the Cinema Dress.
We have reached our last day of the Cinema/Hide-and-Seek Dress Sew-Along. Today we will be finishing up the Cinema Dress.
It’s getting very exciting because we’re so close to the end. Off we go!
Prepare the Sleeves and Attach the Cuffs
- Sew a row of gathering stitches 3/8” from the raw edge of the cap of one sleeve, starting and stopping at the sleeve cap’s side notches and leaving thread tails several inches long on both ends of the gathering stitches. Then sew a second row of gathering stitches 5/8” from the raw edge. (Note that the sleeve cap also has a center notch, which you’ll use later to help align and pin the sleeve and armhole to sew them together.)
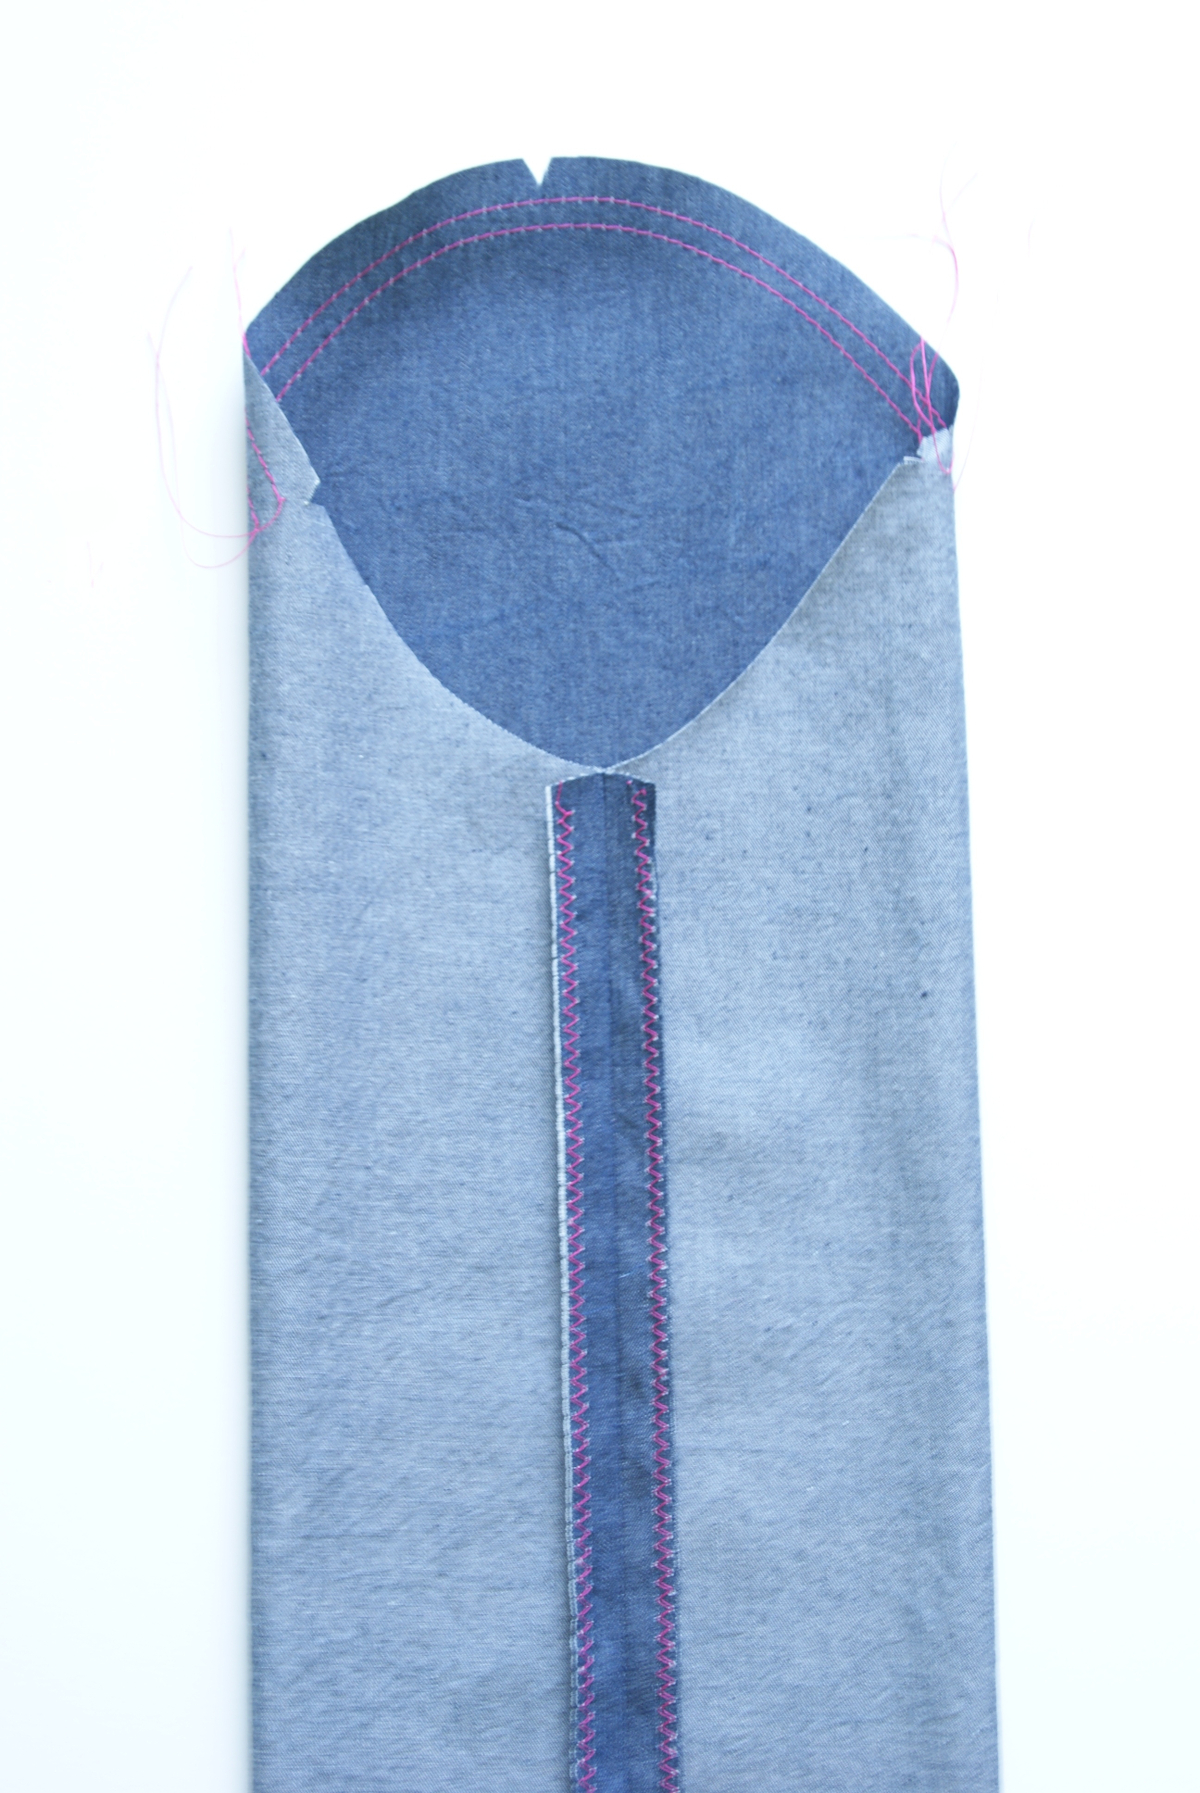
- Fold the sleeve in half, with right sides together, and pin the side edges of the sleeve together. Stitch the sleeve with a 1/2” seam and press the seam allowances open. Finish the seam allowances using your preferred method.

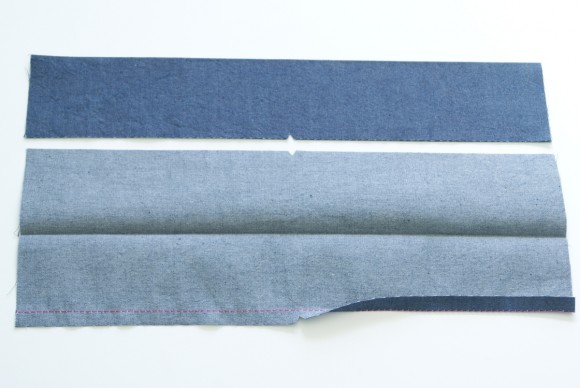
- Fold one sleeve cuff in half lengthwise, with wrong sides together, and press a crease into the center. Unfold the fabric and sew a line of basting stitches 3/8” from one long, notched edge. Fold and press the fabric to the wrong side along the basting line.
- Unfold the sleeve cuff’s edge and pin the short ends of the sleeve cuff, with right sides together. Stitch the short edges together with a 1/2” seam, backstitching or lockstitching at both ends. Press the seam allowances open and then refold the sleeve cuff’s long, pressed edge.
- Pin the right side of the sleeve cuff’s long notched edge to the wrong side of the sleeve’s raw edge, matching the seams and notches. Stitch the cuff in place with a 1/2” seam.

Turn the sleeve right-side out and pull the sleeve cuff away from the sleeve. Press the sleeve cuff and remaining seam allowances away from the sleeve.
- Fold the cuff along the center crease and pin the folded edge to cover the basting line from Step 3, pinning from the right side of the sleeve. Edgestitch the seam to finish the sleeve cuff, catching the folded edge in the seam.

- Repeat steps 1-6 to prepare the second sleeve and cuff.


Sew the Side Seams and Attach the Sleeves
- Pin the front and back of the dress together at the sides, with right sides together, and stitch the side seams with a 1/2” seam, backstitching or lockstitching at both ends. Press the seam allowances open and finish them using your preferred method.
- With the dress turned wrong-side out, pin one right-side-out sleeve into the corresponding armhole. Match the notches and seam of the sleeve with the notches and seam of the armhole. Pull on the gathering thread tails to ease the small amount of excess fabric at the top (cap) of the sleeve until it matches the armhole. Smooth the fabric to eliminate any puckers and pin the sleeve into place. Stitch the sleeve to the armhole with a 1/2” seam. Finish the seam allowances together using your preferred method and press them toward the sleeve. Attach and finish the second sleeve the same way. Once the sleeves are sewn, you can remove any visible basting stitches from the sleeve caps.
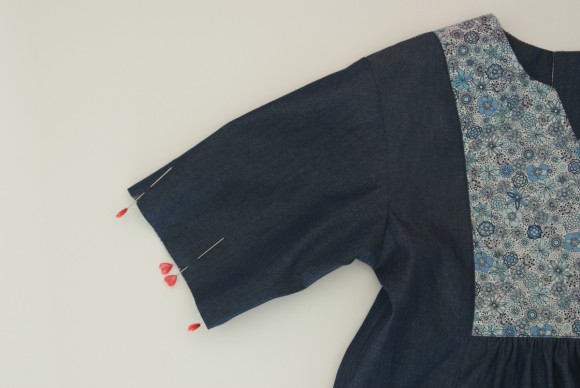
- Fold an press the cuff to the sleeve’s right side by approximately 1 1/2”. Tack the folded edge of the cuff to the sleeve at the underarm seam by hand or by machine to hold it in place. (If desired, you can also tack the cuff by hand in a few other spots to help keep it in place when the dress is worn. Try to take the stitches just inside the fold, so they aren’t visible from the outside of the dress.)
- Repeat steps 2-3 for the second sleeve.

Finish the Dress
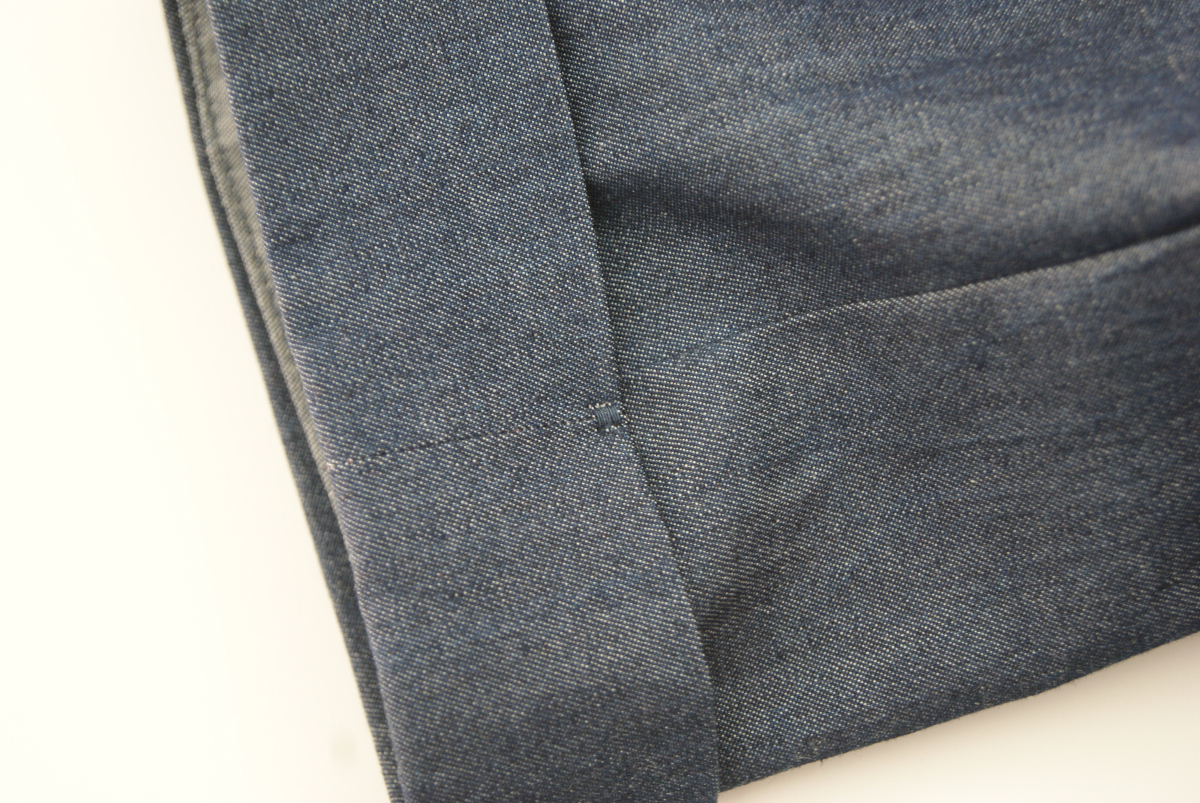
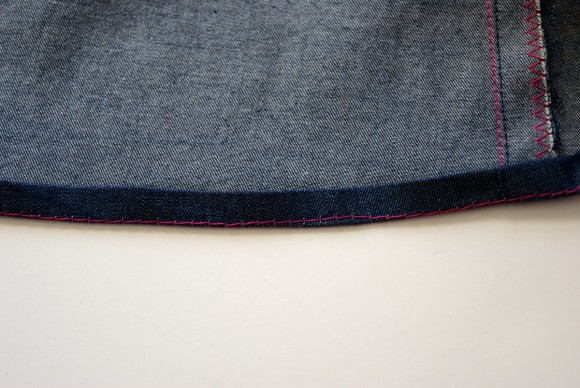
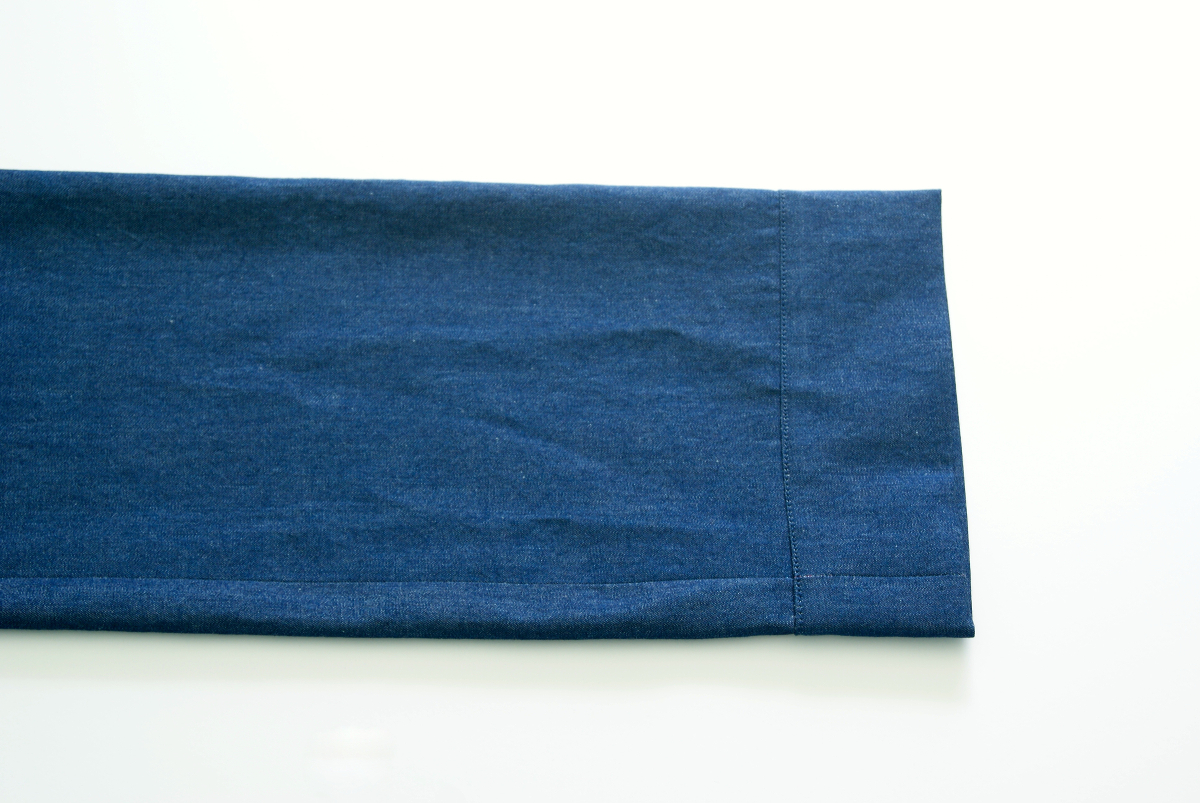
- To hem the dress, sew a line of basting stitches 1/2” from the garment’s bottom edge, which will become the first fold line for the hem. Sew a second line of basting stitches (or use tailor’s chalk to draw a line) 1 1/2” from the bottom edge.
Fold and press the fabric’s bottom raw edge along the first basting line to the wrong side.
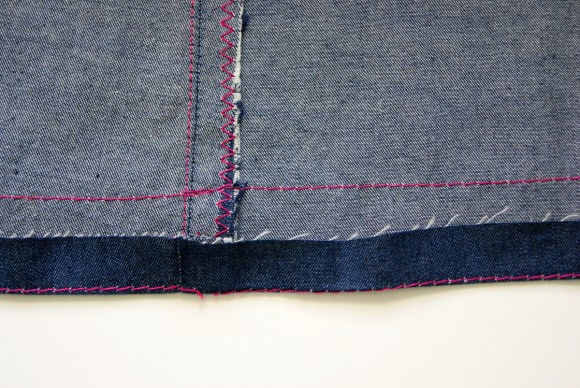
Then fold and press again at the second basting line to enclose the raw edge.
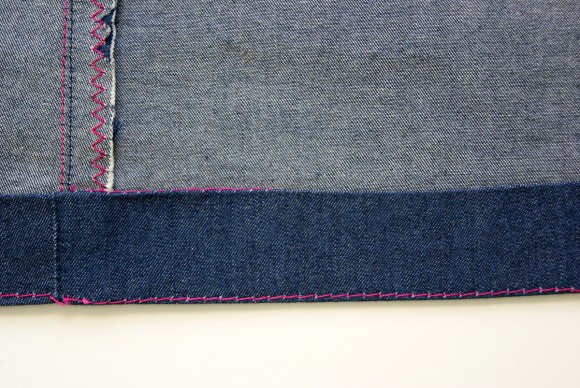
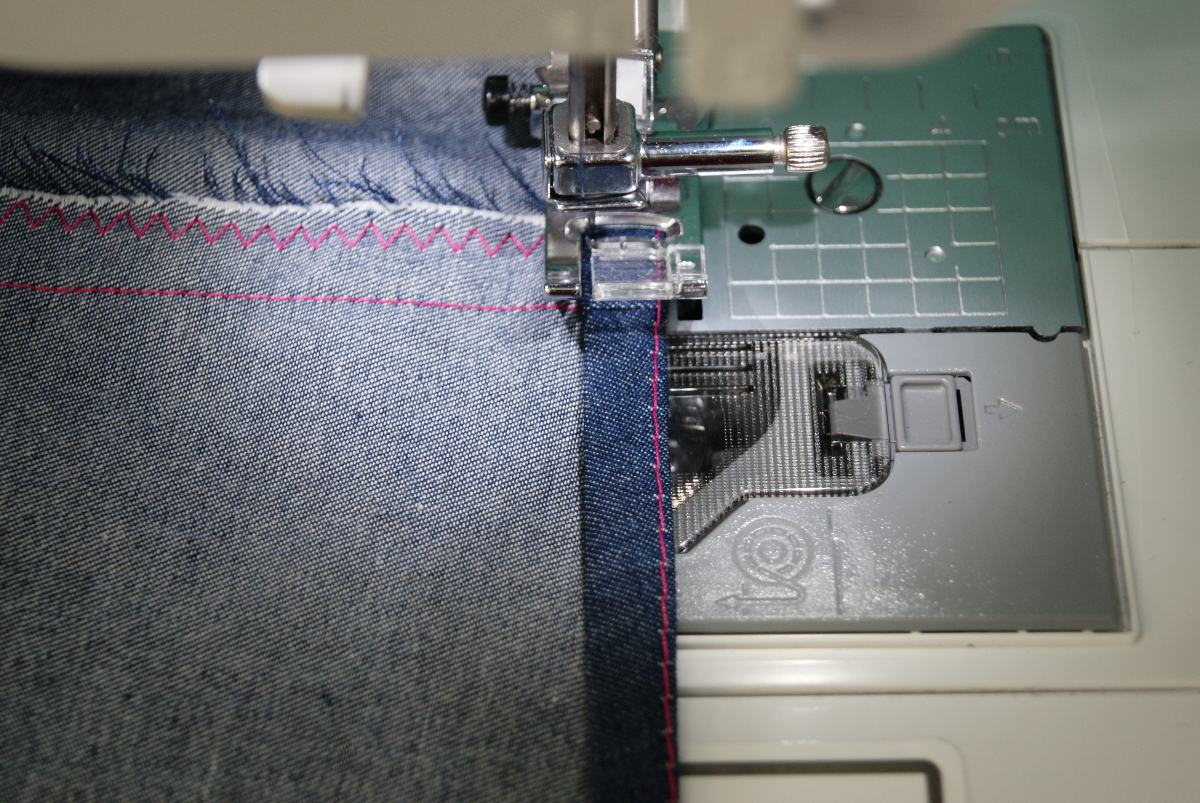
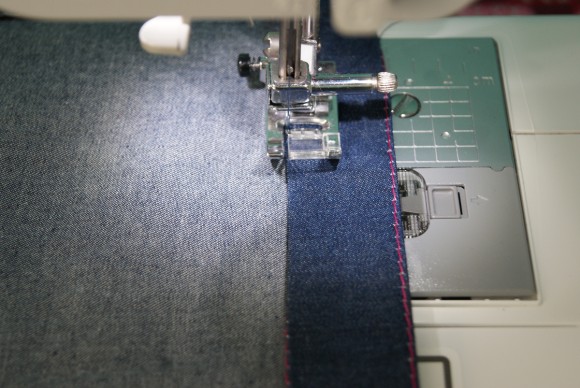
Edgestitch the hem along the second, innermost, fold to hem the dress.
Remove basting stitches.
- Sew buttons on the wearer’s left yoke at the marked positions.


You are now done with your Cinema Dress! Please do share photos of your completed Cinema Dresses in the Liesl +Co. Patterns Flickr group, we’d love to see what you created!
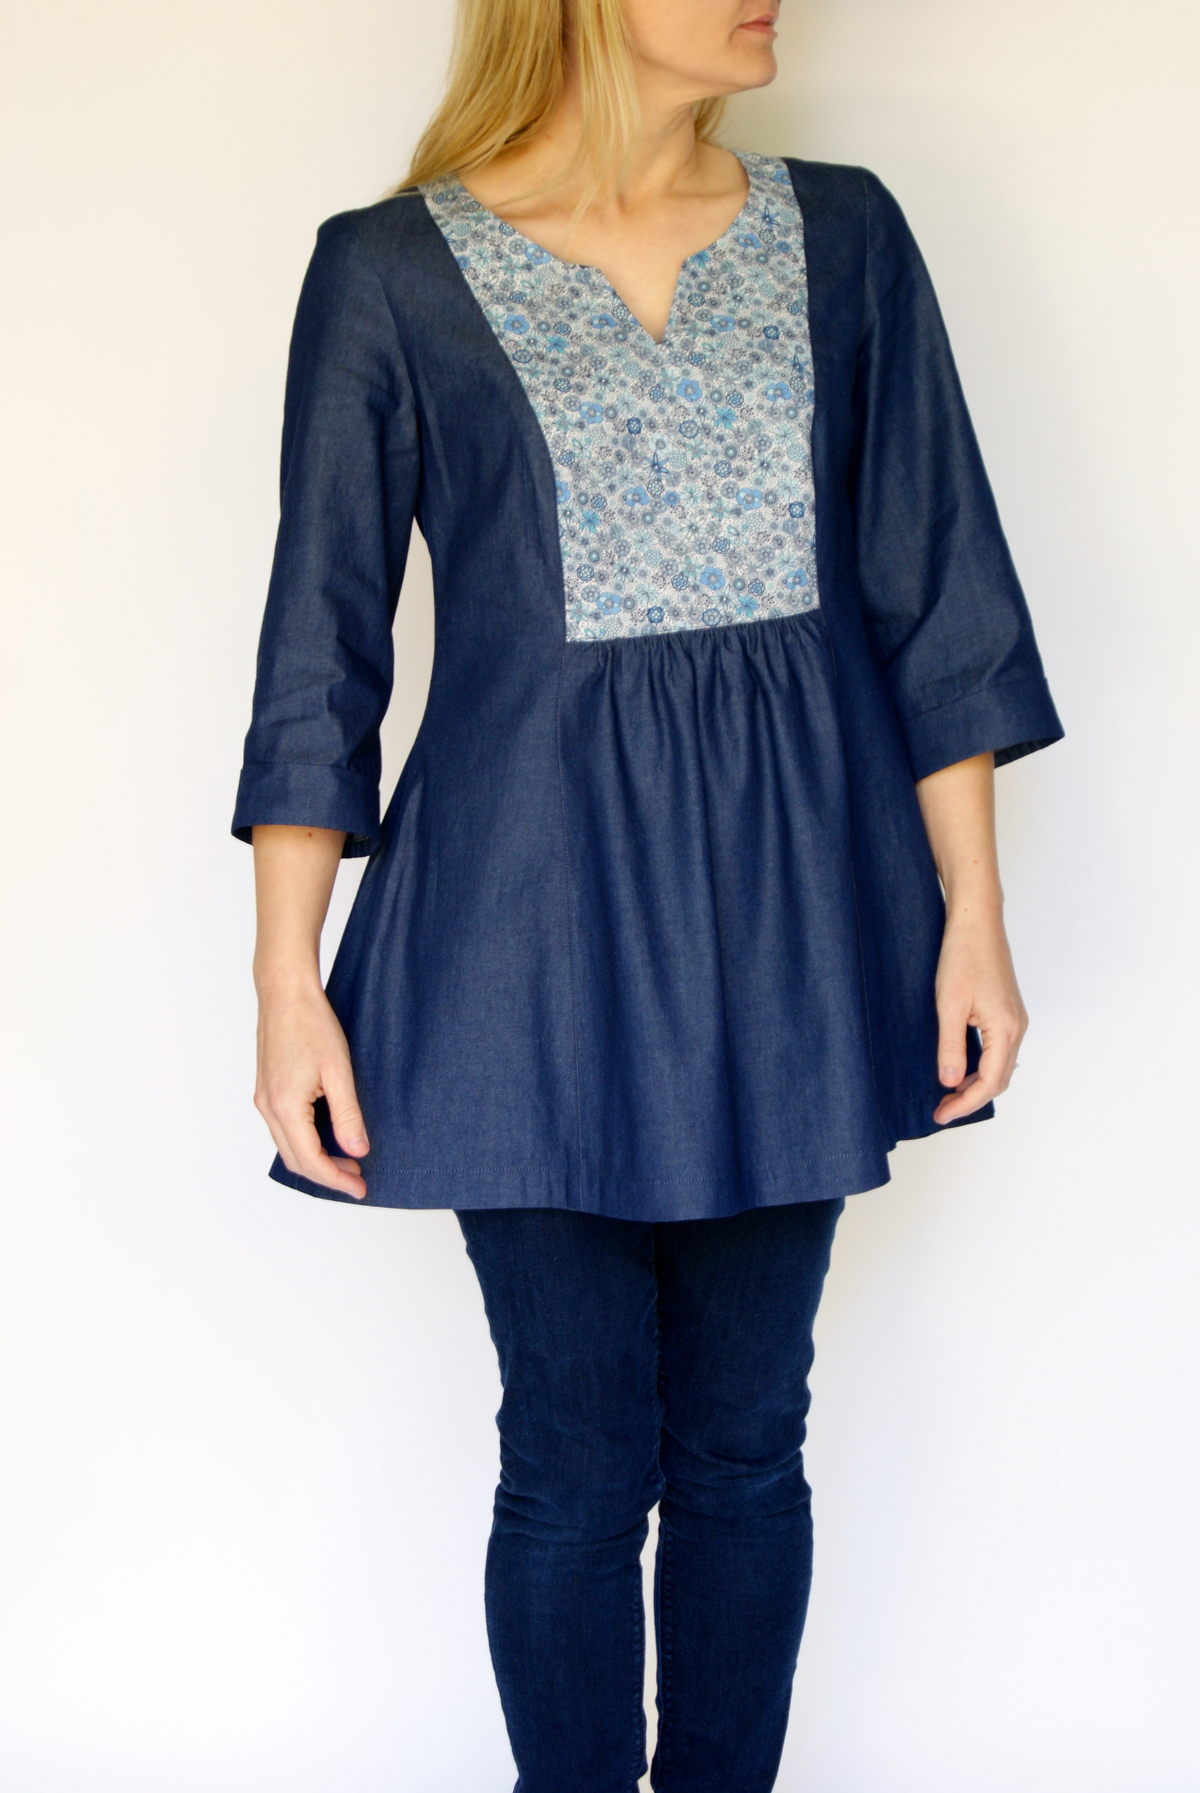
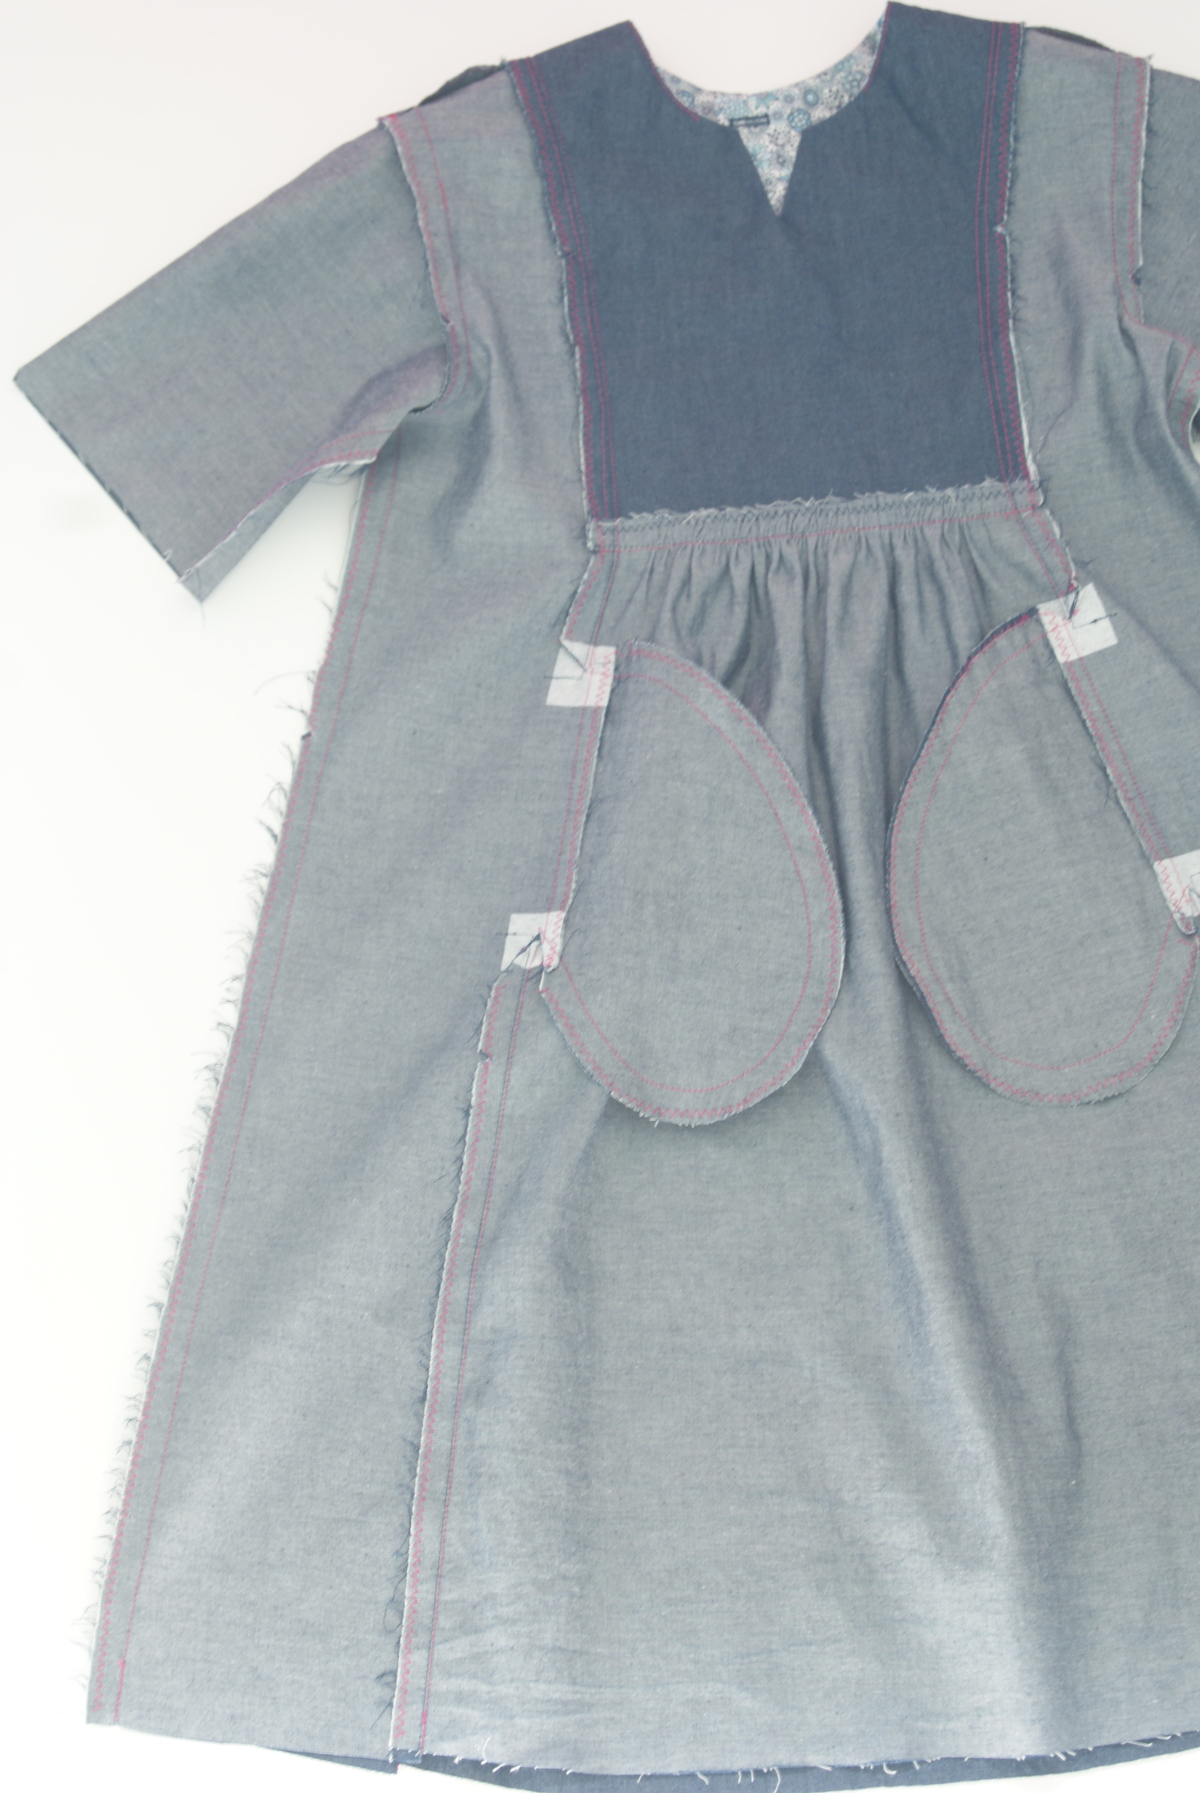
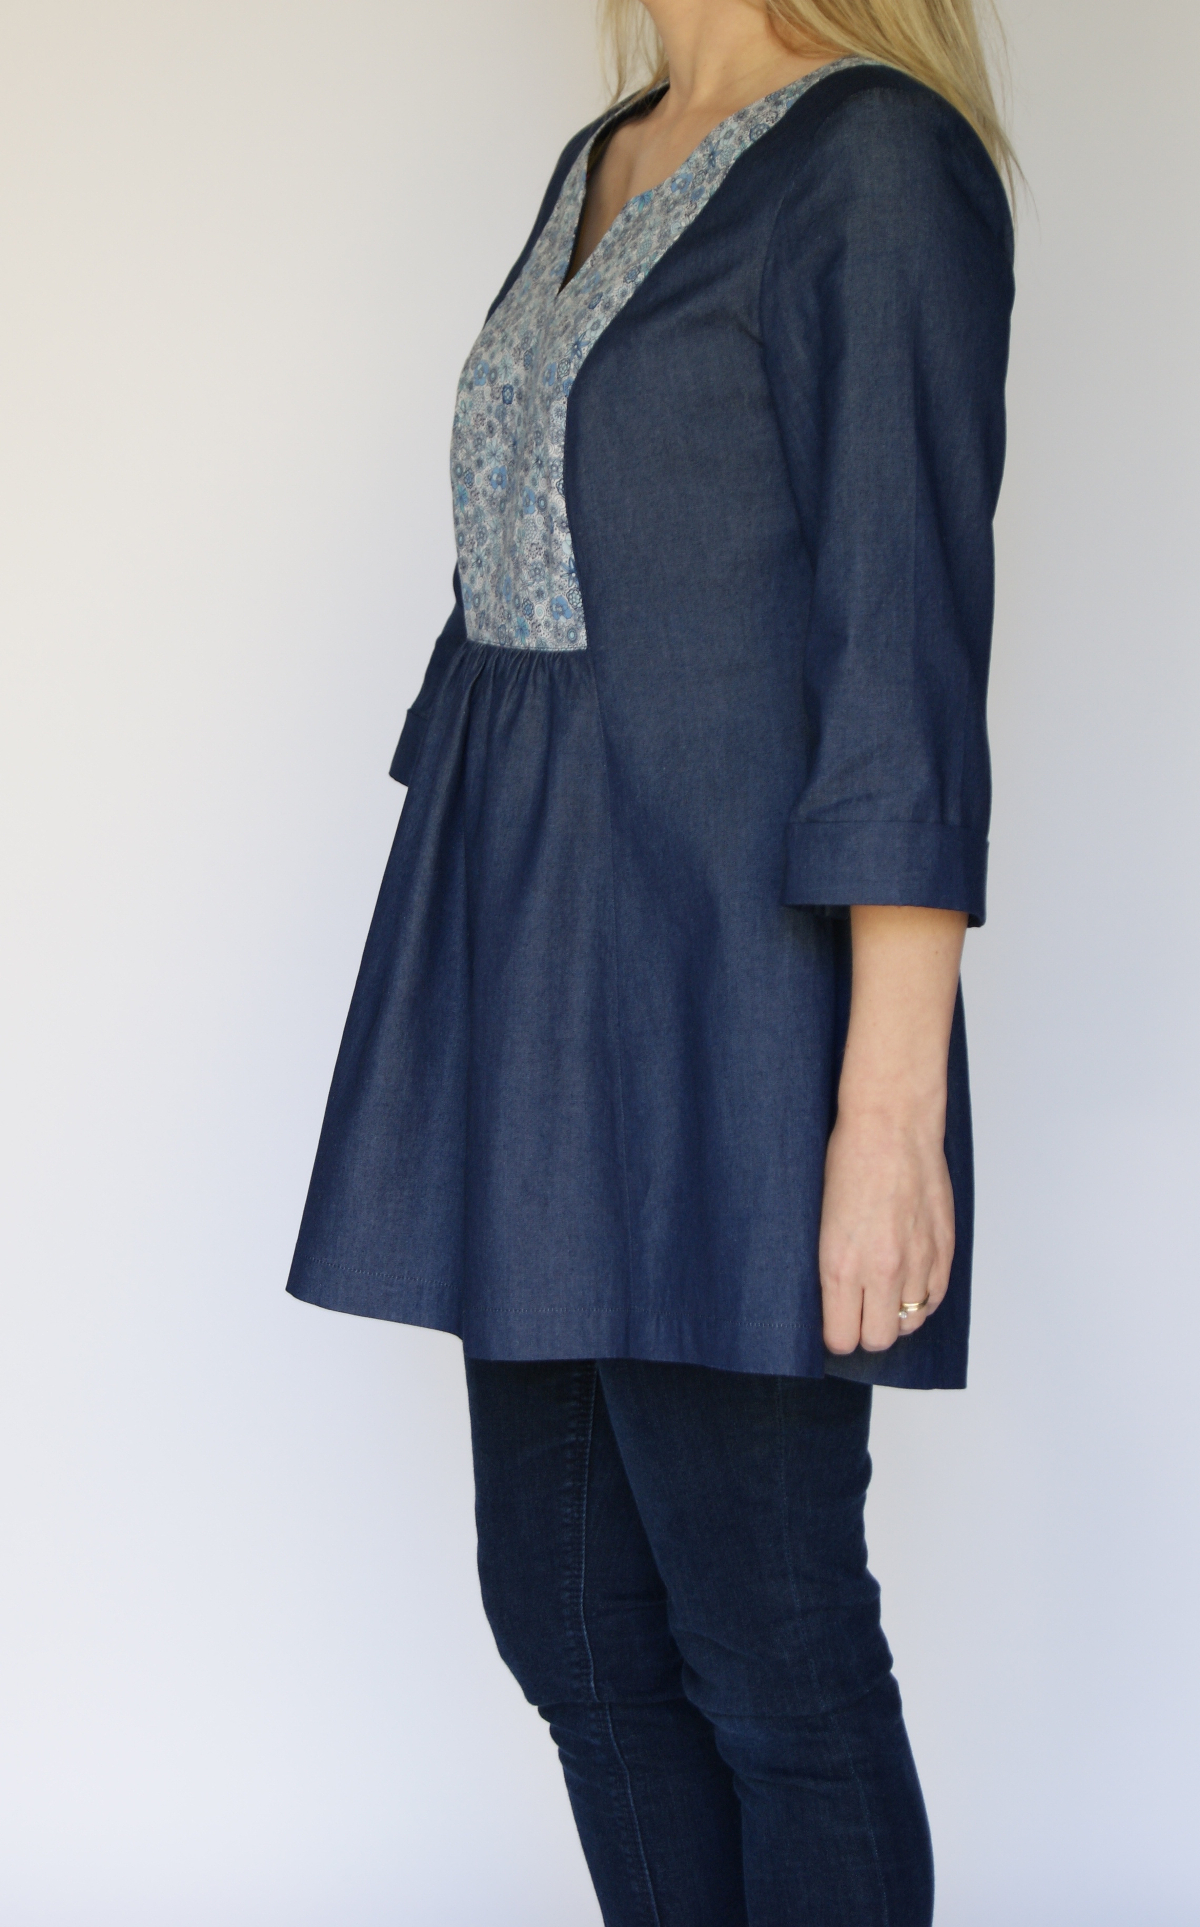
Surprise! I shortened my Cinema Dress to tunic length and eliminated the pockets.
Thanks so much for joining us this week for the sew-along. Also, the posts will be up indefinitely in case you didn’t have the opportunity to sew with us this week, but want to make your dress in the future.
This is beautifully demonstrated. Now if only I had a bust to speak of….
I’ll swap you one F and one G cup, my FBA!
My apex is about 1 1/2 inches OVER the side edge of the pattern 🙁 this gives a very odd shaped arm hole (and a pile of trial muslin), I’m not one to give up though as I think the pattern is great and I have some lovely soft jade green fine corduroy for it. I just started sewing after a gap of 2 children 20 years and 6 sizes………………
Seriously, what about the very full busted? (with narrow (sloping) shoulders/chest/back but out of proportion boobs & a long forgotten front waistline LOL)
Donna, do you have the Fit for Real People book? There’s a great explanation for this on page 150, second column. You can make a similar adjustment to the front yoke if your apex is further to the front. You may still want to add a little bit to the side panel as well, but you could focus on adding the fullness to the front yoke. Another option might be to add a dart (don’t close up line #3 all the way) to help with shaping. I hope that gets you headed in the right direction?
Hi Donna, I’m similarly shaped to you and have successfully muslined this dress. The pattern pieces look really different when you add that much of an FBA, but it works.
Wow fast answer, yes I do have the book and I am using that method this afternoon! I’ll try leaving the bust dart open, thanks for the tip I don’t need much extra width for the front yoke, just about 1″ additional length as I’m quite narrow, 12 at neck/shoulders blended to 16 at front bustline I just stick out forward a long way at the front and need the side bodice much wider than a 20 so will add side extensions.
I cut the back 12 to 16 at (dowagershump) then in to 14 at the waist with sway back and have a good fit except for needing a bit more bodice length reduction at the sides as I only took out 1inch so far. Thank goodness I can print out the bodice pattern pieces over and over, I love that 🙂
Thank you Liesl,
Donna in France
Donna, if you decide to keep the dart for a little extra shaping, be sure to shorten it by at least 1/2″ so it’s not too pointy! I’d suggest trying the regular full bust adjustment at the front yoke first, since princess seams should allow you plenty of opportunity to get a good fit. And don’t worry too much about the shape of that armhole–the extreme curve should give you a better fit!
I never thought I would enjoy a sew along without actually sewing along. I’m learning by reading and seeing, this post is really helpful. Vicarious sewing is great! I’m really looking forward to seeing all of the dresses pop up in the Flickr group.
I’m so glad, Helena! Thanks for commenting, and I hope the rest of the week is helpful, too.
Thanks for this sew along! I’ve been working on my first version for a couple weeks and didn’t think I would end up sewing along, but now my goal is to finish this week.
I’d planning a second version with some wool crepe. Could you talk a little about how to line it? I’ve lined things with a facing but not sure what to do with this pattern’s front yoke. I’d like to line it since the wool is a bit itchy.
Thanks for these great instructions. Can you comment on how to adjust the pattern for narrow shoulders?
Collette, there’s a great illustration for this on page 162 of Fit for Real People. It’s a pretty each change to make, but be sure you don’t make them too narrow or you’ll have trouble moving!
Thanks Liesl! Love your designs, patterns and advice!
So detail, pretty good
This FBA adds width all the way to the hem.
“The full bust adjustment allows extra room at the width of the bust as well as the length of the dress, so you’ll have a better fit and can further tweak it later according to your specific needs.”
If you have a very full bust several inches of extra room for the bust are required. That does not mean extra room for waist or hips is needed.
Yes, the full bust adjustment adds width, throughout. As you quoted, you “can further tweak later according to your specific needs.” If you want less width through the waist and hips you can reduce the width at the princess seams and side seams to suit your specific needs. That’s the beauty of sewing. I’m glad you’re able to make use of our tutorial. Best wishes.