Ashley is back with another fantastic contribution to the Outdoor Ready series which is all about using performance fabrics to make handmade outdoor apparel. Not too long ago she kicked off the series with hiking shirts, and today she is sharing camping capes. Now I’ll hand it over to Ashley.
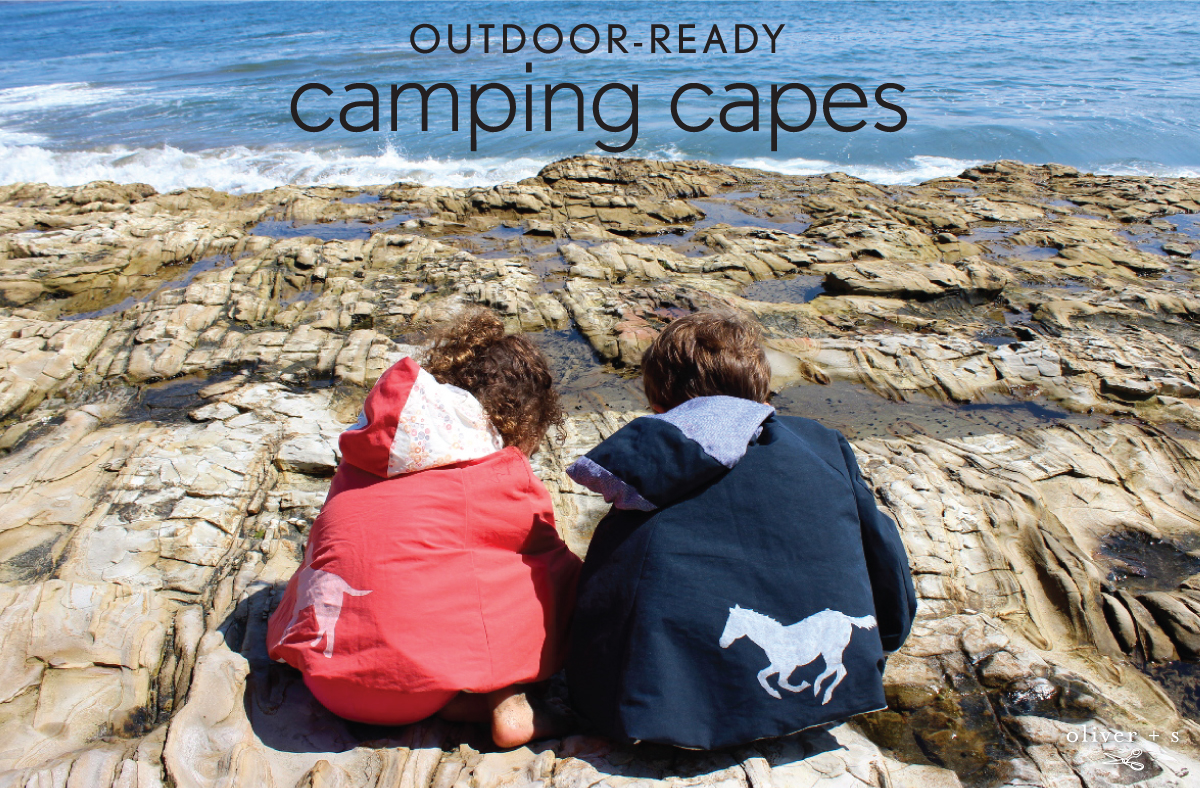
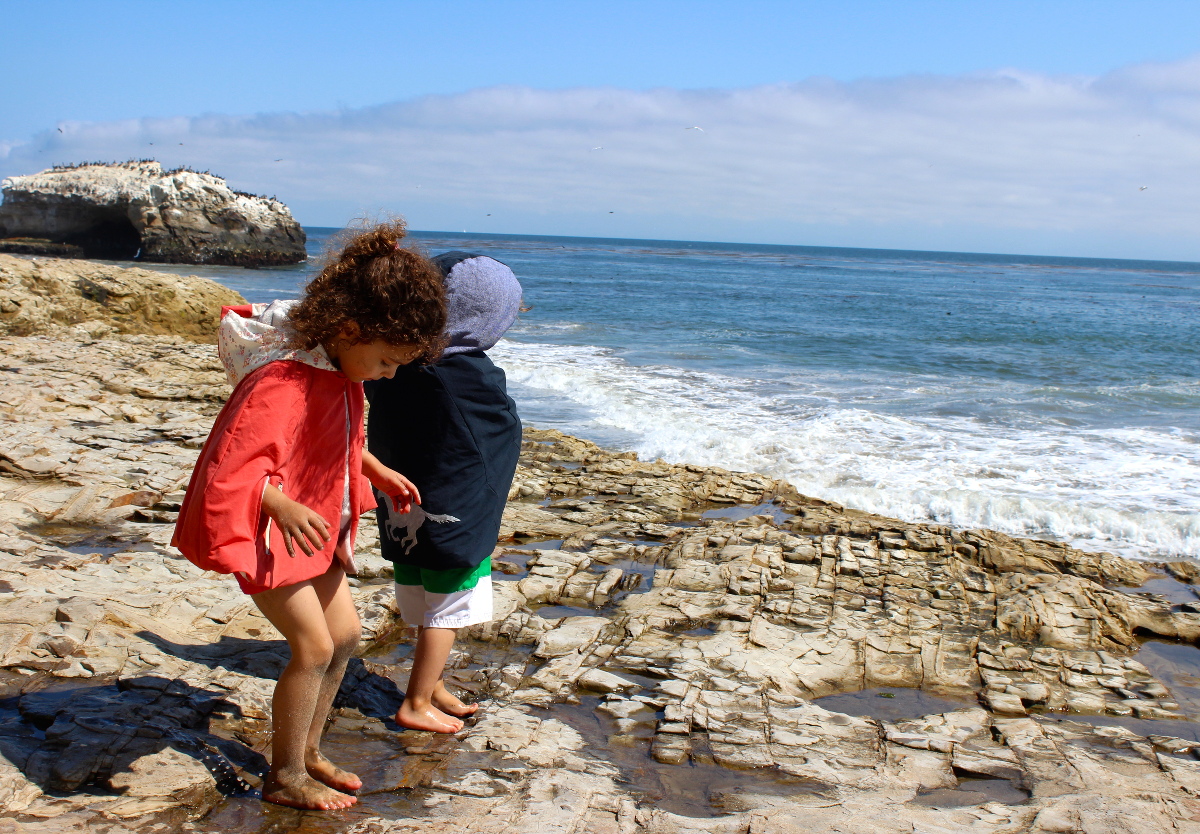
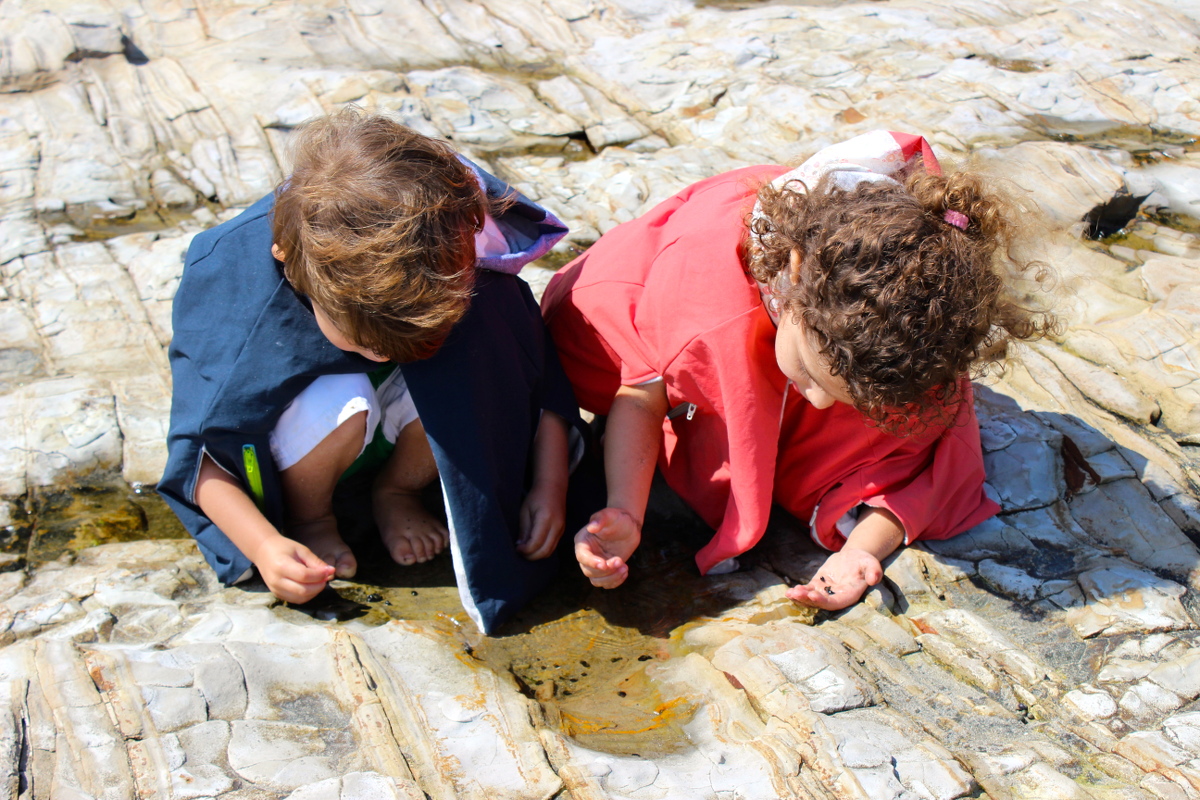
Hello again! I’m back for my next installment of Outdoor Gear, and already these items have gotten a ton of use in our final few adventures of the summer. You may recognize these as the Red Riding Hood Cape from Little Things To Sew. I had bookmarked this pattern as a potential beach coverup long ago, and then gone on to cut my next project for the series. I ended up having quite a bit of leftover material, and with a trip to the beach coming up at the end of that week, I wondered if I could stretch my remnants into some quick and versatile coverups after all. As a result, this ended up being a bit of a hodgepodge project using only materials I had on hand. I think it led to some fun customization that you guys and your little ones will enjoy!
For the exterior, I used my remnants of performance stretch woven wicking purchased from Rose City Textiles in Portland, Oregon. Don’t worry, they have great online inventory if you don’t live close by! As the name implies, this is a woven fabric with a bit of vertical stretch. The wicking properties allow it both to draw moisture away from the body and then dry it quickly, making it ideal for outdoor apparel, especially at the beach. I didn’t have quite enough fabric for the entire hood, so I grabbed some coordinating fabrics from my stash to finish off the hood side panels (Robert Kaufman Herringbone Chambray Union in indigo on the navy cape, and Cloud 9 Palos Verdes Abalone Cove voile on the coral cape).
Because I meant for these to be worn at the beach, I was about ready to chop up some old beach towels for the lining fabric, which strikes me as a great way to repurpose last season’s towels. However, I happened upon some chevron minky in my stash that I thought would increase versatility of the finished garment–still appropriate for summertime beach wear, but with some added warmth to possibly carry over into other seasons and locales, and you can’t top the sumptuous hand of minky against your skin. You can find a great selection of chevron minky here and solid minky at many local fabric stores, including JoAnn. And let me tell you–if you can sew with minky, sewing with performance fabrics is a complete breeze! This was my first time using minky and I continue to have sneezing fits every time I enter my sewing room, several weeks and vacuumings later.

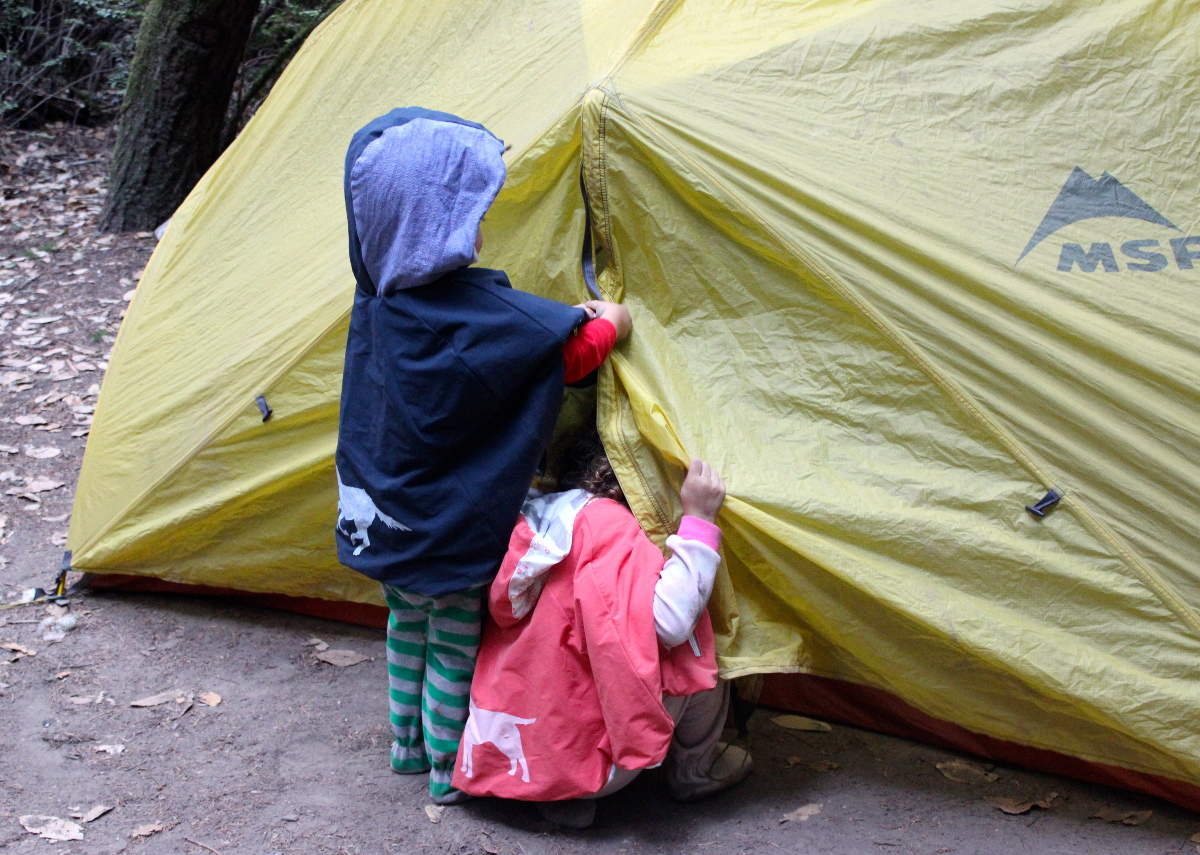
But back to the coverups! Aside from fabric selection, I also added some zip pockets. I think we can all agree that pockets are 100% mandatory for any sort of outerwear to be worn in nature. Beach combing seems to turn up an undue amount of treasures that need secure storing, hence the zippers. As for the animal emblems on the back, these clearly serve no functional purpose, but I was curious to see how fabric paint would fare on the outdoor fabric. It went quite well, so I’ll also outline the steps to creating your own stencils for further customization. Here we go!
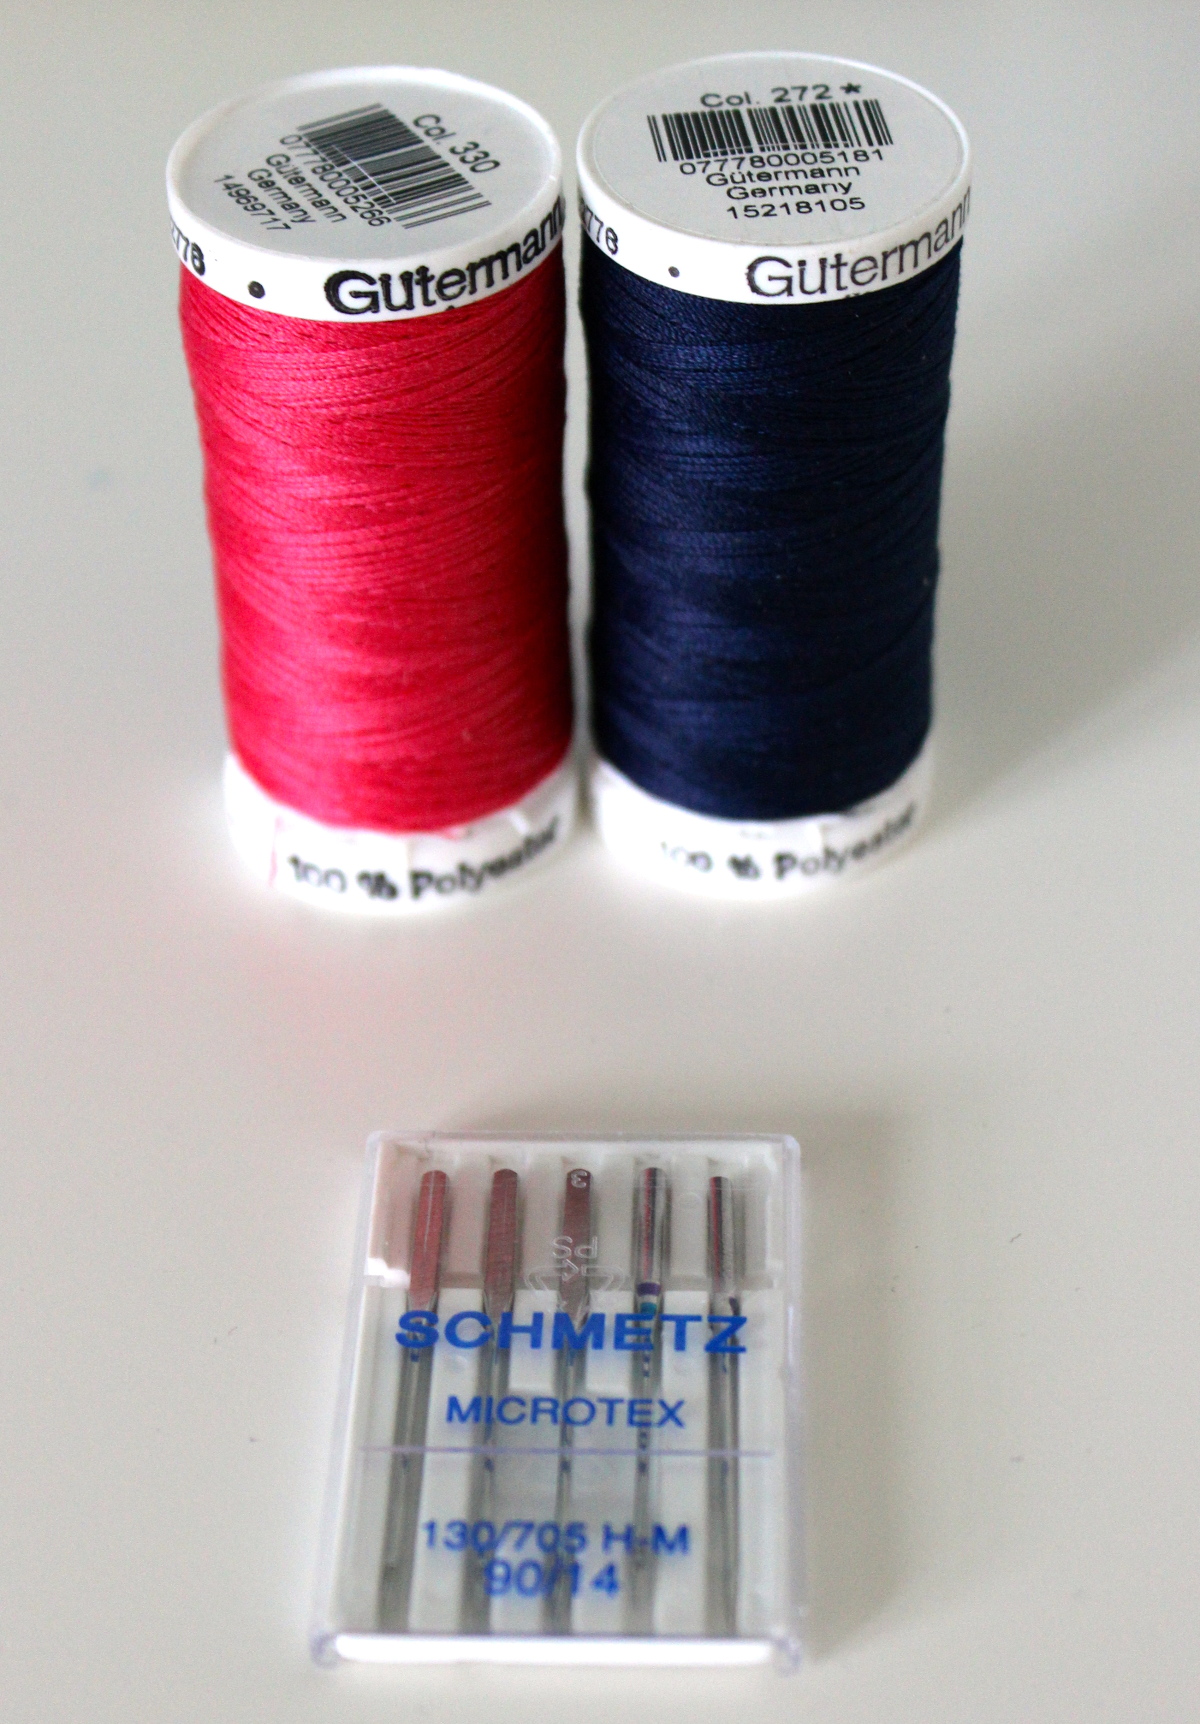
There are only a few steps to keep in mind in caring for and sewing with wicking performance fabrics such as those used in this post:
1. Use microtex needles in your sewing machine, available at well stocked fabric stores including JoAnn.
2. Don’t be afraid to use pins.
3. Use 100% polyester thread.
4. Machine wash cool, line dry.
5. Do not use heat to dry the fabrics as it may disrupt their performance properties.
6. Iron on low heat.
Keeping those tips in mind, go ahead and cut out the pattern per the instructions. I experimented with adding the pockets after the whole cape exterior was already assembled, as well as adding them to the lone front panels before assembly. I prefer the latter, and will outline those steps below.

Of course, you will need to begin by drafting a pocket. I sewed the capes in the smaller of the two sizes, and for reference, my pocket piece measures roughly 7.5″ in length by 6.5″ in height (this includes a 0.5″ seam allowance). It is extremely generously sized (we need to account for a lot of treasure storage and still have room for chilly little hands, right?) and accommodates my own hand. I imagine something similarly sized will work for the larger version of the pattern as well. As you can see above, be sure that your pocket pattern piece fits within the confines of your front panel piece in the proper orientation. Once you are comfortable with your pattern piece, cut four pocket pieces. I chose to use another moisture wicking fabric for my pockets imagining them becoming a harbor of wet sand and sea shells. Now that I know these capes get so much use as jackets, I might have opted to make the pockets from something warmer, like more minky or fleece.
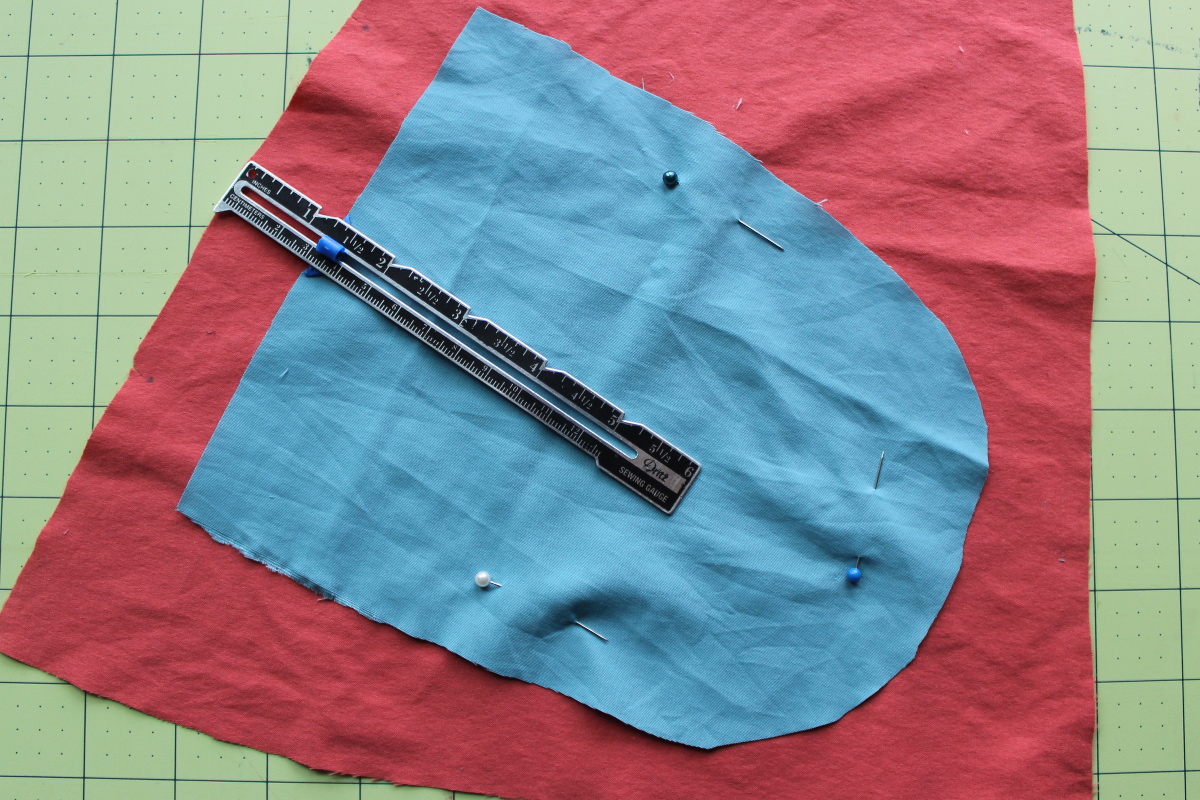
Take one pocket piece and place it on the corresponding cape front piece, right sides facing. The rounded end of the pocket should face the front most part of the cape, the side that will not be seamed to another cape piece. The straight edge of the pocket should be placed 1.25″ from the other edge of the cape (which will eventually be seamed to a side piece), centered between the two marks that denote the future hand opening on the cape front piece. Pin in place. Take care to have the cape piece in the correct orientation, with the front edge running directly up and down like the grain line, and angle the pocket accordingly.
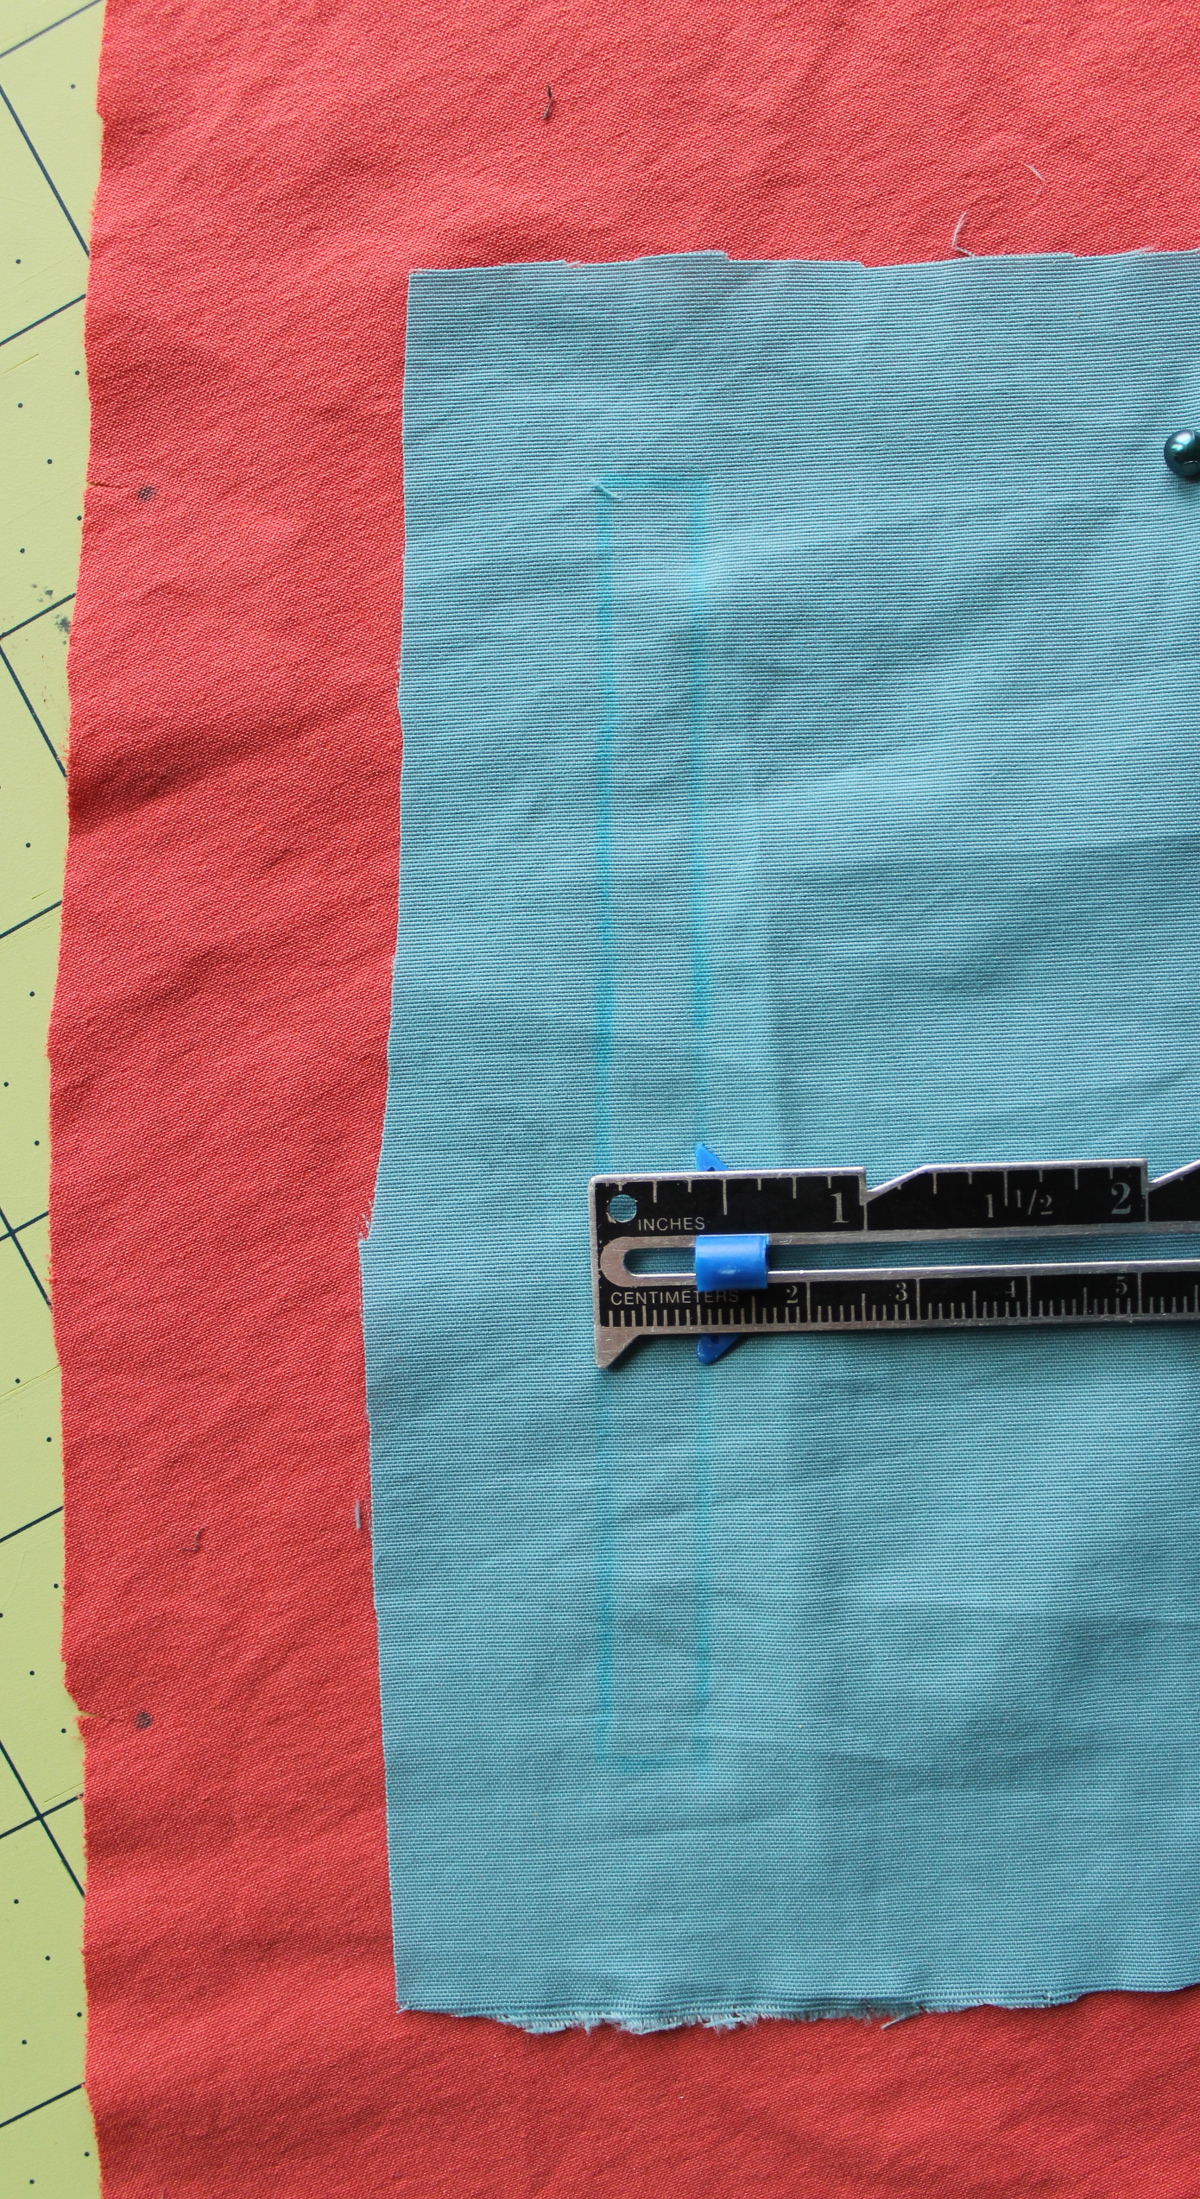
Now, let’s make room for a zipper! One inch from the straight edge of the pocket piece, make a 5″ vertical line. On my pocket piece, a 5″ line has 0.75″ of pocket on either side of it to make it centered on the 6.5″ height. 3/8″ from this line, draw another 5″ line running parallel, then join the two making a skinny rectangle. This will become your zipper window.

Sew all the way around the rectangle you just drew.
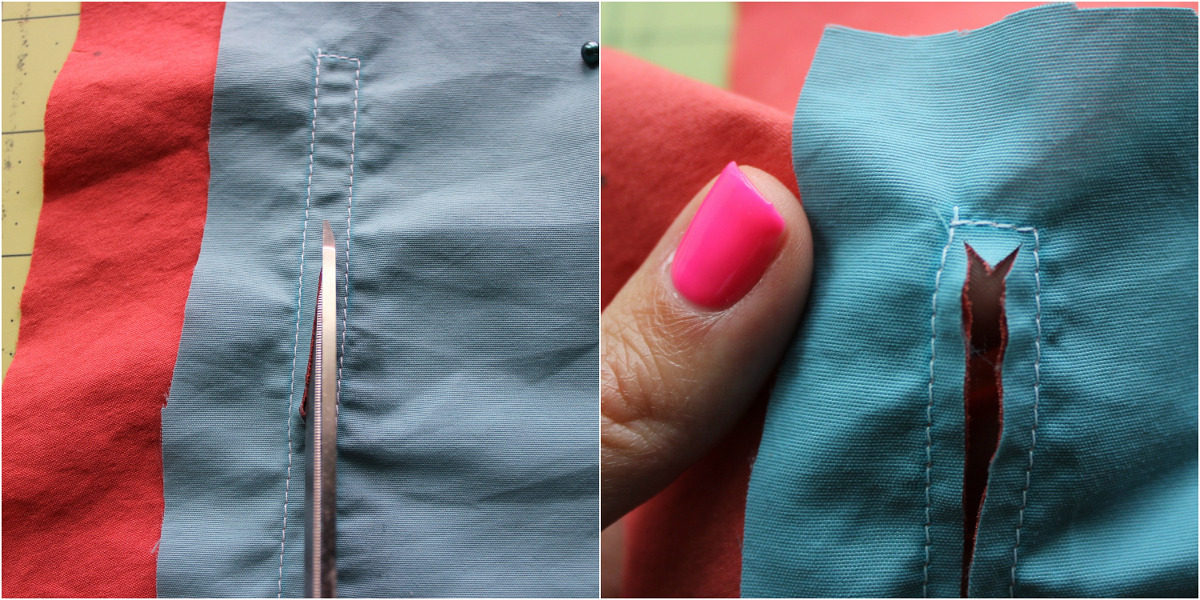
Starting in the middle of your rectangle, carefully cut right down the middle until you are almost at the end of the rectangle, then cut a small v shape toward both corners, cutting very close to, but not through the corner stitches. Repeat on the other side of the rectangle.
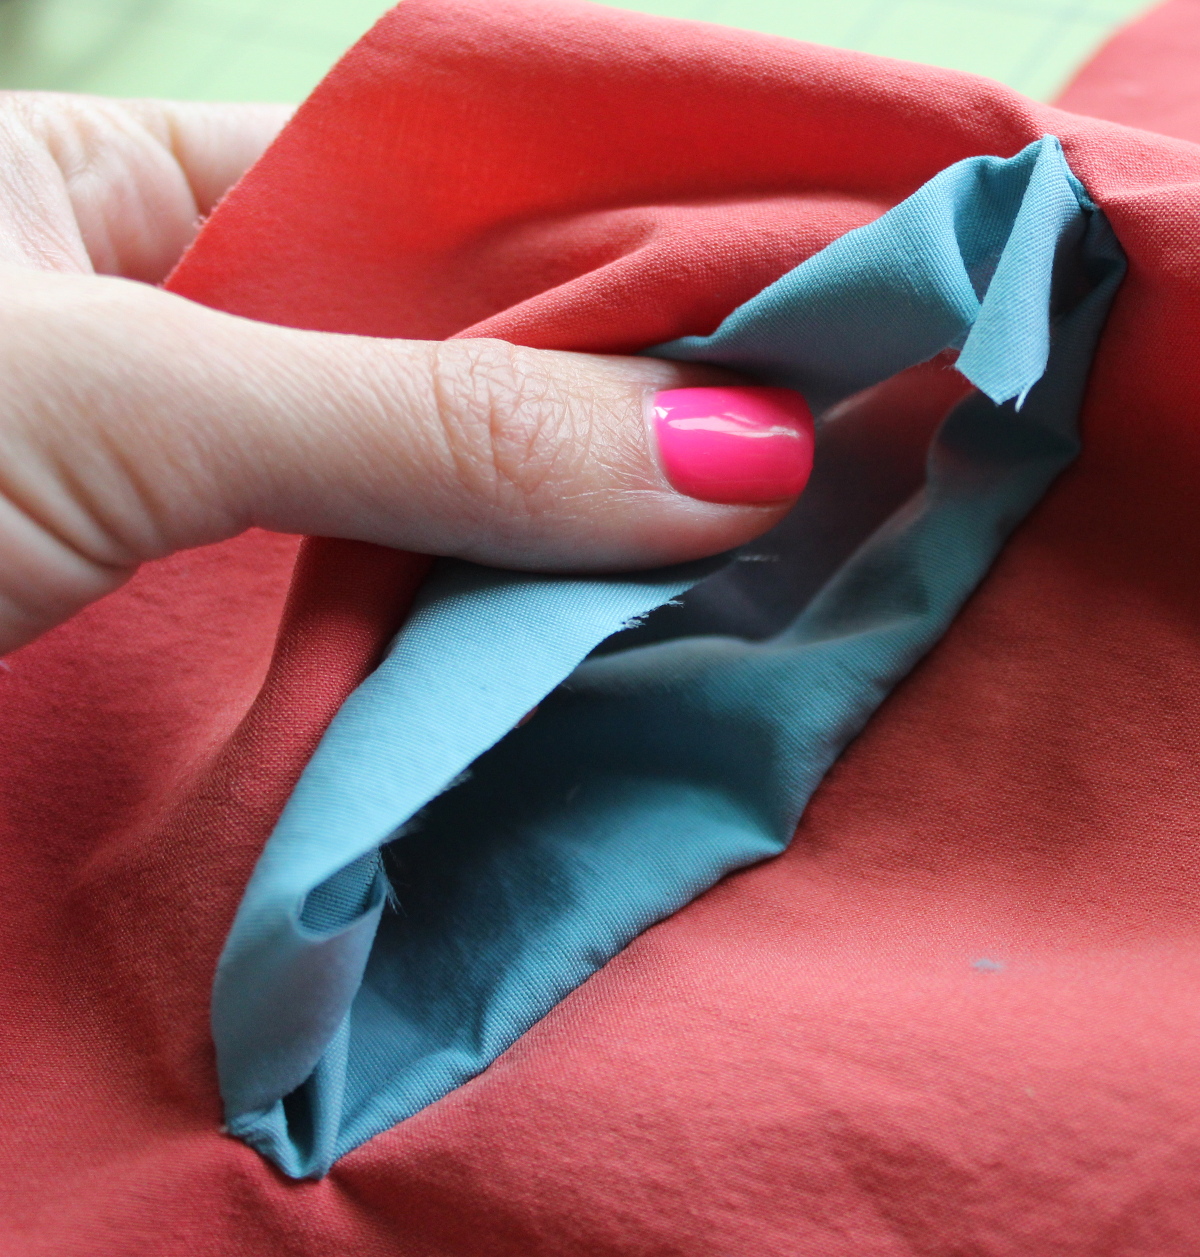
Remove your pins and push the pocket through the opening you just made to the wrong side of the cape piece.
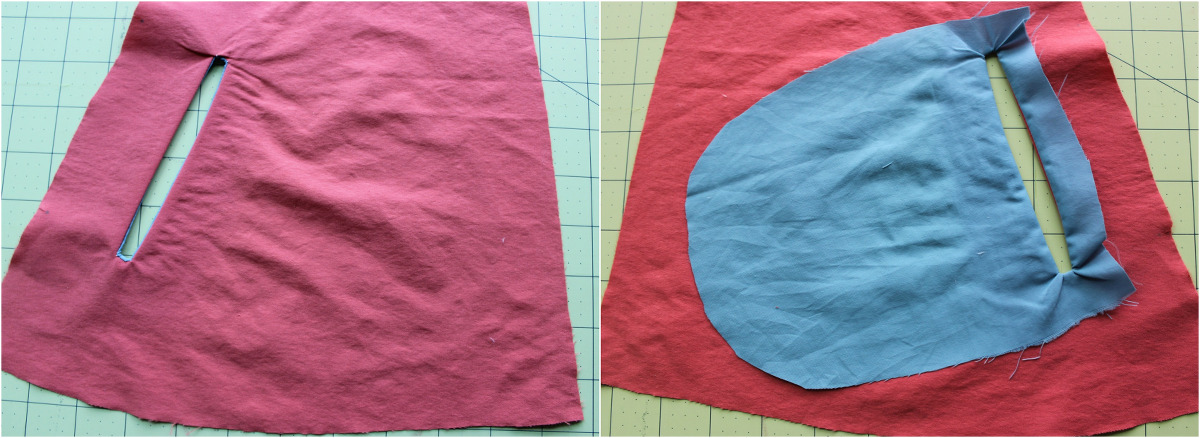
Press to make the rectangular window as neat as possible. On the left is a view of your front cape, on the right is the wrong side of the cape piece with the pocket all pressed into place.

Now, for the zipper! It’s getting exciting, right? As I mentioned, this was a hodgepodge project for me, and all I had on hand were 7″ zippers. If you use plastic zippers, you have a lot of flexibility if you stock longer sizes, because you can always adjust the length to make it shorter. It’s possible a 5″ zipper would work perfectly for this purpose, but I can’t guarantee it. I can, however, show you how to make a 7″ or longer zipper work great. Pin the zipper in place, centering it inside your zipper window.
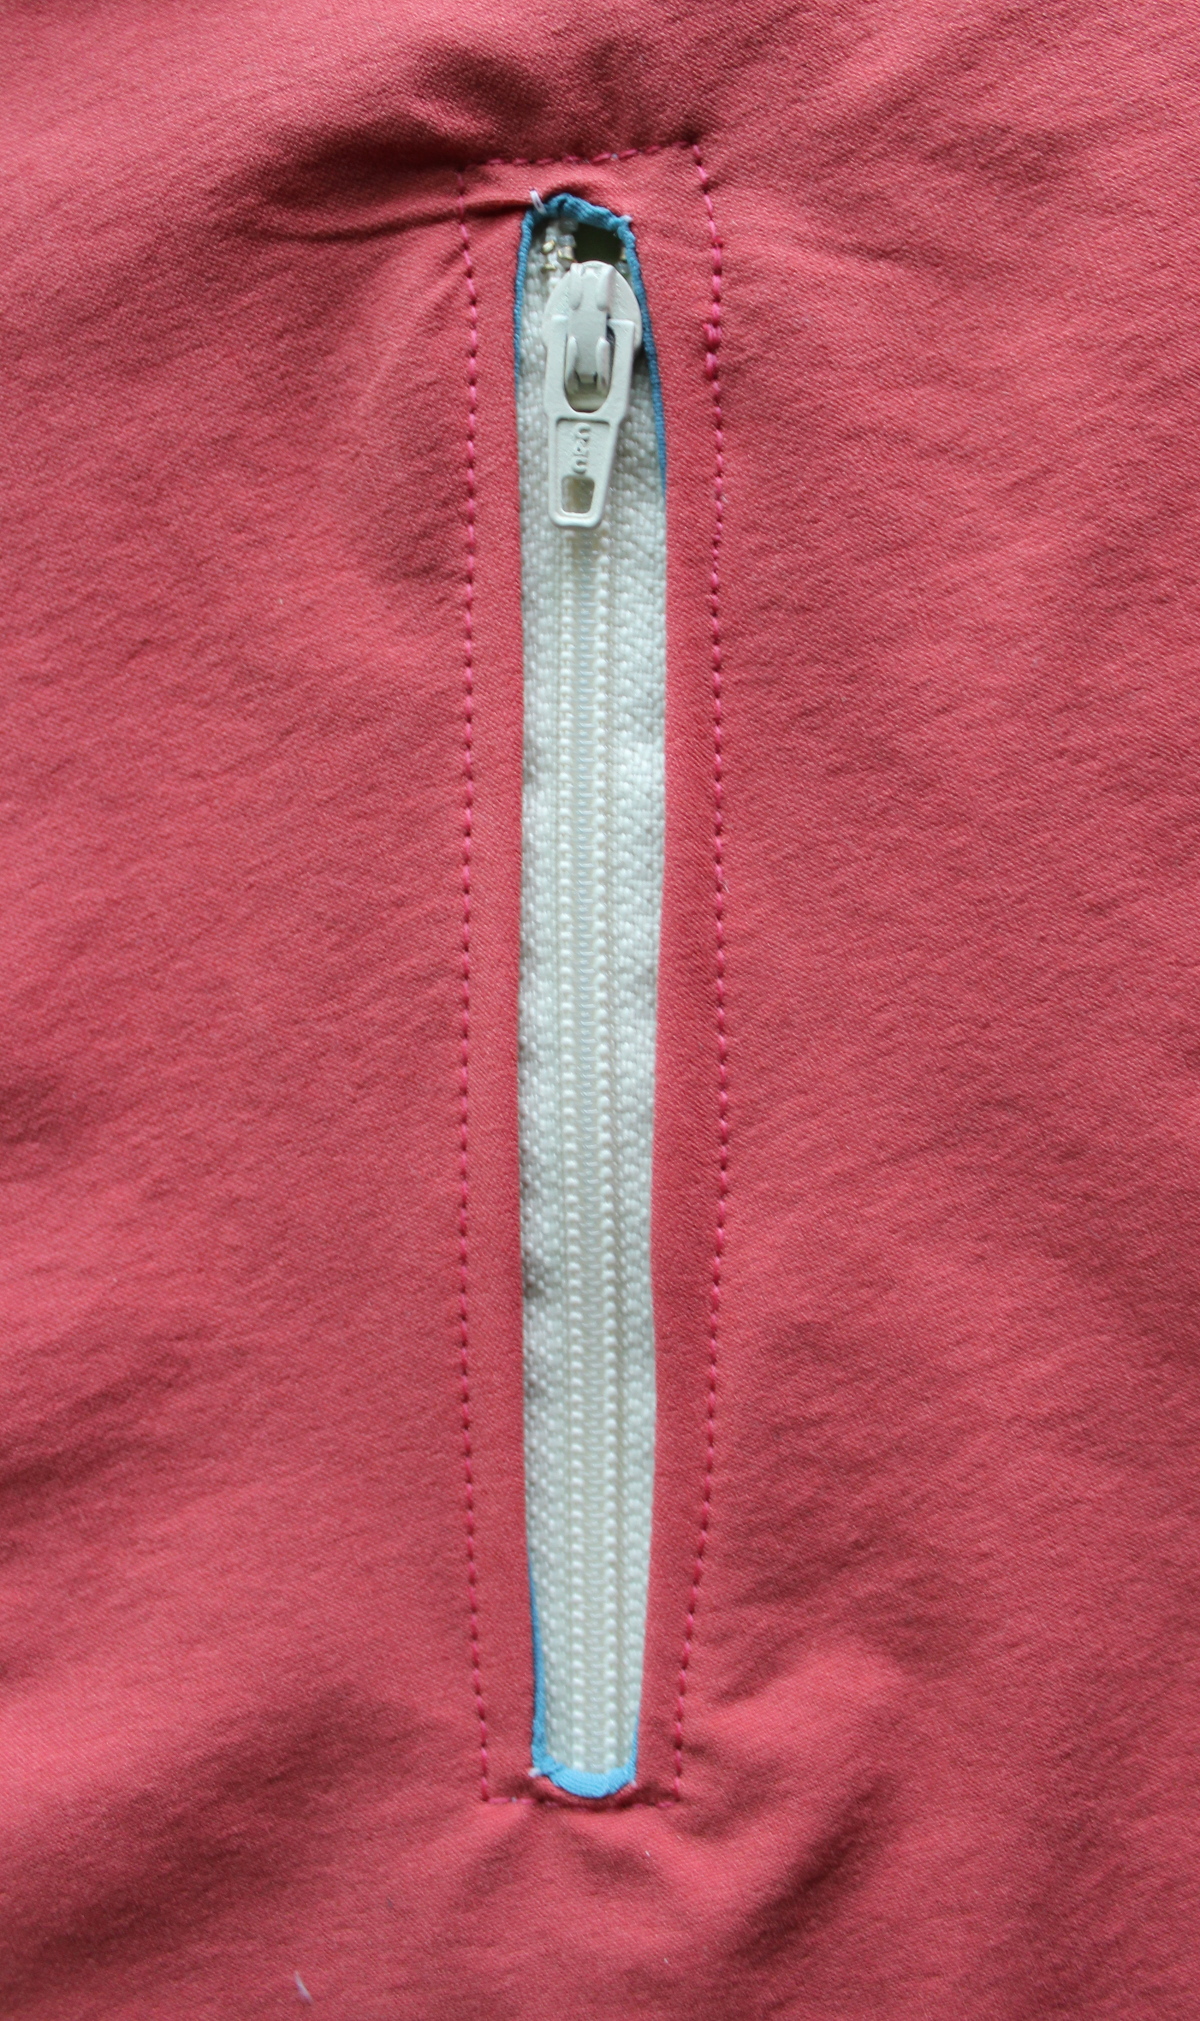
Topstitch the zipper in place around the perimeter. You may have to move the zipper pull out of the way to get around it with a regular presser foot, but it’s doable.

If you’re using a 7″ zipper or longer, the end of the zipper will hang over the edge of the pocket by at least a couple of inches. Mark a line on the zipper tape that falls within the edge of the pocket. None of this needs to be exact or incredibly tidy. It will all be concealed between the cape exterior and lining, so don’t fret imperfection! Using a tight zigzag stitch, go back and forth over the zipper teeth several times where you drew the mark to make a new end point for your zipper. Trim off the excess.
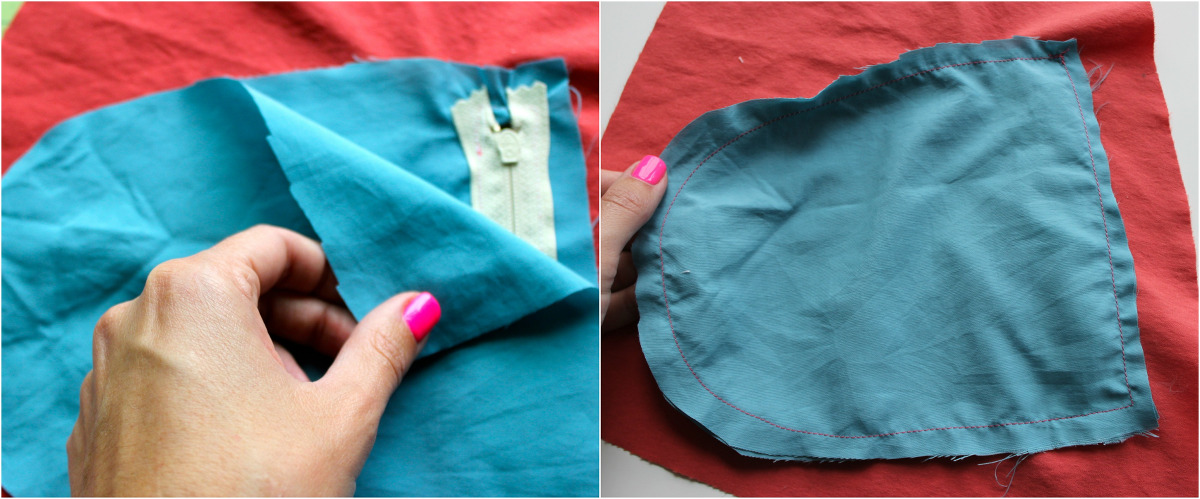
To finish the pocket, lay a second pocket piece over your attached piece, right sides together. Pin in place. Sew around the perimeter of the pocket with a 0.5″ seam allowance, taking care not to catch the cape piece. You are only attaching one pocket piece to the other.

And there you have it, a zip pocket! Repeat for the other side. It seems like a lot of steps when spelled out in a tutorial format, but I promise it goes fast when you’re actually assembling it. This technique has wide application–now you can add zipper pockets and pouches to everything!
Continue assembling the exterior of the cape until it is complete. Now, let’s make some stencils! For these, I used freezer paper, a crafting powerhouse which I truly mourned when it was no longer carried at any of my local haunts. Apparently, I’m the only person in my town who uses it, but typically, you can find this in well stocked grocery stores, and can always order it online. I use freezer paper to trace/reinforce my patterns, and save any leftover scraps from that process for future stencils (and toddler scribbles, evidently).
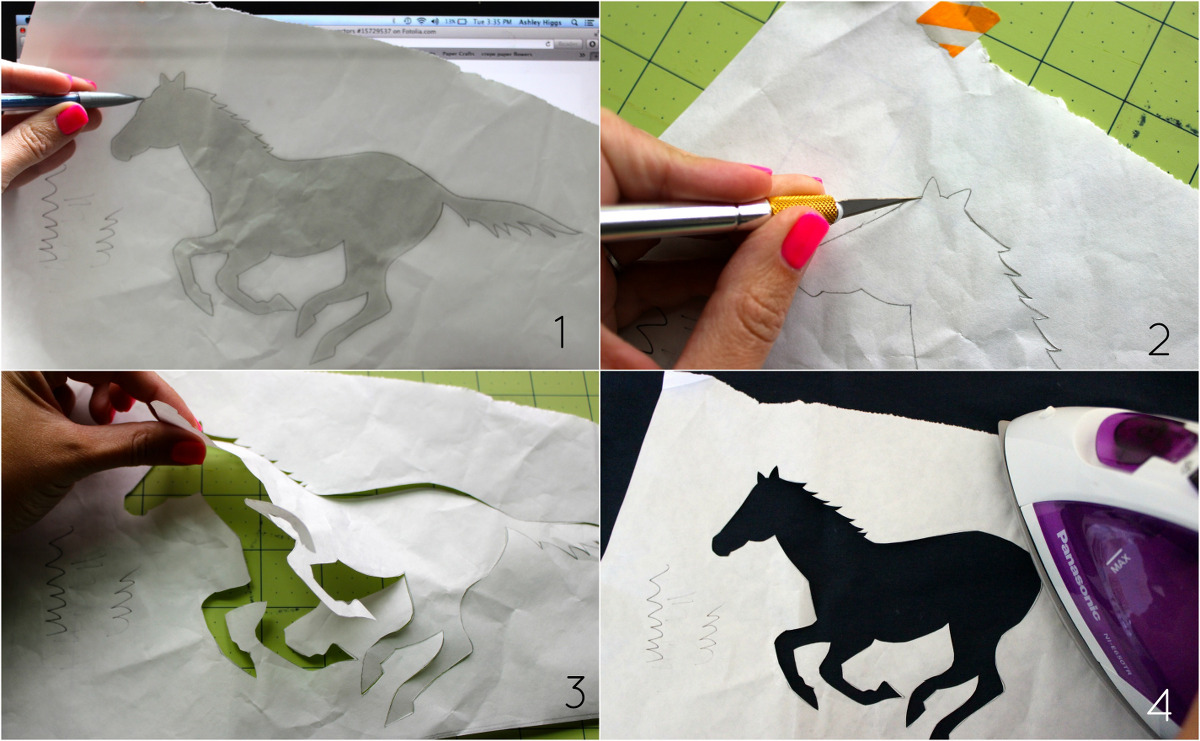
To create a stencil, I begin by searching Google images for a silhouette, e.g. “galloping horse silhouette.” That will give you a good idea of what the finished product will look like without the details of a photo or cartoon. When I find a suitable image, I zoom in to make it the appropriate size, and often just trace the outline of the image right off the computer screen to save on ink and paper (image 1, above), which I’m sure is a completely acceptable use of a laptop screen. The smooth side of the freezer paper will face the right side of your fabric, so make sure to trace your image in the correct orientation. Next, secure your traced image to a cutting surface, and carefully cut around your outline using either a sharp craft knife, or a pair of eyebrow or cuticle scissors can also get into those nooks and crannies quite well (image 2). Once you have cut all the way around, carefully remove the center of the stencil (image 3). Position your stencil shiny side down on the right side of your fabric (image 4), centering and straightening it as you see fit. Iron in place using low heat. Pay close attention to all the tiniest angles and make sure the paper is well affixed. You want it to be air tight so the paint doesn’t bleed underneath the stencil and get messy at the edges.
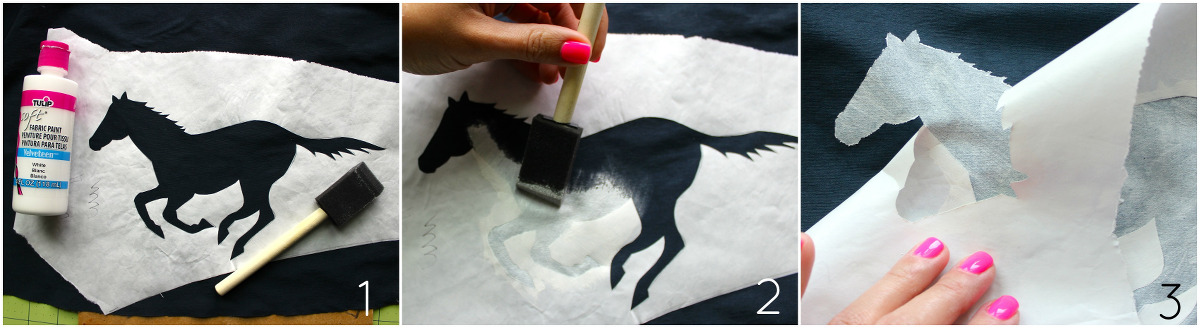
Now for the painting–my favorite part! Before you actually paint your garment, it would be prudent to do a test swatch of fabric to see how the paint takes, including running it through the wash. I can’t honestly say I always exercise that degree of caution, but of course, it’s advised. Once you are comfortable with applying permanent paint to your fabric, you can begin. I use Tulip brand, widely available in craft and fabric stores, and a small sponge applicator, though q-tips would certainly work in a pinch (image 1). Slide a piece of cardboard or scrap paper under the garment in case the paint bleeds through. Gently dab paint all over your stencil, making sure to get right up to (and over) the edges of the stencil so you will have nice, sharp lines when you remove the stencil (image 2). After waiting the amount of time recommended on the paint bottle, carefully peel back your stencil to reveal your handiwork (image 3). Something about this feels like opening a present to me. I always get excited to see the results.
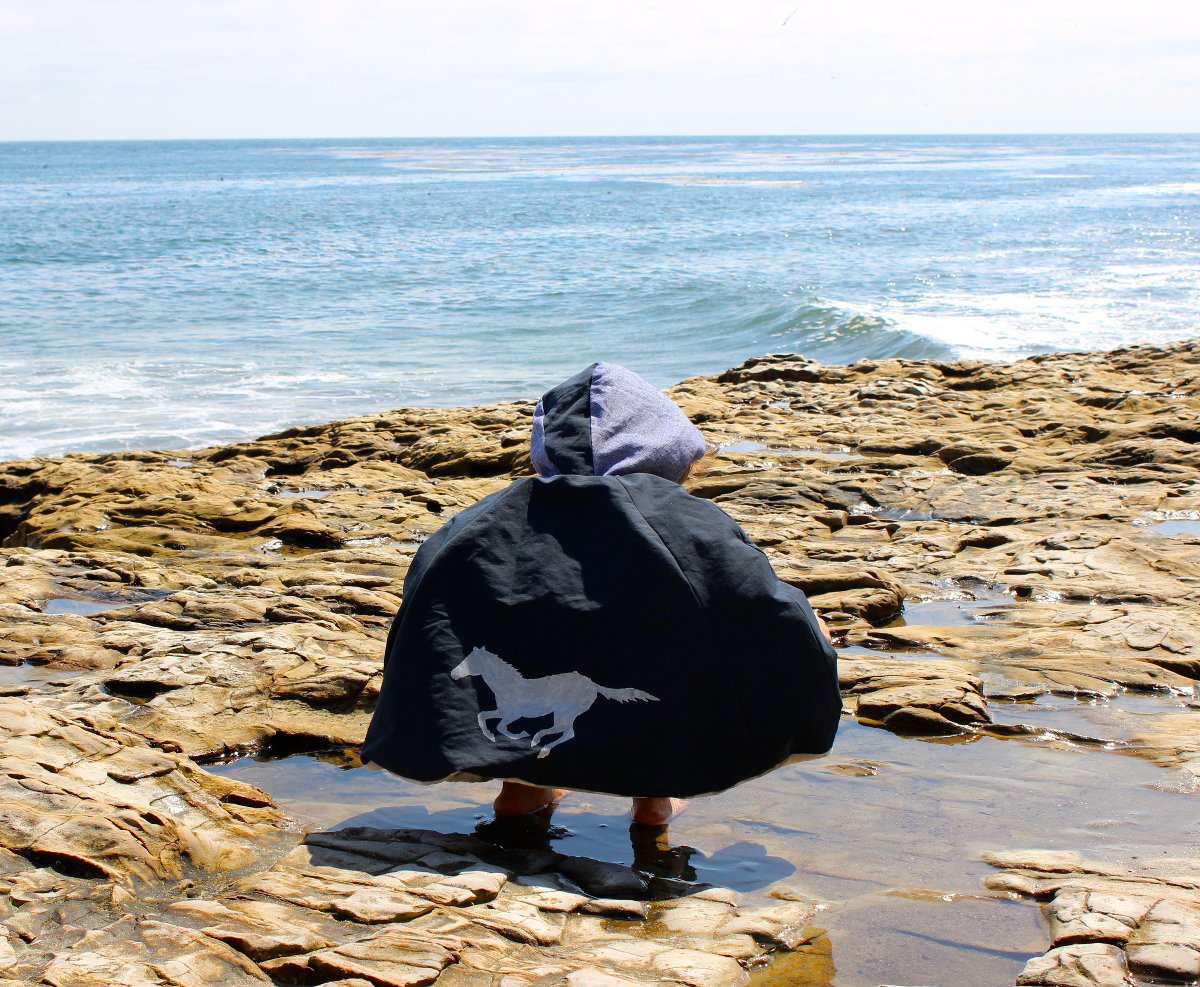
That’s about it for pattern tweaks–continue to assemble the cape per the instructions until it is complete! These capes have been a huge success for my mini-campers. They do make great beach coverups as they were intended, but using a thicker lining fabric definitely makes them more versatile (fleece would be an ideal and significantly less messy alternative to the minky). With so much ease and no sleeves to fuss with, they slip on and off no problem when it starts to get chilly around the campsite. The addition of zip pockets is over half the battle of winning the kids over, and the animals on the backs give them just the right element of fun such that they are now the outer layer of choice in cooler weather.

I hope this post inspires you to make some of your own camping capes as we transition from summer to fall. Let’s stay outdoors as long as we can!
Que hermosa foto y que bien ver a los niños disfrutar de esta naturaleza,gracias.
Love this post. Cute kids, great sewing, the real-deal of a tent and you had your nails done for the photos! All round professional mum!!
Well done.