We are delighted to have Shelley joining us again on the blog. She has been a multi-time guest poster sharing her favorite pattern, Evel Knievel costume, disco pants, and Little Things to Sew Cover to Cover Challenge. Now today she will be showing us how she customized the no-tie scarf. Thanks for being here, Shelley!
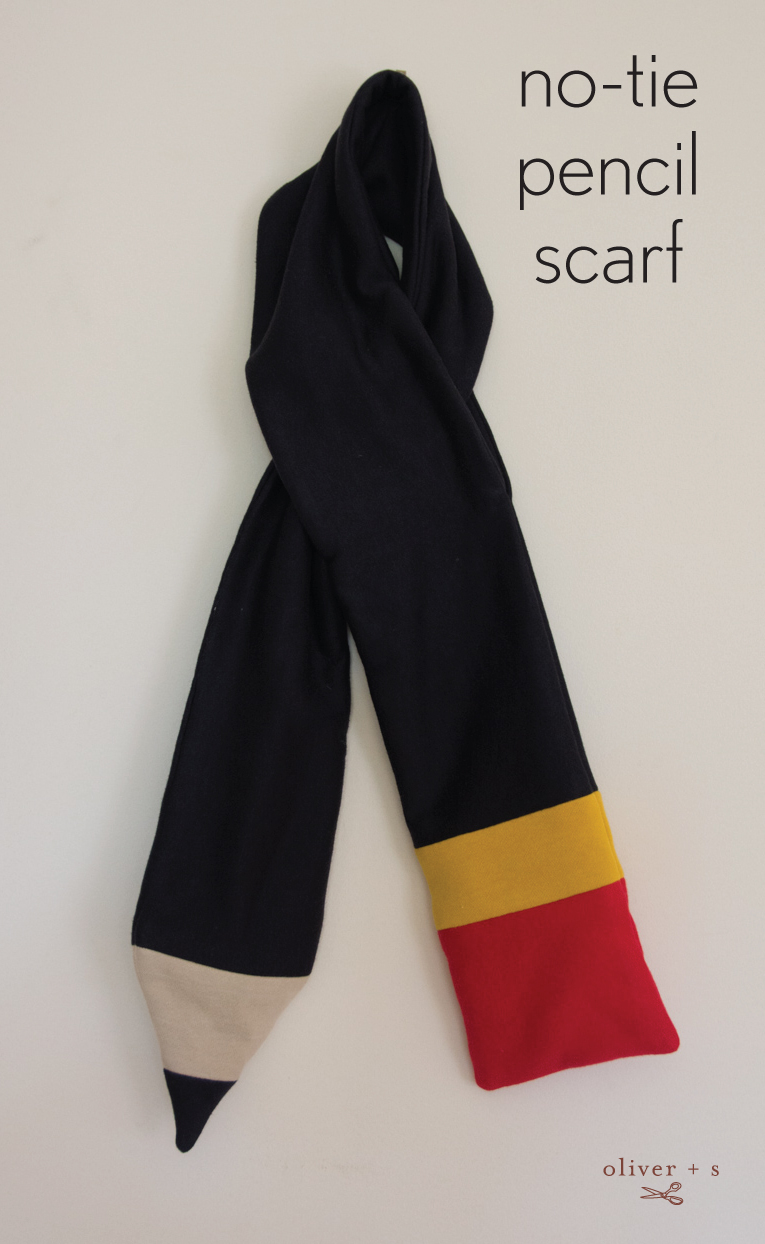
Hello Oliver + S sewers, Shelley from Bartacks and Singletrack here. I’m delighted to have been invited back to show you how I adapted the no-tie scarf from Little Things to Sew into a pencil.
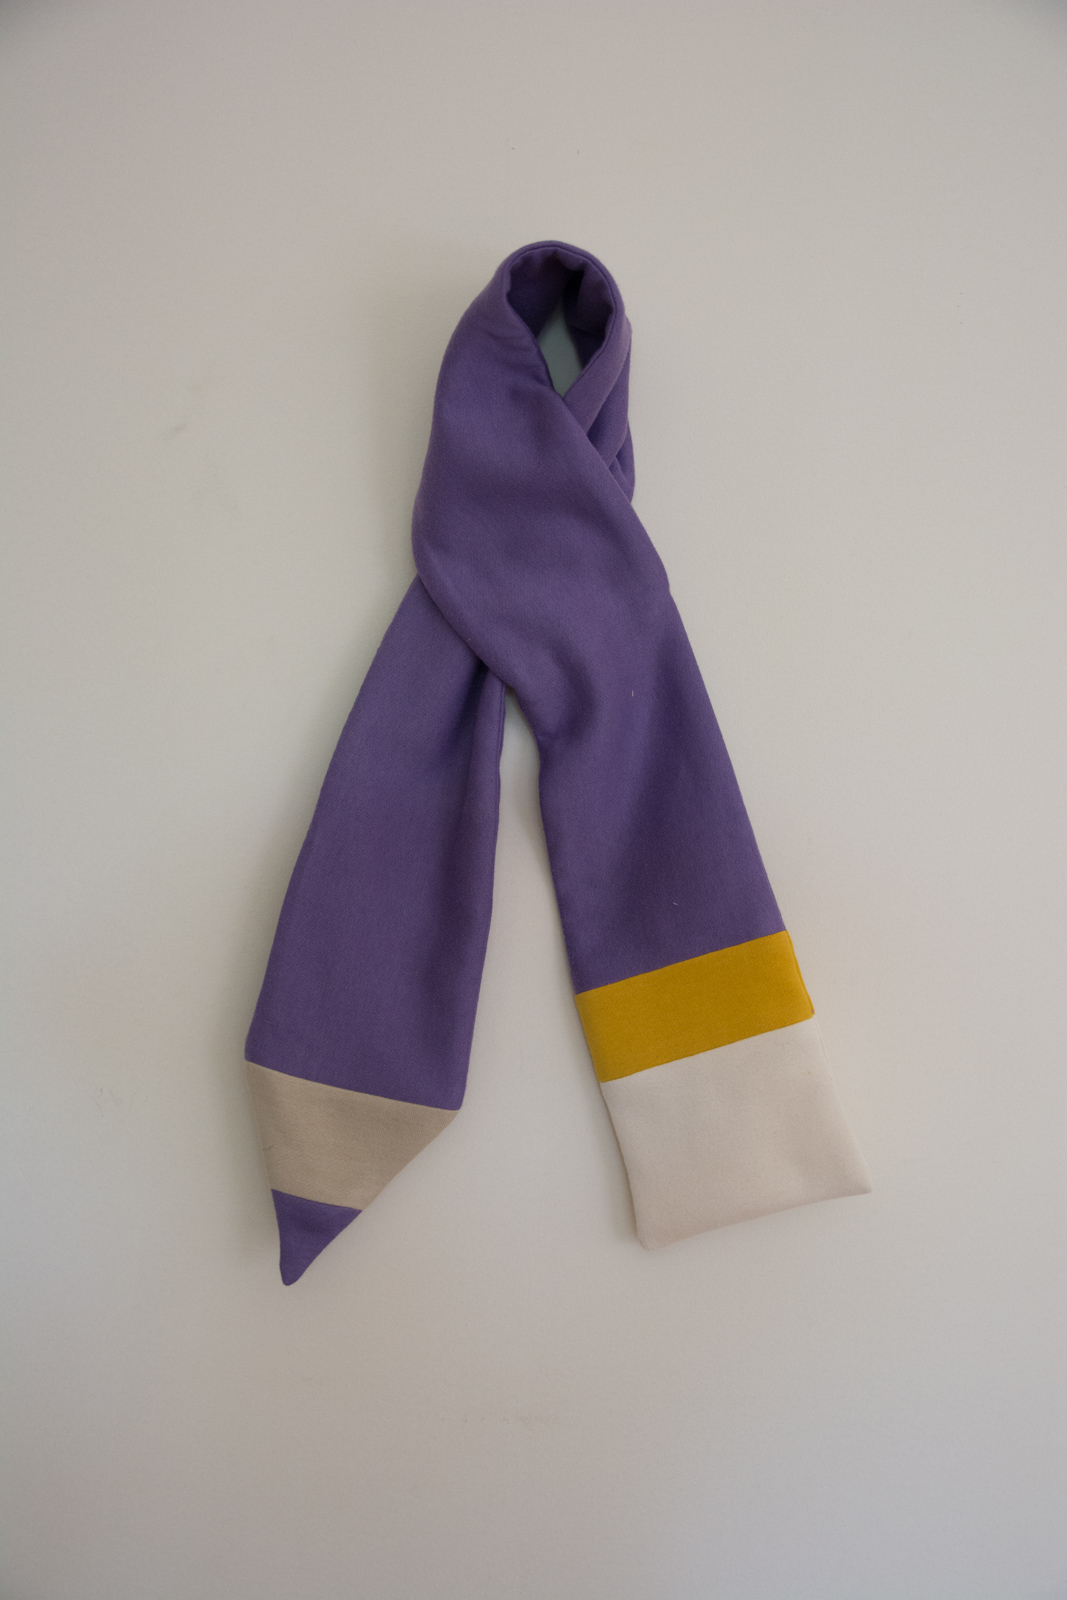
I was sitting in a coffee shop, flicking through a magazine, and I spied these gorgeous lambswool knitted pencil scarves on etsy (Sara Carr credit). I immediately thought of making a sewn version using leftover bits of sweater fleece from my son’s school uniform sewing.
By a coincidence of timing, you northern hemisphere folk are gearing up for fall and back to school, and my southern hemisphere kids fell ill and spent the weekend in bed. So, while I was housebound and ministering to the little sickies I had the opportunity to make another pencil scarf and create this photo tutorial for you (the kids say “you’re welcome (cough cough)”).
Forgive me if this is more detail than you need, but this was one of the few projects in Little Things to Sew (I crossed the finish line!) that really had me baffled first time.
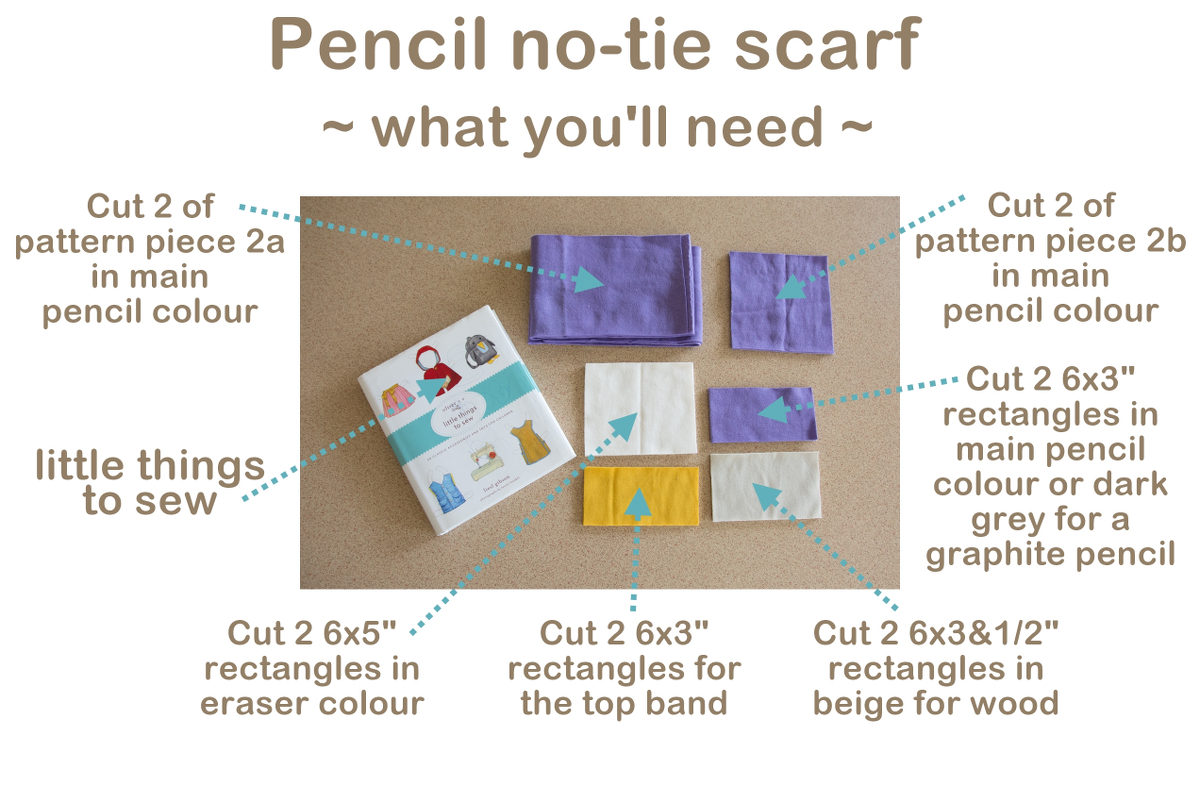
I’ve used sweater fleece for these scarves, but they can be made in almost any fabric. Just bear in mind that it can get pretty thick where the loop section is. If you’re using a thick fabric for the main scarf you might choose a lighter matching fabric, or even a lining fabric for the loop pieces (pattern piece 2b).
To keep the pencil looking balanced, I cut about 1.5” off the end of the main scarf piece (pattern piece 2a) at the end closest to the notches and loop markings. This will become the eraser end.
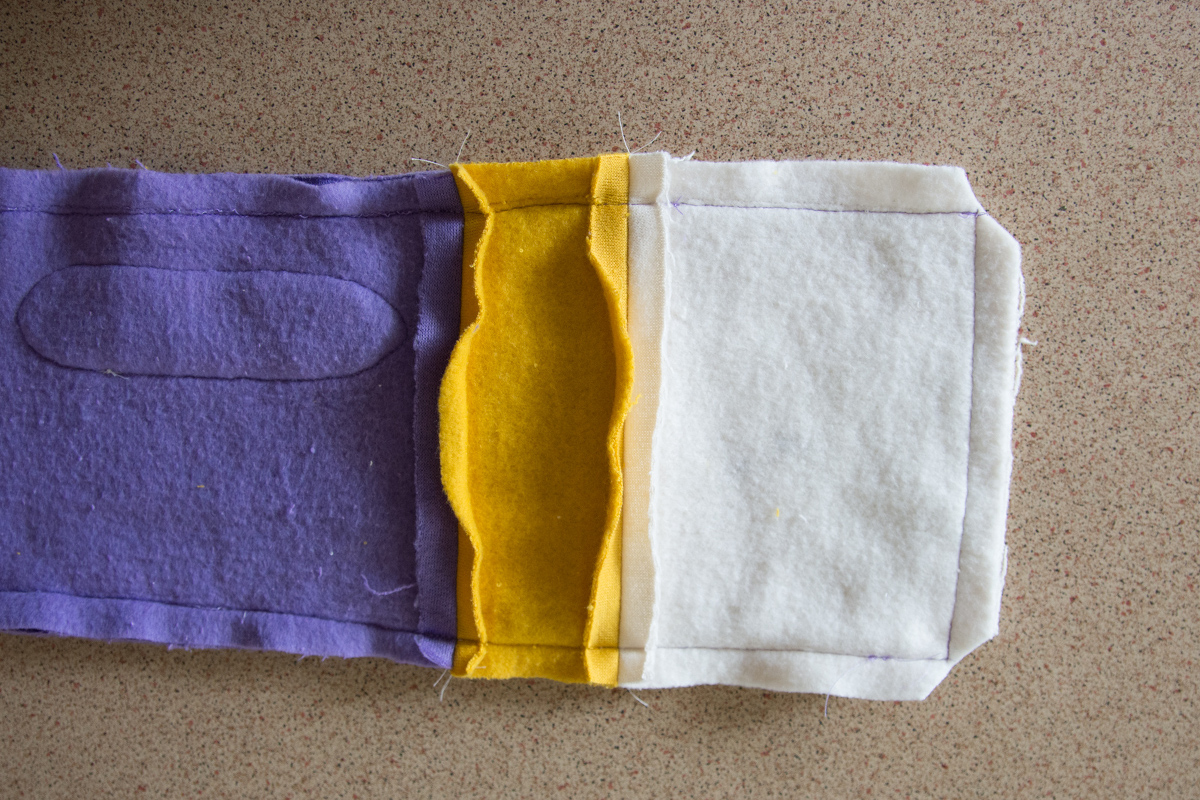
Starting at the eraser end, stitch the band piece to the scarf with a ½” seam. Then stitch the eraser piece to the band piece with a 1/2” seam. Press the seam allowances open.
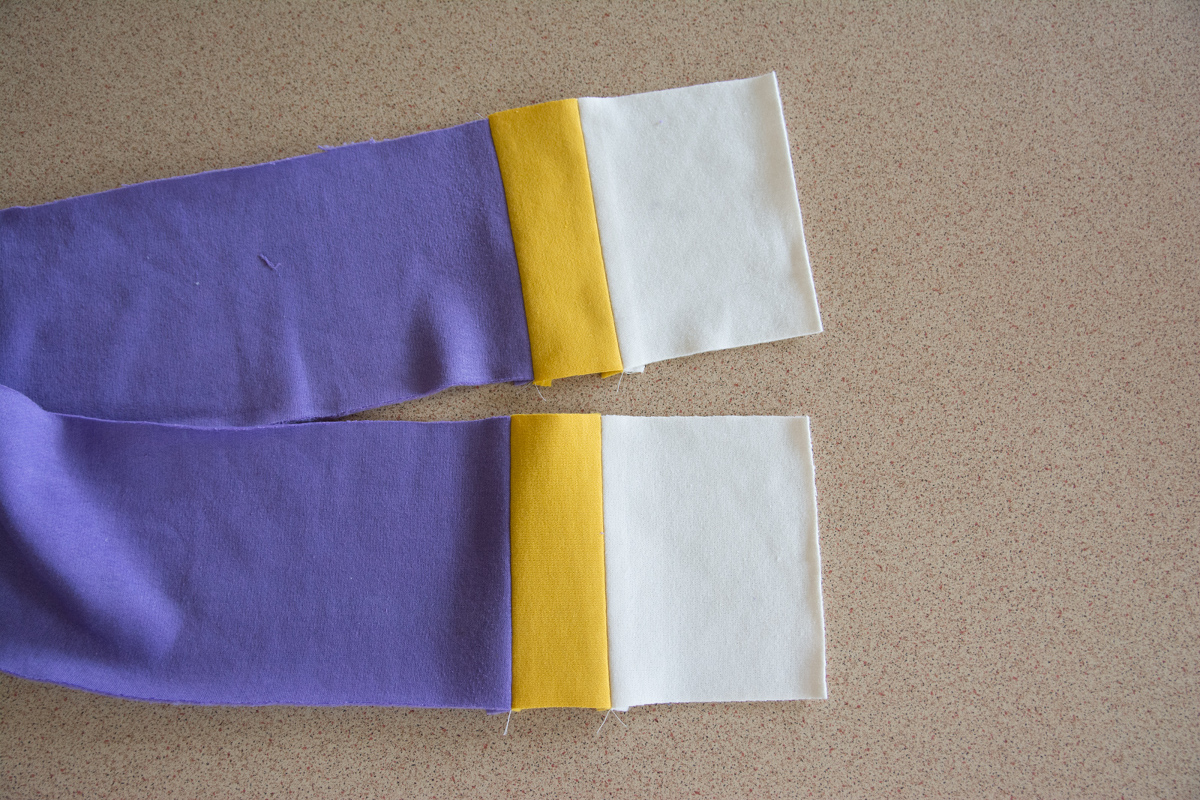
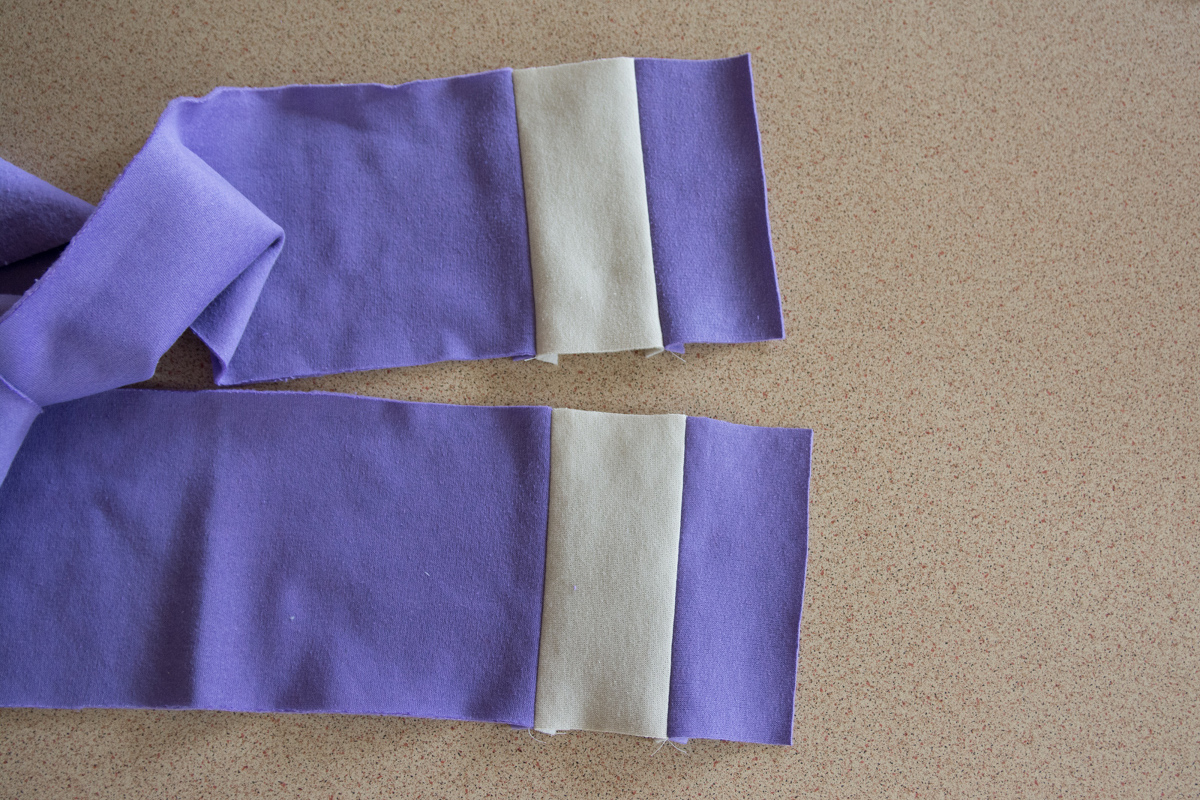
At the opposite end of the scarf attach the beige wood piece with a 1/2” seam, and then the pencil tip piece in the same manner. Press the seam allowances open.
Here, I got a bit sidetracked…. I’m hopeless at doing the same thing over without some tweaking and so I decided this pencil would have a name tag at the eraser end. Do you remember having a grown up shave a patch into your pencil and then you could write your name on the exposed wood? This scarf is to be a gift for a little friend, so I decided it needed a name tag. You can skip this bit if you like.
I drew a rectangle 1 1/2″ x 5” onto a scrap of the beige, wood coloured fleece using a washable pencil. Then I curved the ends to make it into an ellipse.

Using a basting stitch I sewed over my drawn lines. Then I cut around the ellipse with about a 3/8” seam allowances and clipped the seam allowances at the curves.
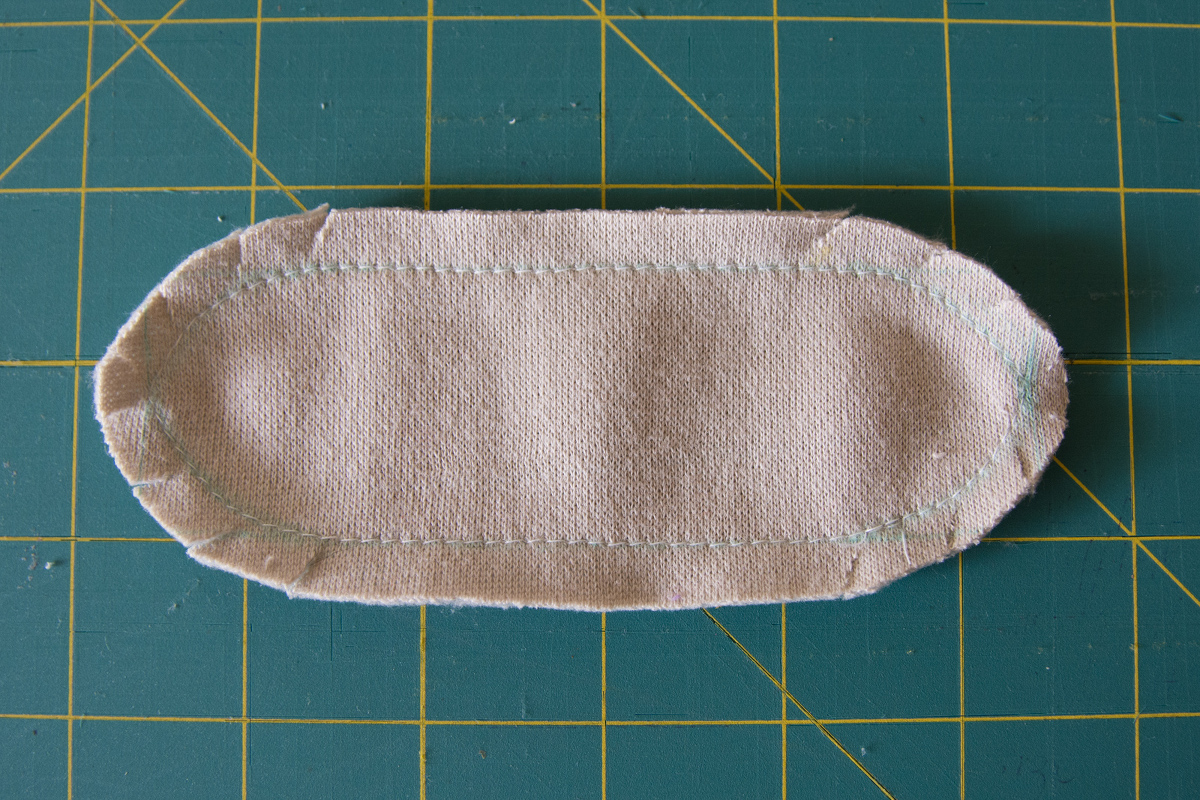
The basting stitch makes it easier to turn under the seam allowances. Turn them under as evenly as possible and press well.
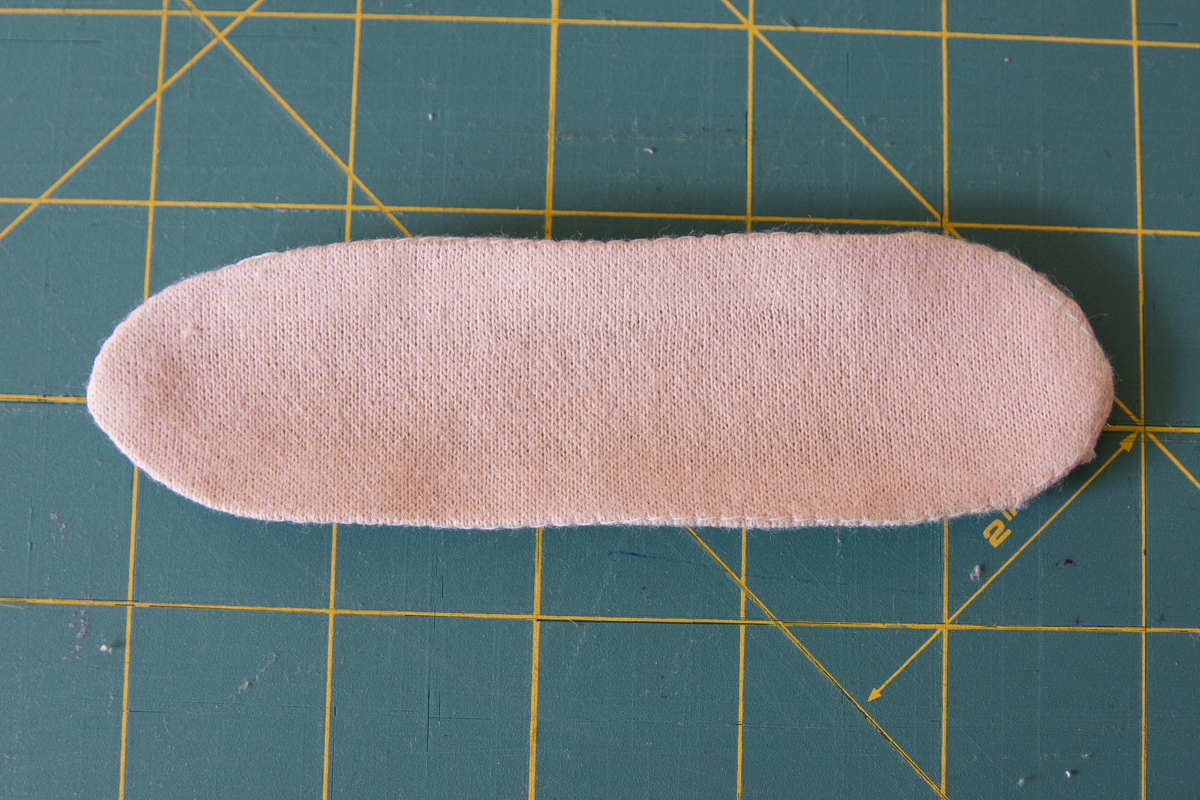
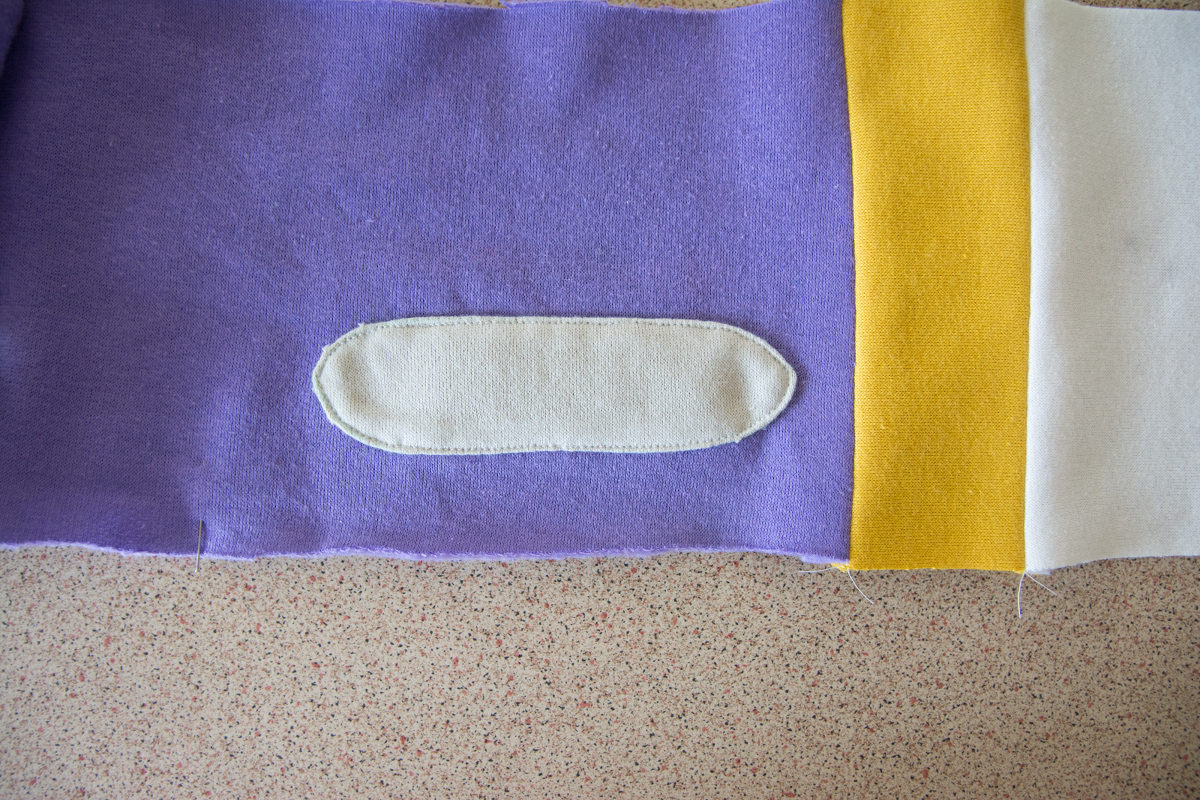
The name tag can then be edgestitched onto the scarf at the eraser end. Set it in from the long edge by about an inch so you’re well clear of the seam allowance. Also note the pin at the bottom left of the picture below which marks where the loop is about to be sewn. You need to keep your name tag clear of that area too.
As soon as I’d done this it occurred to me that it really should be done by reverse applique as then it would look more like it was shaved into the pencil. It bugged me that I hadn’t thought of that earlier, but I’m throwing it out there for you guys if you want to take it that little bit further!
Now, to continue the scarf construction as per the pattern instructions. This part can get a bit confusing as there’s a fair amount of turning things and you can lose track of whether you’re inside out or right side in, or whether that’s even any different…
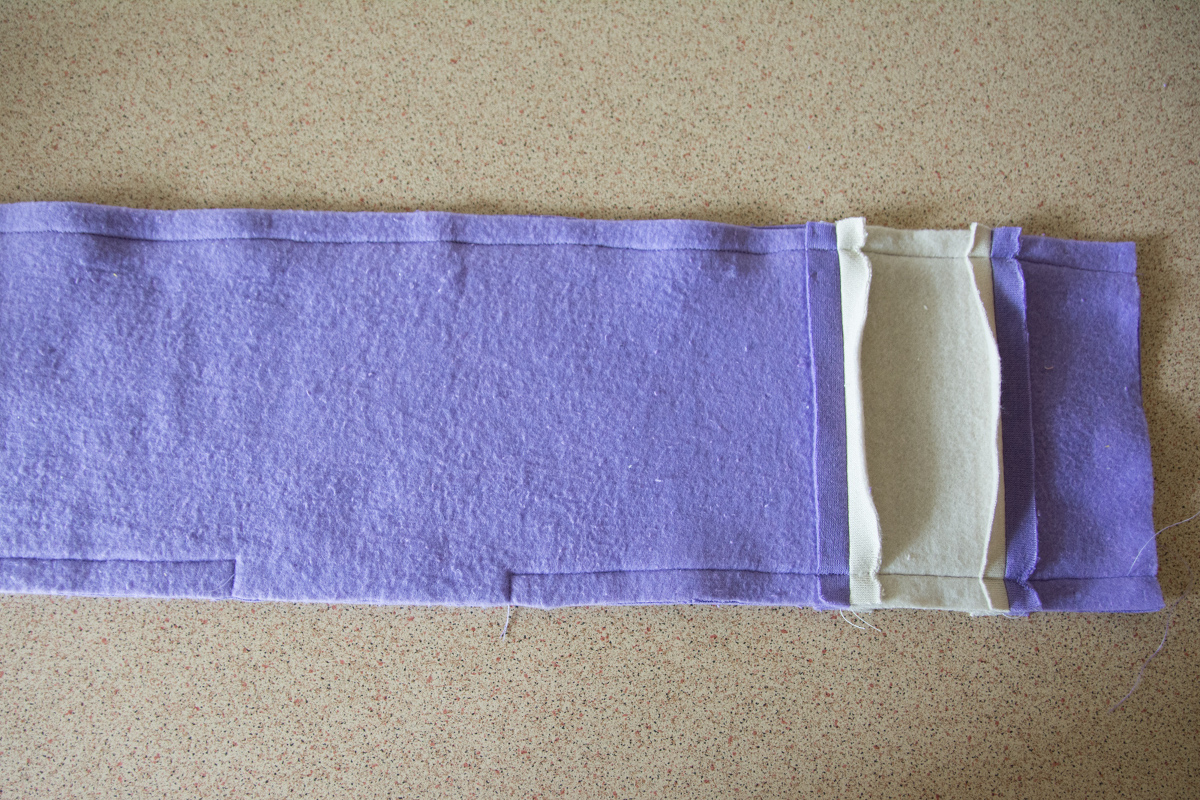
Attach the loop pieces to the scarf as directed.

Turn each loop/scarf section so that the loop pieces are now right side out. Put the two loop/scarf pieces together so that the scarf pieces have their right sides facing. Don’t worry about pressing the short ends as per the instructions as we’re going to sew them later.

Stitch the long edges of the scarf together as per the instructions, but leave a gap about as wide as your hand on one side near the pencil end of the scarf. We’ll use this for turning the scarf right side out after sewing closed each end later on.
Turn the scarf completely right side out through one of the open ends. Now, start turning the scarf inside out again until the edges of the loop pieces appear. Pin them together and stitch them in order to close the loop.

Pull that back to being completely right side out again, and then start in from the other end. Turn the scarf inside out until you get to the loop edges, then pin and stitch them together. You should now have a completed loop. Turn the scarf right side out and admire your work (or go back and stitch closer to the dots if you left gaps like I did!)
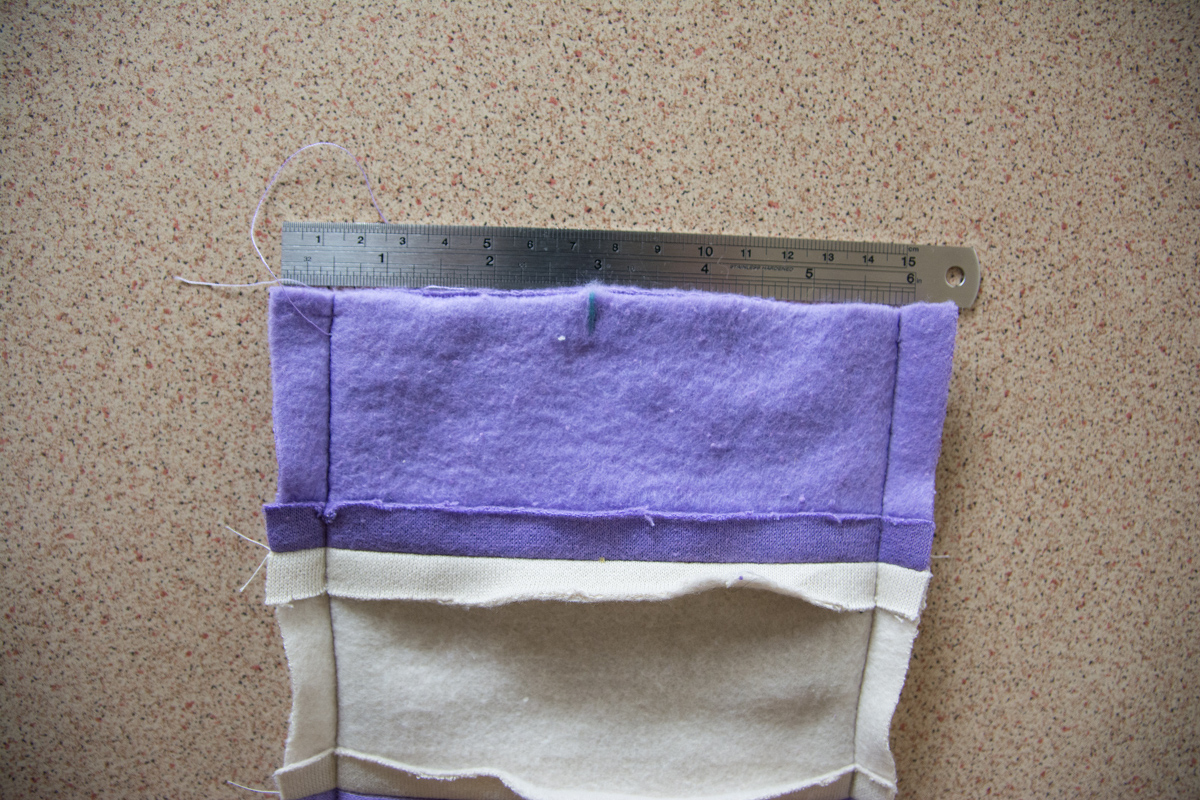
Turn the scarf inside out again to finish the ends. At the eraser end of the scarf, sew across the short end with a 1/2” seam. Then trim the corners ready for turning.
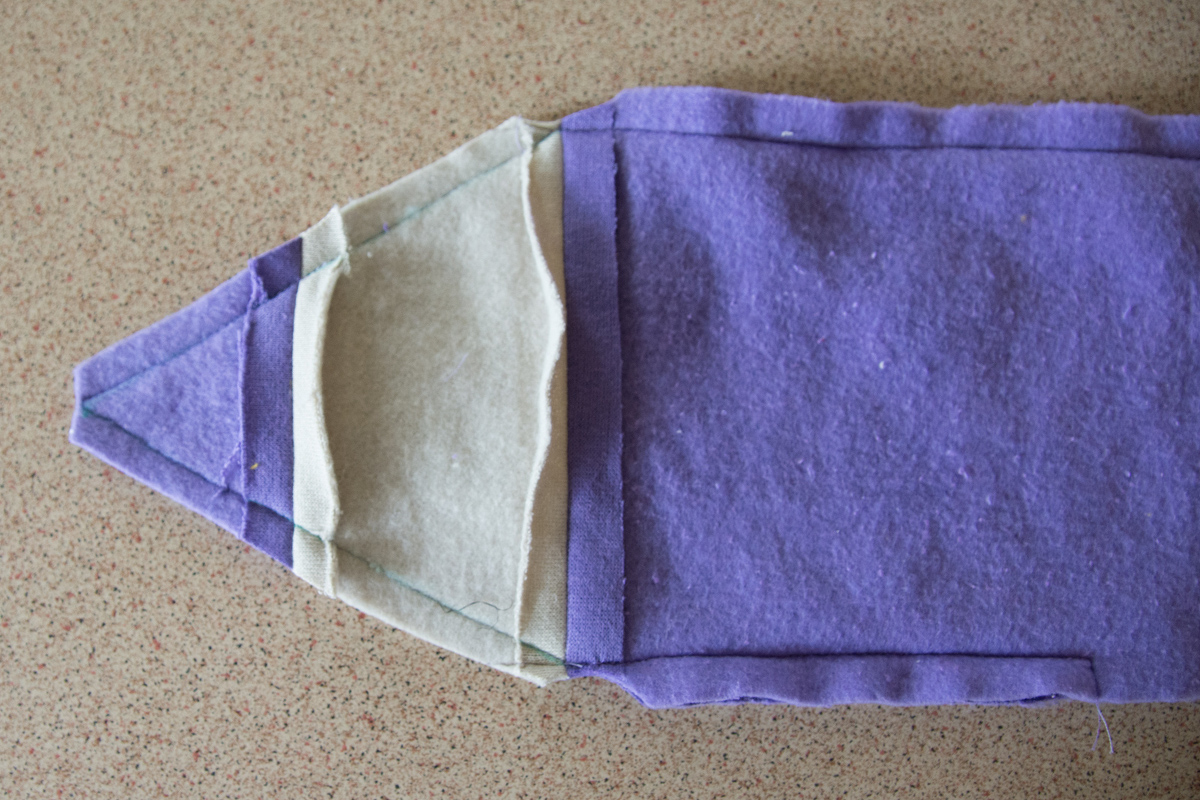
At the pencil end, measure halfway (3”) across the short end and make a mark that is ½” from the raw edge. This will be the pencil point.
Now draw a line from this point to the seam that joins the main scarf section to the beige wood section. End your line where the two previously sewn seams intersect.
Draw the same line on the other side.

Starting on one long edge, stitch along the drawn line. Pivot at the point and then stitch along the second line to the opposite long edge.
Finally, clip the corners in readiness for turning the scarf right side out again.
Now that both ends are sewn closed, turn your scarf right side out using the gap you left in the side seam. Handstitch this closed with a slipstitch and you’re done!
If you added the name tag, you can write on it with a fabric marker, or handstitch a name on it using embroidery thread.
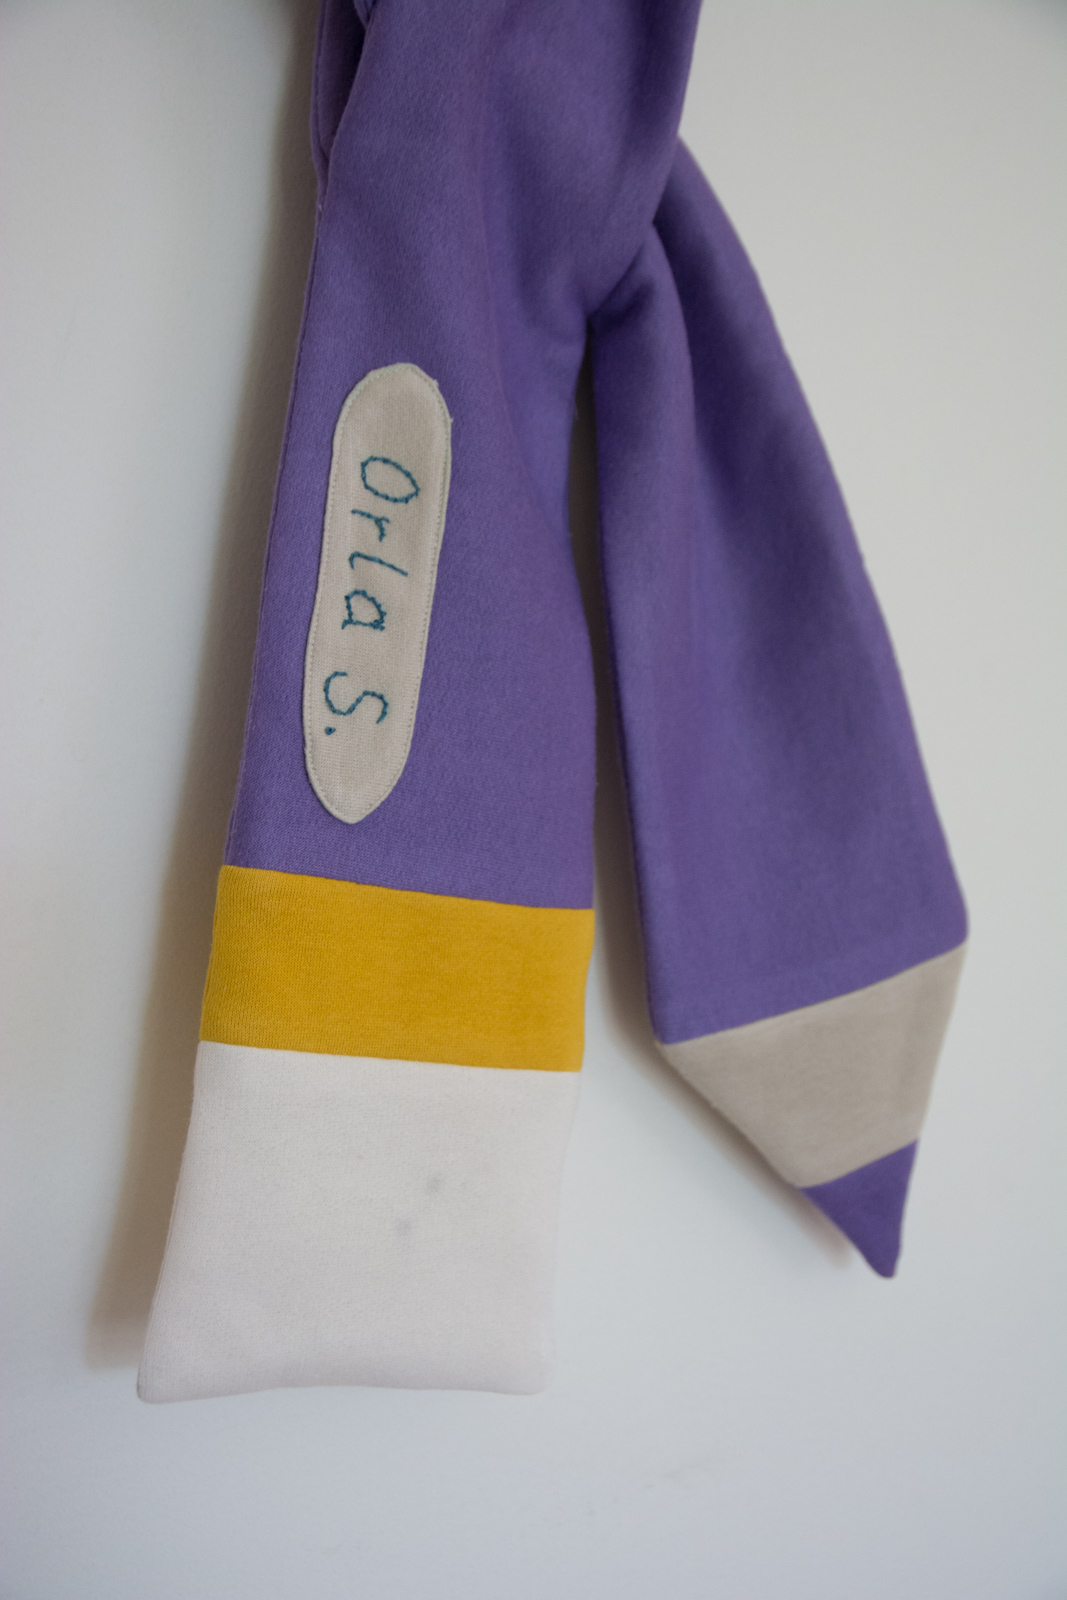
There you have it, a no-tie scarf as a pencil! Perfect for back to school, or just for kids like mine who like to write on the walls!
What a cute idea Shelley! I love that’s it personalized too. So annoying when things get lost in the mountain of winter clothes at school.
Darling, Shelley! And I had never heard of shaving off the paint to write your name. What a great idea!
OH, SO CLEVER. . . UNIQUE TOO, A LONG PENCIL SCARF! Simple & EASY-TO-FOLLOW sewing instruction on your “NO TIE” Pencil Scarf tutorial, Shelley. To know you made this as a gift to a young friend, how generous … who’s certain to get many compliments when wearing to school or any place. I like the name added to the scarf. THANKS for sharing. I’m telling 2 nieces who sew because they would probably like to sew this for their kids. Sarah
Super duper cute! I’m a teacher and hopefully can find the time to make one for myself.
That looks great Shelley! We used to have a shaved off bit at the end of the pencil with our names on too (maybe it’s a Melbourne thing!).
Adorable scarf, Shelley! Thank you for sharing how you made it.:)
I have to say I’ve never heard of shaving off the paint either, but I thought maybe it was something done, “after my time” and not “back in the day”, LOL! Maybe it IS just an Aussie thing?
the scarf sure is cute though. Thanks so much for the tute. May have to make for a church auction, since I don’t have any little ones to sew for at this time. Hopefully soon!
Hi Shelley, I never see this type of idea in my life and its incredible and the method you saw us it just excellent and I like to make for someone I am sure he would like to wear this way. Thanks for sharing this amazing idea.