Today we welcome Kristi from SweetKM. Kristi sews beautifully, knits beautifully, and runs a shop where she sells adorable knitting patterns. Kristi is here with a clear and easy-to-follow tutorial to lengthen the Sunny Day (or any basic shorts) pattern. Thanks, Kristi!
My son likes his shorts at a very conservative just above the knee length that often requires adding an inch or two to a pattern. After sewing him a few pairs of the Oliver + S Sunny Day Shorts, and making the same modifications to each pair, I thought I’d share my notes for lengthening this pattern. This way I can refer back to them the next time (and there will be a next time) I make these shorts, and maybe you will find them helpful.

While I’m using the Sunny Day Shorts pattern as an example, the same steps can be taken with most any basic shorts pattern.
Here’s the tutorial:
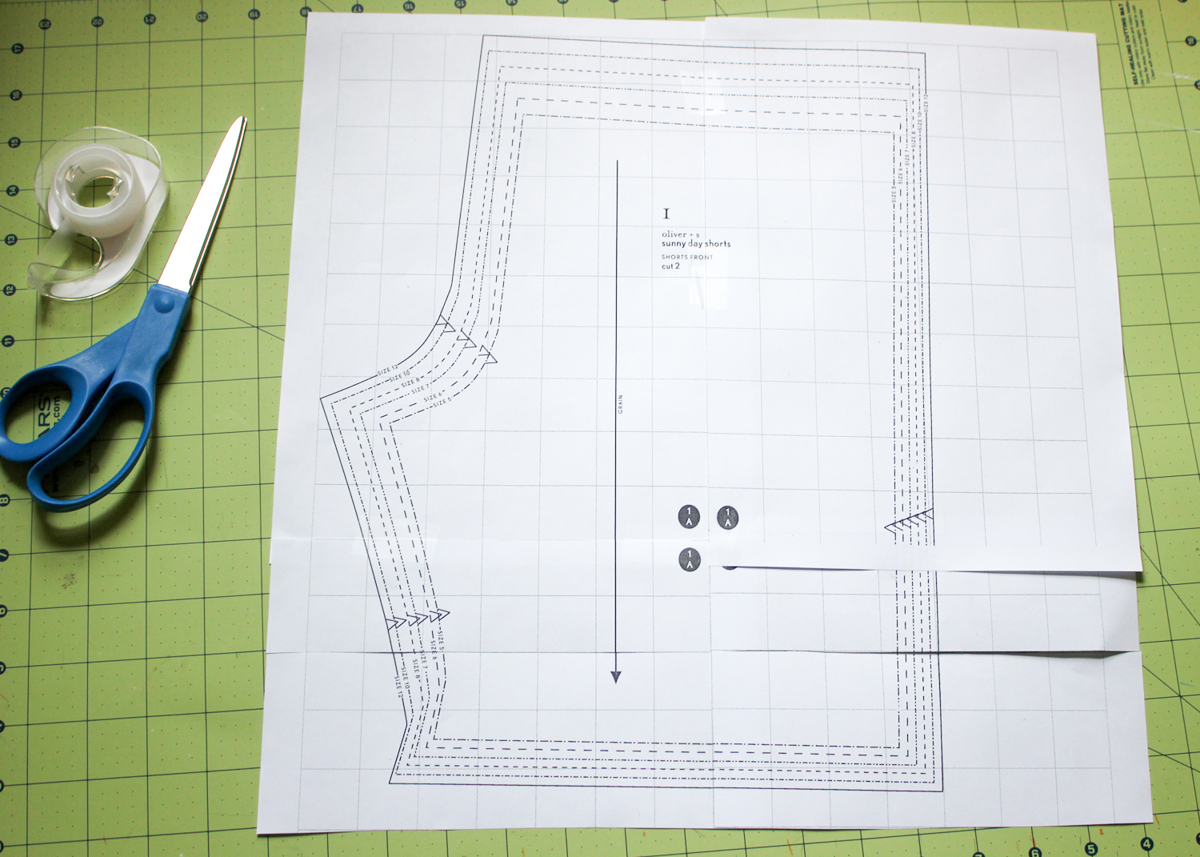
1. Print and assemble your paper pattern as indicated in the pattern instructions.
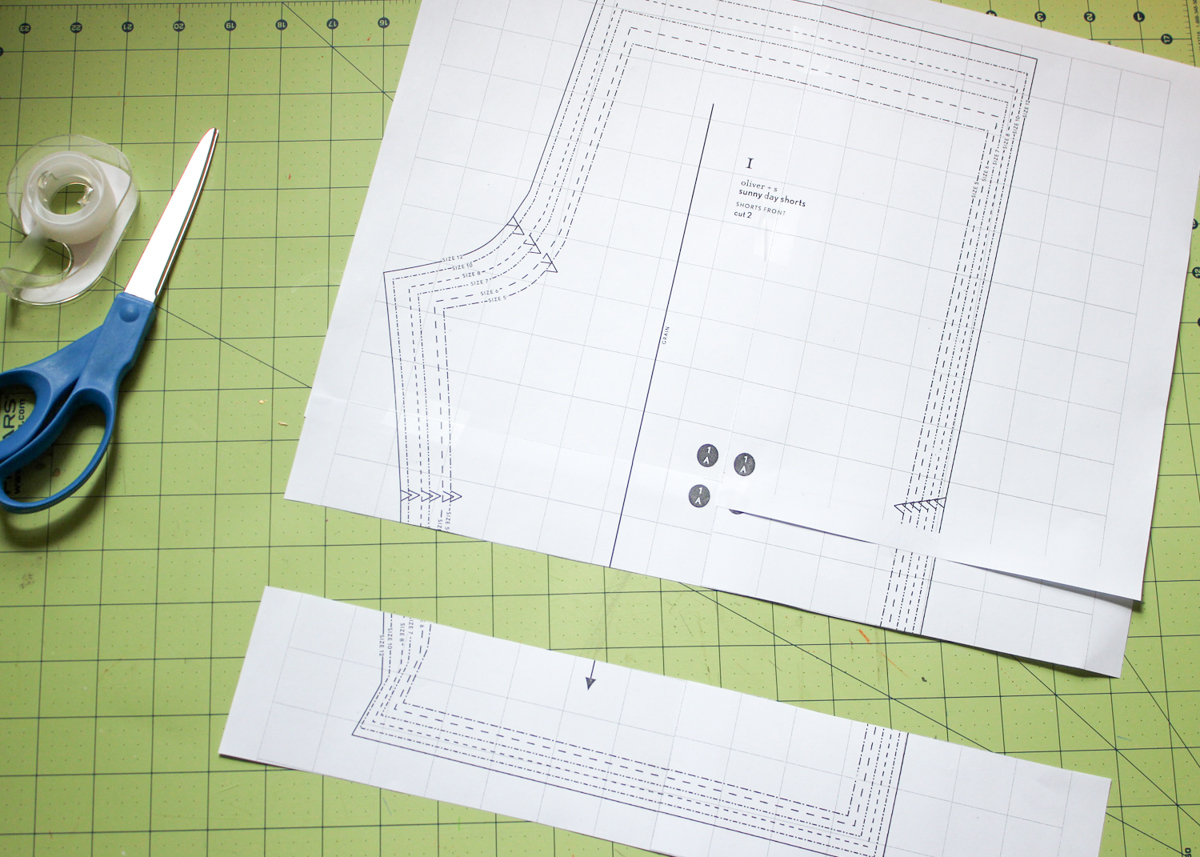
2. Cut across the grid about 1 1/2″above the hem edge of the pattern piece. I cut between the notches and the fold for the hem. Adding to the middle of the pattern piece, rather than the bottom edge, allows you to add length without changing the size of the leg opening.
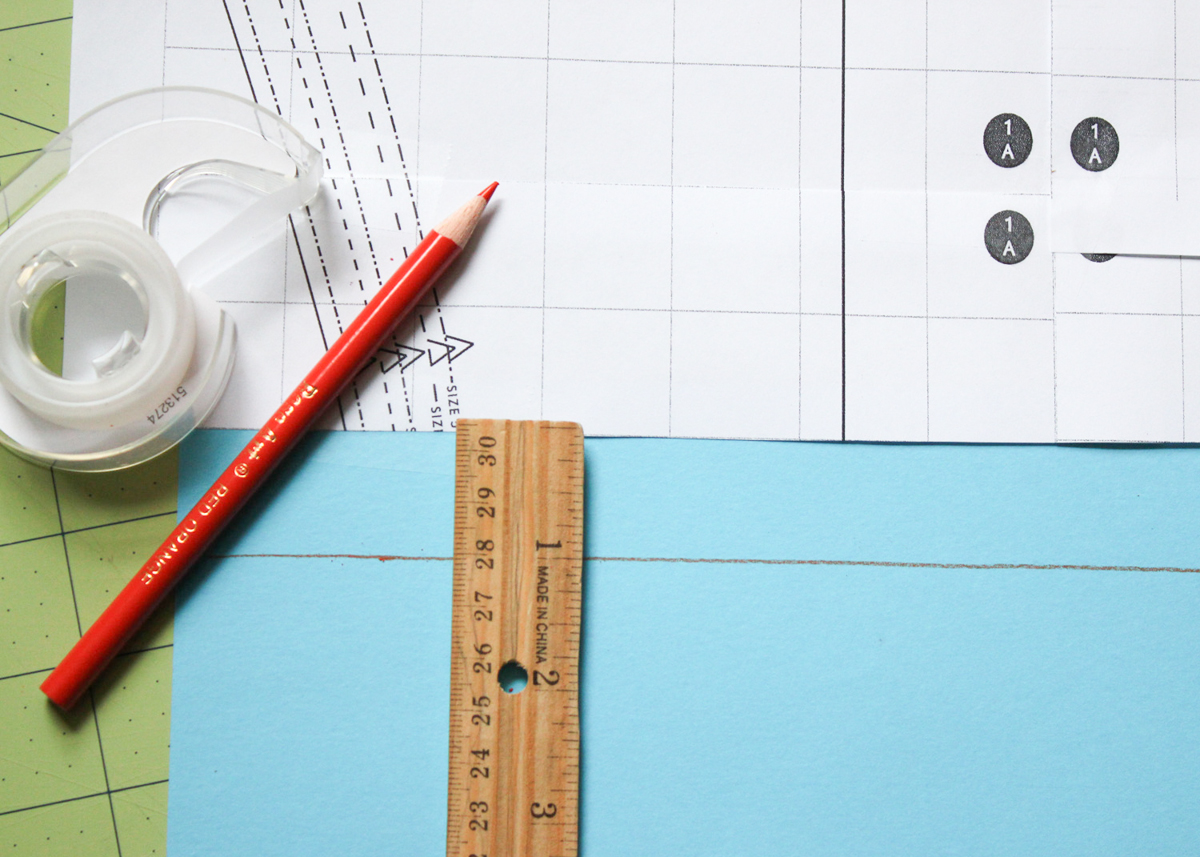
3. Attach a piece of plain paper (here shown in blue) to the back of the upper pattern piece that is at least as wide as the pattern piece, and a bit deeper than the amount of length you would like to add. At the left edge measure down the amount you want to lengthen the shorts (in this case 1″). Do the same thing at the right edge and draw a line between them that will be parallel to the pattern grid.
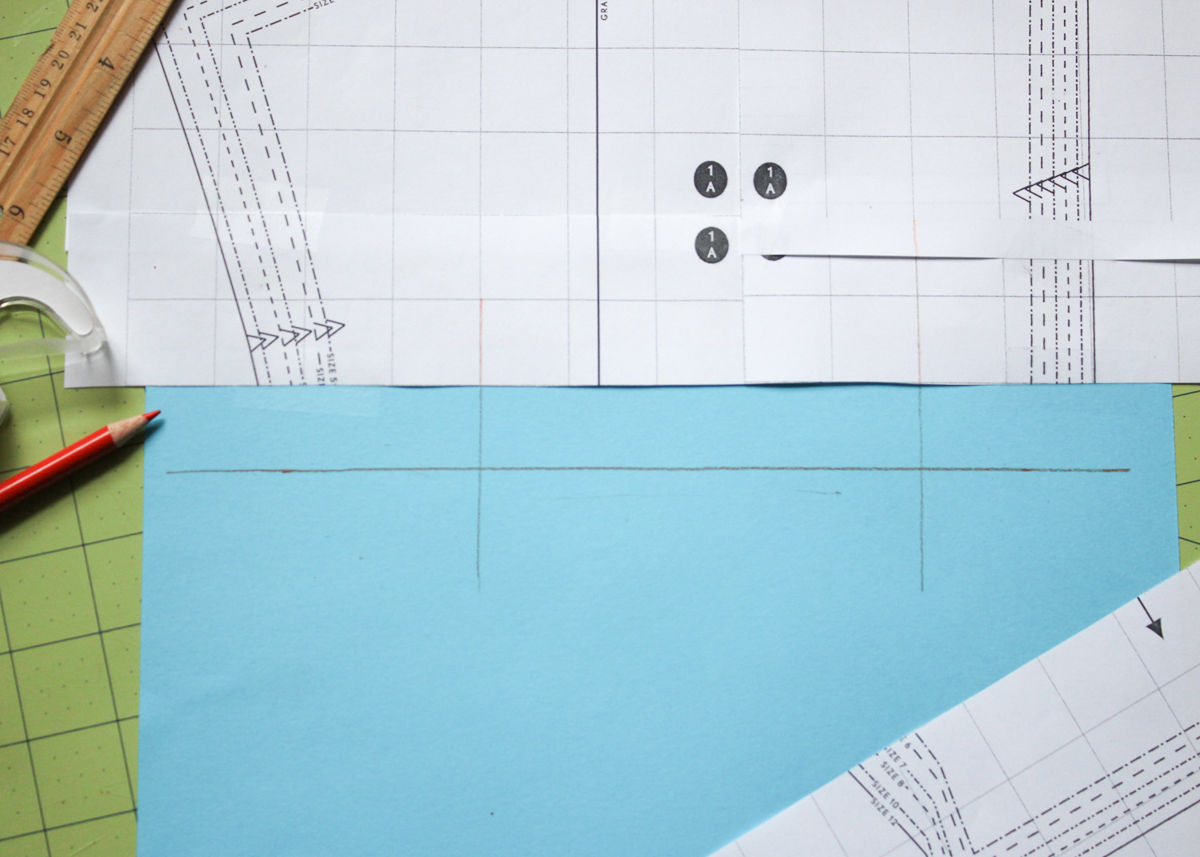
4. Line your ruler up with two of the vertical grid lines and continue them down onto the plain paper and across the horizontal line you have drawn.
5. Use those vertical lines to attach the lower pattern piece to the extension piece along the horizontal line you have drawn.
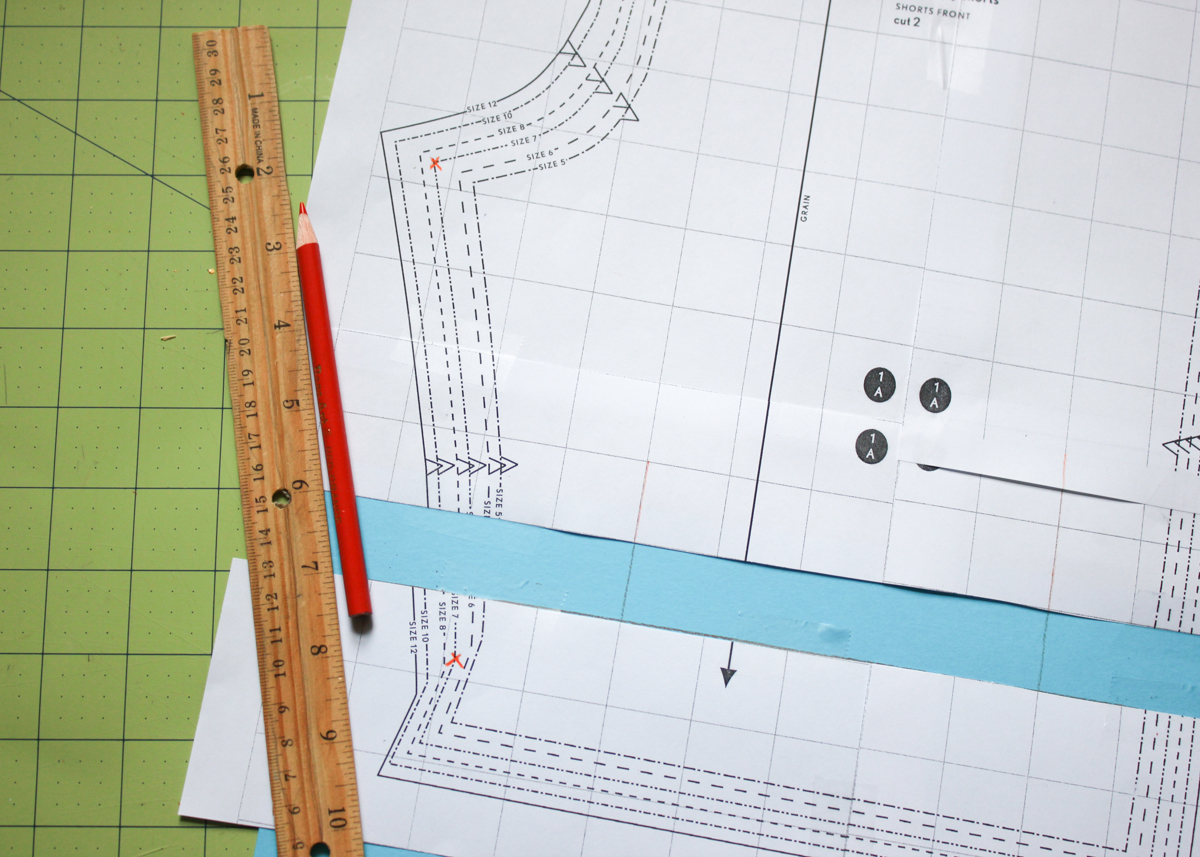
6. At the left edge of the pattern piece, use a straight edge to connect the point at the crotch with the point of the hem fold. At the right edge of the pattern piece, continue the straight line between the upper and lower pieces in a similar way.

7. Repeat this process with the front pattern piece.
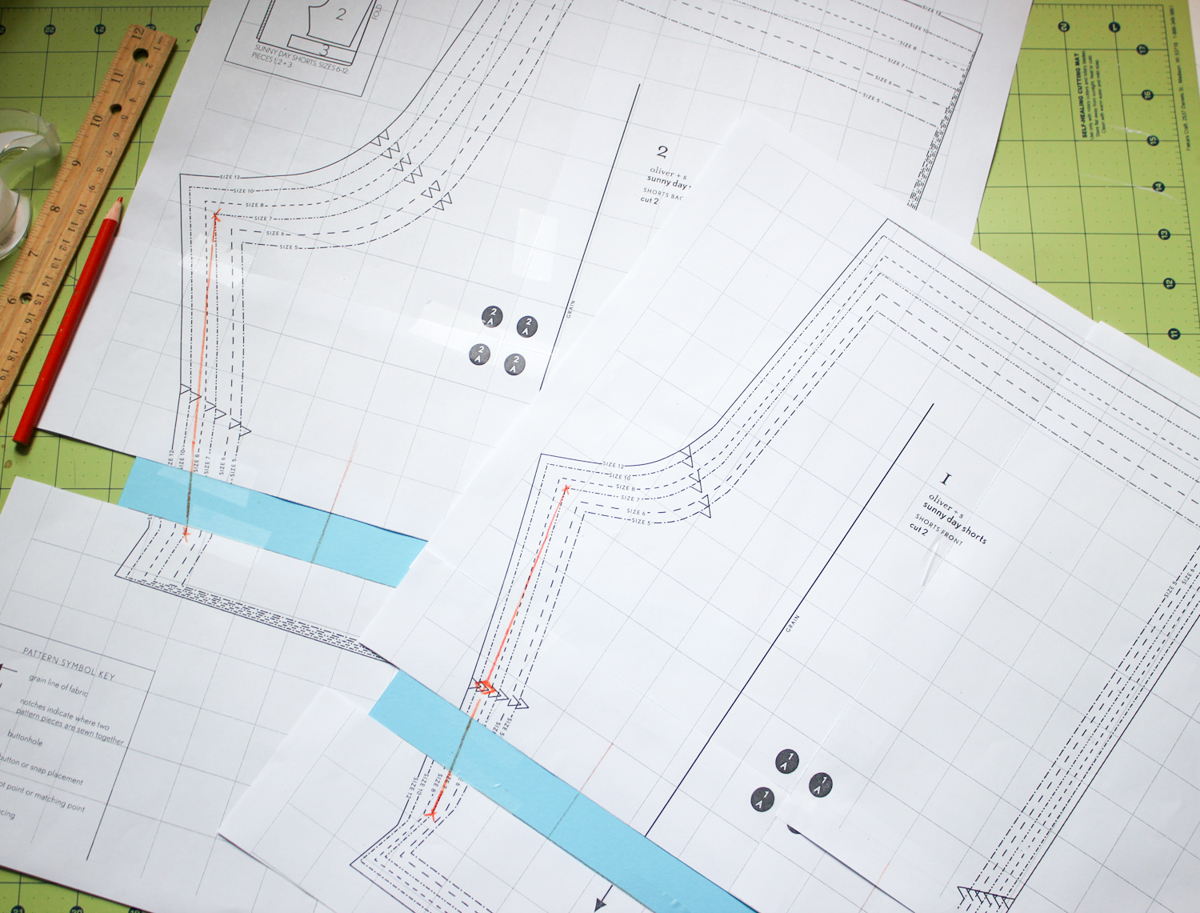
8. Cut out the pattern in the size you want to make.

Sew the shorts as indicated in the pattern instructions.
Thanks so much for having me! Come visit me over at SweetKM anytime.
I’m printing this off to add to my pattern box. Short shorts don’t suit my boy, but i wasn’t certain where to length the shorts so I previously opted for a very narrow hem. Thank you for a much better solution!
Beautifully presented Kristi.
Great Janell! So glad you found my tutorial useful.
Hi Kristi, do you think you could show us what the modified back pattern looks like on the right please?
So I print out my Sunny Day Short pattern. My 7 year old has no hips or butt, so I need a size 5, but I know it is too short. I google “lengthen short pattern.” This is the #2 search result. Why do I even bother to google when… the answer is ALWAYS here! 🙂
Hi,
Can i use this method to lengthen for a long pants?