It’s been so cold this winter! We’re all wearing multiple layers of clothing to keep warm, especially when it’s time to go outside. I counted the other day and was wearing three shirts, two pants, and two sweaters. So spring will be a welcome arrival!
But in the meantime, I thought it might be nice to sew some warm flannel-lined trousers for a little friend of ours, since two layers of warm fabric might eliminate the need for two pairs of pants.

I used our Art Museum Trousers pattern for this tutorial, but any pants patterns with a separate waistband will work. You’ll need enough fabric for the outside of the pants (I used corduroy for extra warmth), and the same amount of flannel for the lining.
Are you ready to go?
To get started, you’ll cut all the pattern pieces for the Art Museum Trousers pattern in the regular manner. If you’d like to be able to roll the hem of the pants to make cuffs and to let the flannel show as well as allowing for growth, I would suggest adding 2-3″ to the hem of the front and back pieces.
To make the flannel lining, you’ll make a quick pattern alteration using the front pants piece and the pocket piece:
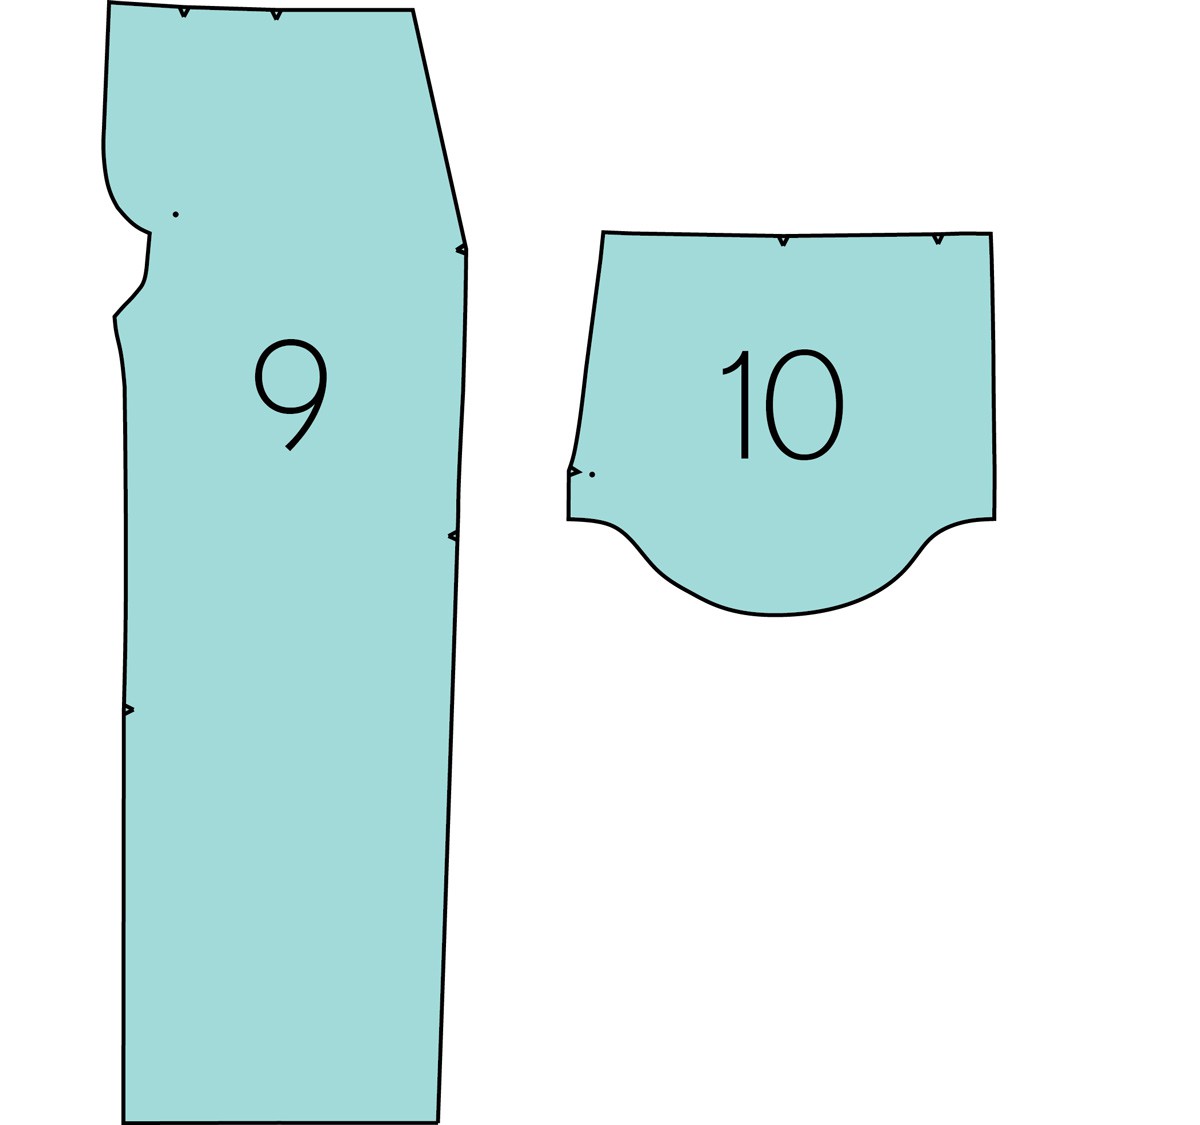
Begin by folding the pocket in half as shown:
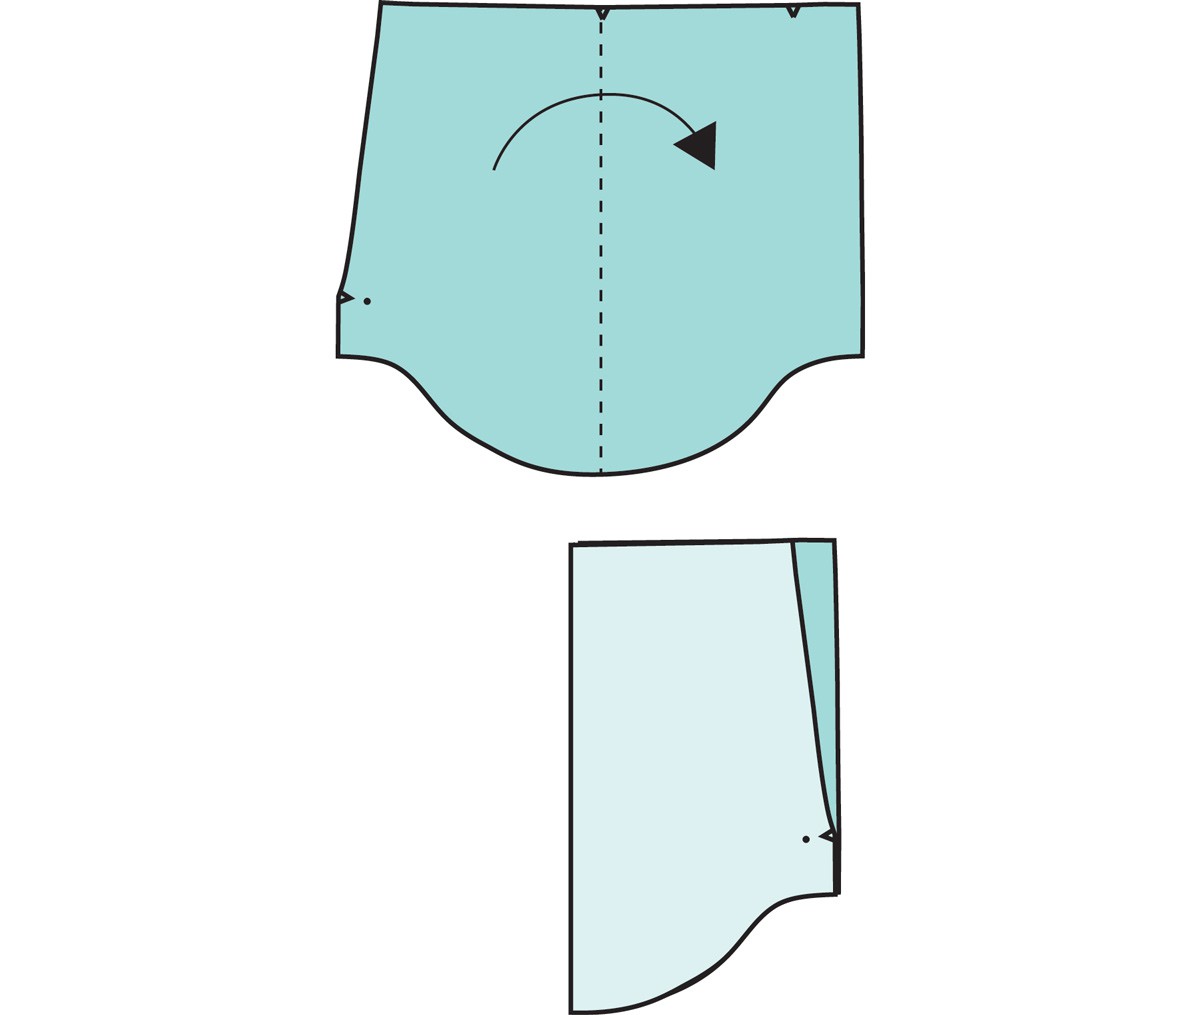 Then slide the folded pocket pattern piece under the front pants pattern piece to make a whole front pants piece:

Now you have a front pants pattern piece without a pocket. 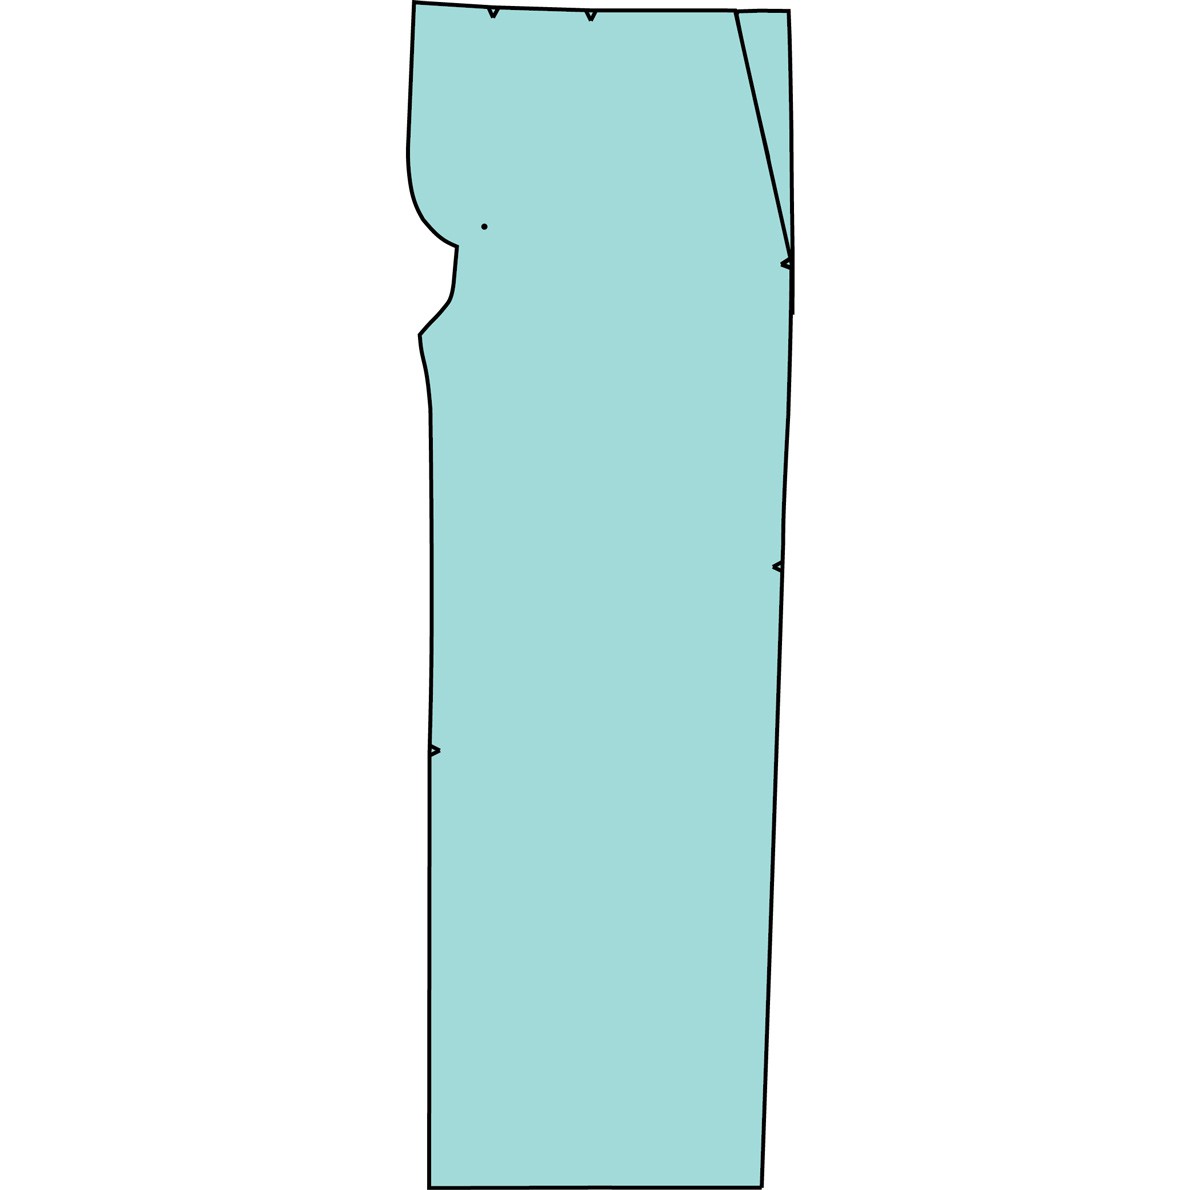
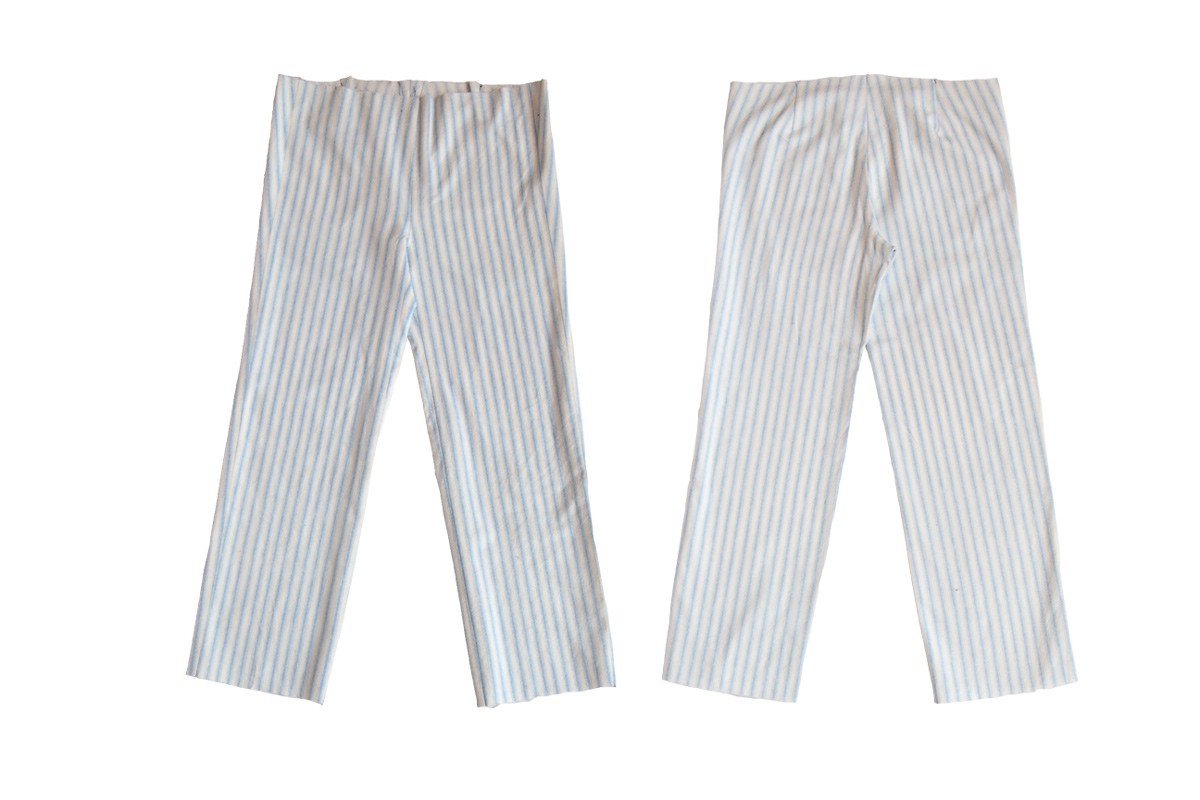
Now you can cut the flannel lining: 2 fronts and 2 backs (plus one flannel waistband piece, which you may have already cut with the other pieces). Don’t forget to add extra length (2-3″) to the hem of the lining as well! I like to cut the lining 1/2″ shorter than the outside pants, but you can also cut them to be the same length if you prefer.
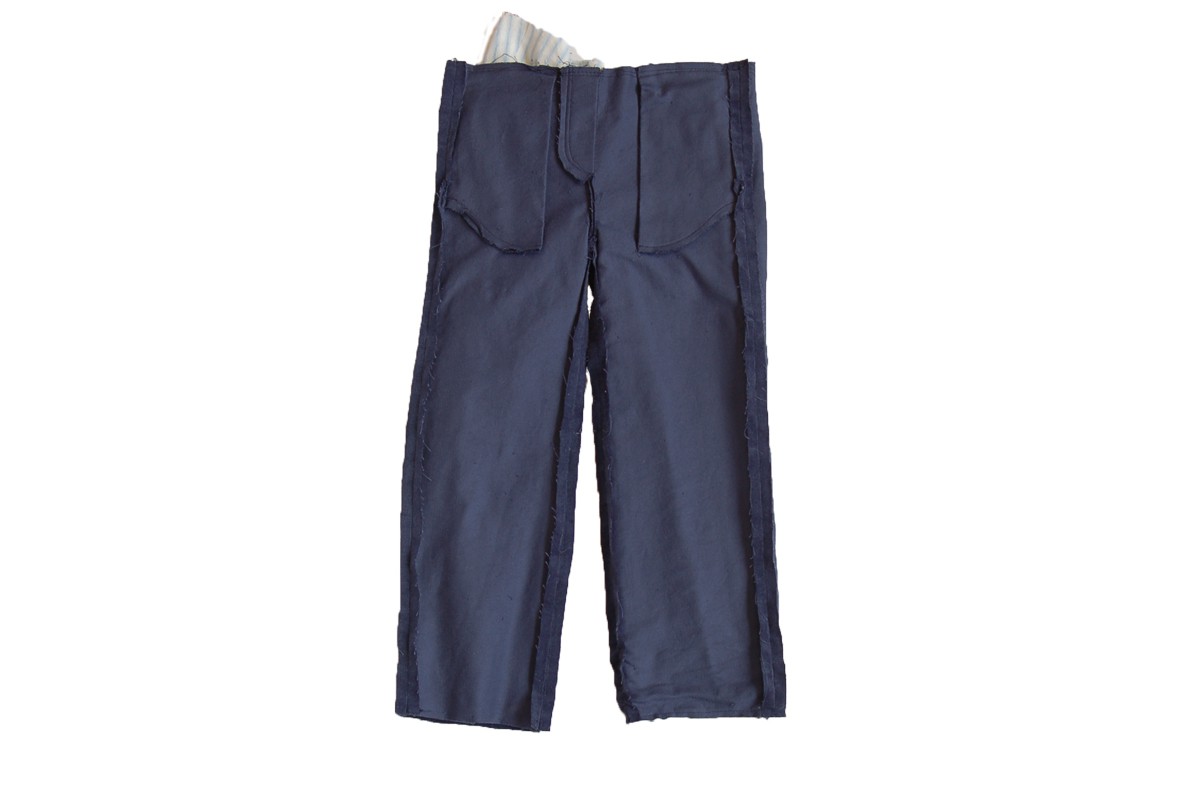
To sew the pants, you’ll follow the usual directions to assemble to exterior (Fabric A) pants up through the step where the waistband is attached. The pants will look like this, with pockets and belt loops sewn:
 Sewing the lining is much faster and simpler since you won’t be making the pockets or belt loops, but you follow the same basic assembly instructions as the pants:
Once your lining and outside pants are assembled, now comes the fun part! First you’ll stitch the lining to the pants at the hems, one at a time. To sew the first hem, turn the pants inside out and slip the right-side-out lining inside so the right sides of both fabric are together. Pin the lining to the pants at one leg and stitch around the circumference of the hem with a 1/2″ seam. Only one leg can be sewn this way because if you stitch both legs you won’t be able to turn the pants right side out and tuck the lining inside. So I’ll show you a special trick to hem the second leg with no hand stitching.
 Turn the pants right side out and and press the hem of the first leg.

If you’ve sewn our reversible Firefly Jacket pattern, you’ll be familiar with this little trick, which we use to stitch the sleeves. First you’ll reach inside the pants and pull the un-sewn pant leg out the top of the pants so just the pant leg is inside out. Then pin the lining to the hem, with right sides together, taking care that the lining isn’t twisted. You’ll be making a little cuff at the bottom edge of the lining in order to pin it, and in the process you’ll be forming a doughnut shape with the pant leg and the lining leg. It will look all wrong and impossible. But if you check it before you stitch (which I recommend, just to be sure nothing is twisted) by pulling the pant leg right side out again, you’ll see that the pants will be neatly hemmed once this crazy seam is sewn. Turn the leg inside-out again, and stitch the loop, working your way around the tube. It’s a bit of a puzzler at first, but it’s easy to sew once you understand what’s going on.
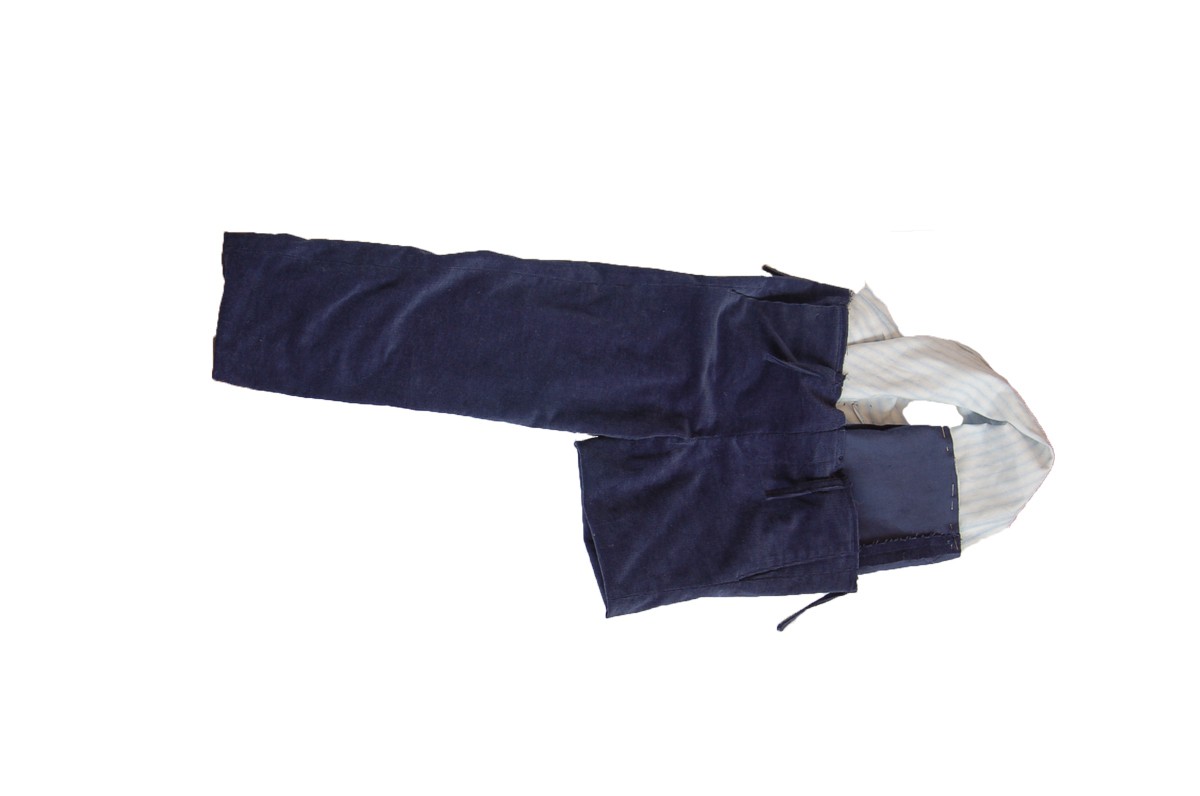
Turn the pant leg right side out and press the hem. See? Nicely finished hems. Then smooth the lining and pin it to the pants at the waistband.
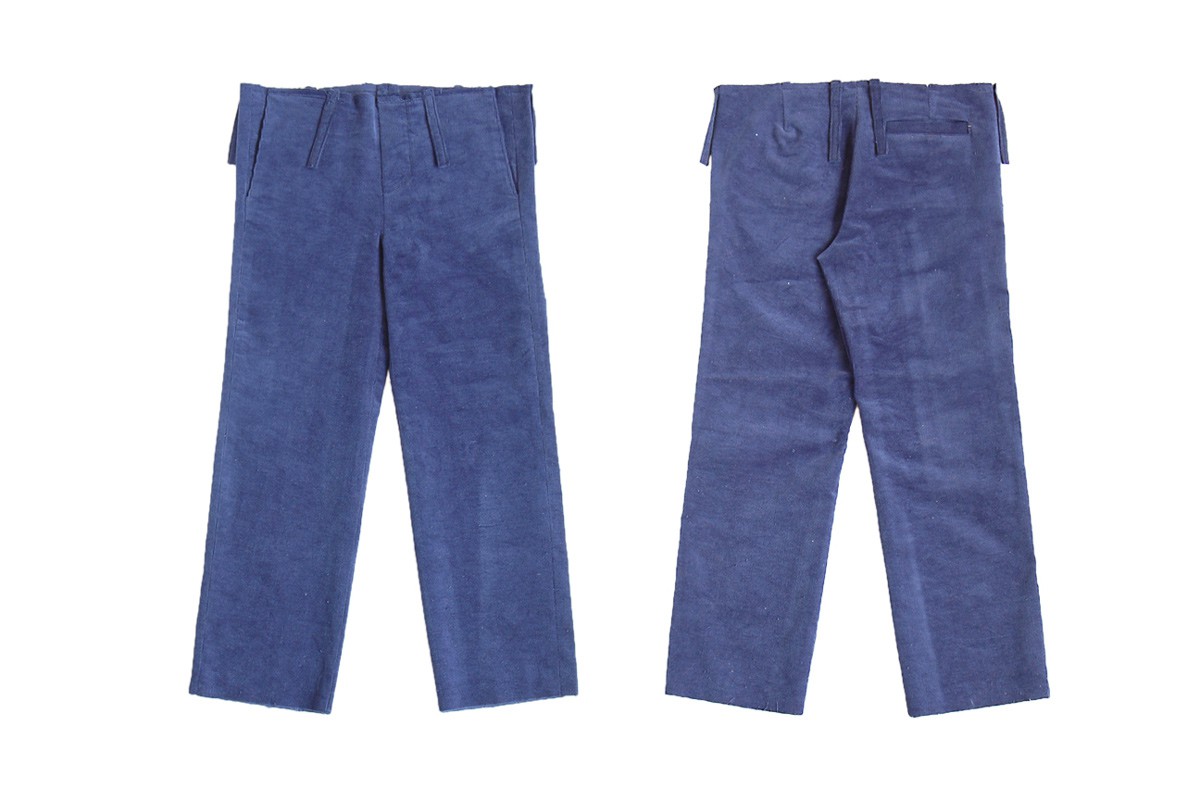
Now you can continue to follow the instructions to attach the waistband and finish the belt loops in the regular manner. And that’s all there is to it! Cozy flannel-line pants with just a few extra steps and no hand stitching.
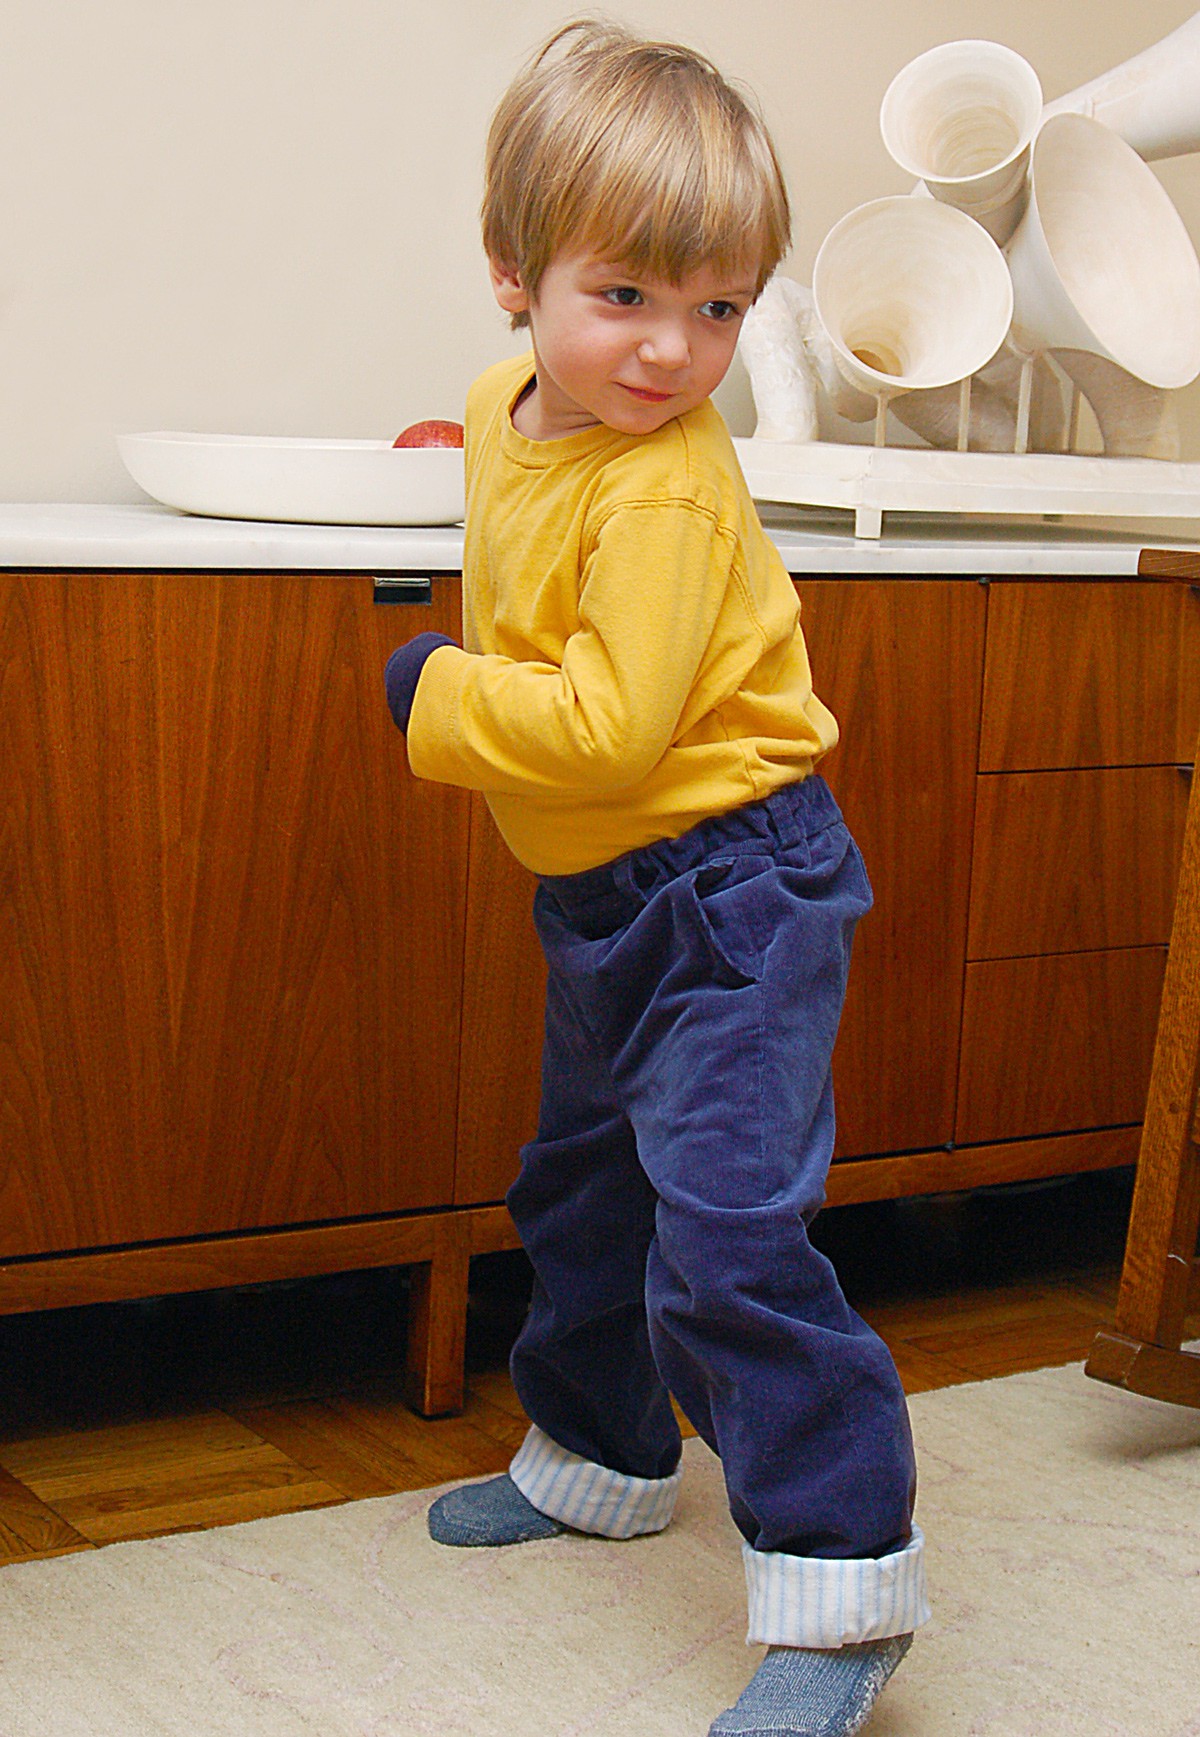
I think he likes them. After we took these photos, he left for home wearing his new pants. And he left his old pants at our apartment!
Thank you so much for this tutorial! I have been wanting to make lined pants for my kids but wasn’t sure how. This is excellent!
Thanks so much for this! I just made a pair of flannel-lined pants for my little guy and, though they’re otherwise great, I couldn’t figure out how to get the bottoms machine sewn. It was too late in the evening for me to think it though, so I just hand hemmed them, but I’ll be sure to refer to this for next time.
I love flannel lined pants!! I usually use the Field Trip pattern (w/o cargo pockets). I always hem the two layers individually because then I can pull the lining inside-out for washing and drying. This really decreases drying time!
They look great! And what a fantastic idea to line with flannel for warmth. I am storing away all these ideas to sew for my girls when we hit US shores (although in pink of course….unfortunately ;-)). At the moment, I simply have absolutely no concept of clothing for temperatures below 0!
Oh yay!
I love this, thank you!
This would be so helpful! Thank you 🙂
Of course, I have no desire to test it in bellow 0 temperatures, but I do know a little boy who would love flannel lined pants (for playing in the recess in wintertime).
oh!! you did the flannel lined trousers! you’re a star!! now i must make a pair! 🙂
Thank you very very much; I have lined the Tea Party playsuit, and the first time did exactly the wrong thing, and couldn’t turn them right side out. Never having made the Firefly, I didn’t know there was such a good tip available. Thank you Liesl; you are my go-to lady.