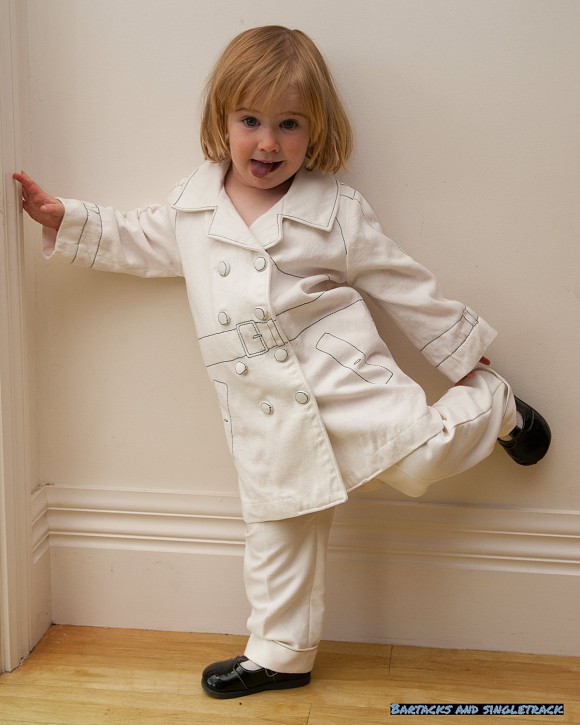
I recently came across an outfit that blew my socks off, and I figured you would be as interested in how it was made as I was. I reached out to Shelley, a.k.a. Lightning McStitch on Flickr and in the Oliver + S forums, and asked her if she would write a little post about how she did this project. You might remember Shelley from the incredible Evel Knievel costume she made last year for her son. She was kind enough to take the time to do it.
Hi Liesl, and thanks for inviting me onto your blog again. I’ve learned to sew using your patterns and now I’m having a lot of fun playing with them. Also, thanks to the wider Oliver + S sewing community I was inspired to start a blog of my own, Bartacks and Singletrack, to document everything I’m making for my kids.
Sometimes the most fun to be had in sewing is found in the designing and creating of something quite pointless. Just to see if it can be done. To see if it makes you laugh. To see if, by making the darn thing, you can finally stop thinking about it. Surely I’m not alone. Everyone does this, right? Right?
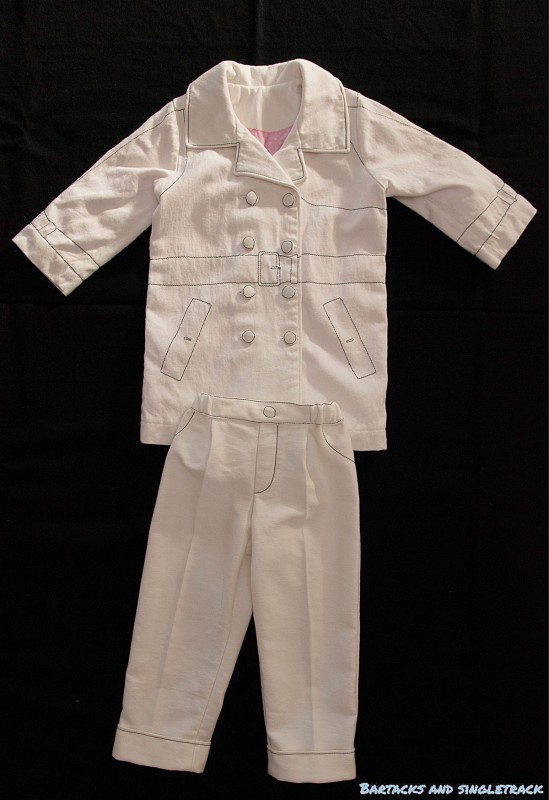
Well I do. Once I got it into my head that I needed to sew a Moschino suit for my two year old daughter the only reasonable question was how.
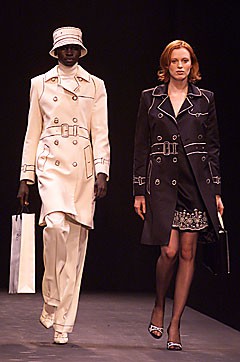
Moschino Fall/Winter 2001 (Image credit : Fashion Channel)
While this suit dates back to ten years before my daughter was born, it was the cartoonish quality of the faked details that made me think it was perfect for a little kid of today.
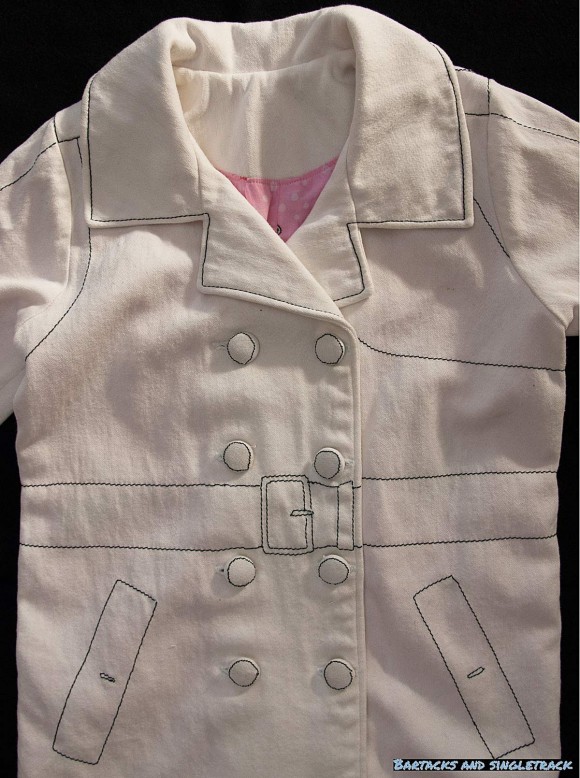
Trompe l’oeil literally translates as “to trick the eye” and it’s an art form that is best known in painting, sculpture, and architecture. The “trick” is usually implying third dimensional depth on a flat, two dimensional tableau. In the example of couture, the effect of three dimensional structures, such as pockets or a belt, is created with either stitched or painted embellishments.
An Internet search found that plenty of crafty women on tight budgets have made their own Moschino suits by taking a fabric marker to a chain store trench coat. Not so surprisingly I didn’t find any toddler sized versions!
I decided to stitch rather than draw the features onto my suit. In hindsight, a nice, thick fabric marker would have been a lot quicker, but this was a sewing project after all and so I was going to sew it through and through.
I chose a superthick topstitching thread in order for the stitching to stand out sufficiently. Here’s where I struggled, as even with machine needles marked as Embroidery, it was very hard to thread the needle. Getting the needle and bobbin thread tensions right was also a battle. Since making this coat I learned a trick from “with love Heidi” of the Oliver + S forums and now do all my topstitching with two threads of normal sewing thread. Somehow this is much easier to handle and gives a great oomph to the topstitching.
Of course, I got a little carried away with making my suit as exact a replica of the Moschino original as I could and so there was some pattern mashing to be done.
An obvious choice for the jacket would be the marvelous Secret Agent Trench Coat, but I noticed that the Moschino suit had a set-in sleeve more akin to the School Days Coat pattern. So I’d sew a set-in sleeve but then topstitch it to look like a raglan sleeve. Don’t like making things easy for myself, do I?
Here’s where I’ve found there’s a lot of fun to be had with playing with patterns. I’ve seen some wonderful pattern mash-ups in the Flickr group; think Puppet Show sleeves on a Playdate dress for example. I had wondered how on earth anyone could be that clever, but it’s really not that daunting. The trick, it seems, is to keep the armhole matching the sleeve and morph the patterns at the shoulder area.
First I drafted the pattern piece that I wanted at the collar and front: The Secret Agent Trench front pattern piece. Then I drafted the pattern piece that I wanted at the armhole: The School Days Coat front pattern piece. Then I laid these two drafted pieces on top of each other and tried to line up a few critical points. Namely, where the front neck opening would be and the bottom of the armhole. Then, on a third piece of tracing paper I sketched in an armhole that represented one pattern piece and joined it via a bit of a shoulder section to the neckline of the other.
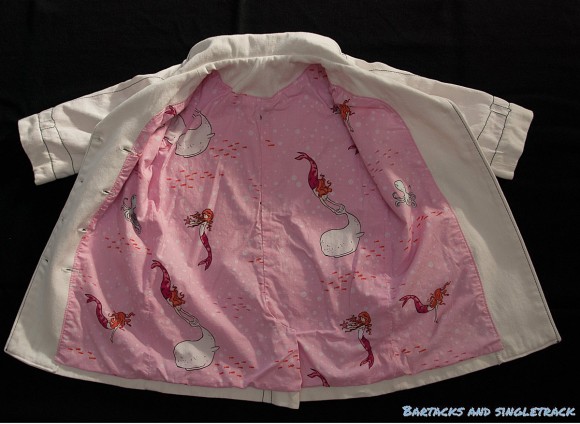
The front facing could then be drafted directly from the Secret Agent Trench. I’m afraid I don’t have any helpful tips on creating the lining as I sort of pinned fabric into the coat, smoothed it then sewed it into place and trimmed the extra beyond the seam. I guess the tip is don’t be afraid to try, as it sort of worked.
The pants required only a little change up to the Sketchbook Shorts. By adding enough length to create trousers with a turned up cuff, I had some perfect suit trousers. I left off the pockets altogether and just “squared off” the front pattern piece to fill in the bit where pockets would normally be.
A bit of trompe l’oeil certainly saves time in sewing! Whether the trick is appreciated by a toddler who quite likes pockets and twiddly bits remains to be seen. I may never really know whether she likes it, as I’ll admit that dressing a toddler in an off white suit is not very practical for everyday.
For me the fun is to be had in the making and I sure did enjoy myself with this one. Thanks again Liesl for the great patterns and for having me on the blog.
Thanks, Shelley. And be sure to check out Shelley’s original blog post about this fabulous outfit. I love the location shots inspired by the Kill Bill movie, especially!
Loved looking at the pictures in Flickr, thank you for sharing how you did it. I’m looking forward to what you’re going to concoct next…
So cool to see my own tip here on the website!
The coat is amazing Lightning!
incredible topstitching detail! so amazing, Shelley – you continue to amaze!
Emma Peel is born again!! The photos, and the suit are just stunning!!
Really amazing. I am off to visit your blog and see mote delicious creations!
Oh I wanted to look like Emma Peel!