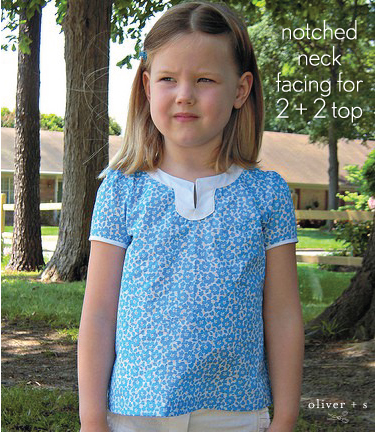
I recently saw this photo in the Oliver + S Flickr group and loved how Cindy modified the 2 + 2 blouse for a completely different look. I asked her if she would share her method with those of you who may have a copy of the pattern. (Sorry, this style has recently gone out of print. We’ll be re-releasing it as a digital pattern at some point in the future, but it’s not available at the moment.)
And by the way, Cindy recently also posted a tutorial on her blog for the amazing ruffled shorts that look so great with this top. She used the Class Picnic Shorts pattern, and you can find the instructions here.
Here’s what Cindy has to share. Thanks Cindy!
Gymboree had a girls’ clothing line a couple of years ago titled “Santorini Sweetie.” One of the tunics, in a blue print with a white facing around the neck, stood out to me. I loved the way the white facing looked against the blue. I pinned the top to my Inspiration for Children’s Clothing board on Pinterest and there it sat.

In the meantime, a blog that I follow called Sew Together had a post entitled Beyond the Basics: Colour Pop Tunic Tutorial in which Maryanne shows how to add a facing with an opening to the front of a basic bodice. Since I never did find a pattern that was exactly what I wanted, the tutorial was a great starting point. I went digging through my patterns and decided to use the Oliver + S 2 + 2 pattern in a size 4 as my basic bodice.
The first thing I needed to do was eliminate the gathers in the front. I took the front bodice piece of the 2 + 2 top and folded the pattern 1/2″ from the facing fold line.

This then became my front pattern piece and I cut one out on the fold. I went ahead and prepared the back of the blouse per the 2 + 2 instructions and joined the front and back at the shoulders.
Instead of using my pattern pieces to make the facing template, I worked off of my joined together front and backs. Here’s what I did.

- Sew the front and backs together at the shoulders. Then lay the shirt down, right side up.
- Place tracing paper over the neckline and trace the neck opening. Measure and mark the bottom edge of the facing 1 1/2″ below the neckline, and draw a center point 3 1/2″ down and 3 inches wide. Add 1/2″ to the back edges for the seam allowance.
- I chose to fold my facing pattern piece in half to make sure it was even. If you need to trim or adjust, now is the time to do it. I cut out 2 facings on the fold.
- Pin the two facings with right sides together.
Now it’s time to sew together your facing pieces. Stitch the outside edges with a 1/4″ seam and the back edges with a 1/2″ seam. I shortened my stitch length from a 2.5 to a 2 to ensure the strength of the seam. Press, trim the seam allowances to 1/8″, notch the curves if needed, clip the corners, and then turn to the right side and press again. If you have a point turner, it will come in handy for smoothing out the curves. This is what it should look like.

Now it’s time to mark the stitching line for the opening. You’ll do this on whichever side you want to be your wrong side. I placed the end of the opening approximately an inch above the bottom.

Pin the facing’s right side (the side that you doesn’t have a stitching line) to the top’s wrong side at the neckline, making sure the ends of the facing and the button placket are lined up.

Sew along the neckline (I used a 2 stitch length and 1/4″ seam allowance) and around the stitching line (marked in blue). Press, clip the curves if needed, and trim the seam allowances to 1/8″ (photo A). Turn the facing to the top’s right side, press again, match the ends of the facing with the button placket, and pin into place (photo B). Topstitch along all the edges, rolling the seam slightly to the wrong side at the neckline and the opening (photo C). Press again.

The other modification I did was to bind the edge of the sleeves. I cut 2 bias strips 1 1/2″ wide and folded one long end 3/8″ to the wrong side. The unfolded edge was sewn right sides together to the sleeve edge with a 3/8″ seam allowance. I trimmed the seam allowance and folded/pressed the binding to the wrong side. Then I topstitched close to the edge from the right side.

Here are the finished top(s). This is BK in the original modified 2 + 2.

And here is MG in her modified 2 + 2.

And I couldn’t resist making one more using Lisette Lawn!

Great, clear, precise tutorial, thank you! Do you think I could this technique with knits, as well? Thinking of something a little like a henley, but more casual.
Wow,I had no idea how you made this!
Fantastic Cindy!
Thank you so much for taking time to make this tutorial! I know I will be useing very soon!
I would use interfacing on the knit under the facing to stabilize it but otherwise I don’t see why not!
I am going to do this. I love it! Thank you for the tutorial. I like how you included your stitch length.
Thanks for the tutorial. I love how you modified and created the ruffle shorts. And Liesl, I’ve really enjoyed this series on how people modified, creatively adapted, etc patterns. I hope you’ll continue to do these.
what a fun transformation! thanks for sharing.