This is the day you’ve been waiting for. It’s time to feature the finished skirts from our Extra-Sharp Pencil Skirt sew-along panelists. Do you remember what our panelists had planned? Have a look here. Well, they have been busy sewing and their skirts are now completed. Today you will get to see what they have done with the pattern and you can see how it fits.
Many thanks to everyone who has participated in the sew-along so far and it’s by no means too late! You can still enter your Extra-Sharp Pencil Skirt into the contest. You have until Monday July 2nd 11:59 PM ET.
Alright, let’s hear from the ladies.
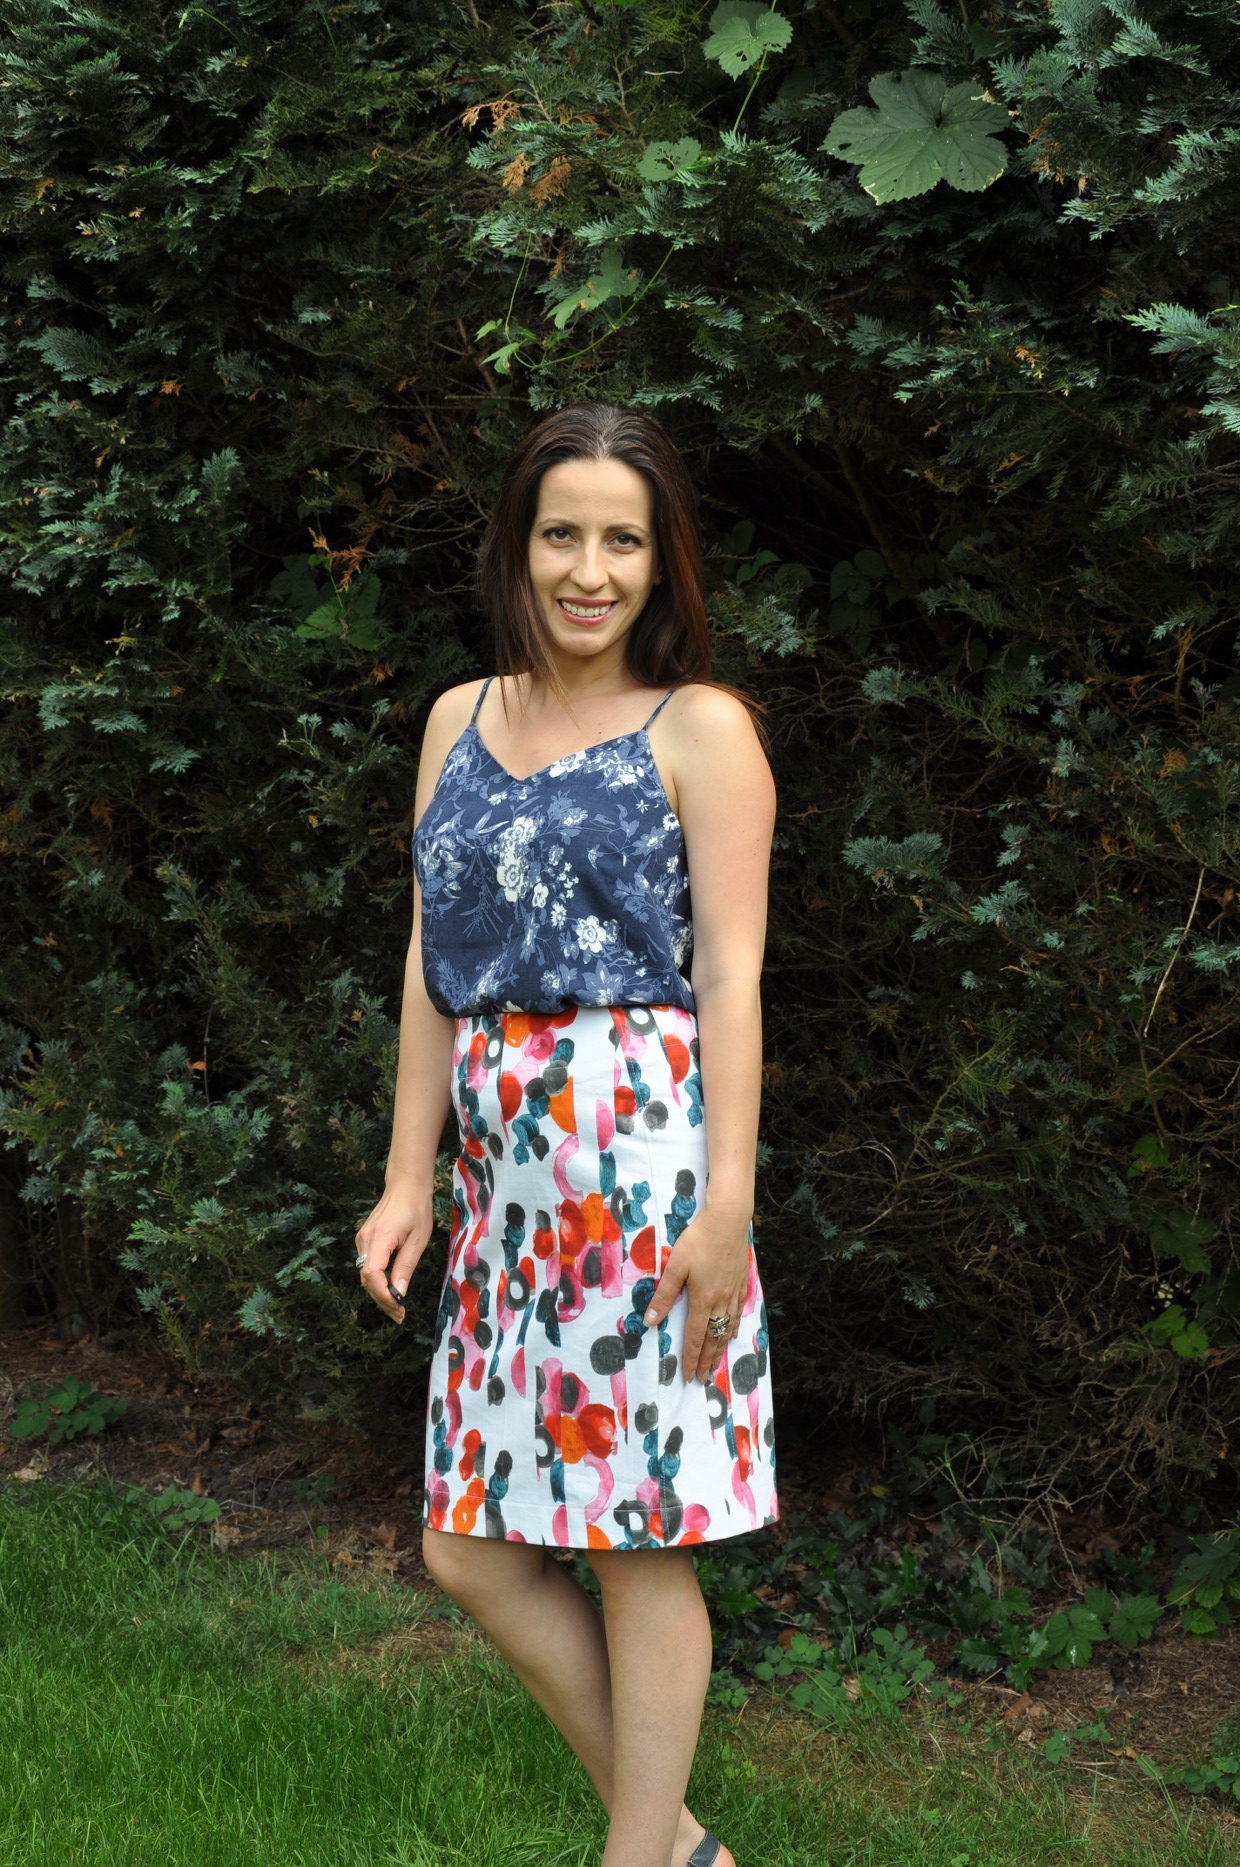
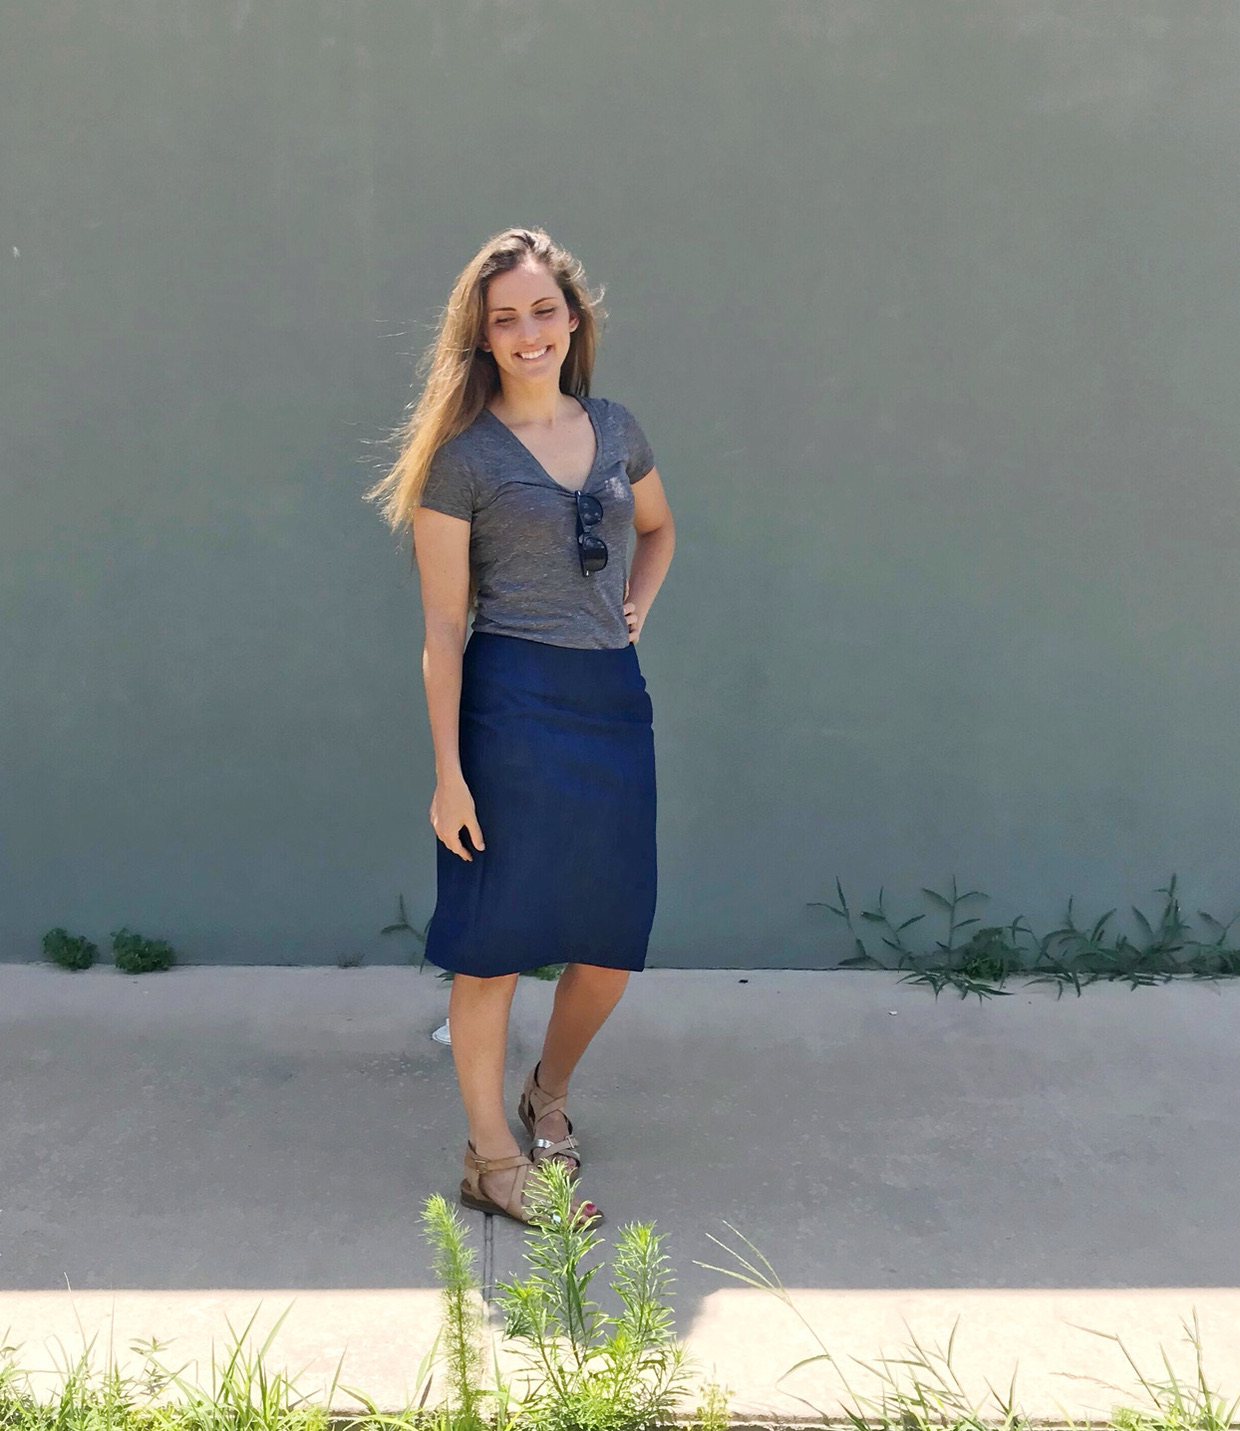
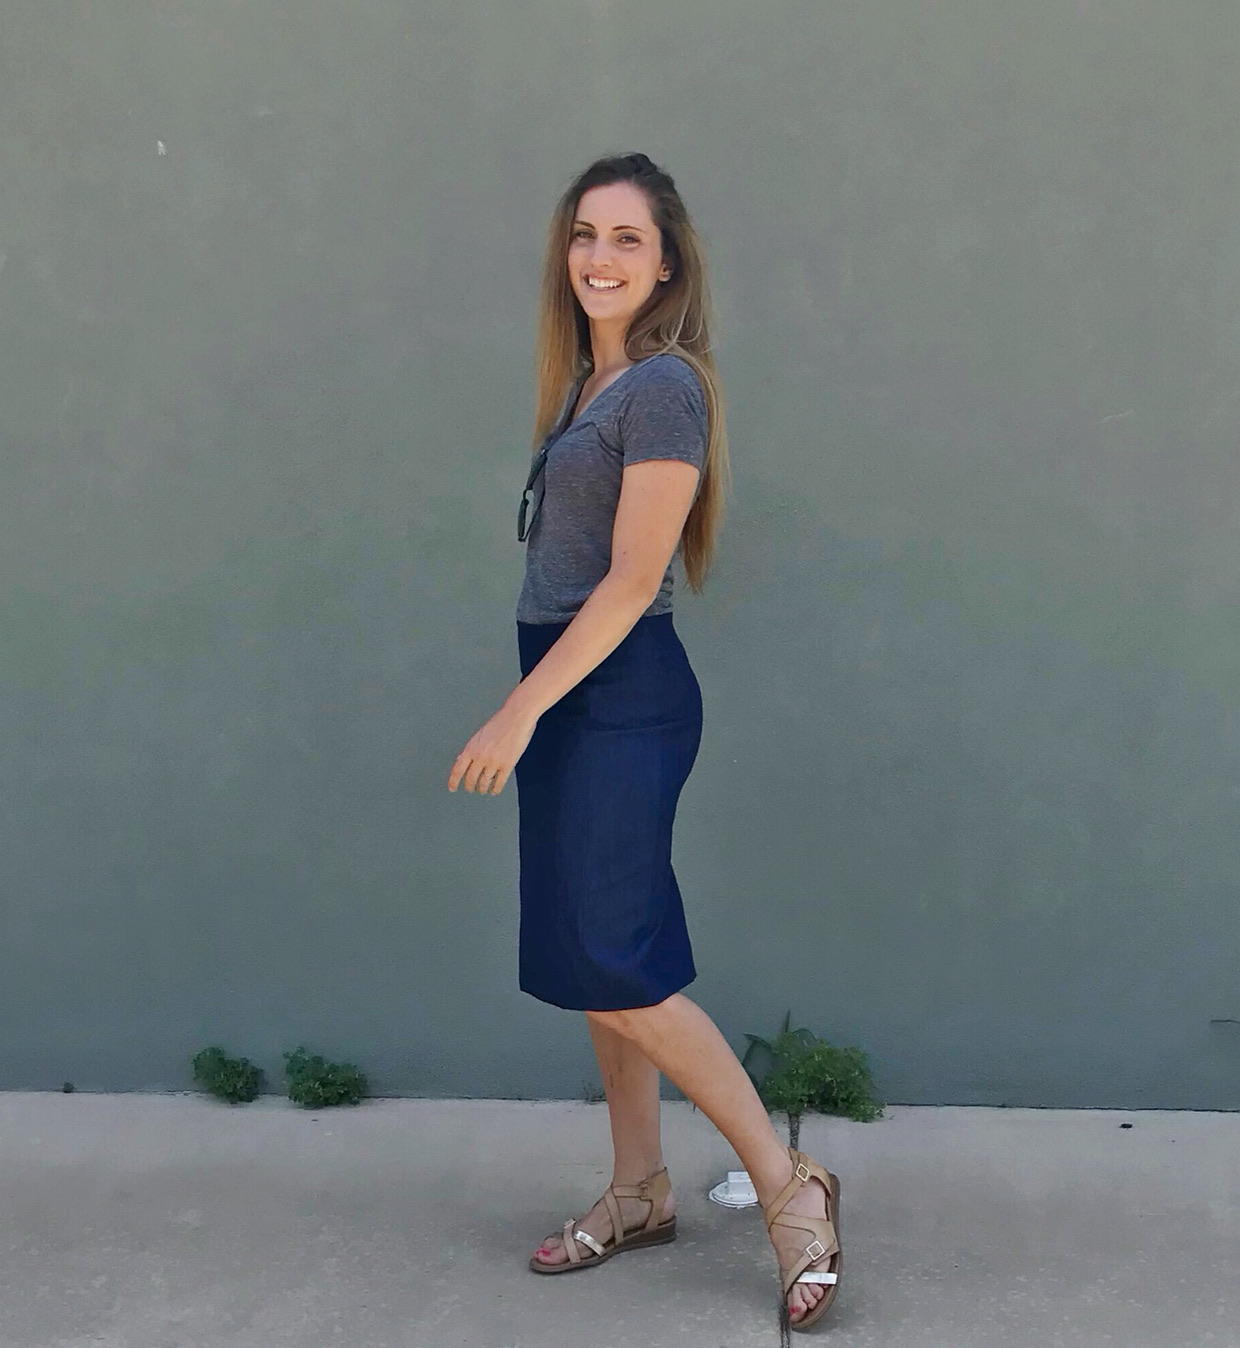
I made my skirt in size 4 and based on the muslin I only took 0.6cm along the front panel seams. It is great to sew something that doesn’t need a lot of adjustments. I took some shortcuts and sew the hem by machine, I think it works on my casual skirt. I don’t think I ever sewn a skirt with vent but this one went like a dream, I can put a vent in everything now. For this skirt the vent is a must, very comfortable. I was so happy with my skirt so I made a second one in denim, took me longer to top stitch everything than sewing the skirt. I am so happy with these skirts!

Hello everyone! It’s Darcy, here today to share my version of the Extra Sharp Pencil Skirt.
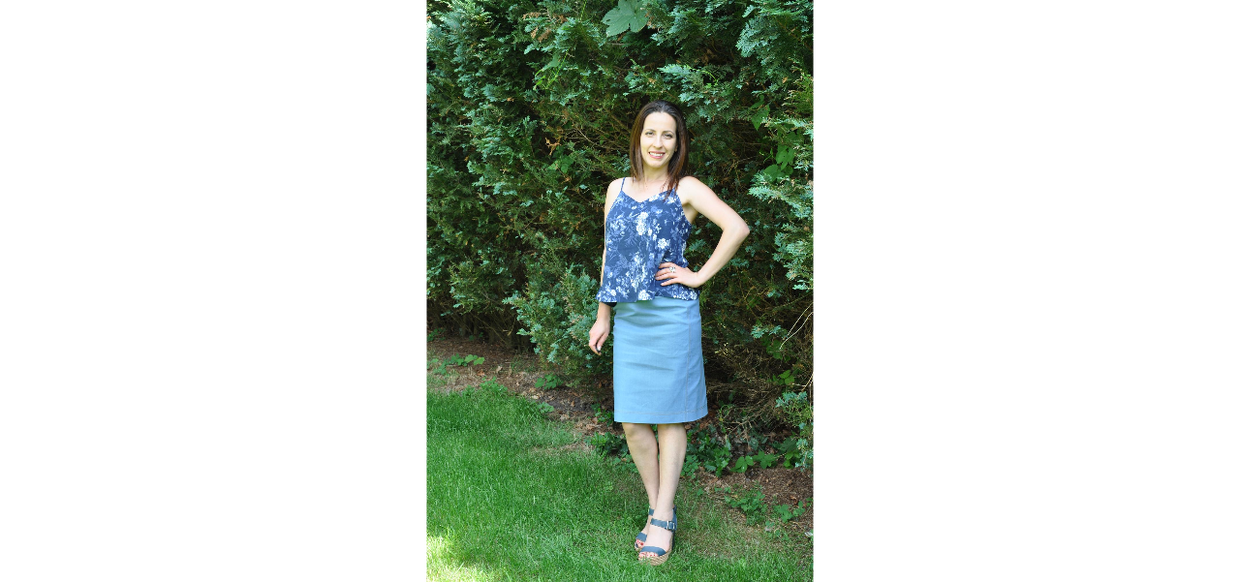
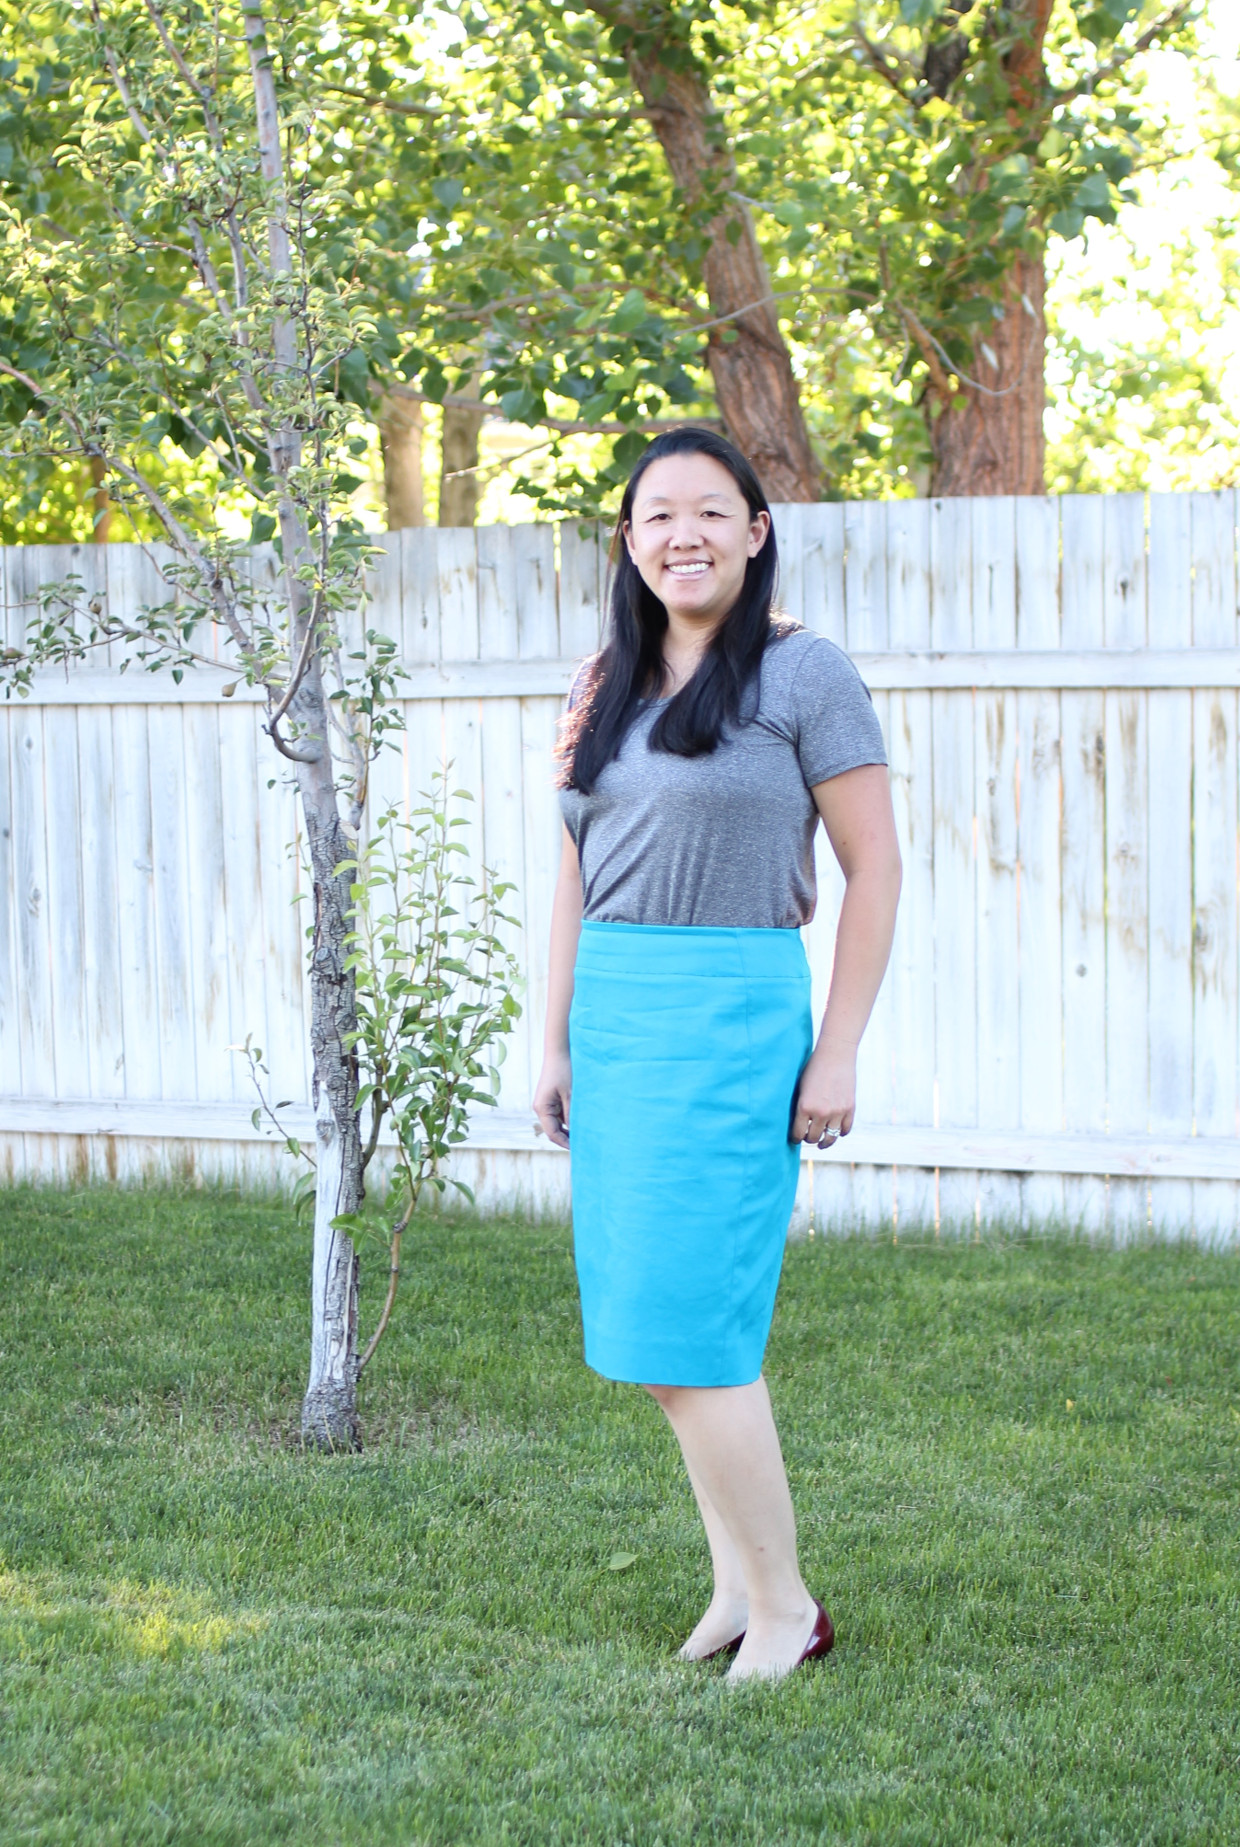
I had such a good time sewing this one! I found the fitting to be very easy because of the side panels. It’s easy to take a little out of the sides here and there to make it fit just perfect. I sewed a size 8, taking in the skirt a little in the waist.
Once it came to sewing, the hardest part of the process was the zipper, but the instructions walk you through it very thoroughly. Also, the back is the first thing you sew in the pattern, so once you knock that out, the rest of the skirt was a breeze to sew!
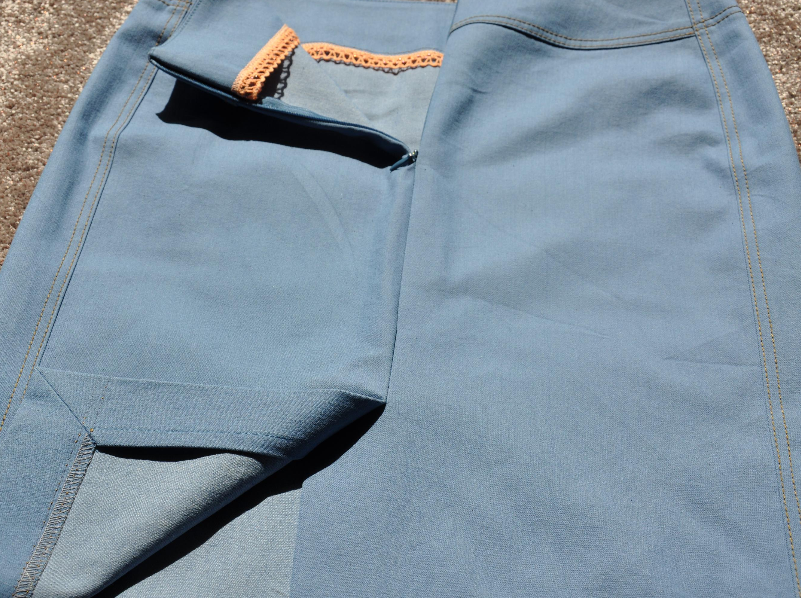
Now that I have created a functional jean skirt, I’m thinking of making it in a fun bold pattern, a piece that I might not wear everyday but will serve its purpose in my wardrobe for date nights and weddings.
I loved sewing up the Extra-sharp Pencil Skirt! I hope you enjoyed the sew along!
The instructions were clear and helpful and I love the fit! I am a rectangle (no hips compared to my waist) and was concerned about the fit and wondered if it would be flattering/comfortable. After baste fitting, I was surprised how well it fit as is but also very appreciative that was an easy way to make adjustments after sewing that invisible zipper without having to redo the zip! I love the security of the twill tape around the waist and the tidy finishes overall.
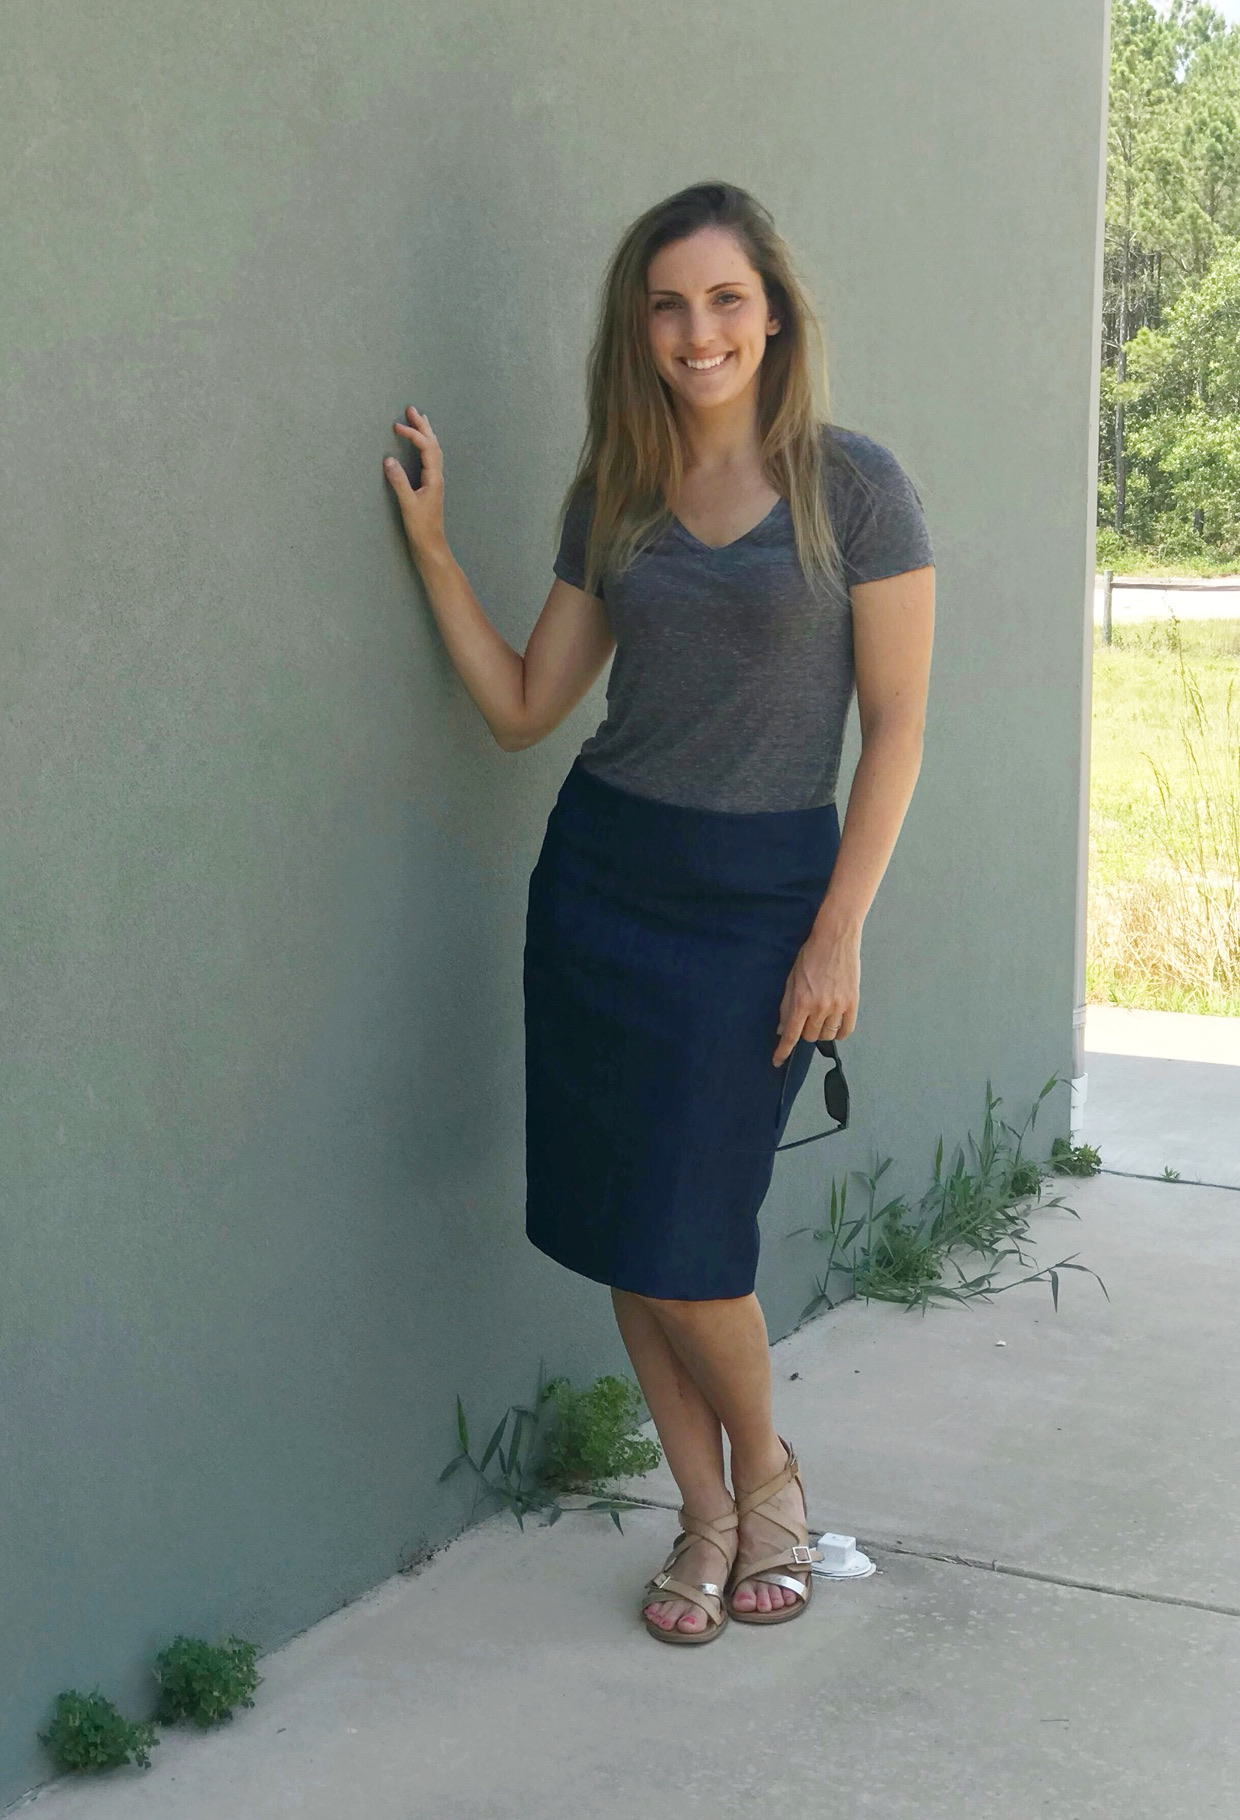
I was also pleasantly surprised how well a pencil skirt fits into my everyday life as mainly a stay at home mom. I am thrilled to have a new wardrobe staple in my collection that can be dressed up or down!

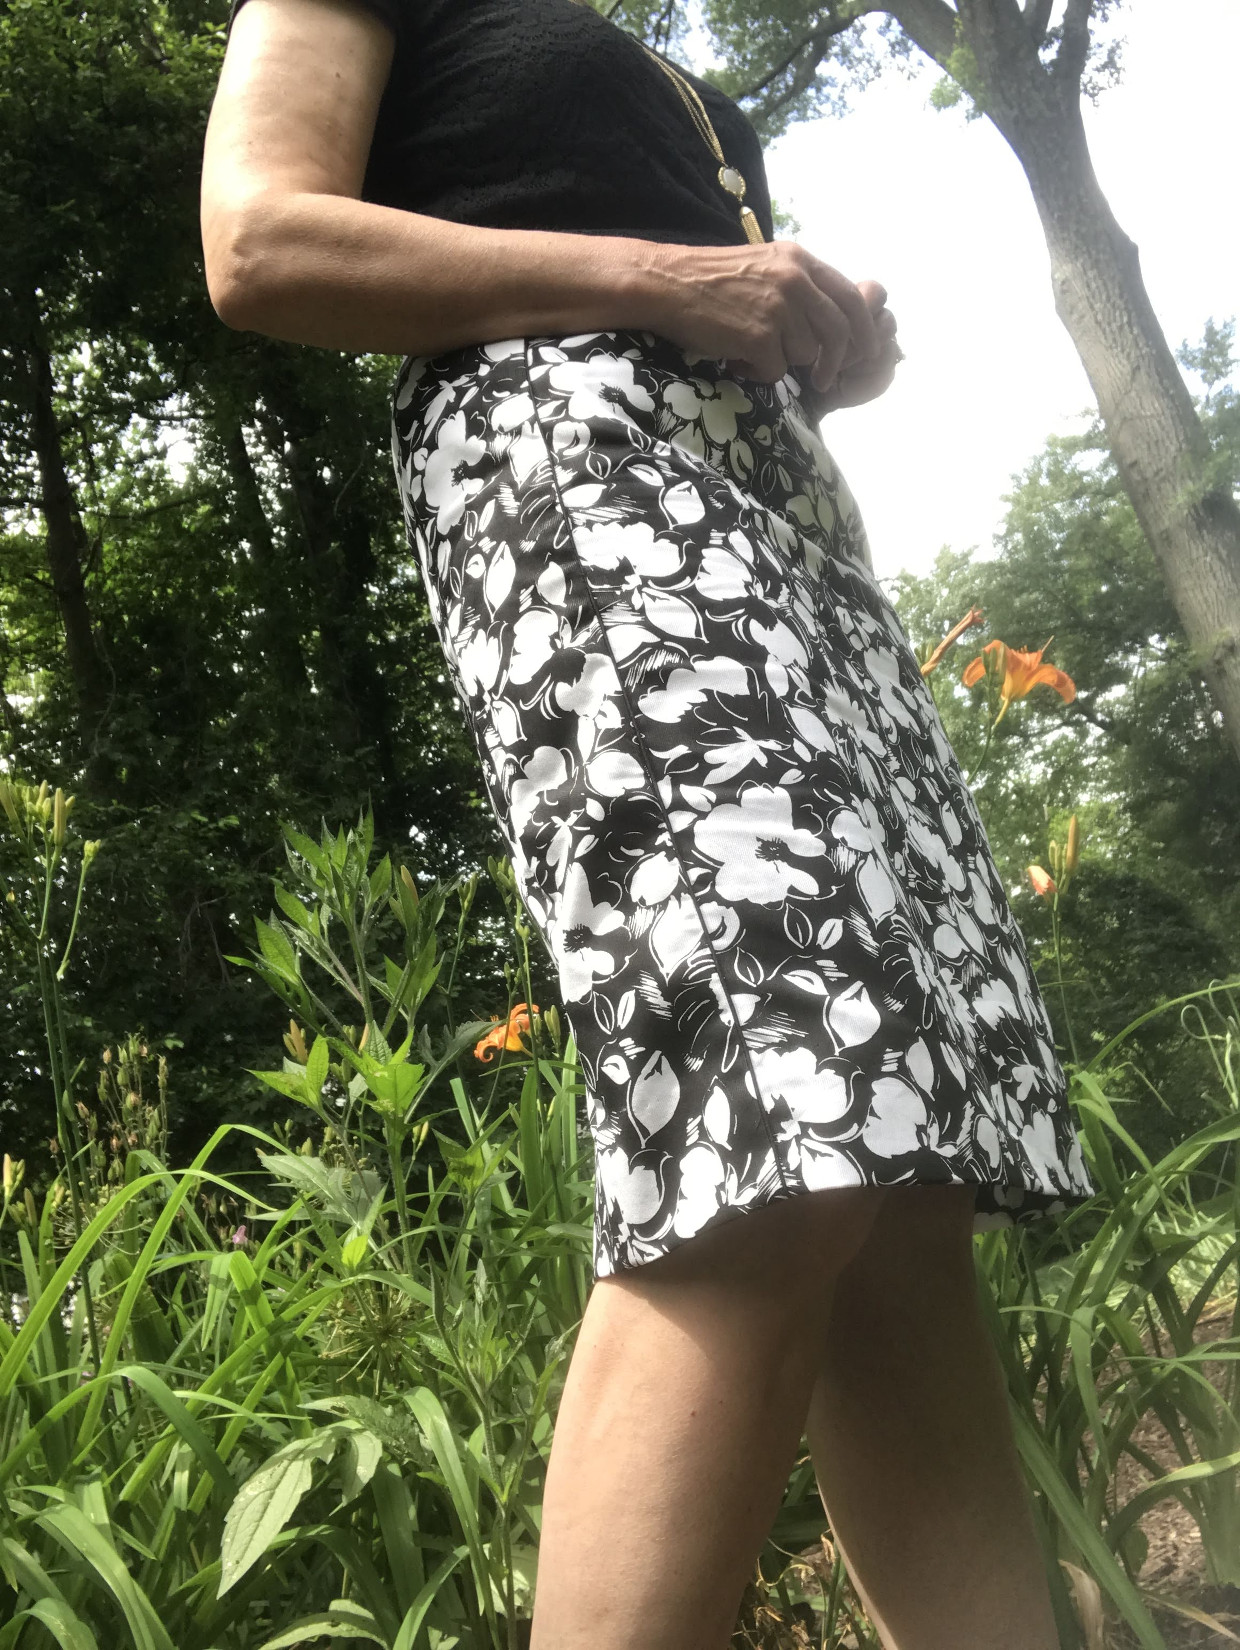
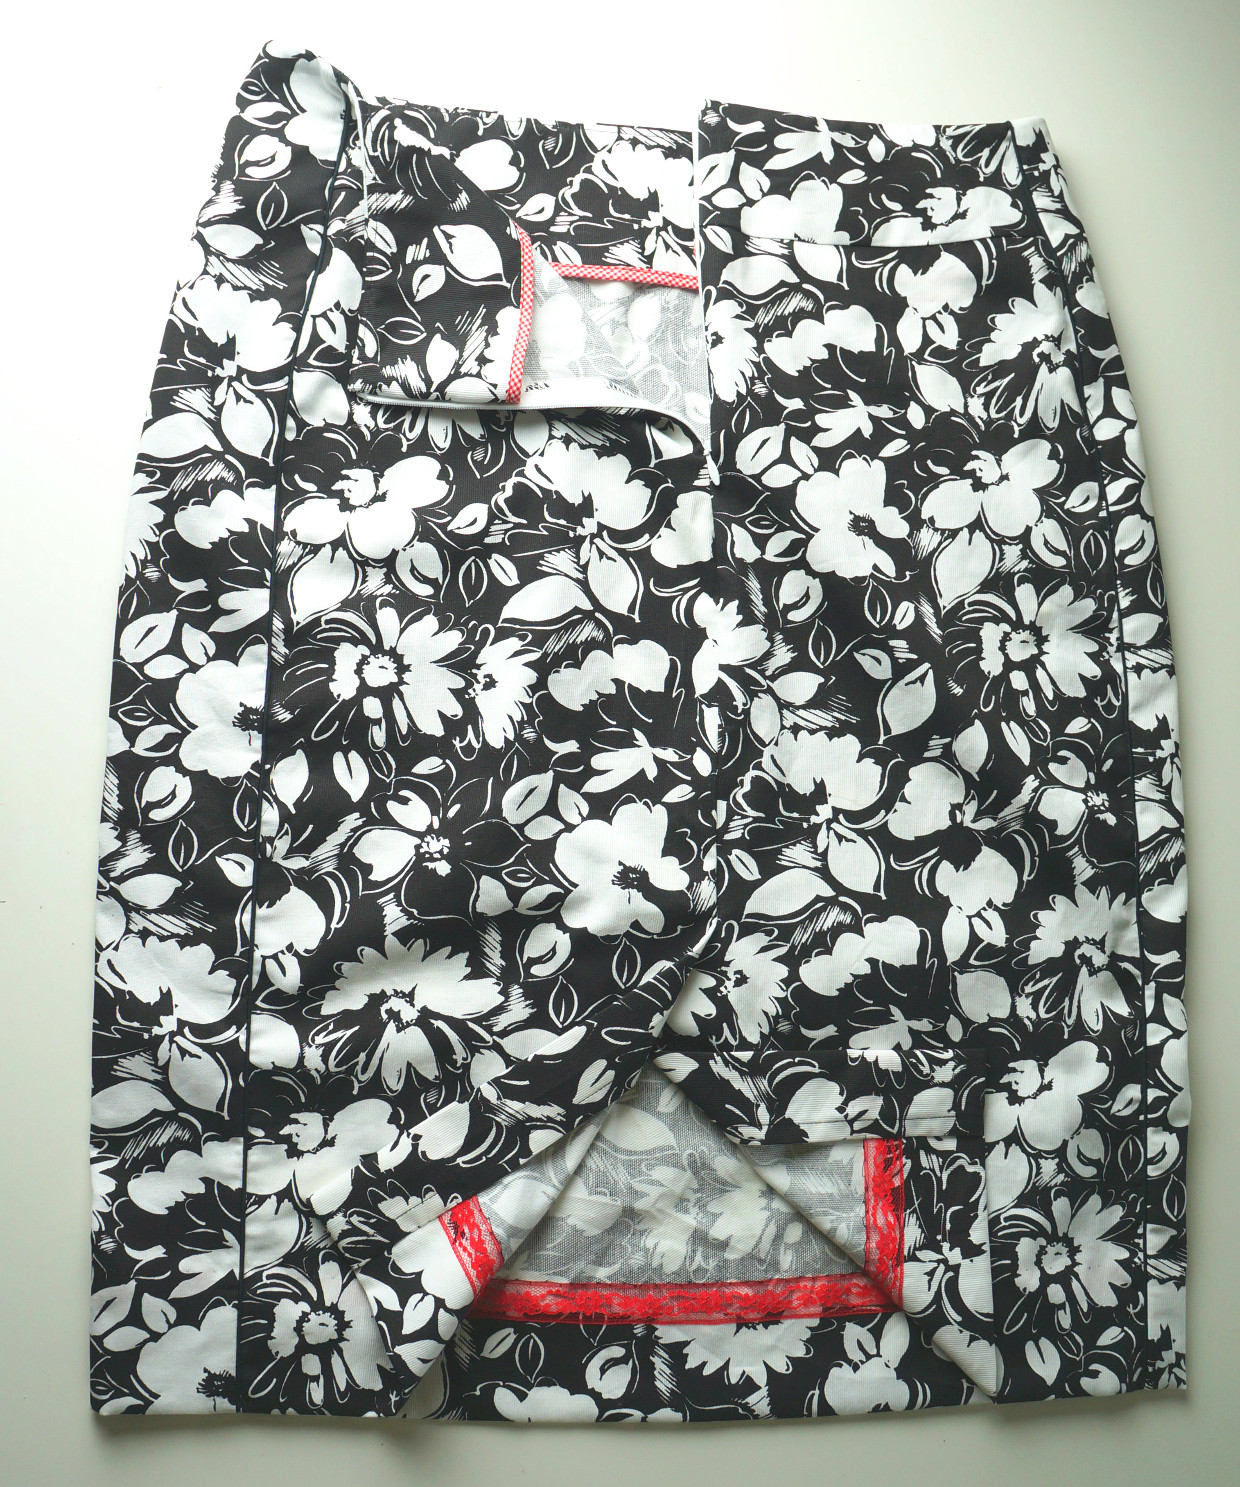
Sewing my Extra-sharp Pencil Skirt has been a joy every step of the way! My invisible zipper went in perfectly the first time thanks to the clear instructions that specified exactly where to mark the zipper. The waist band finished without a hitch because again the instructions included such details as exactly when and how the zipper tape should be caught in the seams. I did make a few subtle changes to the pattern. I added black mini-piping (much narrower than purchased piping) to each of the four vertical seams to emphasize the vertical lines. You can read about how to make your own in this tutorial. I didn’t want to detract from the vertical lines by stitching the waist band facing down as the pattern instructed so from the right side, I stitched in the ditch of the piping from the top of the waistband to the bottom of the waistband facing. This secures the facing without creating any lines of stitching on the front. I also had some fun by adding a little color to the inside of my skirt. The fabric store was out of black hem tape and as I was reaching for the white, I thought “white is so boring,” so red it is!
Later as I was constructing the pattern, I read Liesl’s suggestion of using a contrasting bias tape to finish the waistband facing and so I used some vintage red check bias binding from my stash. When I first saw this pattern, I wasn’t sure if I wanted to make it. I have had two previous pencil skirts that had odd fits, but I am so glad that I jumped in and gave this a try. The fit on my skirt is amazing thanks to the four seams. In fact I like it so much, that there is a black piece of wool in my stash that is going to be another Extra-Sharp Pencil skirt come winter!
Liesl
Since in the end Meredith wasn’t able to participate (great plans gone awry, which sometimes happens!), Liesl jumped in at the last minute on this sew-along. She’ll catch you up on her initial plans and results:
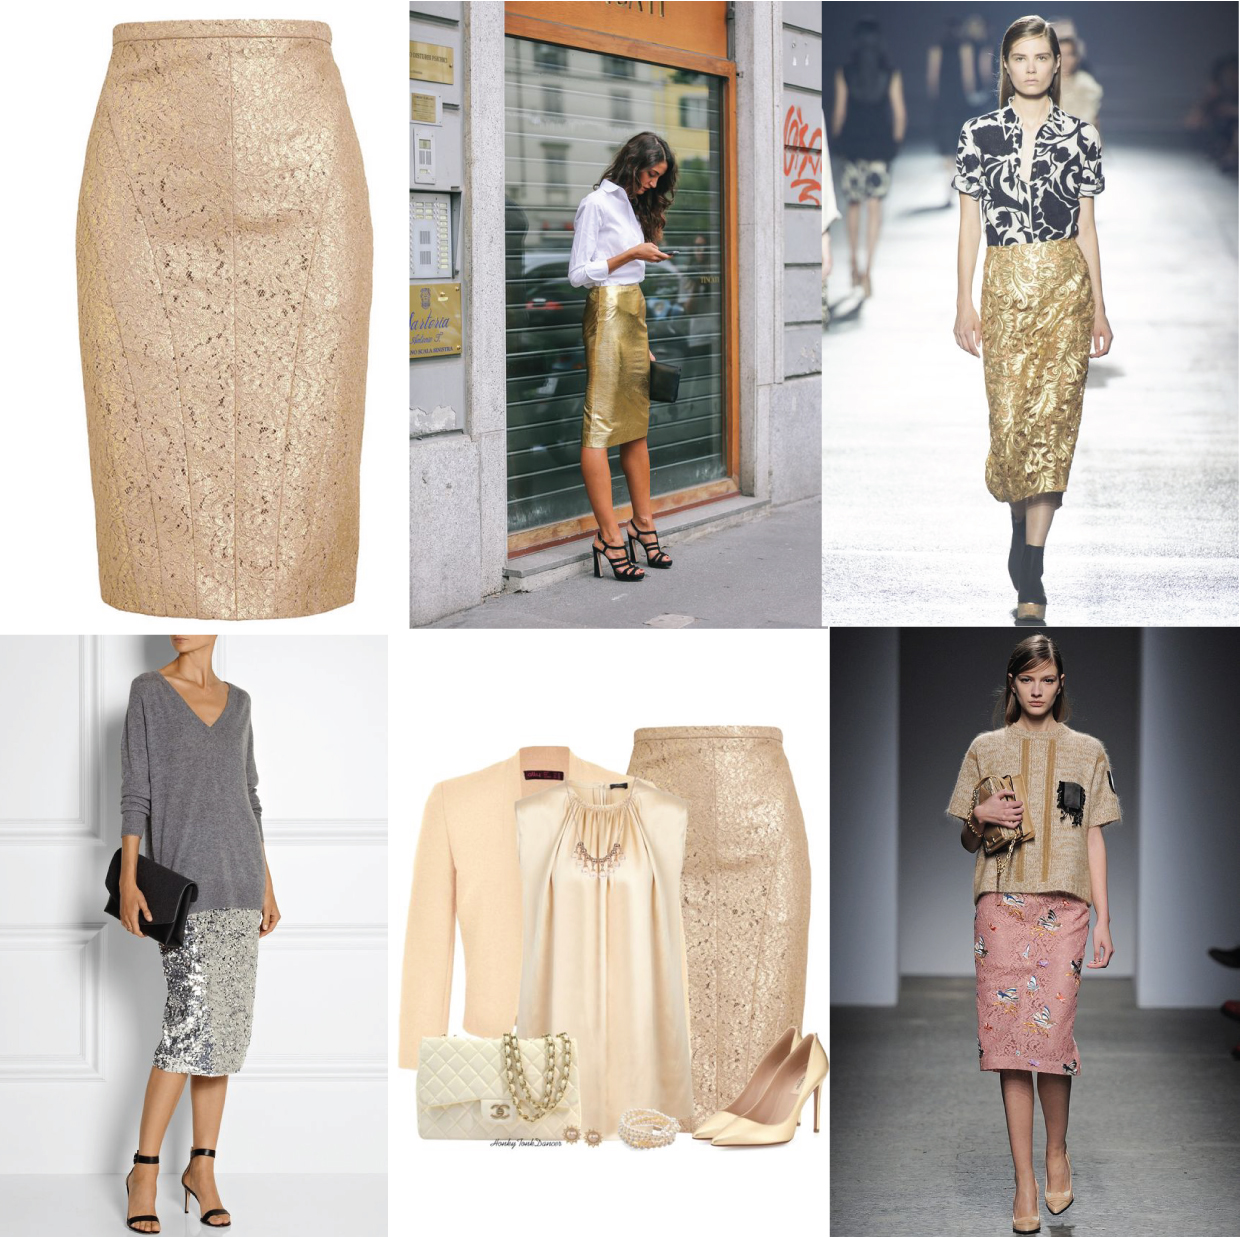
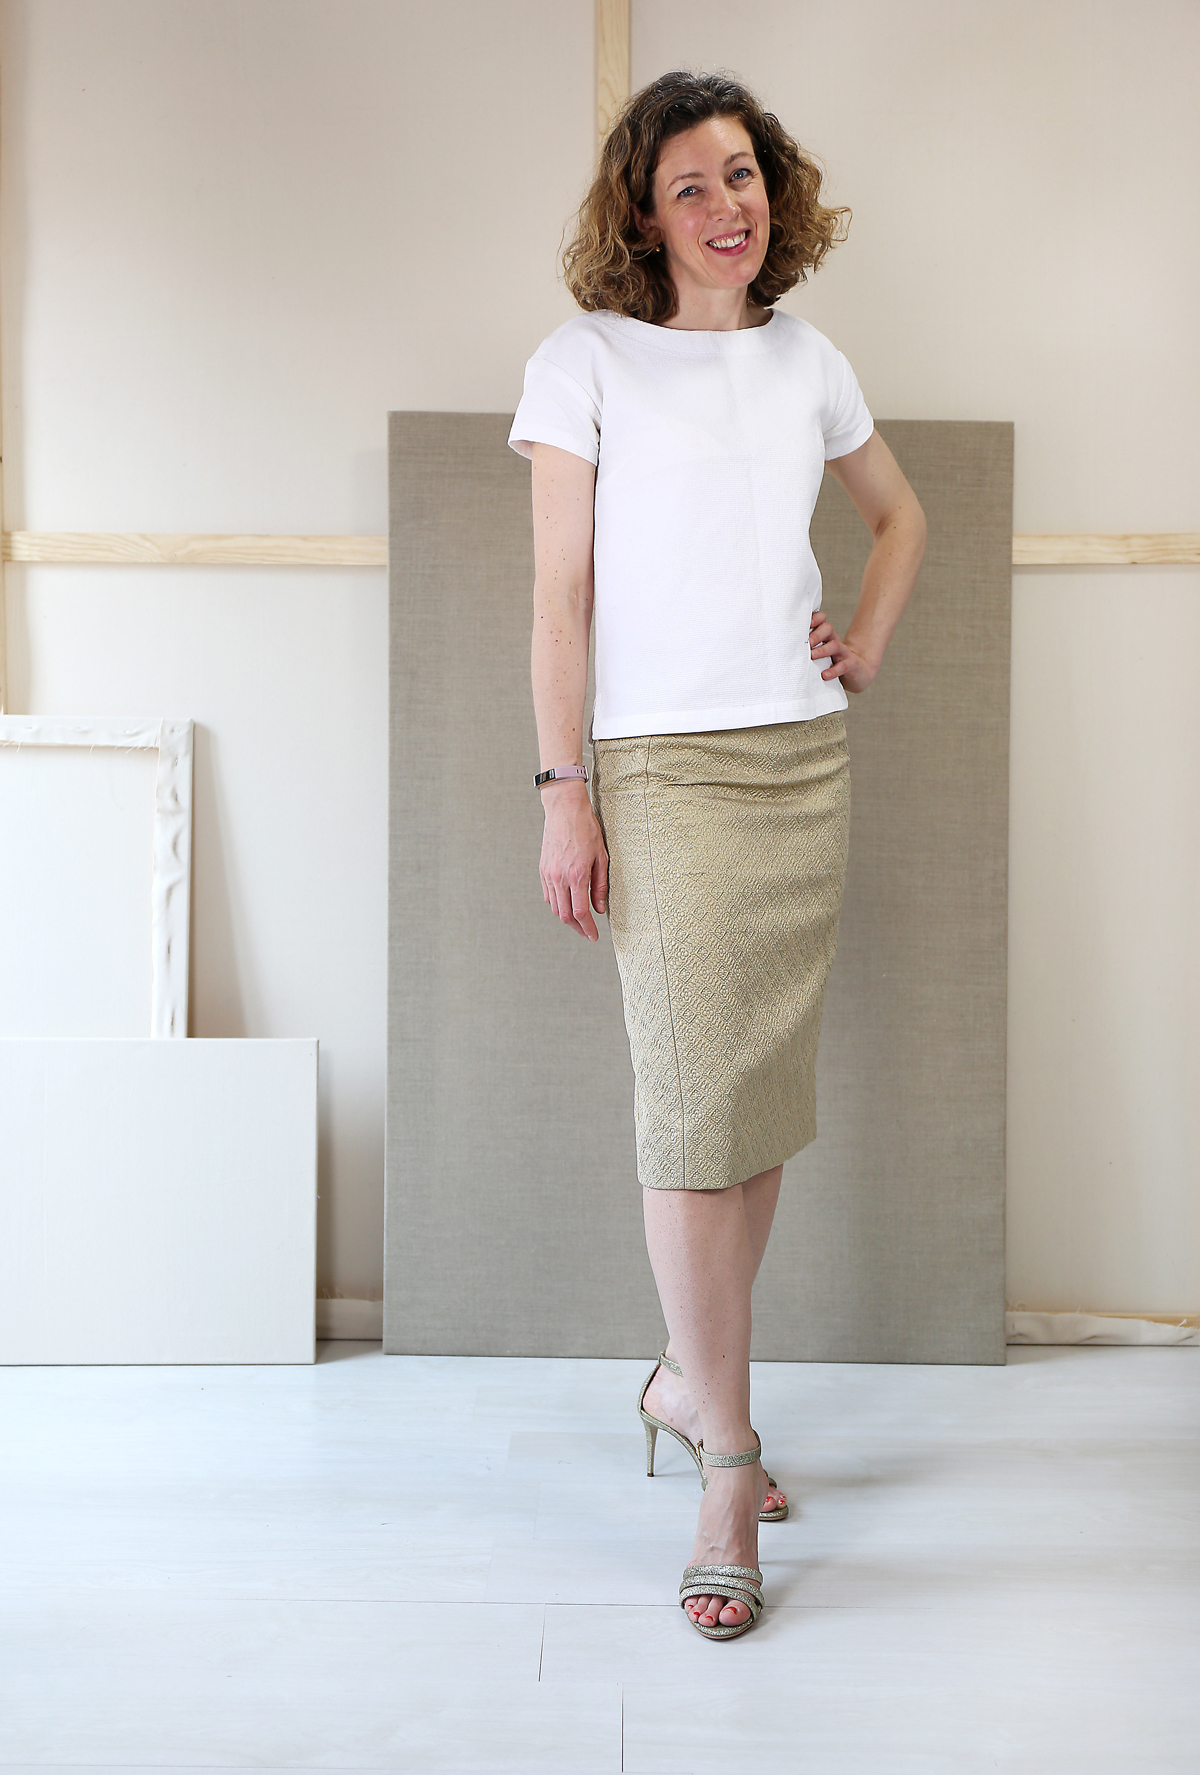
I chose to sew my pencil skirt from a fancy gold brocade. Madrid tends to dress up more than New York, so I know I’ll get lots of use out of a fancy gold pencil skirt because I can wear it for formal occasions and well as more relaxed days. Here are some photos that inspired me:
I love the look of a boxy top with a longer pencil skirt, as well as a cozy sweater or just a simple white button-down shirt. For me, this skirt is all about the texture and how to contrast it with other textures. I’ll definitely wear it with my old denim shirt as well as T-shirts and other tops.
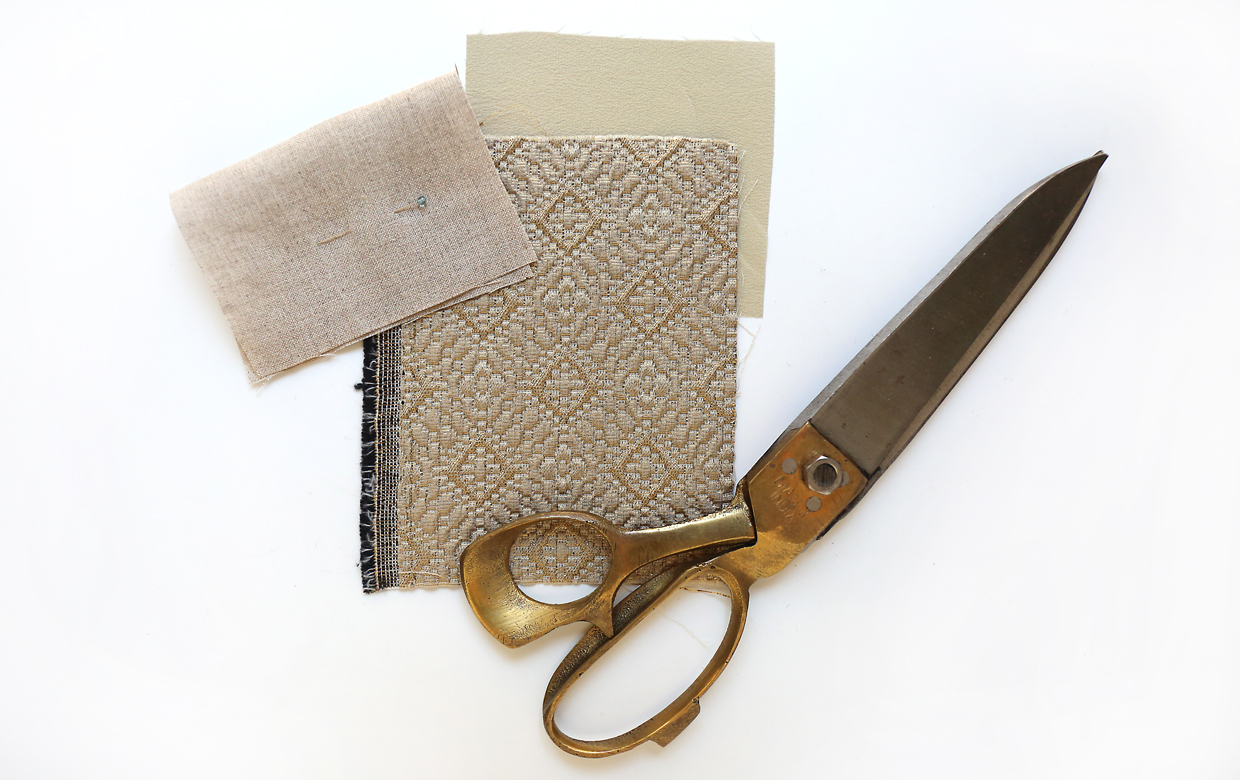
Because my brocade is quite bulky, I used a leftover scrap of unbleached linen for the facings. I also decided to back the brocade with a woven fusible interfacing to give it a little more structure and to protect the fabric a bit. I wasn’t entirely sure the gold threads could stand up to rubbing against skin and other fabrics, plus I wasn’t sure it would be very comfortable on its own. I also decided to bind the seam allowances with some leftover washed silk to make them more comfortable and to make the inside of the garment look nicer.
Here are my selected fabrics which I showed on Instagram a couple of weeks ago.
And here’s a little peek at the inside of the skirt with the woven interfacing and Hong Kong seam finishes. (I love Hong Kong seams because they’re quick and look so nice!)
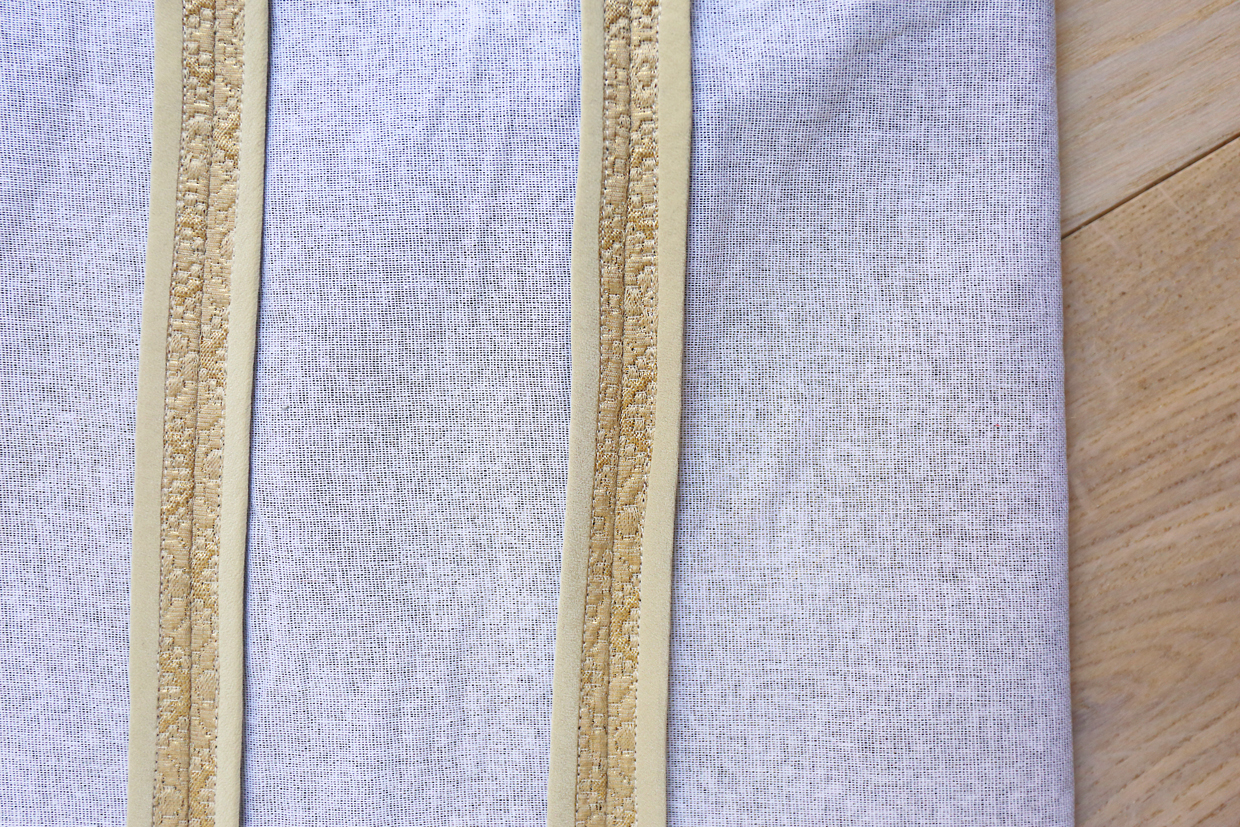
Once I cut out the brocade I block-fused the woven interfacing to the back of each piece. You could also baste a second fabric to the back of a first fabric if you want to give it a little more structure. This is sometimes called underlining, and it’s a great way to give extra body or structure to a fabric.
Other than that I sewed the skirt just as the pattern is written. I should probably also mention that I’ve put on a few pounds lately (stress!), so I’ve sewn the skirt in my “usual” size and will adjust it if I don’t lose the weight again soon. So it fits a bit snugly here, but that’s one of the advantages of this pattern; it’s easy to adjust or tweak if you need to.
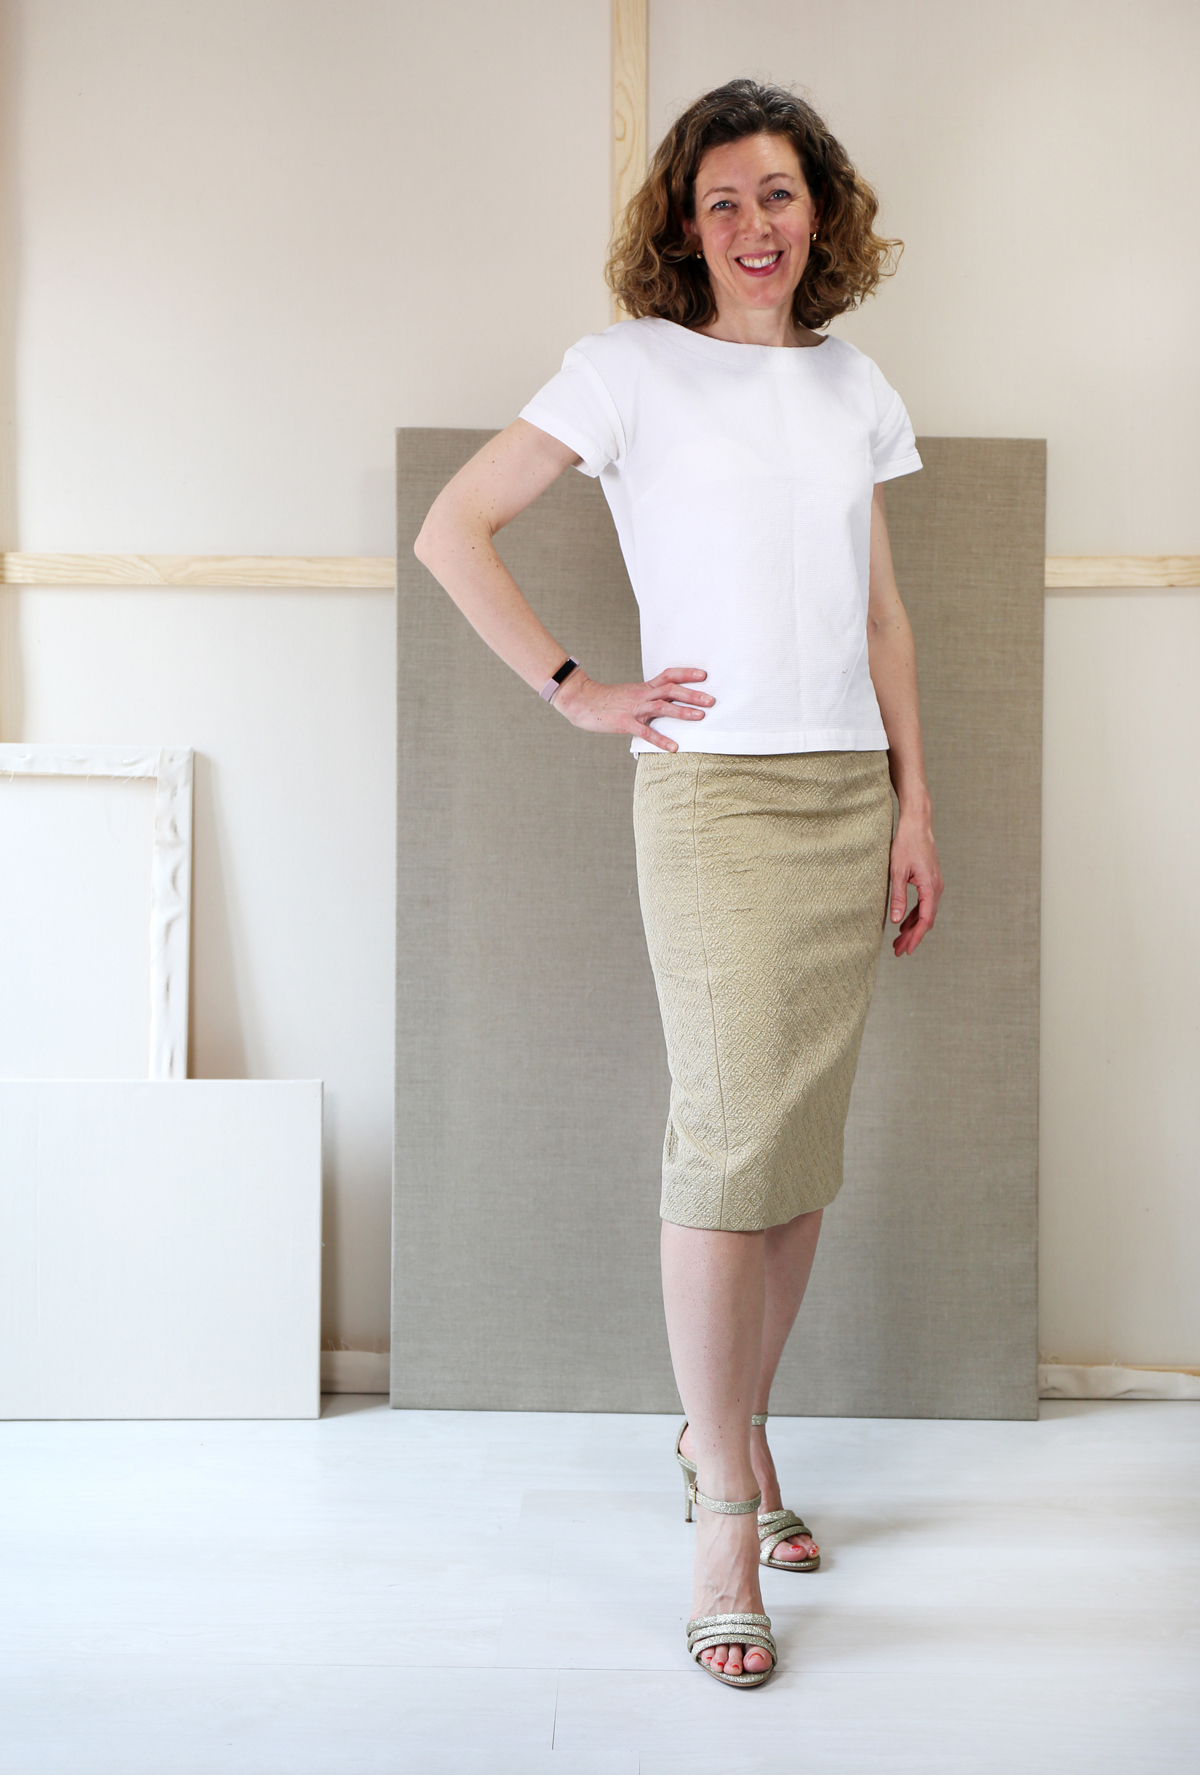
I can’t wait to wear this skirt! I might even bring it along on our trip to the U.S. this summer since we have a couple of exciting events planned. For these photos I wore it with a very stiff waffle-weave Maritime Knit Top I made a few years ago.
***
Weren’t they all lovely? Many thanks to the panelists for sharing their talent with us. We appreciate them taking time out of their busy schedules to inspire us with their amazing sewing skills! Once the linky part has closed, the panelists will pick their favorite from the sew-along linky party. Come back here on Thursday July 5th to see who they chose as the winner of the contest. See you then!
I would wear every single one of these skirts!
Everyone’s skirt looks great.
Doesn’t every one of these skirts look fabulous? And, they look great on the inside, too! It is such a versatile pattern for casual or formal wear.
These are all beautiful!
I have to say, Liesl, I’m surprised to hear you describe Hong Kong seams as “quick.” I definitely agree that they look awesome, but compared to, say, French seams (my go-to for clean seams), it seems like a lot more sewing, plus there’s making the bias tape too, right?