

I added a faux fly to my Montauk Trousers the other day. And now, just for you: an easy faux fly you can add to any trouser or shorts pattern that doesn’t have one. Or you could add it to a skirt as well, as long at it has a front seam. (Or hey! Add a front seam yourself. Isn’t sewing great? So many creative opportunities!)
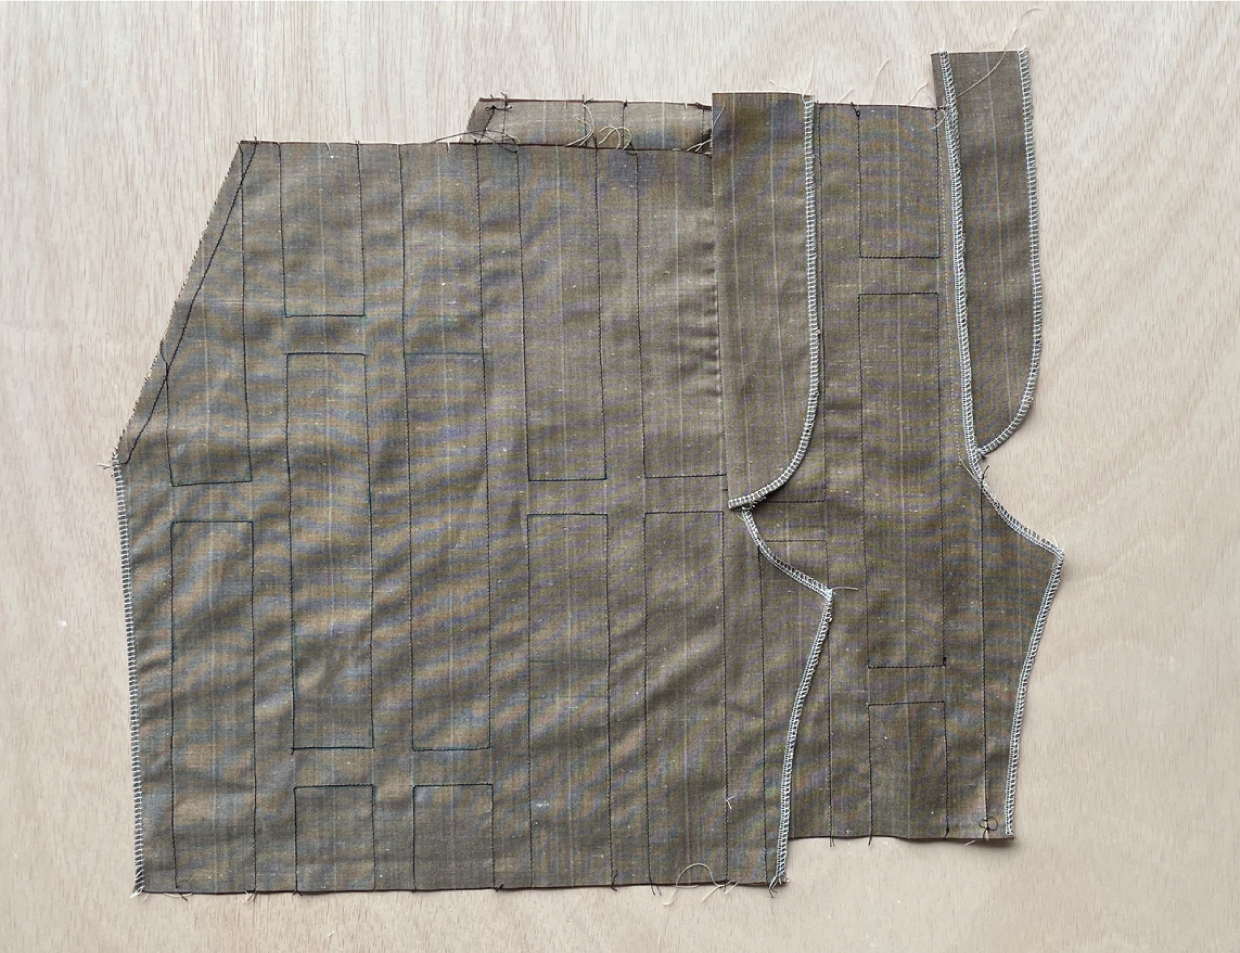
Today I’m adding a faux fly to some silk Lisboa Shorts that I’m sewing just for the fun of it. I’ll show them to you once I have time to finish sewing them. Ignore the black topstitching on the fabric–that’s part of the project, and I’ll explain when I show the finished shorts. Meanwhile, I’m sewing my shorts with matching thread, so you’ll have to look closely to see what I’m doing in this tutorial, but I think the photos are clear enough that you can see it well. Plus: illustrations!
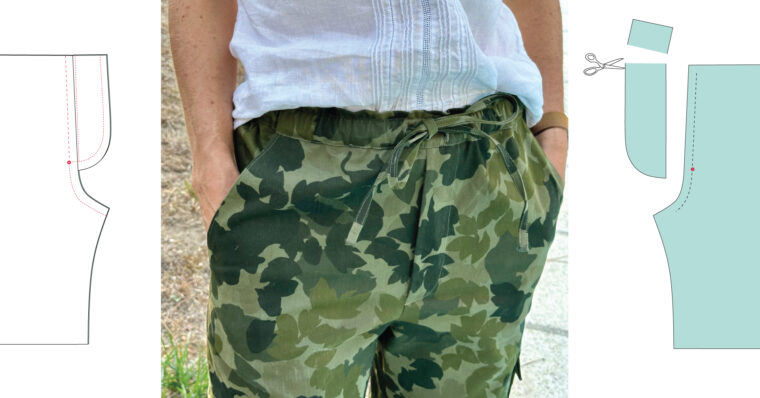
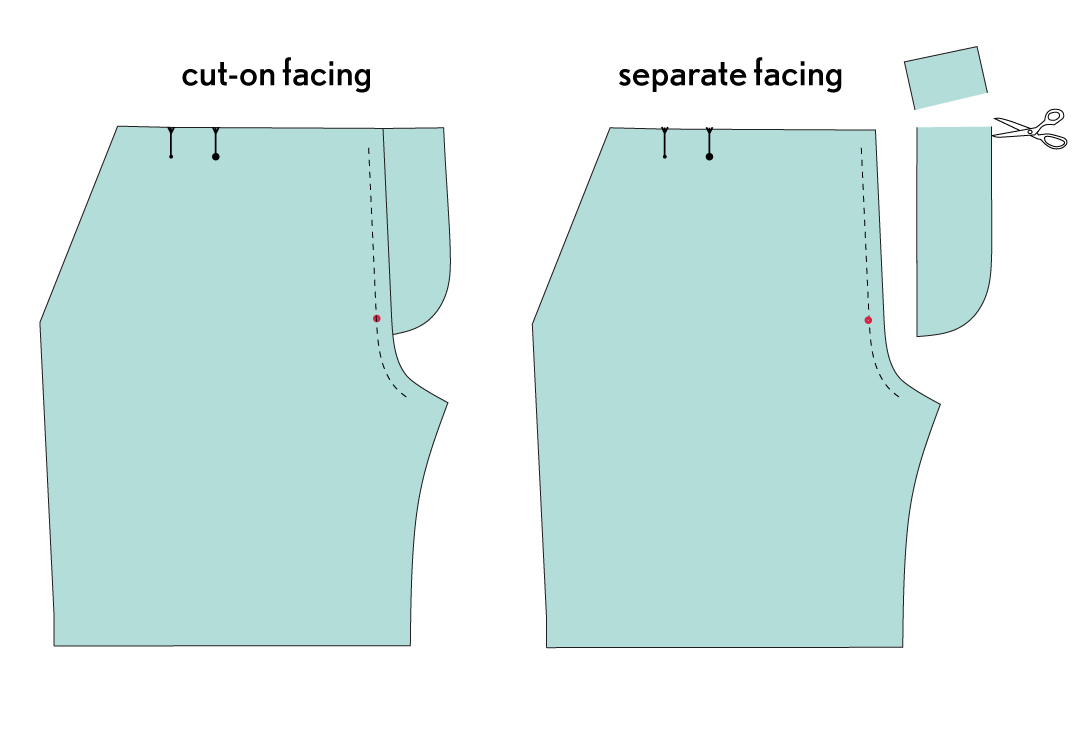
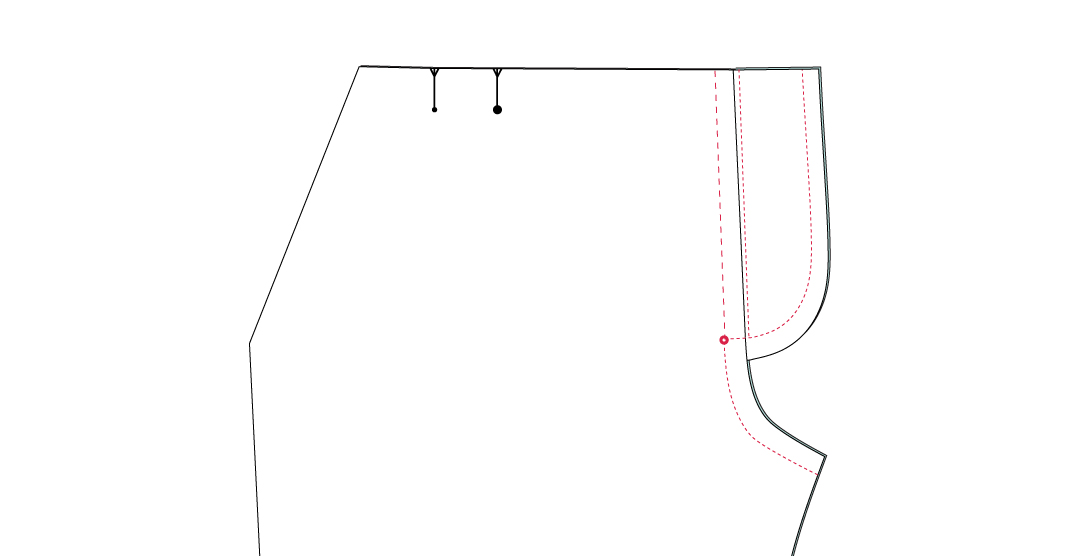
To make a faux fly we need to add a fly facing to the center front seam, where the fly will be located. To do this you can either alter the pattern to add a fly facing to the front edge before you cut the fabric, or you can cut a separate fly facing and sew it to the already-cut fabric. If you’re like me, you forget to add the fly facing before you cut your fabric. No worries! I’ll be demonstrating this in my photos.
First decide how long you want your fly to be. For me, a good rule of thumb is to make the fly approximately as long as the straight part of the front rise. I strongly dislike a fly that isn’t very long because I think it cuts the line of the trousers in an unflattering way. Another guideline, if you want one: I like to make the fly about 9-9.5″ from the natural waist, but of course if your trousers have a lower rise you’ll need to take that into account. The best bet is probably to hold the front trousers against your body to decide where you want the fly to end, or compare the pattern piece to another pair of trousers you like. Mark the end of the fly with a point on the seamline of your pattern piece or on your cut fabric and make the fly extension about 1/2″ longer than this point.
Here is a mock-up of the two types of fly facings: if you want to draft the facing directly onto your front piece, you’ll add approximately 2″ from front edge of the fabric. You can use an existing fly extension and topstitching guide like the ones included in our Cannes Trousers pattern, or you can draft your own. For a separate fly facing, cut two fly facings, one for each cut front trousers/shorts piece. I used the fly from our Cannes trousers sewing pattern, but you can also draft your own 2.5″ wide (because you’re adding seam allowance to attach it to the front trousers.).
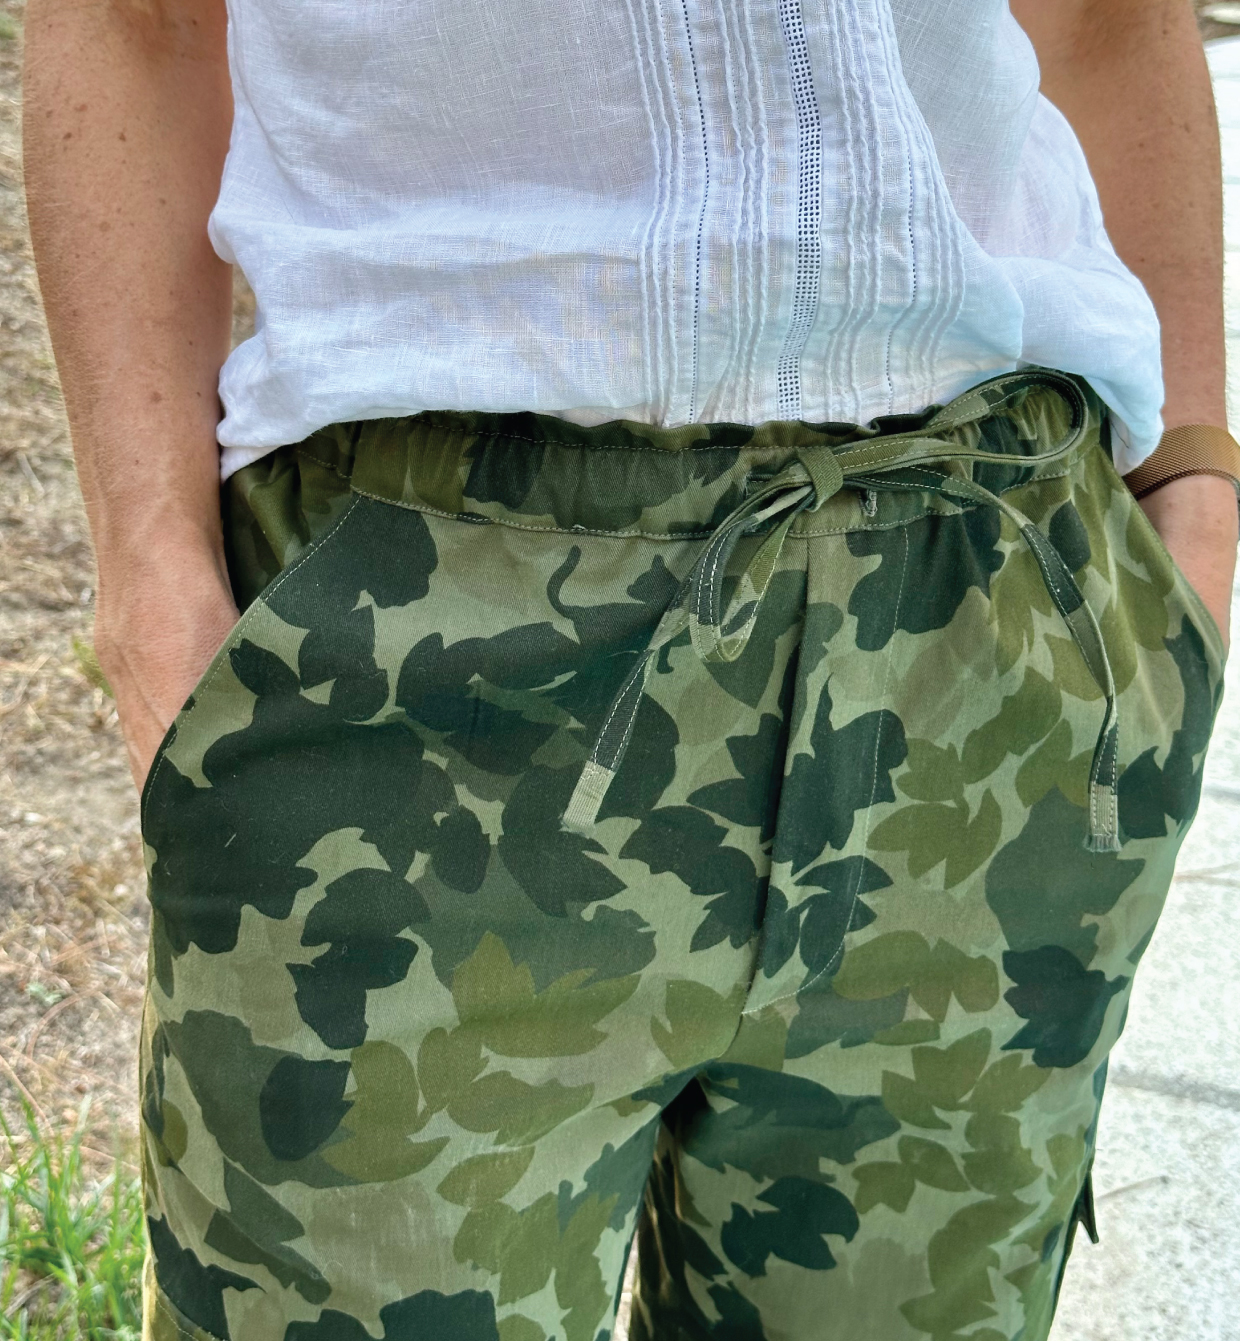
To sew the faux fly, pin the two front pieces together with right sides facing and stitch the front rise with a basting stitch when you read the point where the faux fly will start. Then switch to a normal stitch and sew the lower rise and the curve of the fly facing with a regular stitch and a 1/2″ seam allowance, backstitching or lockstitching at both ends and pivoting at point that marks the bottom of the rise. I like to also sew the fly facing together about 1/4″-3/8″ from the basting stitches. This is approximately where the zipper would be on a real fly, and this stitching will keep the faux fly mostly closed but will allow a bit of a gap when the basting stitches are removed to give the appearance of a working fly. Finish the seam allowances separately or together using your preferred method.
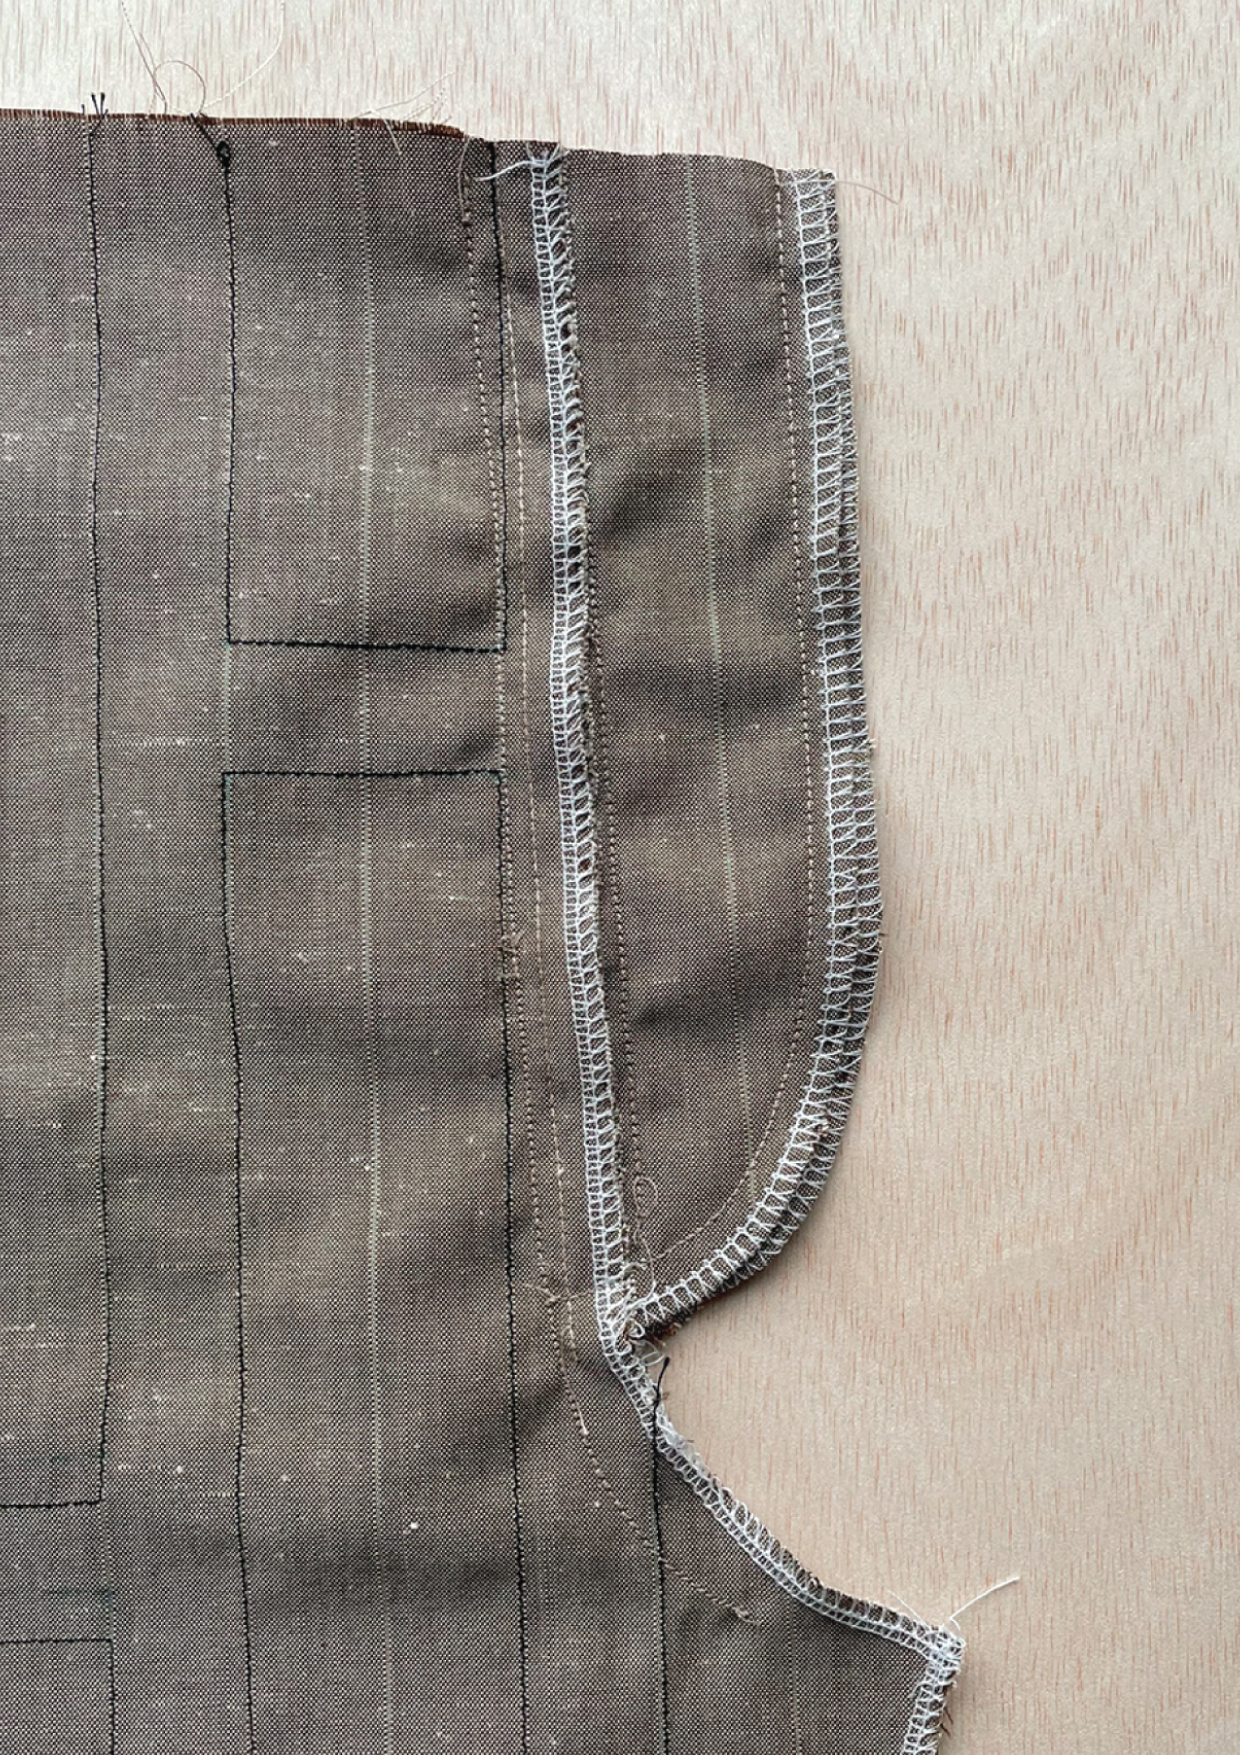
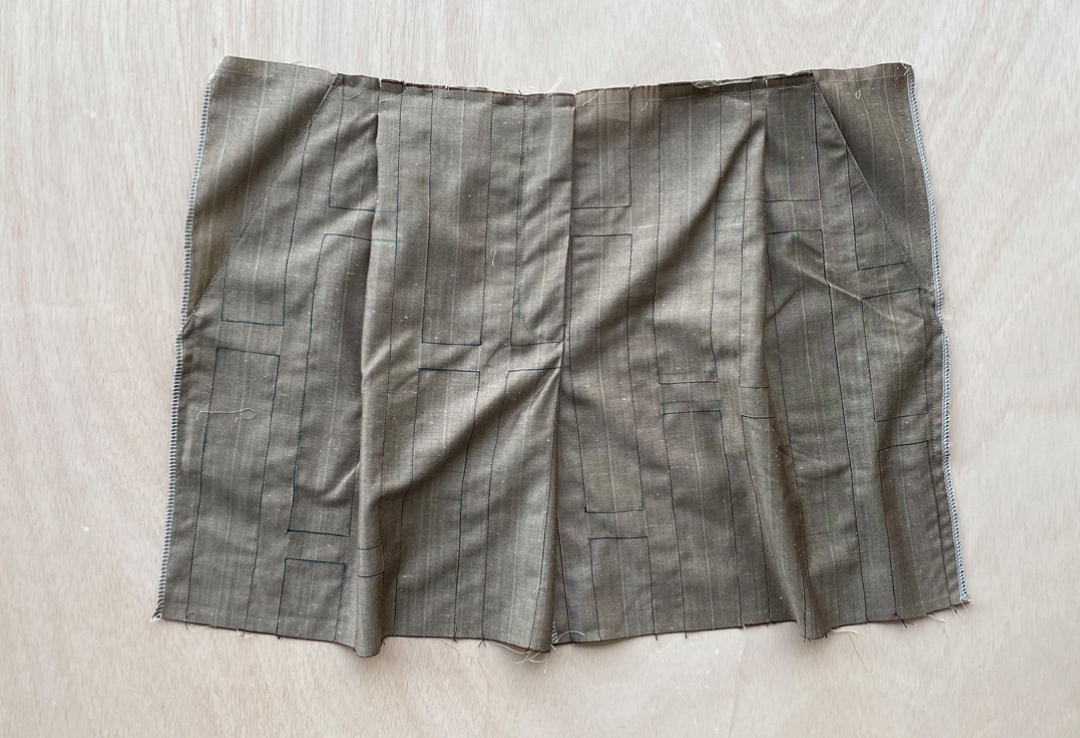
Now press the fly facing to one side: For men it’s traditional to press the fly facing toward the wearer’s left and for women toward the wearer’s right, but follow your own preferences here. The basting stitches will help you to press accurately and to get a good crease. Pin the fly facing to the front of the trousers/shorts to keep it in place for the time being, then use a water-soluble fabric pen or tailor’s chalk to draw the fly topstitching before you stitch it. Or use the topstitching guide from one of our sewing patterns like the Cannes Trousers. I like the topstitching to be about 1.25″ from the center front edge with a gentle curve at the bottom to meet the point you originally marked. This is what makes your faux fly look authentic, so topstitch it well!
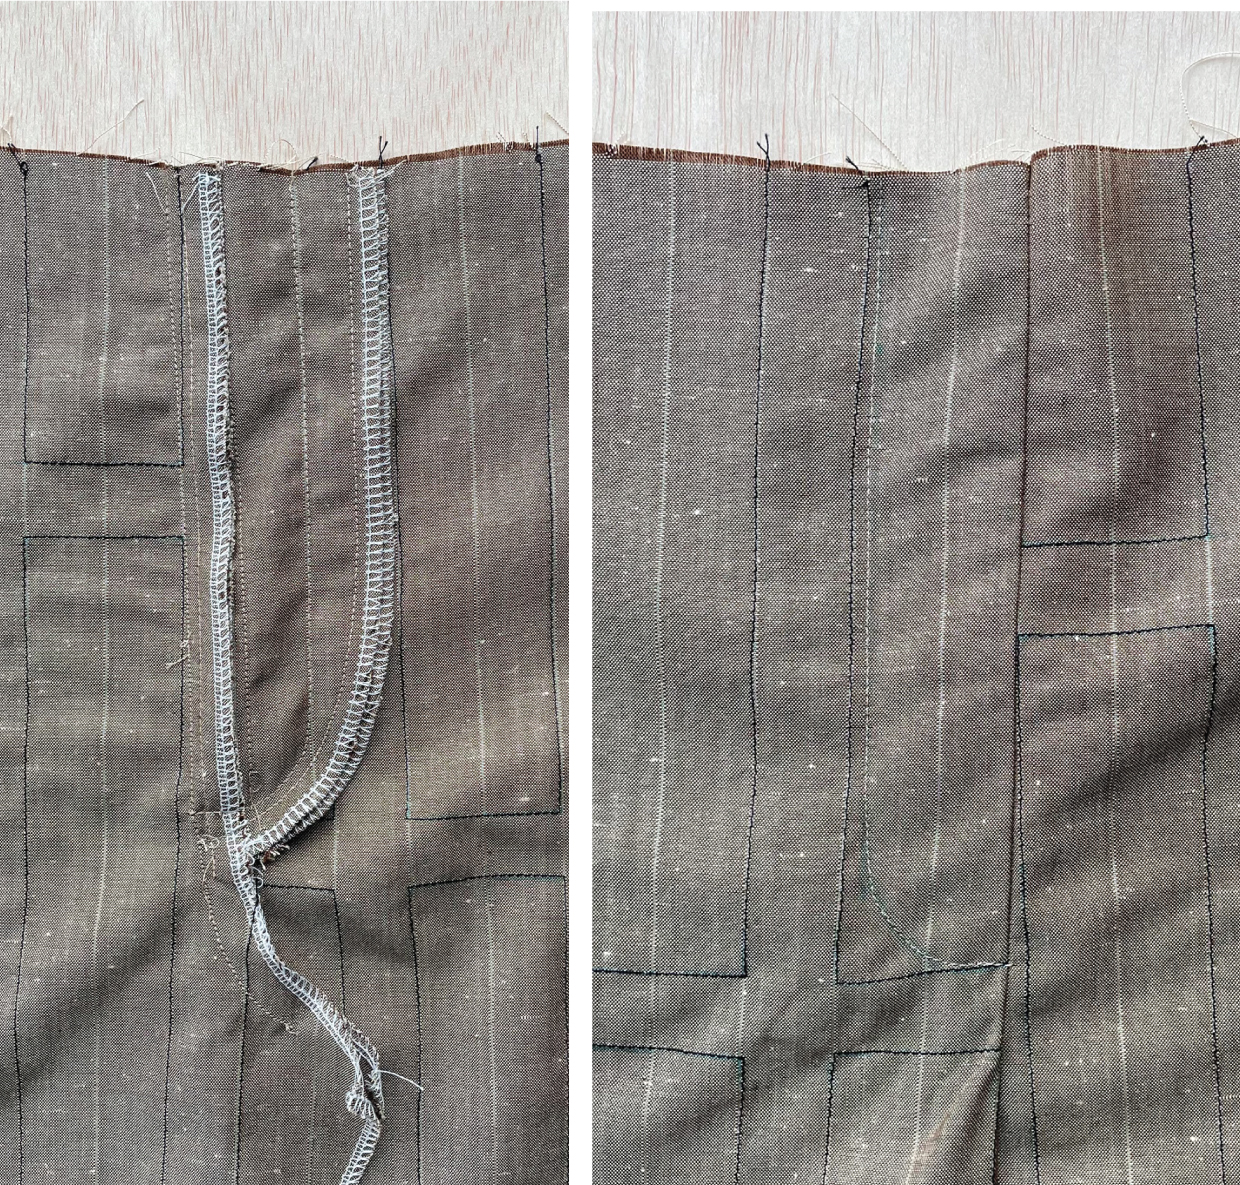
The only step left is to remove the basting stitches from the center-front seam, and your faux fly is finished. You can continue on with the rest of the trousers or shorts construction as normal. Which is exactly what I’m going to do so I can show you my new silk Lisboa Shorts soon! I’ll be back…
You can pick up a copy of our Montauk Trousers, Lisboa Shorts, and Cannes Trousers patterns in the shop. I hope this tutorial will be useful to you so you can customize your sewing as much as you like.