
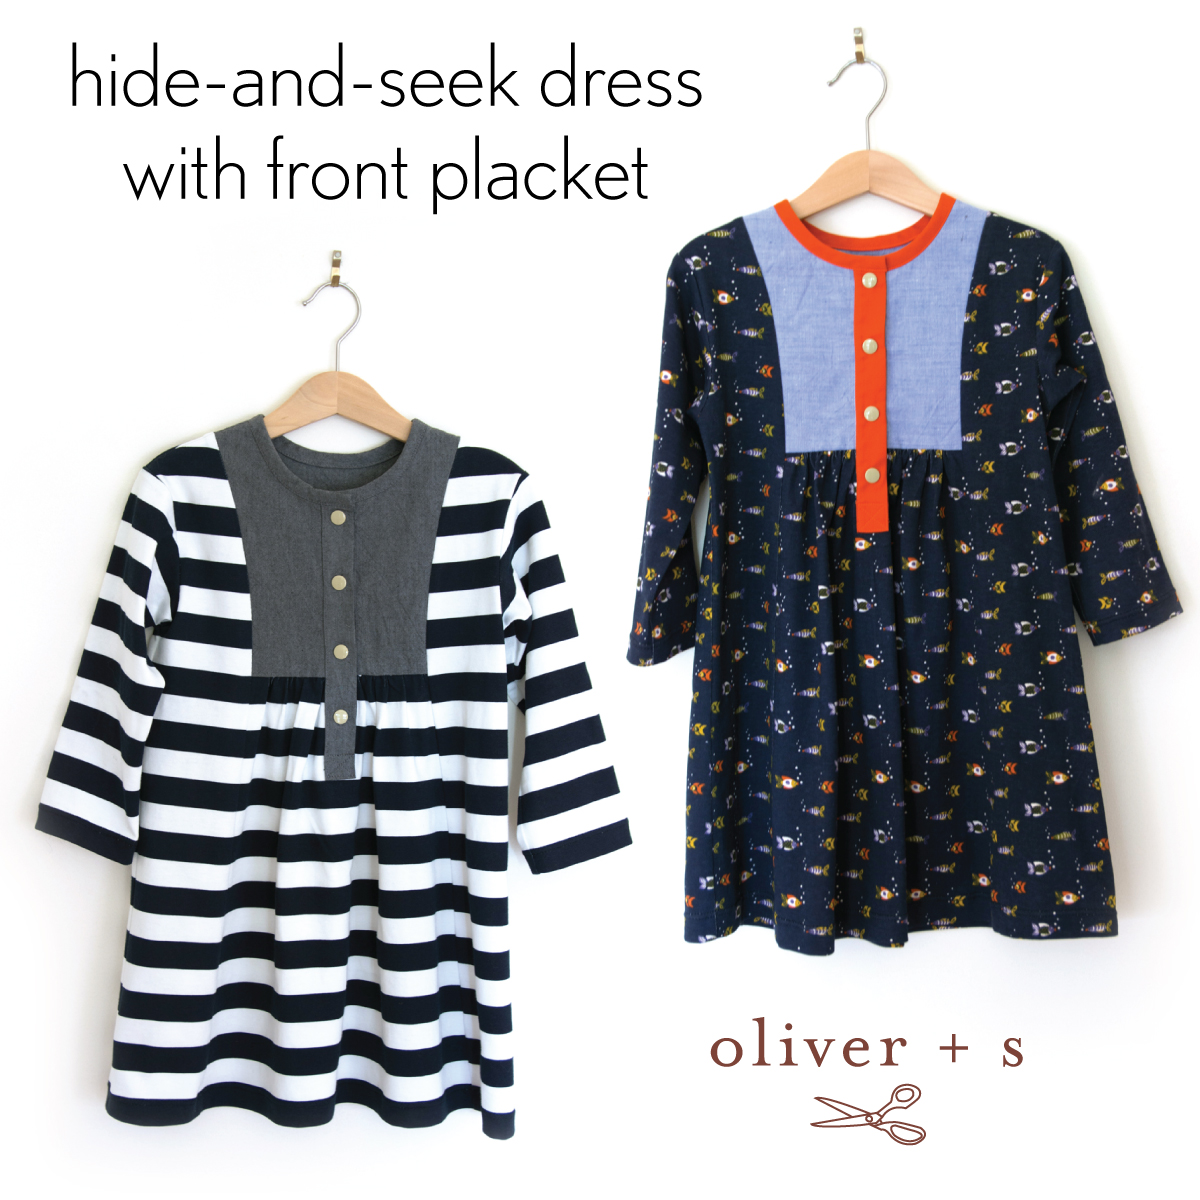
Today we have Shelley returning with a modification to a girl’s Oliver + S pattern. If you are interested in seeing a couple of her past customizations for girls, be sure to check out her adorable ruffled bloomers and amazing trompe l’oeil creation. Thanks for stopping by Shelley and sharing this terrific tutorial!
As much as I’m not ready for her to leave home just yet, I do like to encourage my 4 year old daughter to do things independently. Getting dressed is one such activity. To remove a Hide-and-Seek Dress without help, it becomes easier if the buttons (or snaps) are in the front.
For those nursing mothers whose babies are a long way from independent dressing this kind of modification would also work perfectly for the Cinema Dress. Do you recall Liesl showed us a photo during the Cinema dress sew-along of how to move the buttons from the back to the front?
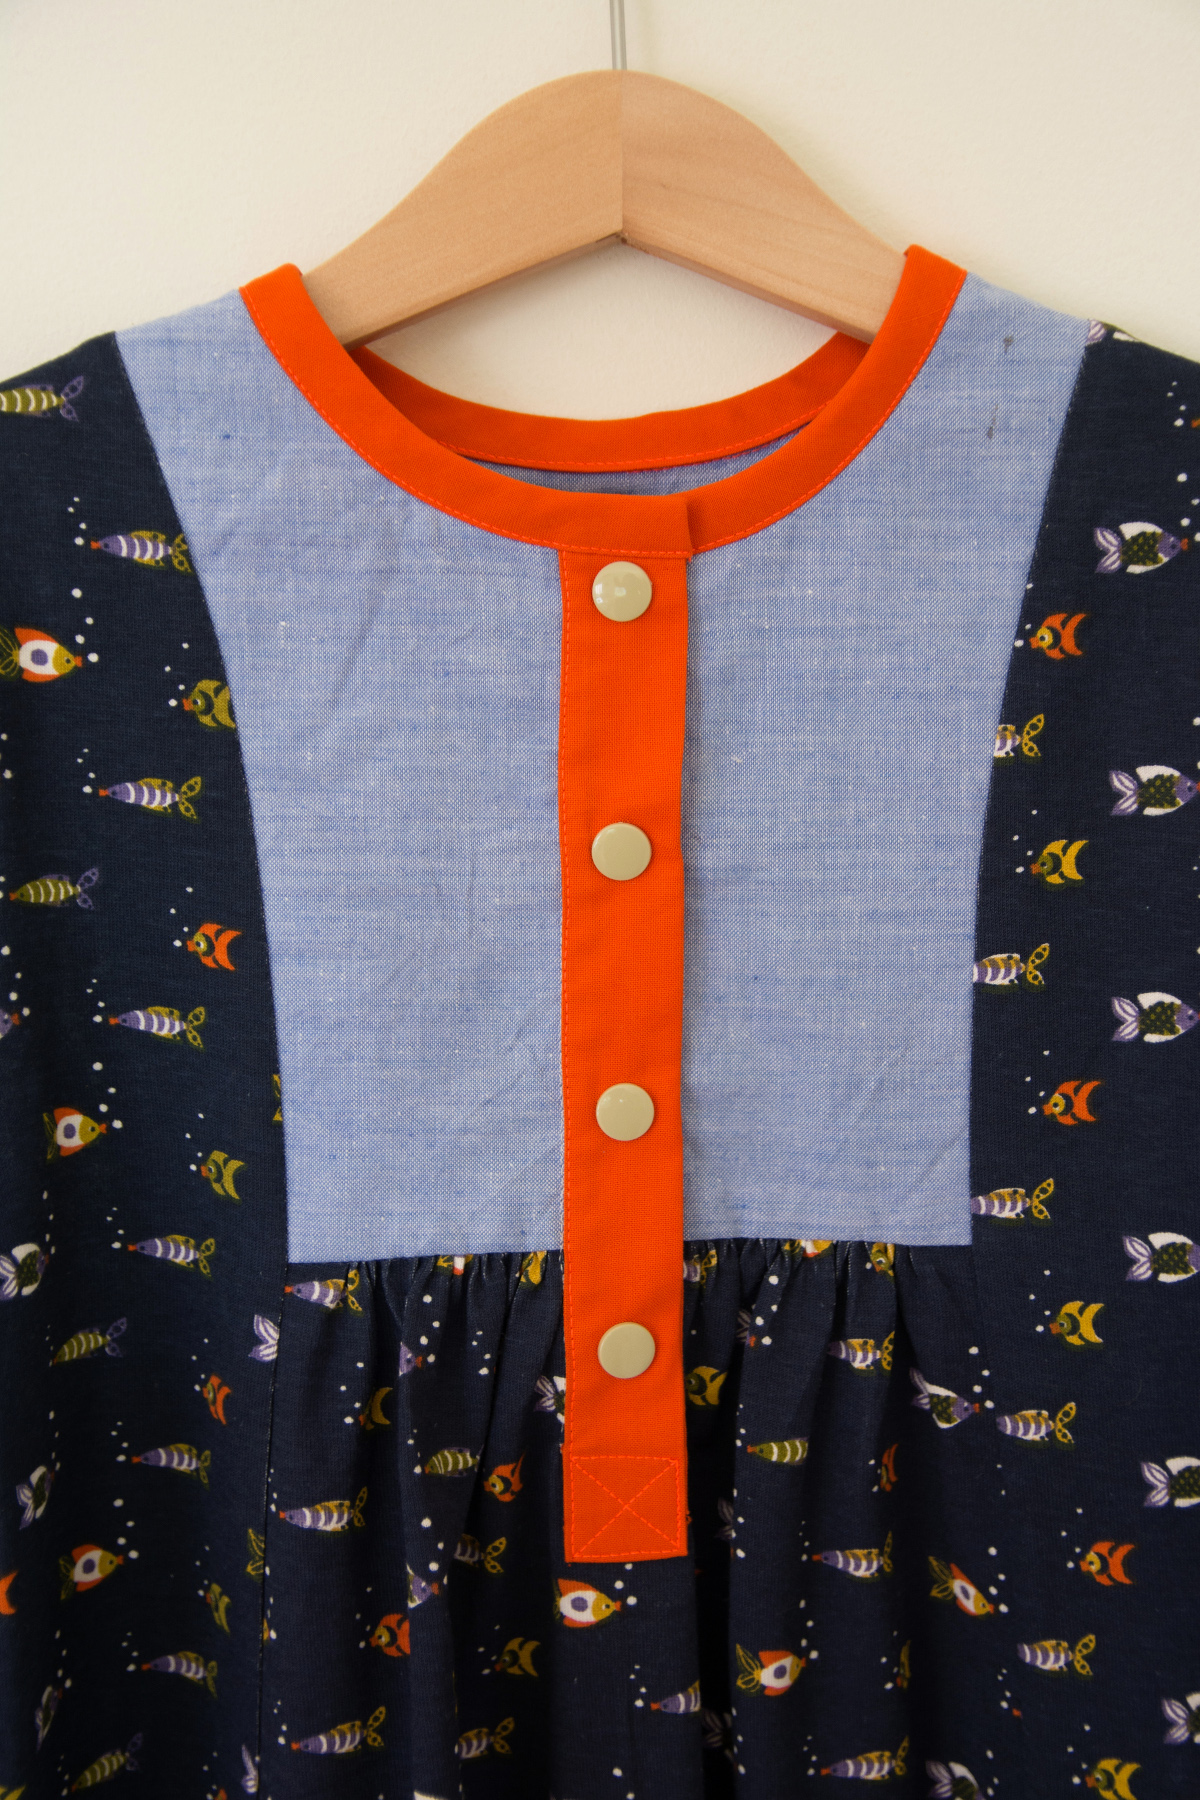
Well, I wanted to add a placket that was not the same length as the yoke section. I wanted mine to be longer, but this would also be perfect if you just wanted a half length placket. My solution was to create a front placket and then finish the neckline with bias binding. Of course I could have used the placket instructions from the Jump Rope Dress, but I didn’t think the pointed placket would go well with the square angles of the Hide-and-Seek yoke. So let’s reinvent the wheel!
Trace the yoke pattern pieces and then make just a few adjustments: Firstly, cut off the 1” placket allowance from the center back pattern piece. Then trim the 1/2” seam allowance from the neckline of both front and back yoke pattern pieces.
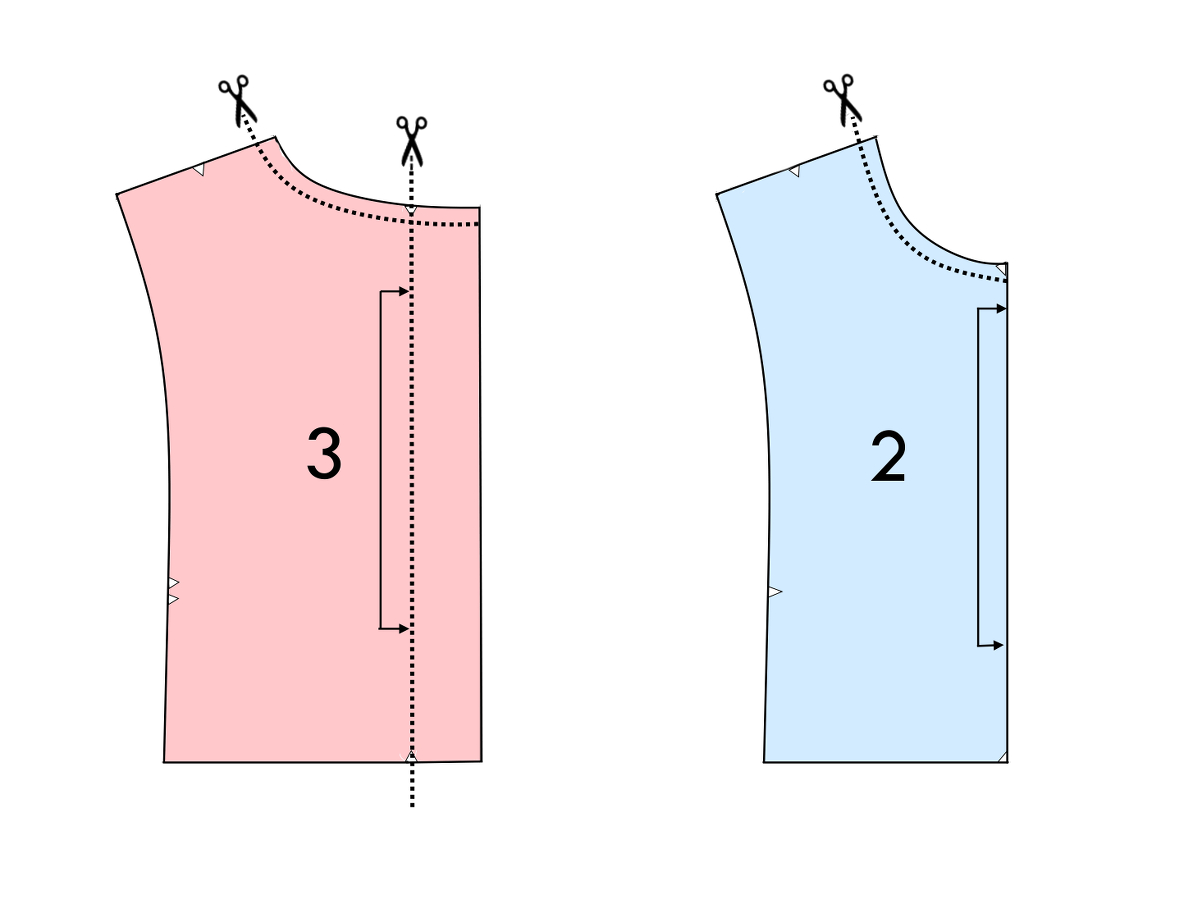
Now you’ll cut the yoke and yoke lining pieces on the fold for both the front and back.
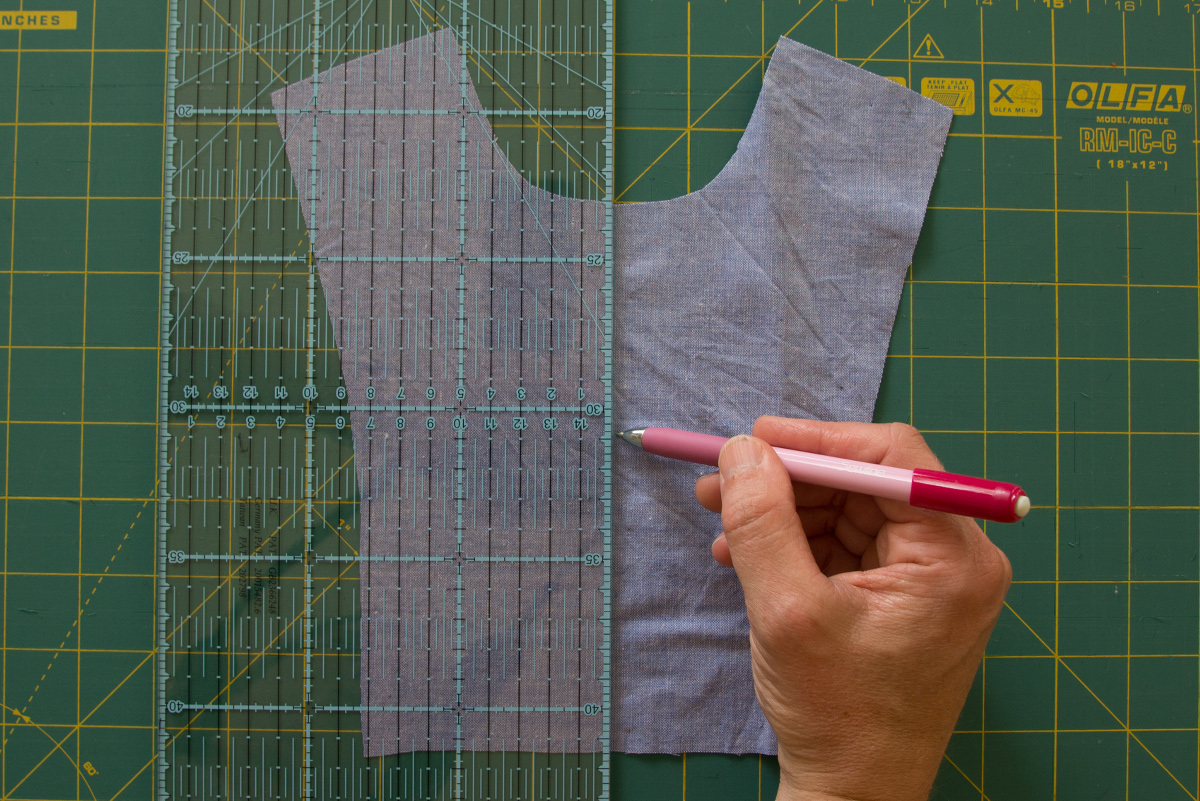
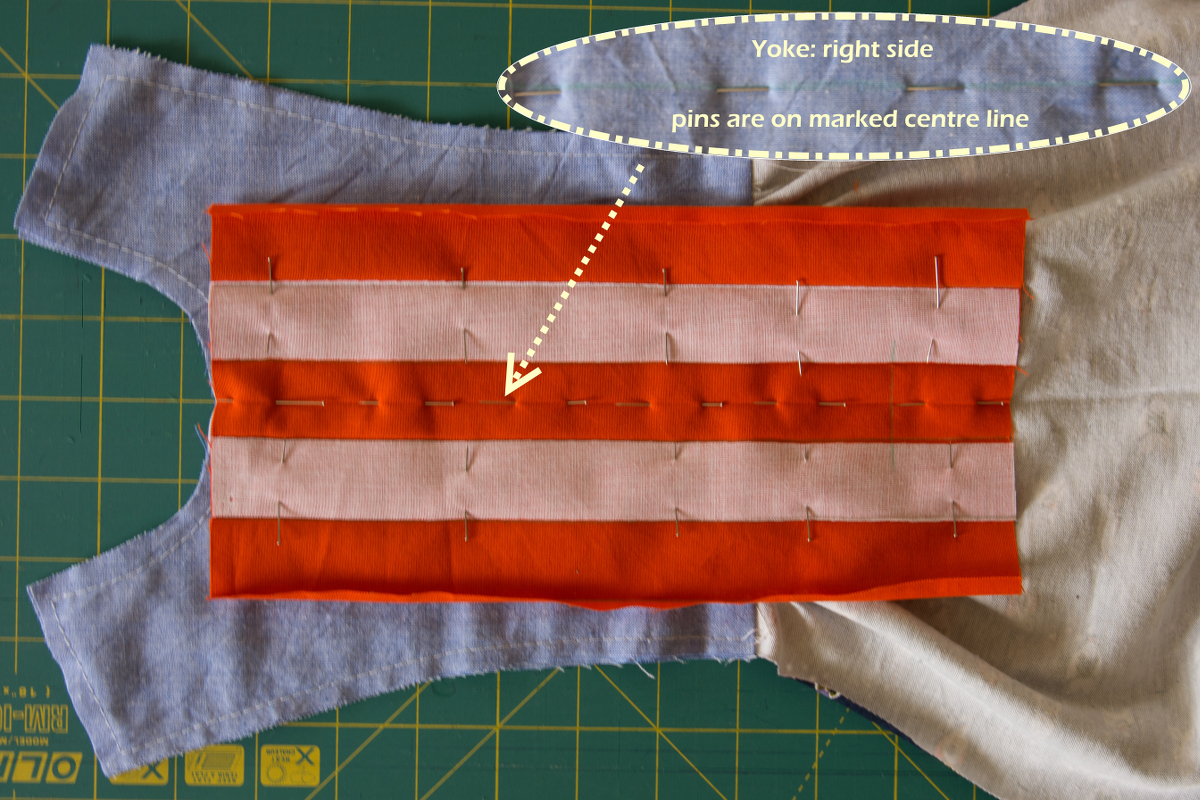
Mark the center line of the front yoke on its right side with a fabric marking pencil or chalk. This will help to ensure your placket is centered nicely later on.
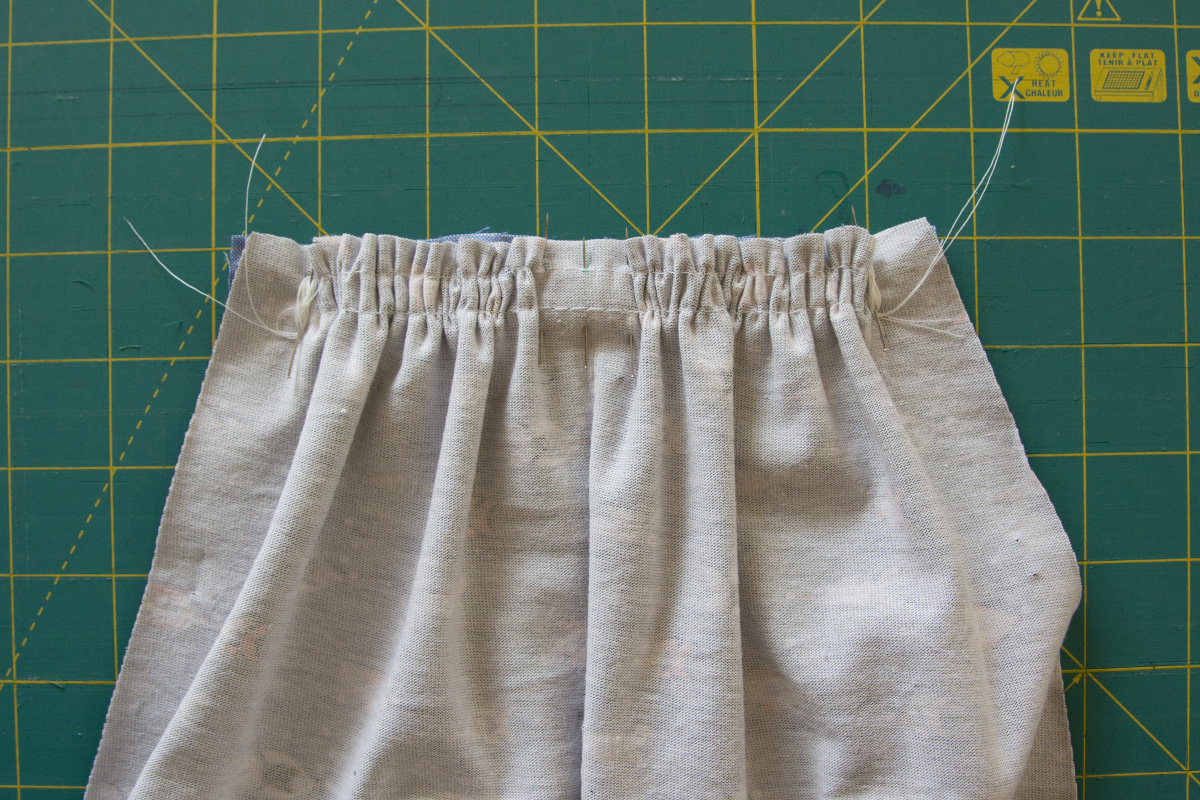
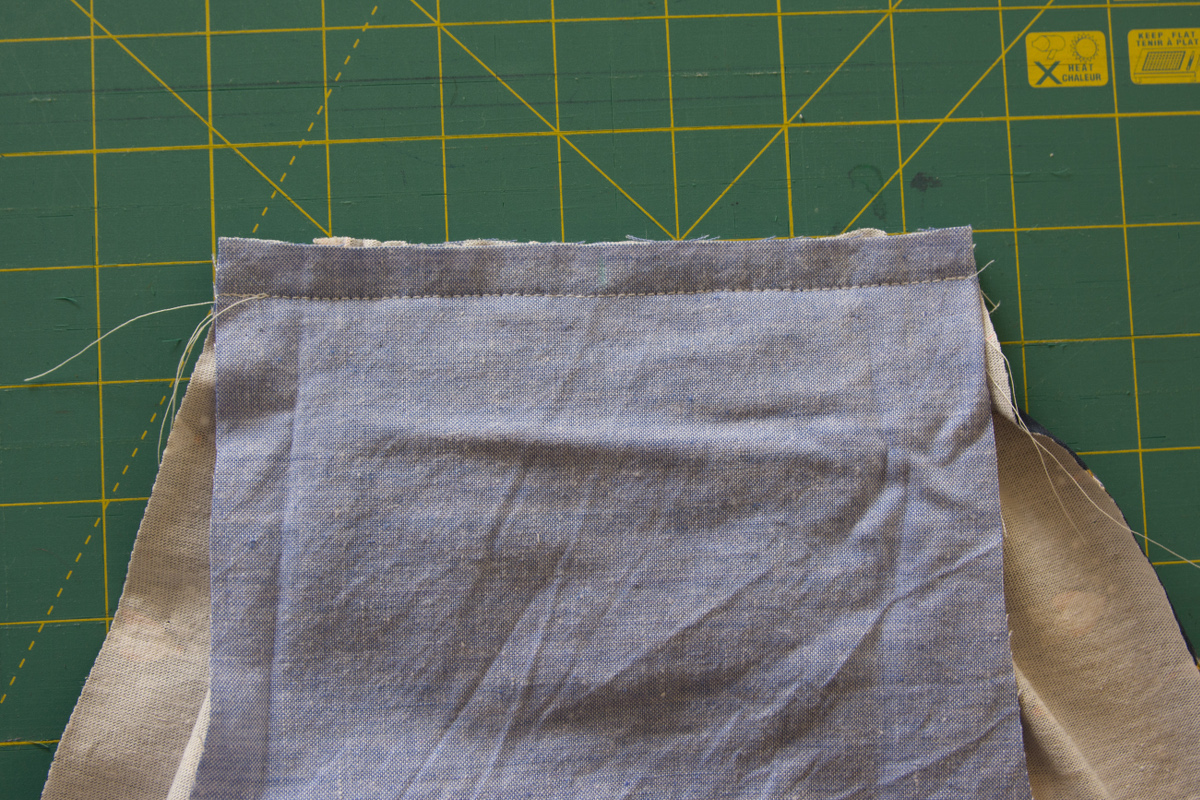
Make two rows of gathering stitches along the topmost edge of the front skirt panel and gather it to fit the yoke (right sides together). You can see I’ve left a 1” wide area in the middle without gathers. This is where my placket is going to cross the yoke/skirt seam. If you’re making a shorter placket then keep your gathers even across the width of the yoke.
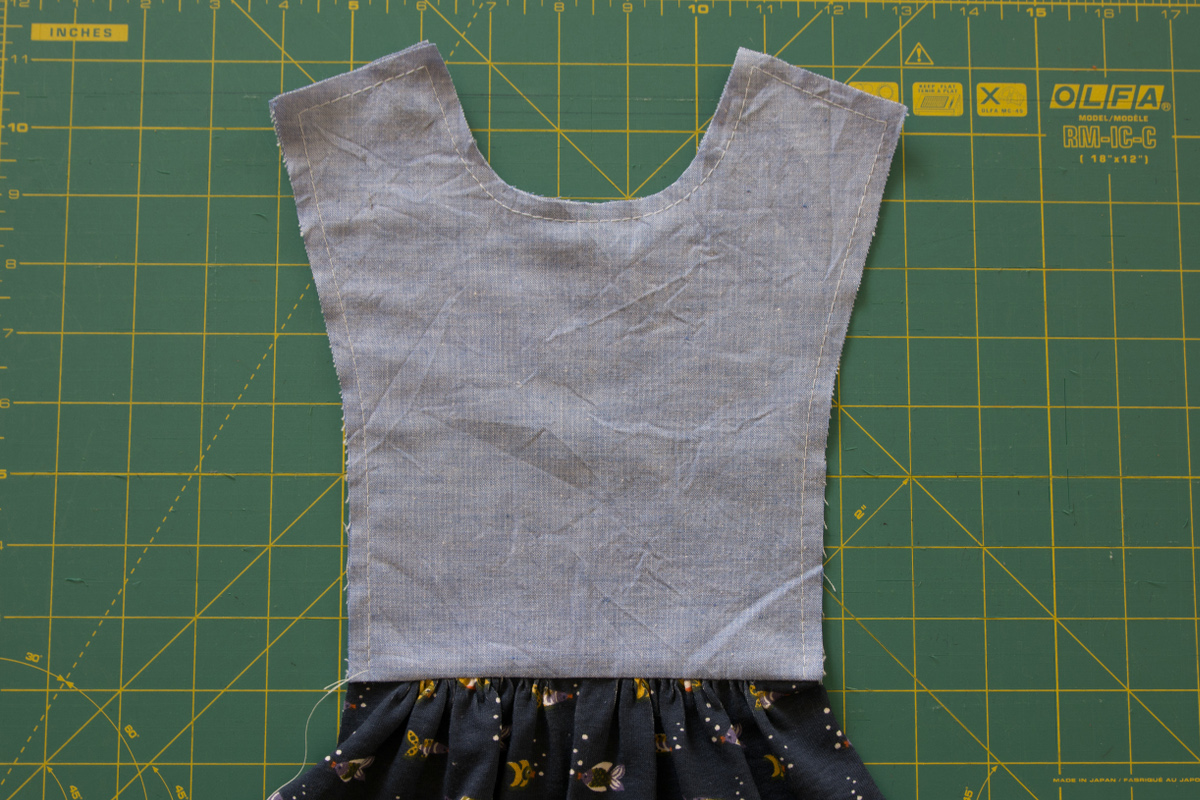
Pin the yoke lining, right side down, on top and then sew the three layers together with a 1/2” seam. Press the yoke and yoke lining away from the skirt and then baste around the edge of the yoke to hold the yoke and yoke lining together.
Now we’re ready to cut our placket. Decide how long you want your placket to be visually, bearing in mind that the functional opening will be 1” shorter than the “look” of the placket. Add 1/2” of seam allowance to the length you’ve chosen. Cut a placket of the final determined length by 5 1/2” width. Mark the placket with straight lines 1/4” in from each long edge and then at 1” distance from the previous line.
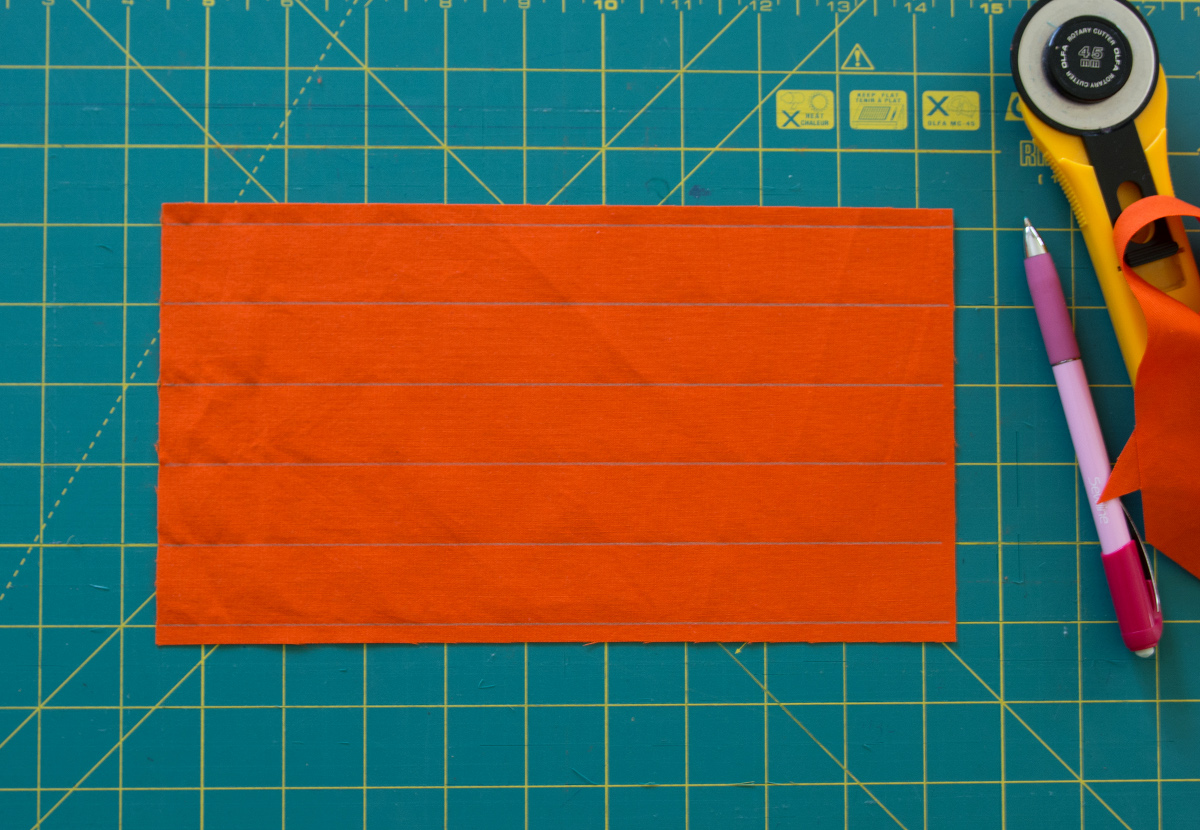
You should have five exactly 1” sections marked. Apply 1” wide strips of interfacing to the second and fourth sections as shown below.

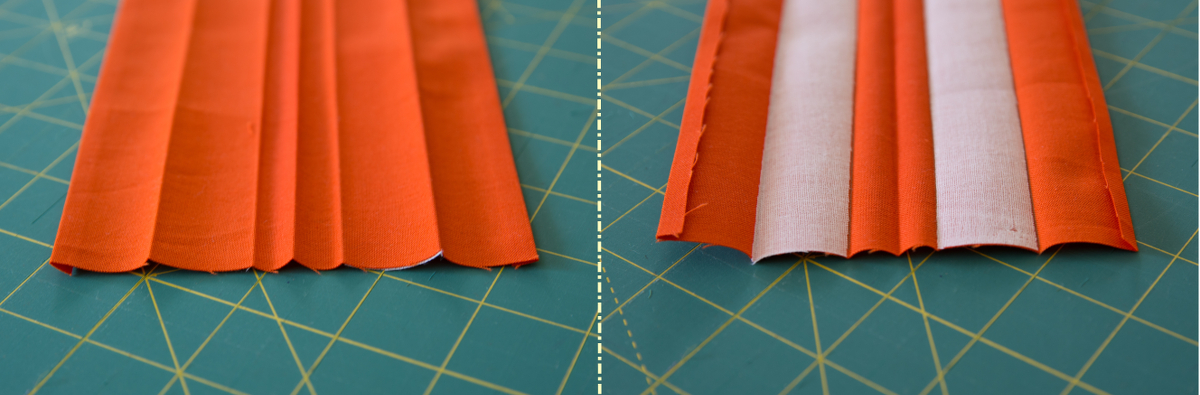
Now, with wrong sides together, iron a crease along each of the lines as well as a center crease.
Pin the placket to the dress such that the right side of the placket is facing the yoke lining (wrong side of the dress). If you pin on the center crease of the placket you should see your pins on the other side coming through exactly on the center line that you marked on the yoke front. Make sure you line it up nice and straight so you don’t get a leaning placket!
Mark a stitching line across the bottom of the placket 1 1/2” from the raw edge. Starting stitching at the neckline, stitch down one interfaced edge, across the bottom at the 1 1/2” line and then back up the other interfaced edge.

Cut down the center line of the placket and yoke stopping a 1⁄2″ from the end of the stitched placket. Cut into each corner as close as you can to your stitches. Then trim the cut edges to 1/4”.
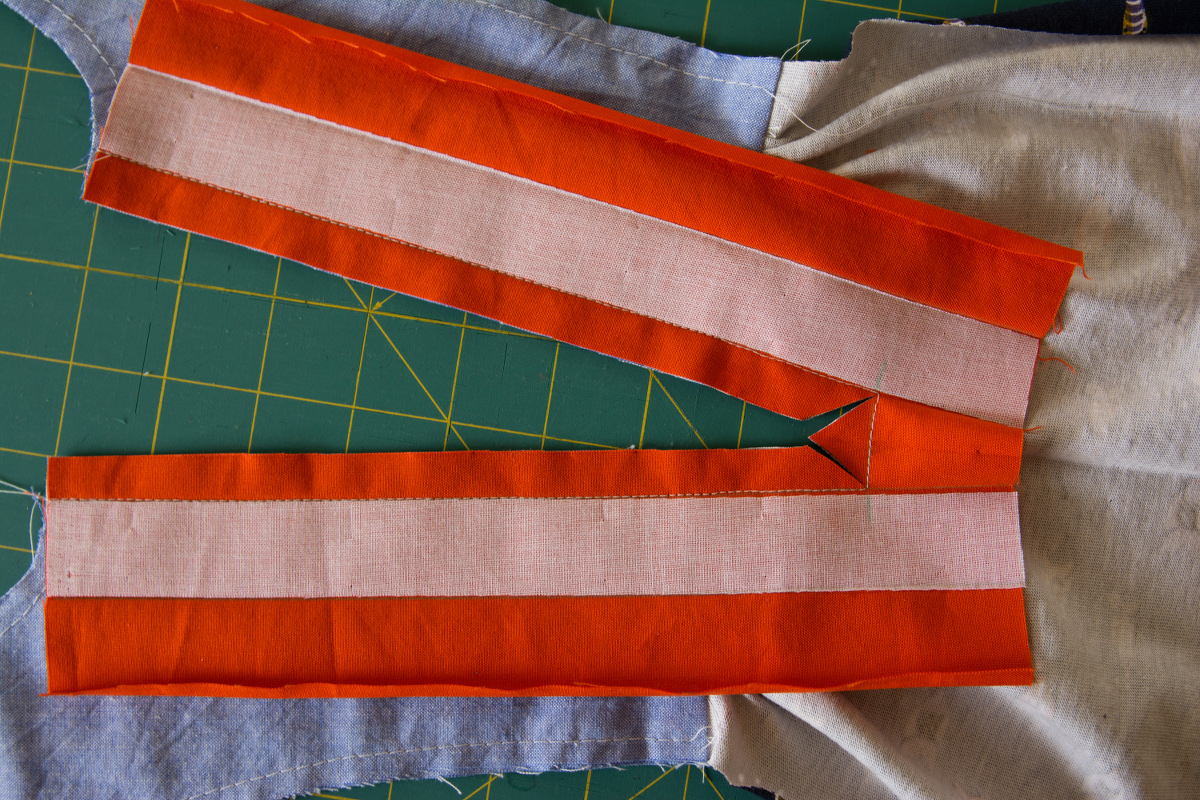
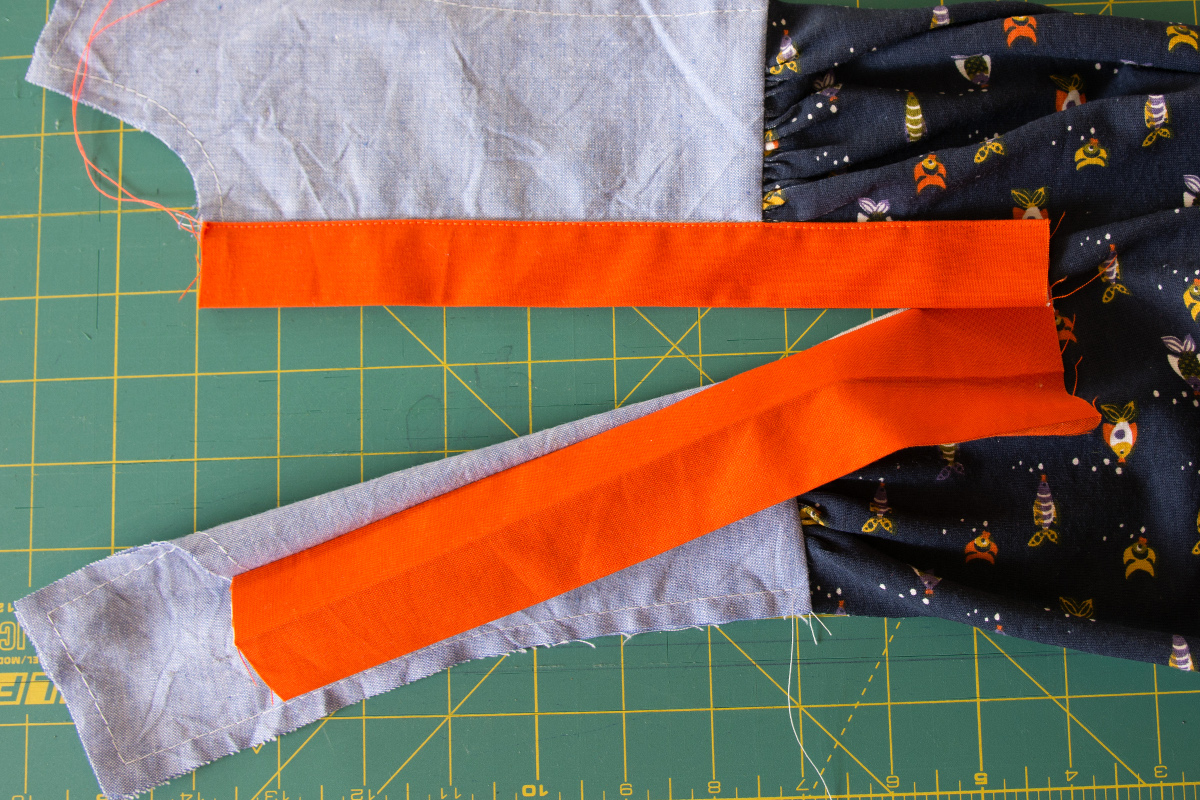
Turn the dress over and bring the placket through the opening. You should be looking at the right side of the dress and the wrong side of the placket.
Working with the placket that will be on the wearer’s left, press the seam allowances towards the placket. Fold the placket back on itself to just cover the stitching line and then topstitch it in place. Take care to stop your topstitching at the point 1 1/2” from the bottom edge of the placket.
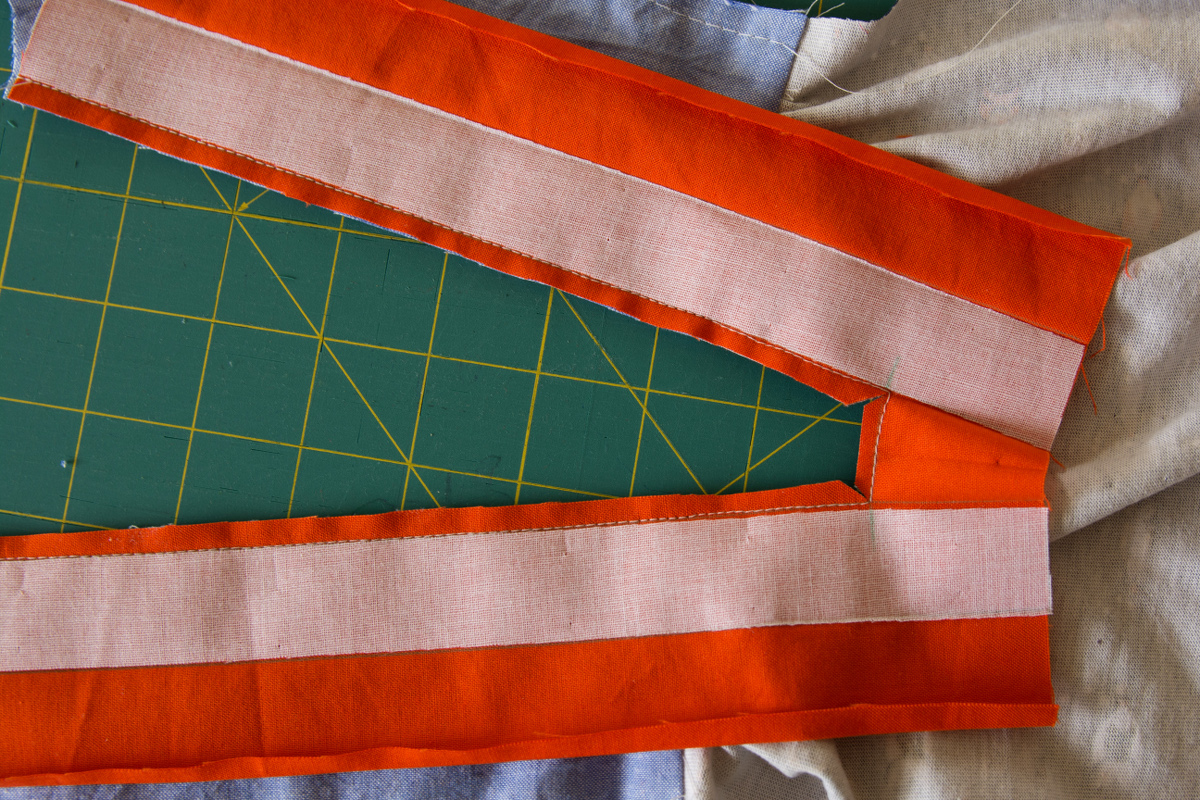
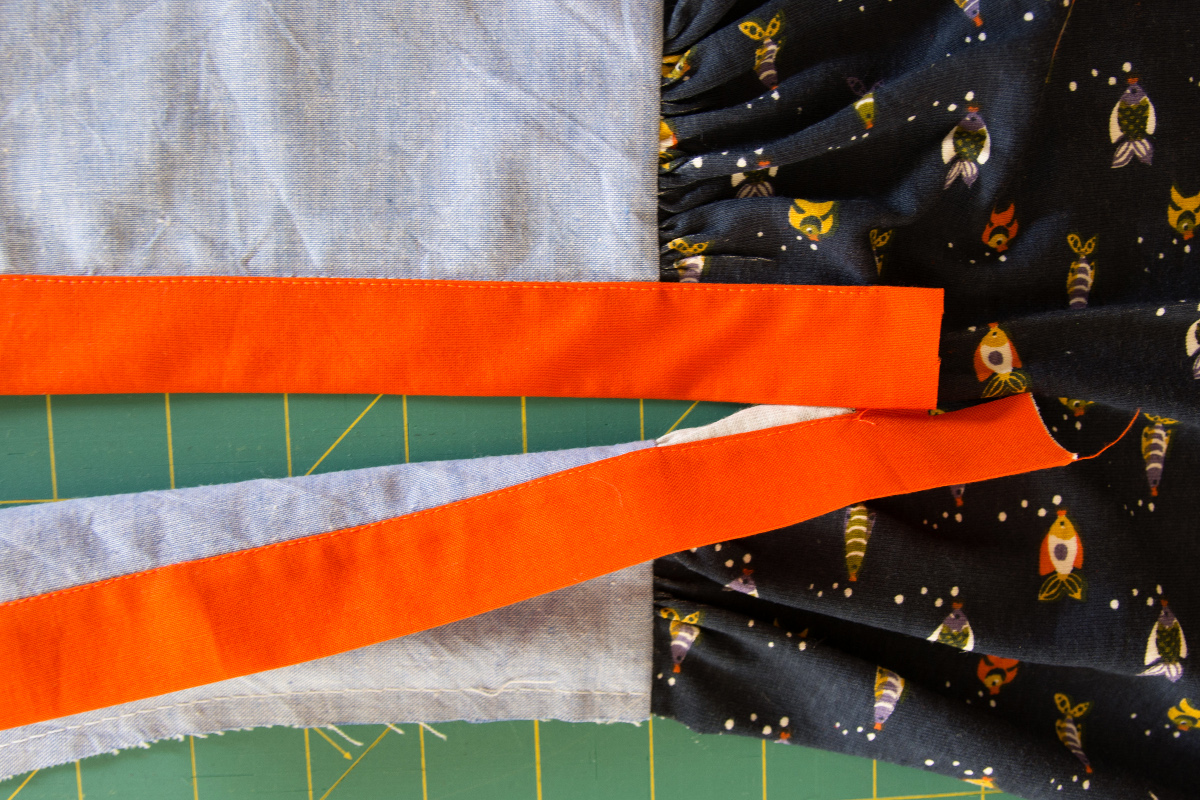
Press and topstitch the placket on the wearer’s right side in the same manner. Now lay the plackets one on top of the other such that the right placket is on top of the left. Lift up the right placket and trim the bottom of the left placket only to 1/2” below the end of the topstitching. You’ll be trimming 1” off.
Put the right placket back on top of the left and tuck the raw edge of the right placket under by 1/2”. It should meet the trimmed raw edge of the left placket.
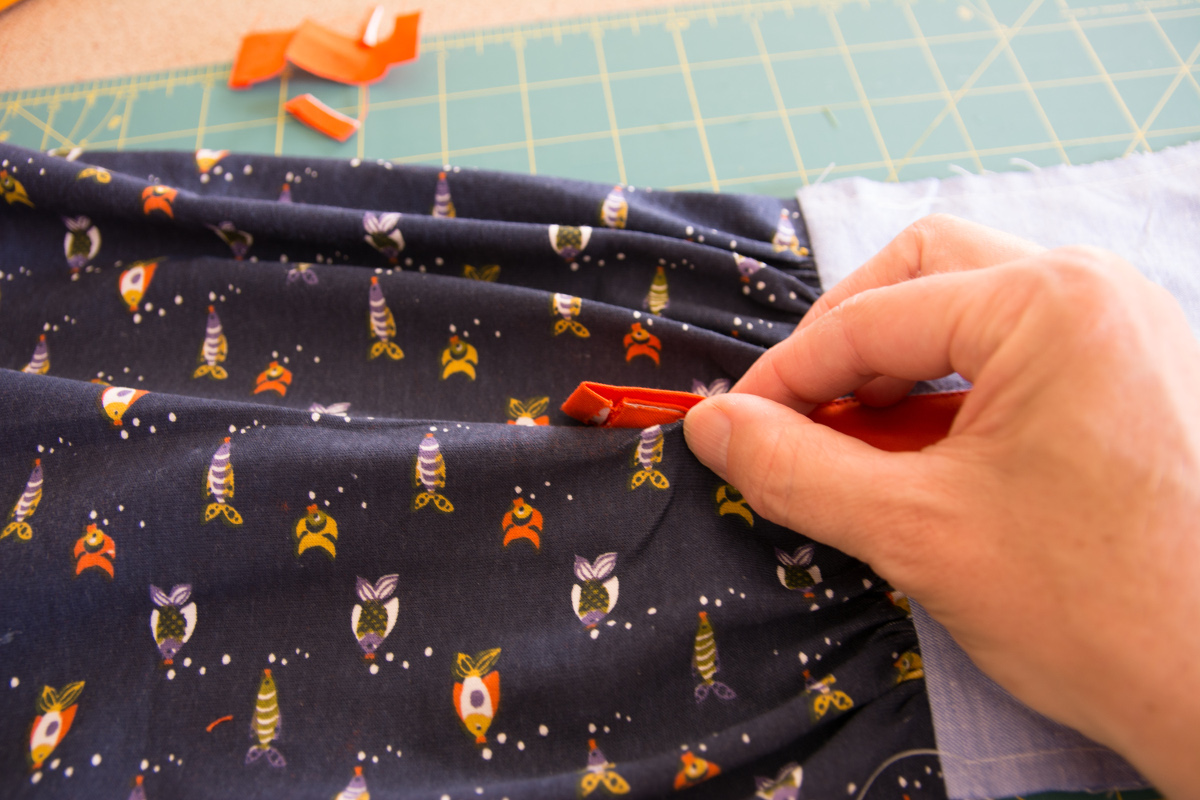
Stitch a 1” square at the bottom of the placket to hold the turned edge under and reinforce the lowermost opening of the placket.

If you’re using buttons you may want to sew your buttonholes now, so that the bias binding doesn’t get in the way. Allow 1/2” at the top and mark then sew your buttonholes (as many as you need) evenly along the placket length.
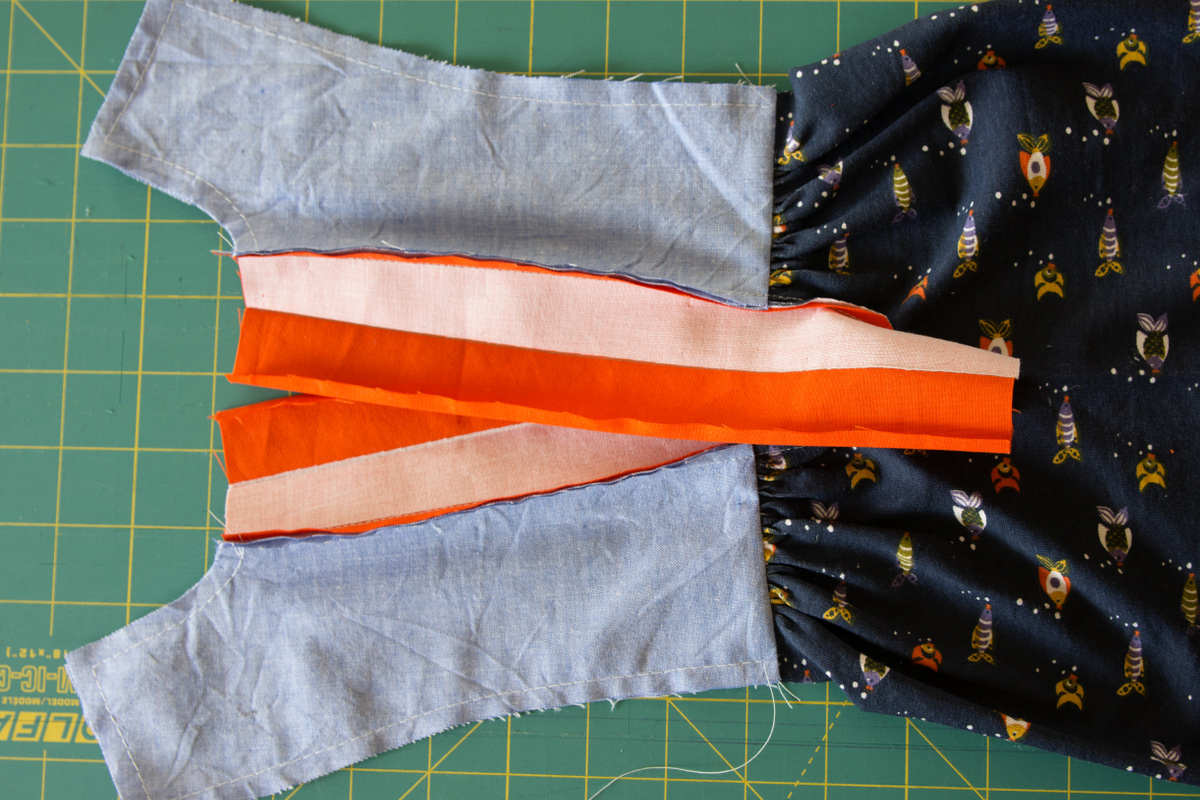
The rest of the dress assembly is straight forward, but slightly different from the pattern instructions so I’ll talk you through the steps briefly:
- Attach the back skirt, sandwiched between the back yoke and back yoke lining, in the same way you did the front.
- Attach the front and back side panels (and pockets if you like) then sew the shoulder seams, pressing them open and finishing the seam allowances separately.
- Sew the sleeves, side seams and hems as per the pattern instructions.
Finally to finish the neckline, cut a 2” strip of fabric on the bias and press it to create a 1/2” double fold bias binding. You’ll need at least the circumference of your finished neckline plus an inch or two for the length of your bias binding strip.
There are various ways to attach bias binding, but having sewn my way through Little Things to Sew from cover to cover, I’m most familiar with that method (and yes, there is more than enough opportunity to practice bias binding in that book!). I sew the bias binding to the right side of the neckline then wrap it round to the inside and use 1/4” fusible web to iron it exactly onto the previous stitching line. Then I can edgestitch from the right side of the dress and know that I won’t miss any bits on the underneath or have to remove any pins as I sew.
You might have noticed they’re not exactly the Hide-and-Seek dress sleeves. Since I was using an interlock knit for both dresses I figured a longer, narrower sleeve would work well. This sleeve was drafted using the sleeve cap of the Hide-and-Seek and a halfway compromise between the Hide-and-Seek and the School Bus for width, with the length of the School Bus sleeve. In all, I’m really excited about this pattern modification for a cute, easy-wearing knit dress. I’m not sure I’ll be able to resist making a third one with some of the gorgeous new Lisette interlock knits.