Today we are happy to welcome back Kristi. On her previous visit she shared how to lengthen the Sunny Day Shorts pattern. She is here now to show us how to add thumbhole sleeves to the Field Trip Raglan T-shirt. Thanks so much for this fantastic tutorial Kristi!
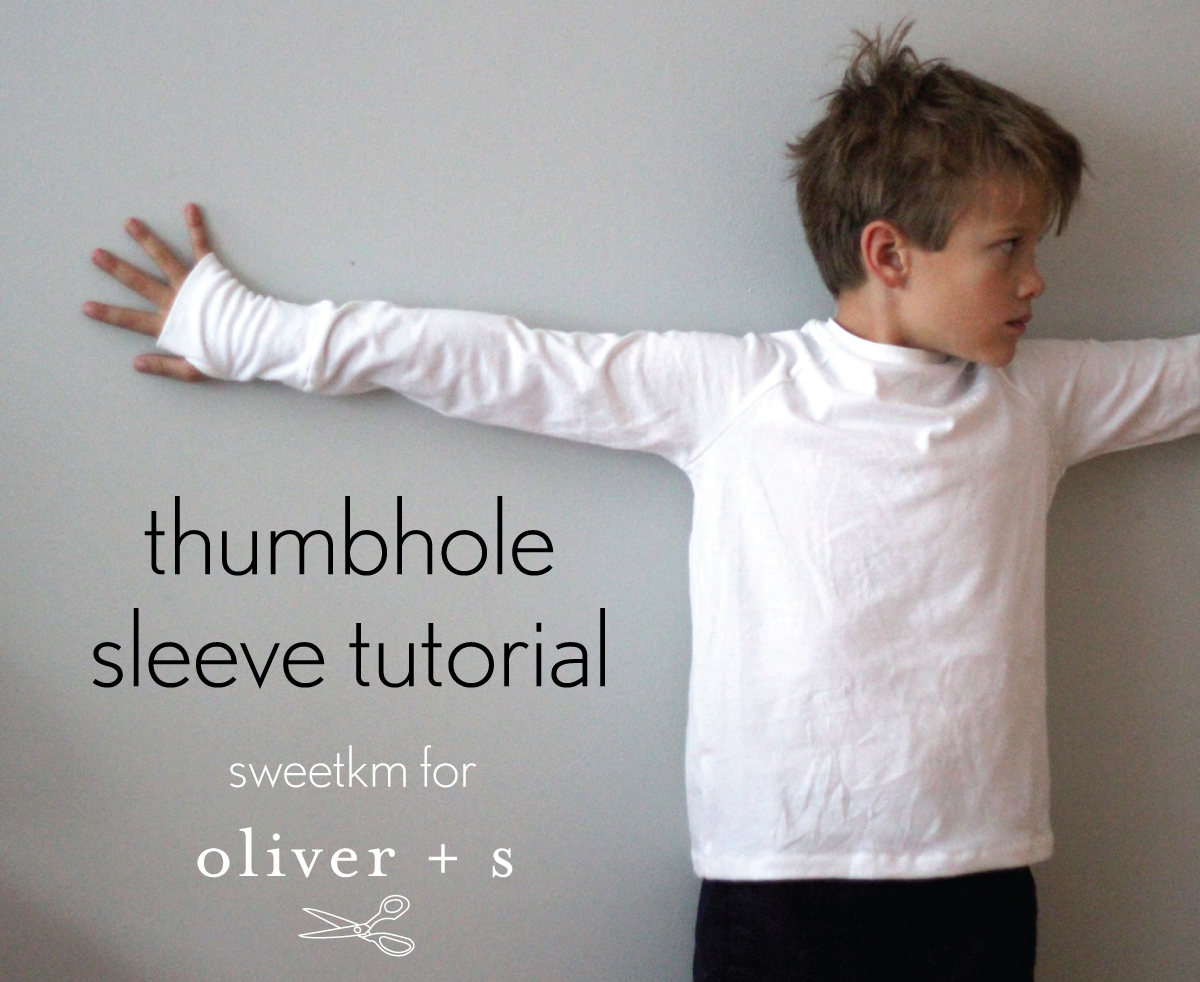
Hello everyone! This is Kristi from SweetKM. Today I am sharing the process I used to add thumbhole sleeve cuffs to the cozy little Field Trip Raglan T-shirts I made for STYLO 3. I love thumbhole sleeve shirts as a base layer in the winter. I’m not a workout wear kind of girl, so my selection has been limited. No more. After a few weeks of intermittent experimentation I have cracked the thumbhole sleeve origami case wide open. Now every day can be a thumbhole t-shirt day.

The best part about this little customization is that it can be done with any t-shirt pattern, for children or adults. I’m demonstrating the process with the Oliver + S Field Trip Raglan T-shirt, but it would also work great with the School Bus T-Shirt (as well as the Metro T-shirt).
PREPARATION
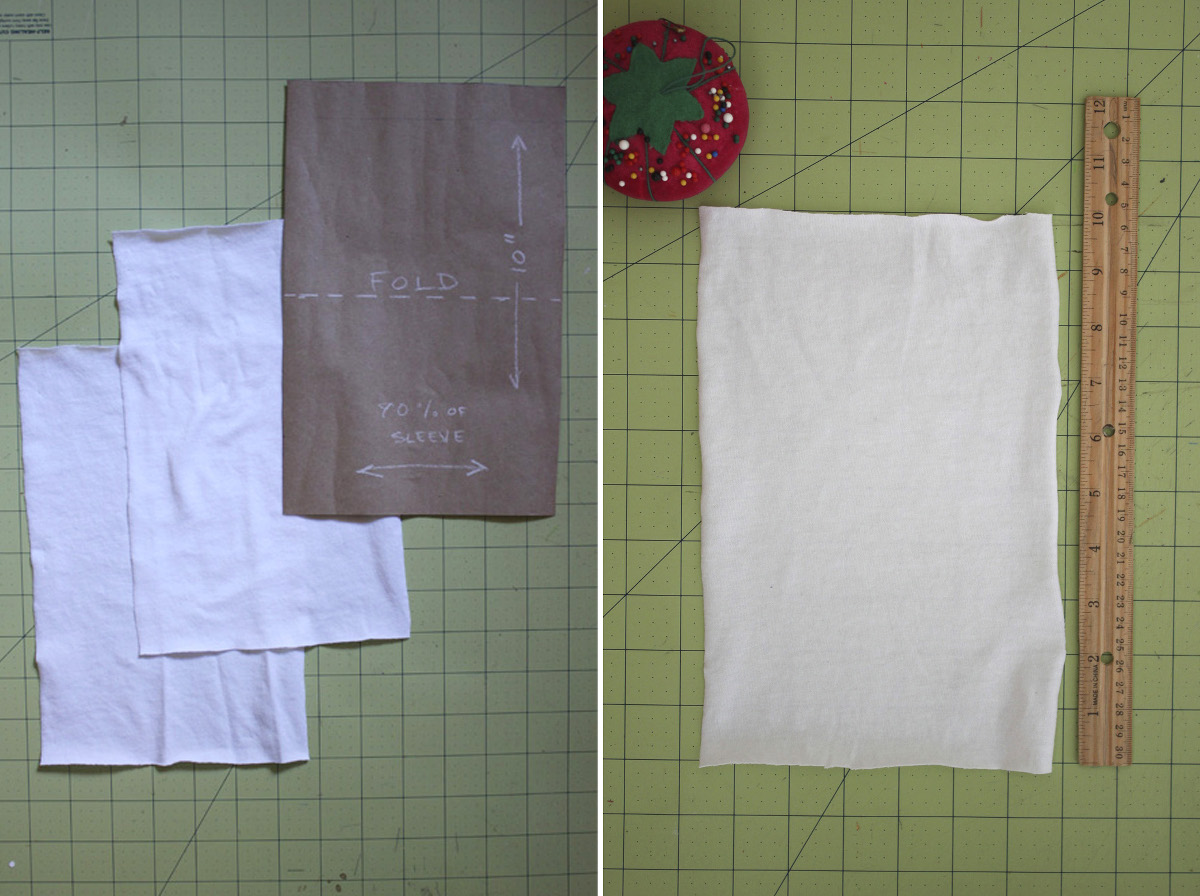
Cut 2″ off of the length of each sleeve piece. Measure the length of the resulting raw edge; you will need this measurement to make the sleeve cuffs later. Assemble the shirt as indicated in the pattern instructions. Finish the neck and bottom hem. Finish the sleeves as follows.
FOR THE CUFFS
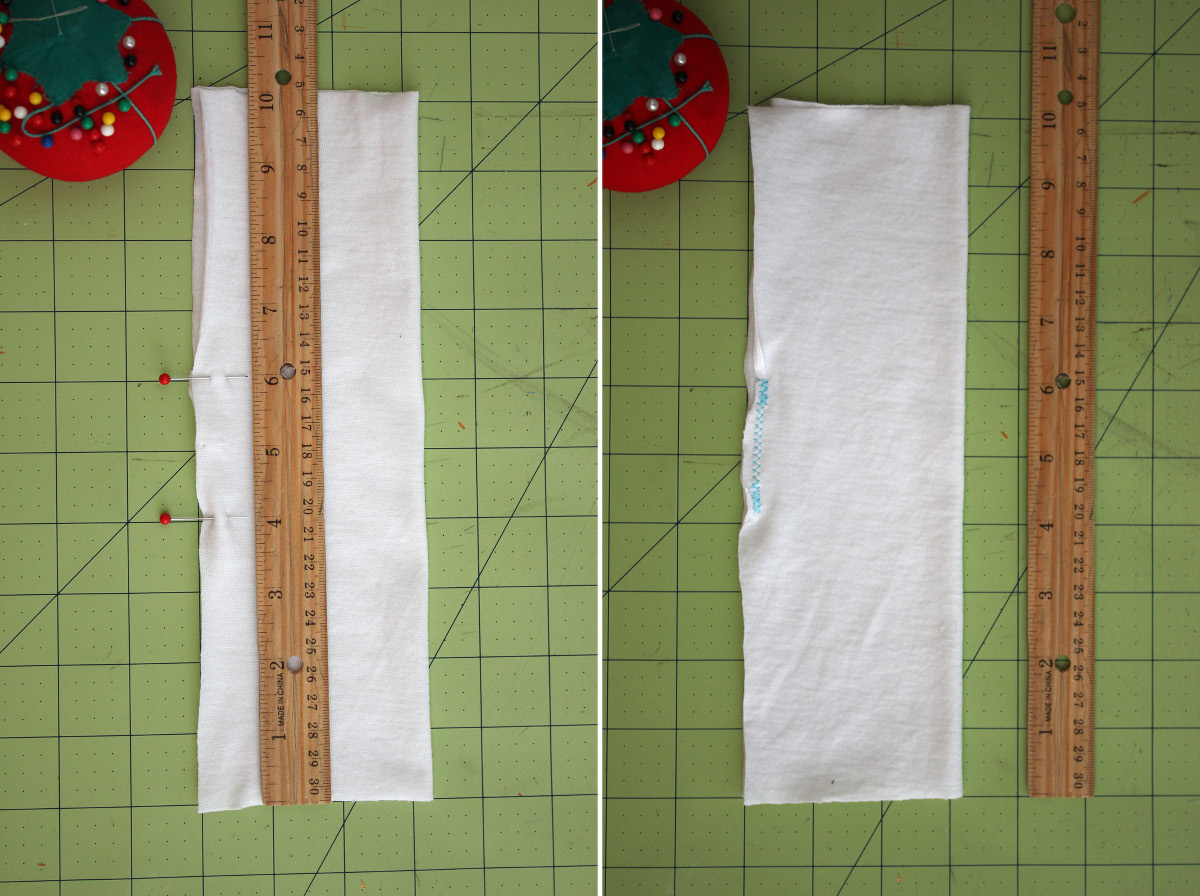
Cut out two rectangles with a length of 10″ and a width that is 90% of the length of the trimmed sleeve edge. My size 7 sleeve edge was 8″ long. Here’s the math: 90% of 8″ is .9 x 8″ = 7.2″ Its not an exact science so I rounded to 7.25″. I cut my cuffs 7 1/4″ x 10”.
The cuff is sewn in three segments. The first is split by the fold at the finger edge of the cuff. The second is around the thumbhole. The third is from the thumbhole to the raw edge where it joins to the arm of the shirt.
Even if you normally use a serger when sewing knits, I recommend sewing the cuffs using a zigzag stitch on your sewing machine, because it is easier to control the stopping and starting point of each seam segment. I am sewing with a large zigzag stitch and a contrasting thread to make the stitching easy to see. If your stitches are showing through the final seam like mine, switch to a smaller stitch length and a tighter zigzag stitch.
FIRST SEGMENT
Fold cuff in half lengthwise with right sides together. Using a ruler, mark the center of the long raw edge. Measure and mark 1″ to either side of the center marking.
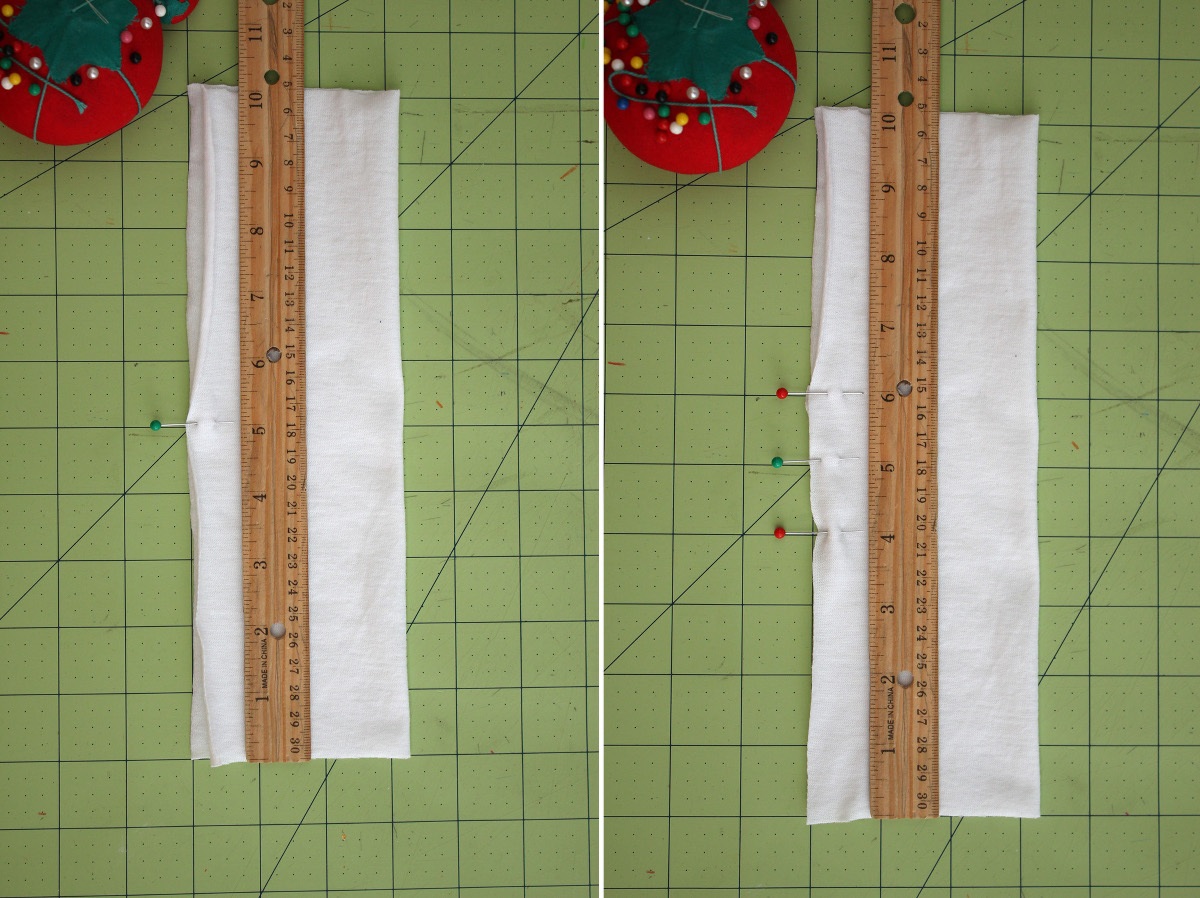
Remove the center marking. Using a zigzag stitch, sew between the remaining markings. Be sure to backstitch securely at each end.
SECOND SEGMENT (thumbhole opening)
With the cuff positioned as shown in the photo on the left below, bring the flaps on the left side together.

Position right sides together and aligned from the raw edge to the end of the first seam. Position so that the rest of the cuff is tucked up inside and out of the way. Place a pin at the end of the first segment of stitching, to keep the edges flat, and the rest of the cuff out of the way. Use another pin to mark 1 1/2″ from the end of the first seam. Using a zigzag stitch, sew between the marks. Get as close to the end of the first seam as possible without overlapping it. It is easiest to start at the end away from the first seam. Be sure to backstitch securely at each end.
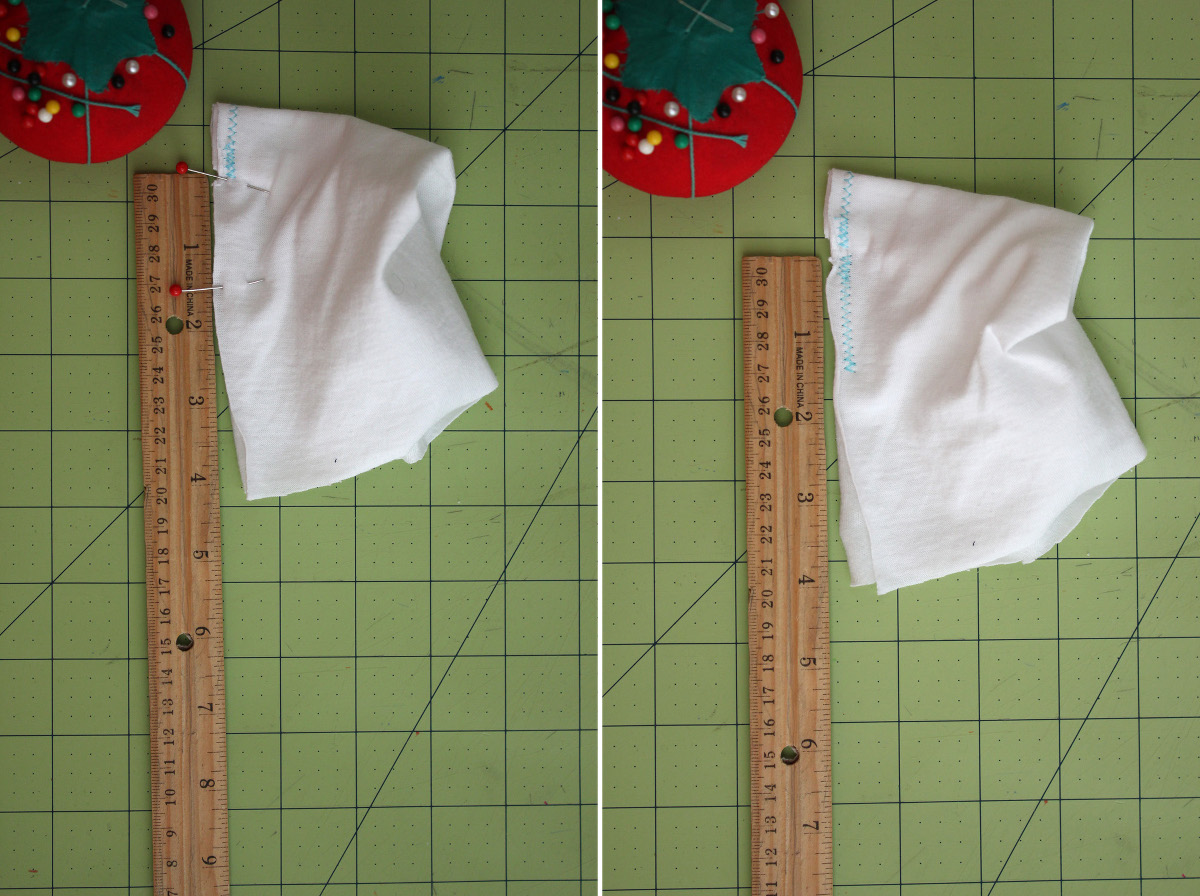
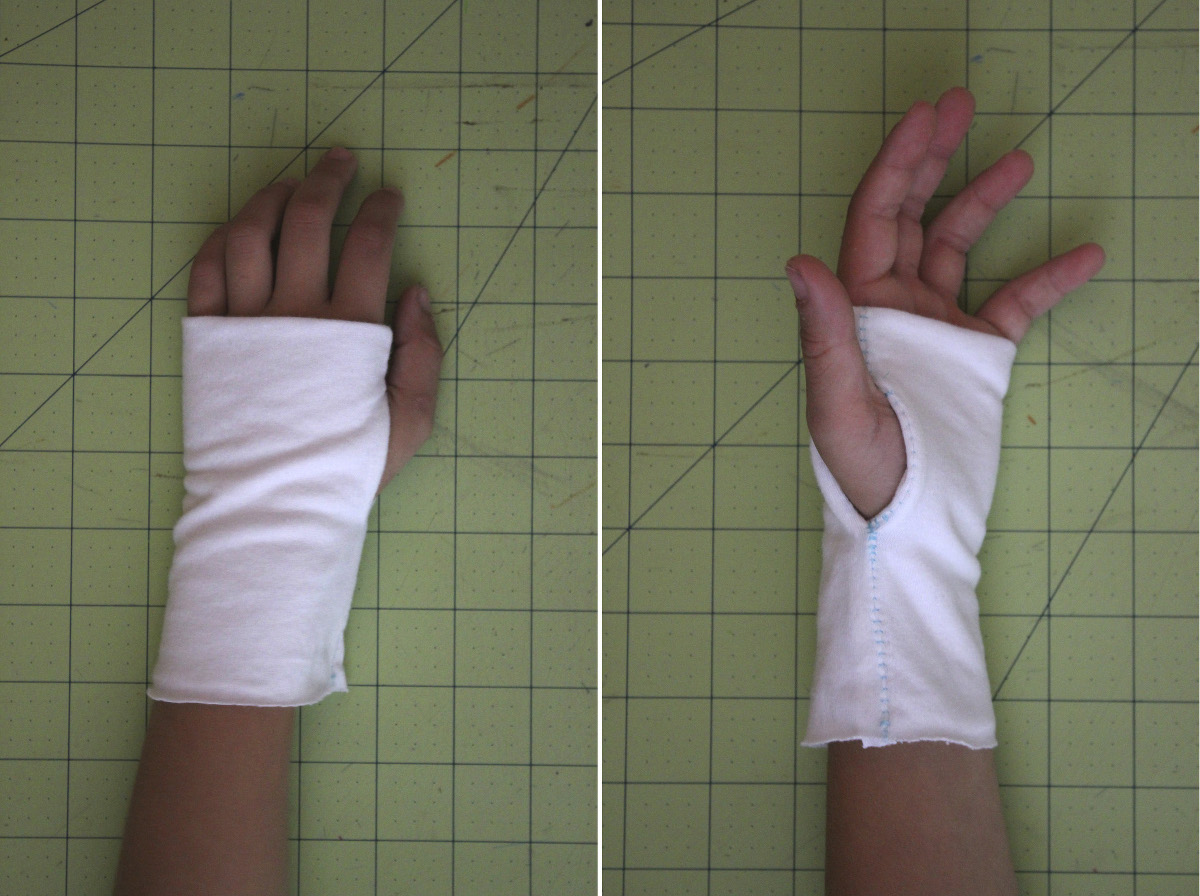
Repeat with the other set of flaps. Turn the work to the right side (as shown in the photo below) to be sure you’re on the right track. This is the thumbhole opening.
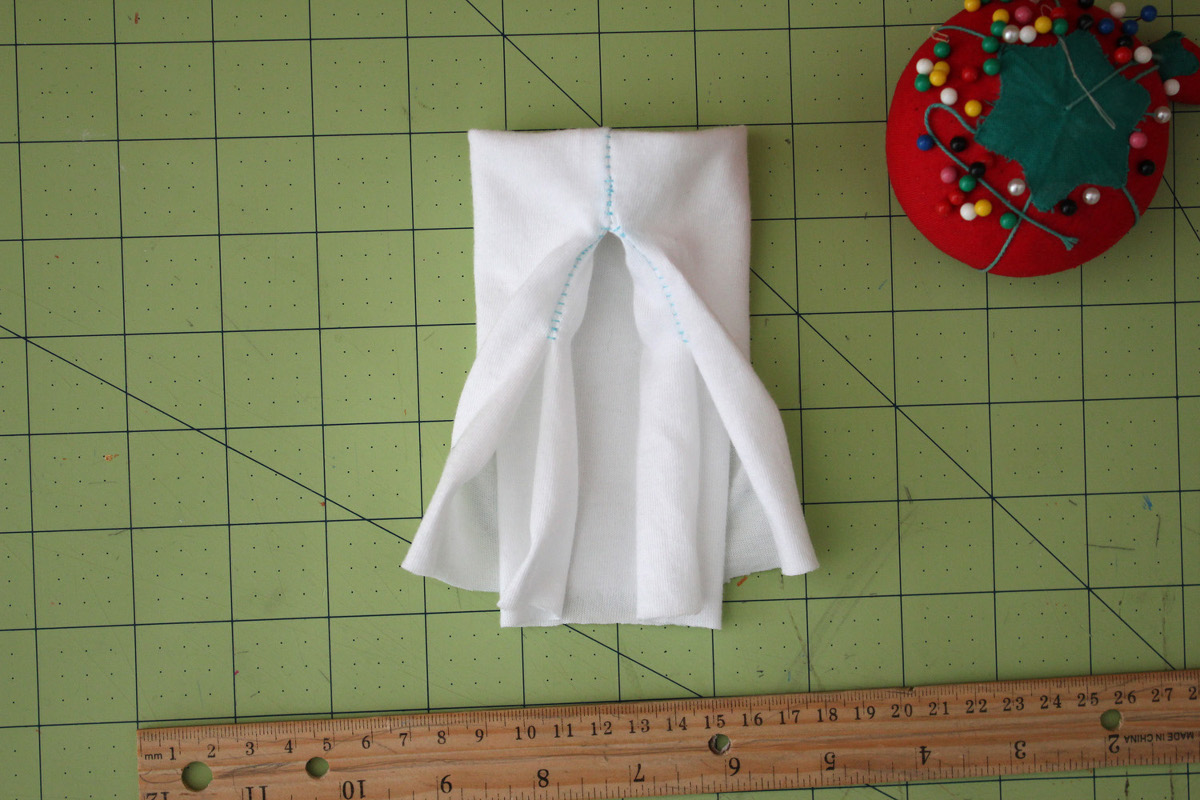
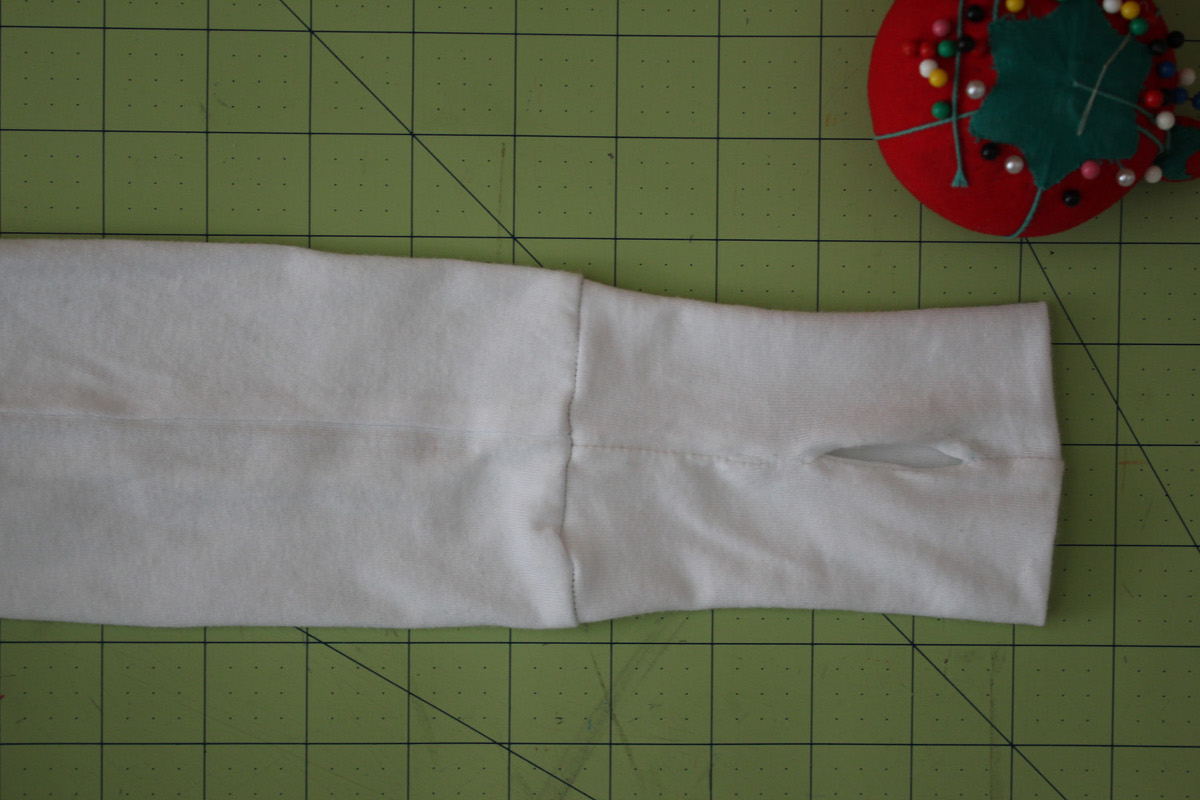
THIRD SEGMENT
You can see in the above image that there is a set of outer flaps and a set of inner flaps. In the next step you will sew the outer flaps together, and then sew the inner flaps together.
Turn the outer flaps so that you can sew with right sides together. Sew from the bottom edge to the point where the second seam begins. Get as close as you can without overlapping. Be sure to backstitch securely at each end. Repeat with the inner set of flaps.
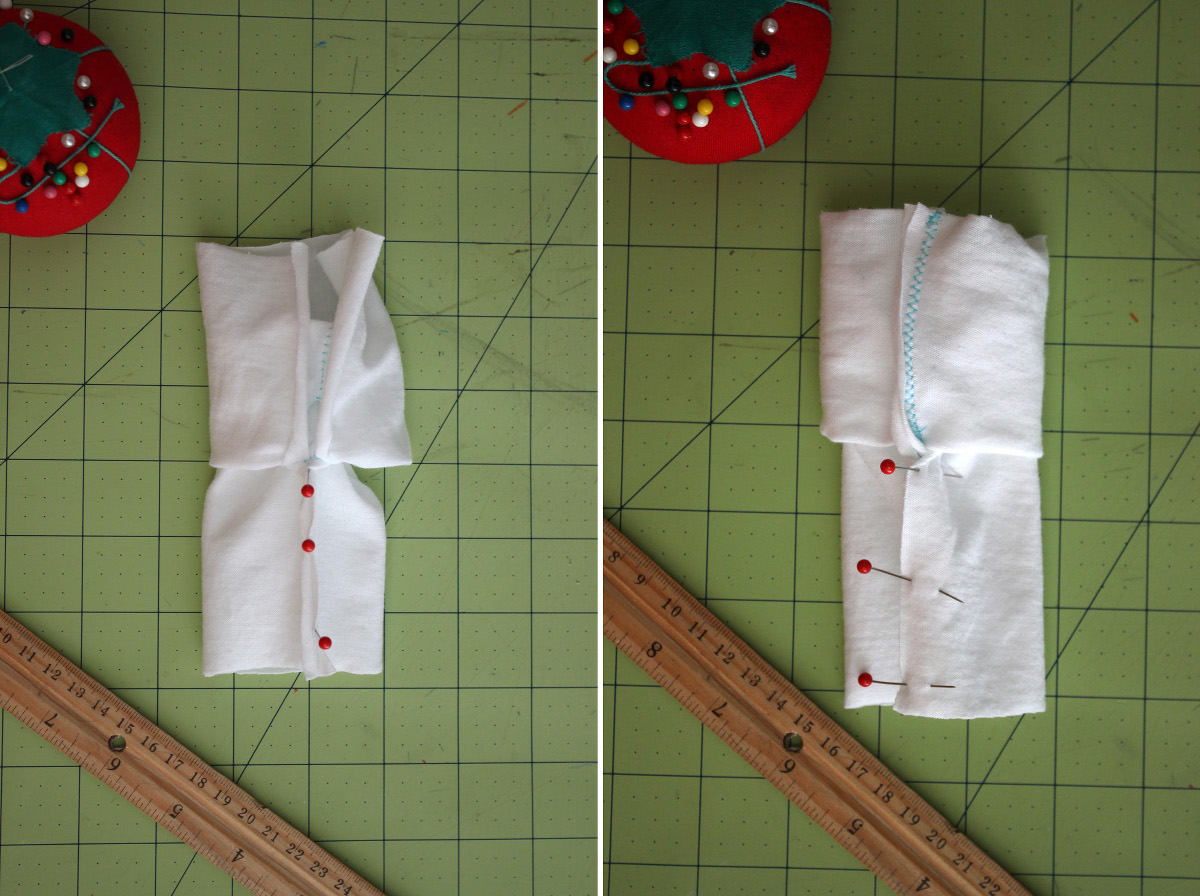
This is your finished cuff. Repeat with other cuff piece.
Right sides together, attach the cuff piece to the sleeve. Align underarm seam of the sleeve with the seam of the cuff. This connection can be made with a serger.
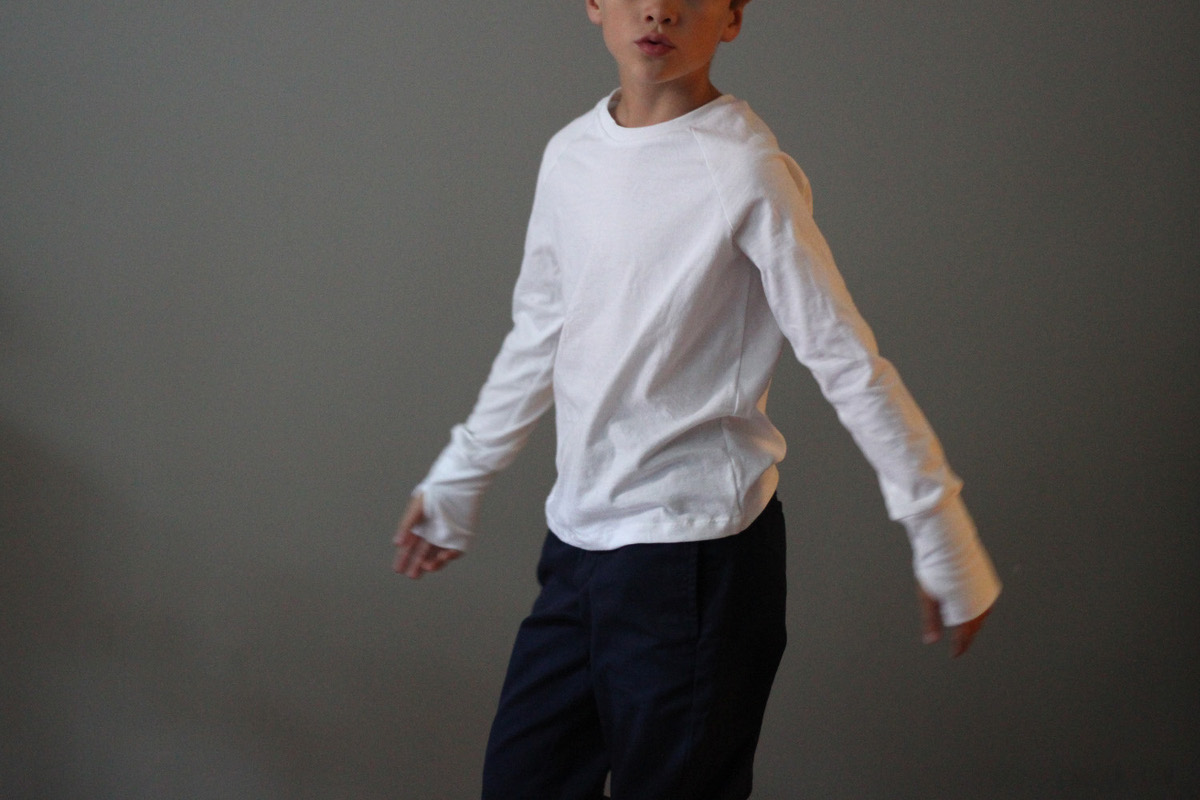
Now this guy sure looks cozy!