
Shelley from Bartacks and Singletrack is back again. In today’s post she’s going to (mostly) leave the patterns alone, and instead, show us how she tinkered with the tension settings on her overlocker to get a pretend flatlock seam. Thank you Shelley!
Flatlock stitching is the stitching that looks like overlocking on both sides of a seam and is often used in swimwear, sportswear, on baby’s clothes, or just as a decorative exposed seam. It creates a seam that is flat and has the same appearance both inside and out. Dedicated machines for creating flatlock seams are probably out of reach for most home sewers (at least that’s what the overlocker salesman told me), so how can we fake it using the machines we already have?
One way to fake a flatlock seam is to sew a normal seam then do some decorative honeycomb stitching over the top. The advantage is that this can be done with a regular sewing machine. The disadvantage is that you don’t get a nice flat seam. Kristin from Skirt as Top used this method to fake a flatlock on a gorgeous Field Trip Raglan sweater she made for her son.
If you have a coverstitch machine then you can fake a flatlock seam by sewing upside down. That is; sew the seam with the straight stitches (normally seen as hem stitching) underneath and the overlocker style stitching on top.
But if you want a truly flat seam with exposed stitching, and only have a basic overlocker, then it’s time to fiddle with that overlocker. Here’s how.
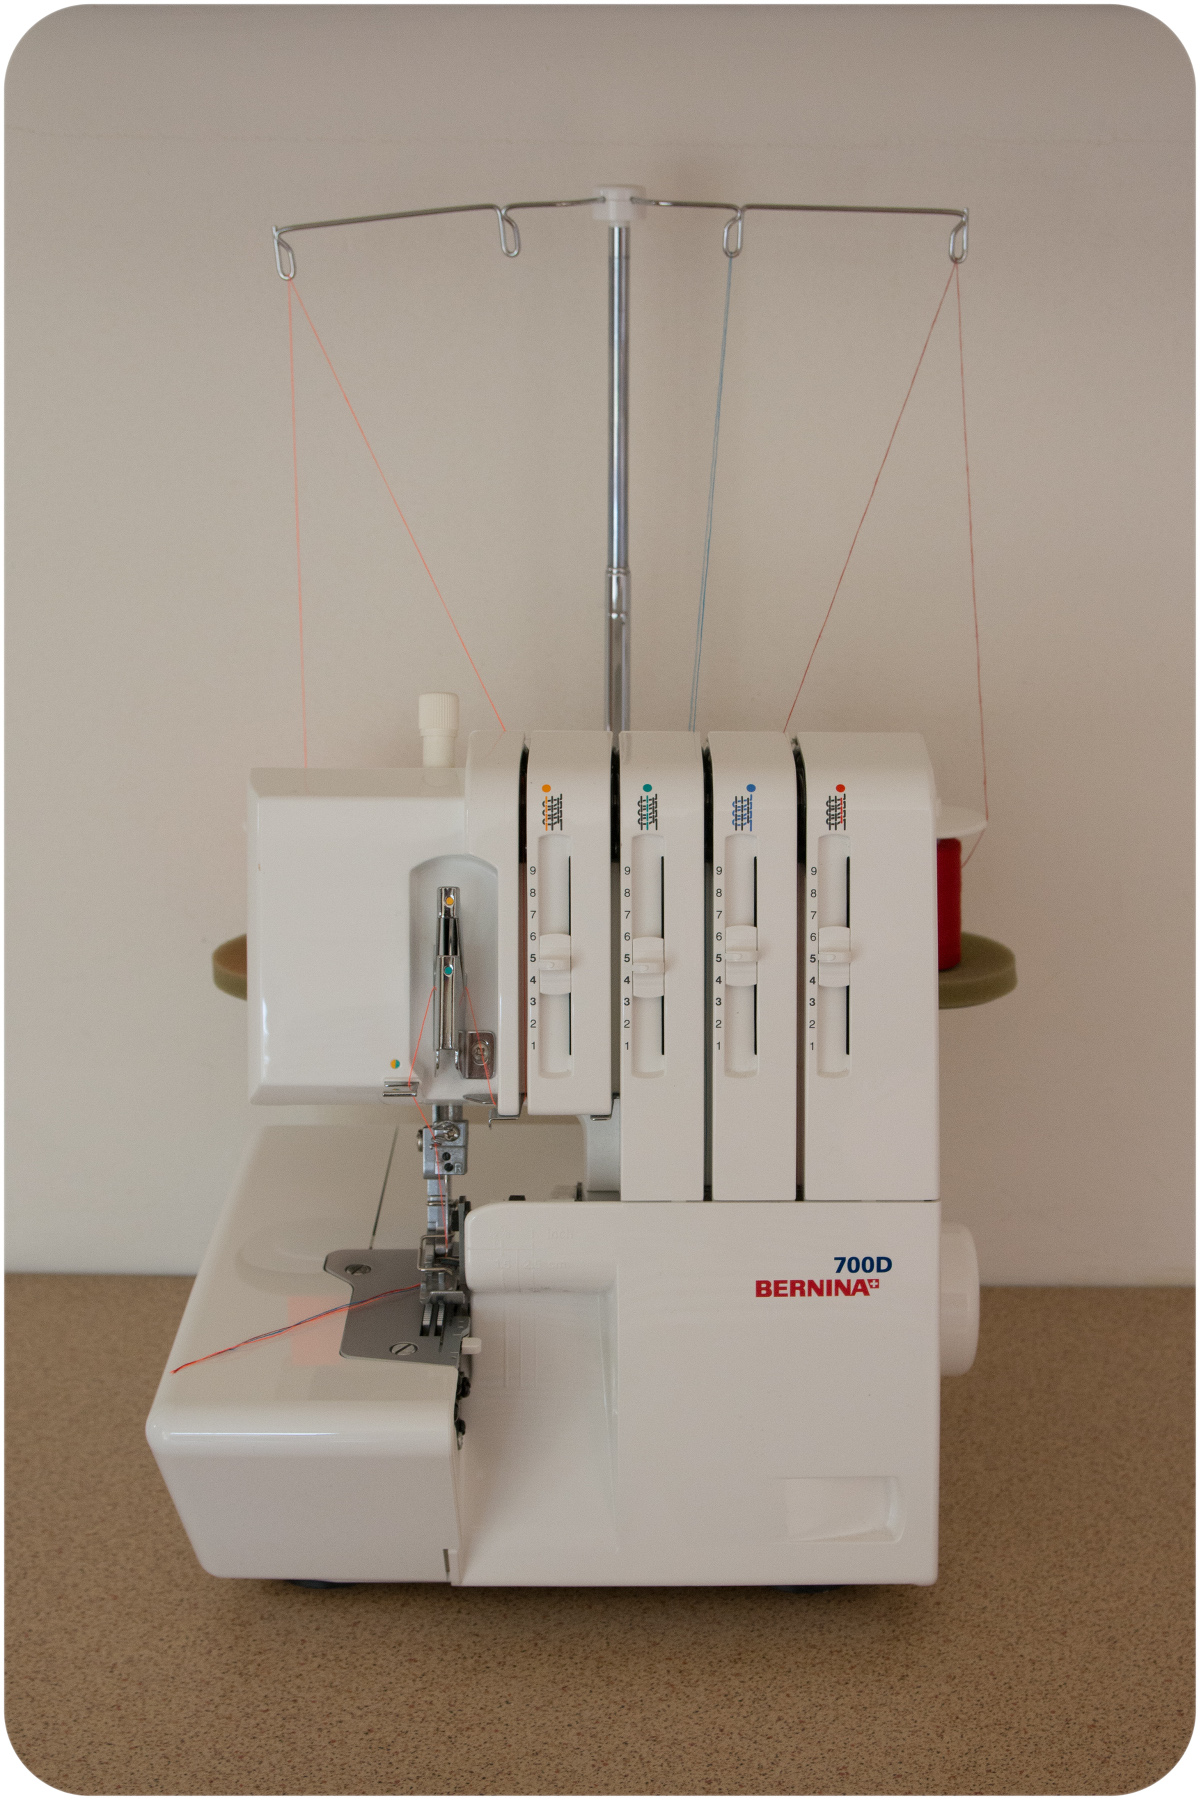
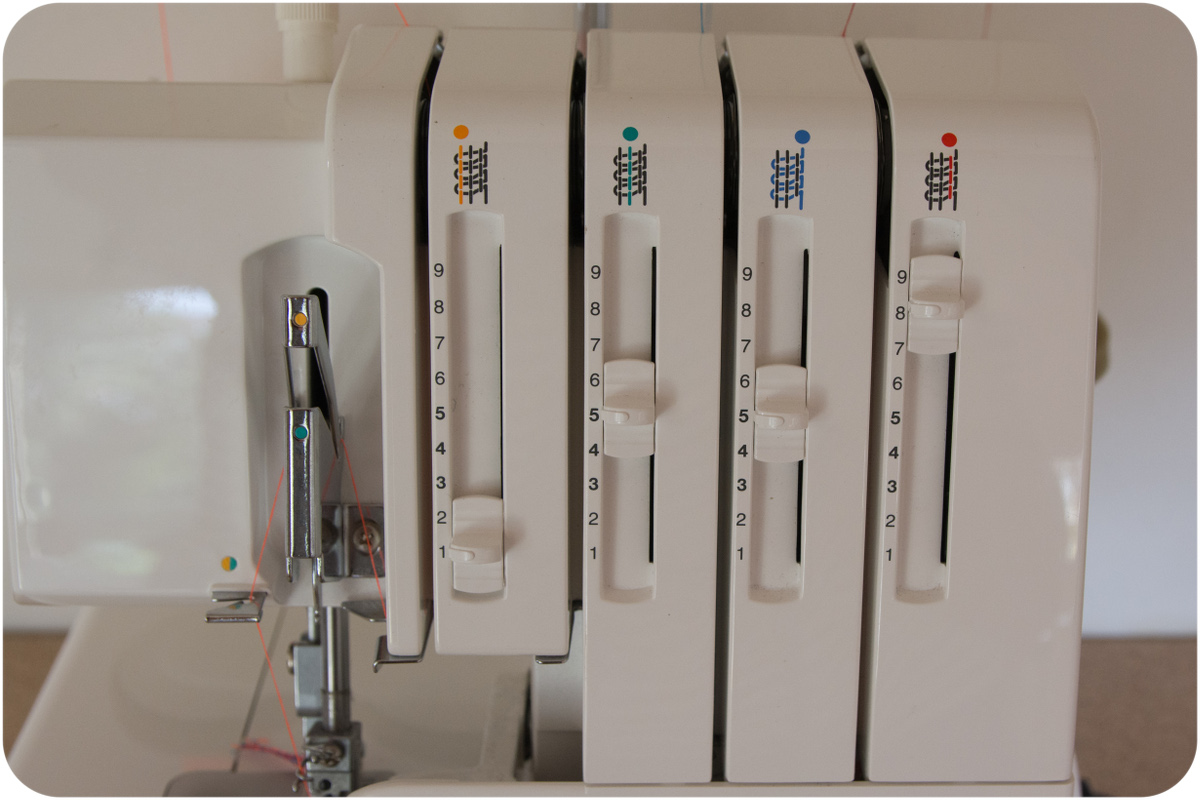
Start by removing the right hand needle. (If you only have a three thread overlocker then you can skip this step!)

Here I’ve threaded my overlocker with threads that match the color coding of the upper and lower loopers and the needle threads. The upper looper thread is blue, the lower looper thread is red and the left side needle thread is yellowy-orange.
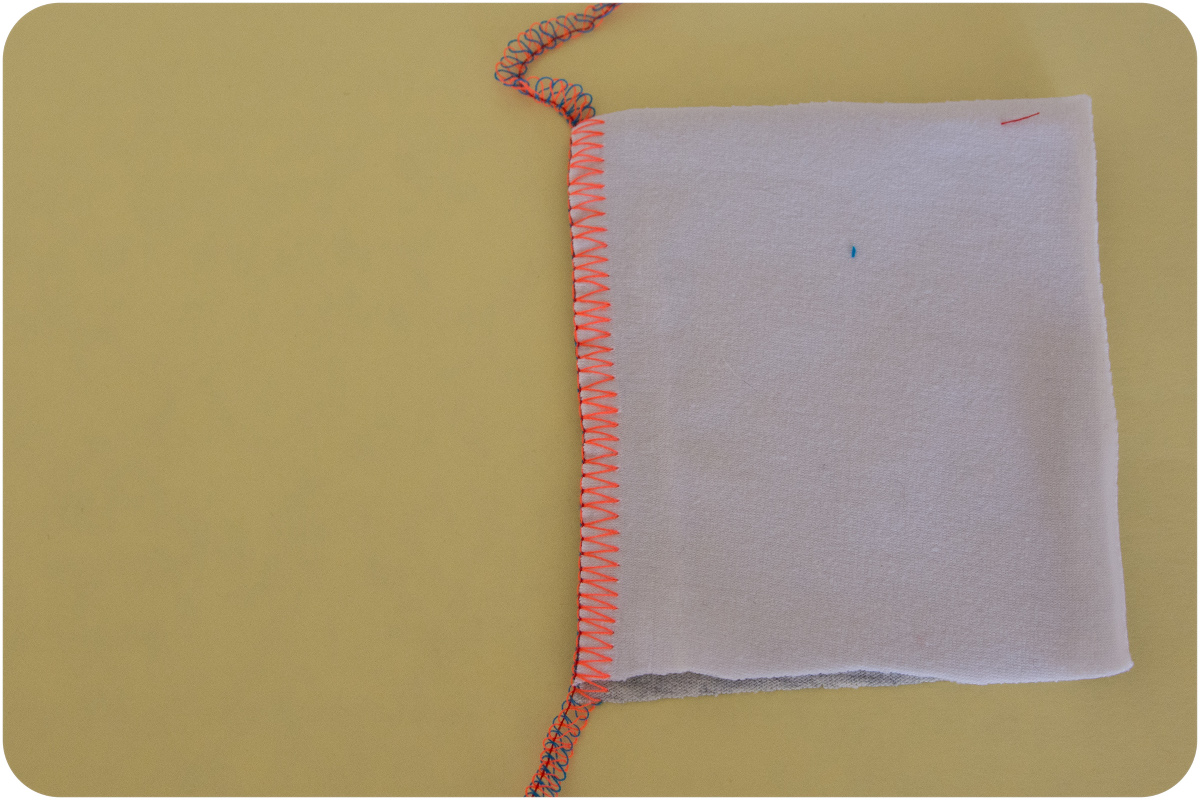
With my machine set to its normal settings for sewing knit fabrics I get a nice, even overlocked seam. The upper side (grey fabric) shows the blue upper looper threads.
While the underside (white fabric) shows the red lower looper threads.
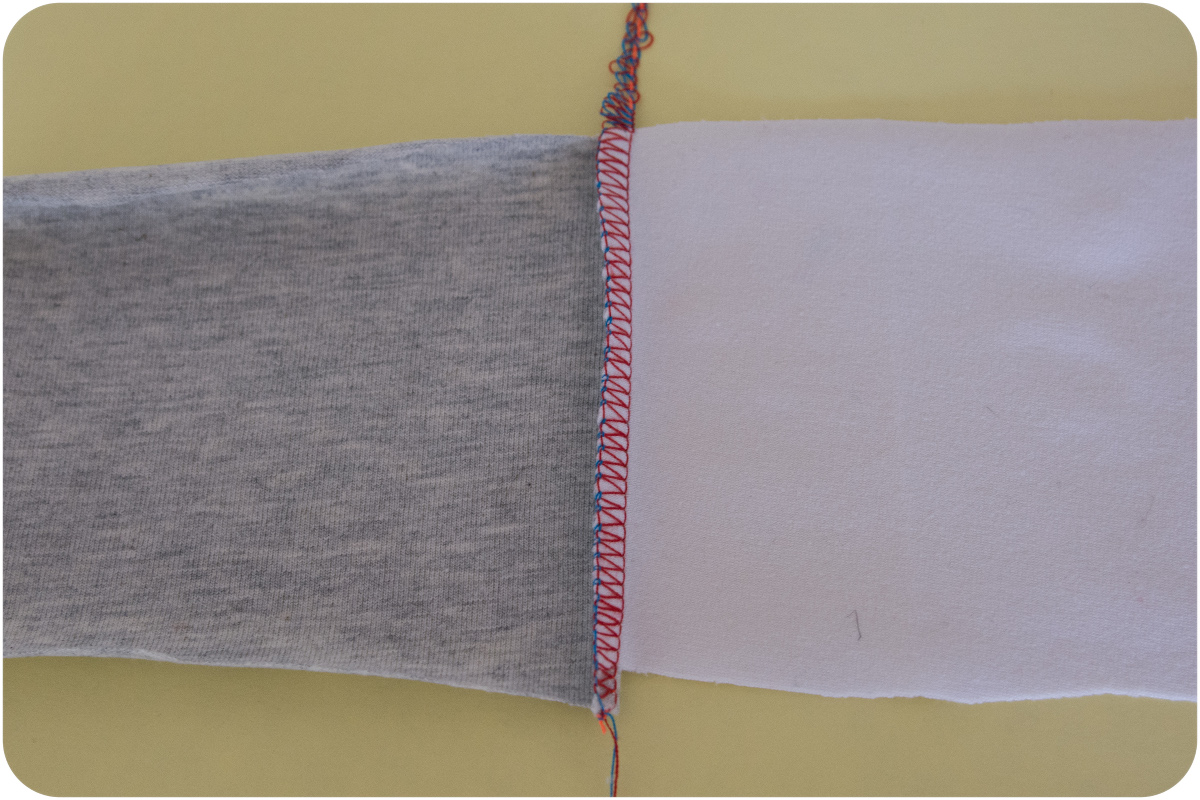
The yellowy-orange needle thread is barely visible along the left side of the seam.
So, now it’s time to fiddle with those tension settings. If you’re the nervous type, or your machine is prone to misbehaving, you might like to make a note of the exact settings that work well so you can return to these settings for regular overlocking later.
To create our flatlock seam we need to turn the tension on the needle thread (yellowy-orange) all the way down to the lowest setting possible, or close to.
Leave the tension for the upper looper thread (blue) where it is, but turn the tension on the lower looper thread (red) all the way up to the highest setting, or close to.
Now, let’s test it out. You’ll need to run the stitching through for a bit before beginning to sew your seam. Make sure you have a good couple of inches of threads before starting as these seams will unravel very easily if the thread ends are too short.

You may also find that using these tension settings will cause stretch fabrics to bunch up a bit as you sew. Normally you don’t want to pull your fabric through the overlocker at all, but a bit of gentle holding from behind is necessary for these seams.
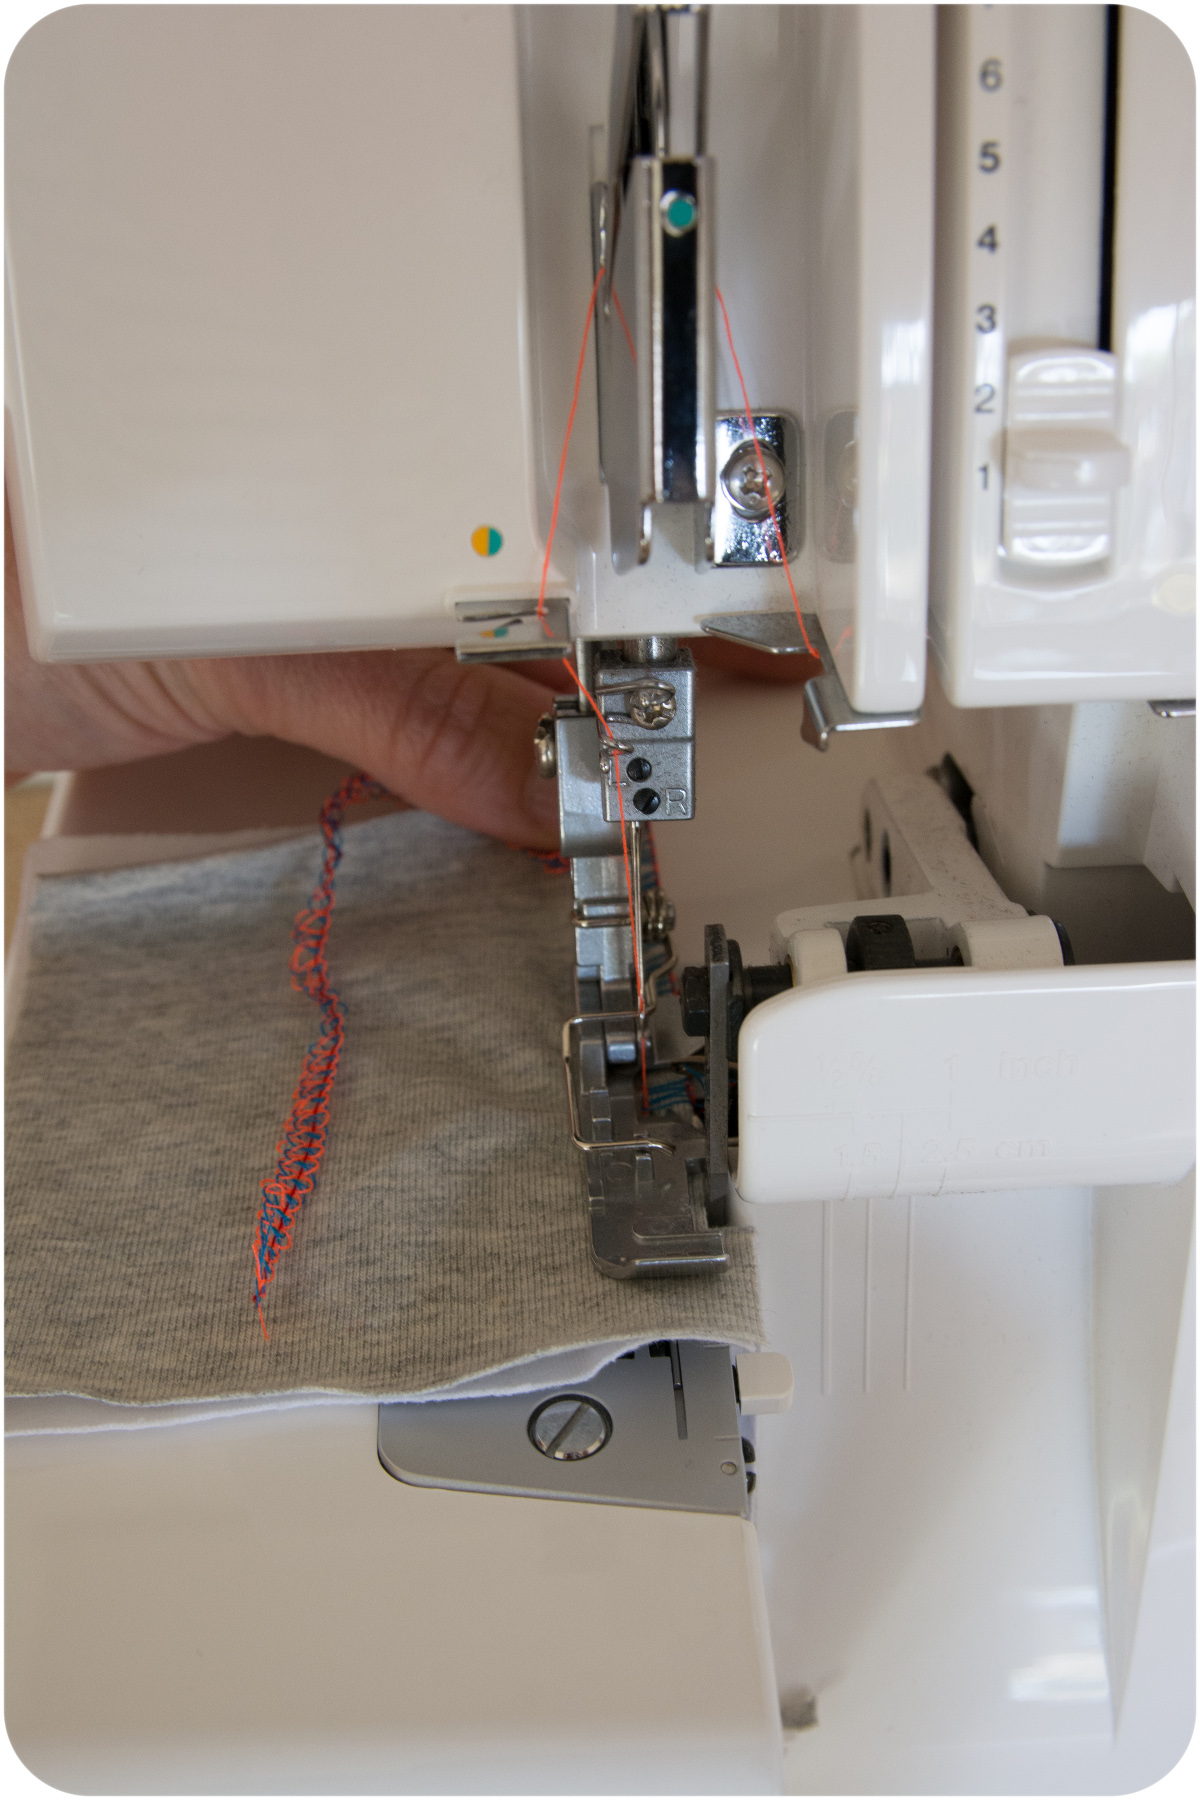
After sewing the seam, make certain to run out the stitching for another few inches to prevent the seam unravelling if you need to stretch the fabric back into shape.
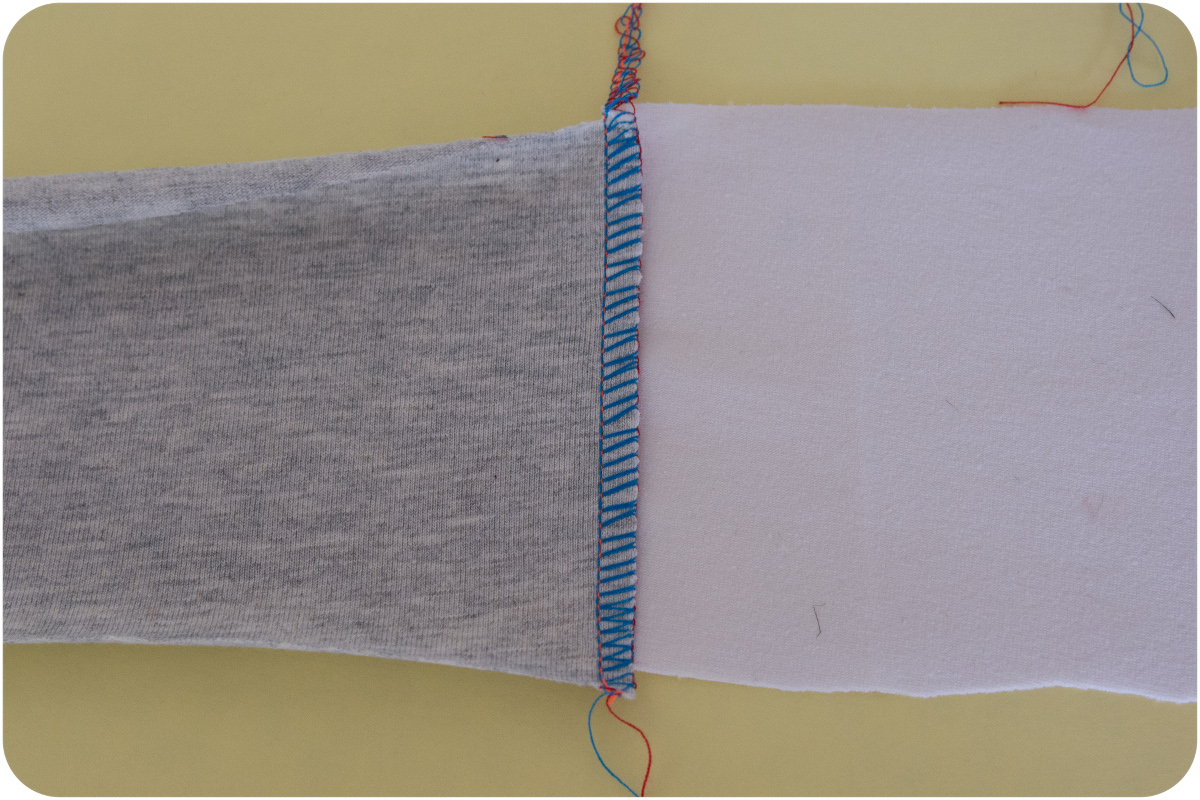
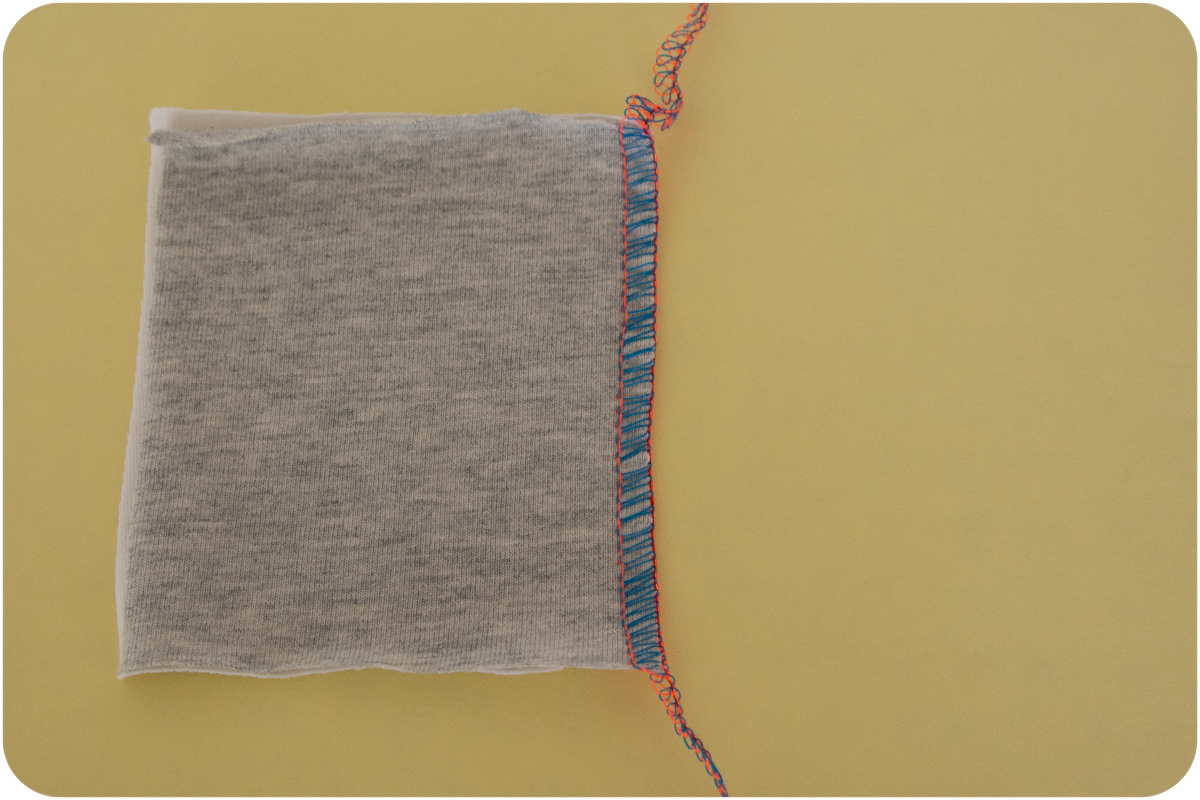
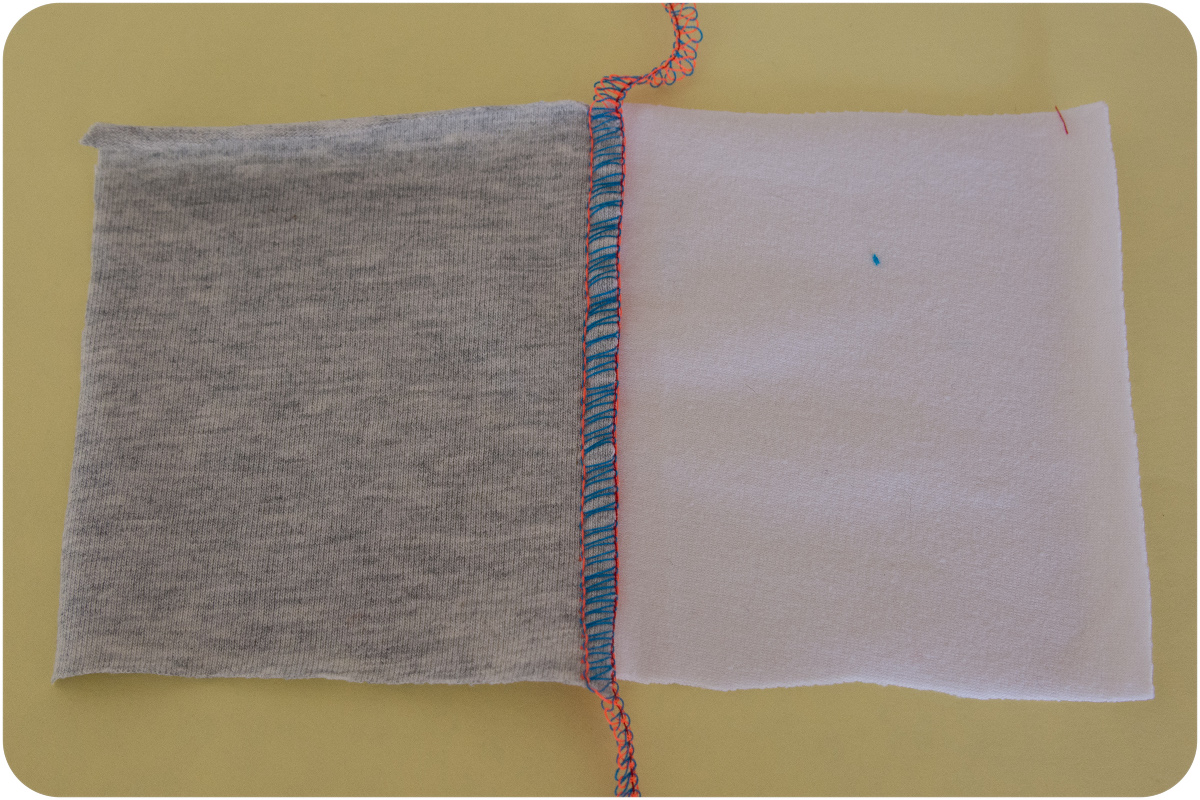
Now, when we look at the seam we see the upper looper threads (blue) on top again, but when we turn it over it’s the needle thread (yellowy-orange) that is most visible on the underside. The lower looper thread (red) is the one that is now barely visible along the right side of the seam.
If your threads aren’t looking fairly even as in the pictures above then try adjusting the tension settings a little. Just change one thing at a time and do more practice runs until it looks balanced on both sides.
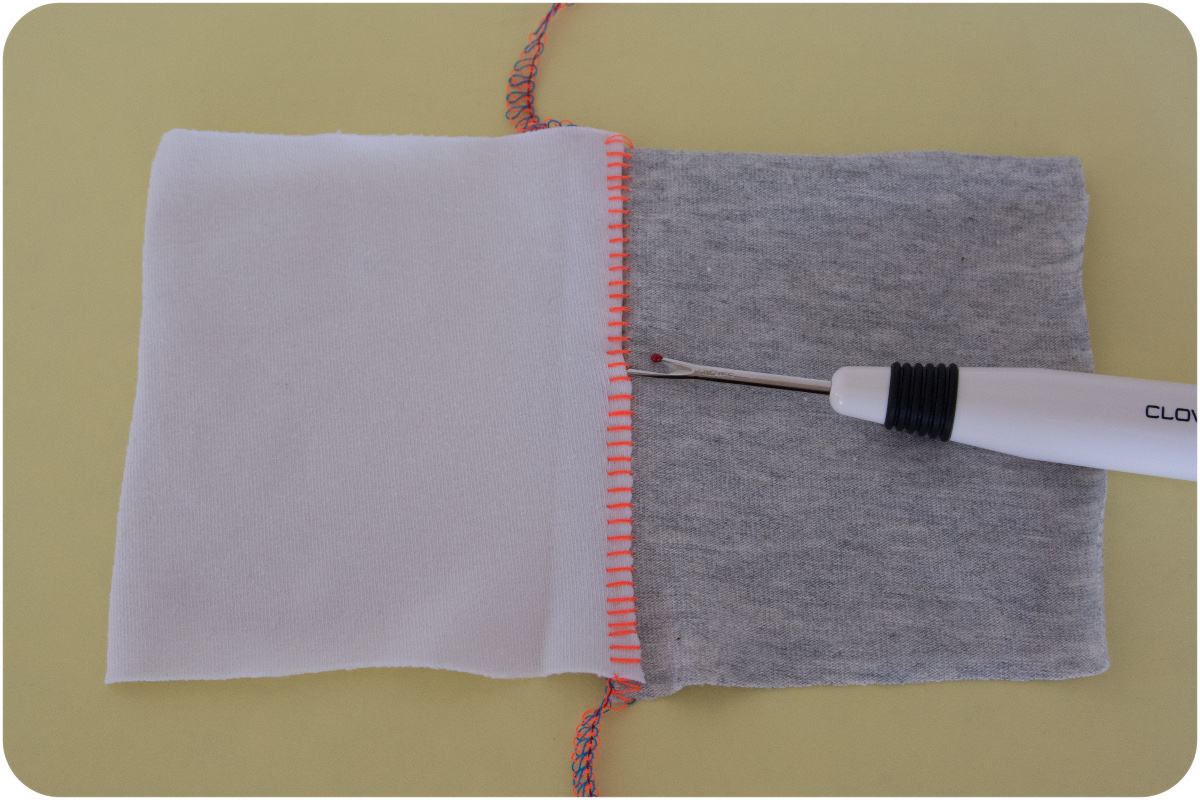
Are you ready? Simply pull the fabric layers away from each other and the flatlock seam appears!
On the top side you get the lovely loops of the flatlocked seam, while on the underside there are the horizontal stripes of the needle thread. I have found that the underside fabric tends to stay just a bit folded under and needs to be teased out if I want a perfectly flat seam.
If it’s the loops of the flatlocked seam that you want to be visible on the right side of the finished garment then sew your seams with the fabric pieces wrong sides together.
Since the cut edges of the fabric will be contained within the stitching, but still visible, this technique is probably limited to fabrics that don’t fray, such as knits. Be really mindful of leaving long thread tails and then very securely knotting and dealing with the thread ends. If they get subsequently cut off when you sew the next seam you run the risk of the flatlocked seam coming undone.
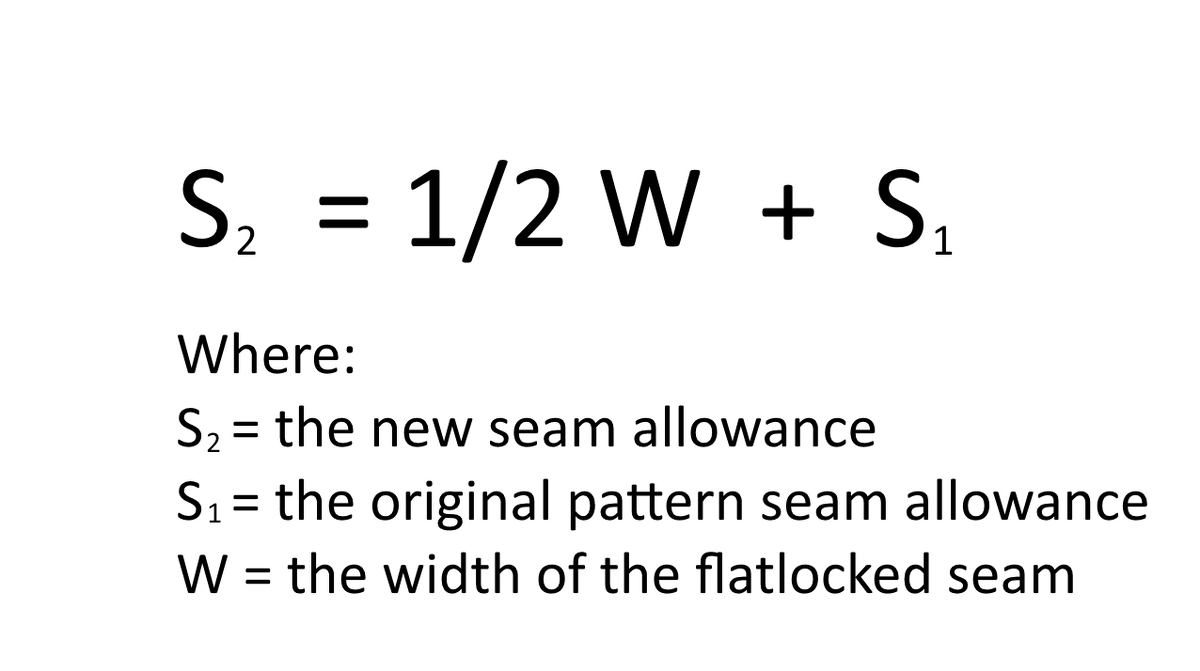
OK, so what on earth do you do about seam allowances? These flatlocked seams obviously take up very little fabric and we need to know how to avoid ending up with an oversized garment. Time for some math again!
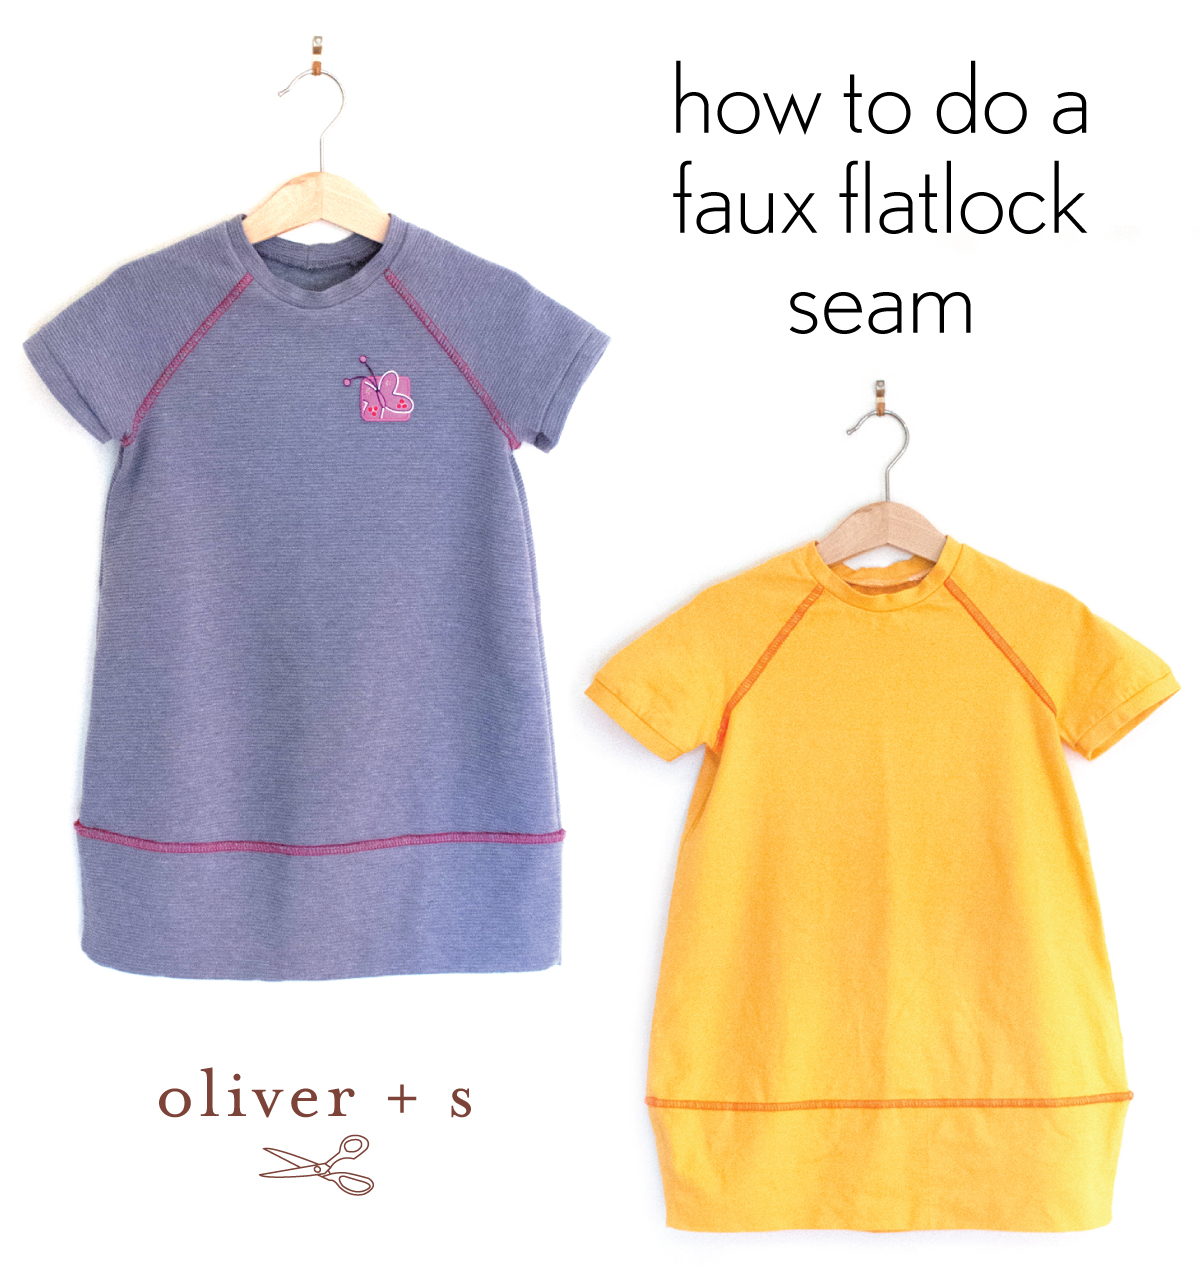
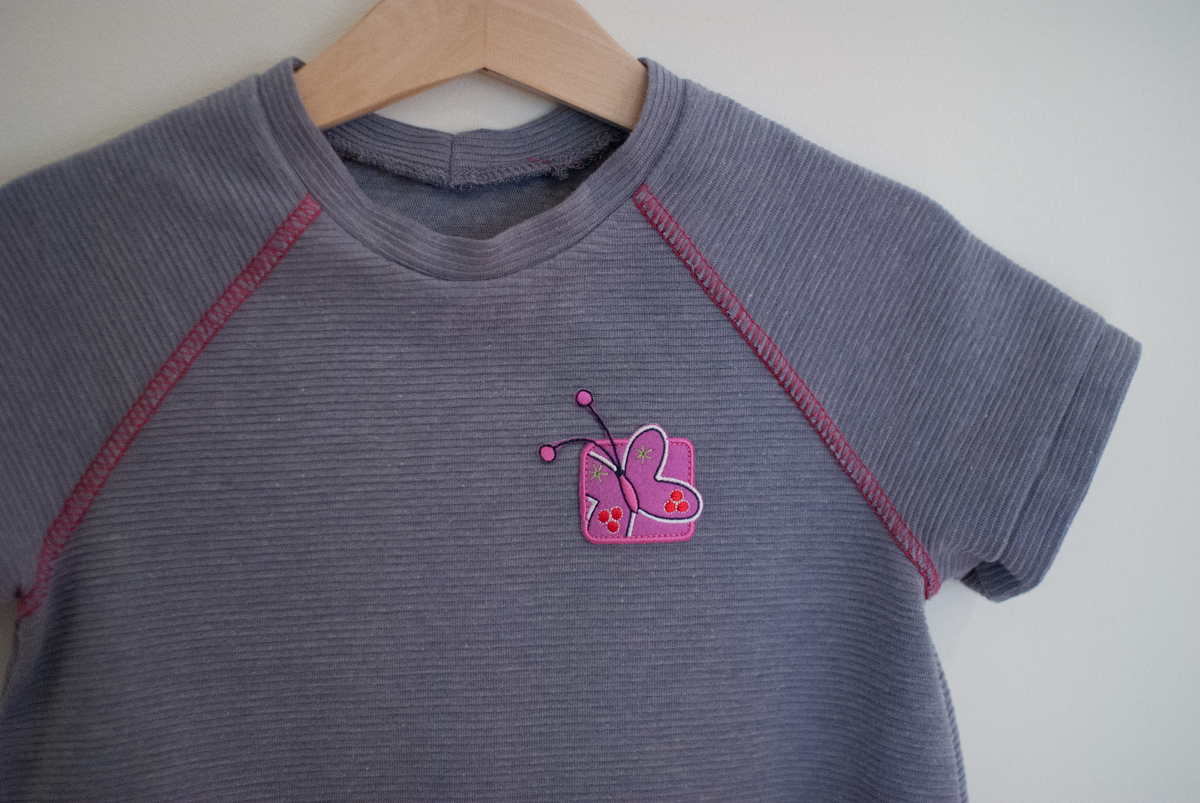
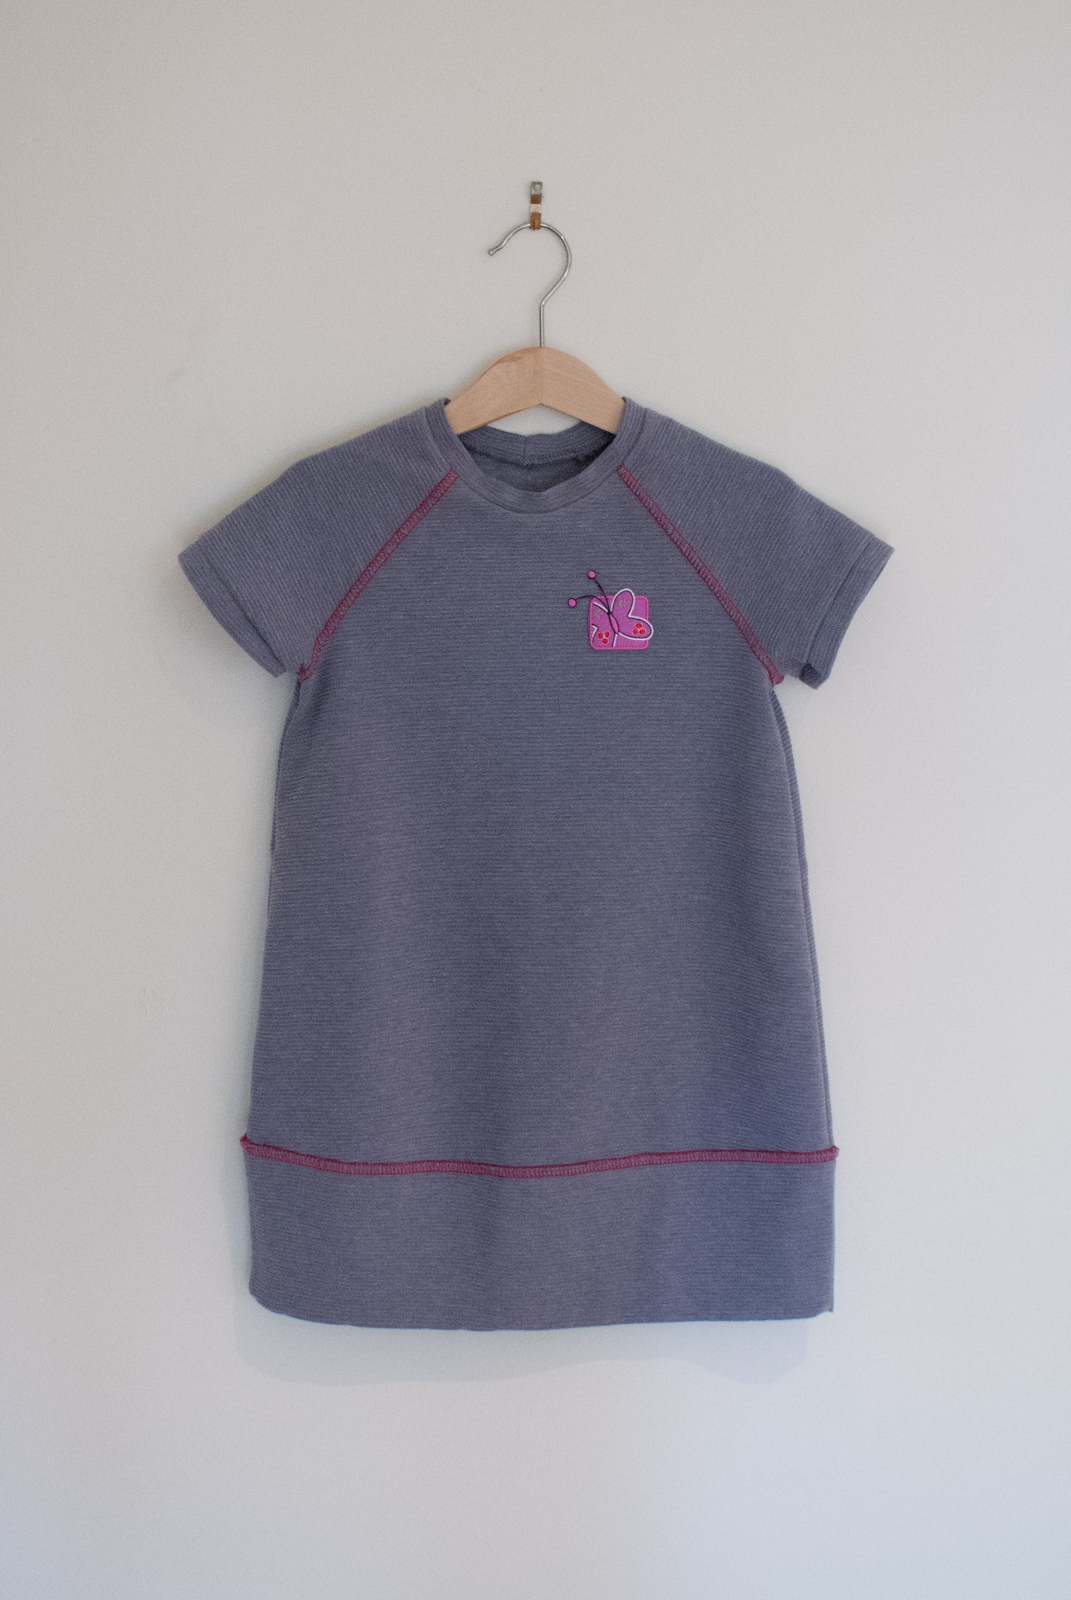
The perfect pattern for highlighting the seams with faked flatlock stitching is the Field Trip Raglan T-shirt, although ever since it was released, I’ve been dreaming about doing this with the Carousel Dress as well.
I made these dresses when my sewing machine was off having its annual service. I based the dress around an A-line dress modification of the Field Trip Raglan T-shirt with cuffs and a hem band added since I couldn’t sew the hems any other way. You can see I tinkered with the sleeve shape and the amount of “bell” shape that the dress had from one version to the other.
I sewed the shoulder seams first with the flatlock settings. Then I changed back to normal four thread overlocking to sew the side seams, attach the sleeve cuffs and neckband and to stitch the hem band into a loop. Then I changed back to the flatlock settings to attach the hem band.
If re-threading your overlocker strikes terror into your heart, then that all probably sounds horrifying, but I have found that the more I do it the more proficient I become, and my overlocker and I are really on very good terms. I think she quite likes being fiddled with.
You know, yours might too.