Today we’re happy to welcome Rachel from Stitched Together as our guest poster. She’s here with a really great tutorial that shows a creative way to modify the Puppet Show Dress.
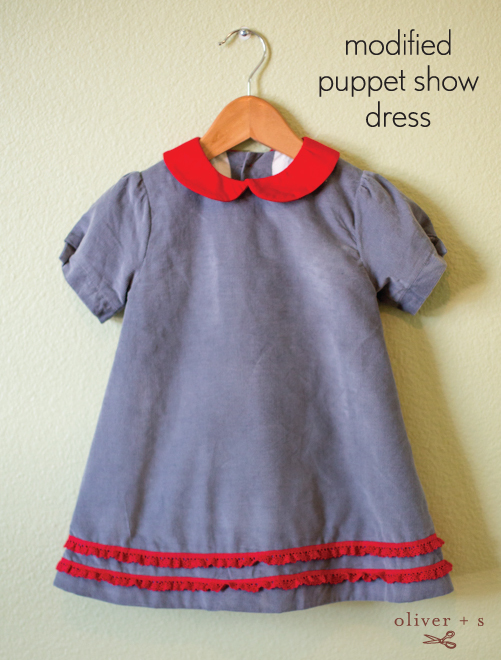
Hi! I’m Rachel and I blog at Stitched Together. Lately I’ve been a little bit obsessed with the Oliver + S Puppet Show Dress. I’m not sure it gets much cuter than that Peter Pan collar, and the sleeve detail is so sweet. I am personally drawn to subtle details and clean lines. To make this dress a little more streamlined, I made the body of the dress into one piece instead of two (bodice + skirt).
I like it so much I’ve made it three times (here, here, and here). Liesl invited me here to share a tutorial describing my process.
To start, when working with paper patterns, I find my paper cutter to be indispensable. It makes assembling the pattern easy…and a lot less tedious.

Start by marking 1/2” at the top of the skirt pattern piece and the bottom of the bodice pattern piece.

Then overlap the two pieces at 1/2”, matching edges at the armhole.

Because the original pattern has darts, the two pieces won’t fit together at this point. If you try to cut out the darts and tape the pattern back together so the pieces will fit together, the pattern won’t lie flat. It will look like this:

Instead, take your straight edge and draw a line on the inside edge of the front skirt, lining it up with the bodice piece.

Cut at the line. You may want to pencil in the “fold” line, since you’ll be cutting off the original pattern markings.

For some reason, this pattern is particularly long compared to my other Oliver + S patterns, so I knew I wanted to shorten the pattern. I laid one of my daughter’s dresses on top of the pattern and marked the length with a purple arrow, then I added almost 2 inches, because I wanted to finish this particular dress with a wide hem. This put me at the 0-3 month skirt line.
Since we altered the pattern, the original hem facing won’t fit anymore. I found the easiest way to finish this dress is with a narrow (3/8″) hem, like this.

If you chose to do this, you can leave the lining and dress pieces the same length and simply fold the lining into the hem. I was very pleased with this result, but would recommend pressing it well.
For this particular version, though, I wanted to use a wide (1.5″) hem. I cut my lining 1” shorter than the dress. (I will talk more about the specifics of finishing the hem in the sewing part of this post.)
You now have your front dress pattern piece, which you will also use as your front lining pattern piece.
Repeat the process, this time with the back bodice and skirt pieces.
You will now have your front dress/lining pattern piece and back dress pattern piece cut out.

When the two pieces are cut out, you’ll notice that there’s a small notch that sticks out at the armhole. You’ll want to cut that off to make the armhole curve smooth, like this.

Now it’s time to create the back lining piece. In order to create the button placket, the back lining pattern piece is less wide than the back dress piece.
Take your bodice lining piece and lay it onto of your prepared back dress pattern piece, matching edges at the armhole. (My lining piece is outlined in purple, below.)

Then, using your straight edge, draw a line extending the length of the dress. I like to keep my pattern intact, in case I use it again, so I actually fold the pattern at this line when cutting out my lining, rather than cutting at this line.
You may want to include a reminder that your button placket will shift, though the notch at the top of the back neckline accurately indicates where to fold the placket, so this likely will not be an issue.
You will mostly sew the dress according to the pattern instructions.
When creating the back placket (under ‘Creating the Back Placket’ step 1 on page 4 of the PDF), you will simply pin and then sew the dress and lining together from top to bottom, right sides together, like this.

When you attach the prepared sleeves to the armhole, you will first want to baste the dress fabric and lining together at the armhole so they don’t shift when you attach the sleeve. Take care to avoid any puckers. Then attach the sleeve to the armhole as per the instructions.
If using a narrow hem, you simply fold the lining into the hem and press well. For this dress, I folded and pressed 1/4″ first, then 3/8″.
If you prefer to use a wider hem, here’s one way you can finish it. I planned to fold and press first at 1/2” and then again at 1.5” to form a deep hem. Because this dress has so much swing, if you try to press the hem at 1.5” you’ll notice that you’ll have to make the fabric tuck and pucker for it to fold. To overcome this, and get a nicer finish, I ran a basting stitch 1/4” from edge of the bottom of the dress.

I folded the edge in at 1/2” and pressed. Then I gathered the bottom edge just a bit, so that it when I pressed it again at 1.5”, it folded nicely without all of those dramatic tucks.

I hope you enjoy this version of the Puppet Show Dress as much as I do.
Come visit me at Stitched Together today to see lots more photos of my littlest girl in her new dress!
This is so darling, Rachel! Thanks for the wonderful tutorial, and your daughter is just adorable in her outfit.
Oh so cute with these tights! So clever of you!
wow! Beautiful! I love a good peterpan collar! yours is darling!
Jessica
It’s really wonderful, Rachel! Such a sweet and adorable Christmas dress. 🙂
Why has it never occured to me to use my paper cutter to cut my patterns?! Anyway, this Is such a darling dress, Rachel! Iris looks so grown up. 🙂
such a beautiful modification. thanks for sharing it! i love this version of the dress!
Why didn’t I ever think of using my paper cutter when cutting out/putting together PDF patterns? I will try it today.
All of your sewing so well done, this one is no exception, thanks for sharing.
Oh, this is so sweet!
Thanks for reading and for the kind comments!
Thank you for your generous, and beautifully clear illustration of a great modification.
CUTE-AS-CAN-BE simple toddler dress thats fully lined! But OH MY, how this bright RED Peter Pan collar plus 2 rows of thin RED lace adds PIZZAZZ! Thanks for sharing your tutorial focused on the modifications of the Puppet Show Dress, Rachel. I bookmarked your blog for future info. Sarah in Minneapolis