


Hello! I’m Lyndsey Stanfill, and I’m here to share how I modified the Tribeca Knit Cami to add cups to the shelf bra.
A well-fitting ready-to-wear cami with a shelf bra is hard to find when you have a full bust. Very often, the bottom of the shelf bra will fall across your bust instead of under your bust. I have purchased high-end camis designed for large bust sizes and have the same challenge.
When the Tribeca Knit Cami was released, I was excited about the opportunity to sew a cami that fit my body. However, I knew I wanted to add bra cups to the shelf bra for shaping and modesty so that I would be confident wearing the cami on its own. I tried several methods for adding bra cups, and I will walk you through the process I prefer.
Full Bust Adjustment
When you make a full bust adjustment in a woven, you add width and length. Knit fabrics usually only need minor adjustments on the width because the fabric’s stretch allows for additional width. However, a knit fabric that only stretches one way (like a jersey) will likely need extra length, depending on your bust size.
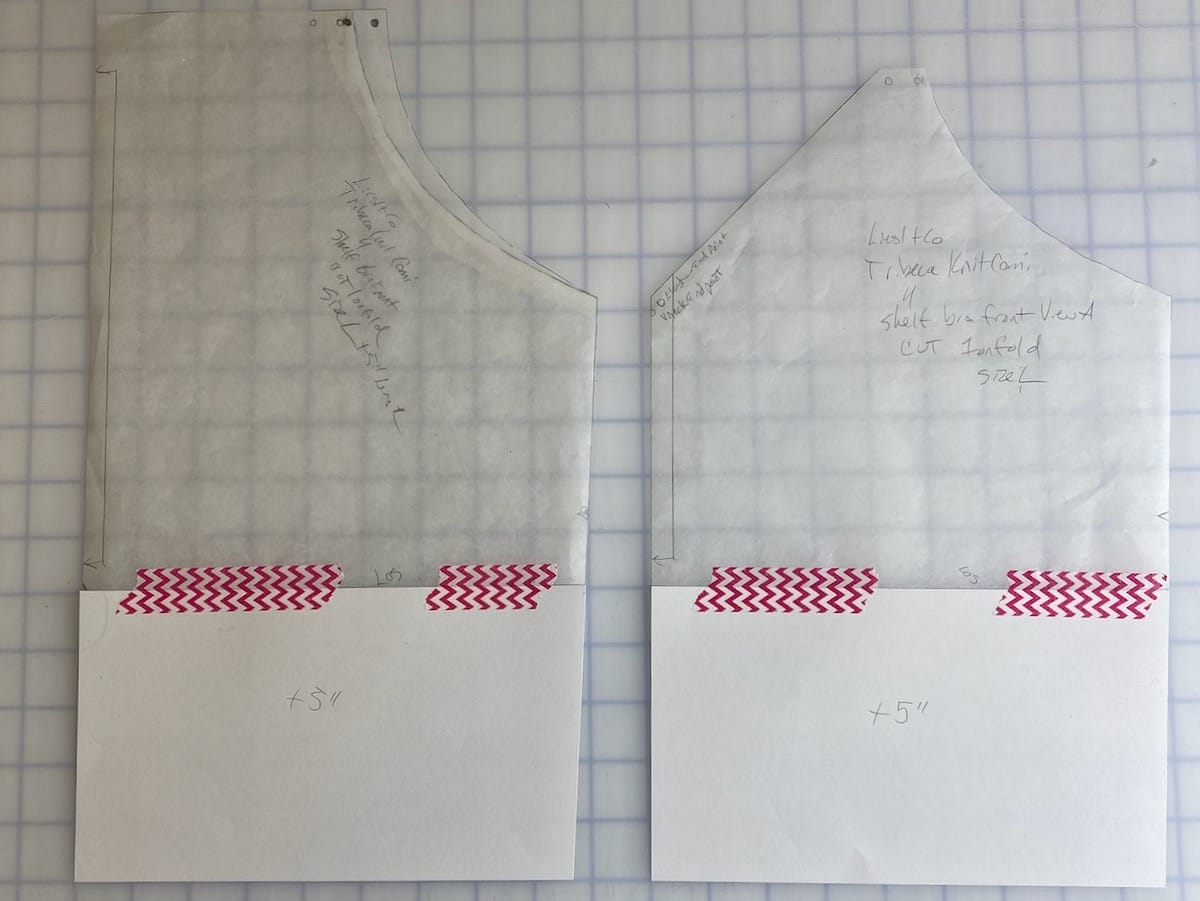
To ensure I would have enough fabric for the bra shelf, I added 5” below the Lengthen or Shorten line on the bra shelf pattern pieces. This was much more than I needed, but I wanted to ensure I had enough to work with.
Then I followed the cami instructions as directed, adding only one step in the process. Essentially, I just draped where I wanted the elastic to fall:
• Form the elastic loop as directed in the “Finish the Shelf Bra Section” and set it aside.
• Try on the cami (all steps completed except for the elastic on the bra shelf and the bottom hem) and pull the outer cami up and over your bust out of the way.
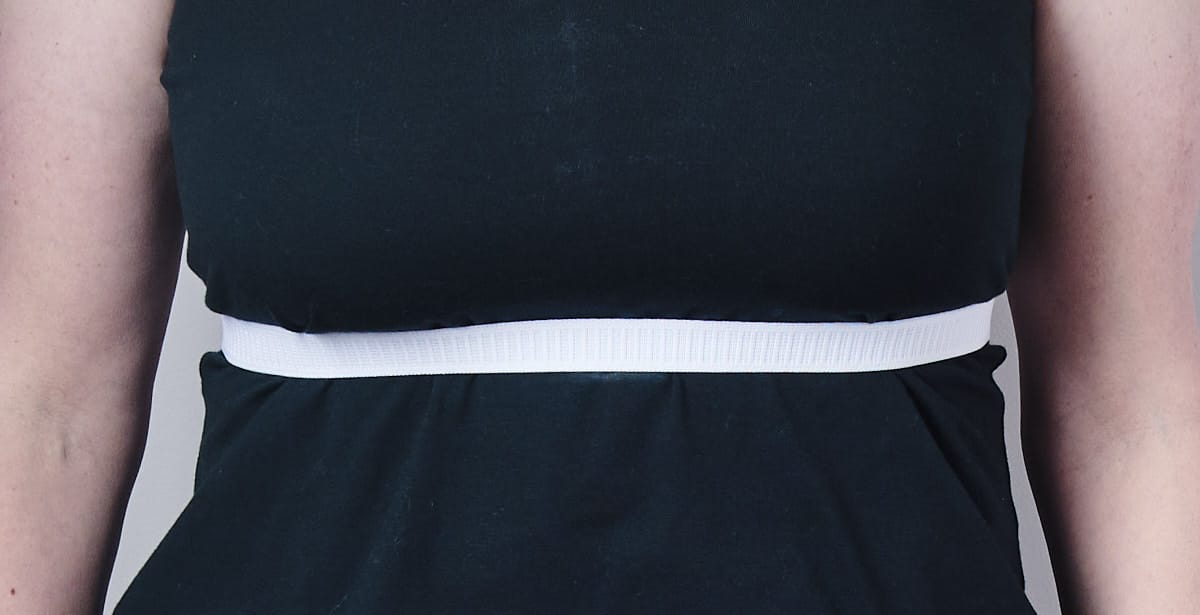
• Place the elastic loop around your torso, under your bust, where you want the final placement. Try to keep the elastic level around your body.
• Mark the bottom of the elastic. I only marked the center front placement.
• Remove the cami and measure the distance from the bottom of the shelf bra to the mark. You will need to add back ½” for seam allowance and a fold. For example, if you measure 3 inches from the bottom of the shelf bra to the mark, the adjusted measurement is only 2.5 inches.
• Remove the adjusted amount from the entire shelf bra, i.e. remove an even 2.5” band from the bottom of the shelf bra.
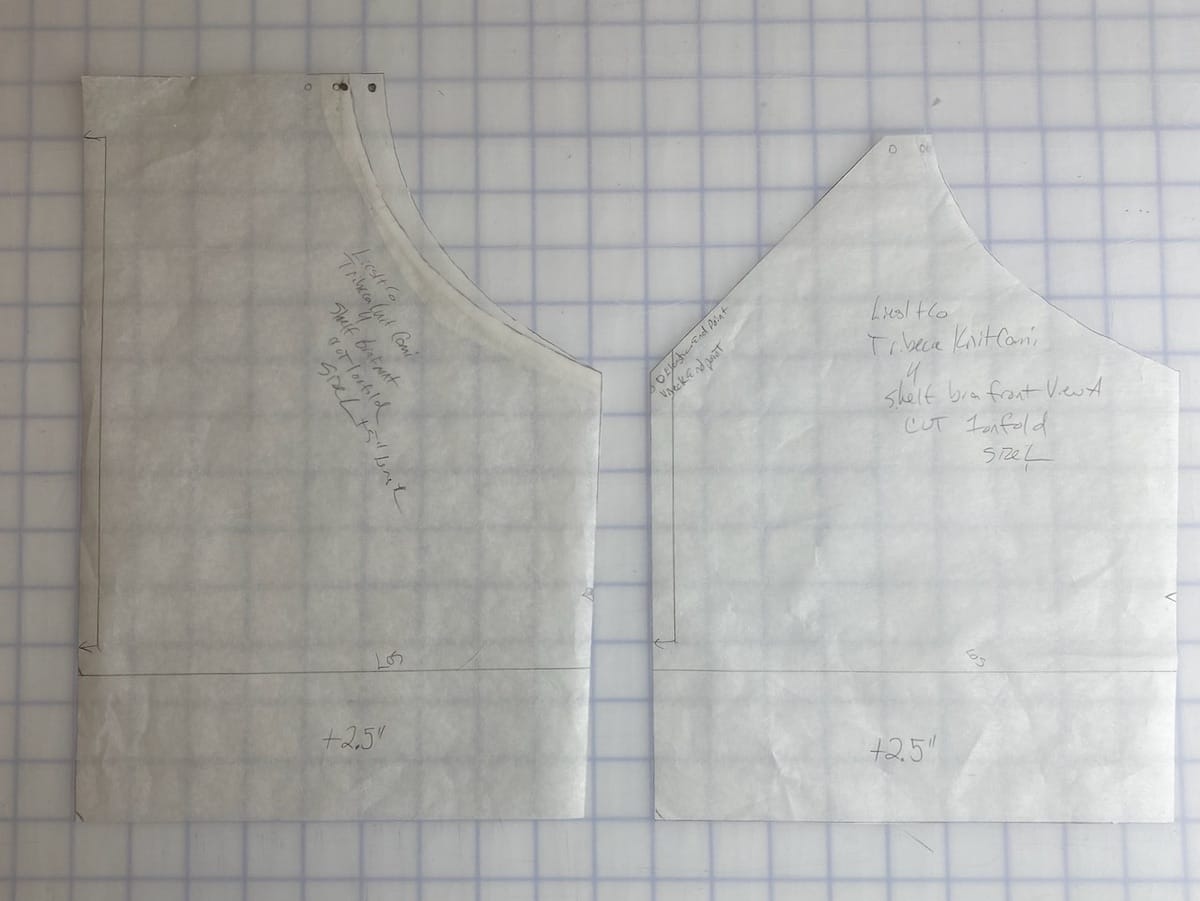
Now you will have sufficient length for your bust and can proceed with the instructions for finishing the shelf bra! After completing the cami, I went back to the pattern pieces to adjust the length to the new measurement. I had allowed 5 inches to be safe but only needed 2.5” in the final adjustment.
Adding bra cups to the shelf bra
I decided to use the same process I use to add swim bra cups to a bathing suit. I examined the construction of several ready-to-wear camis that used a more sophisticated method but ultimately decided to keep it simple. Since the shape of the cups varies based on availability, I was hesitant to use a technique that required altering my pattern pieces.
This method works best when the cami is finished. Before starting, it may be helpful to mark the center front of the shelf bra with chalk as a reference point. I found that I didn’t need to do this with the V-neck version but did need to with the bateau neck version. You also may want to mark the apex of the bra cup, but usually, this is pretty easy to identify.
Step 1
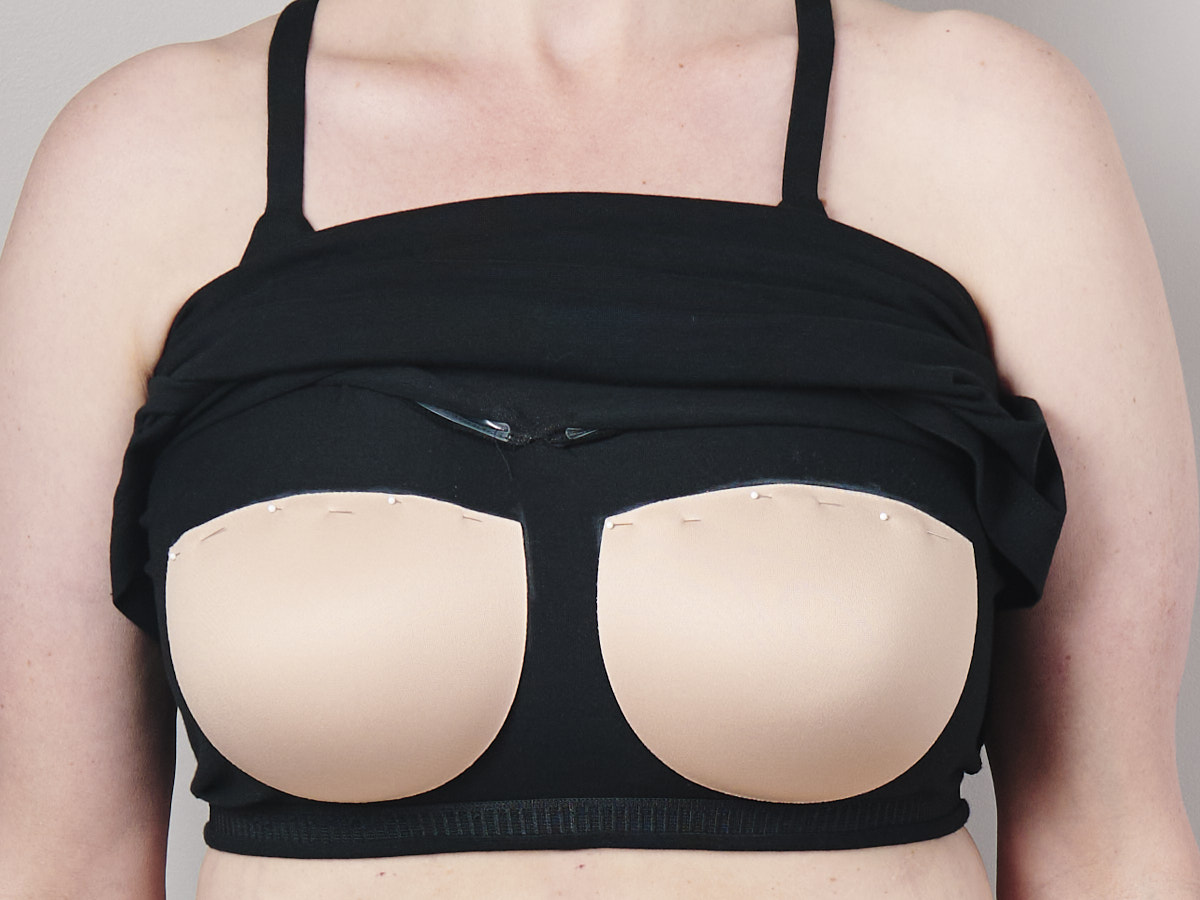
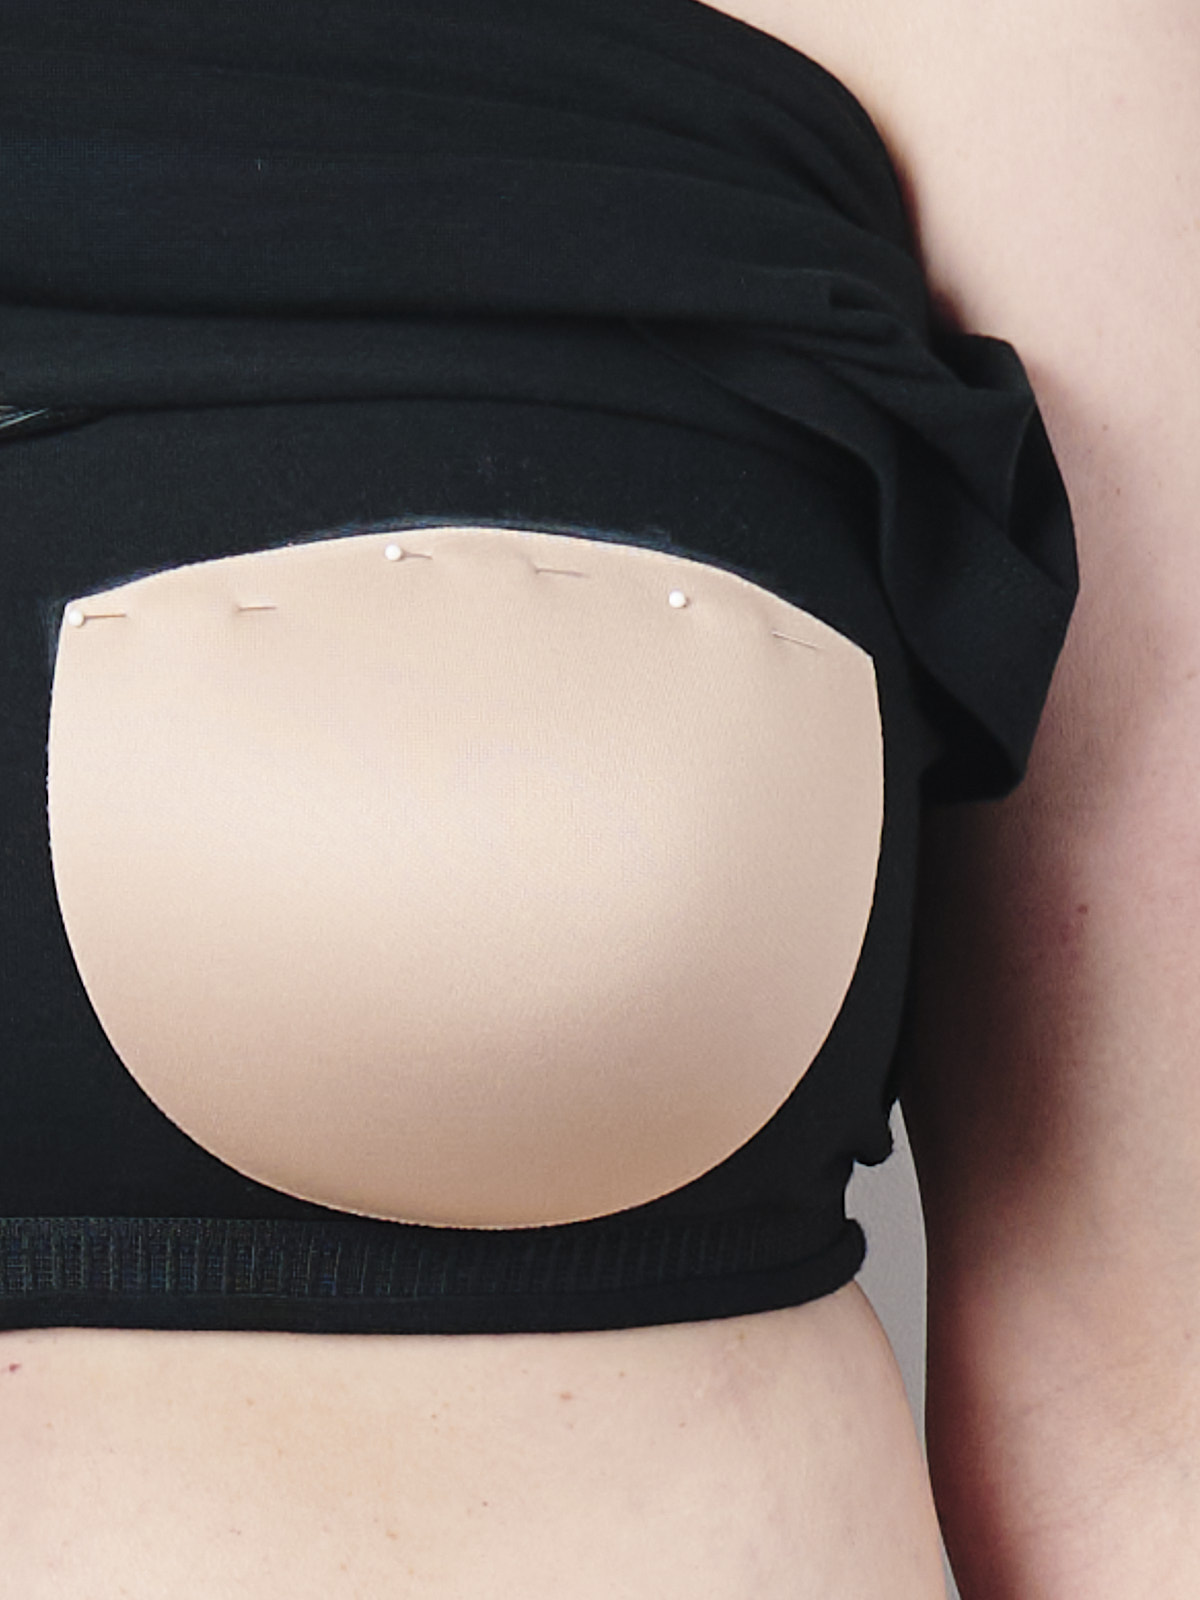
Put the cami on in front of a mirror. Pull the outer cami up and over your bust, exposing the shelf bra. Place the cups over your bust, matching the apex of the cups directly over the apex of your bust and making sure the inner edges of both cups are equidistant from the center front. Pin only the top of the cup to the shelf bra. Use chalk to mark the top and sides of the cup while the cami is still on your body. Since the bust of the cami has a little bit of negative ease, you will need this reference when you are at the machine.
Step 2
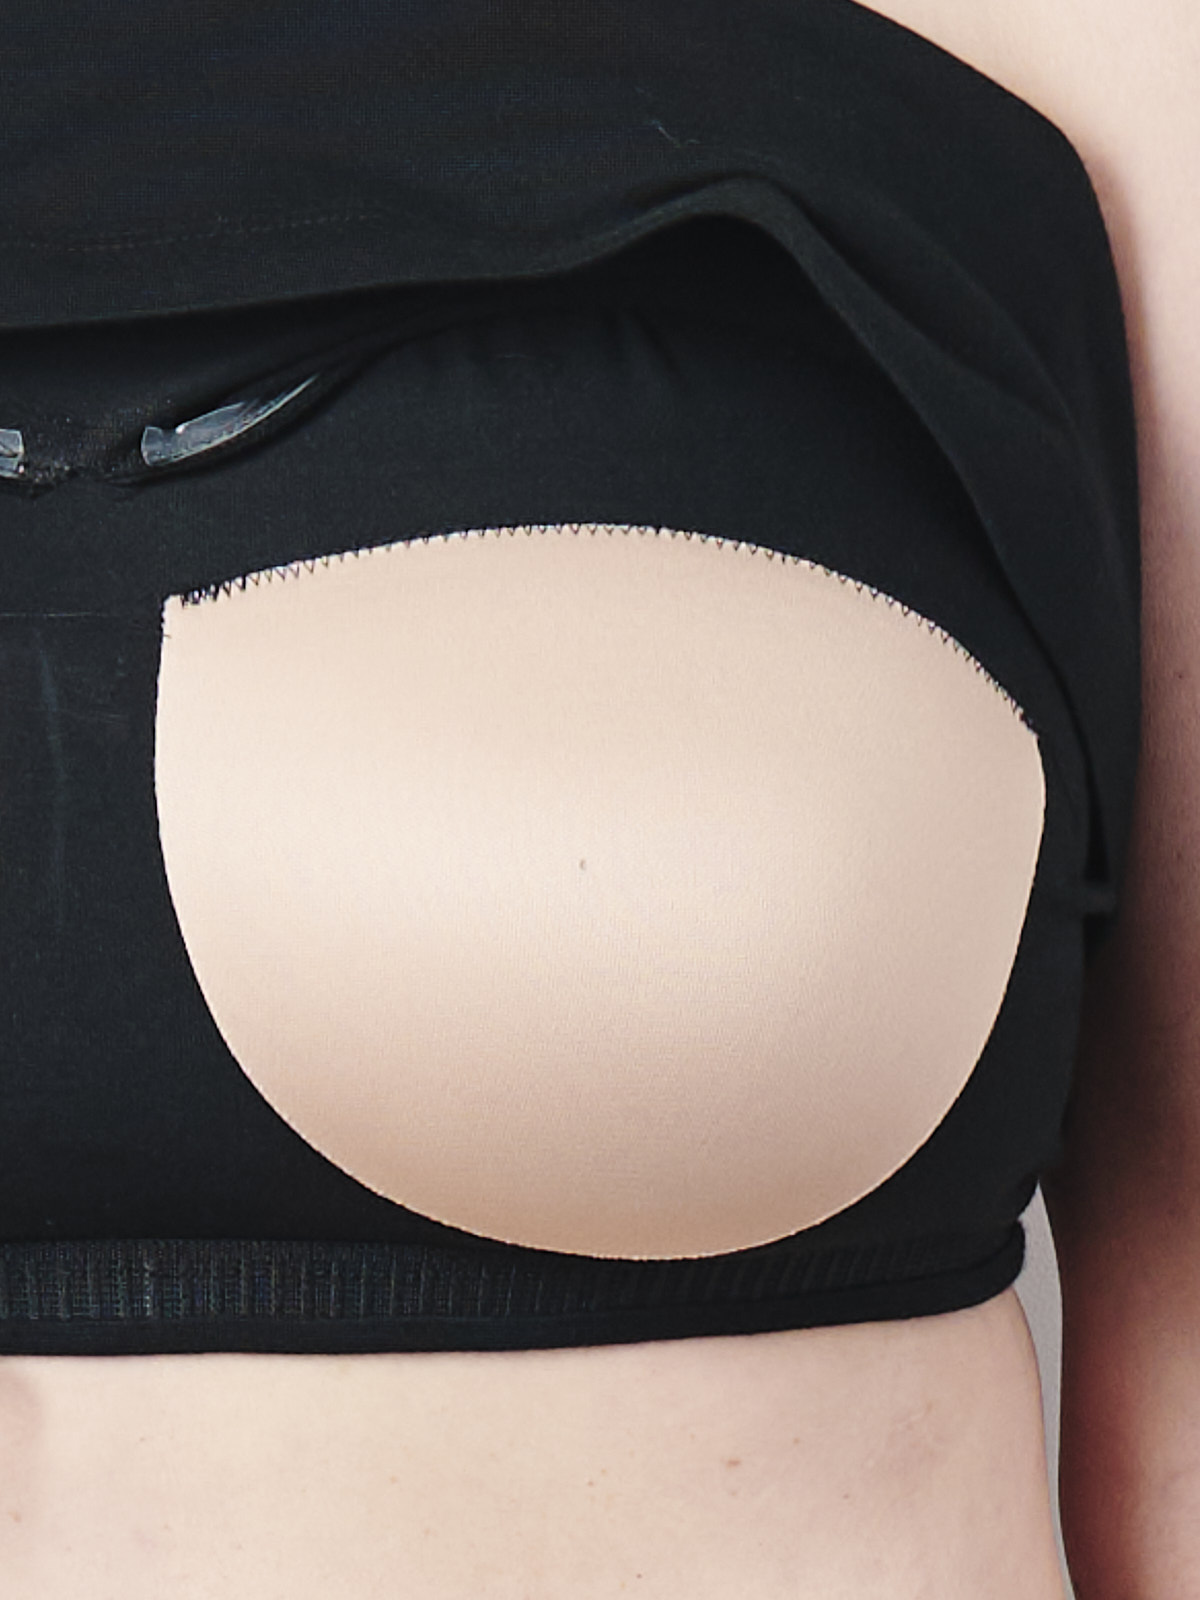
Remove the cami, being careful not to pull out the pins. Set your sewing machine for a wide zig-zag stitch–I used a width of 5.0 mm and a length of 1.8 mm. Place the edge of the cup in the center of the zig-zag and stitch the length of the cup top, backstitching at the beginning and end. Since the cami is no longer on your body, the knit fabric will have retracted to its original shape, so you will need to gently stretch the fabric, lining up the edges of the cup to the chalk lines you marked when the cami was still on your body.

Step 3
Try the cami back on, pulling the outer cami up and over your bust to check the placement of the cups. This is the most crucial step! If the cups do not look equal, now is the time to remove the cups and try again.
Step 4
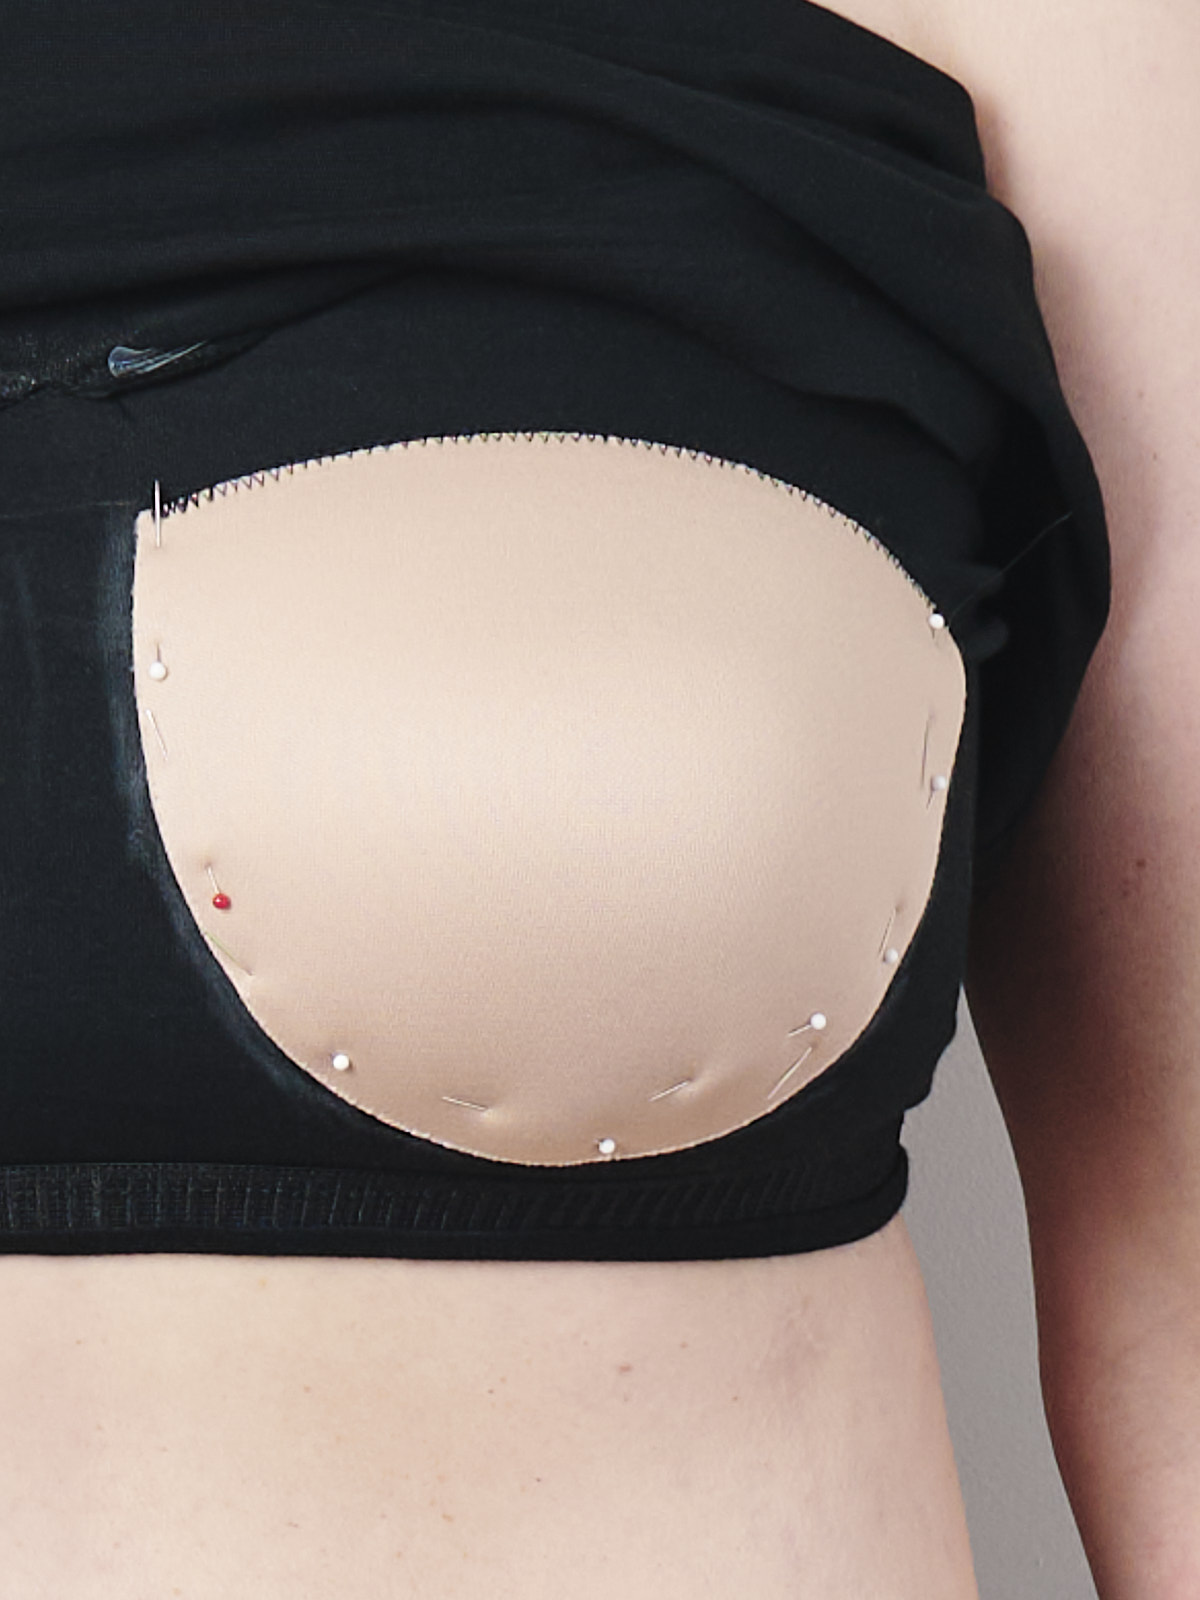
If the cups are in the correct position, pin around the rest of the cups and create a chalk mark around the outside of the cups.
Step 5
Remove the cami again, being careful not to pull out the pins. Sew around the remaining edges of the cups so that the entire cup has been stitched. Try the cami on again, pulling the outer cami up and over your bust to check the final placement.
Step 6
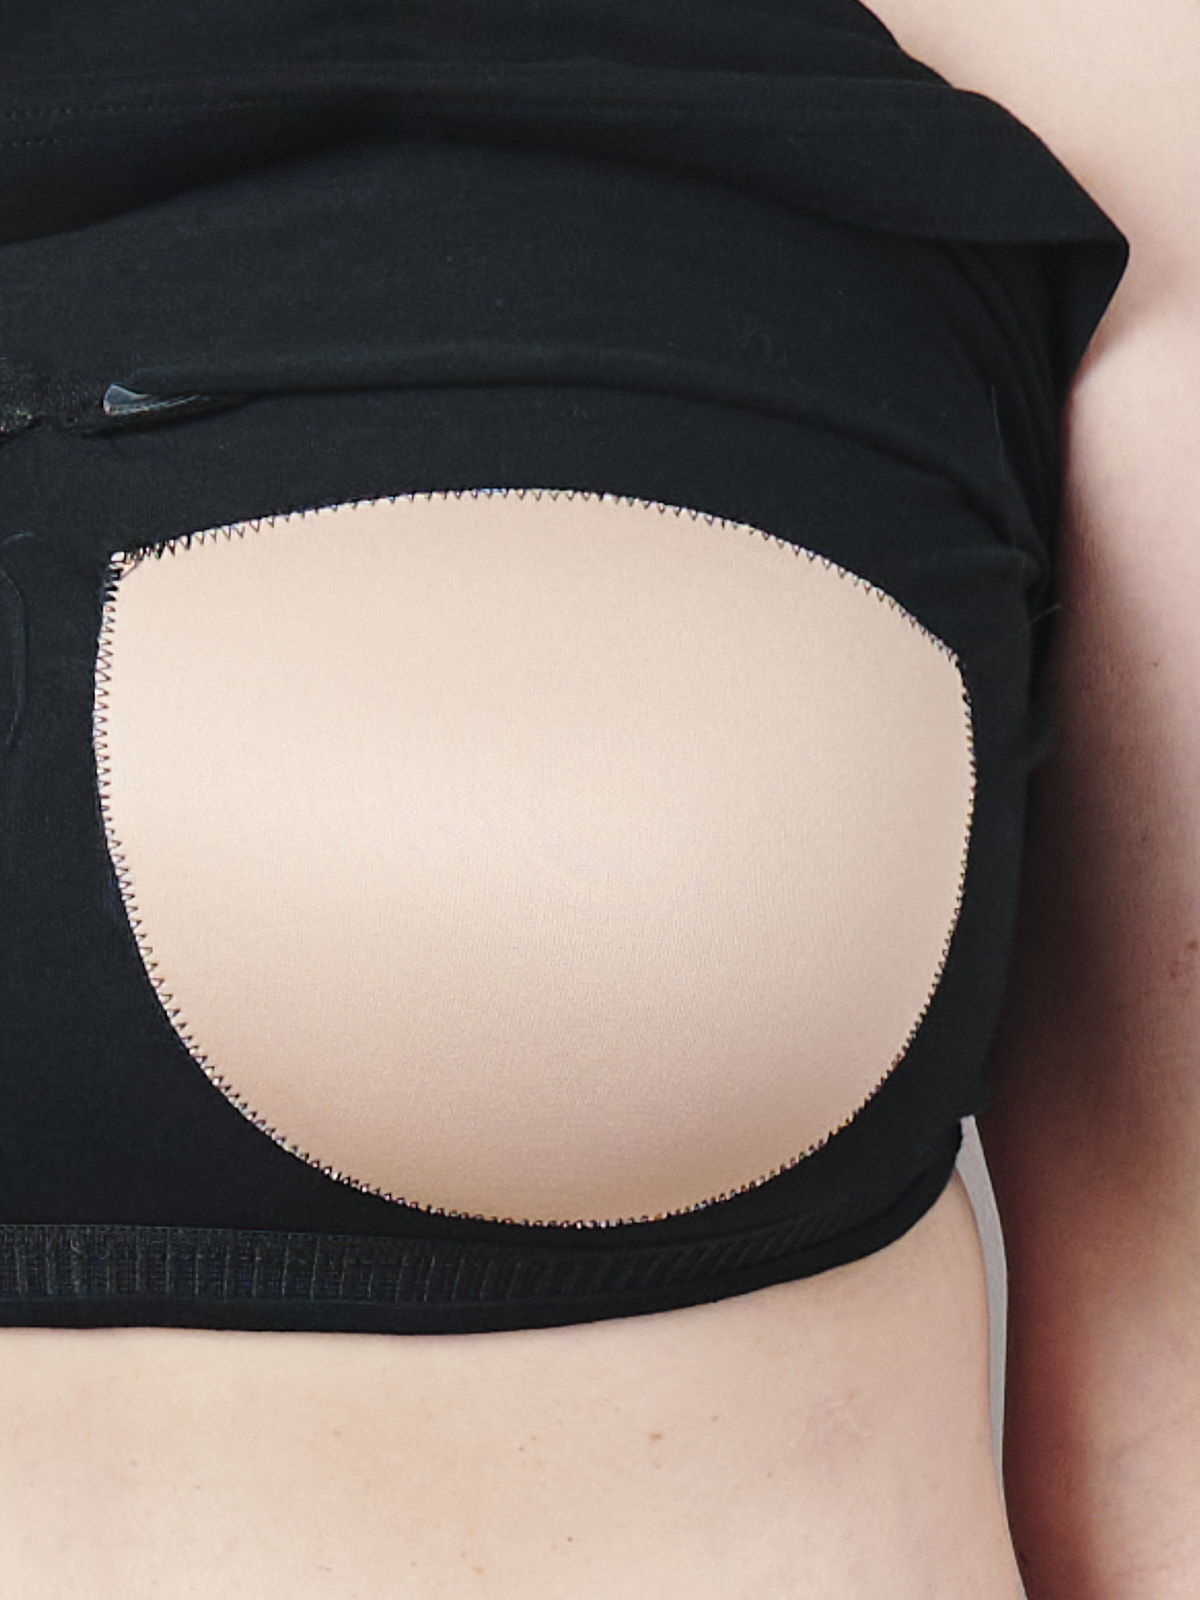
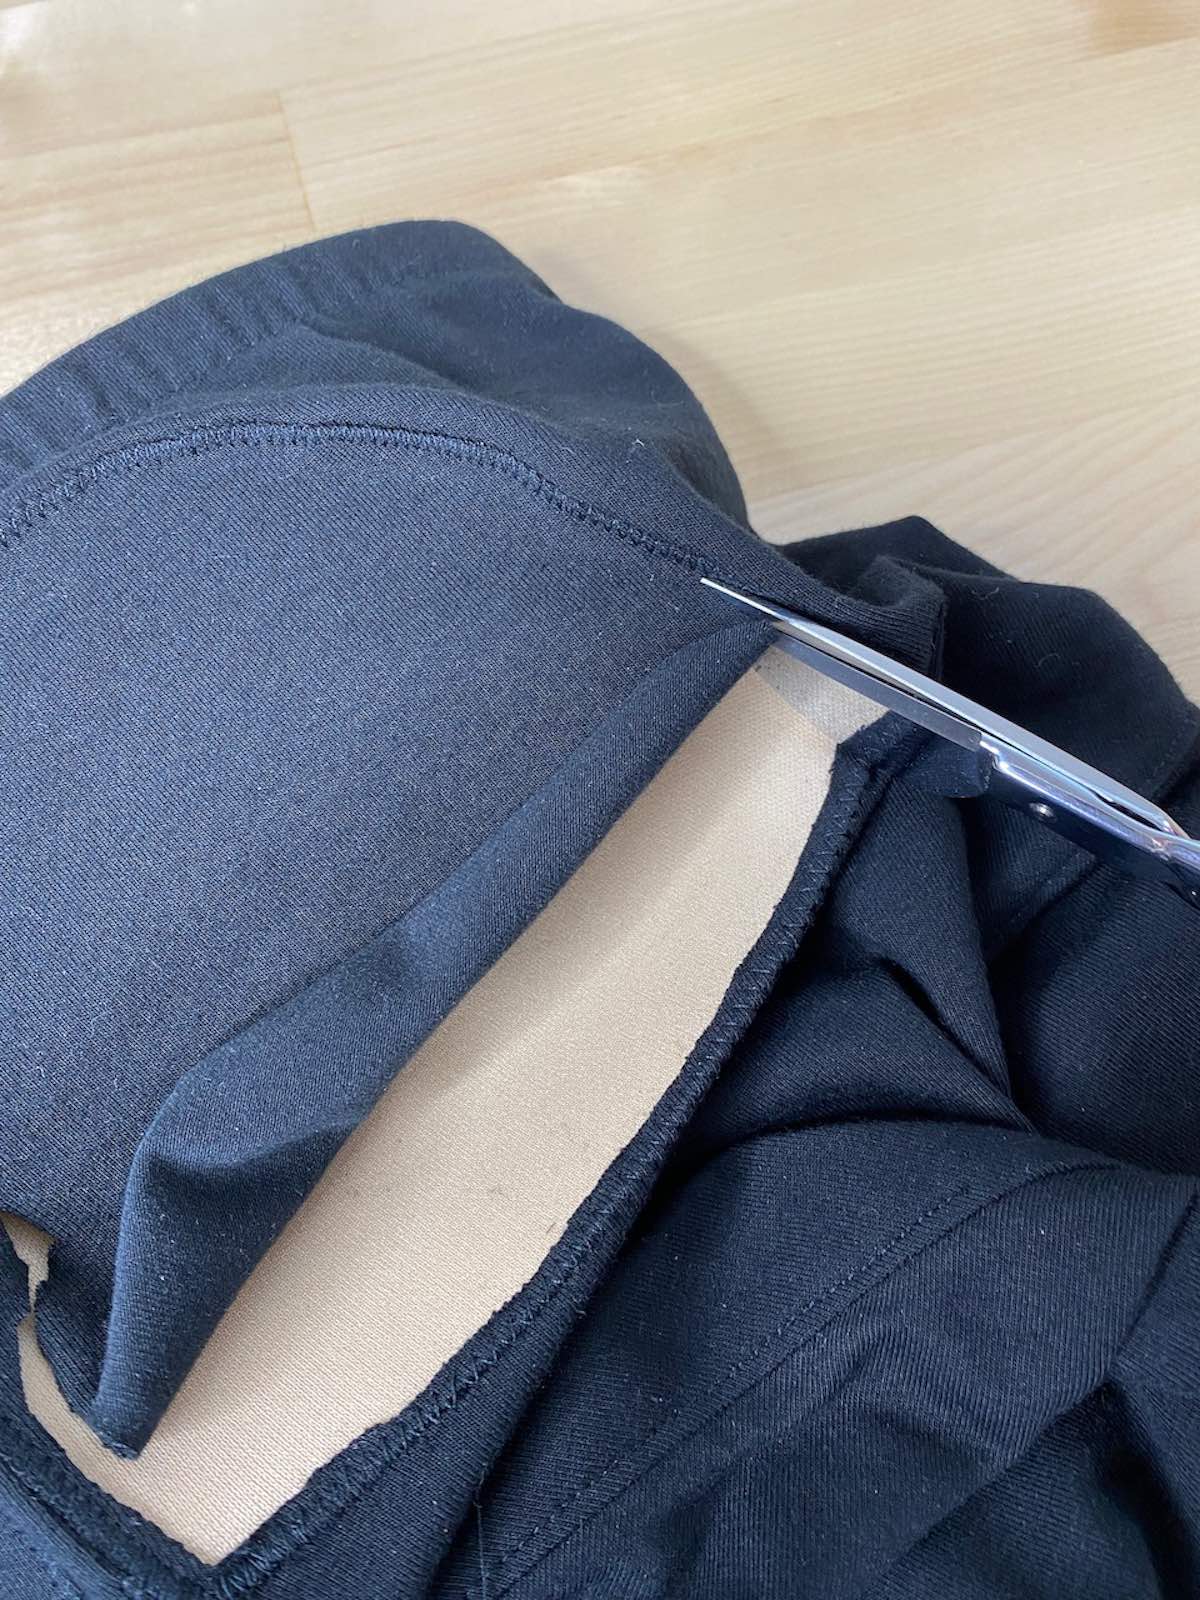
If you are happy with the placement and stitching of the cups, you can now remove the jersey from inside the cups. Remove the cami and turn it inside out so that the inside of the bra shelf (the side that touches your body) is face up.

Carefully cut away the fabric, staying 1/16” to 1/8” away from the zig-zag stitching. Be careful not to cut the stitching. I like to use applique scissors for this step.
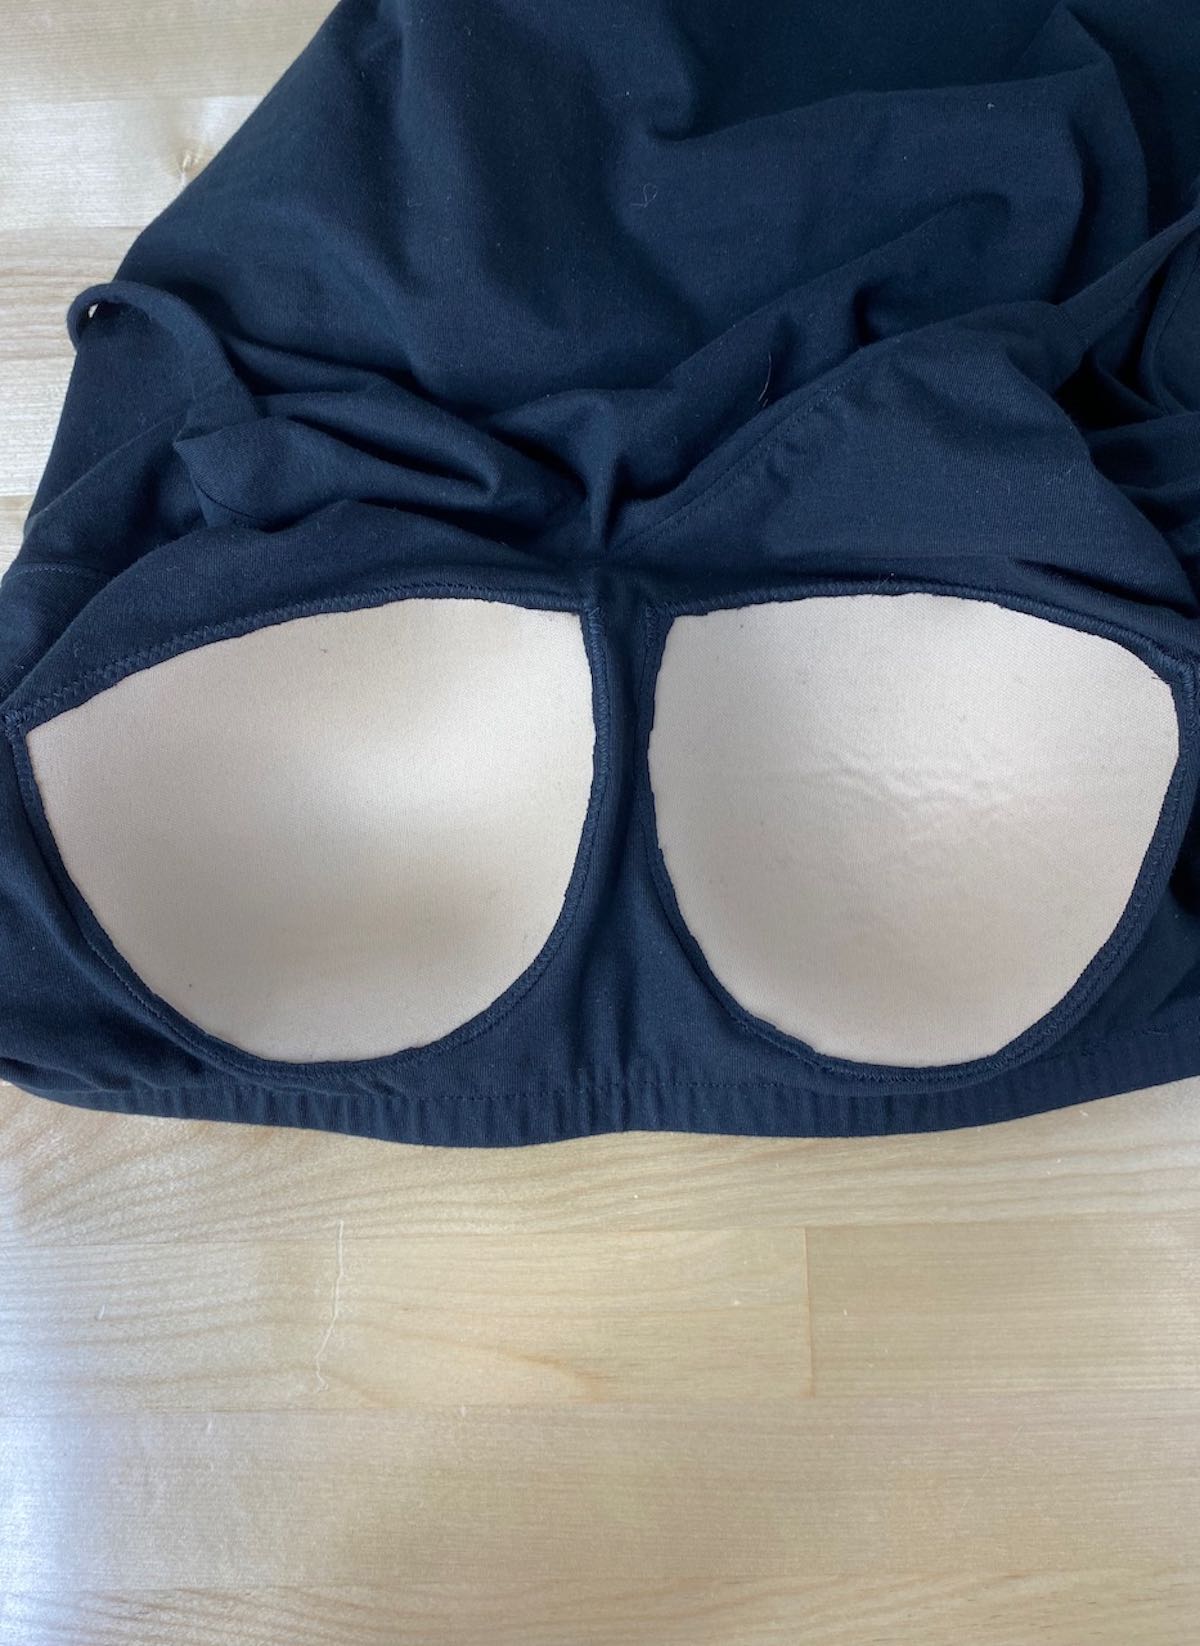
You are done once you’ve cut away the fabric from both sides! Try on the cami one last time to see the final results!
Final look

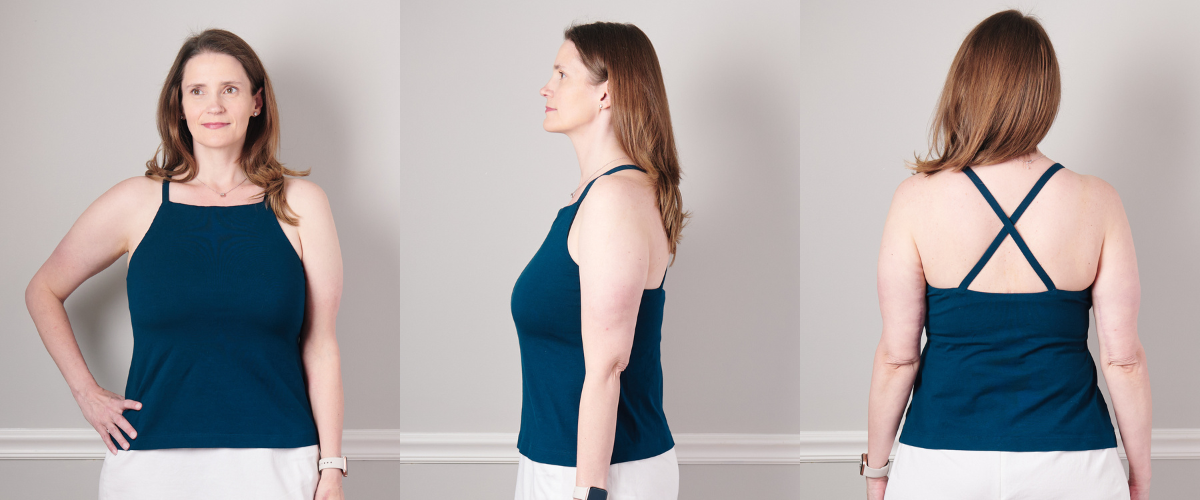
I am thrilled with how this adjusted Tribeca cami turned out. The shelf bra covers my entire bust. The cups provide enough modesty that I am comfortable wearing this cami on its own. I’ve made both the V-neck and the bateau neck versions, and I am guessing I will make this pattern many times for a summer staple!