

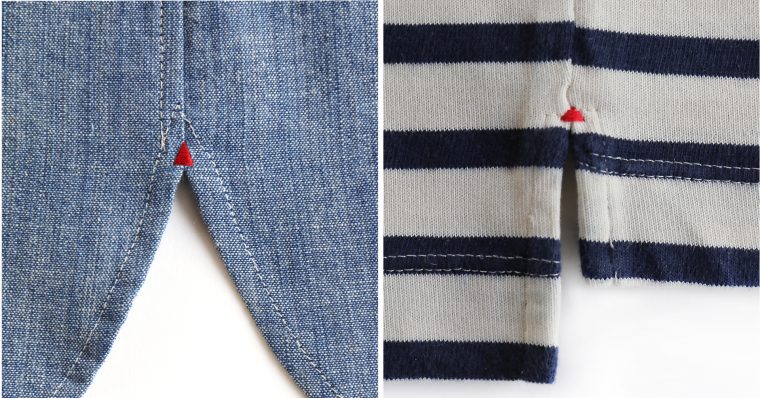
A bartack is a handy little detail you can add to your sewing to strengthen the fabric at a stress point. But bartacks can also serve a decorative role, especially if you play around with your sewing machine a bit. And now that we’ve released the new Liesl + Co. Classic Shirt pattern, you have a great new location to use this technique! But, really, you can use it on many, many more patterns than this.
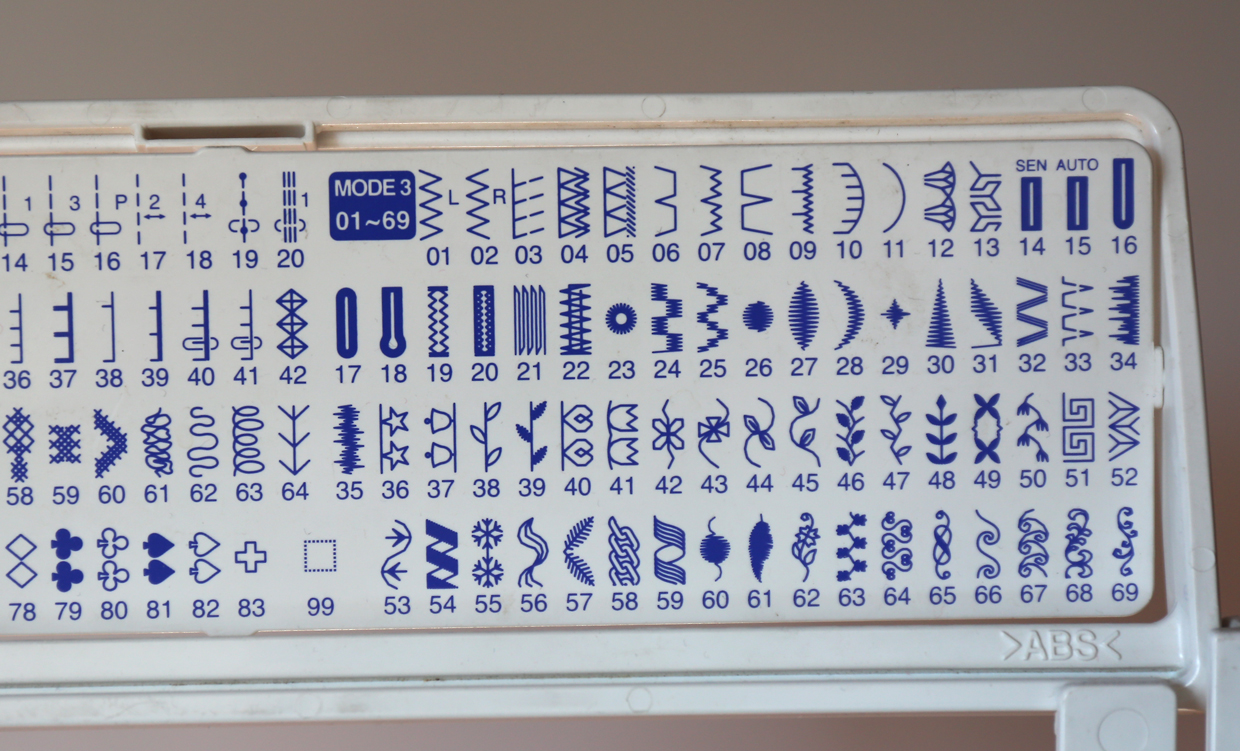
I own a relatively fancy sewing machine that includes lots of stitches, most of which I will confess I never use. S loves to play with them, but mostly I purchased the machine for its fantastic automatic buttonhole options, which you can see in this photo. (I like buttonhole #17 in particular.)
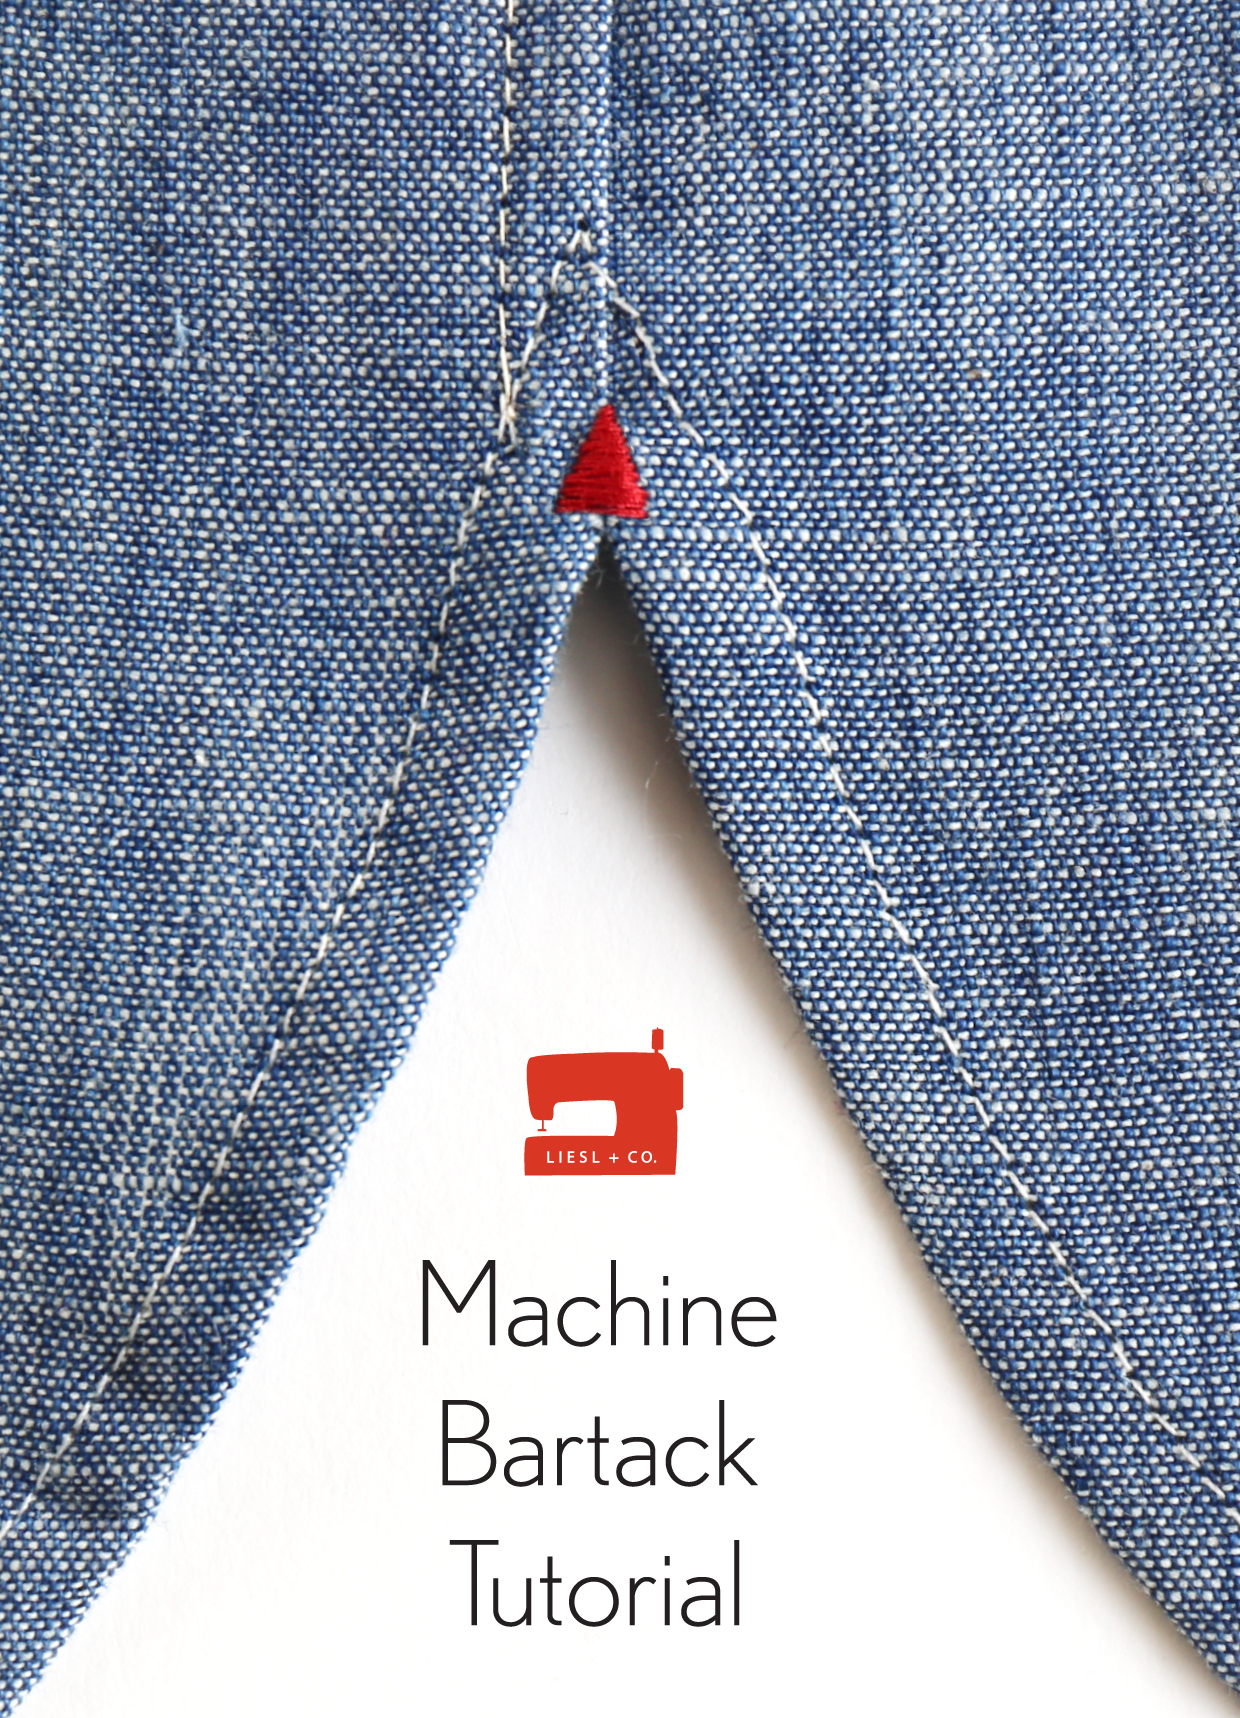
Anyway, I had been messing around with decorative bartacks a while ago and it occurred to me that I could probably sew them by machine instead of by hand. I wanted a triangle-shaped bartack, so I picked the first half of stitch #27. In retrospect it would have been easier to use stitch #30, which is designed to be a triangle, but I got good results nonetheless. Here’s what it looked like with the automatic settings on my machine, stopping half-way through the programmed stitch:

Fun, right? And so fast! I plan to keep playing around with other stitches to see what else I can do. Maybe a circular grommet instead of a triangle would be a fun detail. If you have a machine with embroidery stitches you probably have something similar you can use to make bartacks, too.
But here’s my point: you don’t need a fancy machine to get similar results. Here are the stitch settings my triangle bartack used. It starts at a stitch width of (or close to) 0 and very quickly works its way up to 7.0, all while stitching at a length of 0.4 so the stitches are dense and close together without being on top of each other.


How hard could it be to do something similar by manually adjusting the machine? It took me a little bit of playing around with some scraps of fabric, but after a few tries this is what I ended up with after simply adjusting the machine by hand as I stitched, no fancy embroidery stitches used.

Not too bad, is it? I’ve been adding these bartacks to my Bento Tees and Maritime Tops and anywhere I add a side seam vent. I’ve also added them to a few Classic Shirts because it’s fun to have that little pop of color while also strengthening the join at the side seam.
Here are a couple tips if you’d like to try this on your own machine:
- Hold your fabric taut so it doesn’t pucker when the needle moves back and forth. If you have an embroidery hoop or some sort of stabilizer, that might help too.
- Start at a very narrow stitch width and after every two stitches (one zig and one zag) move up to a wider stitch setting, with the needle lifted when you change the width. Keep doing this until you hit your widest stitch setting. The bigger the jump between stitch widths, the shorter your bartack will be.
Let me know how it goes and where you add them! I’m sure S will be stitching snowflakes and scrolls wherever she gets a chance.