
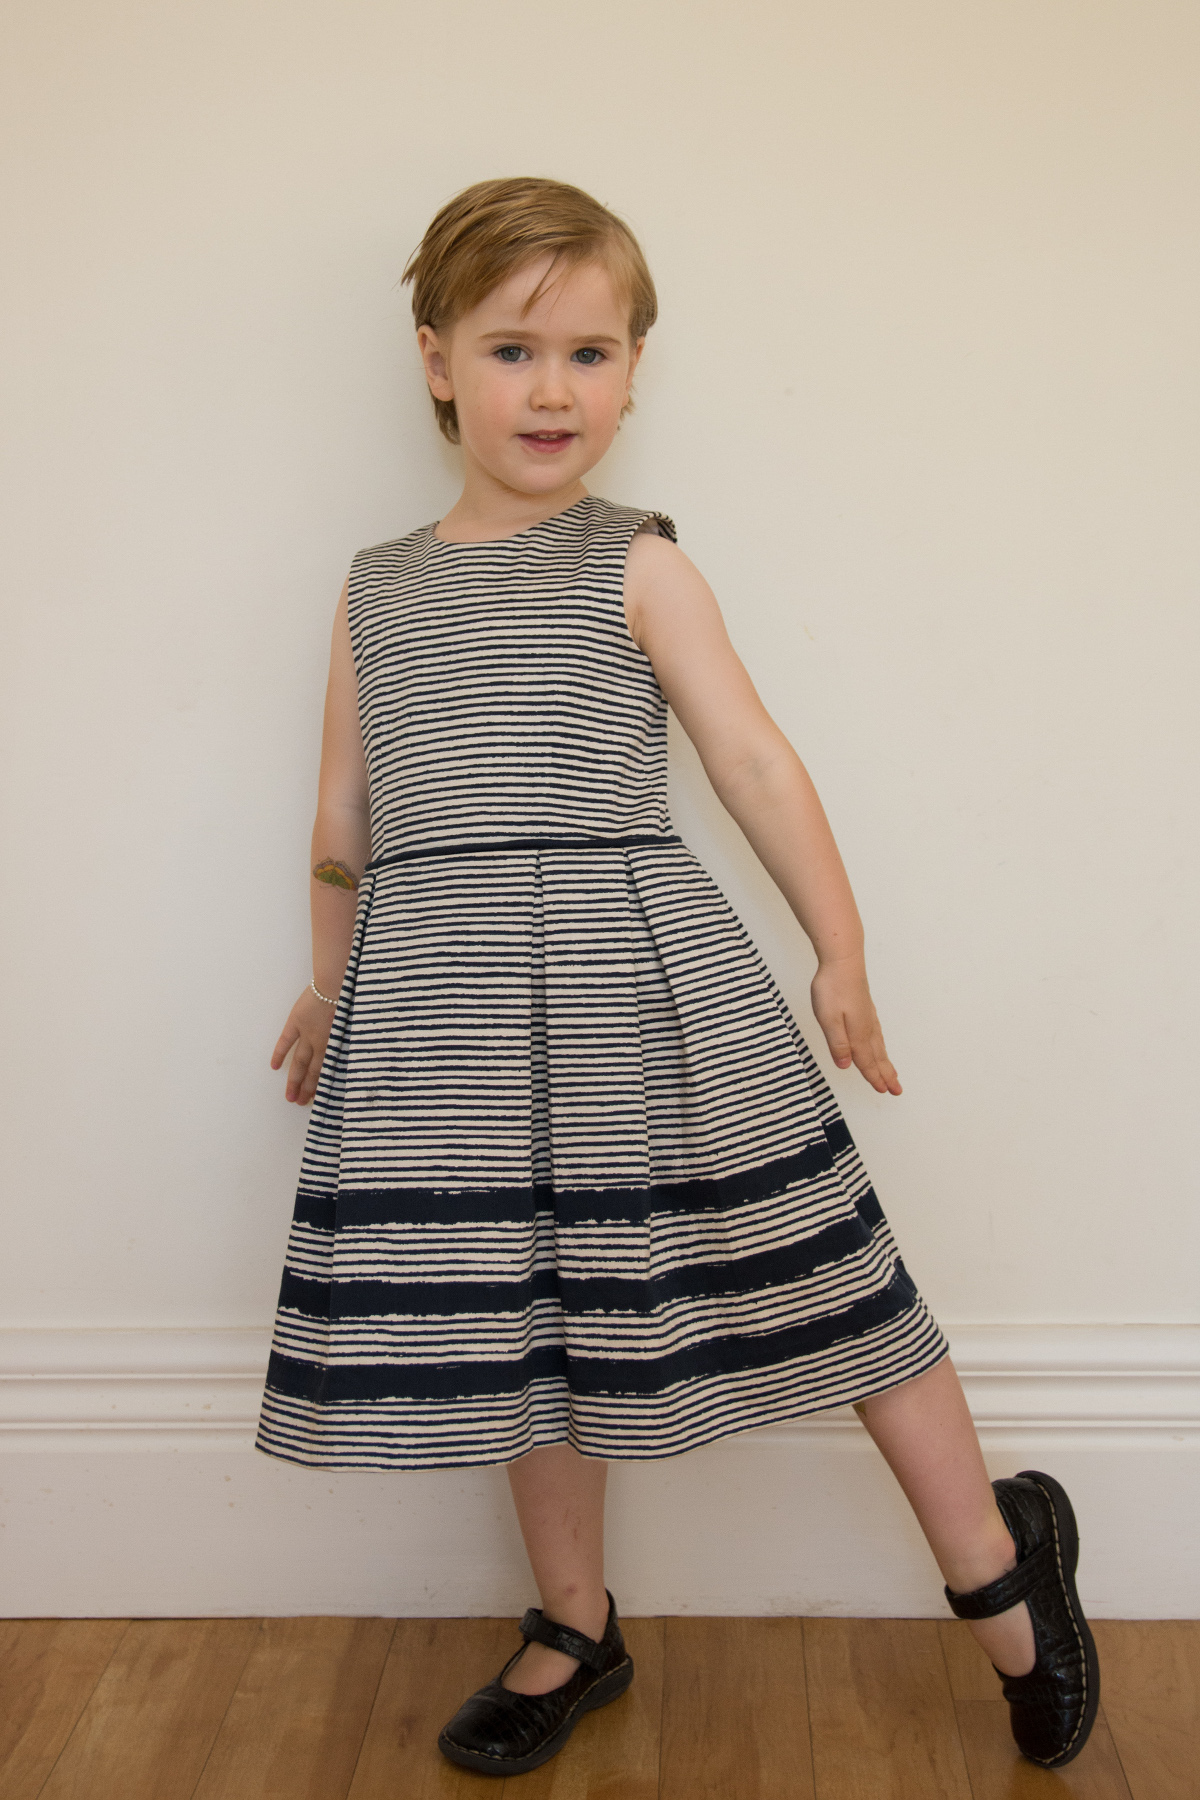
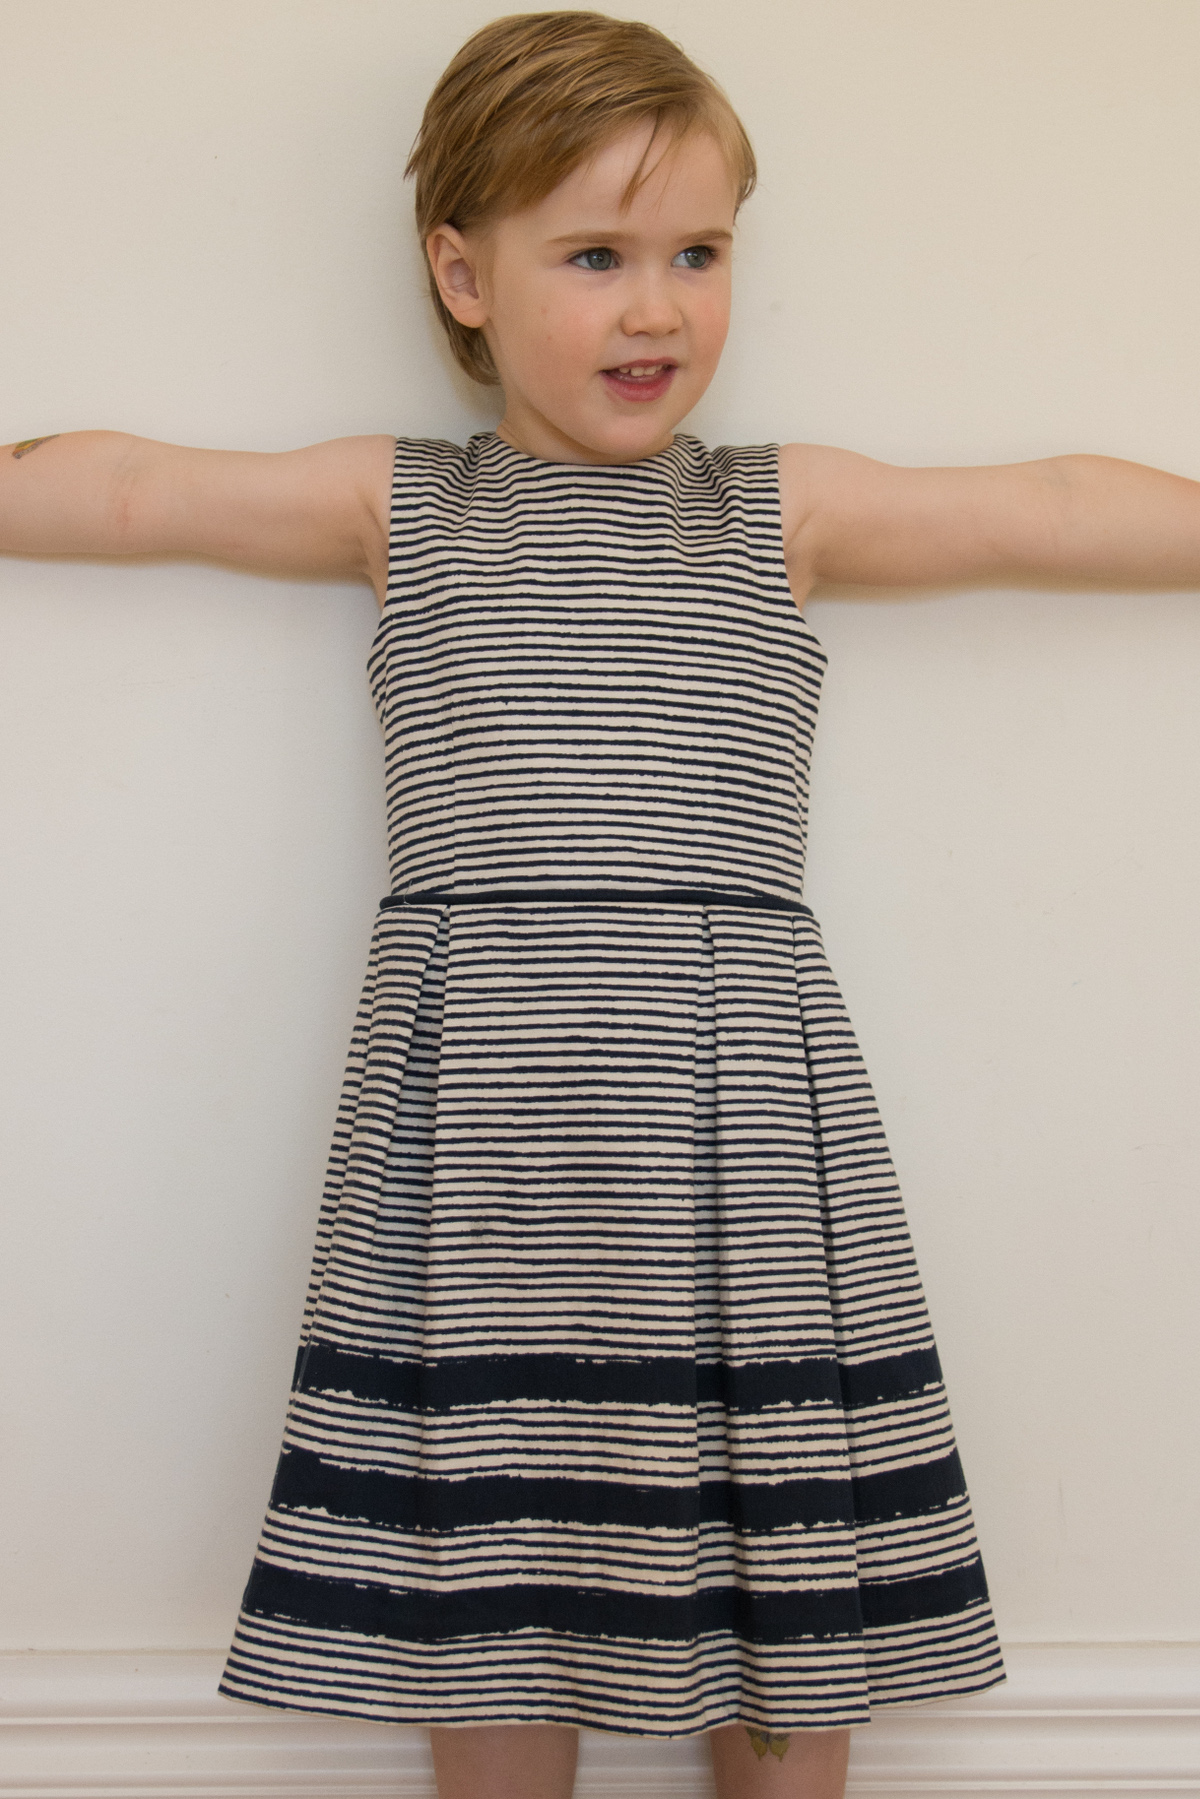
Easter is just around the corner. Do you have plans for sewing an Easter dress? If so, how about adding box pleats to the skirt of a Fairy Tale Dress? Shelley is here to tell us how to do just that. Take it away Shelley!
The inspiration for this dress and subsequent tutorial was a discussion in the forums about pleating the skirt of the Fairy Tale dress. The question about creating box pleats was posed by Sandra and she went on to sew a beautiful pleated version.
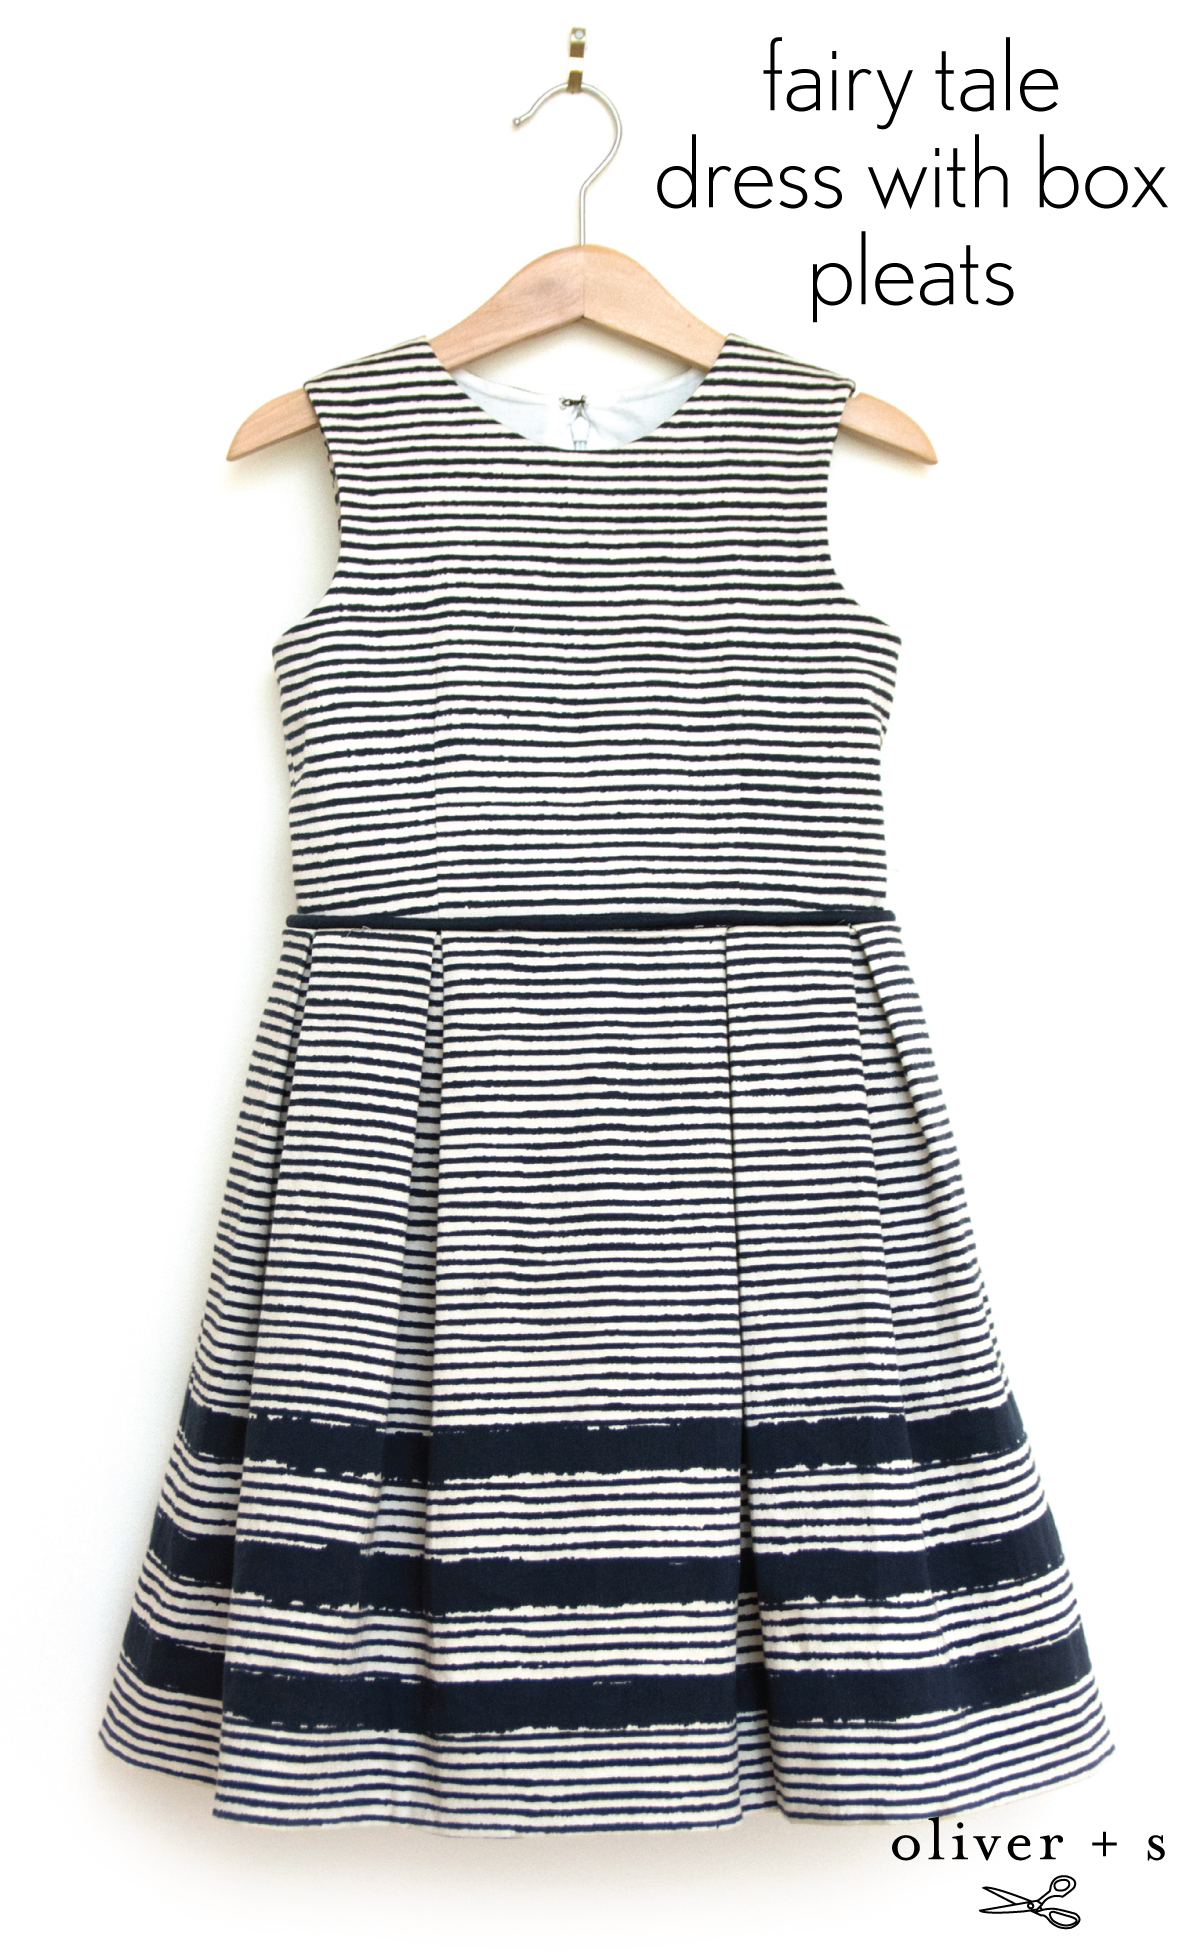
The invisible zipper at the center back creates a problem for any pleats that continue around the back of the dress and the amazing Alexander McQueen dress that Sandra showed as her inspiration had me thinking….
If the skirt was to have two box pleats on each side, front and back, that would leave the center back clear for the zipper. I set to work with pen and paper and a tape measure. I worked out how deep I wanted my box pleats to be visually, calculated out the required skirt width and then got extremely lucky.
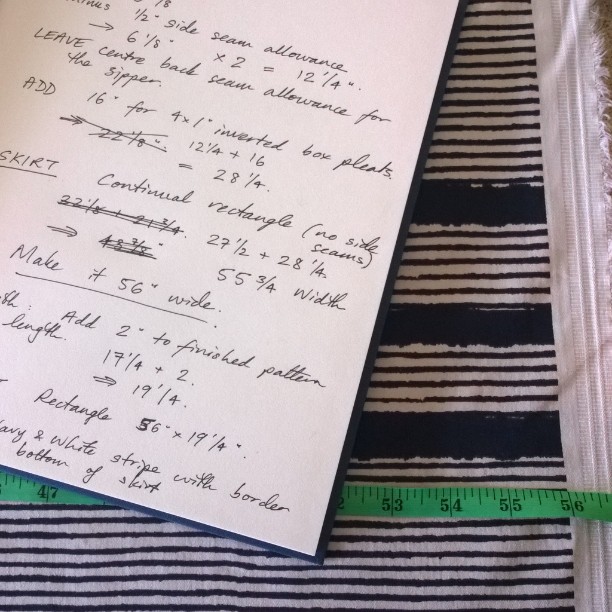
After my fabric width was exactly what I needed, I had some further completely undeserved good fortune as my box pleats lined up almost perfectly with the bodice darts. That certainly wasn’t planned but it got me thinking that it should have been. So here’s all the number crunching that will hopefully achieve the same whether you’re sewing under lucky skies or cloudy ones.
Rather than just give you the numbers (which I will, I promise) I thought you might be interested in how I got there. That way, if you are planning just a single box pleat on a different pattern you’ll know how much width to add to your skirt piece. Sarvi emailed me with this exact mathematics question recently and it’s so much easier to explain with the help of some pictures!
For any pleat, the fabric folds such that you have three layers of fabric. The topmost layer was already included in your pattern measurement, but the two underneath need to be added. As you can see in the illustration below you need to add twice the depth of your pleat to your skirt pattern. Think of a box pleat as two pleats facing each other and you can see you need four times the depth of the pleat for each box pleat.

If the skirt pattern you’re working with has no gathering then you add the extra inches straight to the pattern piece. But in the case of a pattern like the Fairy Tale we need to work with the finished bodice width as our starting point, then add our extra fabric inches for the pleats.
So how do you know how deep the pleats need to be in order for them to sit nicely at each side and line up with the bodice darts? I hope this illustration helps.
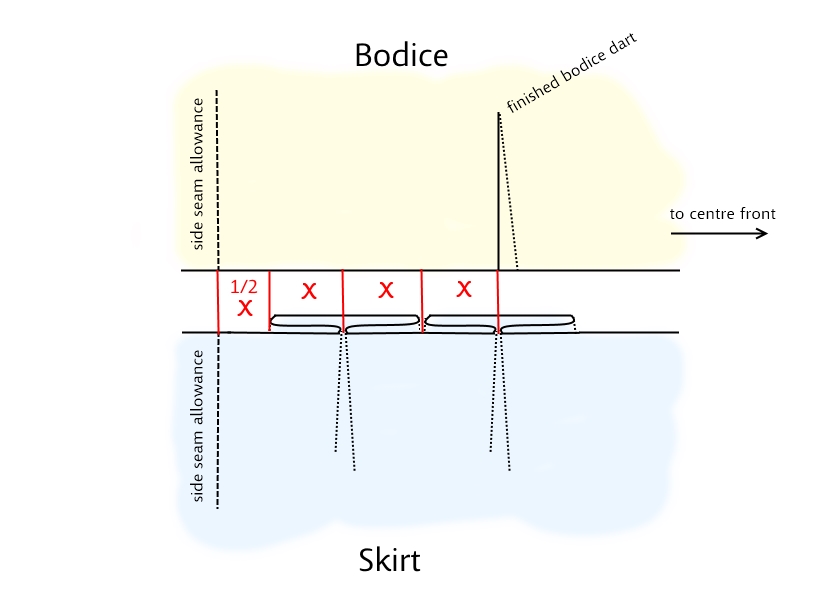
The distance from the side seam to the beginning of the first pleat is kind of arbitrary, but half a pleat depth seemed a nice balance and moves the pleats a bit off the hips.
So, from that calculation I went on and measured the finished bodice widths of the Fairy Tale pattern across all its sizes. Then I worked out the “x” for each bodice size, and then calculated how wide the skirt pattern pieces would need to be. Phew!
Using the table below you can create a new skirt pattern piece. Measure the height of the Fairy Tale skirt pattern piece for the size you want and then use the table to find the corresponding width. Once you’ve constructed your new pattern piece you cut it on the fabric exactly as you would with the original pattern piece. If you have wide fabric (as I did) you might prefer to cut it as one large rectangle, and that measurement is given first.
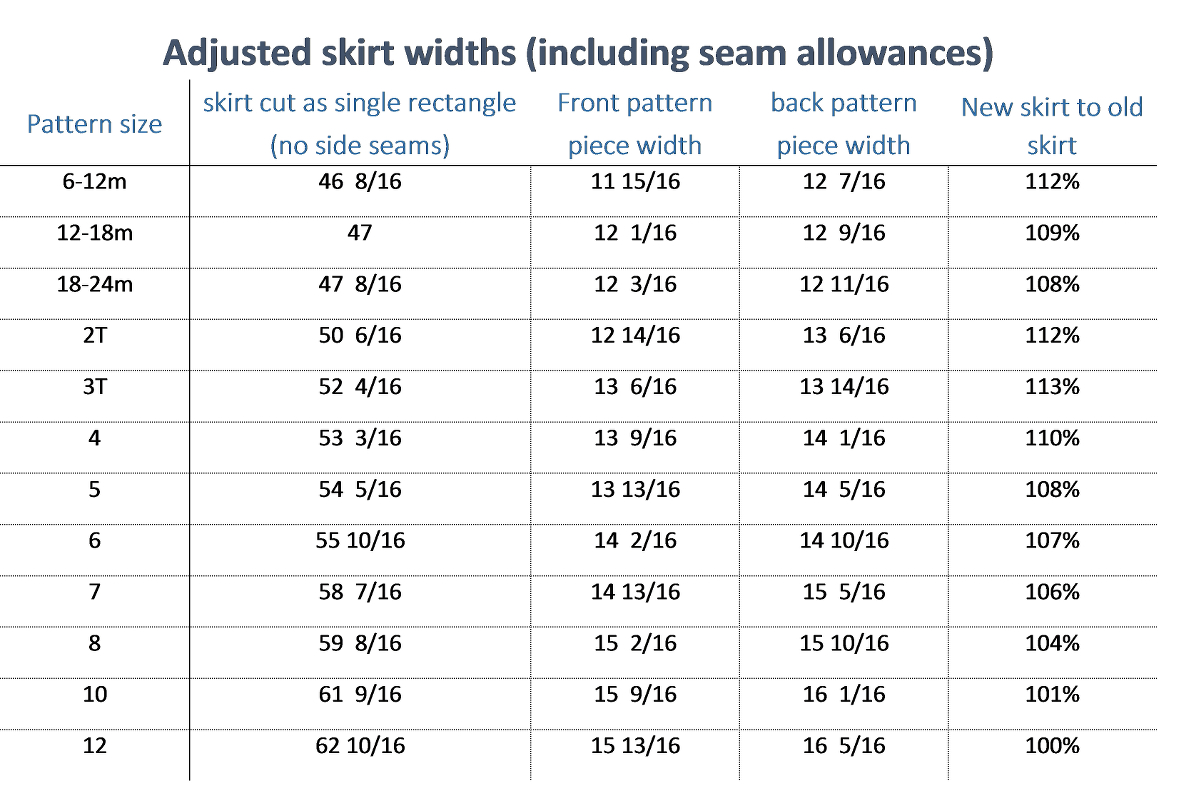
Out of curiosity I then calculated how the new skirt pattern piece compared to the original, and you can see it is a little bit fuller across most sizes, but not by much. Given that it’s quite similar you could use either the new pattern piece or the original pattern piece to cut your tulle and skirt lining, I doubt it would make much difference.
After you’ve cut the skirt front and back pieces and sewn them with a 1/2” seam (or not if you’re using a continuous rectangle) we need to mark where to put the box pleats. If you have cut a continuous skirt piece then you need to first find the “side seam.” Mark the center front by folding the rectangle in half. Now mark half an inch in from the center back edges, this is the zipper seam allowance. Find the halfway point between these marks on each side and this is where the side seam would be had you joined two skirt panels together.
Here’s an illustration to show how the pleat markings will be placed.
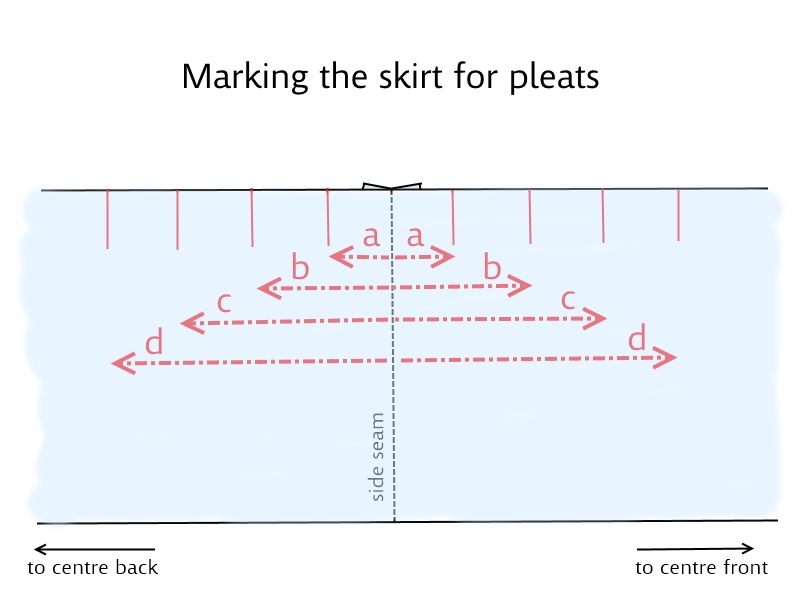
Make each mark about 2 inches long with fabric chalk or erasable fabric pencil. The box pleats will be created by placing the fabric right sides together such that the lines meet; the line at distance “a” meeting the line at distance “b” and the line at distance “c” meeting the line at distance “d”.
Use the table below to measure the distances from the side seam.

To sew the box pleats bring the corresponding lines together with the fabric’s right sides facing. Baste along the marked line. Press the stitched line and resulting fold. Bring the pressed crease to meet the basting stitches and then press the box pleat flat. Pin them in place as you go and then baste along the top edge of the skirt 3/8” from the edge to hold the pleats neatly for when you attach the skirt.
Continue sewing your Fairy Tale dress as per the pattern. I did some trial runs using interfacing and the stapler on a couple of the sizes and it seems that, within a sixteenth of an inch or so, the mathematics holds up and it should work. But just in case I can attest to the power of some piping at the waist to distract the eye from any minor discrepancies!
This is exactly the kind of sewing puzzle that I enjoy and I hope I’ve made it understandable, or at least not bored you as much as your high school algebra teacher may have. I’m always happy to answer queries about how to do something, so keep them coming. I’m not suggesting for a moment that I know what I’m doing, but since I do seem to be sewing under happy skies at the moment I’m fully prepared to have a crack at it!
Happy Easter,
Shelley