
There are two really good ways to cut bias strips. Most people seem to have a strong preference toward one method or the other, so I thought I’d show you both methods and tell you the advantage and disadvantages of both methods. That way you can try them both and make up your own mind which method you prefer. Today I’ll explain the continuous bias method, and tomorrow I’ll walk you through the steps of making bias strips using the more traditional method.
I thought this would be an especially useful tutorial for you now that we’re releasing the Pinwheel Tunic + Slip Dress pattern, because both the tunic and the dress use quite a bit of bias tape. Don’t let bias intimidate you! Bias binding is really not so difficult, it adds a little pop of contrast color to the edge of a sewing project, and it’s a really easy way to finish an edge instead of using a facing or a lining. It’s way more fun to make your own bias binding because you can choose any color or print that you like. It’s perfectly fine to purchase bias tape pre-made, but keep in mind that pre-packaged bias tape usually contains quite a bit of polyester and is much more limited in the color and patterns and widths available.
One thing to keep in mind, when you’re making bias tape: the width of the strips you cut should be four times the finished width of the finished binding. In other words, for the 3/8″ binding that we recommend for the Pinwheel Dress (as well as several of our other patterns, and a few projects in Little Things to Sew) you’ll be cutting your strips to be 1 1/2″ (12/8″) wide. That makes sense, right? OK, let’s go.
Supplies Needed
For this project, you’ll need some fabric (obviously), coordinating thread, pins, a nice long ruler (those 6″ x 24″ clear quilting rulers are great for this, if you’ve got one), and some chalk or a water-soluble fabric pen. And, of course, some scissors. (A rotary cutter won’t work for this technique, but we’ll be using a rotary cutter for the traditional bias binding method tomorrow, so don’t despair!)
Continuous Bias How-To
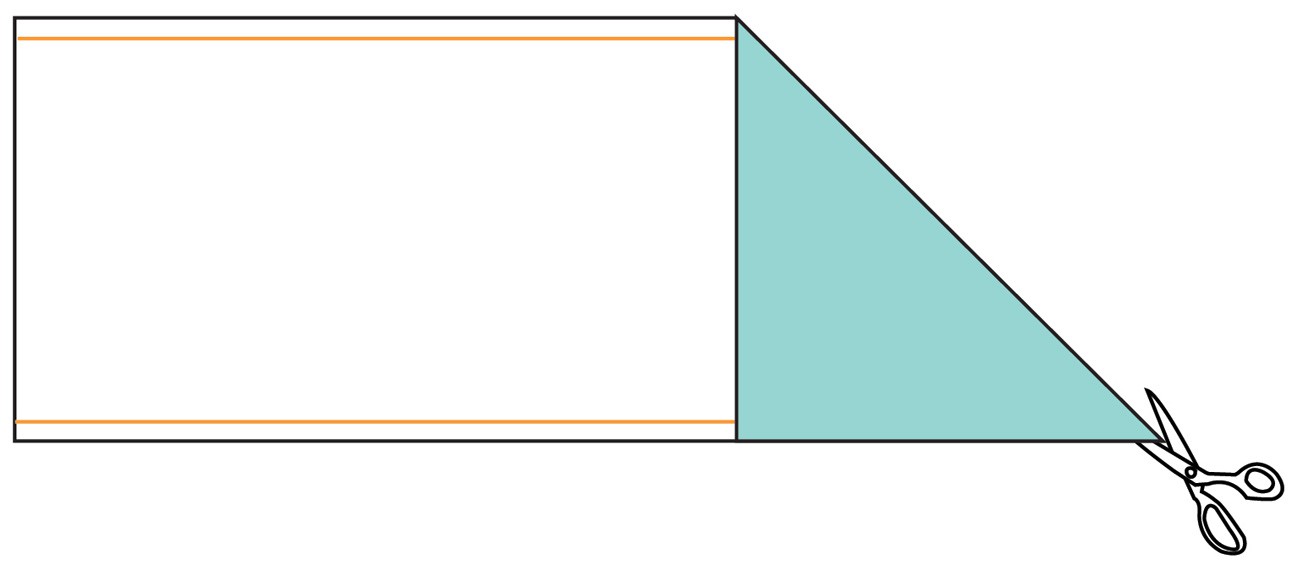
1. Start with a piece of fabric that’s been squared off, so the grain is straight on all four sides. If you’re working with a full width of fabric, remove the selvedges as shown in the illustration below. Then use chalk to draw a 1/4″ stitch line at the top and bottom edges on the wrong sides of the fabric. These chalk lines will help you to sew the ends together later in the process.

2. Fold the upper right hand corner of the rectangle down until it meets the bottom edge, so the right side of the rectangle is even with the bottom edge of the fabric. Crease the resulting fold and cut along this crease to make a triangle. The crease will be at a 45-degree angle to the edges of the fabric, which is the true bias. We’ll be using this angle to mark the rest of the bias strip edges, so cut a nice, straight line.
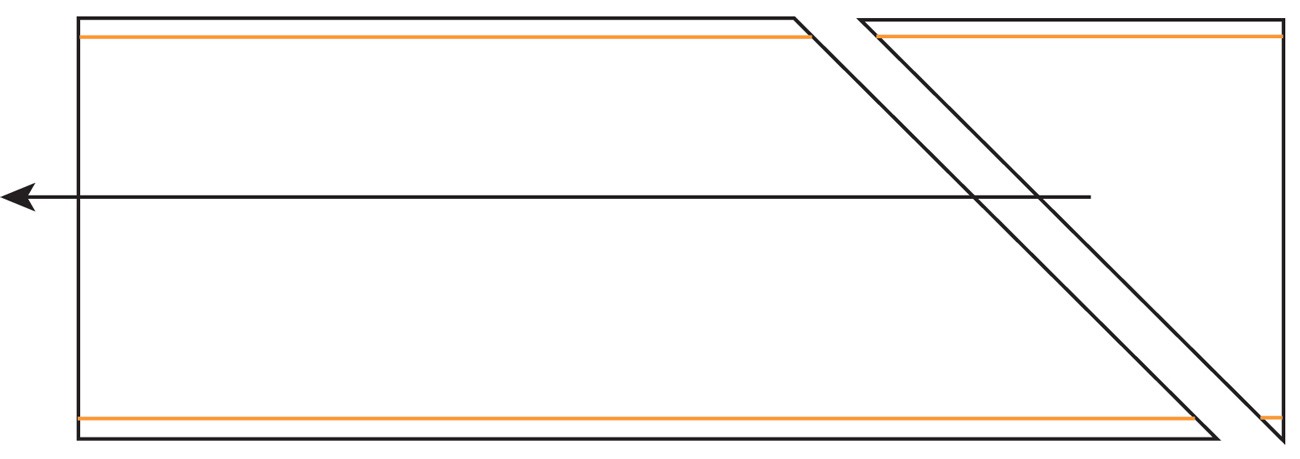
4. Press the seam open, and the resulting shape is a nice parallelogram. (You remember what a parallelogram is, right?)
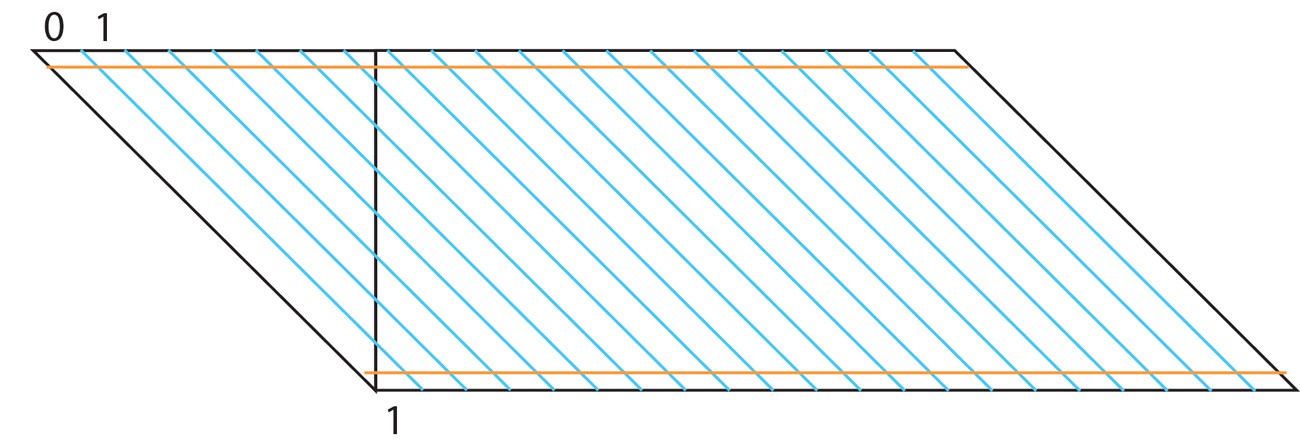
Starting from one angled side edge, begin measuring and drawing cutting lines on your fabric the width of your desired bias strips. (Remember, for 3/8″ bias binding you’ll want to cut the strips 1 1/2″ wide.) Continue to draw the lines all the way across your fabric until you reach the other side. If you have a little extra fabric left at the end, you can trim it off. Now, before you move on, take a moment to look at the way I’ve numbered the strips. When we pin the top and bottom edges together, we’re going to stagger the ends of the strips so the 1s will get pinned together. This way, when the strips are cut, they’ll just continue on from one strip to the next. Make sense?
5. Turn the parallelogram to the right side, and join the top and bottom edges with right sides together, pinning the top and bottom seam lines together. The trick here is to shift the fabric so the strips line up at the seam lines. If you pin at a few of the seam intersections, this will help you to get the edges aligned. This step will seem a little wonky while you’re pinning and sewing it, but once everything is aligned and the seam is sewn and pressed open, the resulting tube will look something like this.
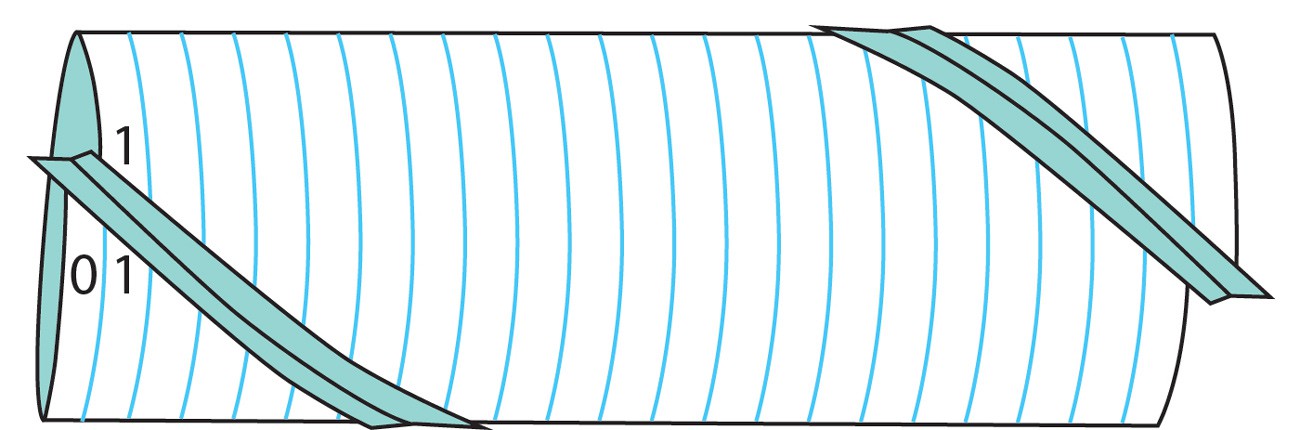
Now you can start cutting your bias strips! Starting at one end, simple cut along the now-continuous line that you drew. As you cut, you’ll work your way around the tube until all the fabric has been cut. Now you’ve got one long, continuous strip of bias!
Advantages and Disadvantages
So let’s talk advantages and disadvantages of this method, shall we? Lots of people like continuous bias because it requires you to stitch only one seam rather than a bunch of short, individual seams, which can be a real pain. You can also use the entire piece of fabric, with virtually no waste.
On the other hand, there are a few disadvantages. One thing that I really don’t like about this method is that you end up with quite a few short sections in your bias strip, with a lot of seams in those areas. Also, the strips need to be cut entirely by hand, so you can’t use a rotary cutter. And one final thing to mention: it’s absolutely crucial that you get everything lined up on that seam or it will cause issues with cutting the entire strip.
OK? So tomorrow, the more traditional method. Make sure you have your bias tape maker ready. I use and recommend Clover bias tape makers. I have one in each size that they make.
If you enjoyed this blog post, why not sign up for our newsletter? It’s free, and you can opt to have new blog posts sent to you by email too!