Note: today we continue our occasional series of seam finishing tutorials written by April Henry.
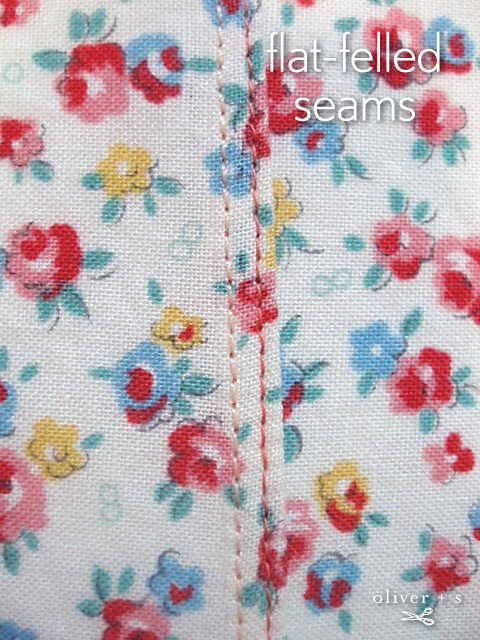
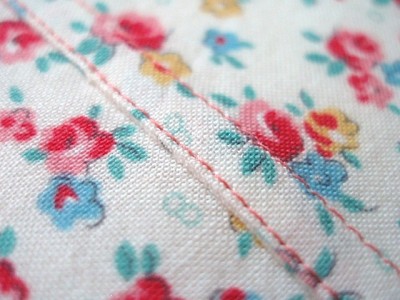
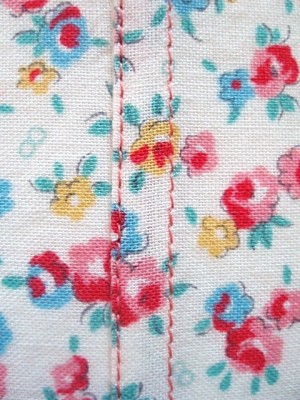
A flat-felled seam is accomplished by sewing two lines of stitching at the seam while simultaneously enclosing the raw edges of the fabric. This seam finish not only prevents unraveling or fraying, but makes the seam very strong. It also gives the finished garment a clean finish on this inside.
A flat-felled seam is commonly found on denim jeans and men’s dress shirts as well as on reversible garments. I’ve even seen this feature instructed in vintage patterns for boy’s and men’s pajamas. It adds one more touch of professionalism to a hand-made garment.
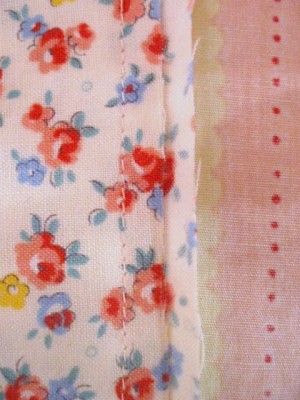
To begin, stitch the seam with the fabric pieces wrong sides together.
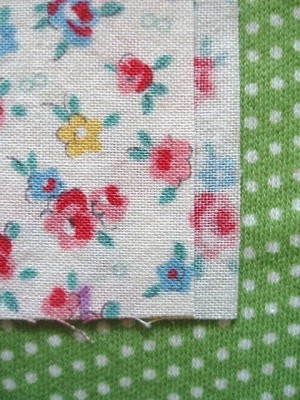
You can determine how wide you want your flat-felled seam to be by how much you trim your seam allowances. Begin by trimming only one side to the desired width of the finished seam allowances.
Trim the second seam allowances to twice the width of the first. For this example, I stitched a 1/2″ seam and then trimmed the first seam allowance to 1/4″, which means I didn’t need to trim the second seam allowance since it was already twice the width of the first.
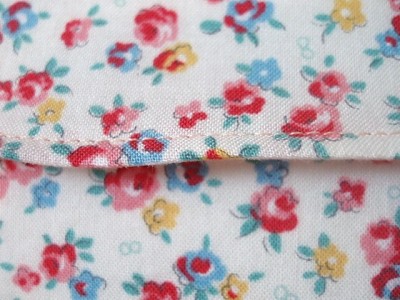
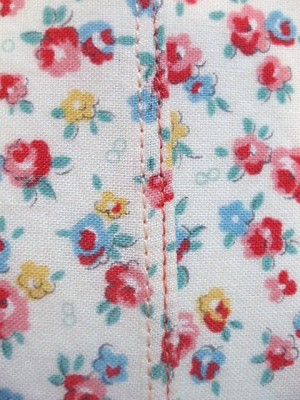
Fold and press the wider seam allowance around the shorter seam allowance so the raw edge of the second (wider) seam allowance meets the first seam line. Then stitch along the folded edge of the second seam allowance. This encloses the raw edge, and with the second row of stitching creates a very strong seam.
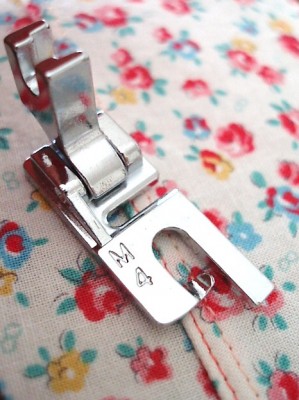
To make my stitching rows evenly spaced, I used a 1/4-inch foot. The black guide on the right followed the first stitching line while the inside edge of the little toe was a guide for sewing the second stitching line.
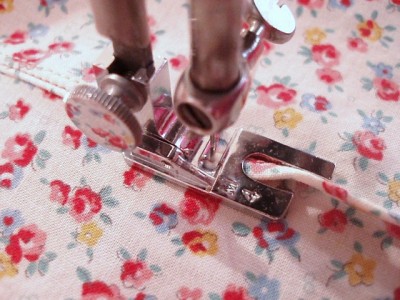
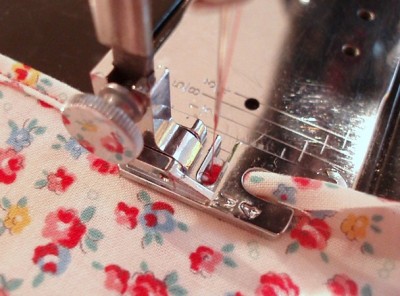
Another useful tool is the Felling Foot, because it folds, presses, and stitches the first row of stitches all in one pass.
Using this attachment, while still accommodating a 1/2-inch seam allowance, I trimmed 1/8 inch from each of the seam allowances prior to stitching so that the finished seam would finish with the correct seam allowance according to the pattern.
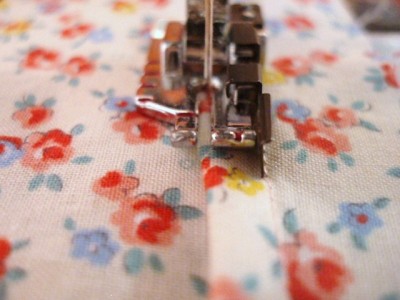
To begin, space the top seam allowance 1/8 inch to the left of the bottom seam allowance as shown in the photo above. Finger press and fold the start of the seam so that you can stitch 2-3 stitches to secure the folds in place. With the needle still in position, maneuver the bottom seam allowance into the Felling Foot so that it curves up and around. Sewing slowly, carefully begin stitching to allow the bottom seam allowance to fold over the top seam allowance so that the folds can be stitched in place for the first stitching line.
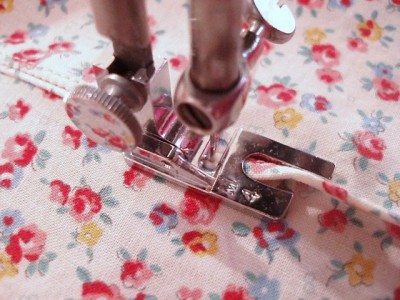
Simultaneously, the attachment is folding, pressing and allowing the needle to stitch the initial seam enclosed.
Press the enclosed seam so that you can make the final pass with the attachment.
Using the Feller attachment for the second pass, slip the stitched fold up into the attachment with the right toe set up against the outside of the first row of stitches. Allow the fold to carefully pass under the foot while stitching it in place for the finished Flat-Felled Seam.
The 4mm Feller Attachment makes a dainty, 1/8″ narrow flat-felled seam.
If you enjoyed this blog post, why not sign up for our newsletter? It’s free, and you can opt to have new blog posts sent to you by email too!
Thank you so much for this tutorial. I love the look of felled seams but never researched it enough to attempt it on my own. I’m going to practice on this over the weekend!
Thanks for this. I haven’t tried it before, and it looks so nice!
YES! I needed this! Thank you!
Very nice – I look forward to trying this.
I was curious about felled seams as I examined a pair of jeans I was mending and wondering if it would be a professional option for the sandbox pants I’m sewing in stretch corduroy.But I couldn’t figure out what to do about the front pockets in the side seam. Hmmm.
I definitely see felled seams in my future. If not on the sandbox pants then somewhere else. Thanks for your always timely tutorials. 🙂
It’s kind of weird, I’ve been doing what I thought were flat-felled seams for years but I always do them on the inside of the garment, with the seam done right sides together. You get a nice seam but it’s hard to sew from the right side – the fact it might be the wrong way out would explain that! And ooo a whole foot to do with this, I might need to look into them. Thanks for a great post!
Loralee, another great Oliver + S pattern to try with this technique is the Bedtime Story Pajama pants. I made my son pajamas and used this technique along the leg and rise seams. It gets a bit tight at the end when stitching inside the leg hole, but not hard – just slow. It made his pajamas look more professional. Not a factory-made look but hand-crafted with attention to detail (if that makes sense). They remind me of the old-fashioned patterns.
Have fun! Can’t wait to see what you make!
Brilliant!
I’ve been wanting to try this technique for a long time – I’m sure it will great on boy’s pants (hoping it will motivate me to sew more for my boys…).
April explanations are as detailed and accurate as usual. Thank you!
cannot wait to use this… i think that it will look especially amazing on boy pants and not just jeans. the hipster seam. thanks, april!
I just used this technique on the leg and rise seams on my first ever pair of sandbox pants and it looks fantastic! Yes, I had an *eek* moment when doing the leg hole, but I took your advice and took it slowly and it wasn’t hard – I’m so glad I tried it. I normally overlock seams, but have been wanting to try a different way – as honestly – my overlocker always left me in frustrated tears, (rethreading took me hours and my boys *always* fiddle with the dials – they can’t help themselves!)Thankyou so much for the tutorial April and thankyou oliver+s for posting it – it really helps to give garments made from your patterns a quality handmade look rather than a homemade look 🙂
So glad I found you! My mom used flat-felled seams a lot. We 3 girls were able to pass our clothes down because they were sturdily made.
I am a gt grama now and couldn’t remember how to do that seam. You came along just in time. Thanks for the clear instructions.
: )
i am a newbie to sewing and working on box jumper. everything was fine until i reached the yoke assembly step 2, 3, need a video or very instruction that experienced big stitchers now. waiting for anyone’s response. thanks
Thanks so much… you are a genius!
What kind of sewing machine you use?
I’m not sure if you were addressing Liesl or me, but the samples illustrated were used on a vintage black Singer Featherweight 221 or 222, which is what I use most all of the time. However, this attachment works on most all low-shank sewing machines – new or old! Good question!
If your question was for Liesl, she has blogged about her lovely little Janome in the past.
Wow! That’s a great tutorial. Thank you so much for taking the time to do that.
I wish this was on a video. I would love to see it in motion…..
Thank you after so many years I kown what it is for.
Do you have tutorials on other sewing machine feet? I’ve sewn many years,
and have felled many seams but didn’t know you could buy a foot to do this.
There are other feet I’m not sure how to use. Thanks, Emilie in NC
Hi, Emilie — Thank you for your question. Yes, we at April 1930’s have several other tutorials on our website showing how to use all sorts of sewing machine attachments. This particular attachment correlated to a “seam-finish” so we collaborated with Liesl in creating a tutorial for her readers. But, you can create a felled seam with or without an attachment. I’ve finished seams both ways. There are several other seam finishing tutorials on her blog as well – be sure to check those out as well.
I’ve been making and teaching flat fell seams for decades! I am going to have to purchase a felling foot and try that as I make a lot of flags for color guards and I think the foot would make it much easier!
When I make my patterns, I add 1/2″ and 1/4″ seam allowances so that I don’t have to trim after the first seam is sewn.
Do you think that making the seams 1/8″ smaller would work with the foot?
Thanks so much will try soon on pj’s . So kind of you to post so many helpful skills.
Is a felled seam the same as a french seam?
No, it’s not. Here’s information about French Seams for you: http://oliverands.com/blog/2010/04/french-seams.html
Hoping for a sewing machine for xmas…haven’t sewn since my kids were young…1976’ish. When I was taught the flat-fell seam in 1962 (in home-ec) we trimmed on side by hand and then actually folded and pinned it in place for final top seam. Always loved it….just seemed more substantial to me. Can’t wait..I’ll get the machine somehow. LOLOL
What kind of sewing machine is the best to buy to do these kind of project’s?
What is the difference between a “felled seam” and a french seam? Thank you the tutorial is very good.
Hi that was a very interesting tutorial,Thank you for that.Recently started sewing again and getting as much info and ideas as I can get.
Thanks for the tutorial. I will have to try this since it looks so nice. I will also check out the link to french seams to learn the difference. Thanks again.
Thanks for posting. Very helpful.
Nice tutorial, like all your other great teaching material, thanks!
I noticed, however, in the first pass you showed when using the felling foot, that you’ve fed into the foot enough width so the foot wraps the raw edge over AND under, the same as when using a rolled-hem foot. Not only is this not necessary (the foot only needs to fold the edge over and catch it raw along with the upper layer, not wrap it, since the second pass does that), it also eats up more of your seam allowance width. That’s only about 3-4mm, so you’ll hardly notice, nor does it spoil the final effect, obviously. But it does make the seam a little thicker than it needs to be, which will make it that much harder to cross with a hemming foot. A minor point, no doubt…but it also highlights how you CAN use the felling foot to wrap a single or double edge. All these feet have hidden powers:) Thanks again for all you do!
I have wanted to try this but had no idea how, thank you for the tutorial
muito obrigada pelo tutorial.O que sei de costura aprendo com voces.Até o próximo.
Is it possible to flat felled or French seam both inner and outer seam of pants? It seems impossible to do it once the pant leg is a tube.
Absolutely! When you have a tube, you just sew it in two passes, sewing as far as you can from the top down and then from wherever you left of to the bottom. It can be a little tricky, but if you’re patient you can sew all manner of narrow tubes this way!
Nice to be seeing so much different new attachments to a sewing machine to make things easier, just retired from 30yrs of nursing, then everything went crazy, now on dialysis and then broke my hip, but I’m ready to start sewing, as soon as l can start driving, thank for your tutorial,will be glad to see more in the near future.