We love seeing our patterns sewn for tweens! It can be tough to find patterns for tweens once they have outgrown the Oliver + S size range. Erica has sewn the Alvalade Trousers for her son, and they look great! So glad she’ll be able to use this pattern for many more years. Take it away, Erica!
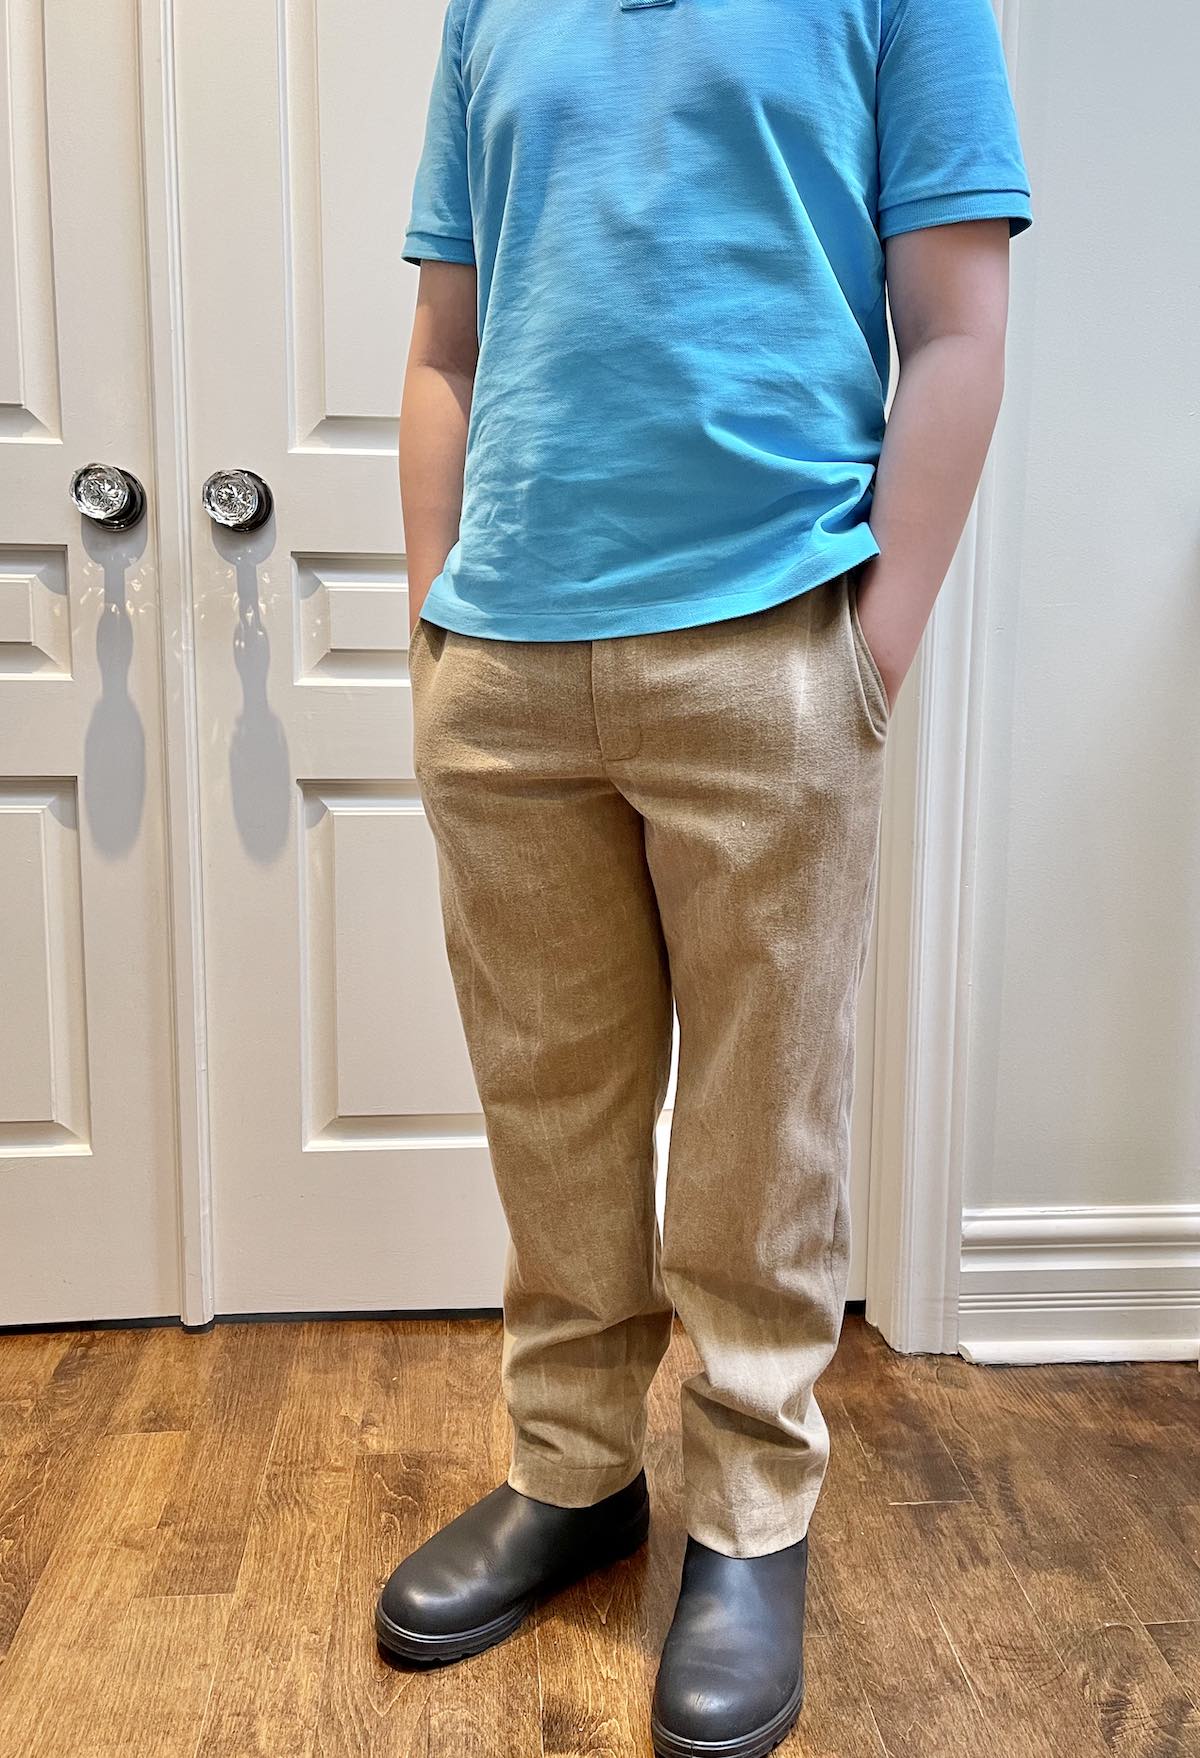
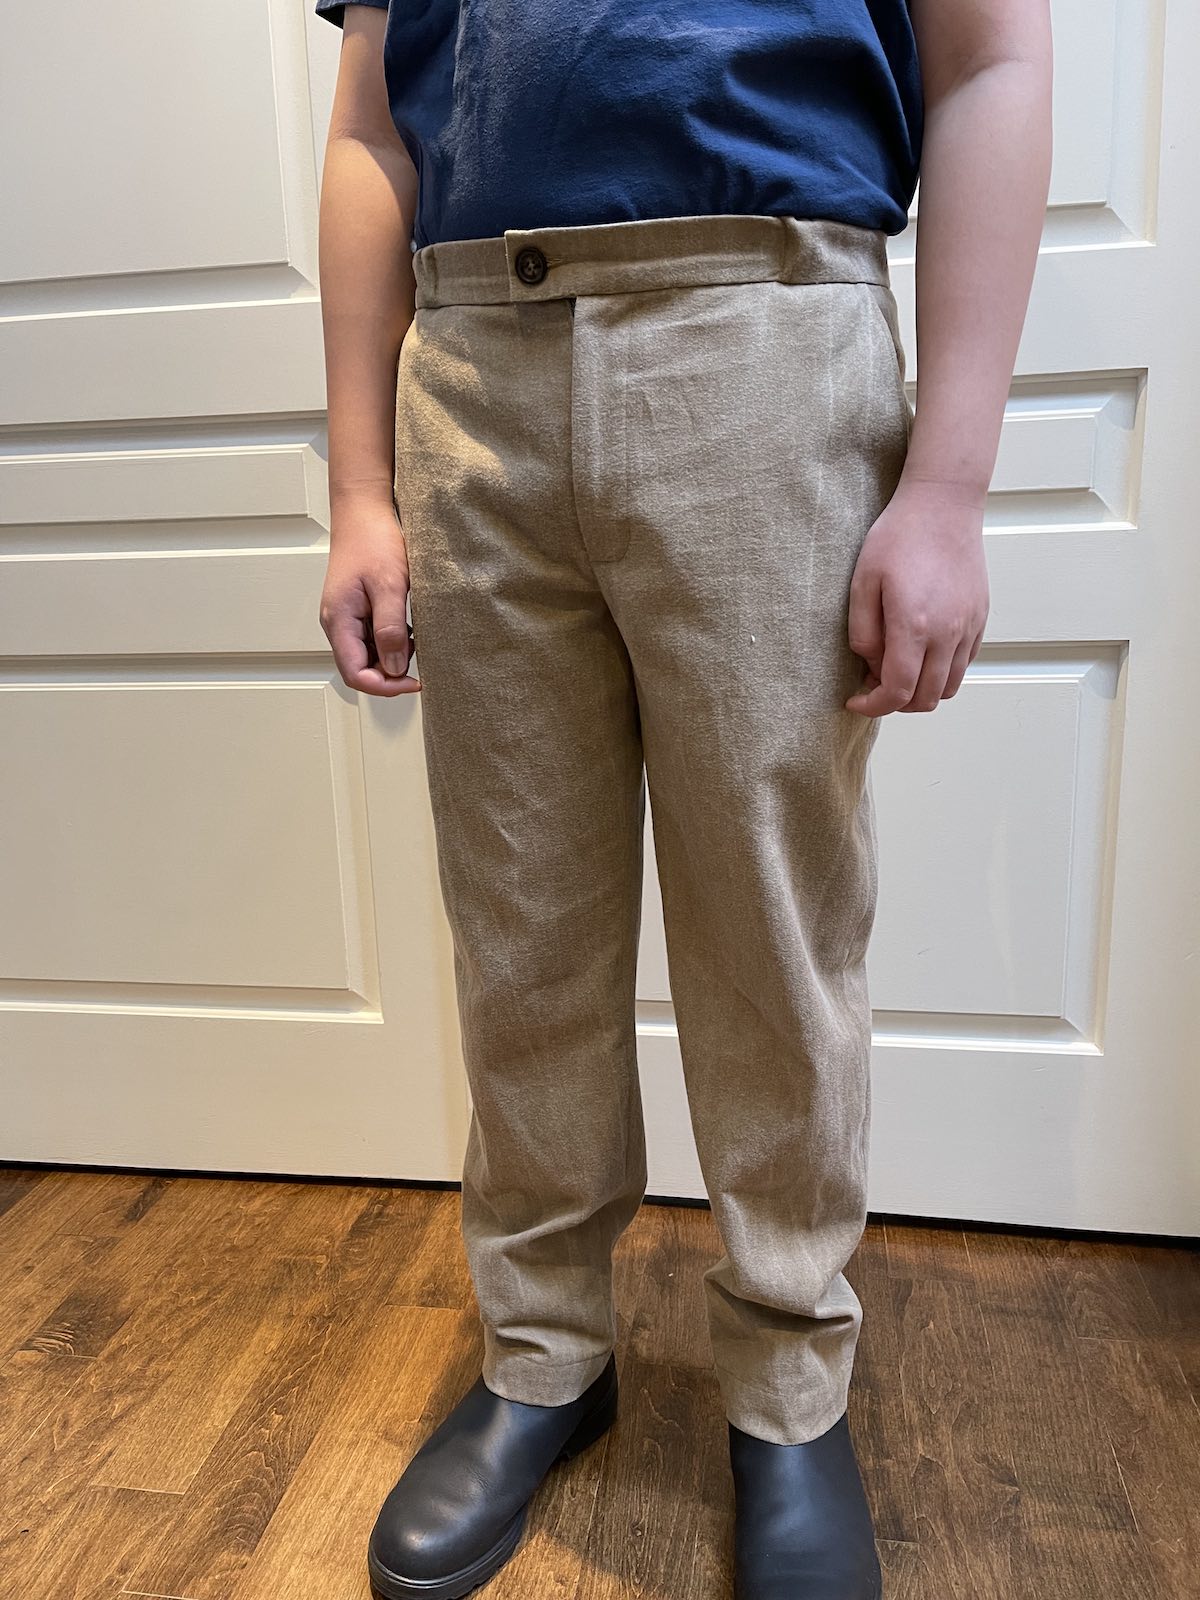
My most used Oliver + S pattern for my sons probably was the Art Museum Trousers, so it was bittersweet a couple of years ago to realize that my oldest boy had outgrown the Oliver + S sizes. My younger son is now days away from outgrowing the largest child size. I was thrilled to learn, then, that Liesl + Co released a men’s trouser pattern this spring! I jumped at the chance to try it out for my son, who will be thirteen this year. As predicted, it was a success!
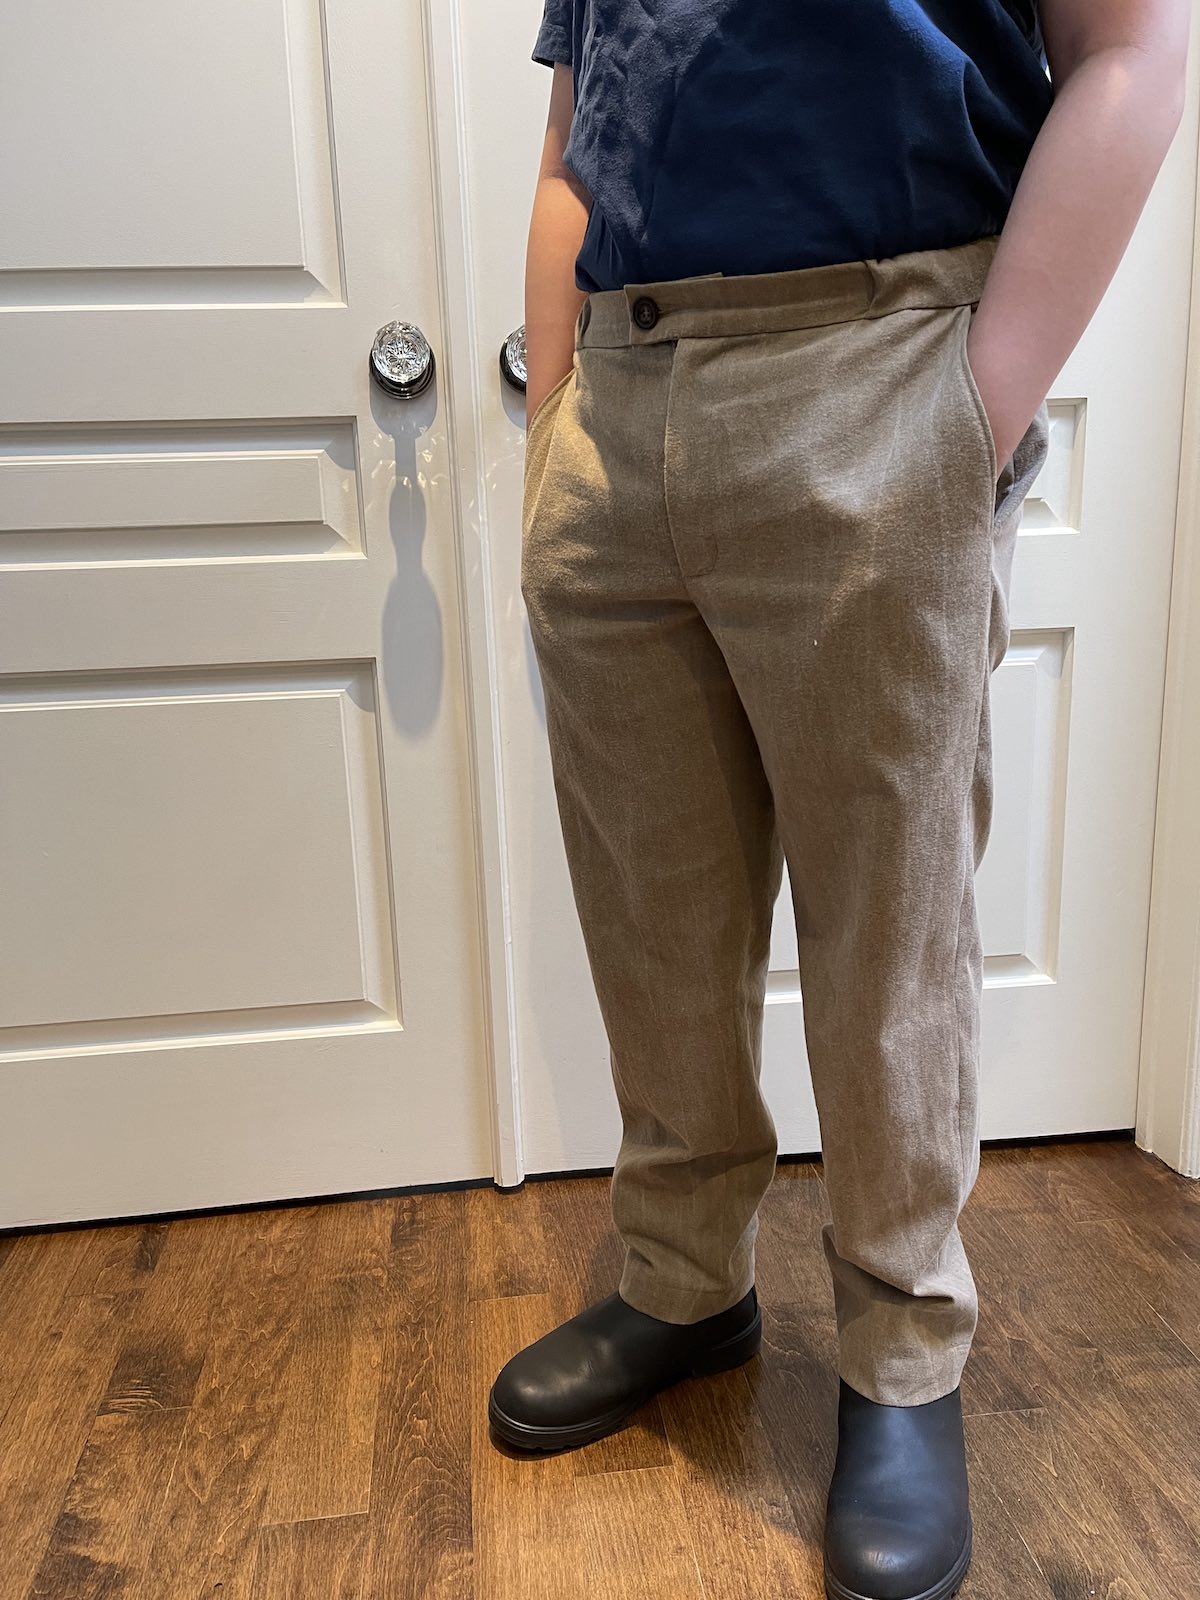
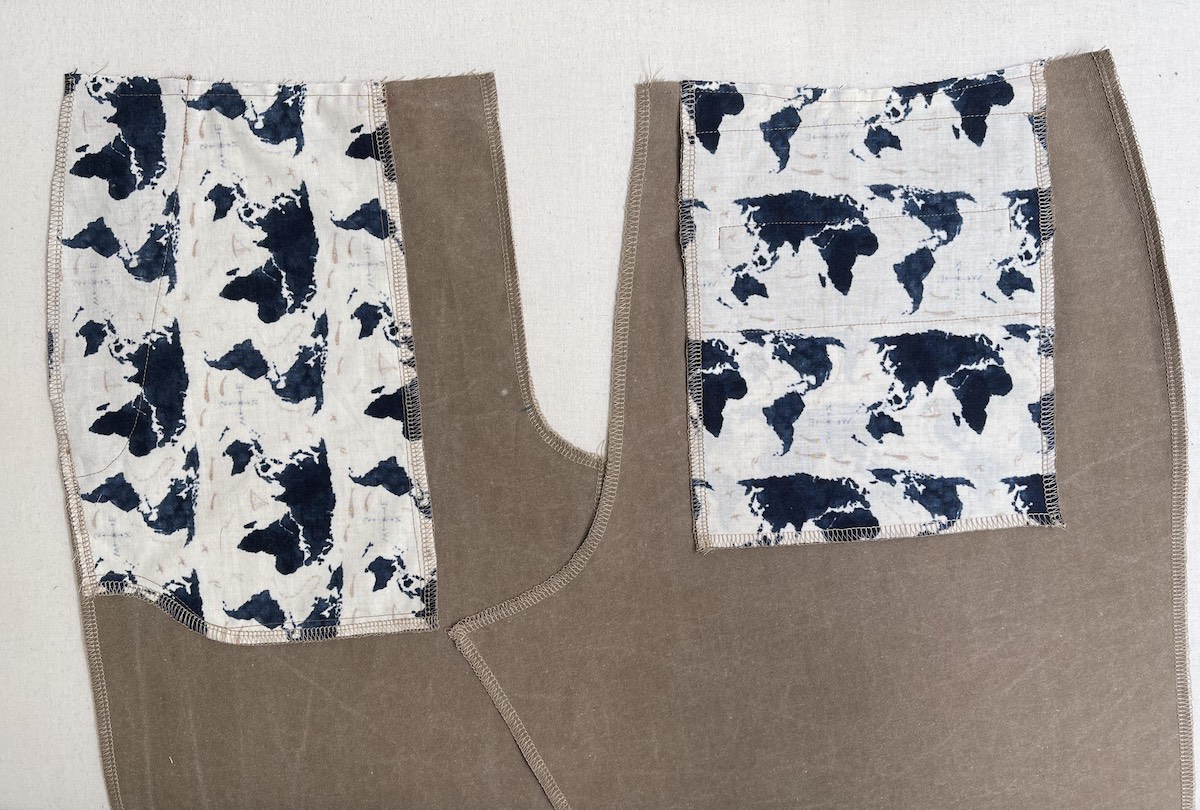
I used some khaki-colored fabric sent to me by a friend. It came with an assortment of home décor fabrics, so I’m not sure if it was intended as furnishing fabric, but my son finds it to be extremely soft. It has more drape than classic chino cotton, and it was a pleasure to work with. It has a “stonewashed” quality to it, with a slight sanded, or moleskin, finish on the front side and even some washed, or faded, lines that are visible in color but can not be pressed out. This mystery fabric pressed well with a cotton iron setting. My son likes the casual vibe of the khaki fabric, but it also will work when he needs to be a little more dressed up. I let him pick out some remnants of quilting cotton from my stash for the pocket linings.
Given his proportions, I made a quick muslin version before I cut into the khaki fabric.
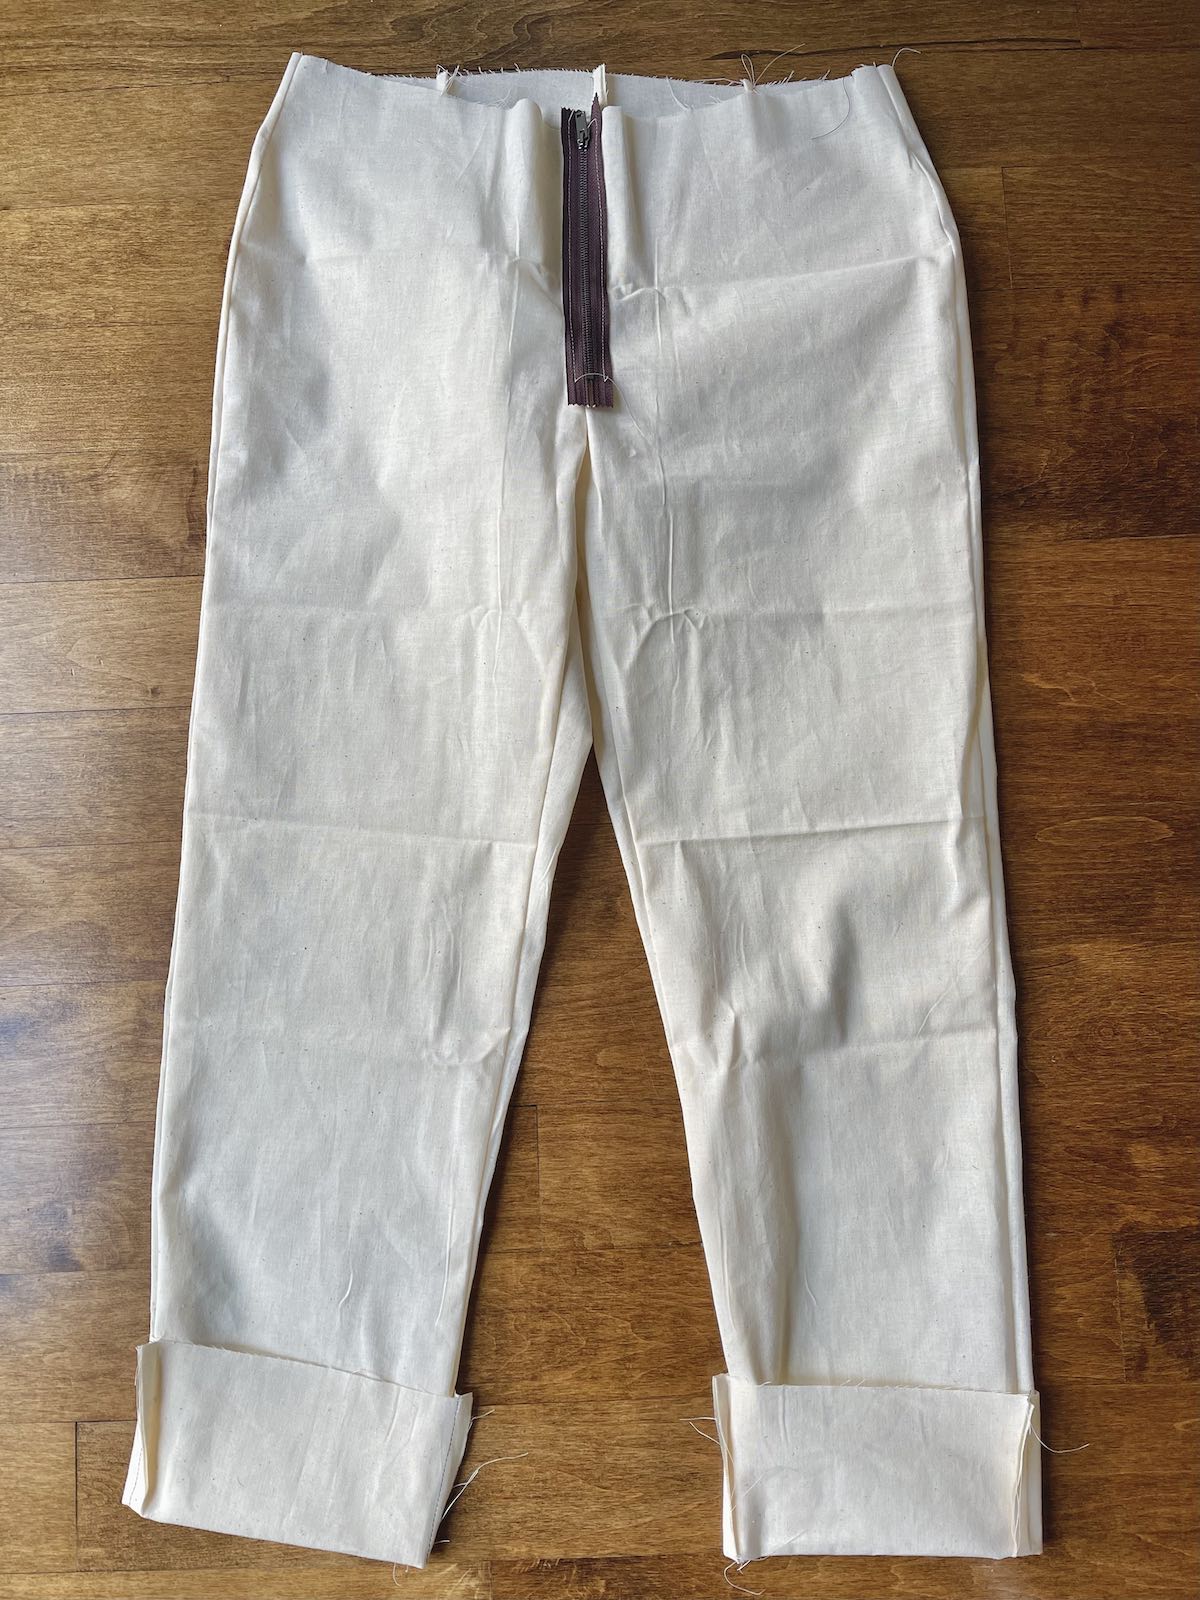
For this fitting version, I placed the front pocket facing piece on top of the trouser leg front pattern piece, where the pocket normally sits, so that I could cut out “pocketless” front trouser legs. I only cut two front legs and two back legs in his size (33” waist), reducing the leg length a few inches at the lengthen/shorten lines (around the knee area) and again around the mid-calf area. I sewed them up as quickly as a waistband-less pair of pajama pants—just four seams!—plus a pair of back darts. Along the front rise, I topstitch-basted a zipper along the seamline and then ripped open the seam stitches behind the zipper, allowing him to pull this test version over his hips. To our happy surprise, we decided that he didn’t need any alterations except to reduce the leg length a little more. This quick version fit well enough that I opted to not test the waistband, especially knowing that it is partially elasticated. In our final version, I still kept the leg length on the longer side with the hopes that this growing boy can wear these trousers for more than a few months!
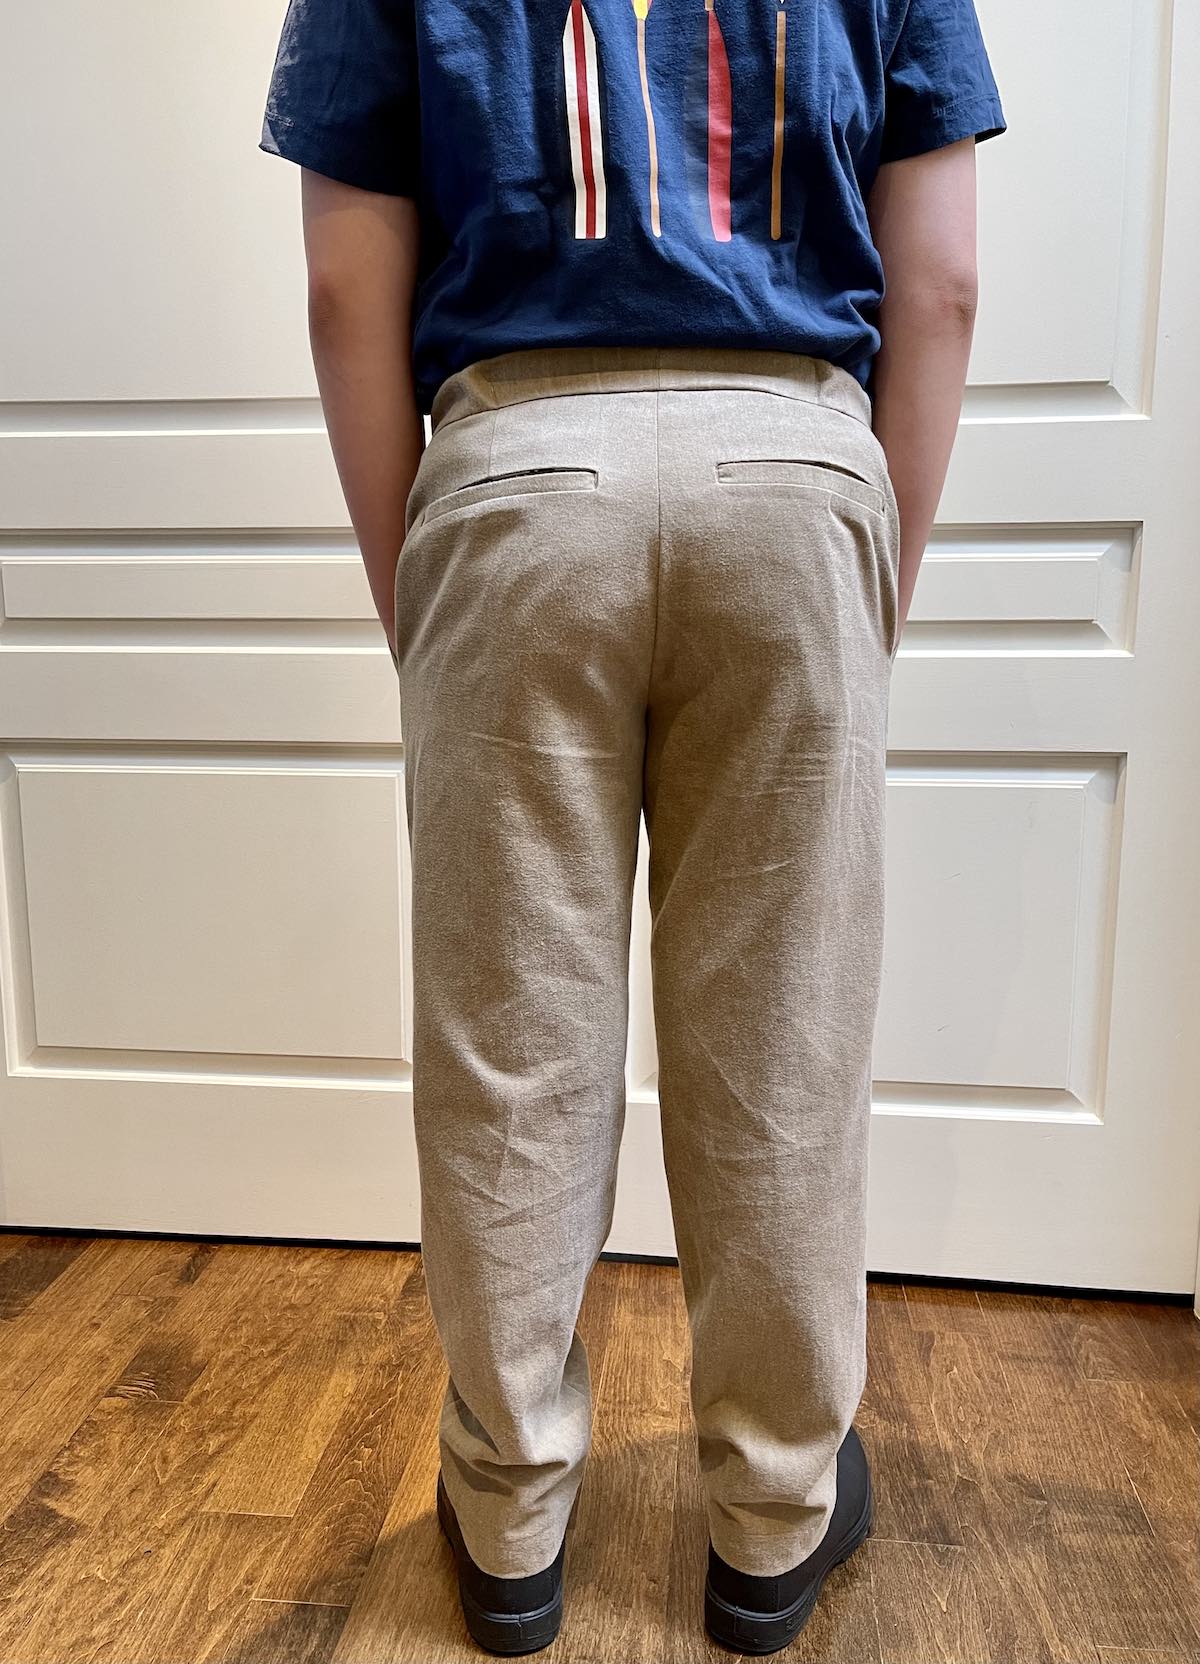
I have made the Peckham Trousers before for myself, so I was already familiar with the construction, which is essentially identical to the Alvalade Trousers. I was in the mood this time to be leisurely with the finishing details, including the back welt pockets and zip fly. Sometimes I race through sewing projects just to have them completed, but other times, I enjoy taking my sweet time. When I do, I find that the slower pace allows me to enjoy the handwork aspect while refining my skills, and I’m always pleased in hindsight with the tidy results.
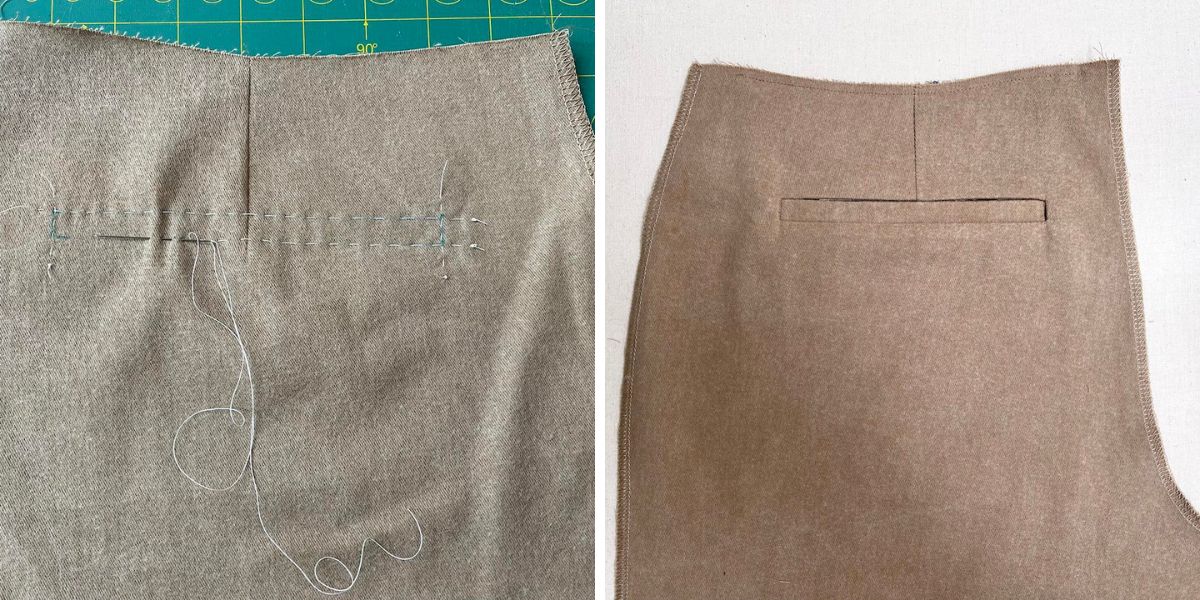
This time, I hand-basted as much as possible for the welt pockets, and I am very happy with the symmetry of the welts. I don’t make welt pockets often enough to remember the order of steps off the top of my head, but Liesl + Co instructions are consistently clear.
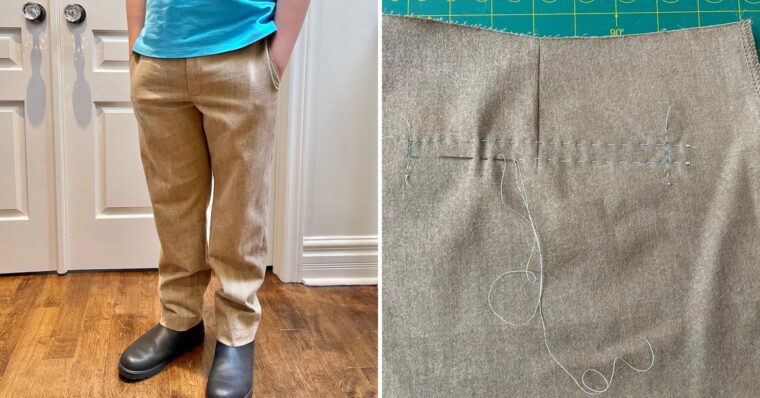
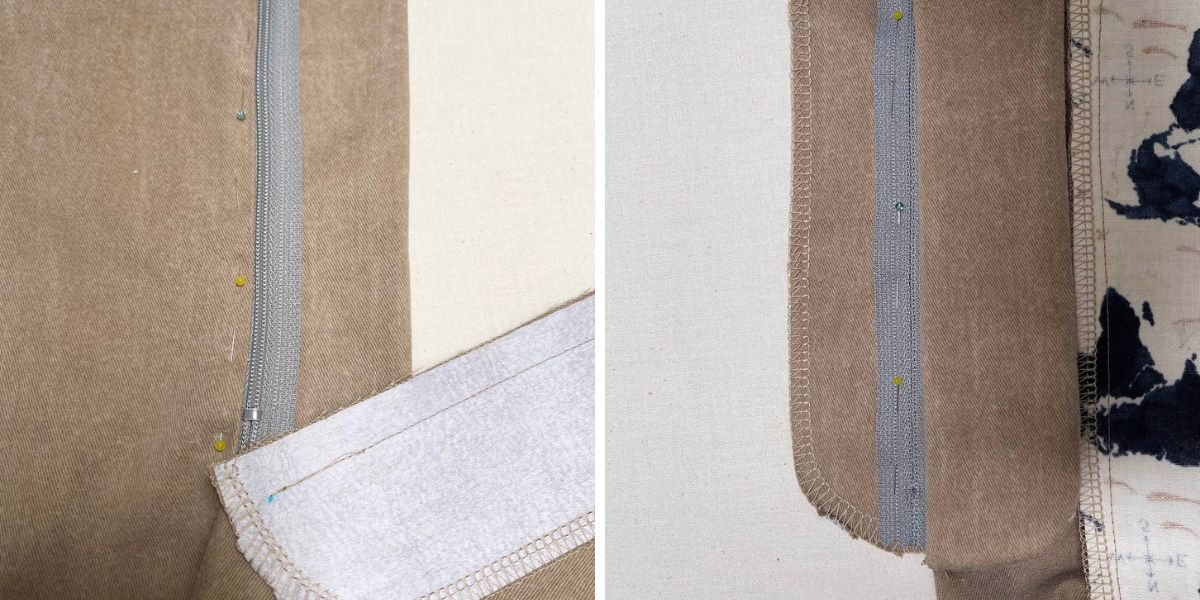
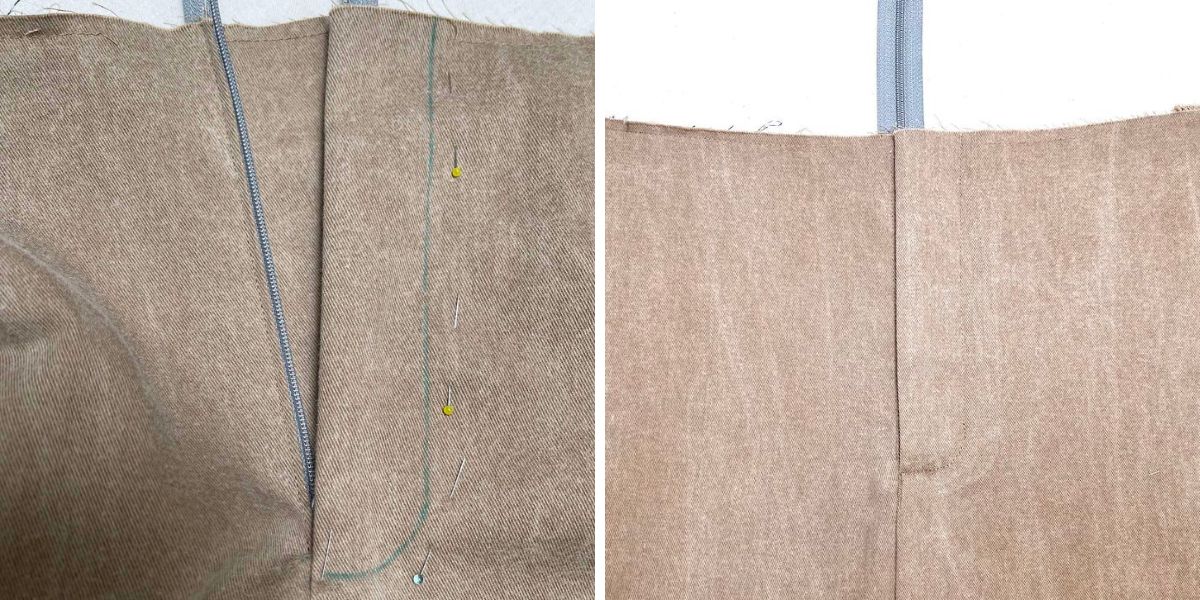
The same is true for the zip fly. I have more confidence when I follow along with Liesl’s instructions to prompt me along the way, and I didn’t need to touch my seam ripper for the entire project! I recently purchased a new-to-me product that is recommended for zipper installation, and I tried it for the first time on these trousers.
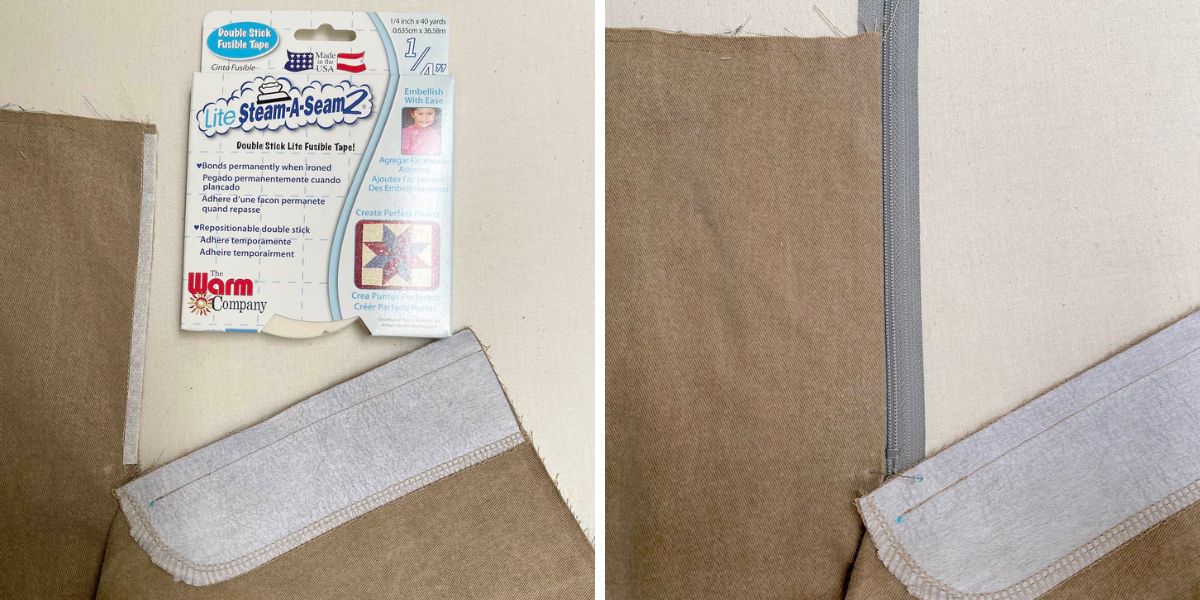
This sticky fusible tape was great as a replacement to the step of basting ¼” from the edge of the rise on the trouser front, and once you peel off the paper backing, this ¼”-wide seam tape is sticky on both sides. I could “baste” the first edge of the zipper with just this tape. This very thin tape is repositionable until you iron, or fuse, it in place. Then, the zipper is essentially glued in place until it is stitched in, all without the bulk of pins. Usually, I like to hand-baste my zippers into place to avoid the lumps and bumps of using pins, but this is a convenient shortcut. I still used a few pins for good measure once I was happy with the visual placement of everything before stitching the zipper fly pieces into place.
After this great trouser-making experience for my eldest son, I would consider the Alvalade a soon-to-be TNT (“tried-and-true”) pattern! I can already imagine tracing off this pattern in many sizes, just as I did with the Art Museum trousers, to keep going up in size as my sons grow through their teenage years.