

Do you have trouble with your handmade tops and dresses sliding backwards on your shoulders? Does your neckline creep up in front? Have you tried a forward shoulder adjustment without success? If so, you might benefit from a high round back adjustment.
As its name implies, this adjustment is useful for people who have a rounded upper back. This rounding elongates that section of back, which means you need to add length for the garment to fit properly. Today I’m going to show you how to do this adjustment, which is actually quite simple and doesn’t take much time.
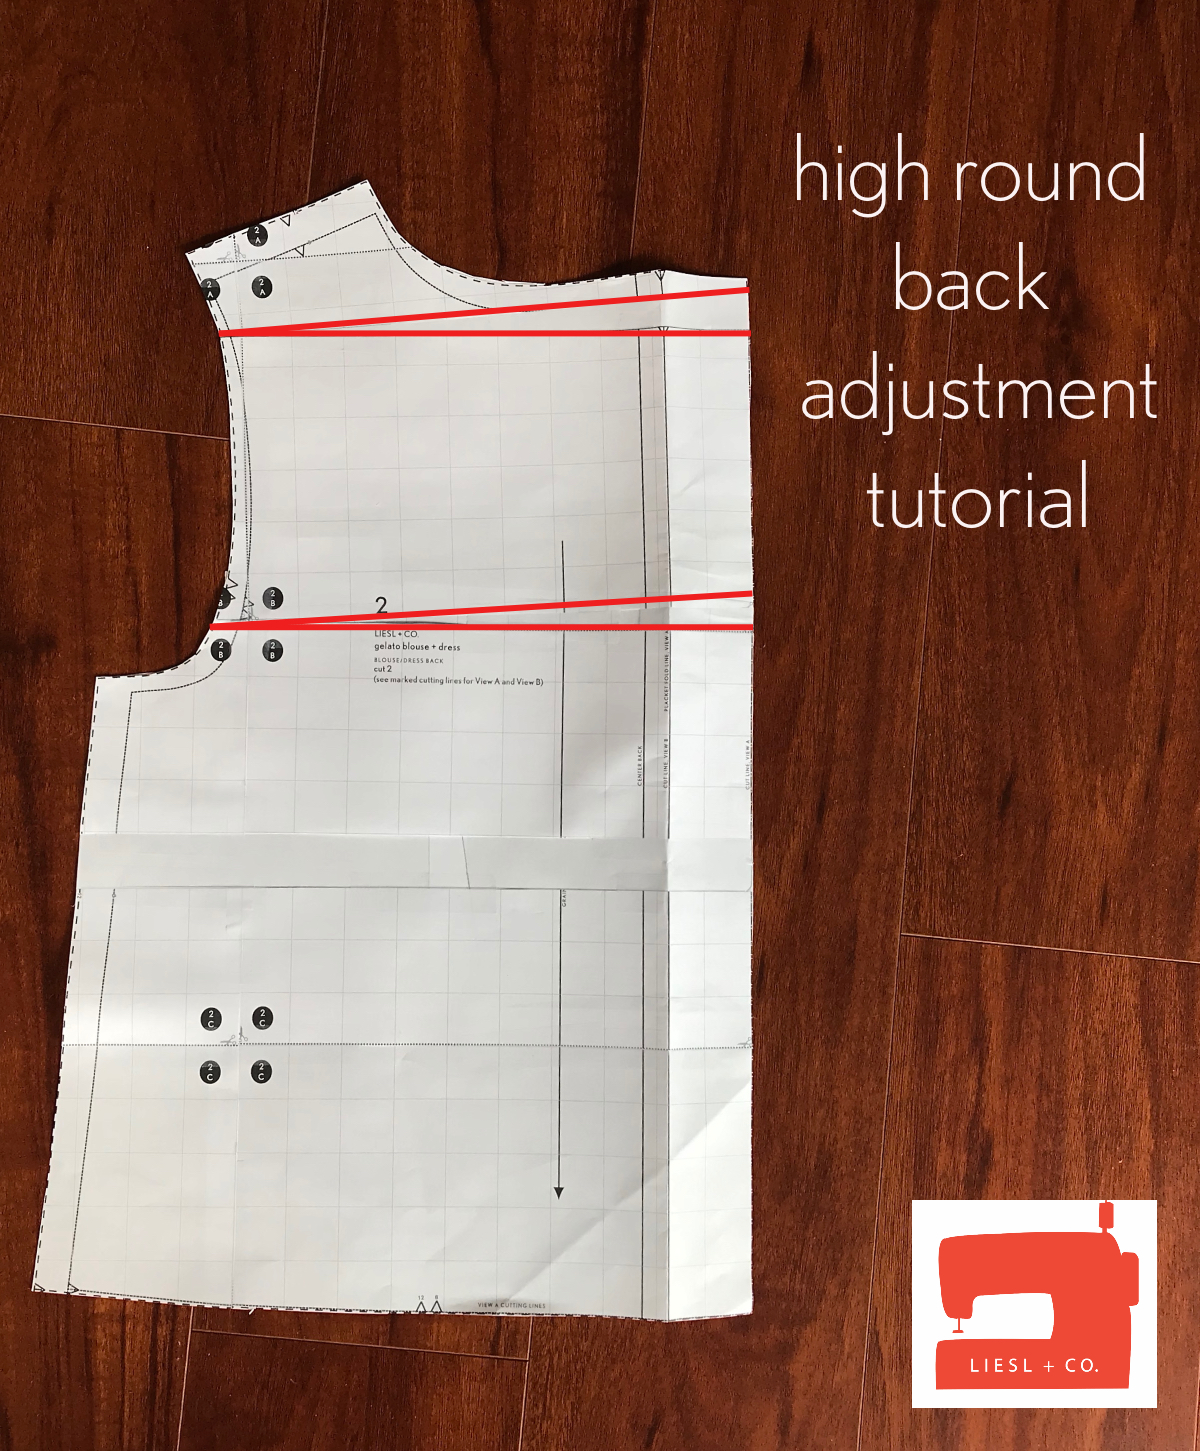
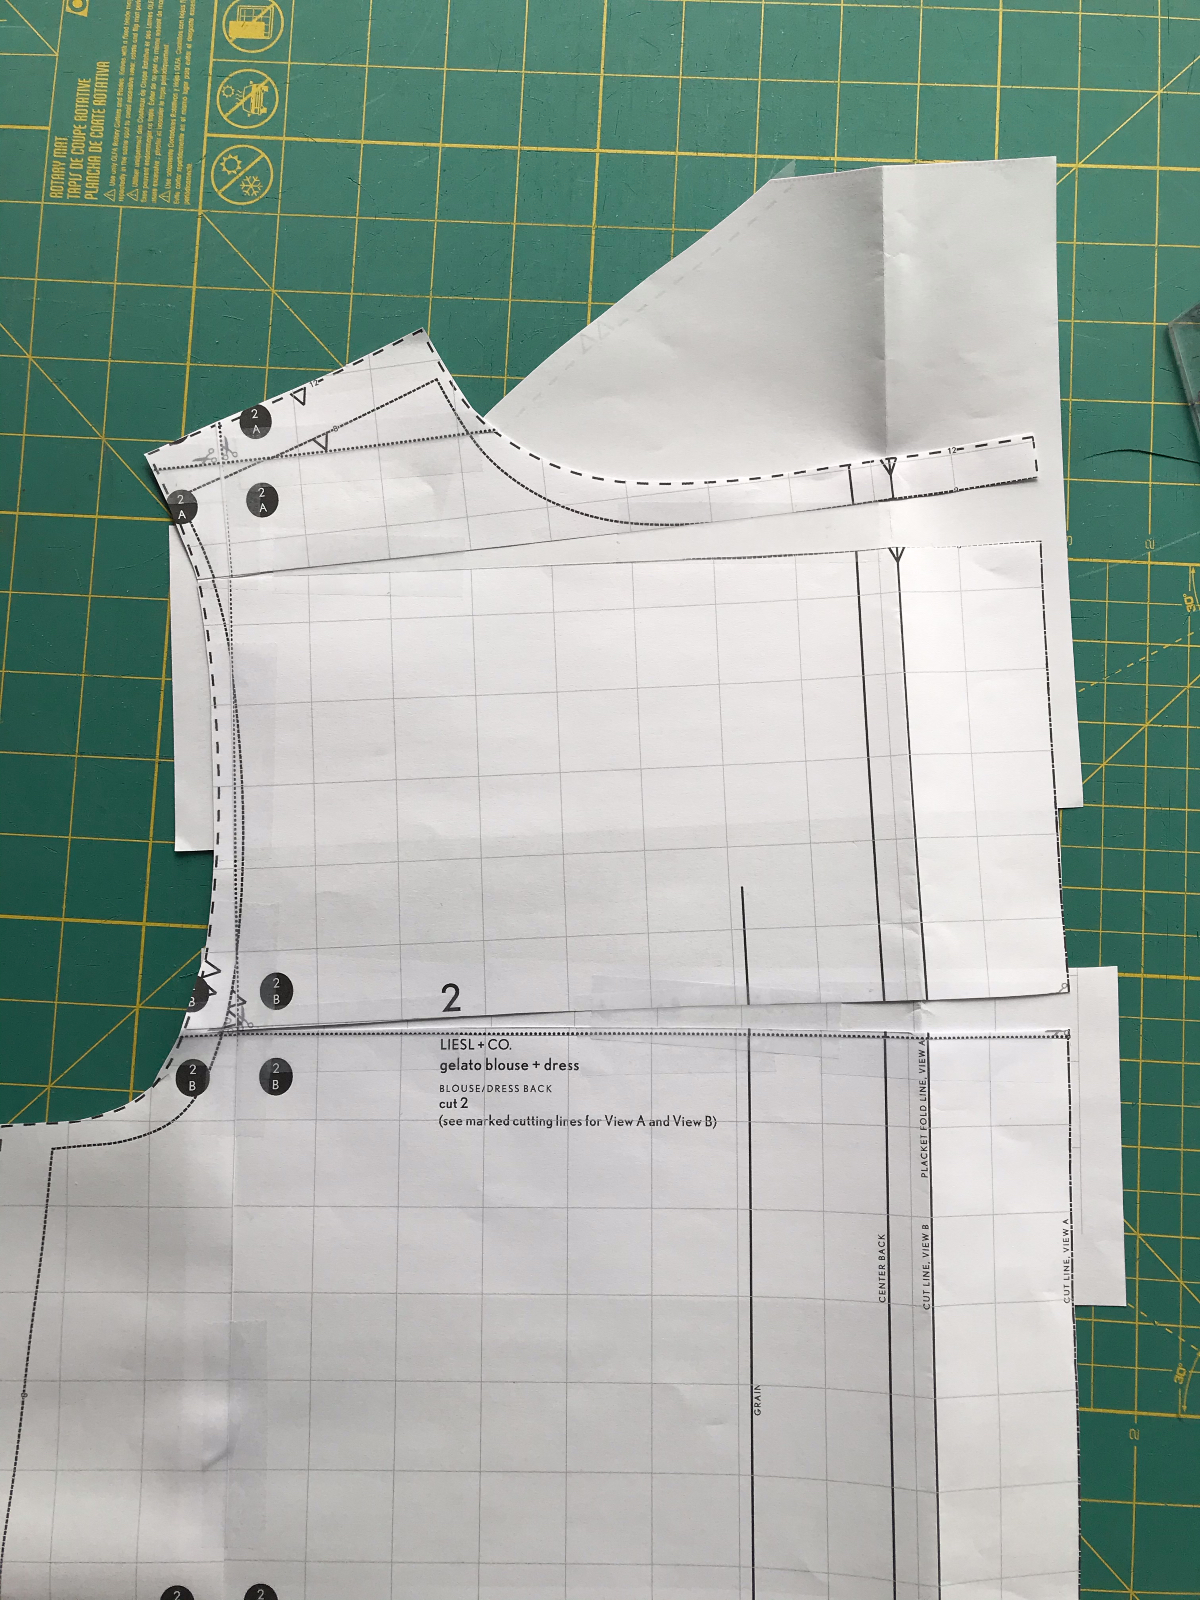
I’m demonstrating this adjustment on view A of our Gelato Blouse + Dress pattern. Performing the adjustment on this pattern does require an extra step or two, because view A has a back placket. I am going to walk you through adjusting for a two-piece back with a placket, as well as the simpler adjustment that you would do if you were working with a back piece that is cut on the fold or is simply seamed.
Step 1: Determine how much length you need to add to your pattern piece. You can do this several different ways.
- You can make a muslin, and then slash the back bodice piece about 1/2″ below the neckline, leaving small fabric “hinges” on either side of your slash to hold the top and the bottom fabric together. If you use this method, you will need to pull the fabric above the slash up to the point where a chain necklace would sit on your neck. The rest of the back bodice garment will fall to its proper position, and the remaining gap represents the length you need to add in your adjustment.
- You can measure, while seated, the length from that chain necklace point on your neck down to your back waist. Then measure from the neck seam line on the back bodice piece, to the waist point. The difference between the two measurements is the amount of length you need to add.
- You can use good, old fashioned trial and error. If you’re the type to make “wearable muslins,” this might be a good choice. If you opt for this method, I’d recommend starting with a 5/8″ adjustment, because if you adjust more than 5/8″, the adjustment has to be performed in two places
Step 2: Prepare your pattern.
If you are using a single back bodice piece cut on the fold, this method will create a center back seam. You do not need to do anything to prepare the pattern before you start, but you will need to add a seam allowance to the pattern piece when you’re done.
If you are using a pattern that already has a center back seam, you’ll want to remove the seam allowance before you start the adjustment. You’ll add it back at the end.
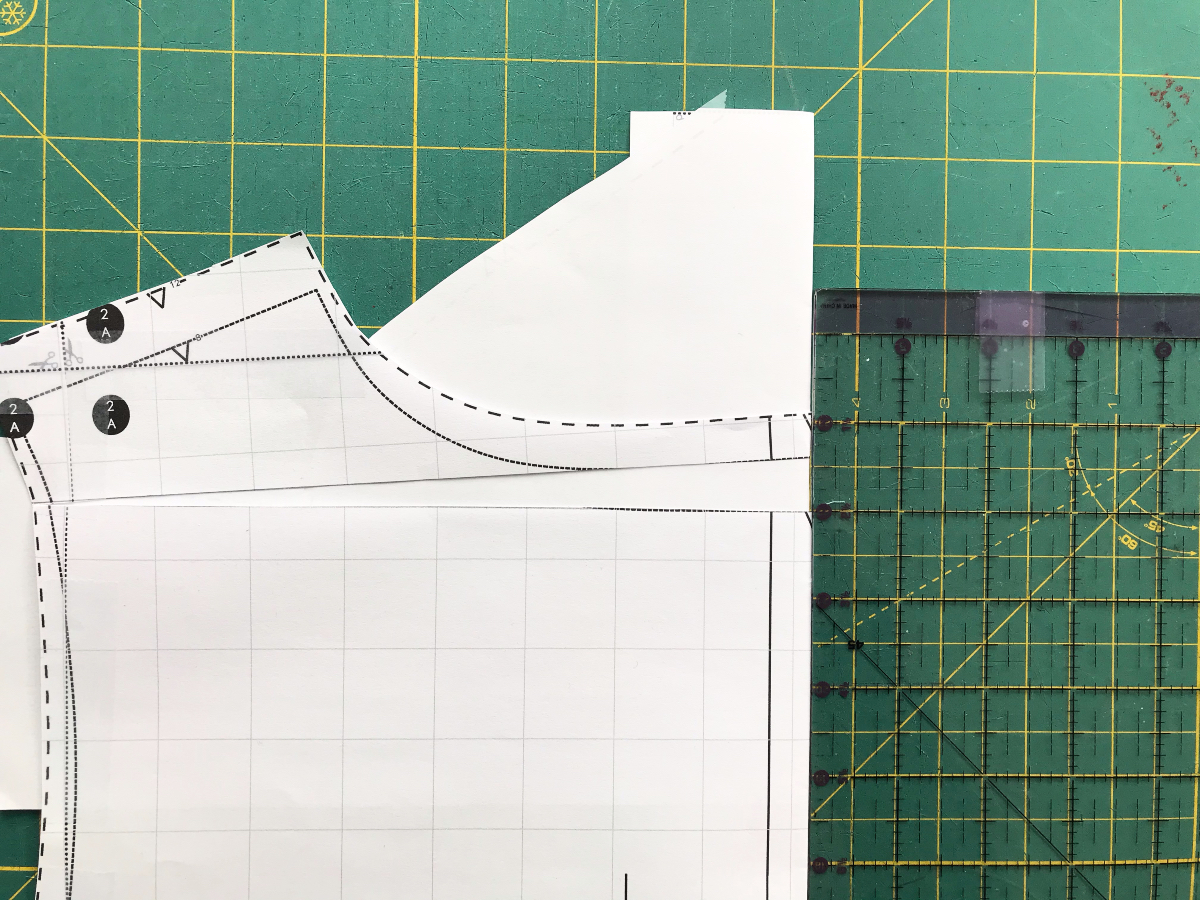
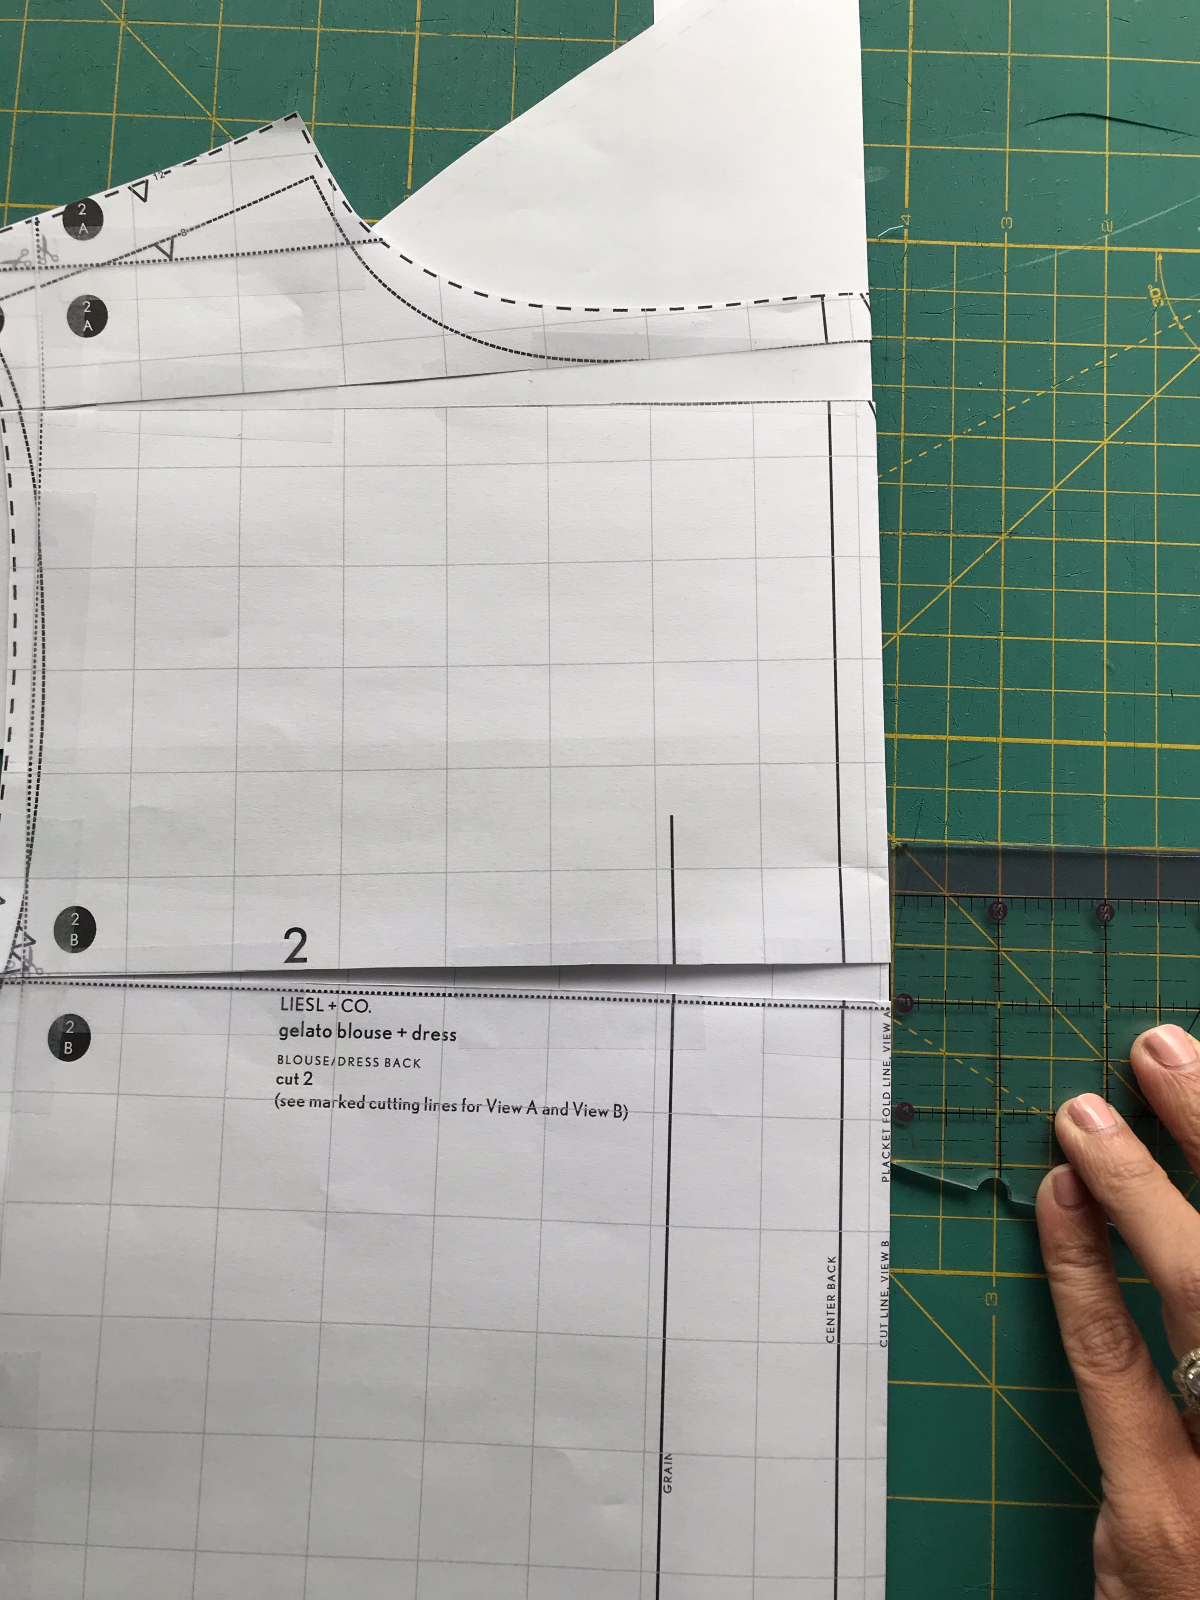
If you are using a pattern with a back placket, like the Gelato Blouse, you’ll want to fold the pattern along the fold line before starting. Here is my pattern piece with the placket portion folded to the wrong side.

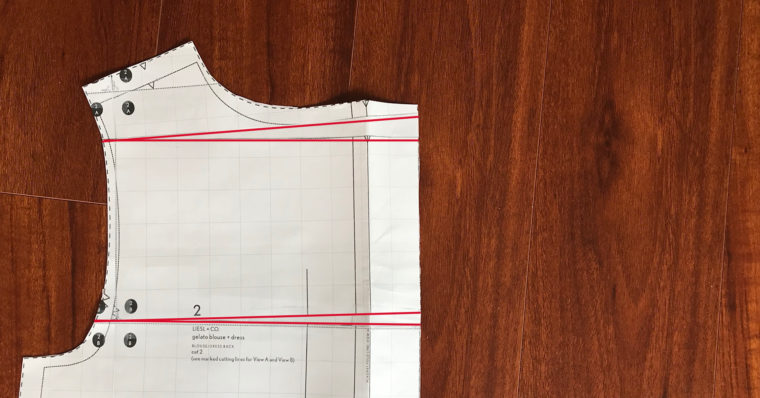
Step 3: Draw a horizontal line across your pattern piece at the neck seam line. The seam allowance for this pattern is 1/2″, so I drew my line 1/2″ below the neck edge. The pencil is pointing to the line that I drew.

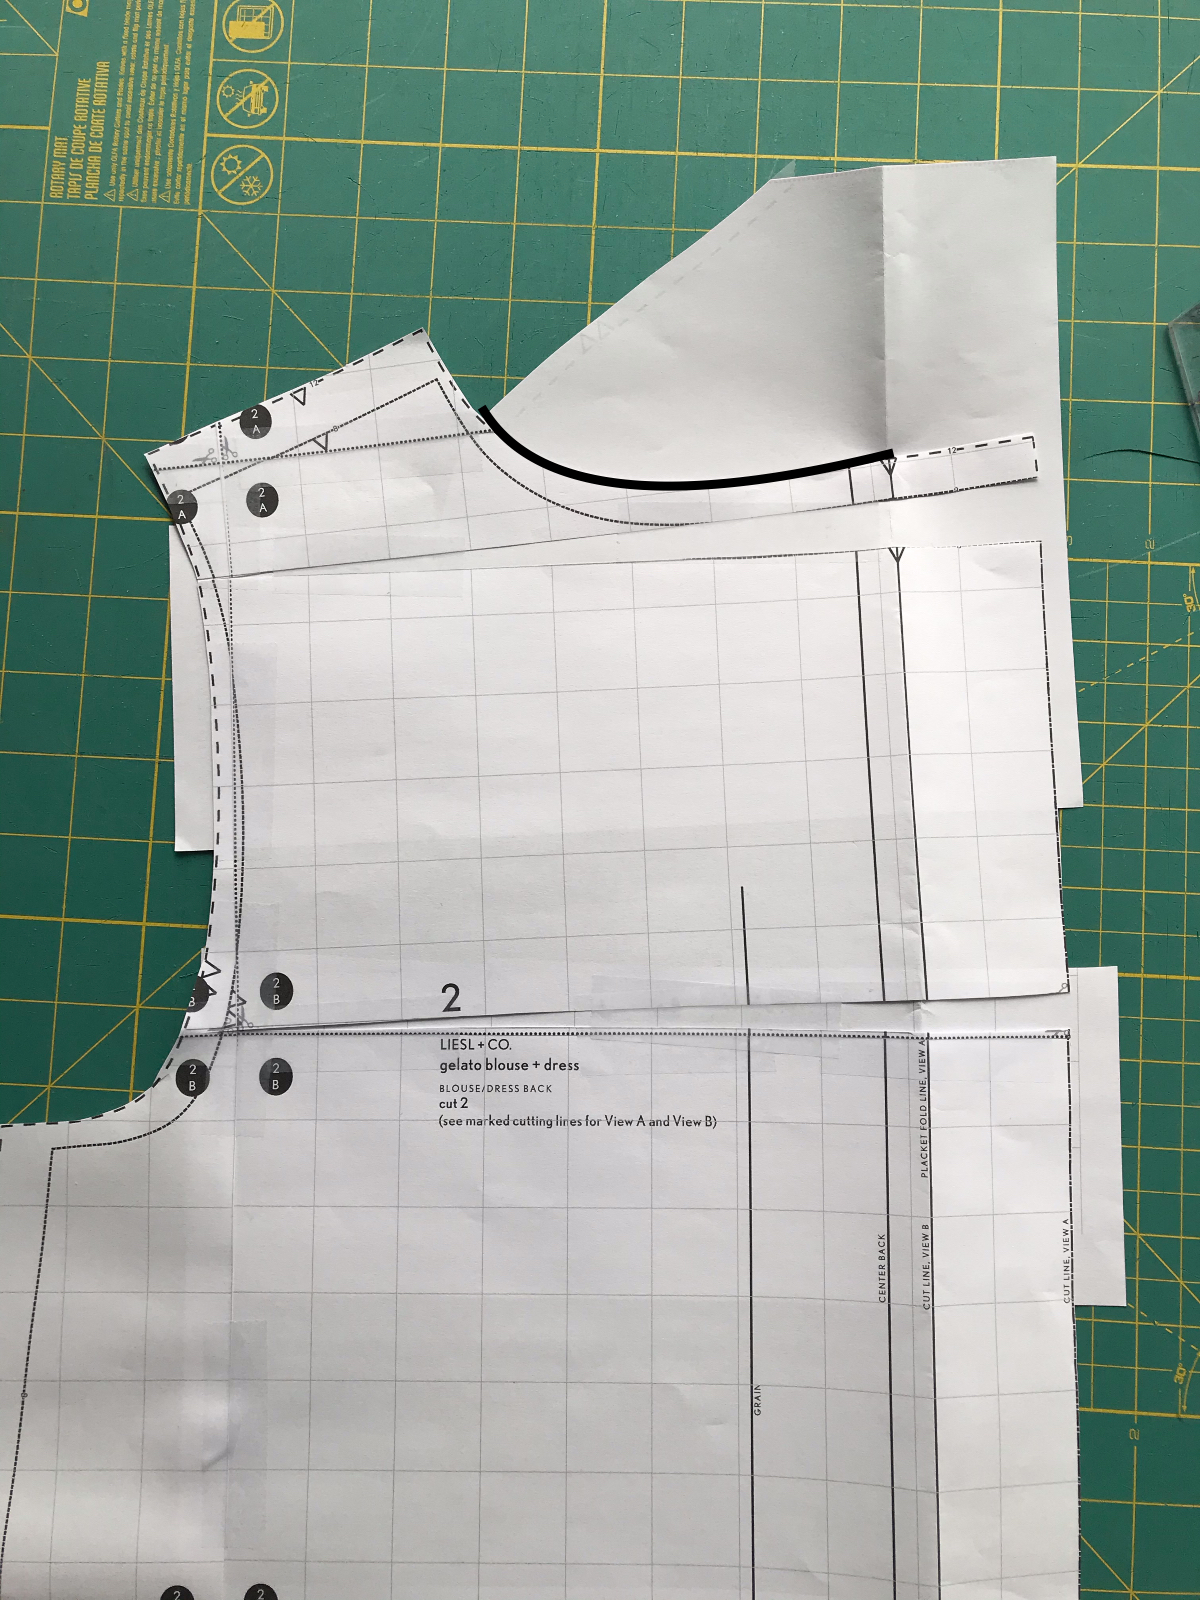
Step 4: Cut along the line you just drew, starting from the center, and cutting to, but not through the armscye edge. You want to leave a tiny paper “hinge.”
Insert paper underneath the pattern (in my case, I folded my paper before inserting, so that when I unfolded the pattern piece at the end, I would already have paper under the folded placket). Hold down the bottom of the pattern while gently moving the top part up, spreading the pieces the amount of your adjustment (up to 5/8″; if you need more than 5/8″, you can add the difference to the pattern piece in Steps 5-6). Tape the pattern in place. If you are doing a 5/8″ adjustment or less, skip to Step 8.
Step 5: If you need more than 5/8″ length added, you can add the additional length here. We’re going to slash and spread a bit further down. This creates a gentler curve than if we tried to add all the length at the neckline.
Draw a horizontal line 6″ below the neck seam line.
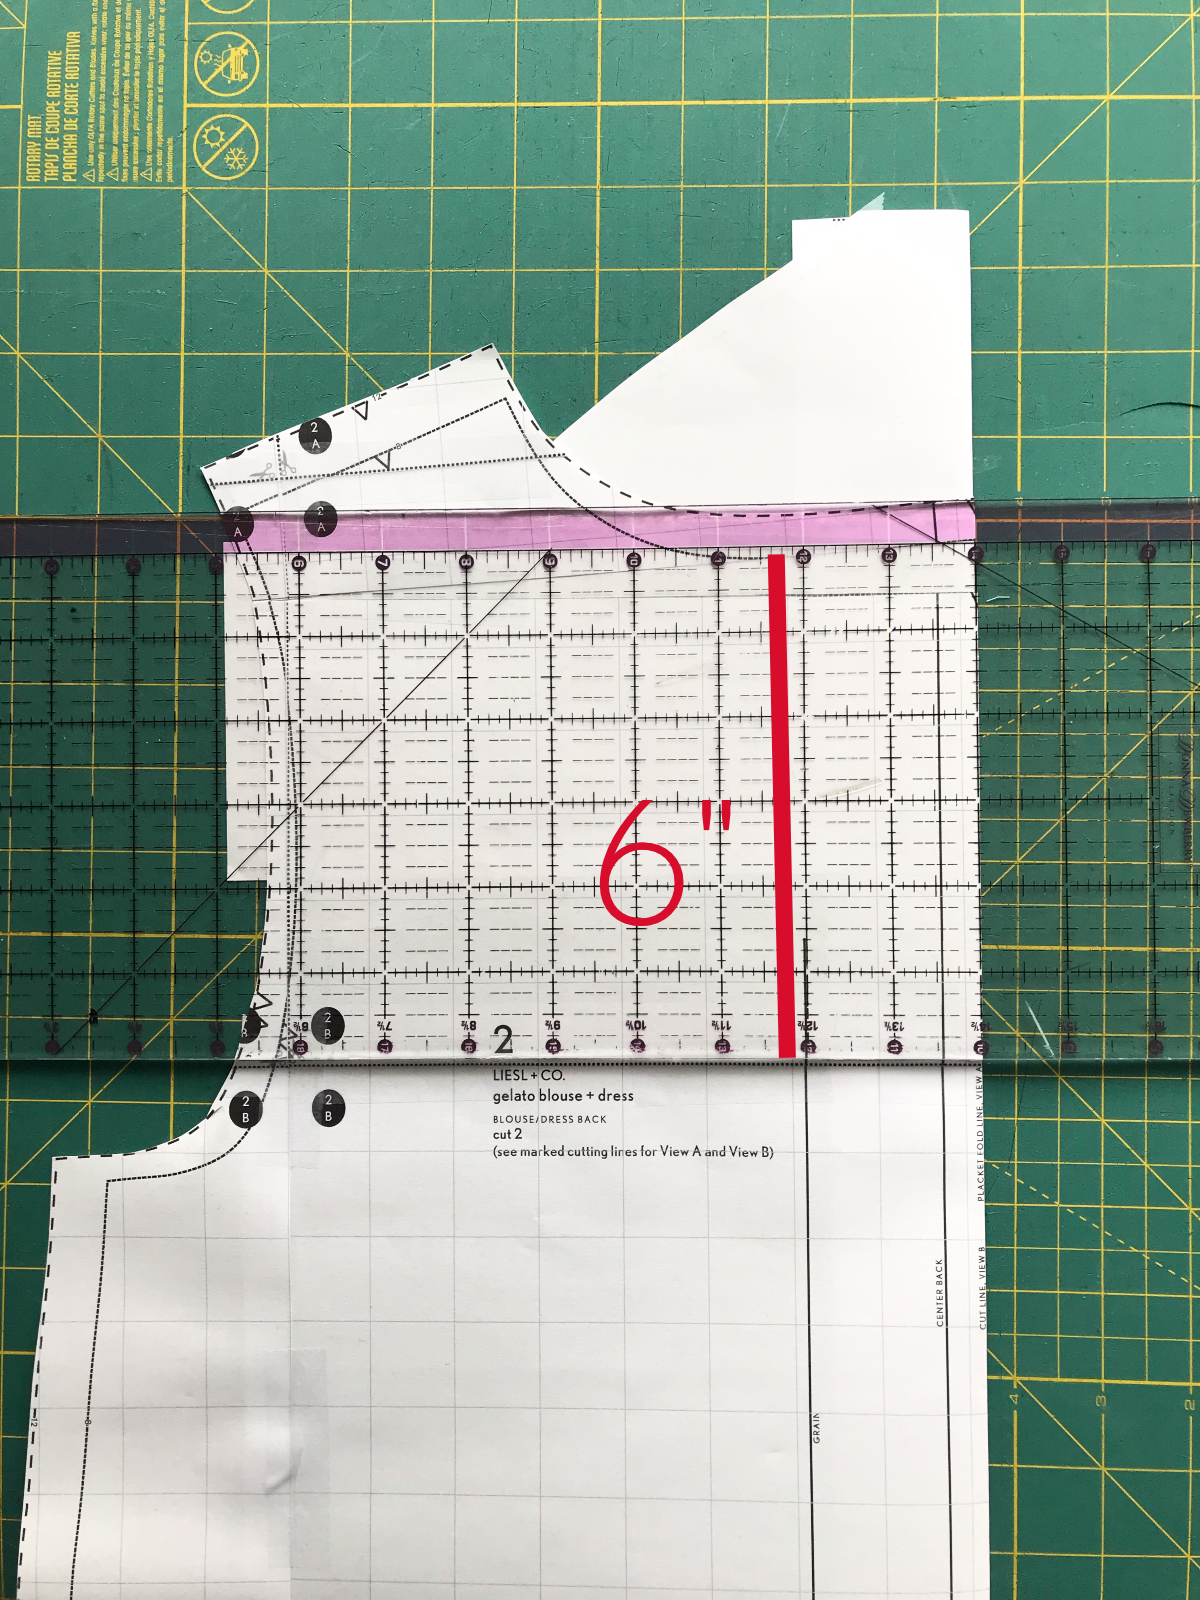
Step 6: This step is exactly the same as Step 4. We’re going to slash and spread this area of the pattern. I wanted a total of a 1″ adjustment, and since I have already adjusted my pattern 5/8″ at the high back, I need to spread my pattern pieces 3/8″.
After you’ve slashed and spread, tape the pattern piece in place.
If you are working with a pattern with a back bodice that was cut on the fold, or that has a center back seam, continue to Step 7. If you are working on a pattern with a back placket, skip to Step 8.
Step 7: (This step is only for patterns with a back bodice that was cut on the fold, or that has a center back seam. If you’re working on a pattern with a back placket, skip to Step 8.)
Trim the excess paper from your pattern. If you need to add a seam allowance, now is the time to do it. After you’ve added back the seam allowance, the adjustment will be complete. Congratulations! You are on your way to a perfectly fitting garment!
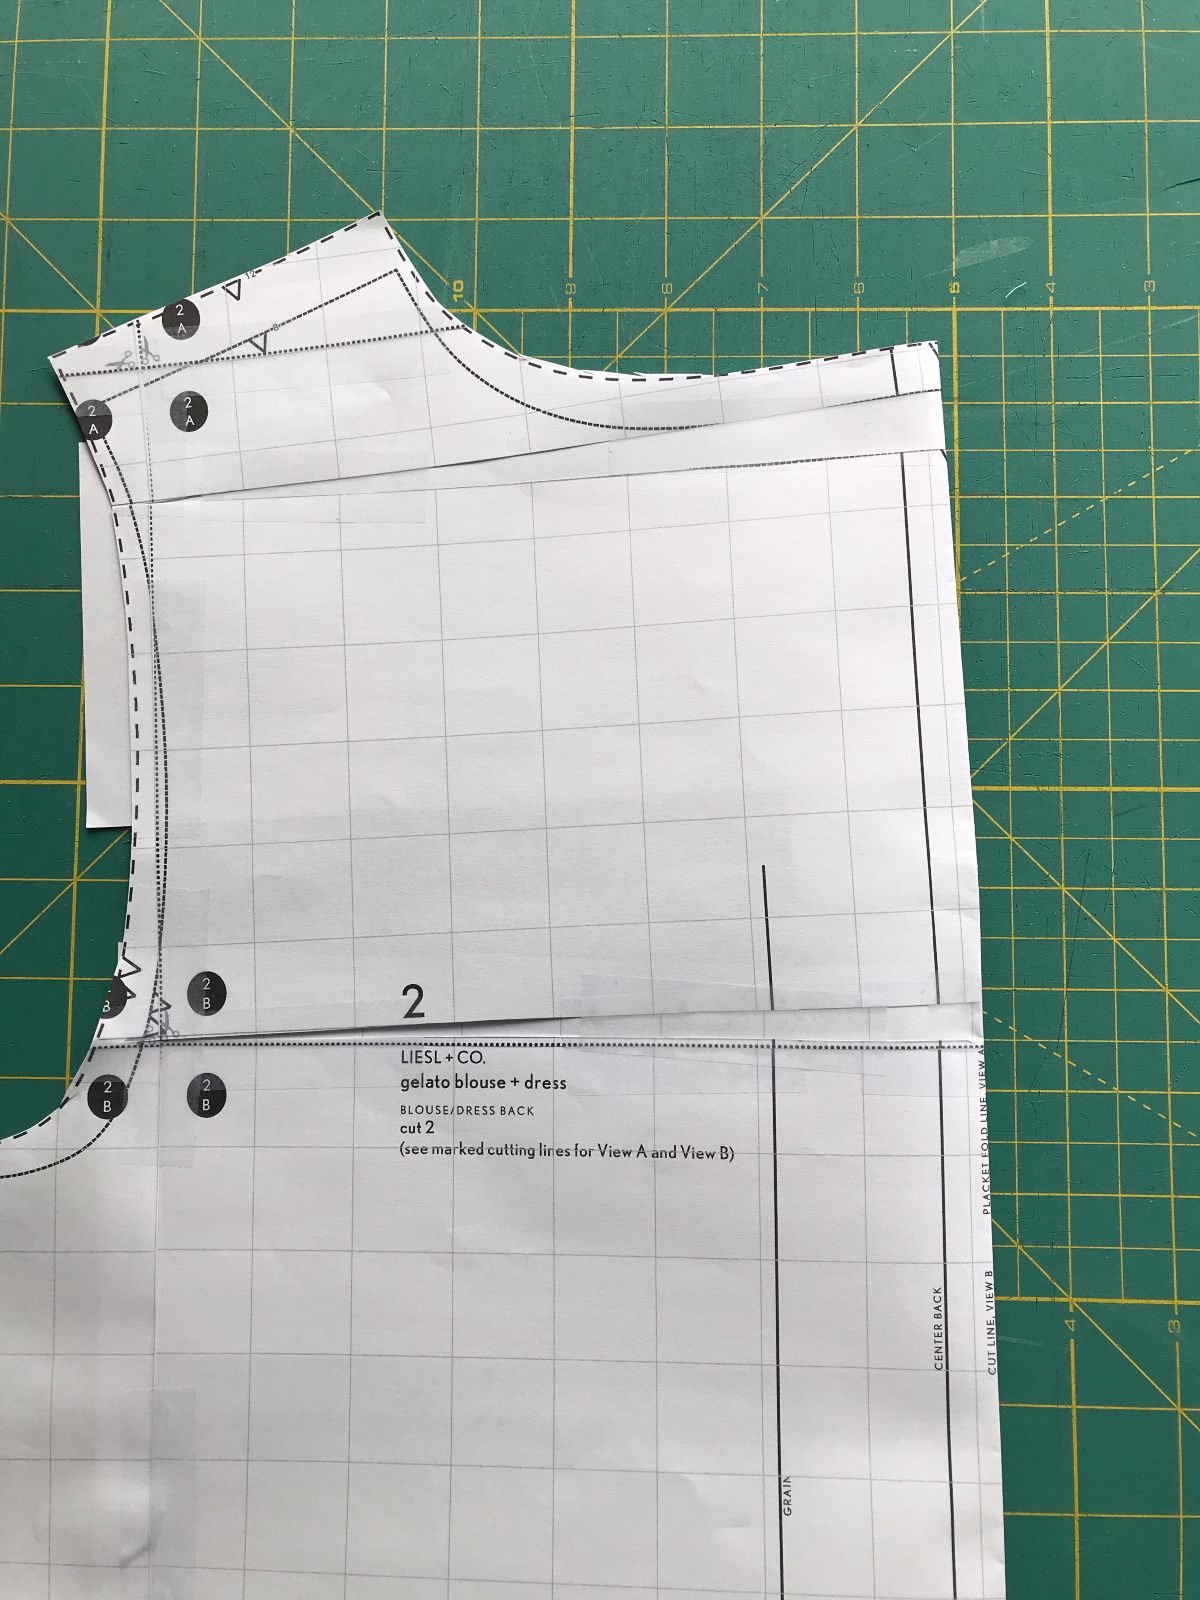
Step 8: (Only for patterns with back placket.) This is what your pattern piece should like when you’ve unfolded it. You can see that we can’t use it as is, because the placket allowance is higher than the neck seam, and they won’t match when folded over. Luckily there is an easy fix for this. Simply fold back the placket at the fold line, and trim the neck seam so that the seams match. Below I’ve outlined in black where you will cut once the placket piece is folded back in place.
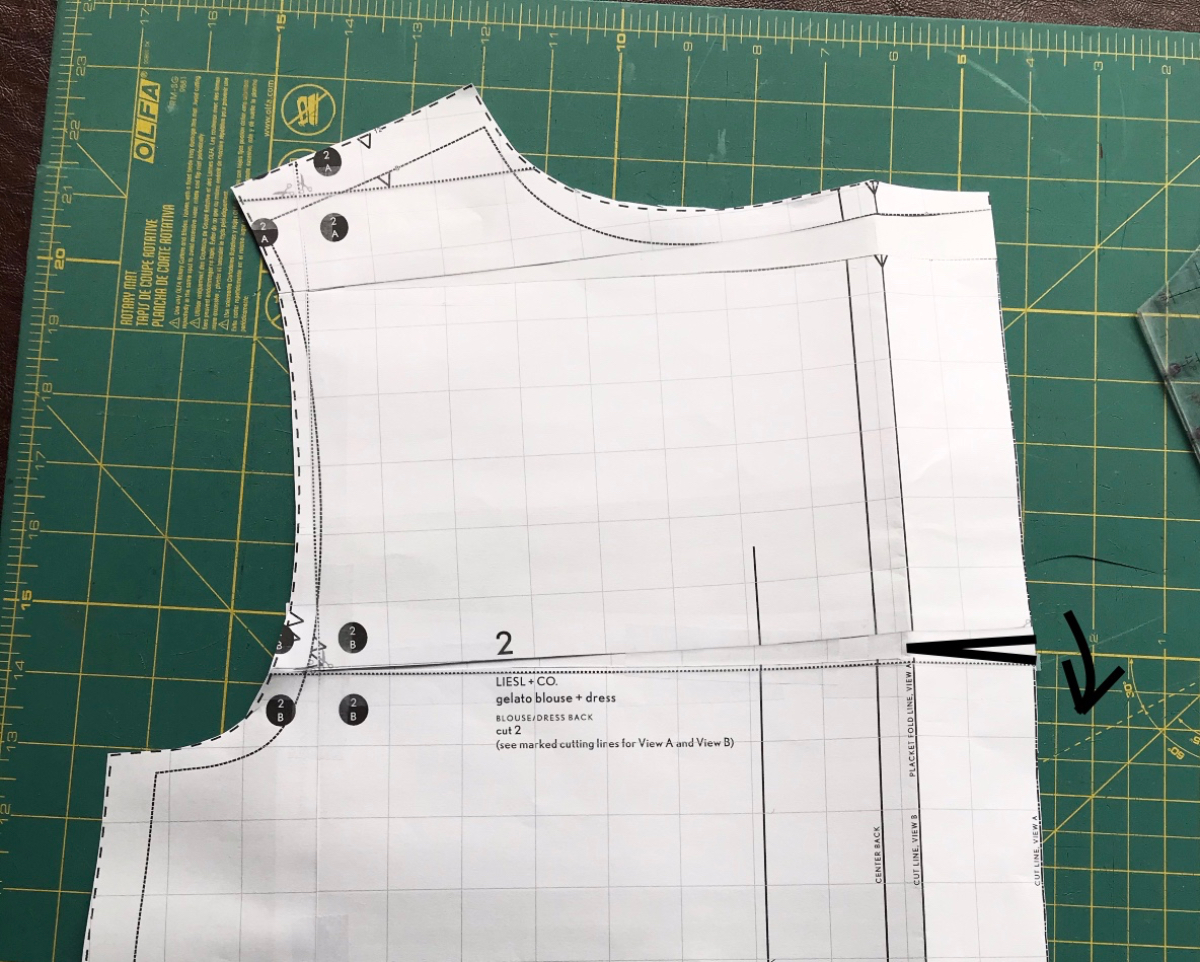
Here’s what your pattern piece will look like while still folded after you make the cut. Trim any other excess paper (like the paper I still have sticking out past the armscye).
Step 9: Unfold your placket again. Because of the way we did this adjustment, the edge of the placket piece will be slightly longer than the area it needs to match up with once it’s folded back. You have two options here. 1) You can just leave the pattern piece as is, and ease the excess in while sewing the placket shut. 2) You can shorten the placket edge so that it lays flat. Do this by cutting from the edge of the placket to the fold line (the upper black line below), and then overlapping the two resulting edges until the pattern piece is the right length (check this by refolding the placket line and making sure the fold is smooth, with no puckers). In the photo below, the lower black line represents where I overlapped the pieces to get a smooth fold.
You’re done and ready to cut out your pattern pieces. Congratulations! You’ve just mastered one more technique to help you achieve a custom fit on any garment.