

Please join me in welcoming Claire to the blog today. She blogs at Belle Citadel and you can also find her as @belle_citadel on Instagram. She is a member of the Liesl + Co. Advisors Circle and she’s here to share her Weekend Getaway Blouse with bias bound edges. For even more Weekend Getaway inspiration be sure to check out Liesl’s Pinterest board: Inspiration and styling ideas for the Liesl + Co. Weekend Getaway Dress and Blouse sewing pattern.
I’ve been meaning to make the Weekend Getaway Blouse for quite some time, so when Liesl told us it was being re-issued in paper format for spring, I decided to tackle a version with something of a twist. The original version is described as having “a relaxed fit and a flattering V-neck – the pattern features kimono sleeves (meaning no sleeves to set-in) and no closures, making it very easy to sew.”
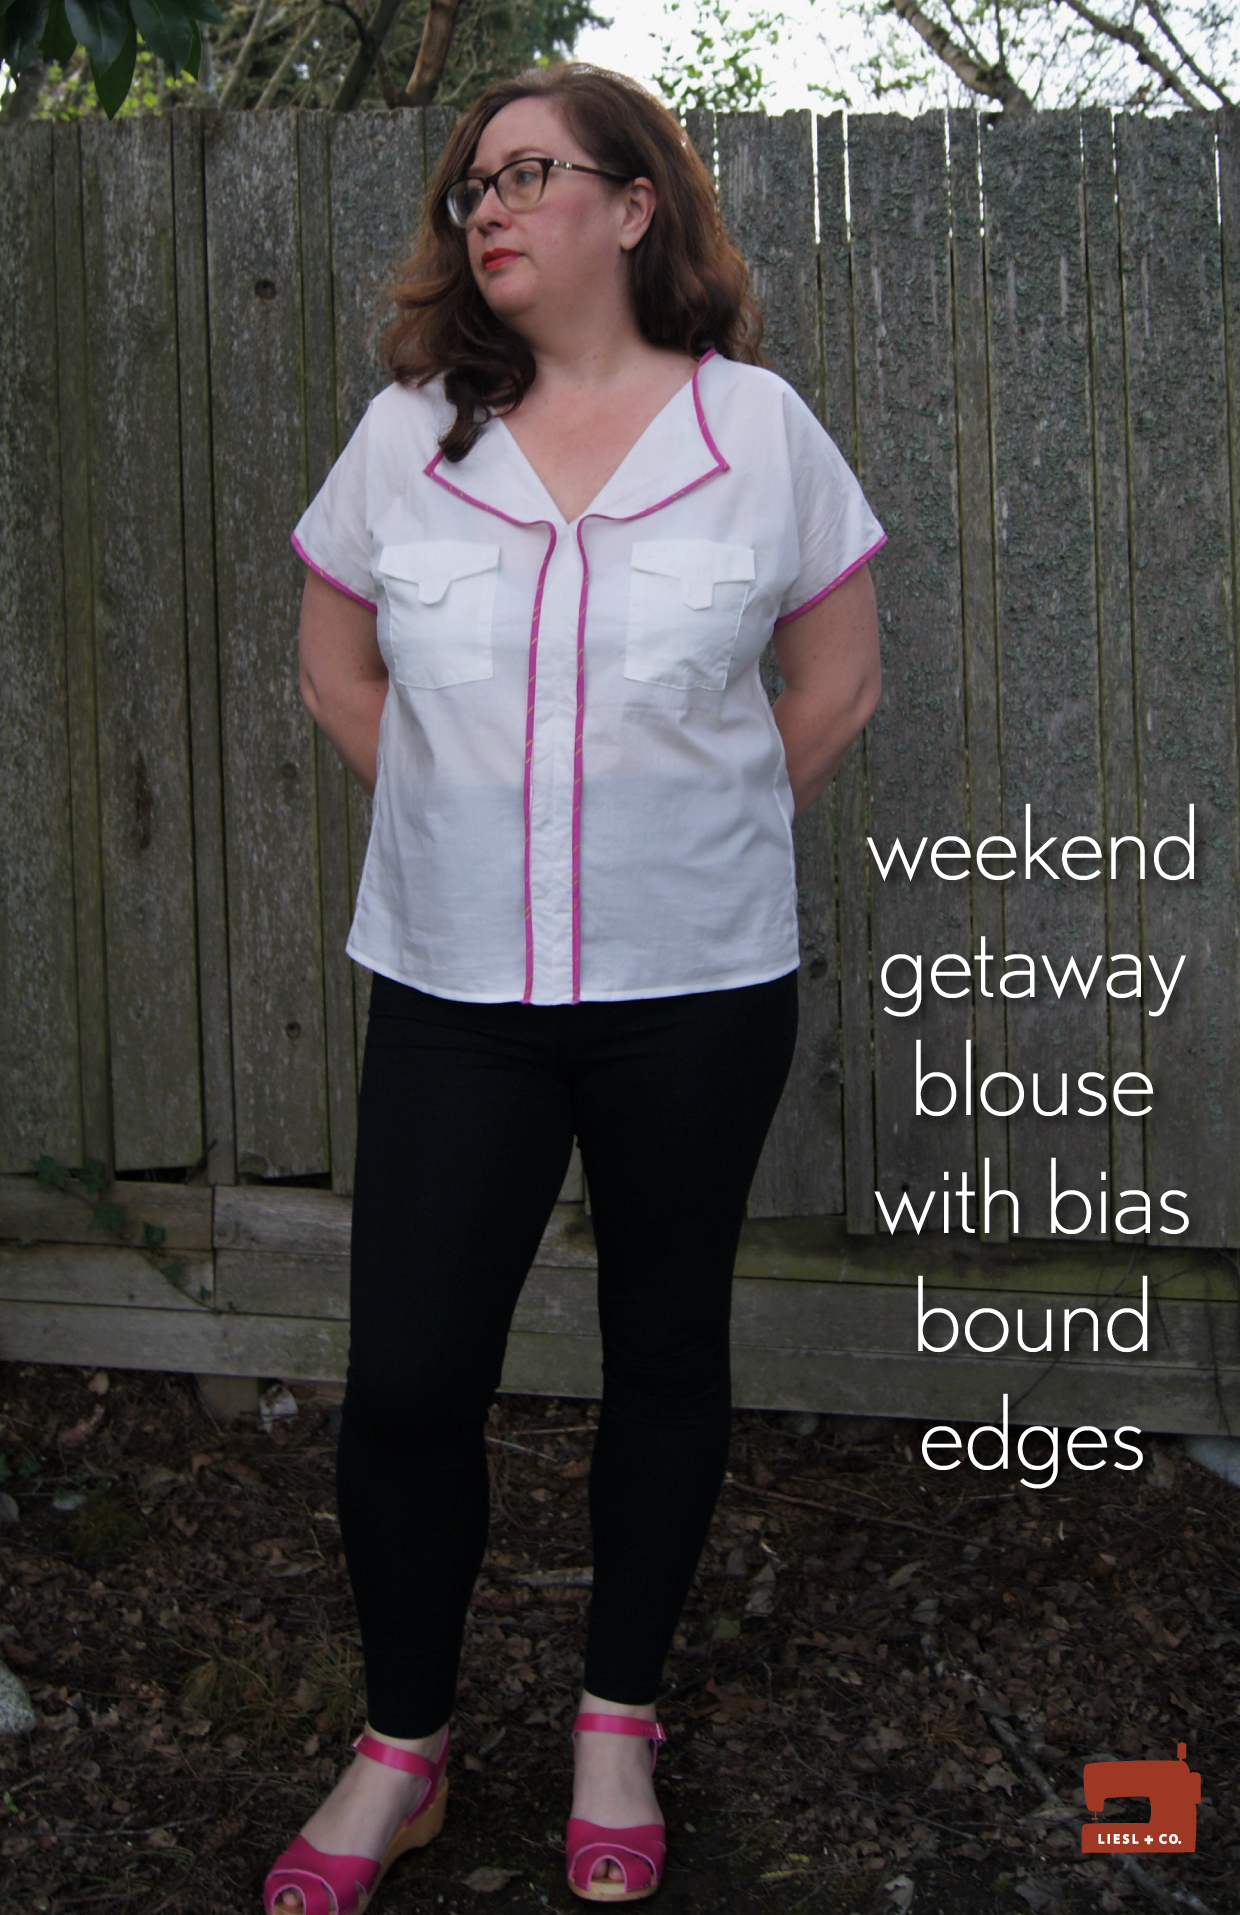
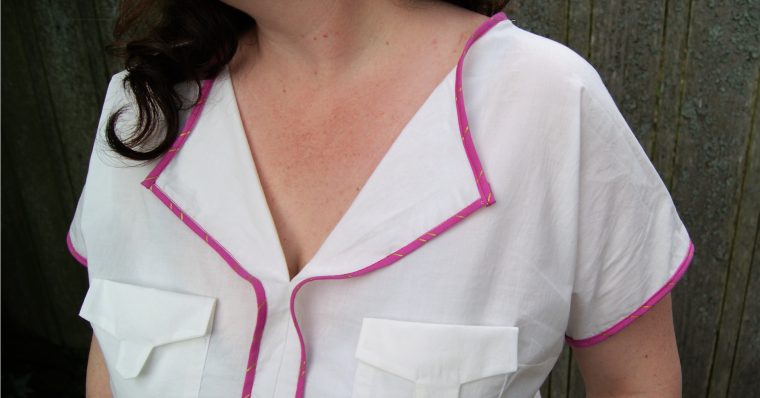
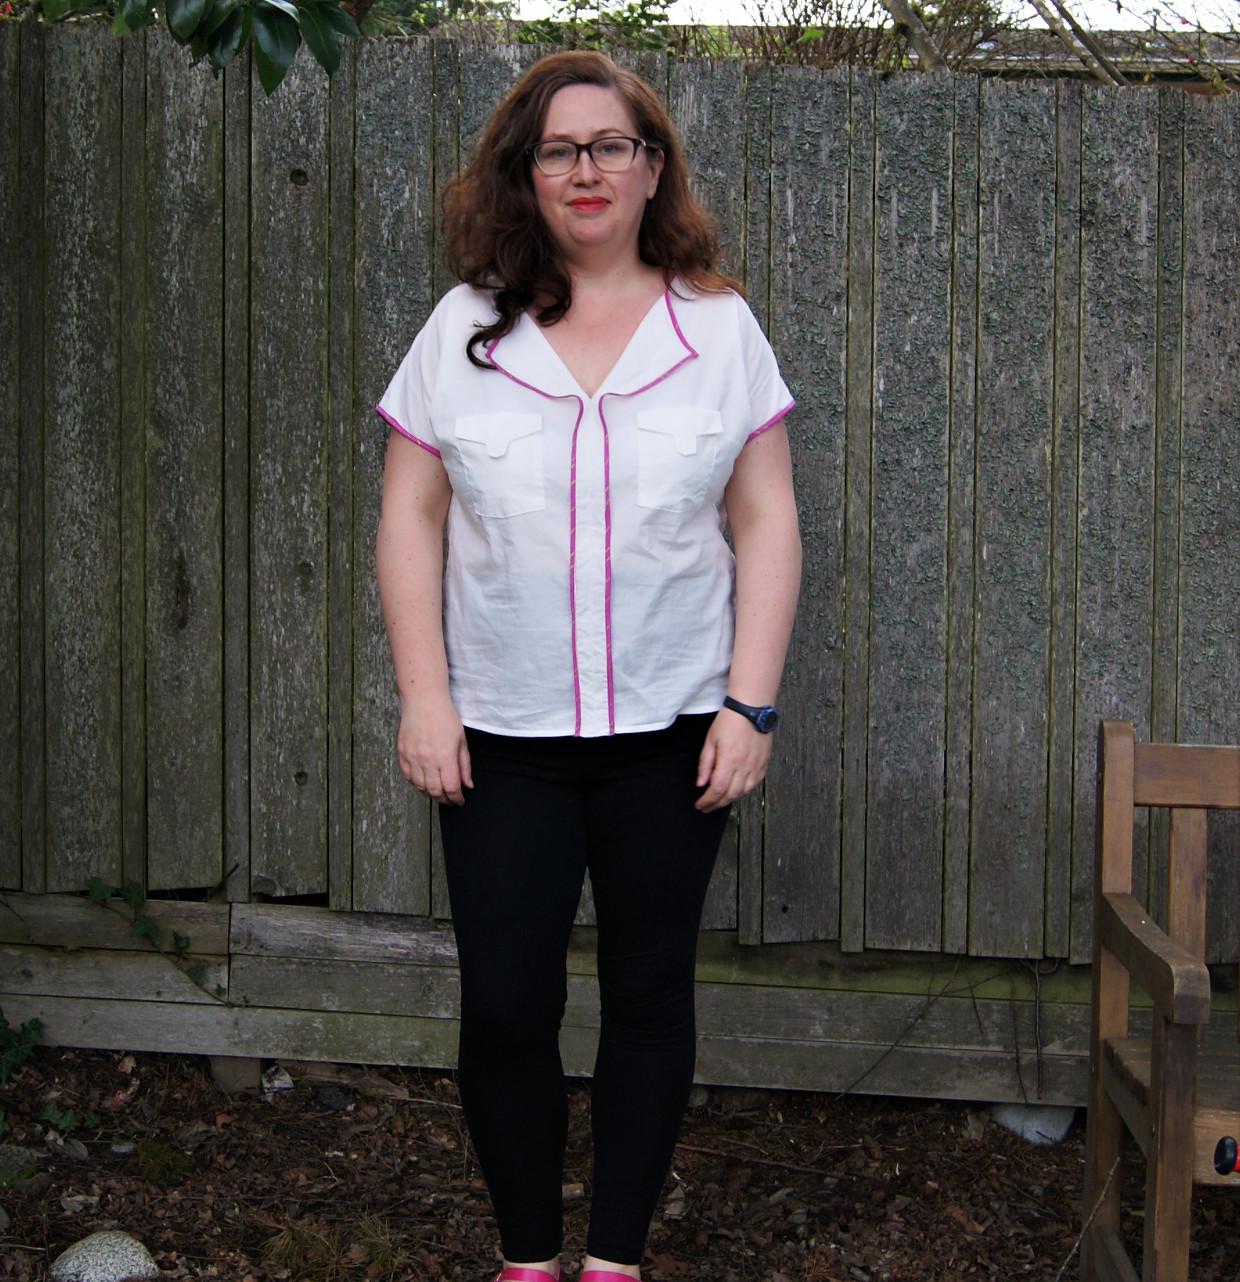
It also features a facing, which is then exposed to offer an exciting contrast if you so choose. Based on an inspiration photo I spotted in Liesl’s notes, I decided to try foregoing the facing completely and finishing the blouse in bias binding to add a pop of color and give it a slightly different look. I’m still a fairly novice sewist and certainly don’t have much experience manipulating patterns and construction, so I was eager to give this a go as a simpler adjustment than some! (Check out Lori’s pleats addition from a few days ago for some springtime eye candy inspiration).
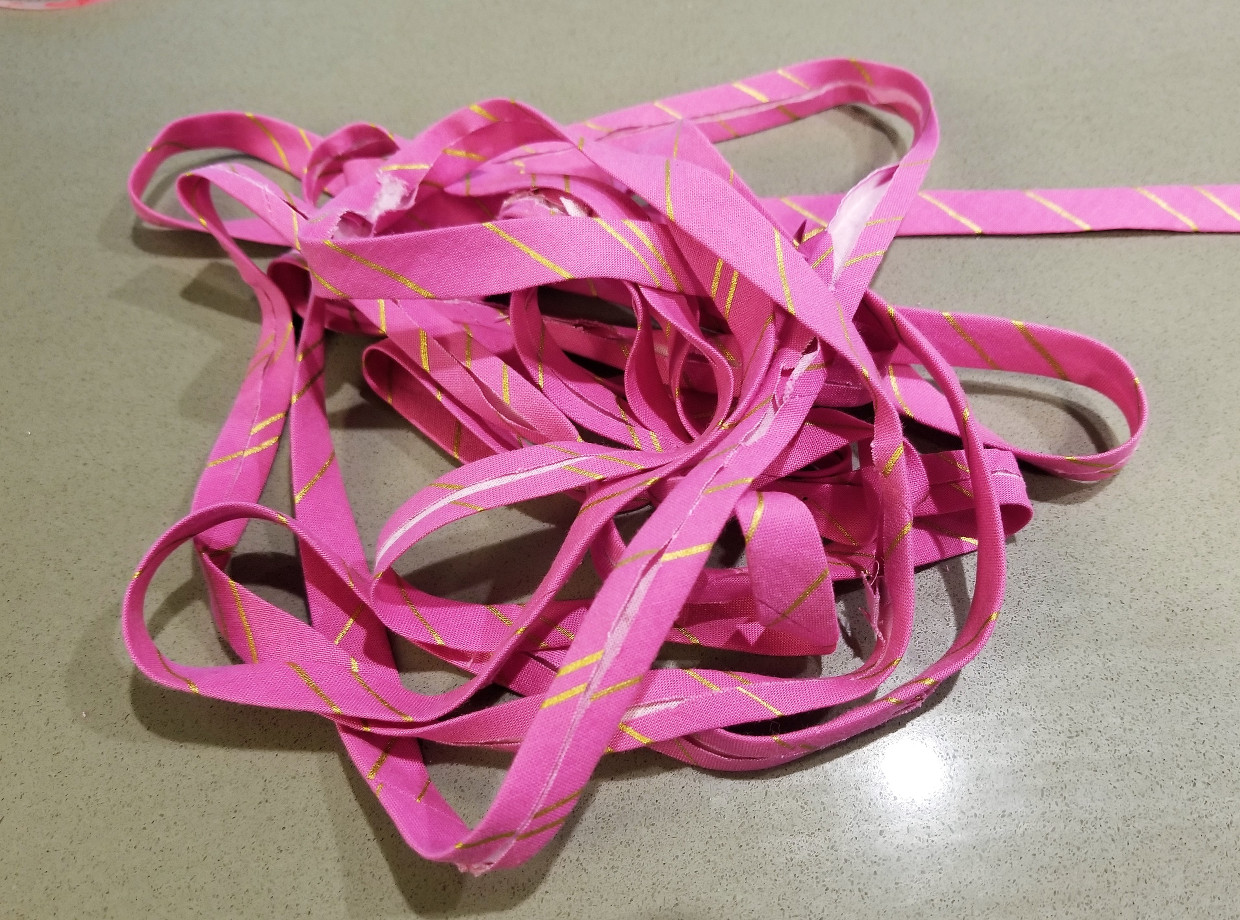
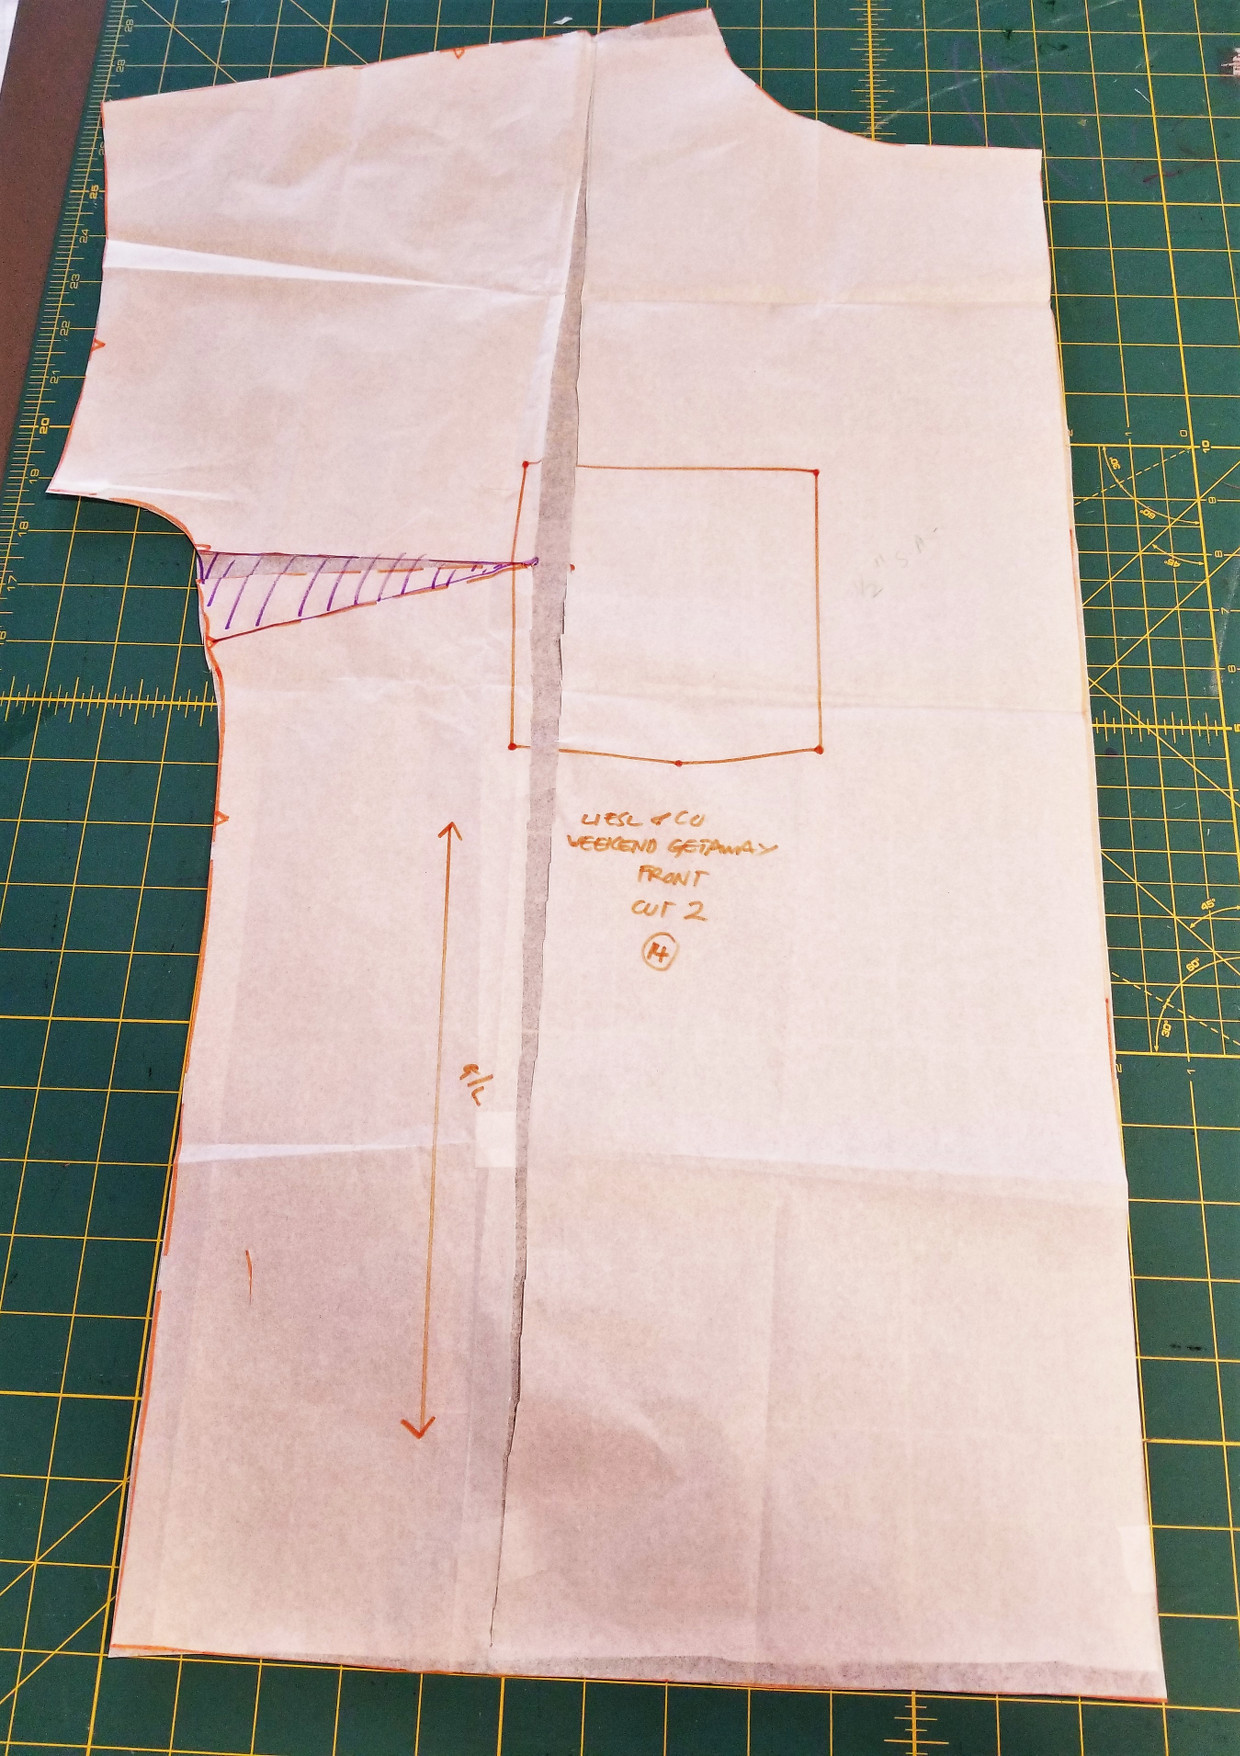
The lack of facing immediately makes the pattern much simpler. I made sure to pick a cotton lawn that was similar on the right and wrong sides and therefore only needed to cut a front, back and the pockets! I have used bias binding a little before and had the perfect bright pink and gold cotton remnant in my stash with which to whip up a few yards. I used the continuous method of making bias strips, which is very useful as you can use a small square of fabric, rather than cutting all the way across a larger piece.
I then decided to bind the center front edges first, so everything didn’t get all caught up after sewing those together. I made sure to remove the ½” seam allowance from the center front edges and neckline that weren’t needed for the bias binding finish. I should also add that I had already taken Liesl’s advice in the pattern and made a full bust adjustment on the size 14. I used the method outlined in the pattern, which was a new method for me and involved manipulating the shape along the body of the garment to a larger extent than other methods I’ve used. I think it worked out rather nicely on the front, although I will definitely lower the bust darts by an inch or so next time.
One thing to watch is which side you sew the bias binding from. I finished the center front binding from the right side, but of course that gets flipped out to form the center front seam. Therefore, I have a little bit of thread that’s gone off-piste; it’s no big deal, but if that sort of details irks you, best to sew from the other side or be really careful.
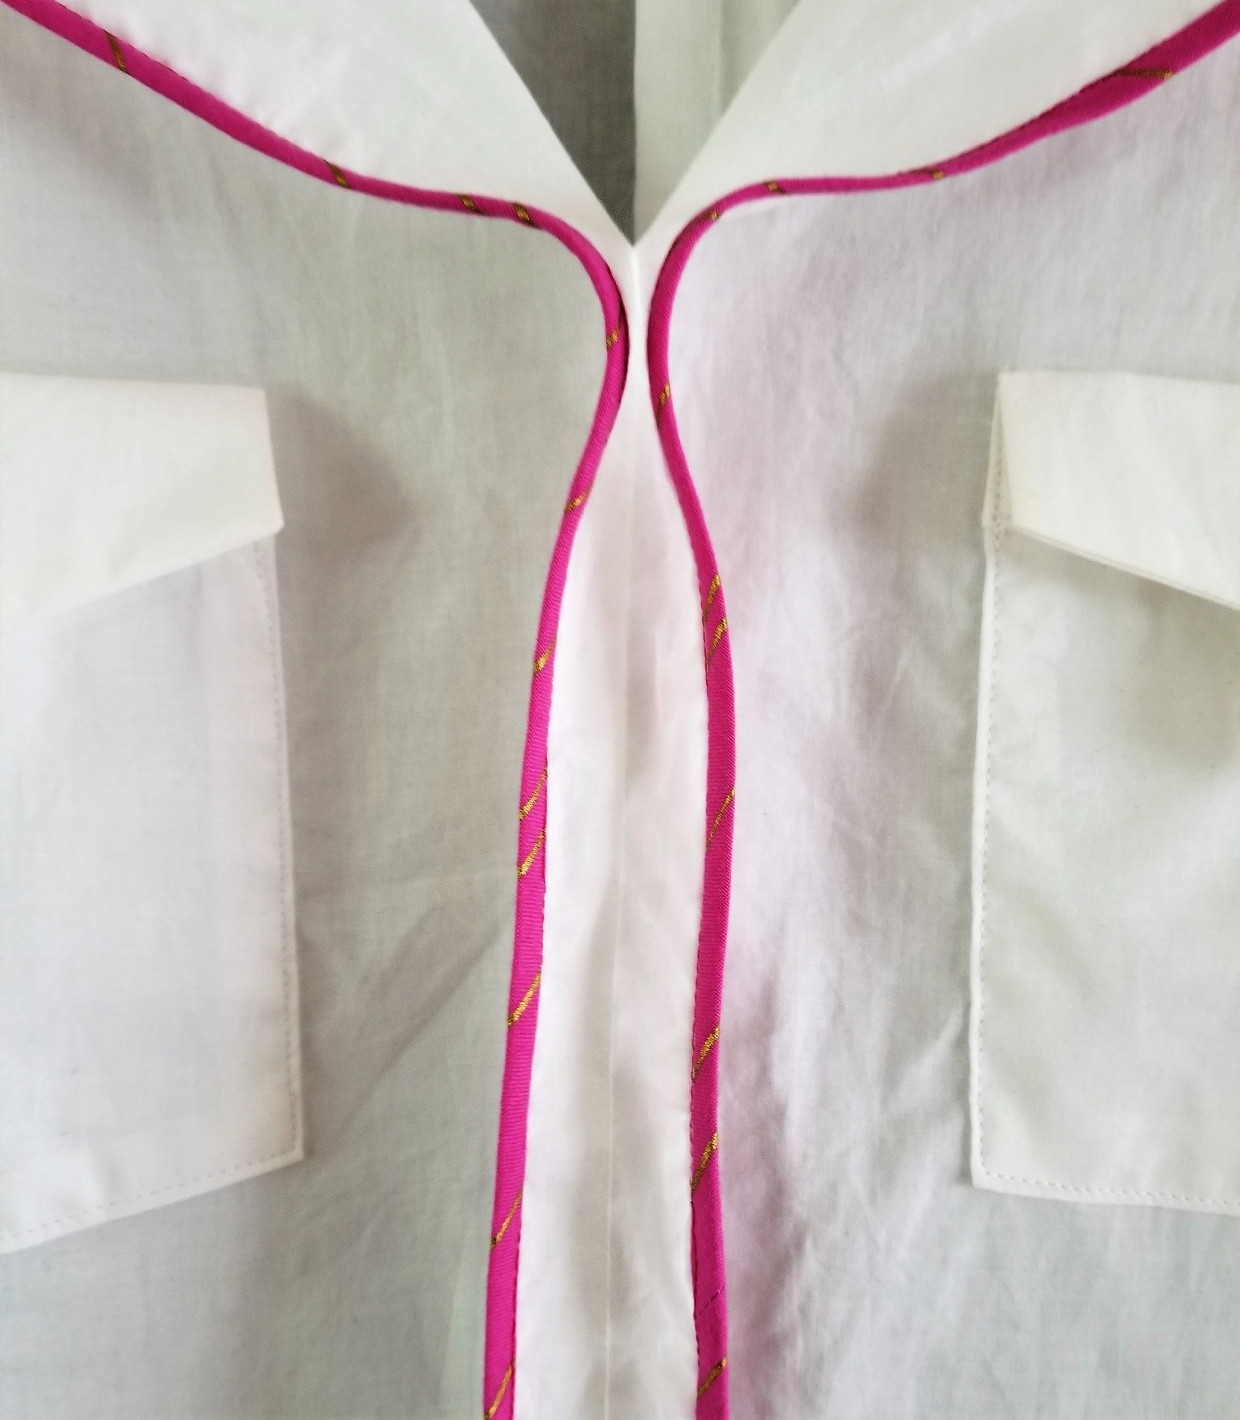
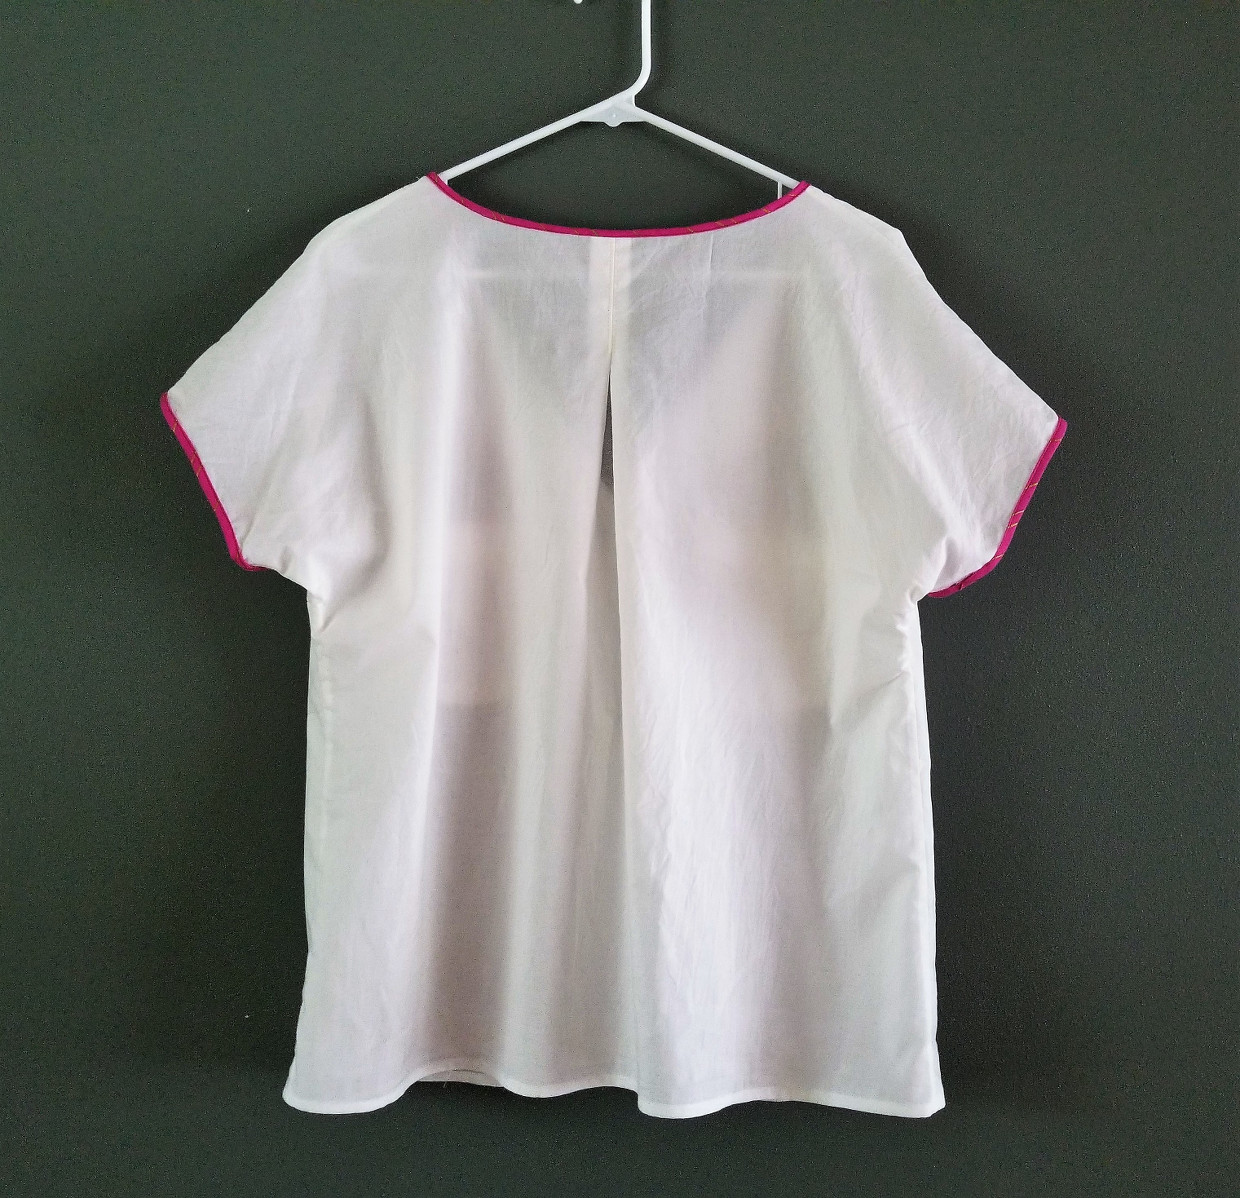
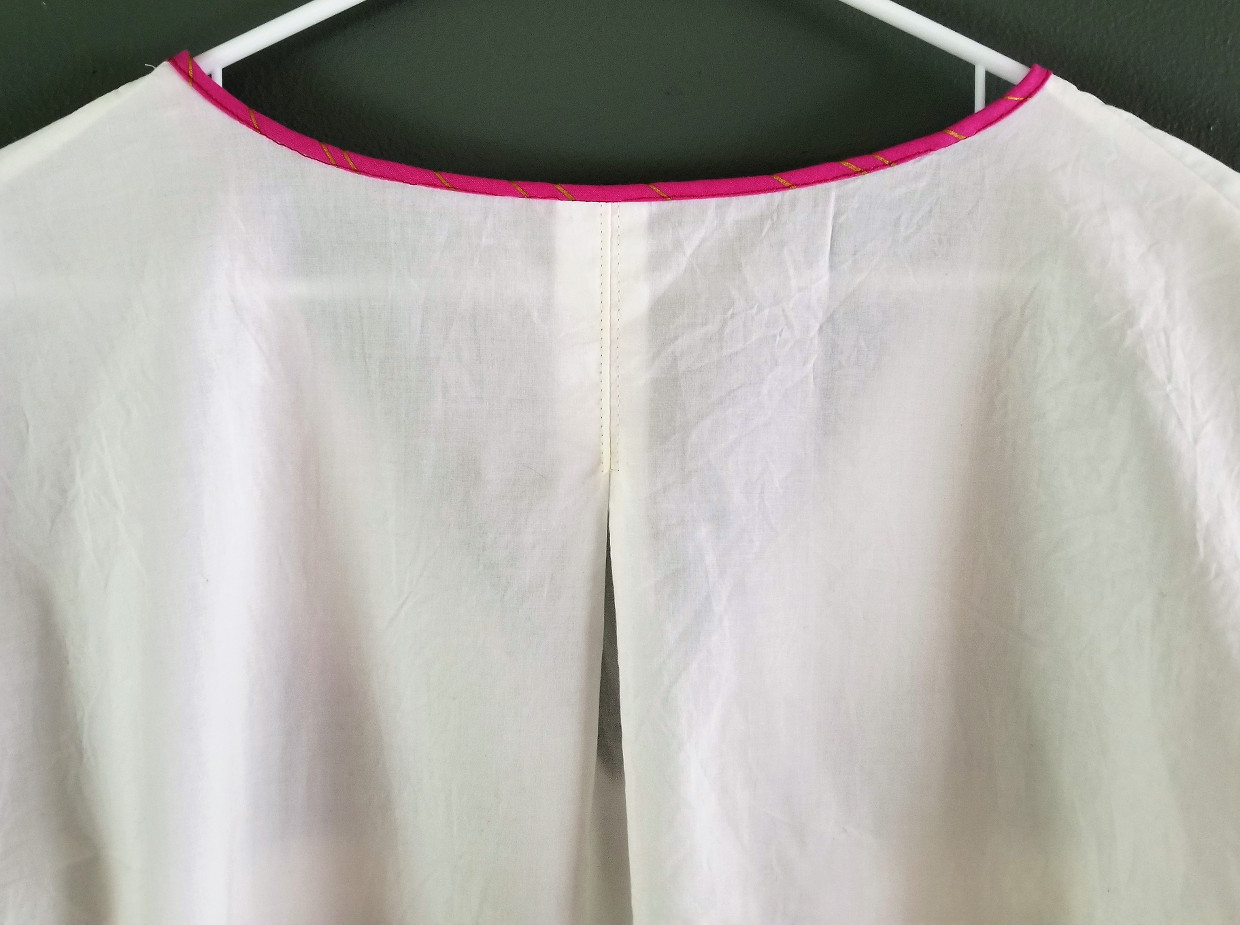
Next, I joined the shoulder and side seams, using a French seam finish, which was almost mandatory with the sheerness of my white lawn. I then bound the entire neckline and finished the corners where the center front meets the neckline with a little handsewing. I could definitely neaten that up and found the perfect way to finish it in Liesl’s tutorials after I’d finished. Ah well, I’ll use this next time!
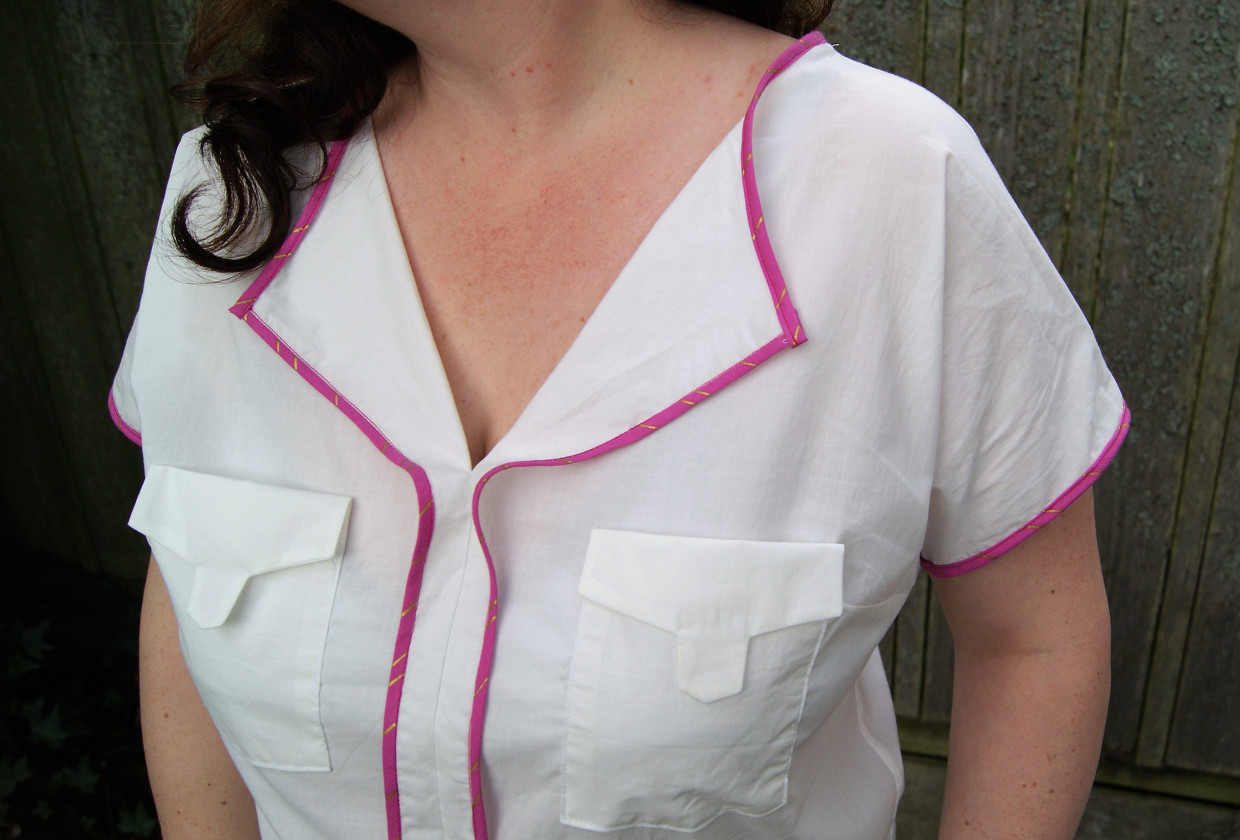
Finally, I added bias binding to the sleeves and made sure to cut off the hem allowance before doing so. This was nice and straightforward. I liked the length of the blouse pretty much as it was, so I took a narrow hem of ¼” and folded over twice for a total of ½”. At this point, I took a good look at the blouse and it didn’t feel quite … finished to me. After thinking about it for a while, I decided to add pockets.
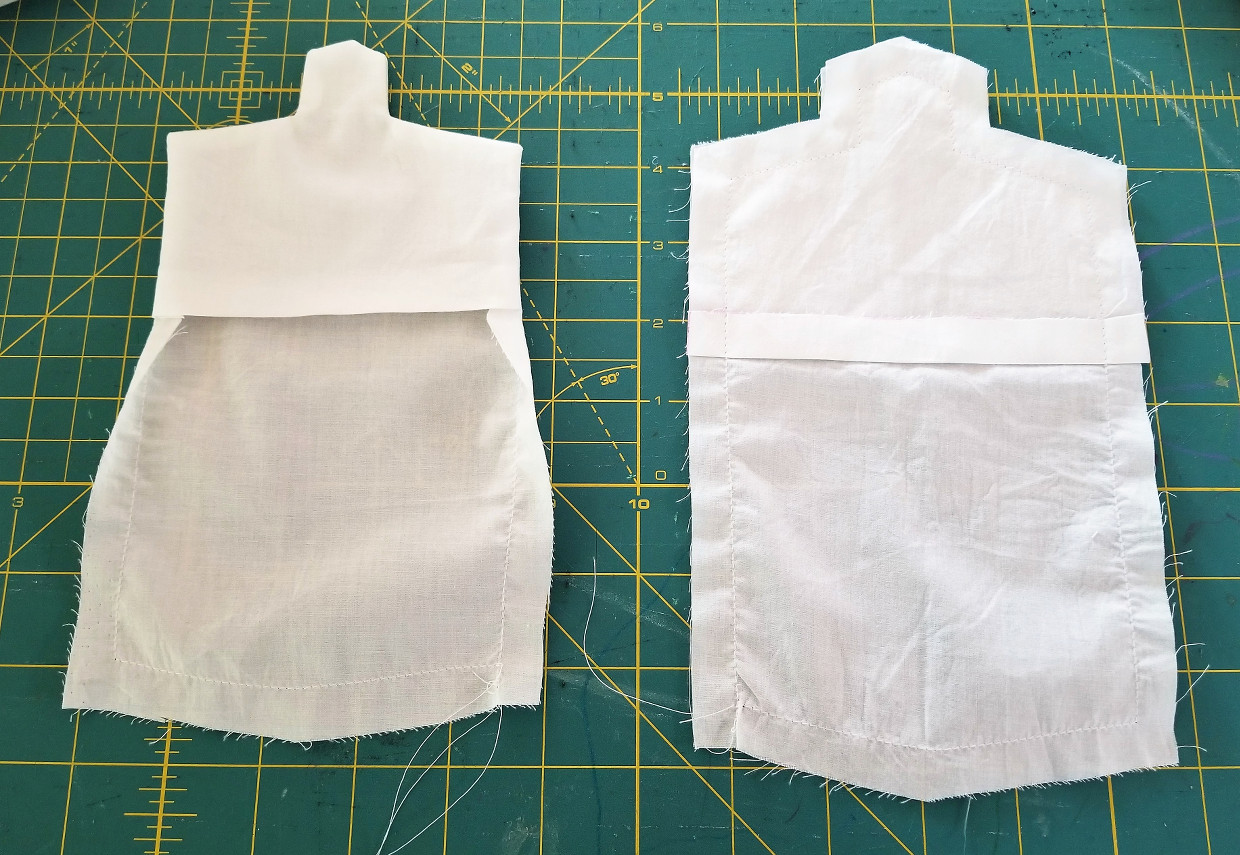
I must say I really like how these pockets are shaped and constructed. I’ve made a few pairs of this type of pocket now and these are definitely one of the best for instructions and just feeling like a “solid” pocket. The blouse now felt a lot more me; I toyed with adding buttons, but opted just to leave it as it was.
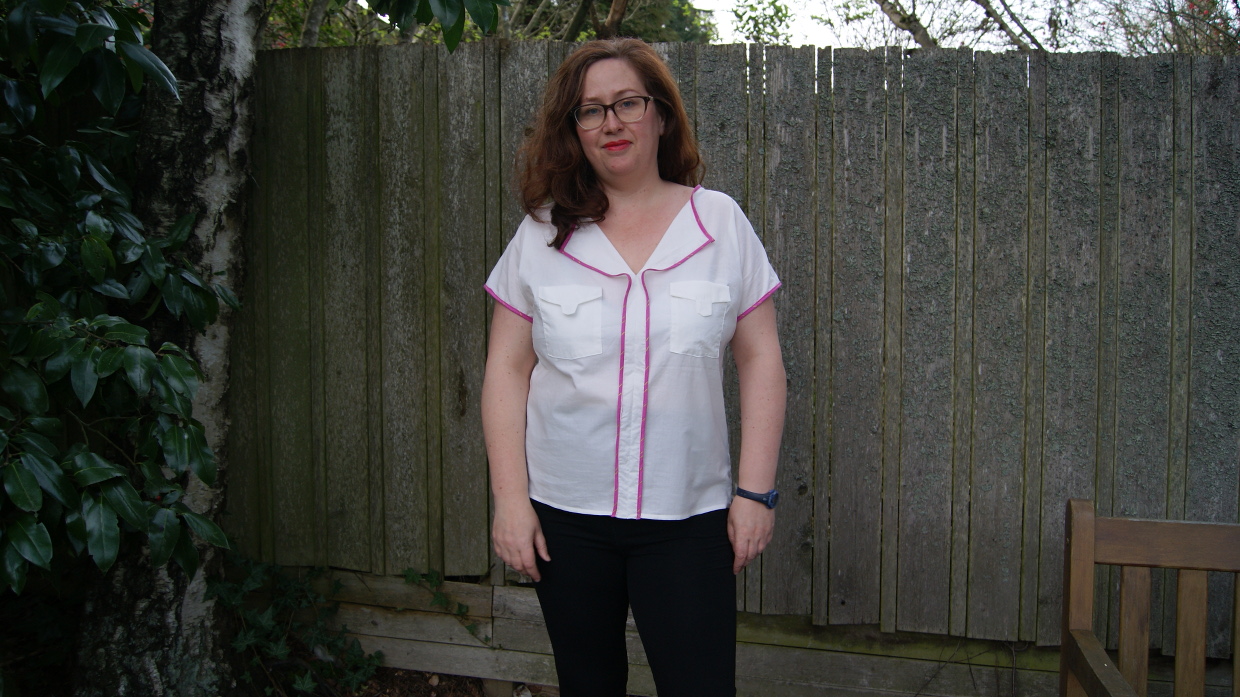
It’s such a light and airy garment. It’s a little different from my usual style, but I can totally see myself wearing this in the summer over a bikini top with a pair of wide-leg linen trousers. That seems hard to picture right now with the continuing Seattle spring showers!
I really enjoyed tinkering with this pattern and it really taught me a lot in how to think about adapting a construction method. I’m looking forward to the next sew already!