

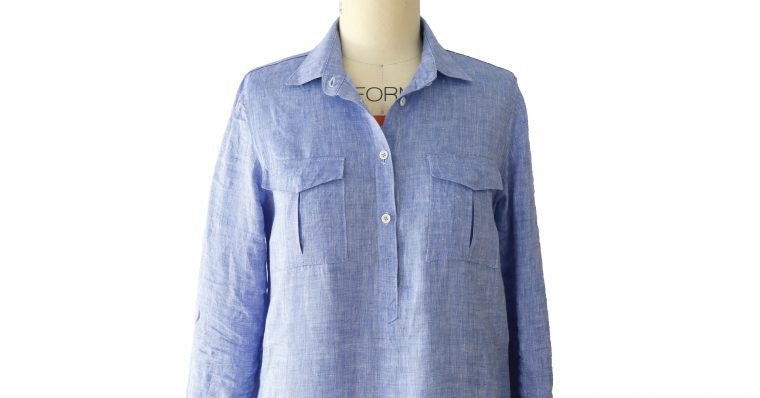
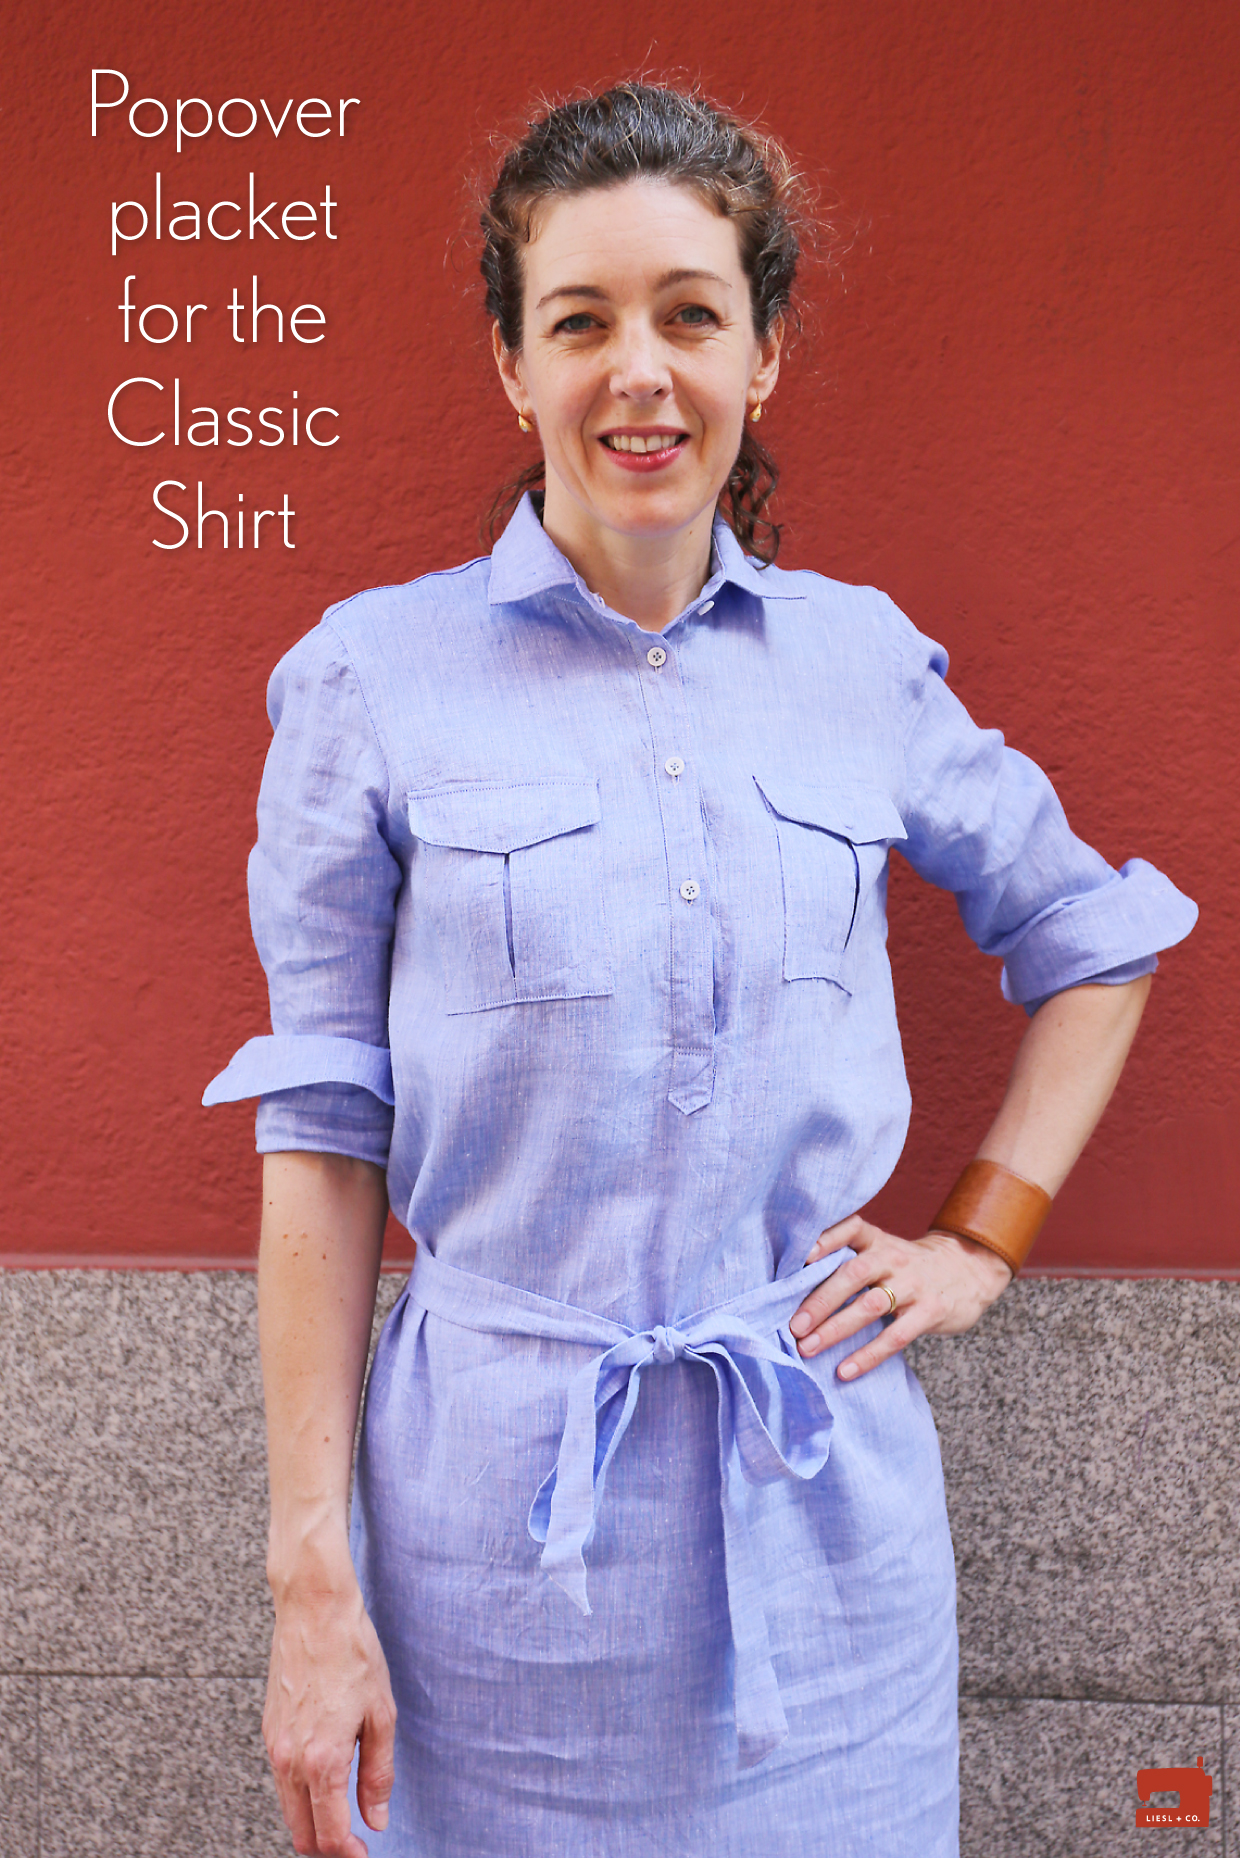
Are you ready to sew a popover placket?
This free downloadable pattern piece and tutorial can be used with our Liesl + Co. Classic Shirt to expand your options. I used it to transform the pattern into a shirt dress. (See my Classic Shirt as a Dress post for details about lengthening the Classic Shirt pattern to dress length.) The popover placket works really nicely on a dress because it eliminates any possible gaps or button pops below the waist (so annoying when you sit down and the buttonholes gape open!), and it also reduces the number of buttons and buttonholes you need to sew. (There are already plenty.)
But you can also use this free placket and tutorial to change the Classic Shirt into a popover style to give the pattern a different look and feel. We want you to get as much out of our patterns as you can!

So how do you sew a popover placket? It’s very similar to the tower placket from the sleeves on the Classic Shirt pattern. So if you’ve already sewn the pattern this is going to be very familiar. I’ll walk you through it, step by step.
- Download, print, and assemble our free popover placket pattern piece. Cut out one popover placket with fabric right side up and transfer the pattern markings to the wrong side of the fabric. Baste the outer edge of each placket piece with a 1/2″ seam, as shown, and follow the manufacturer’s instructions to fuse or baste a 1″ strip of interfacing to the wrong side of the placket, aligning the edge of the interfacing with the basting stitches.
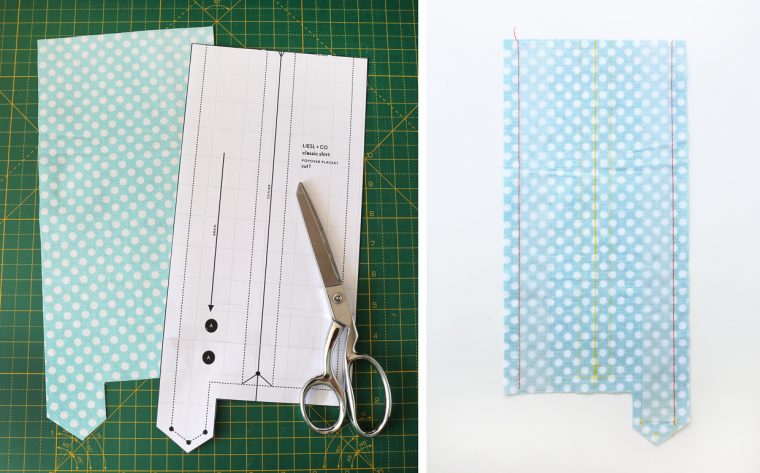
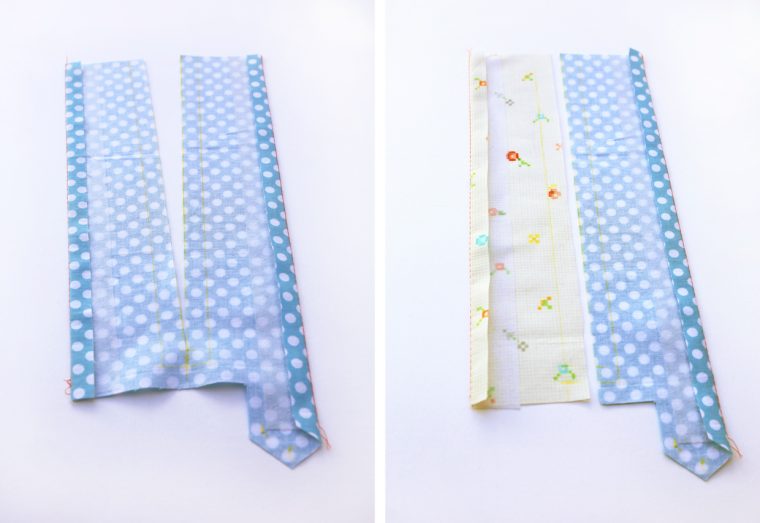
- Using the basting stitches as a folding guide, fold and press the fabric to the wrong side along the basting stitches, as shown. Hint: If you’d like the underplacket to be a different color of fabric, you can use the cut line to cut the pieces from two different fabrics. Otherwise, just cut along the cutting line to the dot.
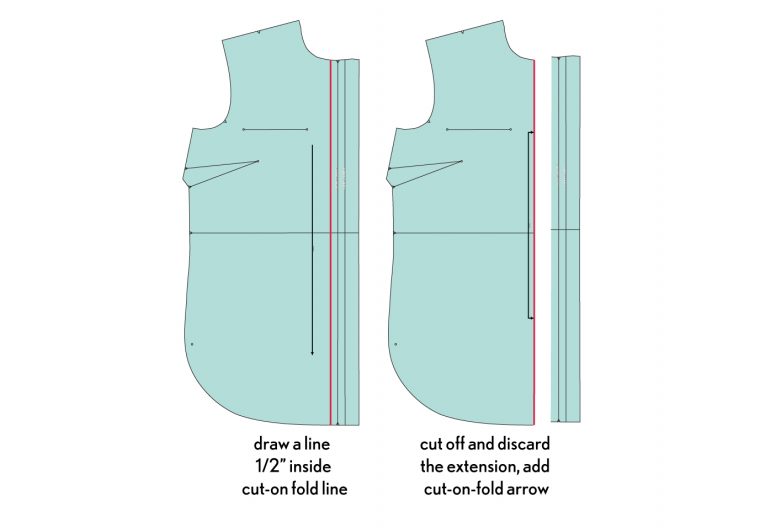
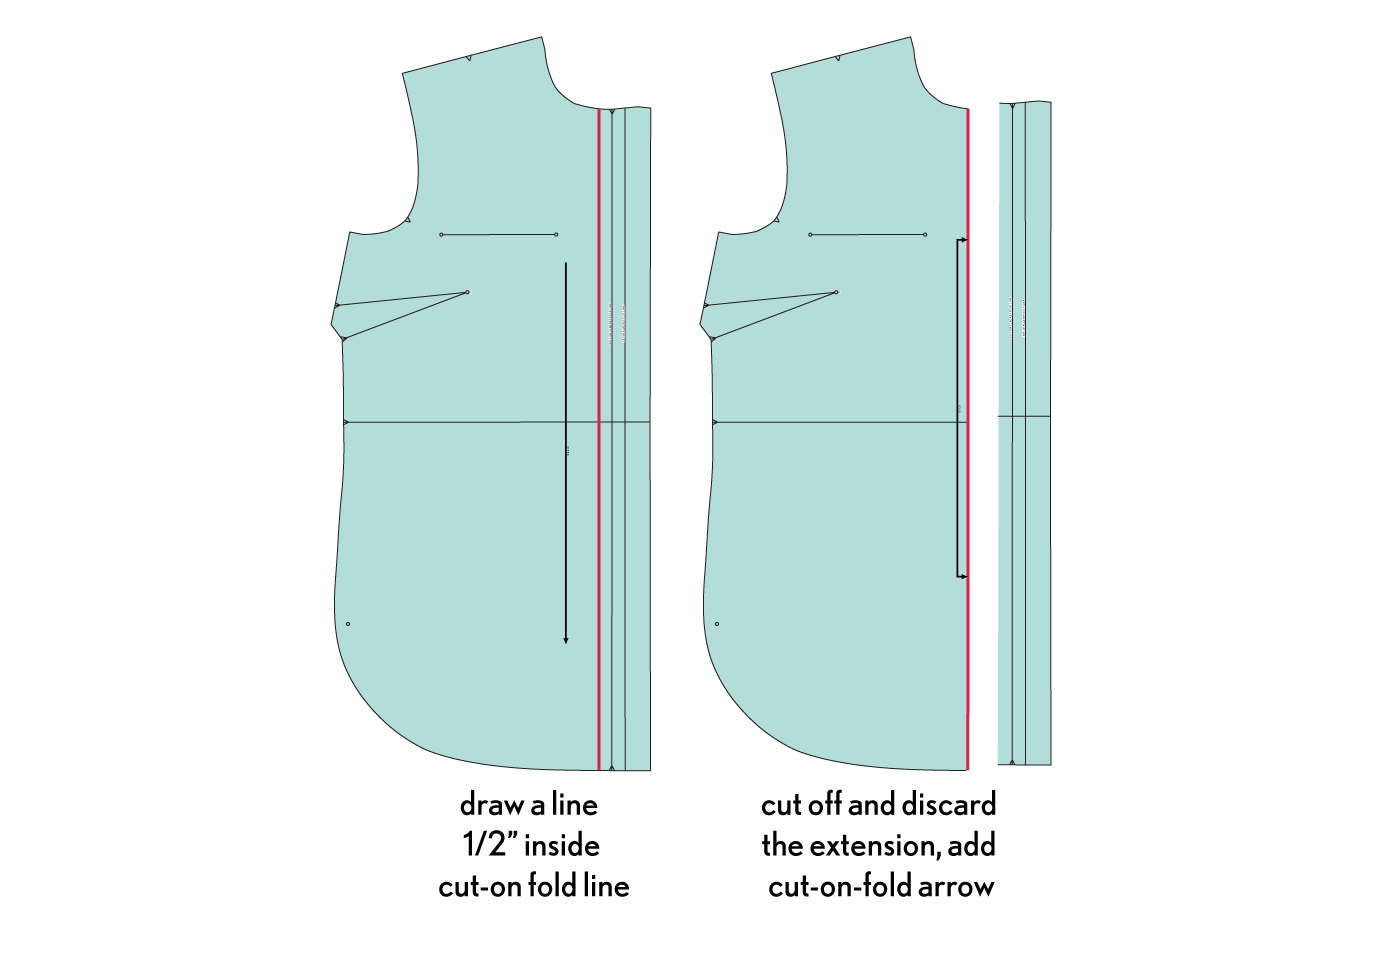
- Alter your Classic Shirt pattern to be Cut on Fold by drawing a line 1/2″ inside the Placket Fold Line for View B. This line marks the center front of the shirt/dress and can also be used to cut the pattern piece on the fold of the fabric. Trim and discard the extension of the pattern piece. Then cut out your fabric and draw the center/fold line on the wrong side of the fabric.
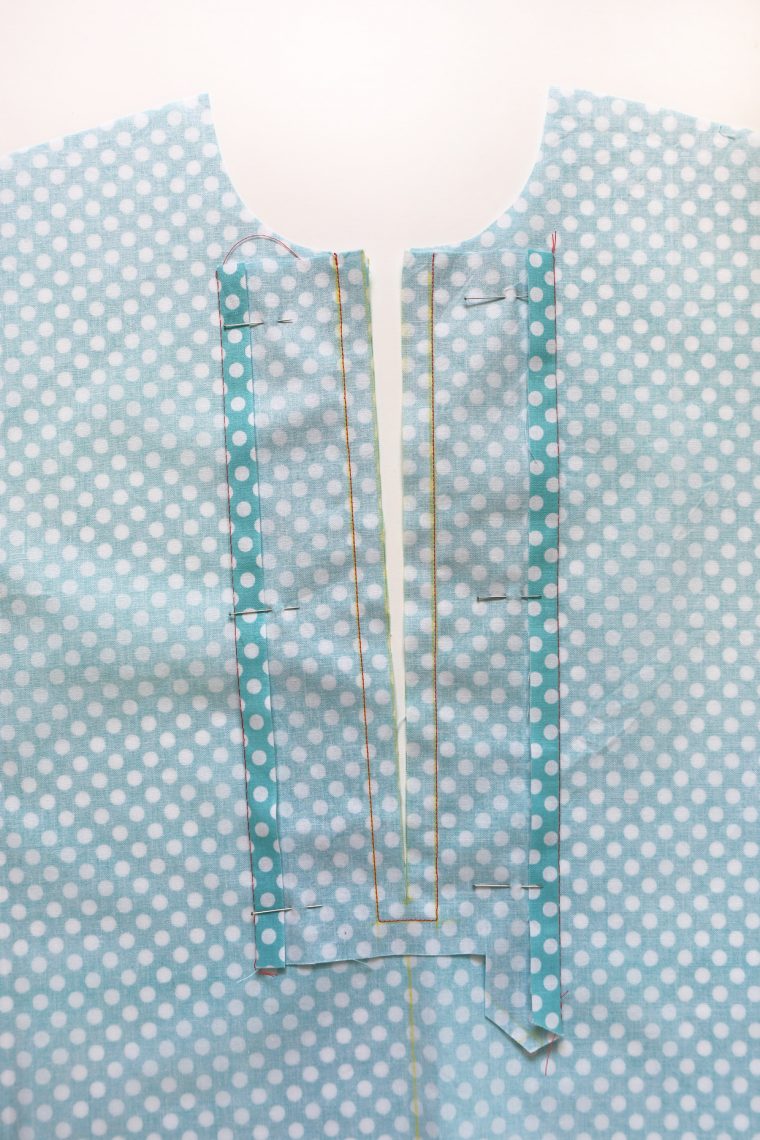
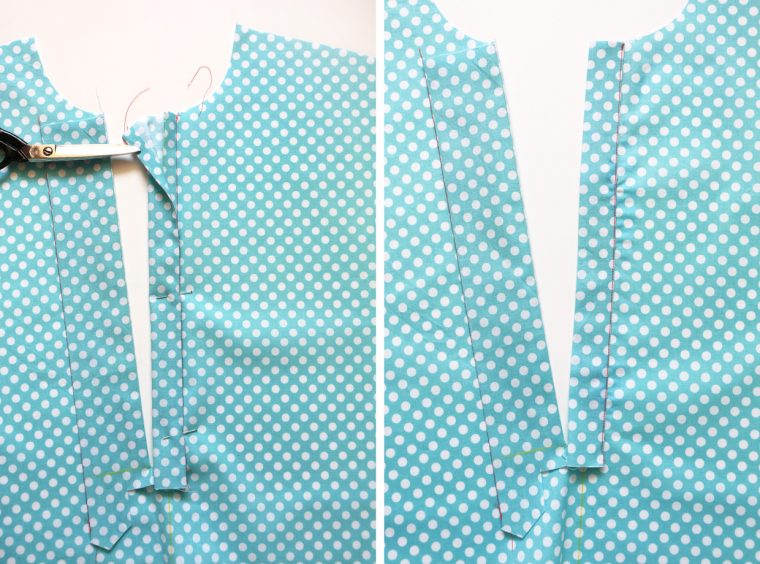
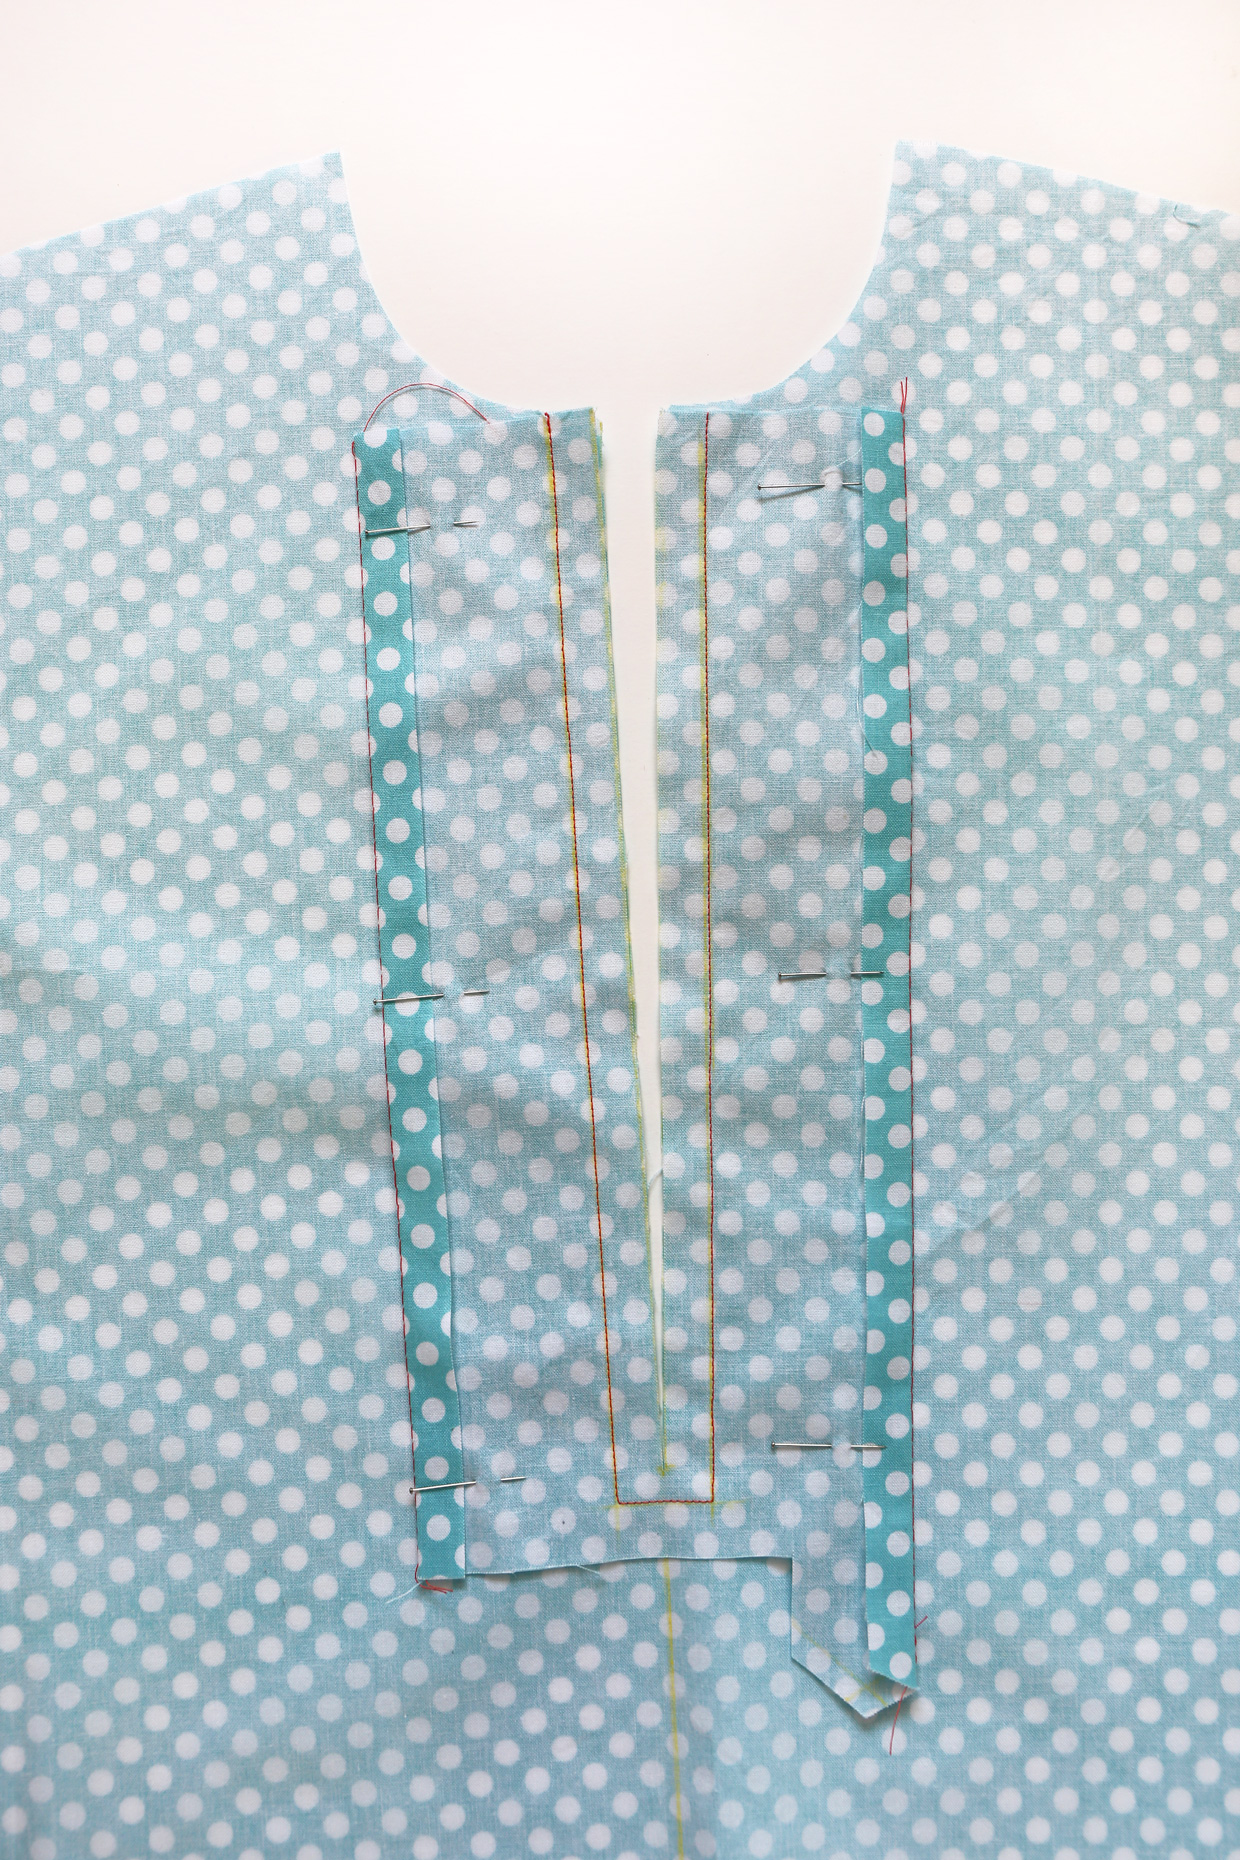
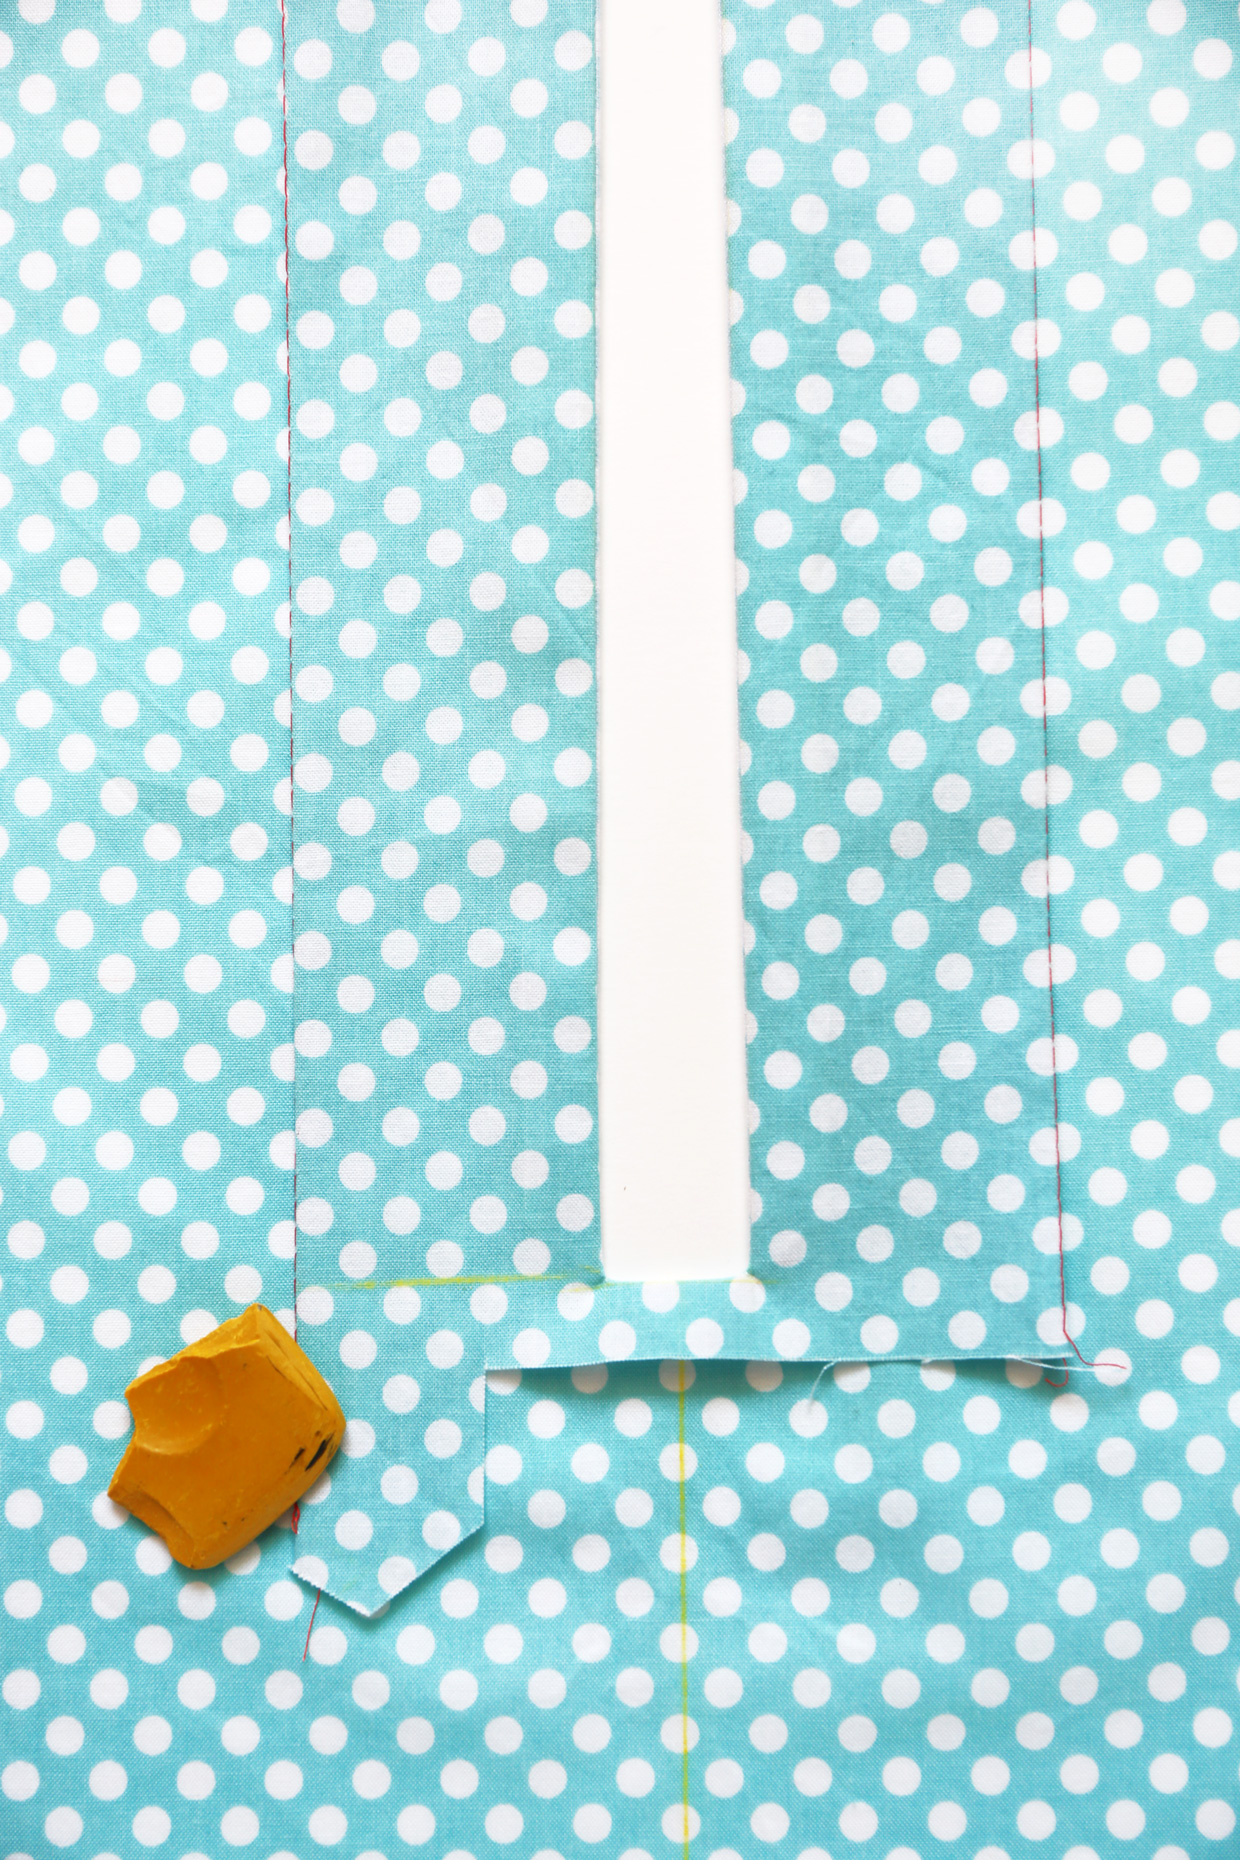
- To sew the placket, pin the right side of the prepared placket pieces to the wrong side the shirt/dress front, matching the cut line on the placket to the center-front line on the shirt/dress. Cut down the center-front line of the shirt/dress to the dot on the popover placket piece so both pieces have the same opening. Then stitch the opening with a 1/2″ seam, following the markings you transferred from the pattern pieces to pivot and stitch across and then back up the other side.
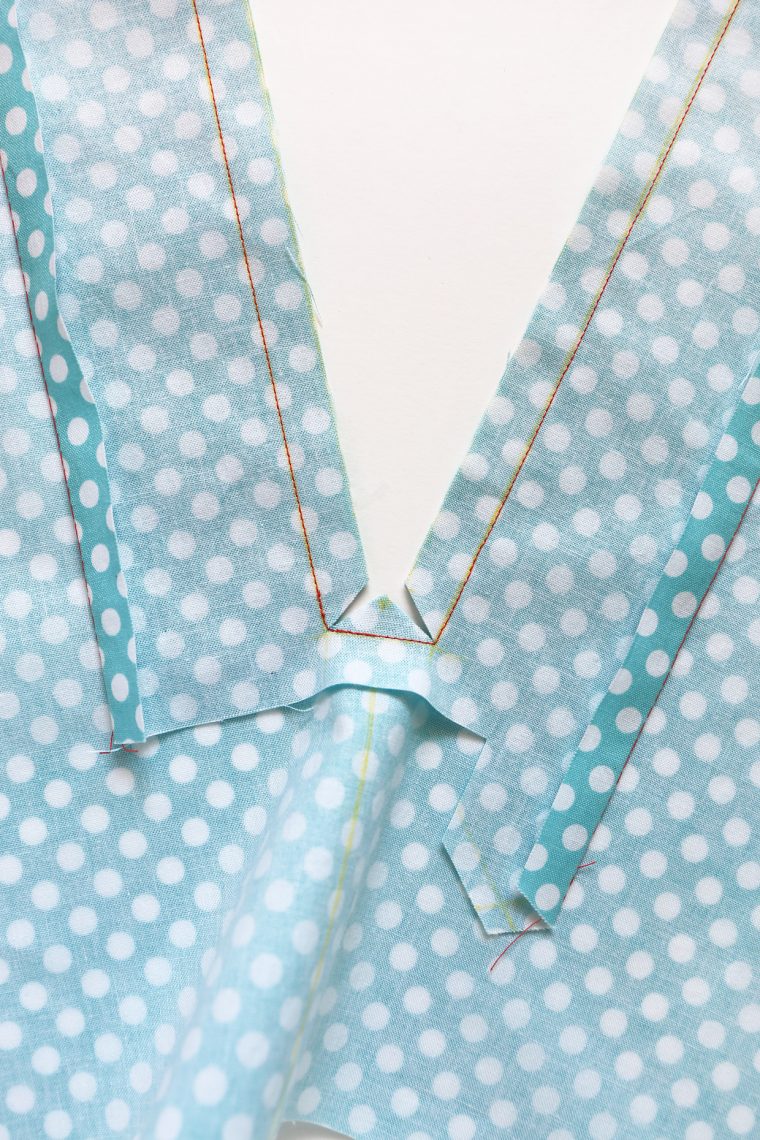
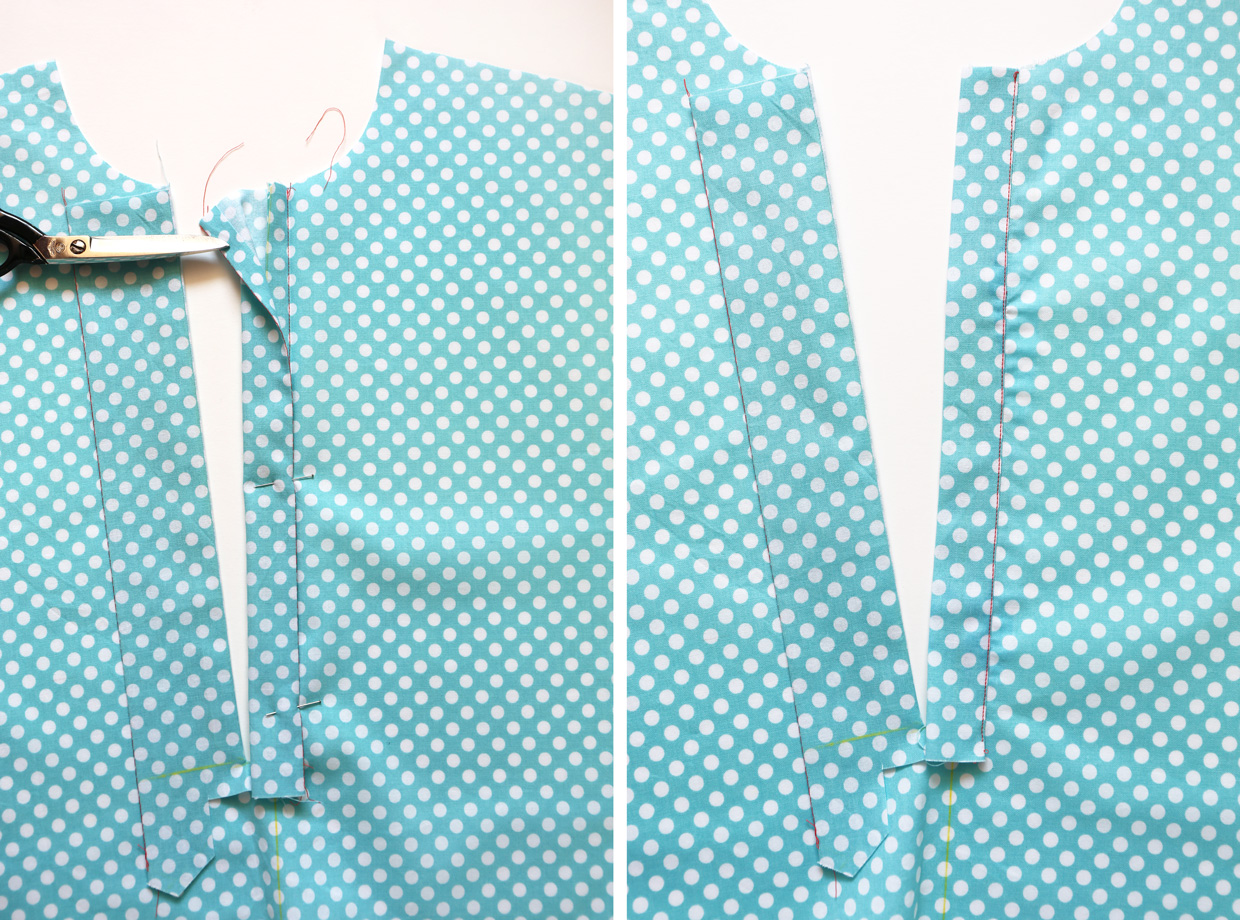
- Clip from the marked dot to the stitched corners, cutting as close to the corners as possible. Don’t be shy here; it’s better to clip very close than not close enough.
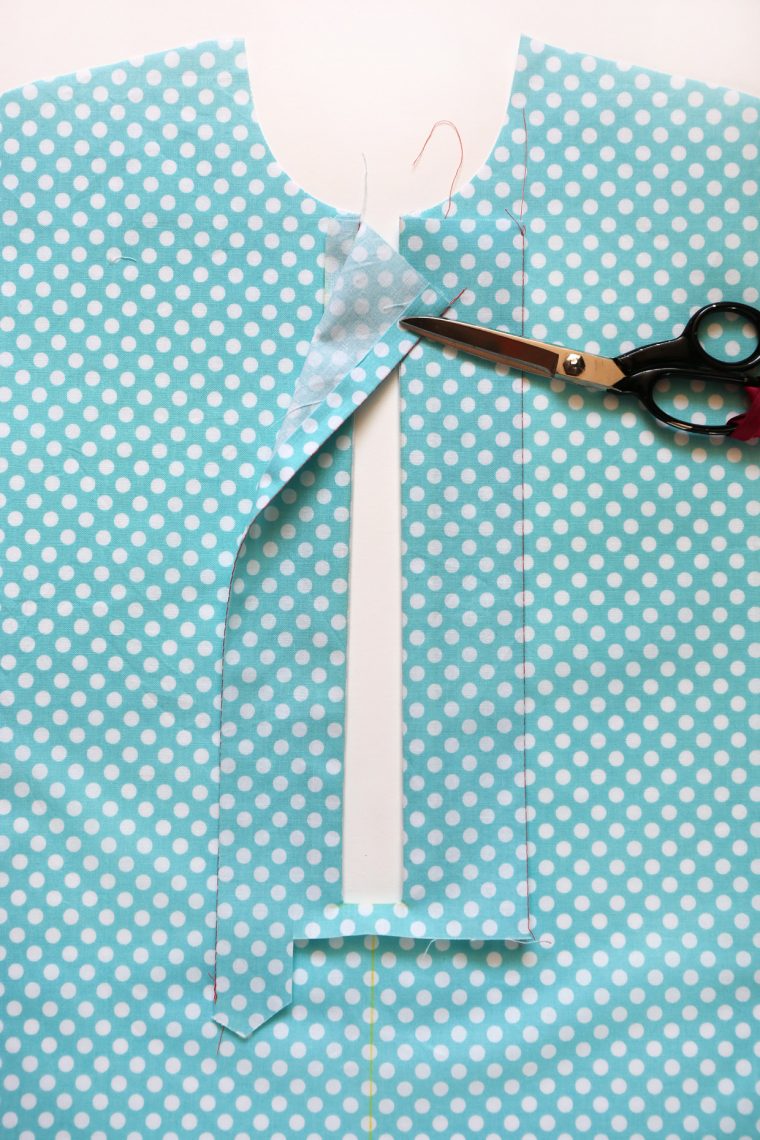
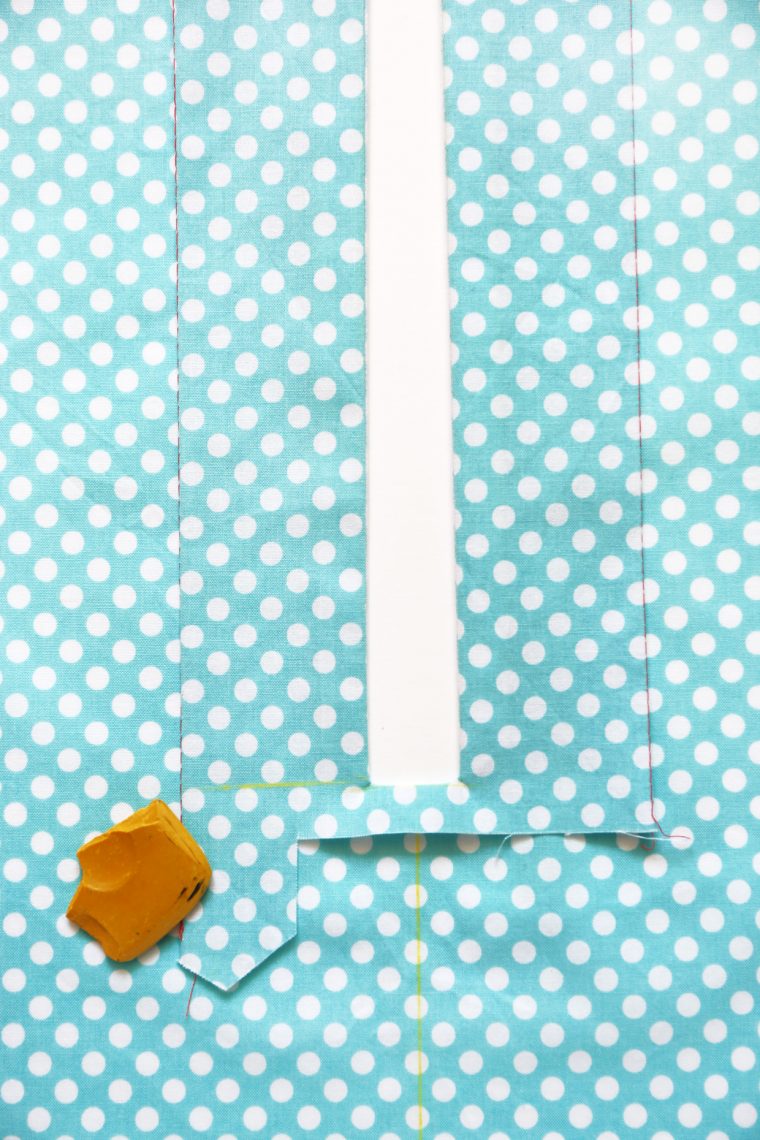
- Turn the placket through the cut to the right side of the shirt/dress to expose the rectangle-shaped opening. This opening is where the placket itself will end up. Press the narrow seam allowances at the bottom of the opening down and keep an eye on them so they stay pressed to the right side of the shirt/dress for the next few steps.
- Before going any further, use a water-soluble fabric pen or tailor’s chalk to draw a horizontal line on right side of the longer (wearer’s right) placket at the same level as the bottom of the rectangle. We’ll use this as a stitching guide later on.
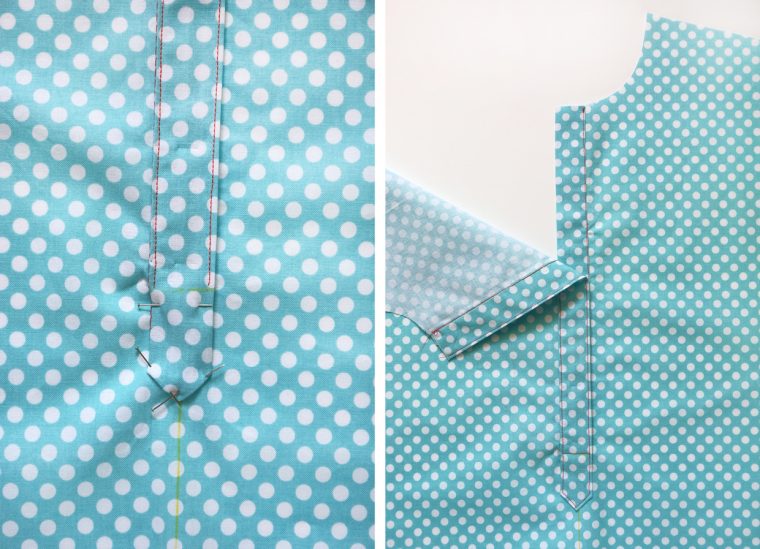
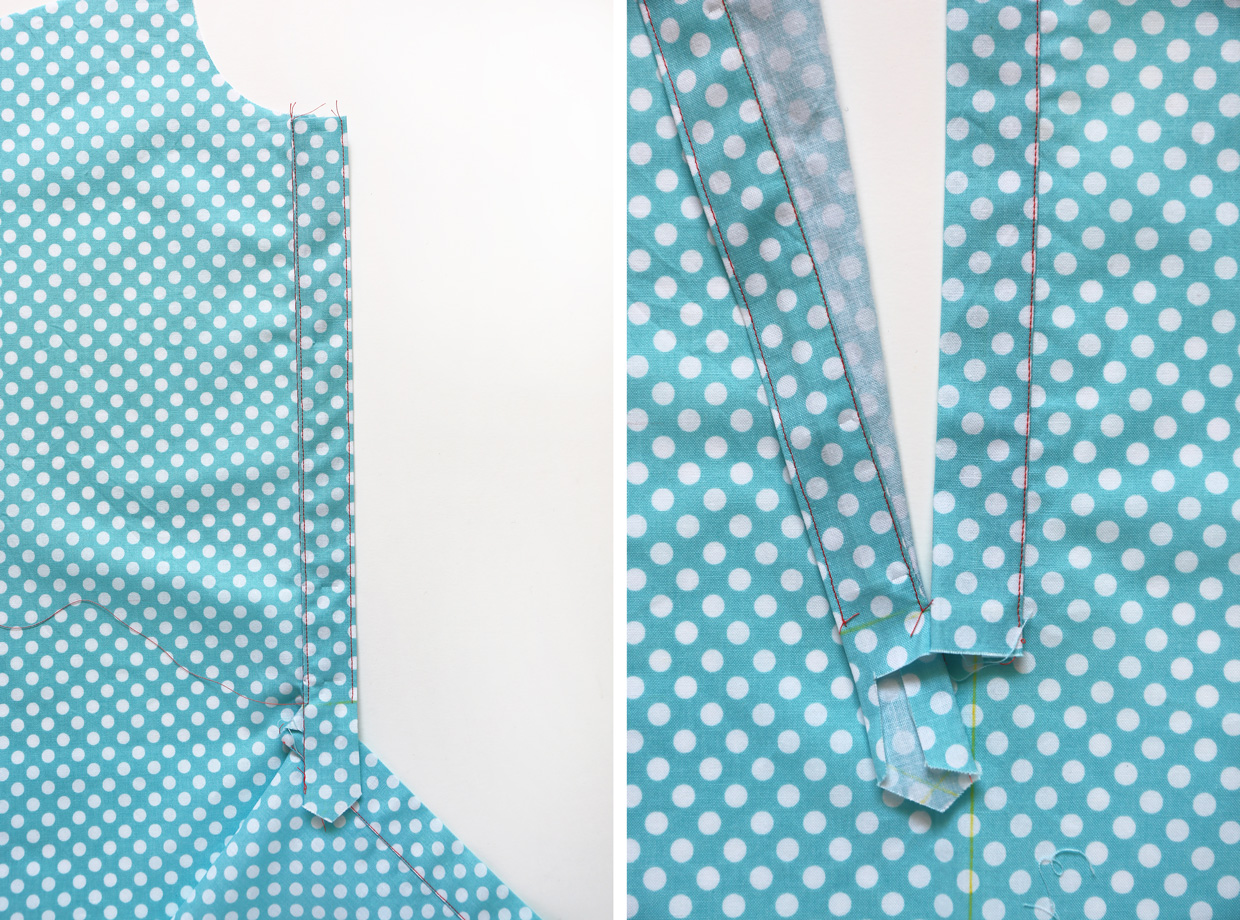
- We’ll be working with the shorter (wearer’s left) side of the placket first. Fold the pre-folded outer edge of the left placket in half to cover the stitching line, taking care to keep the short edges at the top of the placket folded to the right side of the shirt/dress. Edgestitch the innermost folded edge, stopping just above the line you drew on the right side of the placket. The left half of the placket is finished!
- Now working with the larger (wearer’s right) placket, fold it in the same way as the smaller placket so the pre-folded edge covers the stitching line. Fold the left side of the shirt/dress down so it’s out of the way, then edgestitch the right placket starting at the neckline and stopping at line you drew in Step 7, above. You can edgestitch both sides of the placket or just the innermost edge, as you prefer. Either way, leave long thread tails so you can draw them to the back and knot them. This will give a nice finish to the placket, since we’ll be stitching the rest of it in the next step.

- Position the two sides of the placket so they’re directly on top of each other, checking to be sure the neck edges match, and pin them to hold them in place temporarily. Finger-press the bottom of the left placket to form a sharp point, using the dots you transferred from the pattern piece or just folding it until you’re happy with the shape. Pin or glue the pointed end of the placket in place, then edgestitch beginning at the left placket’s innermost edge (opposite the placket opening) and stitching across at the level of the line you drew on the placket. Pivot and continue to edgestitch around the placket to finish it, as shown.
- That’s it! From here you’ll continue with the rest of the Classic Shirt instructions to finish your shirt/dress. That wasn’t too bad, was it?


I’ll be back again on Friday with another post to talk you through the pocket and self tie for this dress. See you then!