

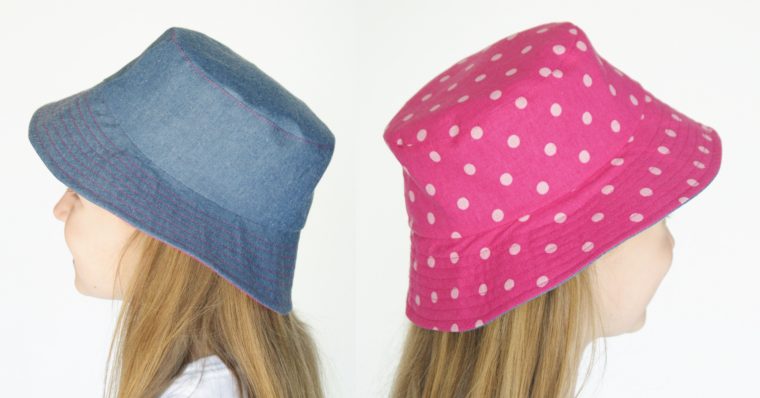
The Reversible Bucket Hat is one of the most popular Oliver + S patterns. The pattern can also be found in the Little Things to Sew book. With its popularity, it’s about time we had a step-by-step photo tutorial. This is sure to make your visual heart happy.
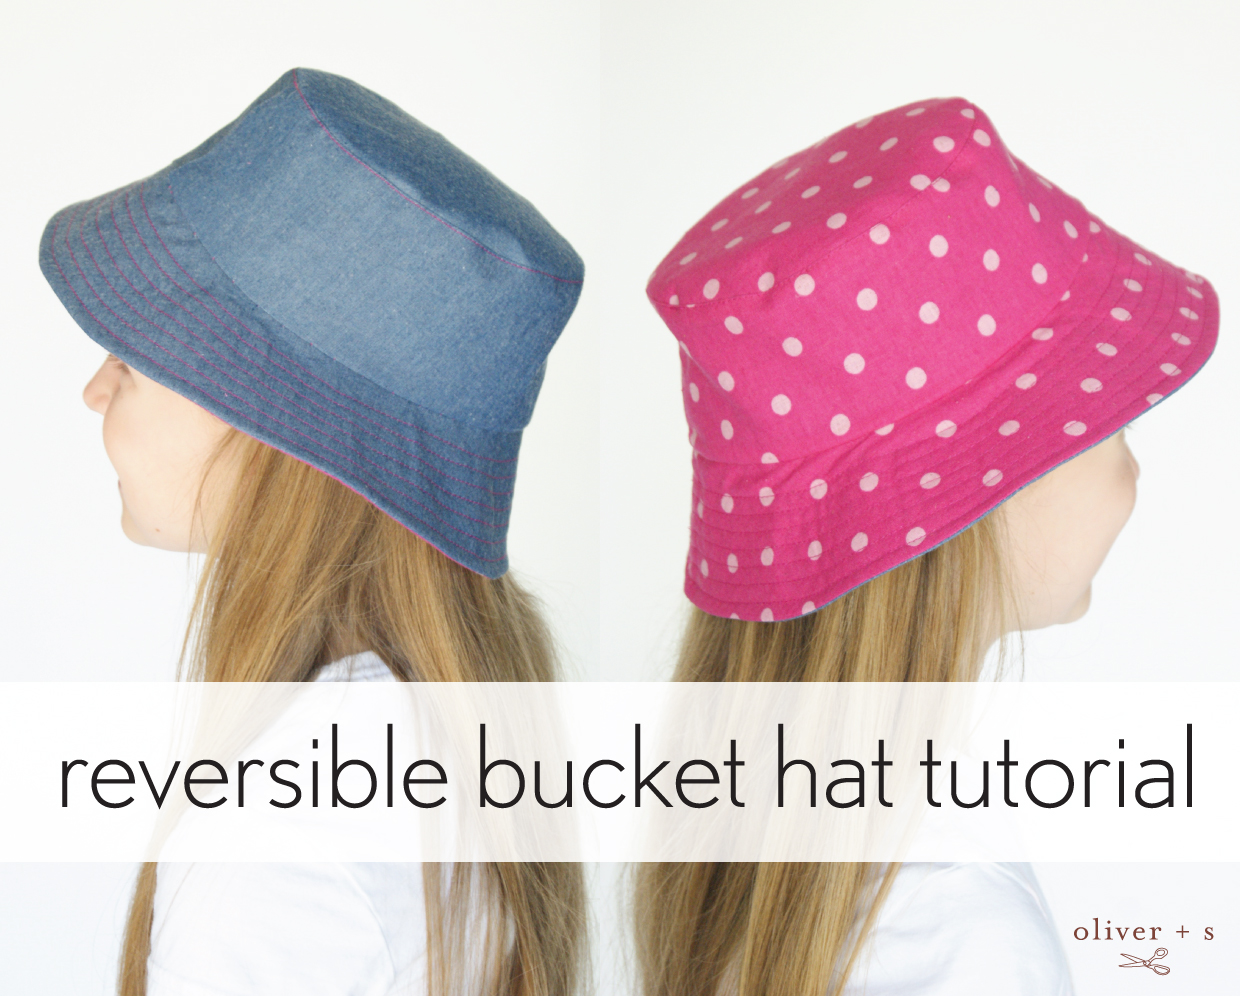
This is a pattern for both boys and girls and it comes in four different sizes. It has a difficulty level of two out of four scissors. It fits perfectly and doesn’t keep falling off. The brim is just the perfect size for keeping a child’s face from direct sun. It’s also comfortable and cute. With all of those qualities going for it, I can see why it’s so popular.
I hope everyone has their machines turned on, threaded, and ready to go.
Assemble the cap
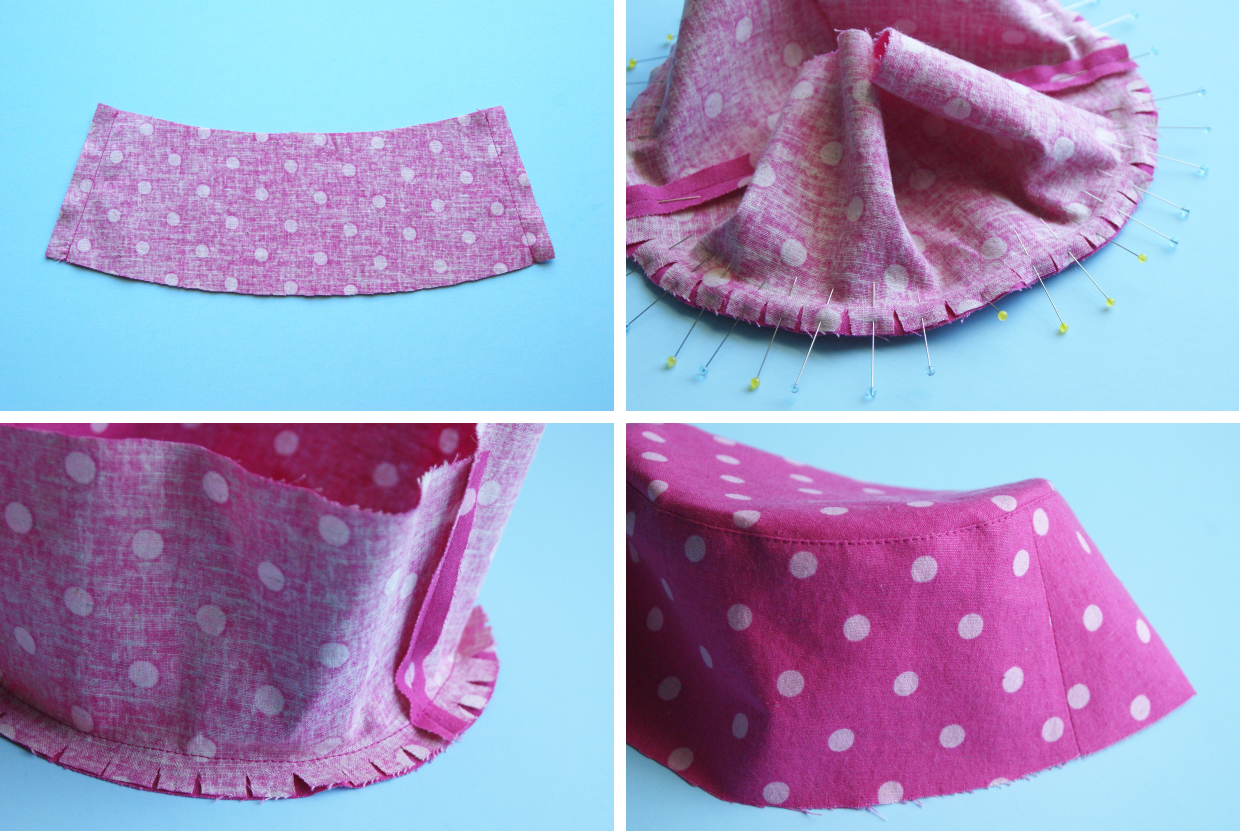
1. Starting with the cut Fabric A side panels, align and pin the two side panels, with right sides together. Stitch the side seams with a 1/2” seam; then press the seam allowances open, and trim them to 1/4”.
2. Pin the crown to the top of the side panels, matching the triple notches on the crown to those on the side panels and the crown’s single notches to the side panels’ side seams. Clip into the seam allowances of the side panels to make the side panels fit the crown; then join the sides and crown with a 1/2” seam.
Hint: Here’s a little trick that might help: Run a basting stitch just a little inside where the stitching line will be–in this case, a little smaller than 1/2″–and use that as a clipping guide for the pieces that need to be clipped. That way you’ll know how much you can cut into the fabric before you start pinning. If you clip every 1/2″ or so you’ll release the seam allowances and allow the stitching lines to match up.
3. Finger-press the seam allowances toward the side panels; then edge stitch the seam allowances to the side panels, if desired, to give the top of the hat a finished look. Trim the remaining seam allowances to 1/8”.
4. Repeat steps 1-3 to sew the second cap from Fabric B.
Make and attach the brim
1. Align and pin two cut Fabric A brims, with right sides together; and stitch the sides with a 1/2” seam. Press the seams open, and trim the seam allowances to 1/8”.
2. Align and pin the interfacing pieces to the wrong side of the two Fabric B brims. Then align and pin these two “interfaced” Fabric B brim pieces, with the Fabric B sides together, and join the sides with a 1/2” seam. Press the seams open, and trim them to 1/8”, as in Step 1, above.
3. Align and pin the interfaced (Fabric B) and uninterfaced (Fabric A) brims, with right sides together. Stitch the outside edges together with a 1/2” seam; then trim the seam allowances to 1/8”.
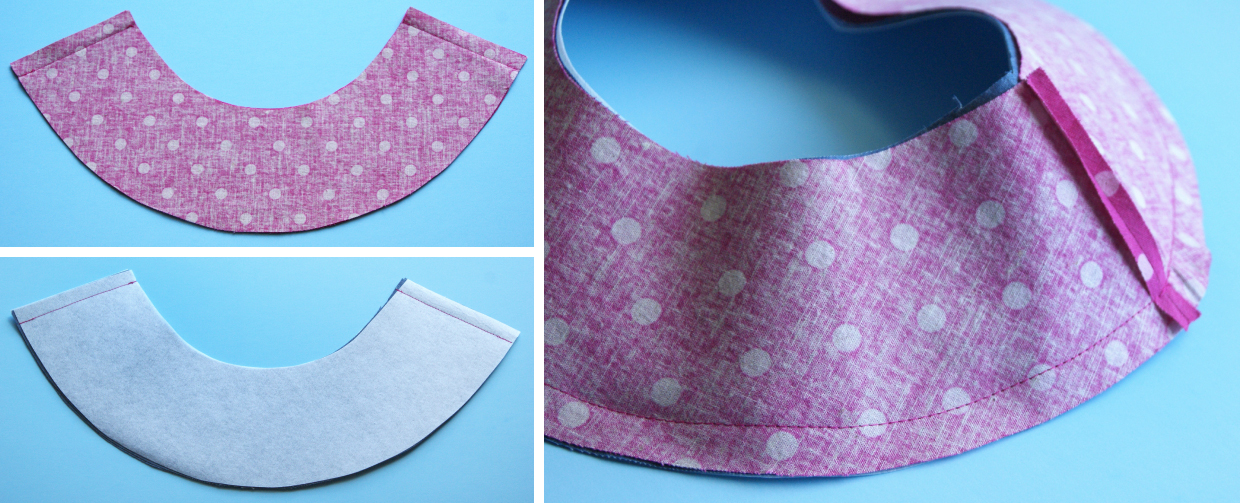
4. Turn the brim right side out, and finger-press the edges before pressing them with an iron. Edgestitch or topstitch the outside edge with a 1/4” seam. If you want, you can also topstitch a series of rows around the brim spaced 1/4” apart to give the bucket hat a sporty look and add additional stiffness to the brim.
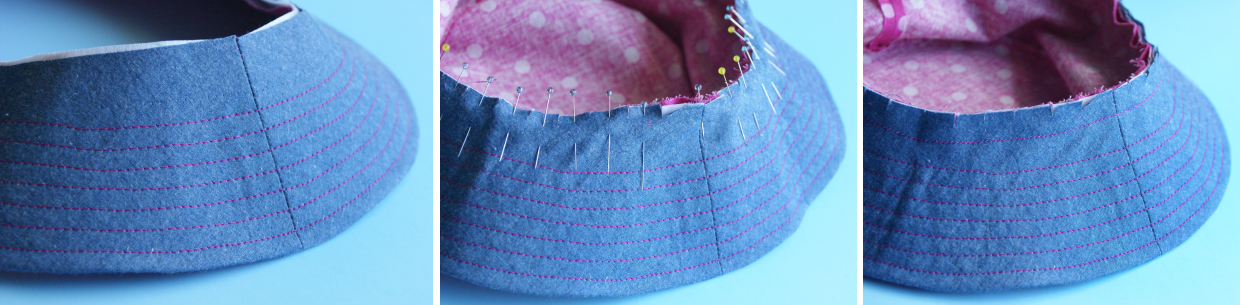
5. Align and pin the brim to the bottom edge of the Fabric A cap, with right sides together and clipping into the brim’s seam allowances to make the two edges fit. Stitch through all the layers to attach the brim to the cap with a 1/2” seam.
6. Trim the seam allowances to 1/4”; then turn the hat wrong side out.
Finish the hat
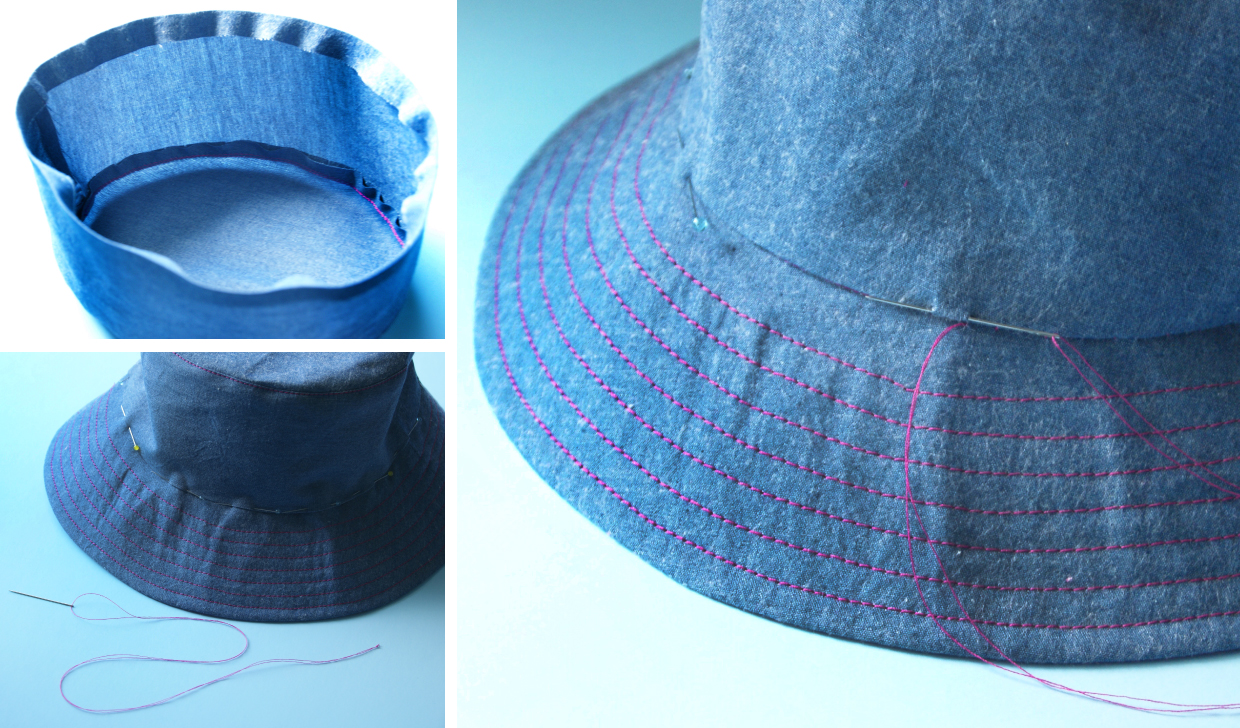
1. Fold and press the bottom edges of the Fabric B cap toward the wrong side by 1/2”.
2. Fit and pin the Fabric B cap over the Fabric A cap, with wrong sides together and the side seams aligned. Hand-stitch the Fabric B cap’s folded edge to the hat with a blind stitch, covering the seam line.
Turn the hat so that the Fabric A side is right side out again, and edge stitch the seam where the side panels and brim meet. This seam will help to secure the two sides of the hat, so they stay together.
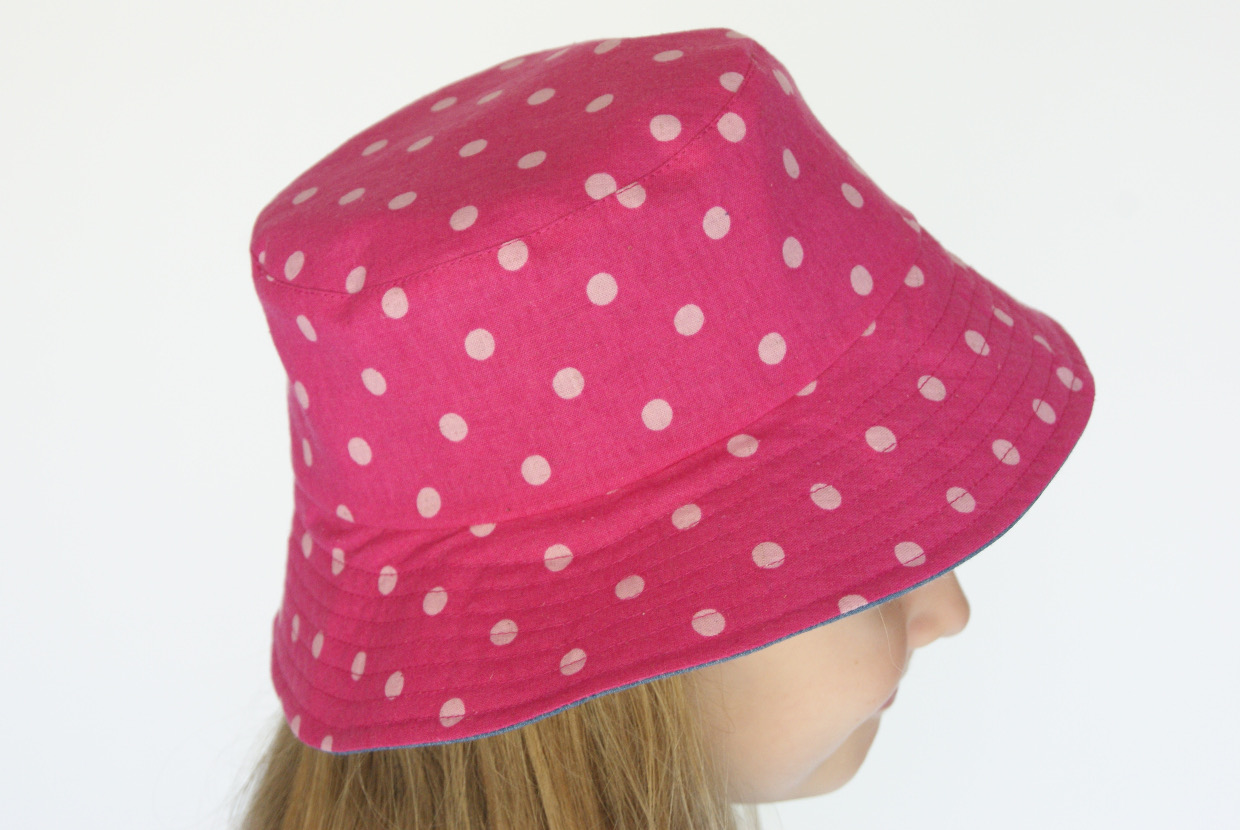
You are done!
If you are looking for more ideas for the Reversible Bucket Hat pattern, here you go:
- turn it into a “Cat in the Hat” hat
- an adjustable drawstring chin strap
- with bias trim along the outer edge of the brim (another one)
- add a chin strap (another one)
- add grommets to feed a strap through and add faux piping to the edge of the brim
- add grommets to both sides and a thin strap to tie under the chin
- with a widened brim
- with a widened brim and a pom-pom trimmed brim
- fun piping detail added
- add a strap that stays on with a button
- use one of the pattern pieces to make a doll skirt