
We welcome Sara back today. Sara blogs at Radiant Home Studio and on her previous visit she talked about her favorite pattern. Now she is here to share a beautiful project she recently completed. Wait until you see the Sashiko embroidery that she did on the yoke of the Hide-and-Seek Dress! She’s going to share the steps she took in order to create it. Now I’ll hand it over to Sara.
Hello! Today I’m going to show you how to customize the Hide-and-Seek Dress with Sashiko embroidery. I first experimented with Sashiko on a blouse for myself last year. I loved the result and started looking for other patterns that could be embellished with Sashiko stitching. The Hide-and Seek Dress has the perfect yoke space for embroidery.
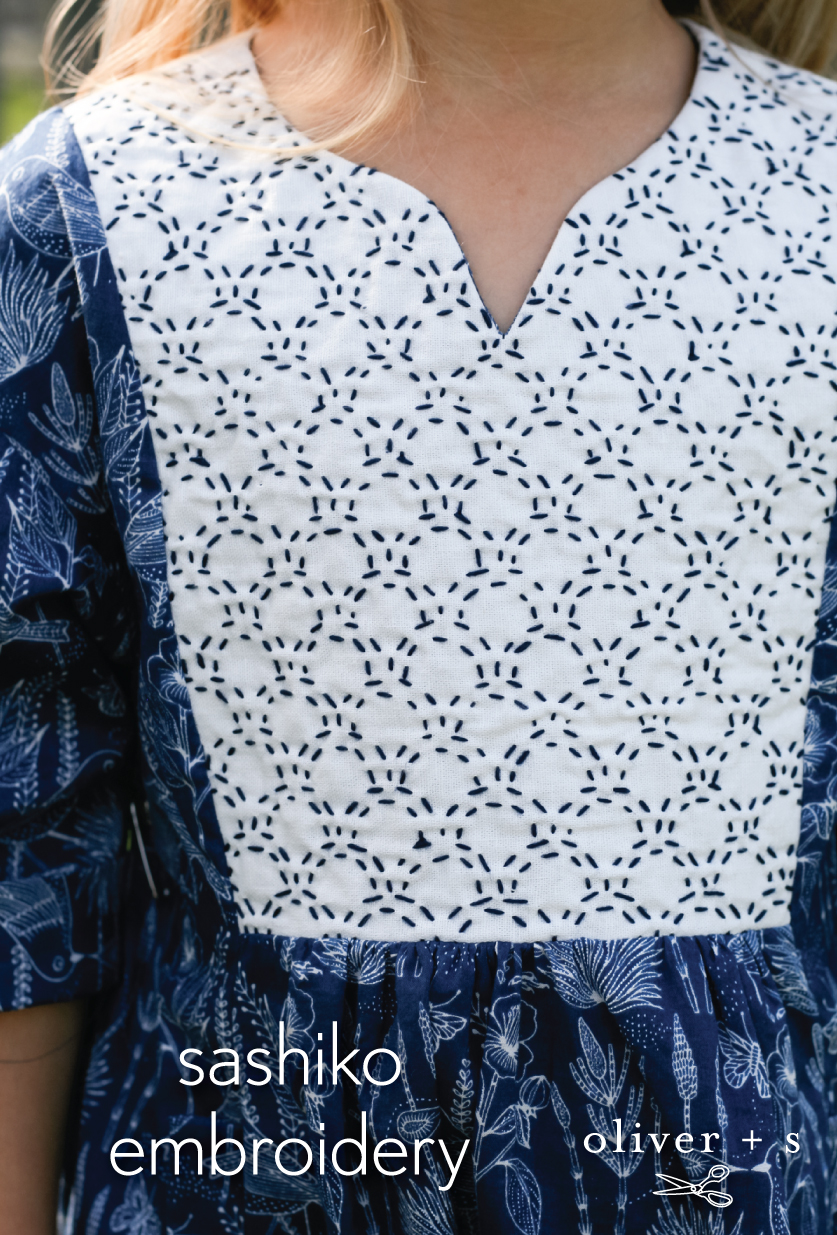
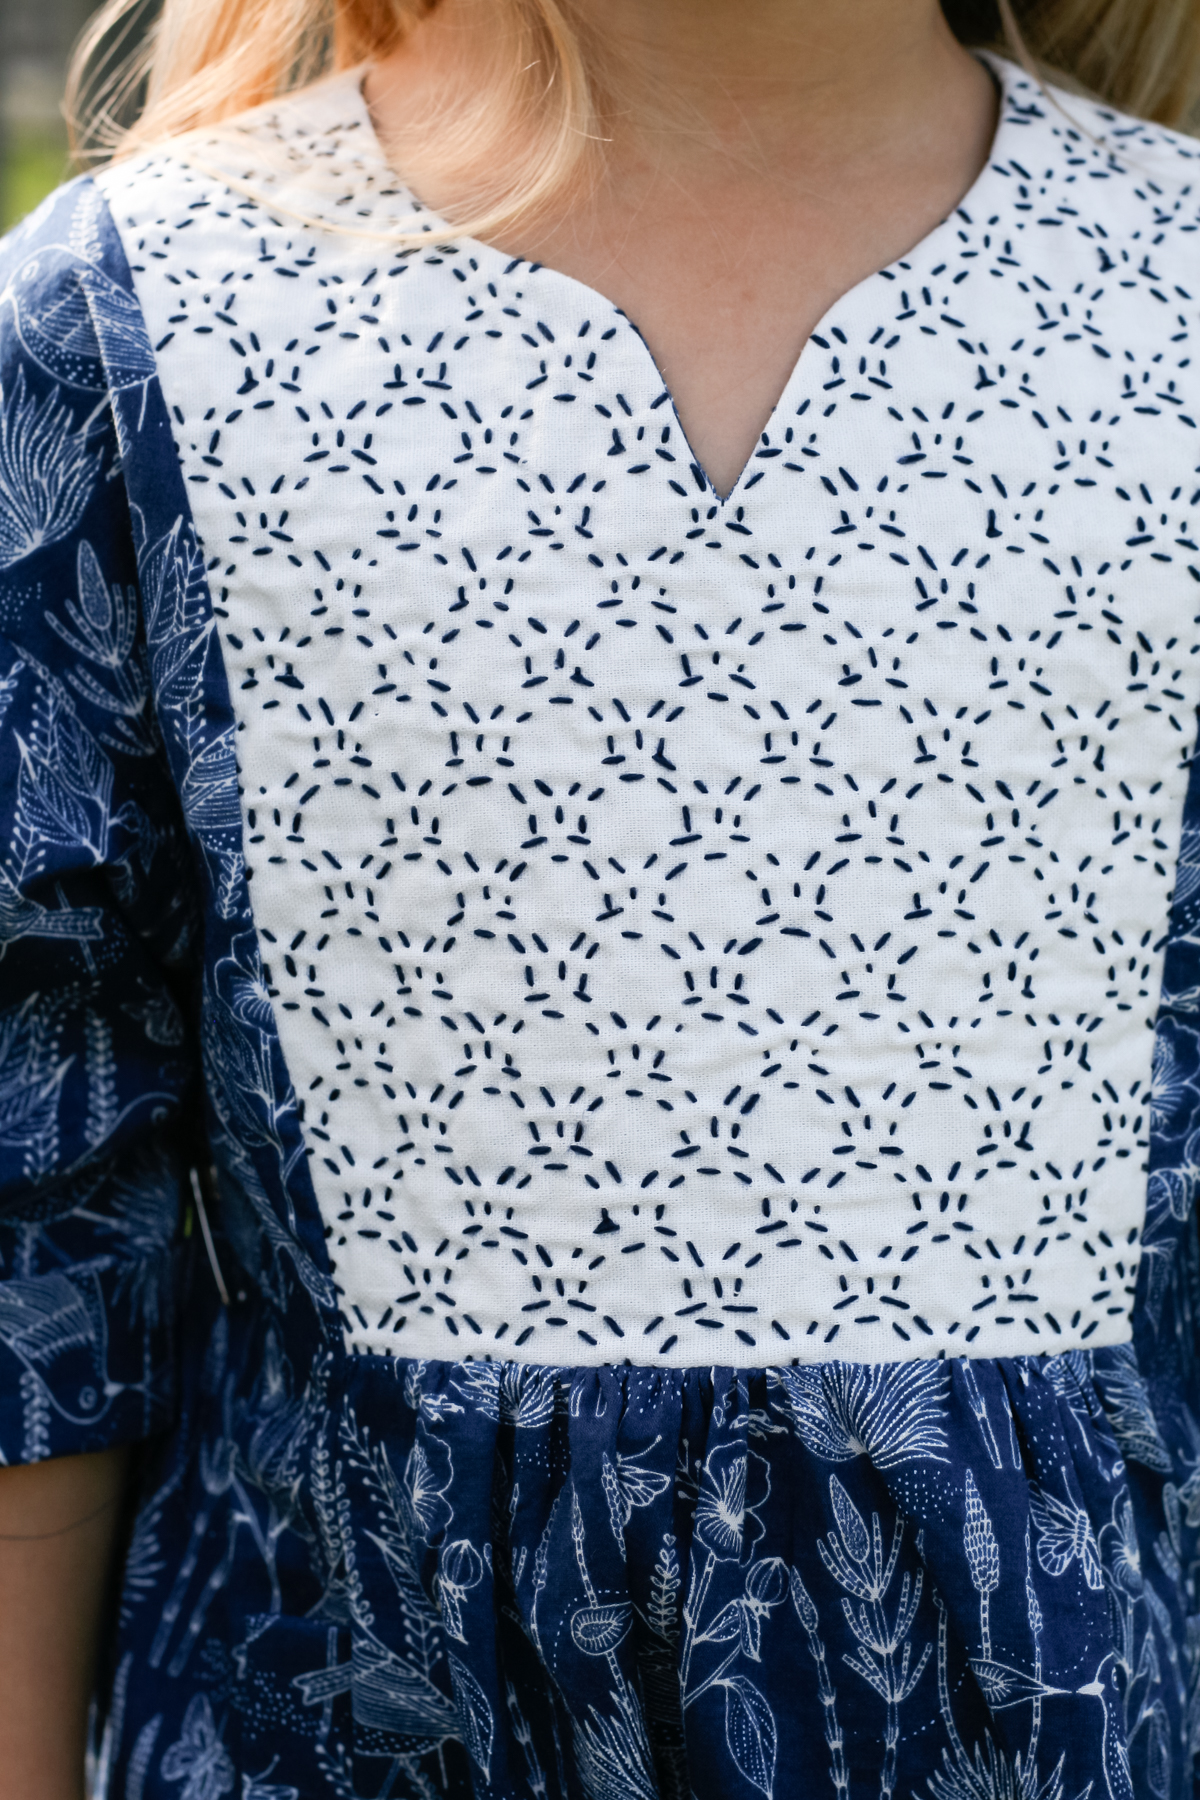
Traditional Japanese Sashiko stitching uses white thread on indigo fabric. The stitches are usually straight lines and geometric shapes. Though we normally use patterns to transfer our embroidery designs to our fabric, traditional Sashiko stitching was done without a pattern using the woven warp and weft threads as a guide for the geometric design.
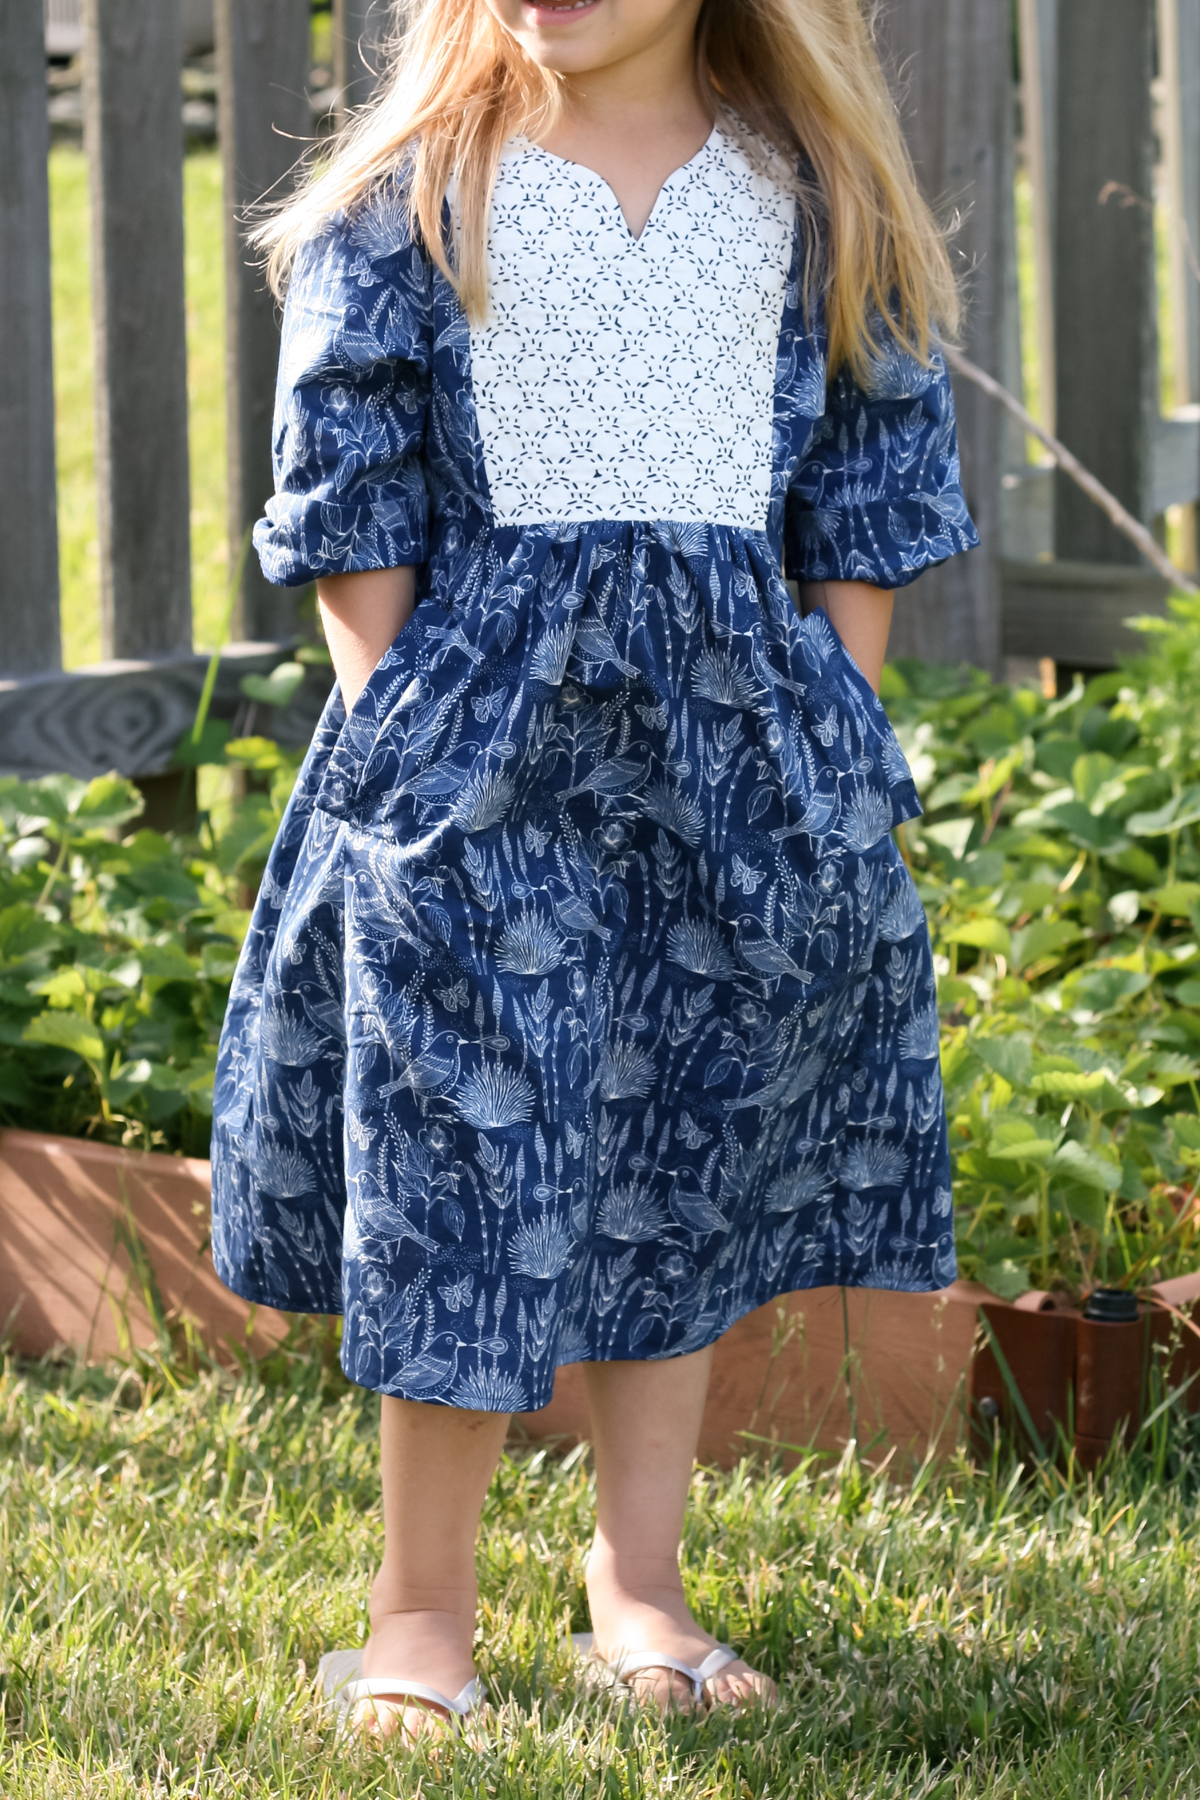
The main dress fabric is voile from the Moody Blues Collection by Geninne. The indigo color palette and Japanese inspired detail is a perfect complement to the Sashiko embroidery. I chose to stitch a clamshell design, reversing the traditional Sashiko colors. With dark fabric for the main part of the dress, I thought the embroidery detail would stand out more with a white background and dark blue thread. I used a similar color palette last year on a blouse for myself.
I also special ordered an embroidery needle and thread that are specifically designed for Sashiko stitching. The needle is slightly longer than a regular embroidery needle, allowing you to make several stitches at once before pulling the thread through the fabric. The thread is a similar weight to embroidery floss, but cannot be pulled apart as easily. It also feels slightly less glossy. Though these supplies are nice to have, you can still achieve a beautiful embroidered yoke with regular embroidery needles and floss from the craft store.
To add Sashiko stitching to the yoke of your Hide-and-Seek Dress, you’ll need some lightweight fusible interfacing and a Sashiko pattern. Many of the geometric patterns are easy to replicate with a ruler and pencil. Or if you have basic design skills, you can make your own digital pattern with your favorite design software. You can also find Sashiko kits with preprinted designs on squares of fabric that are big enough to use for the yoke.
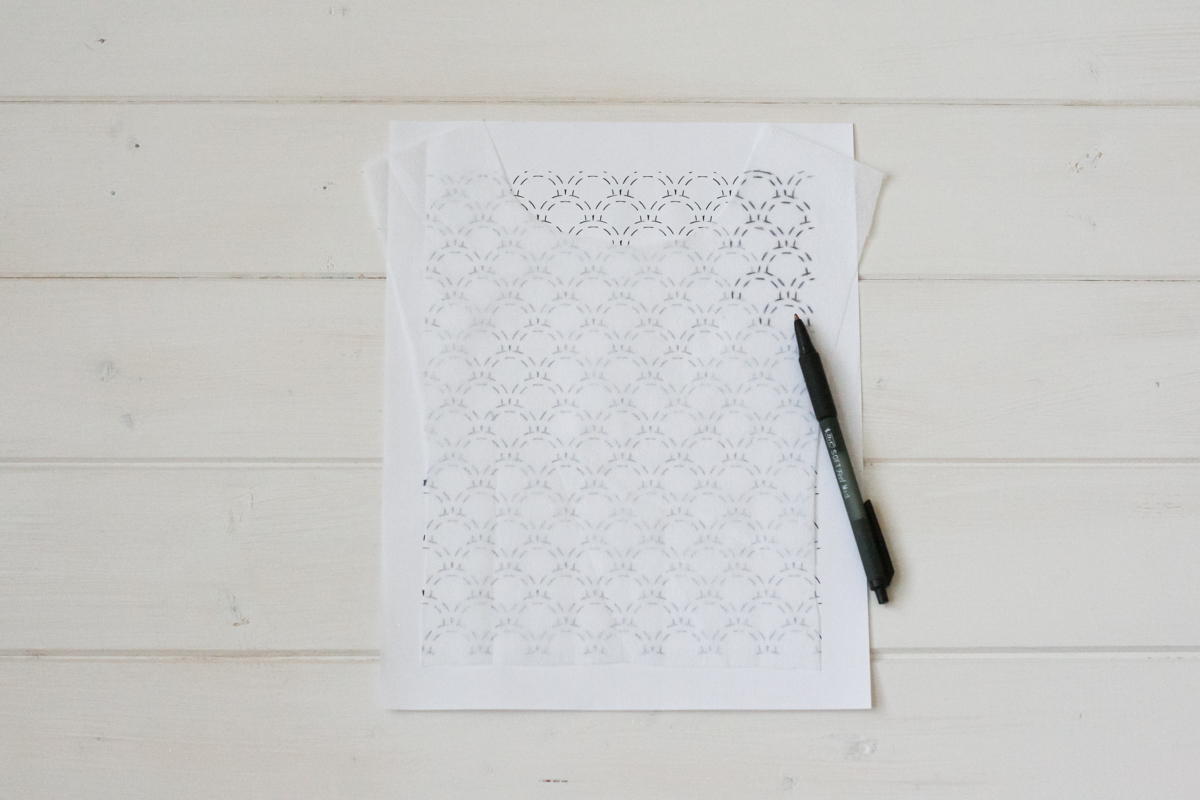
Start by cutting out a piece of interfacing using the front yoke pattern piece. (I noticed that the stitching made the yoke piece “shrink” a bit. If you are worried about that, cut the next size up and trim off the excess after you finish stitching.)
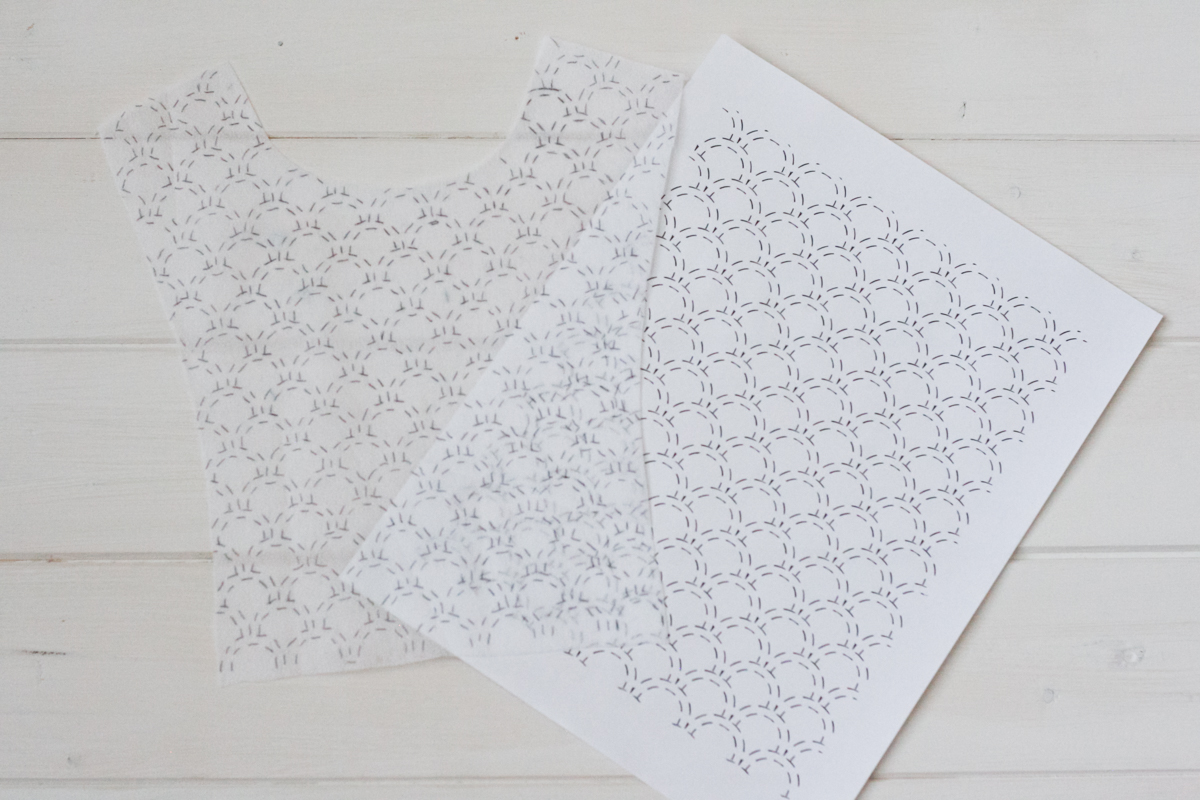
Place the interfacing (glue side down) over the pattern design you want to use and trace it. You’ll want to center the pattern on the yoke so that the notch point looks centered when you finish. I experimented transferring the pattern with water-soluble markers and tailors chalk, but both faded before I finished stitching. I didn’t have an embroidery transfer pen to try, so ballpoint pen seemed to be the best option for me. I have also used pencil successfully.
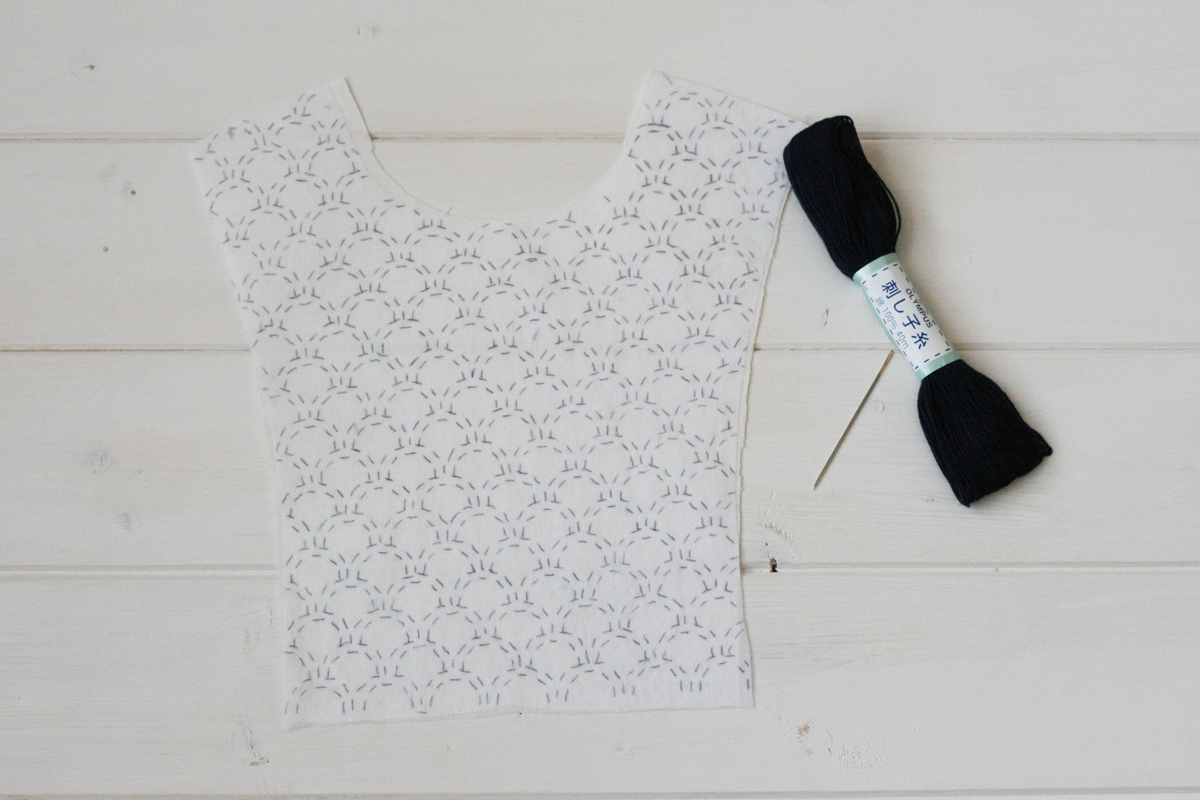
When you finish transferring the pattern, fuse it to the wrong side of the front yoke piece and begin stitching. I stitched horizontally, back and forth across the rows. None of the stitches should cross over each other on the front of the yoke.
I finished my embroidery over three days, working while I sat outside with the kids. I would guess the total added time was about three hours. It might sound like a lot of work, but if you keep your project nearby there are plenty of minutes during the day when you can pick up your embroidery and add a few stitches!

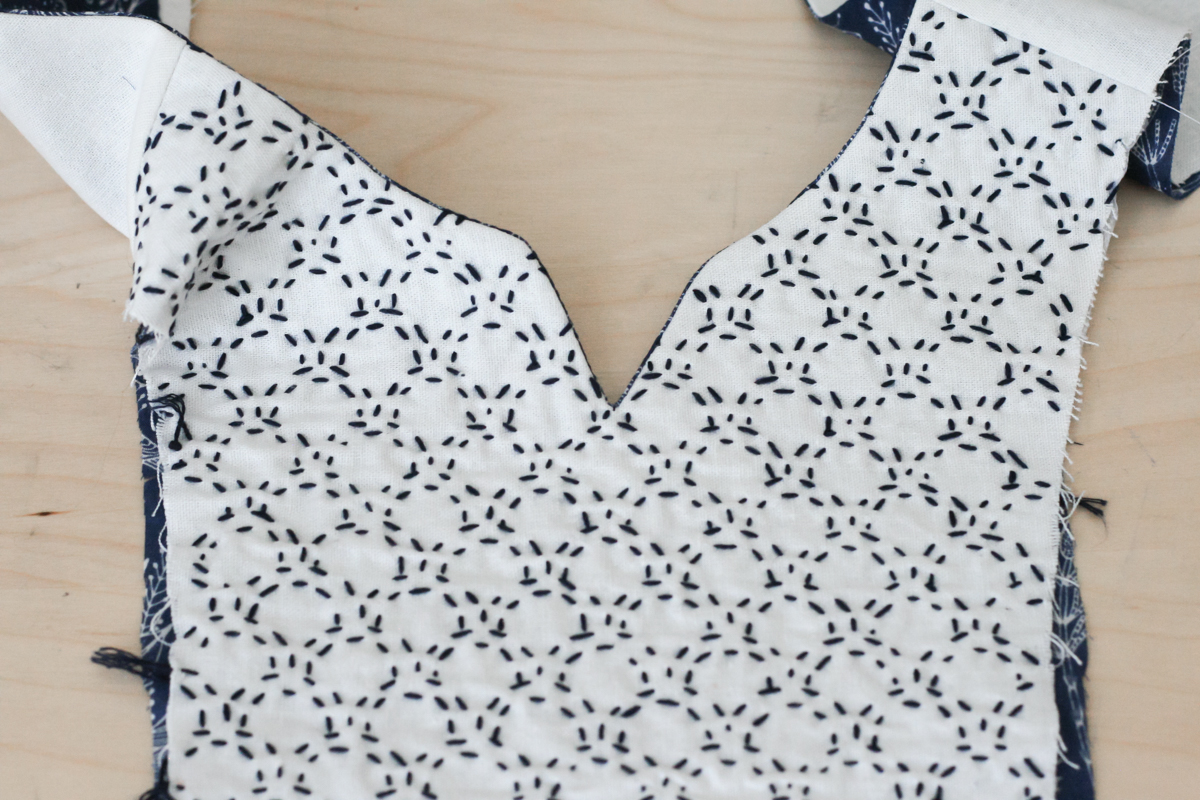
After the Sashiko embroidery is done, just follow the pattern instructions as usual. I’ve included another photo of the bodice construction so you can see it in process.
For more Sashiko help, you can find a round up of articles and projects on my blog. It also includes a link to download and print the pattern I created for my Hide-and-Seek Dress.

Sara, thank you so much for sharing your tutorial, the dress is exquisite!