
About five years ago (has it been that long?!?) I wrote a guest post for the Janome blog on how to use a serger to make a lettuce hem on knits. In the intervening years, that post has been eaten by the internet. Someone recently found a reference to it buried deep within Google’s memory and asked if we could bring the post back. I thought that would be a good idea, so we’re rerunning it today. The method is timeless, and is a good one, so here’s the post again. If you are interested in how to make a lettuce hem using a sewing machine, head this way.
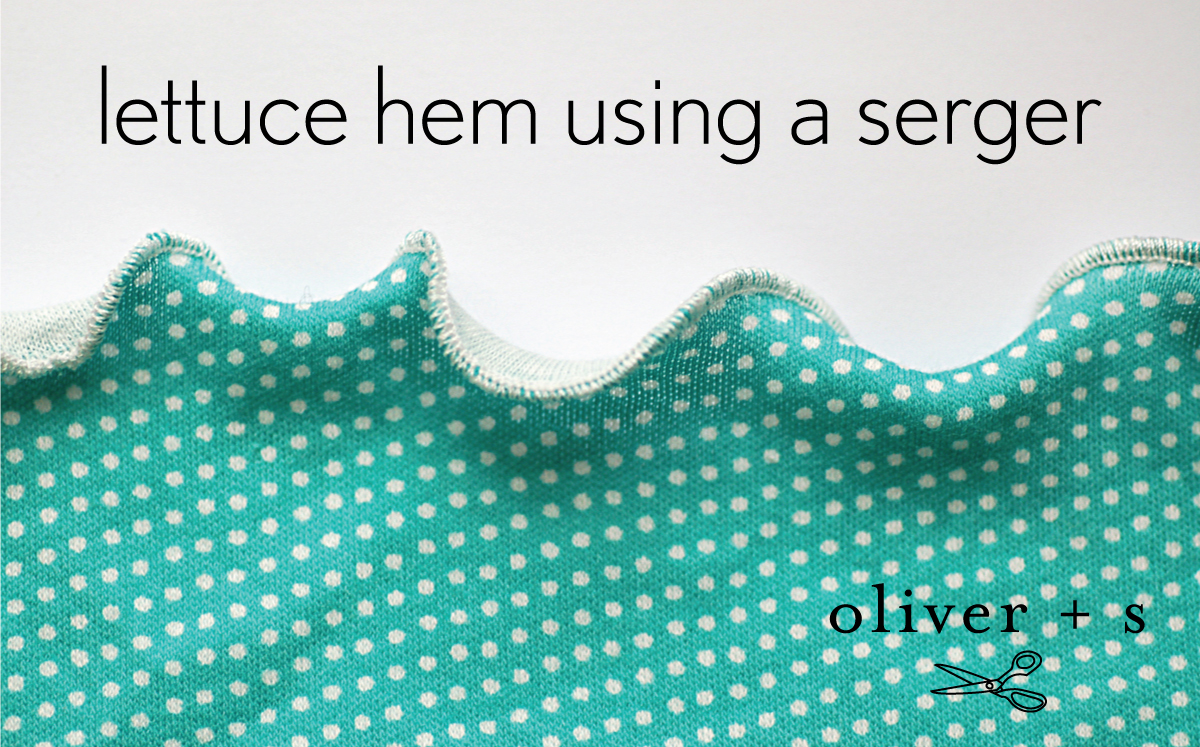
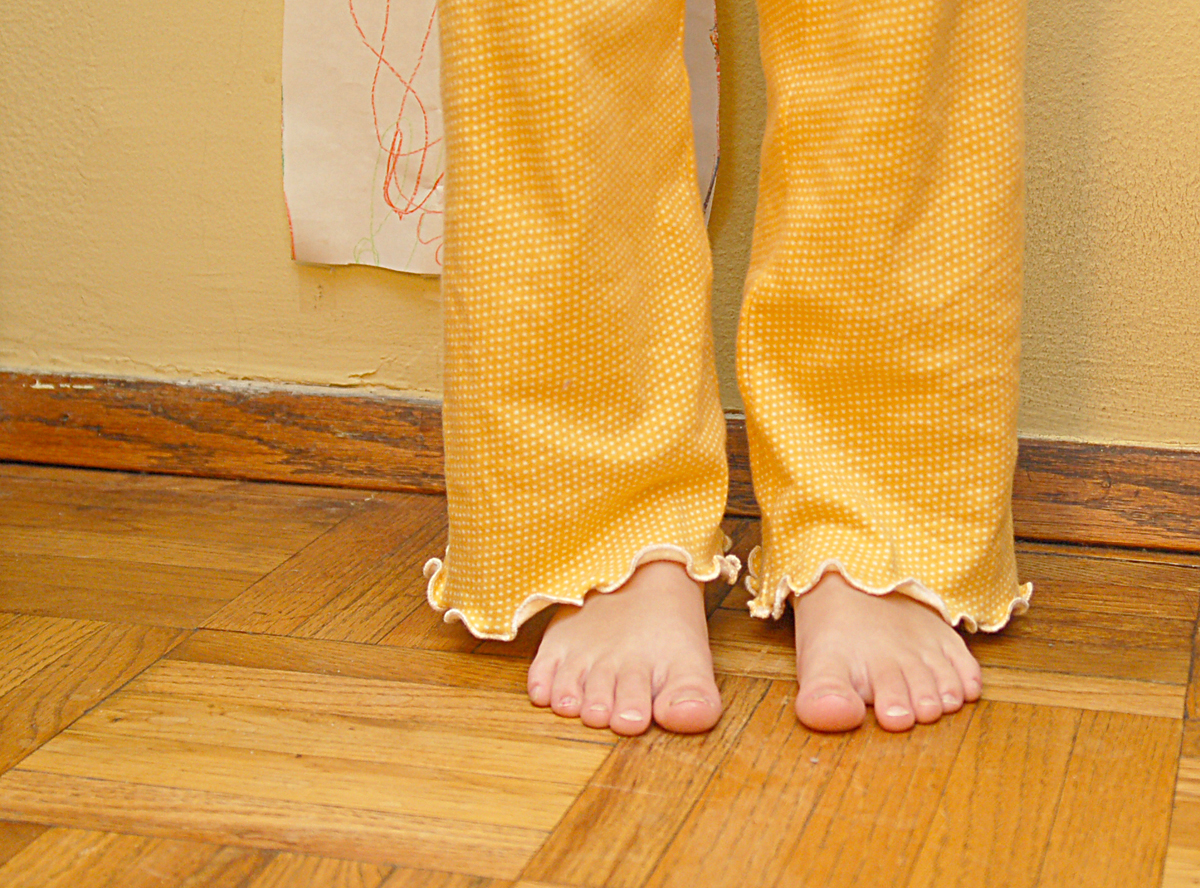
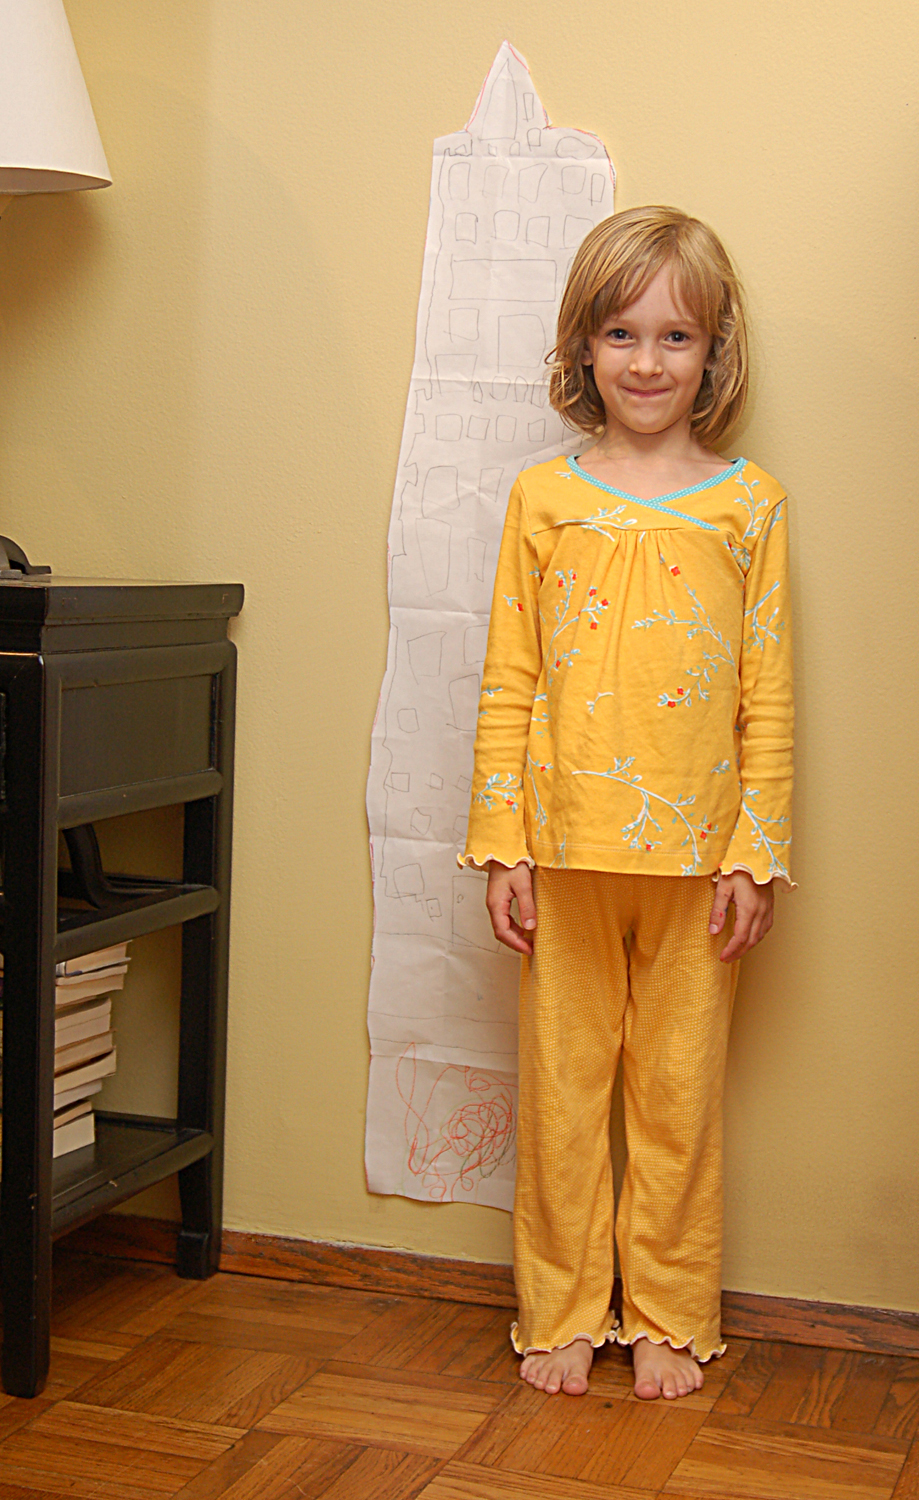
We’ve been playing with our new collection of printed interlock knits (called City Weekend and available at independent fabric shops via Moda) and our Janome 1100D serger, and I wanted to show you how to do an easy lettuce hem on your knits. For this example, I sewed pajamas for my daughter (the S of Oliver + S) using two of our newest patterns: the Hopscotch Top and the Nature Walk Pants. I selected three coordinating City Weekend interlock knits and added a lettuce hem on the sleeves and pant legs to give them a sweet, delicate finish.

Let’s get started.
The Hopscotch Top and Nature Walk Pants patterns are designed for knits, and the instructions will teach you how to sew with knits using a serger or a sewing machine. I love using a serger to because it is extremely fast and gives a beautiful finish to the garment. I really like the 1100D because the tension adjusts automatically, so you simply need to change a few settings on the machine and you’ll be ready to go.
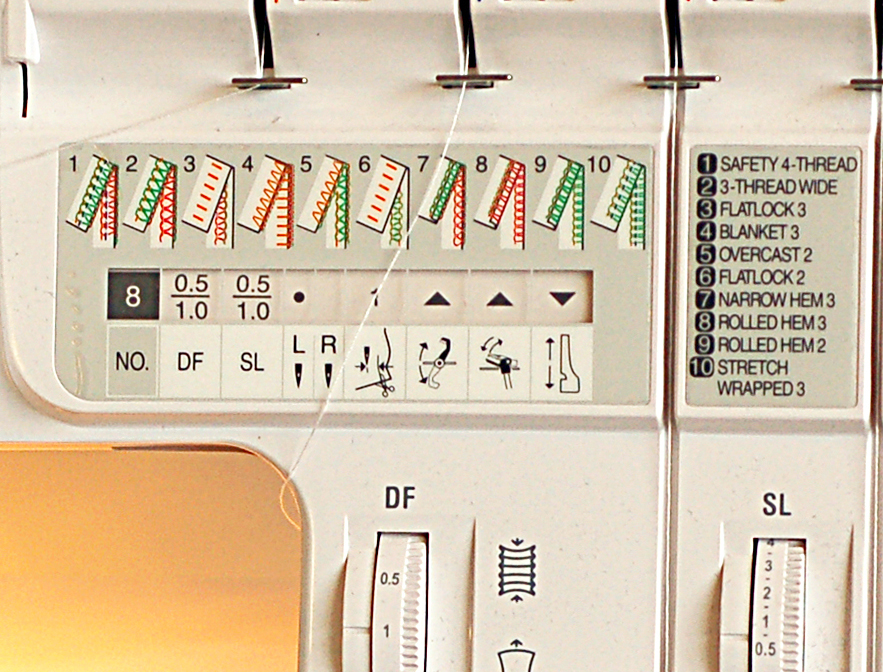
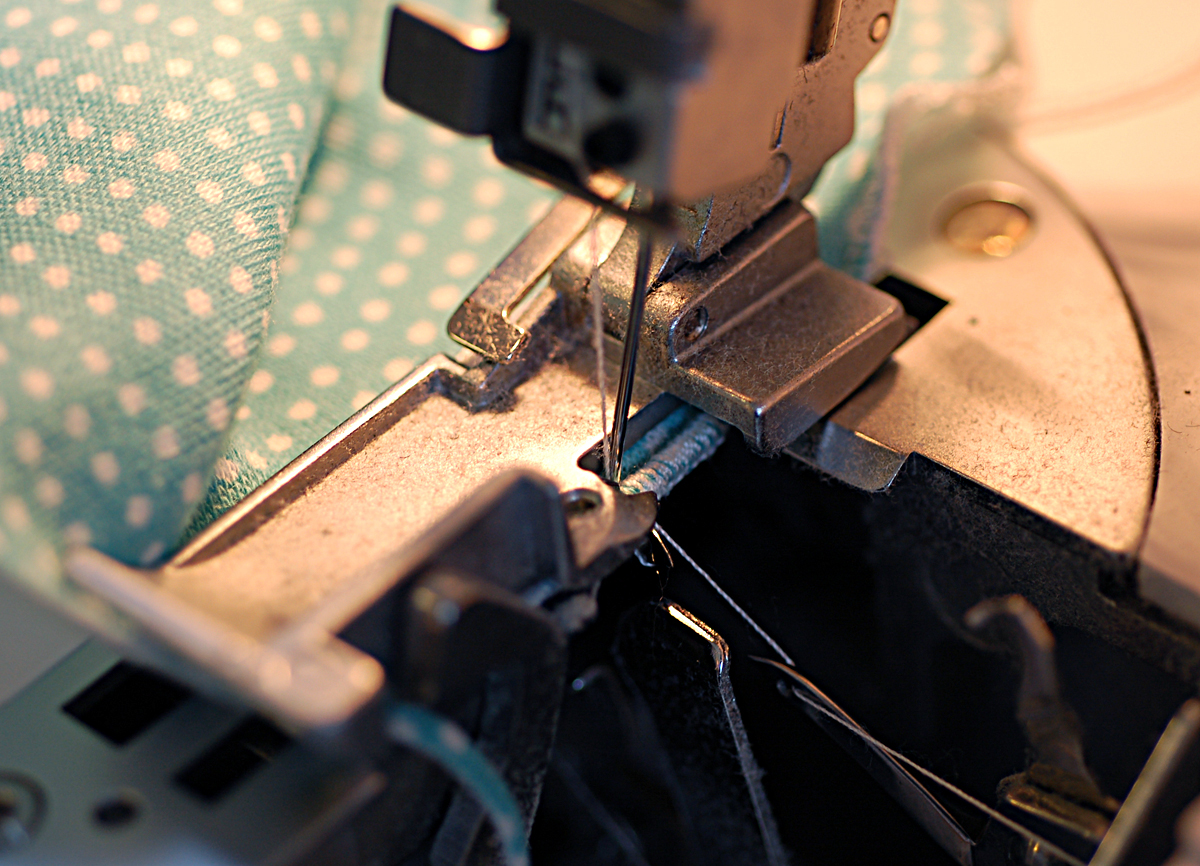
Stitch number 8: Once you’ve selected stitch 8, the rolled hem 3 stitch, you simply follow the symbols displayed in the windows to set up the machine properly. I like that the little windows show you how to set up the machine. Refer to your user’s manual if you haven’t changed the settings on your machine before and need a little extra guidance. It’s quite simple to do.
Here are the specific settings I used.
Differential Feed: Set the differential feed (DF) to 1. (I didn’t play with this setting, but I suspect that if you set this to a number higher than 1 it would do some stretching for you and you would need to stretch the fabric less when you stitch the hem.)
Stitch Length: Set the stitch length (SL) somewhere between 0.5 and 1. I set it halfway between the two numbers so the stitches were close together but the fabric kept moving through the machine as I stitched. If you want even more waves to your lettuce edge, you could set this number at 0.5 so the stitches are closer together.
Needle position: Remove the right-hand needle: this is easy to do, and it disengages the blue thread (#4) for the stitch.
Cutting width: I found that the cutting width is important for this hem. If the cutting width is too narrow, the hem doesn’t fold over enough and looks messy when finished. Too wide, and it doesn’t look delicate and sweet. Because you’ll be stretching the interlock as you sew it, the fabric will be narrower when stitched than it would be if you were stitching a woven fabric. After testing a few widths, I settled on a cutting width halfway between 1 and N. Try a few settings and see what works best with your fabric before you make your final hem.
Upper knife position: The upper knife is engaged for this stitch so the fabric will be trimmed to the correct width for the rolled hem. This is very useful because the knife sets up the edge perfectly for the stitch.
2-thread converter: The 2-thread converter stays up for the rolled hem stitch.
Needle plate setting knob: The needle plate setting knob needs to be lowered so the threads will wrap around the rolled hem neatly. (I was so excited to discover that the needle plate can be lowered, and now I’m starting to contemplate other things I might be able to do with this feature.)
Once you’ve got everything set up, test a few knit scraps to check the settings and get comfortable with this stitch. You’ll need to stretch the fabric as you stitch. The more you stretch, the wavier the edge. Keep the fabric stretched as evenly as possible while you work. It’s easiest to do this with a tube shape rather than a straight piece of fabric, since a tube gives you something to stretch in front and behind the needle as you’re working. (Sleeves and pant legs work perfectly!)

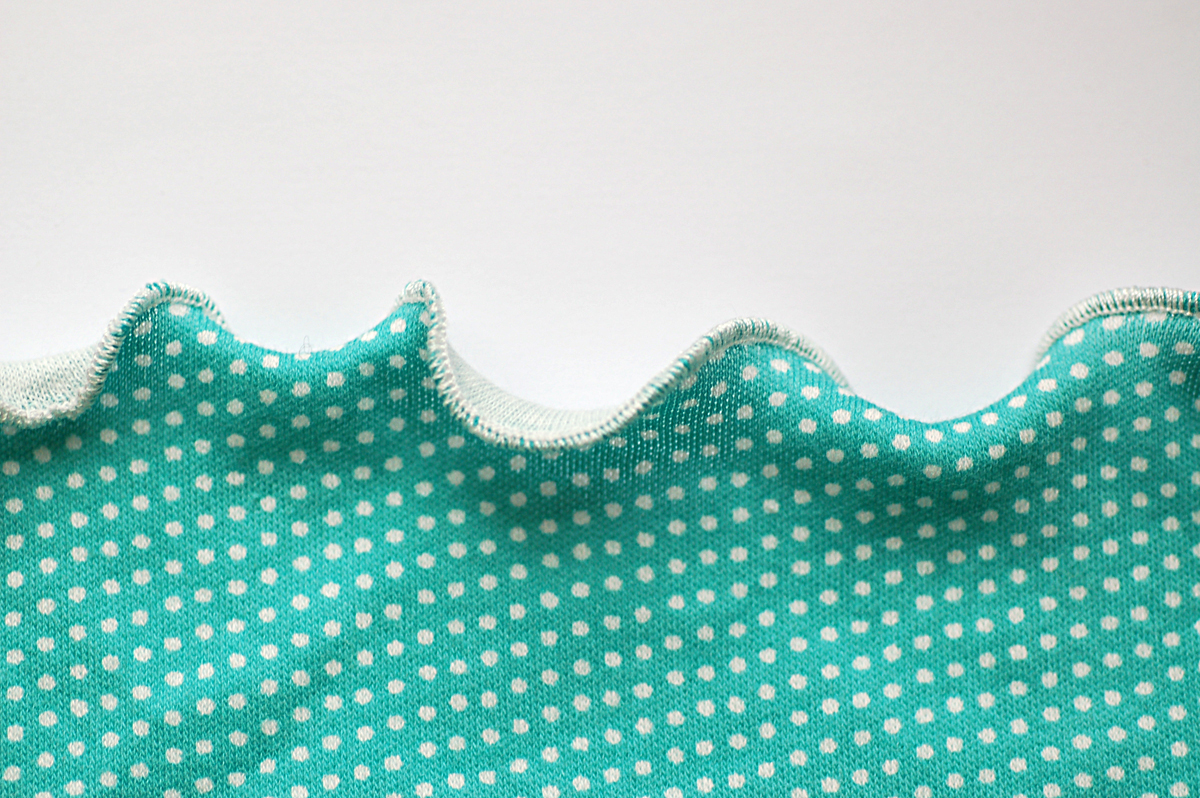
You’ll notice, when you remove the fabric from the machine, that the interlock is stretched and distorted. It won’t look very lettuce-y at first, but if you give it a few minutes to recover, you’ll see that, as the knit returns to its original shape, the hem will curl up.
Fun, yes?