
Note: The welt pocket seems intimidating if you’ve never tried to sew one before. Sometimes color photos can help decipher details and give an alternate view to the illustrations, so Kristin is here with her first Oliver + S blog post to show our technique through step-by-step photos and to demonstrate that the welt pocket is really not a difficult technique and results in a professional-looking pocket!
This tutorial uses the welt pocket pattern pieces from our Art Museum Vest + Trousers pattern, which features welt pockets on the vest and on the trousers.

The numbered steps in this post correspond to the actual instructions in the Art Museum Vest + Trouser pattern, but I’ve provided additional photos and tips along with comments and suggestions.
Ready?
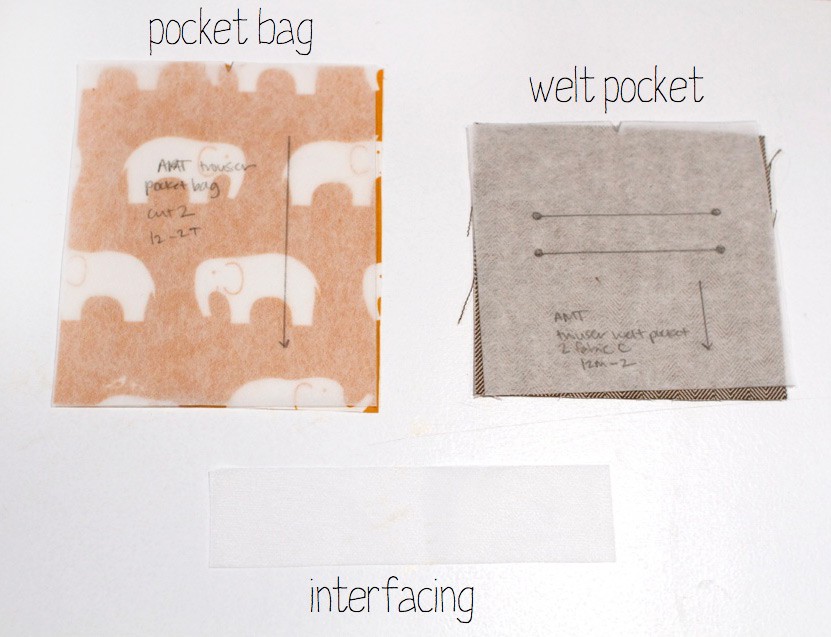
Before you start, gather the welt pocket pieces according to the pattern instructions, including the pocket bag, welt pocket, and interfacing.
Transfer all markings from your pattern to the fabric. I use Swedish tracing paper to trace the appropriate size from the pattern, then poke holes at the dots with a sharp pencil and use the holes to mark through the tracing paper directly onto my fabric with a water-soluble marking pen or tailor’s chalk to ensure accuracy. Remember to transfer the pocket placement dots to both the right and wrong sides of the vest/trouser fabric.

Sew the darts as instructed by the pattern, and let’s get ready to sew a welt pocket!
The Art Museum Vest pattern instructions follow in normal type, with my additional tips in italics. Step numbers correspond to the step numbers in the pattern.
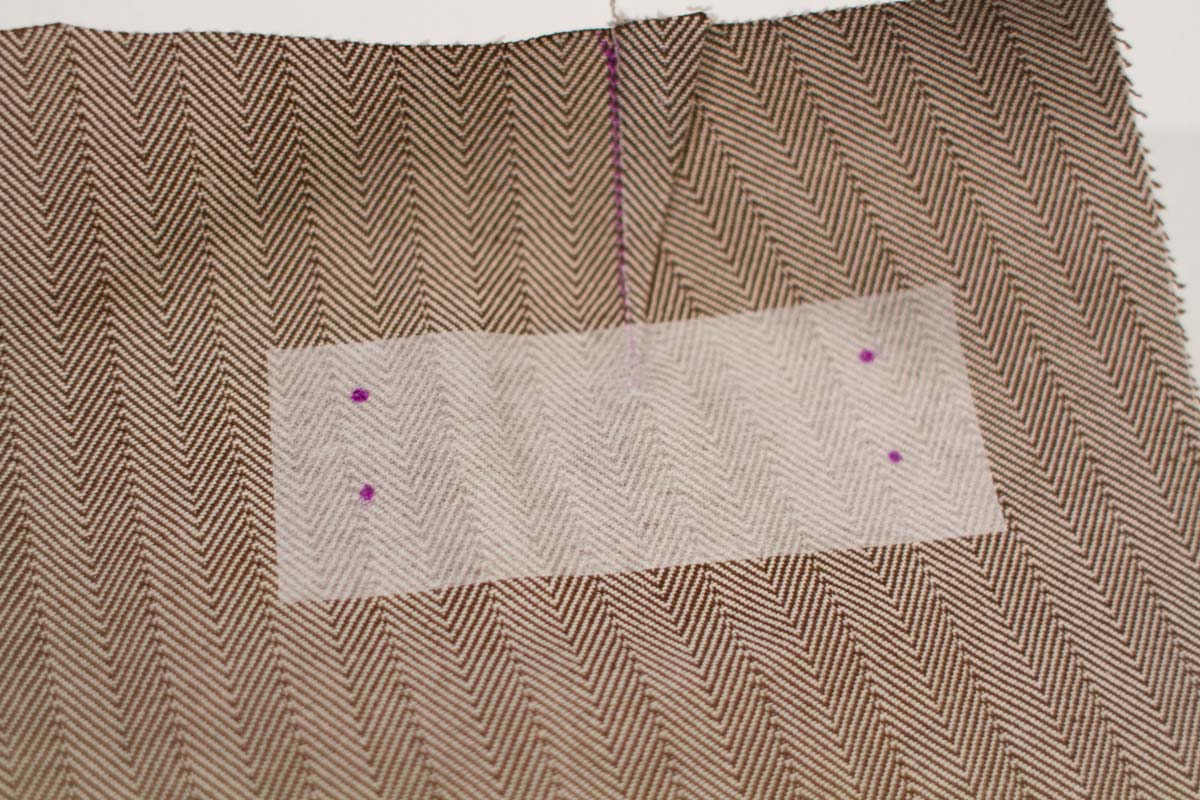
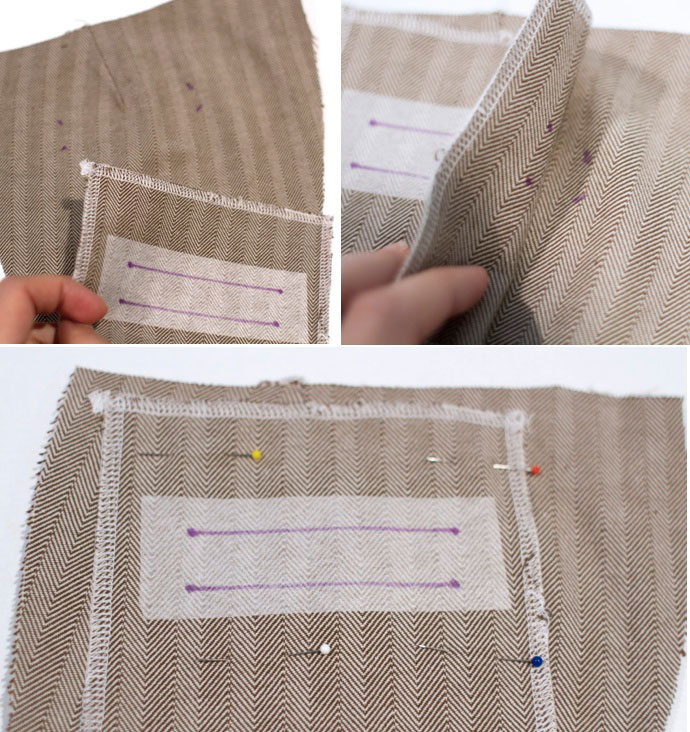
1. Trim one of the 1 1/2″ -wide strips of interfacing you set aside to be 1-2″ longer than the welt placement dots, and fuse the interfacing to the wrong side of the vest, so it covers the welt placement dots. You can use your fabric pen to re-mark the dots onto the interfacing so they show up clearly if you’d like.
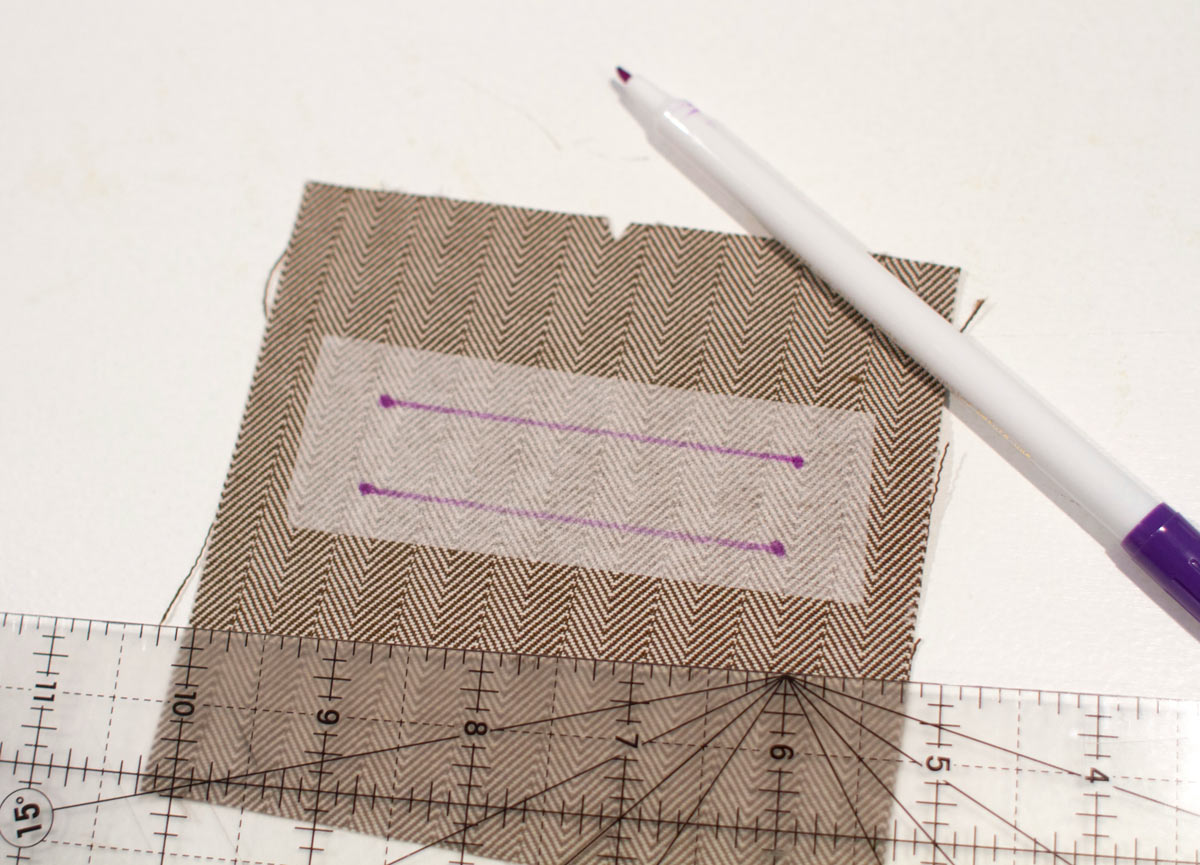
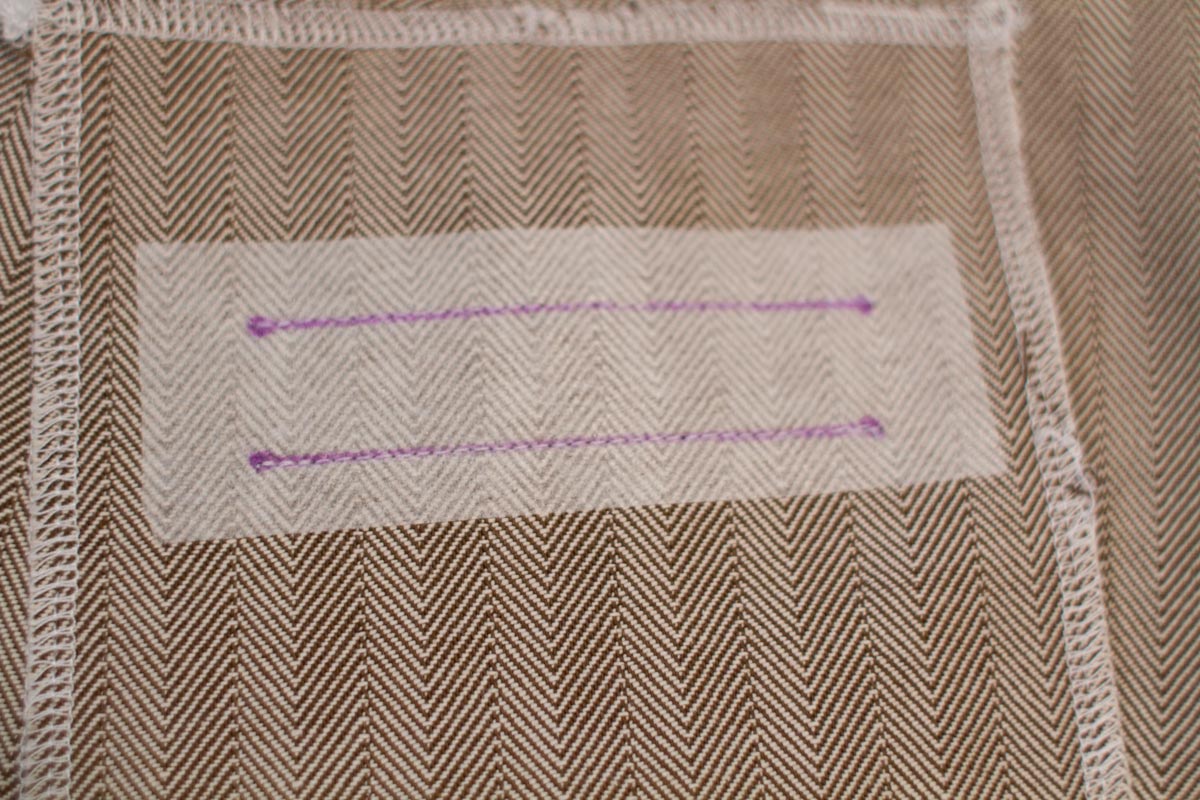
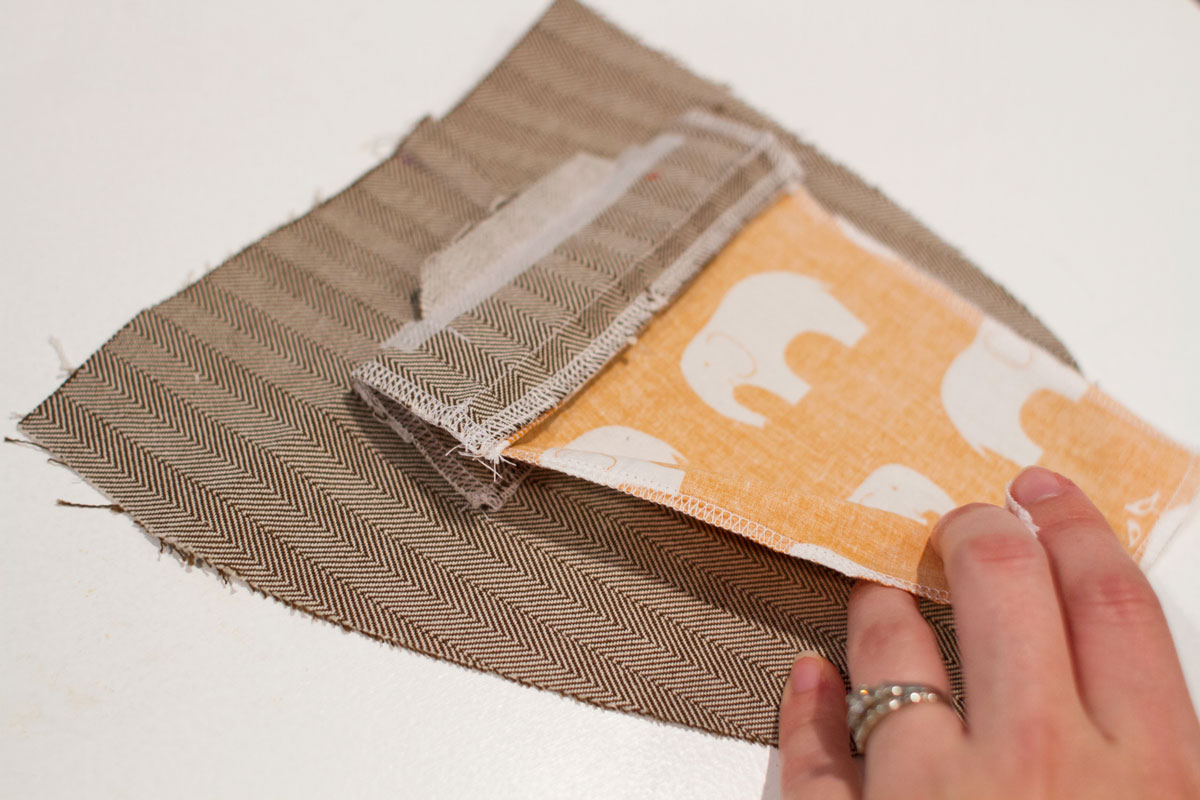
2. Trim and fuse a second strip of 1 1/2″ -wide interfacing to the wrong side of the welt pocket piece, so it covers the placement dots the same way. Using chalk, a water-soluble fabric-marking pen, or a light pencil line, connect the dots to make a rectangle. These lines will help you stitch the welt pocket, so make them as even as possible. I use a clear quilting ruler.
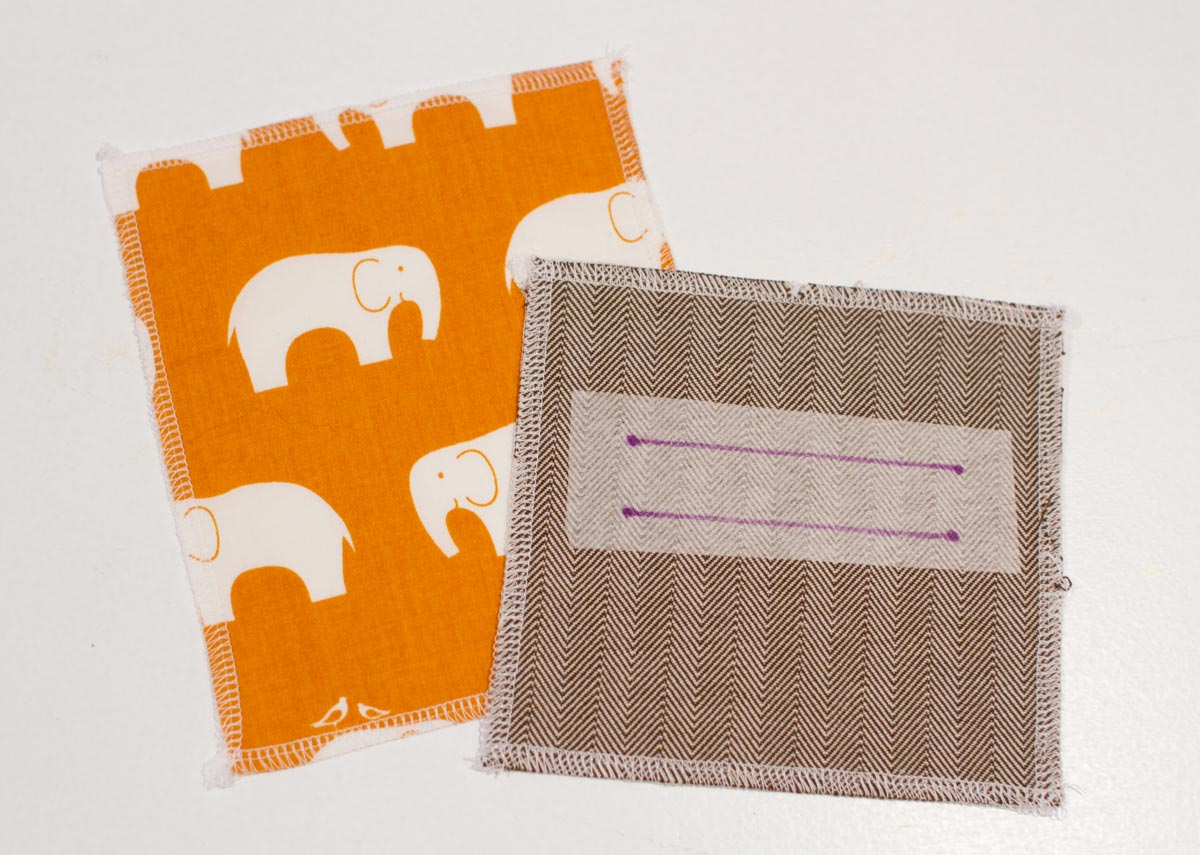
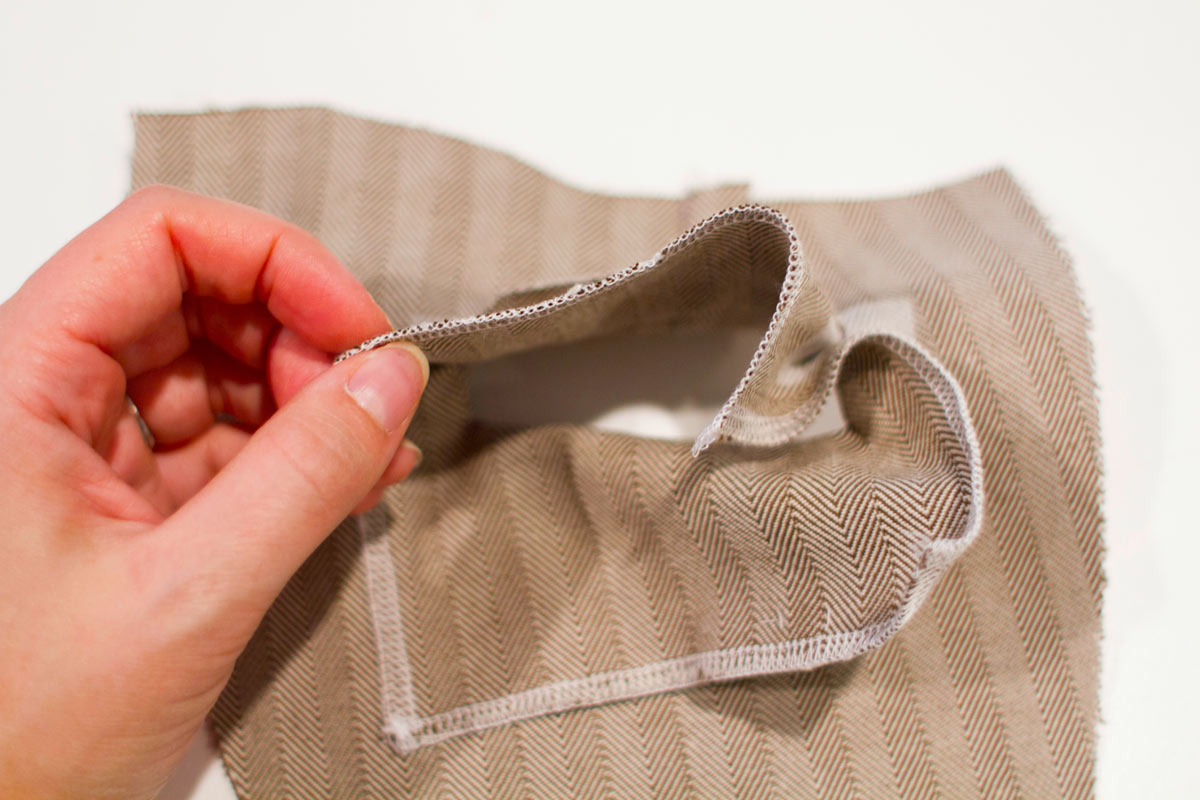
Finish the edges of the welt pocket and the pocket bag, using your preferred method. (If you’re using a serger, take care not to trim the edges as you finish them. You may want to lift the blade of the serger to prevent it from trimming as you serge, just to be sure).
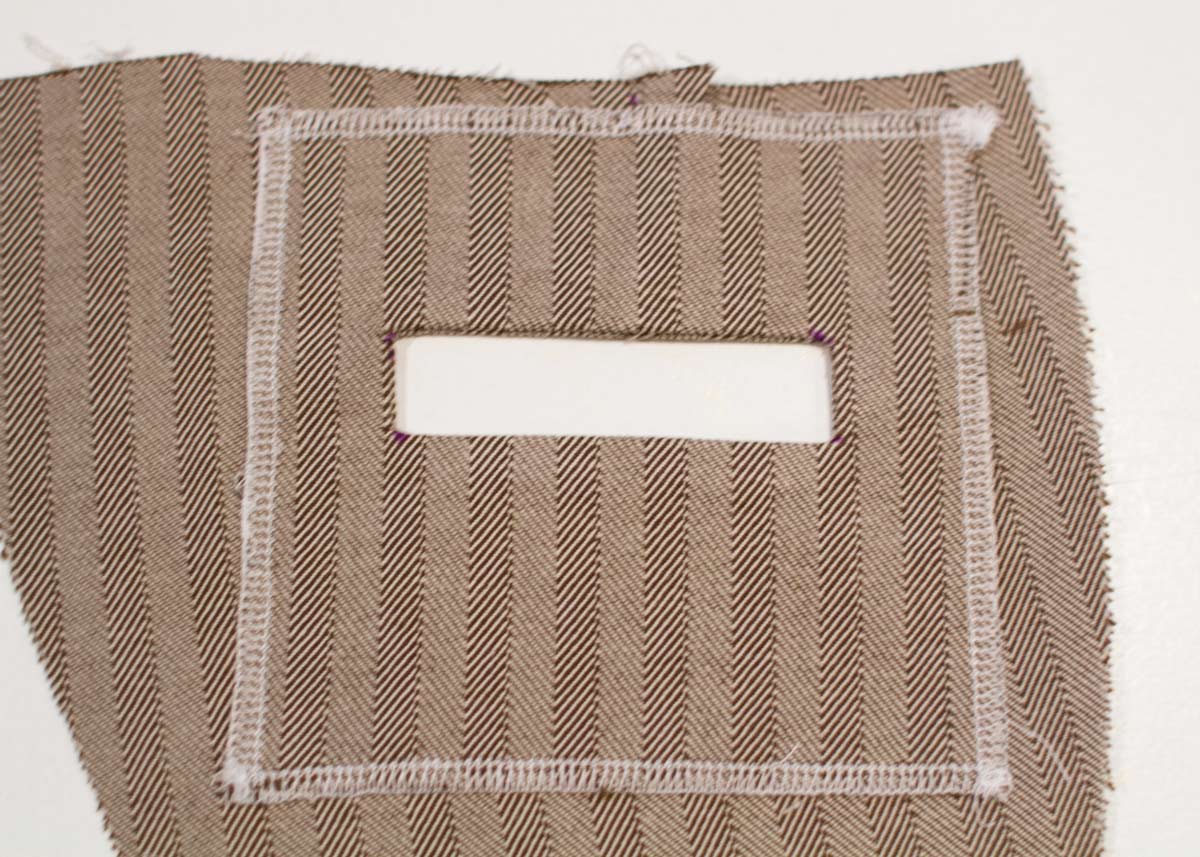
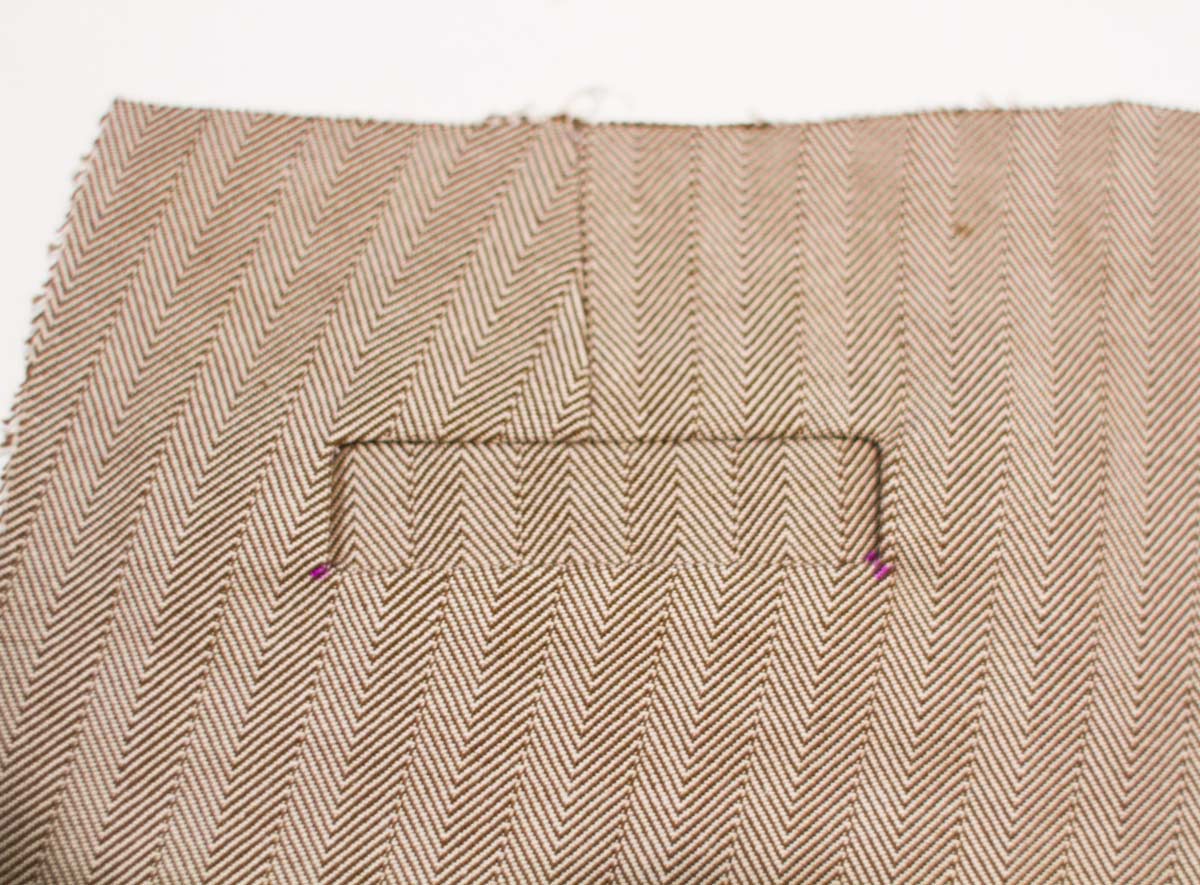
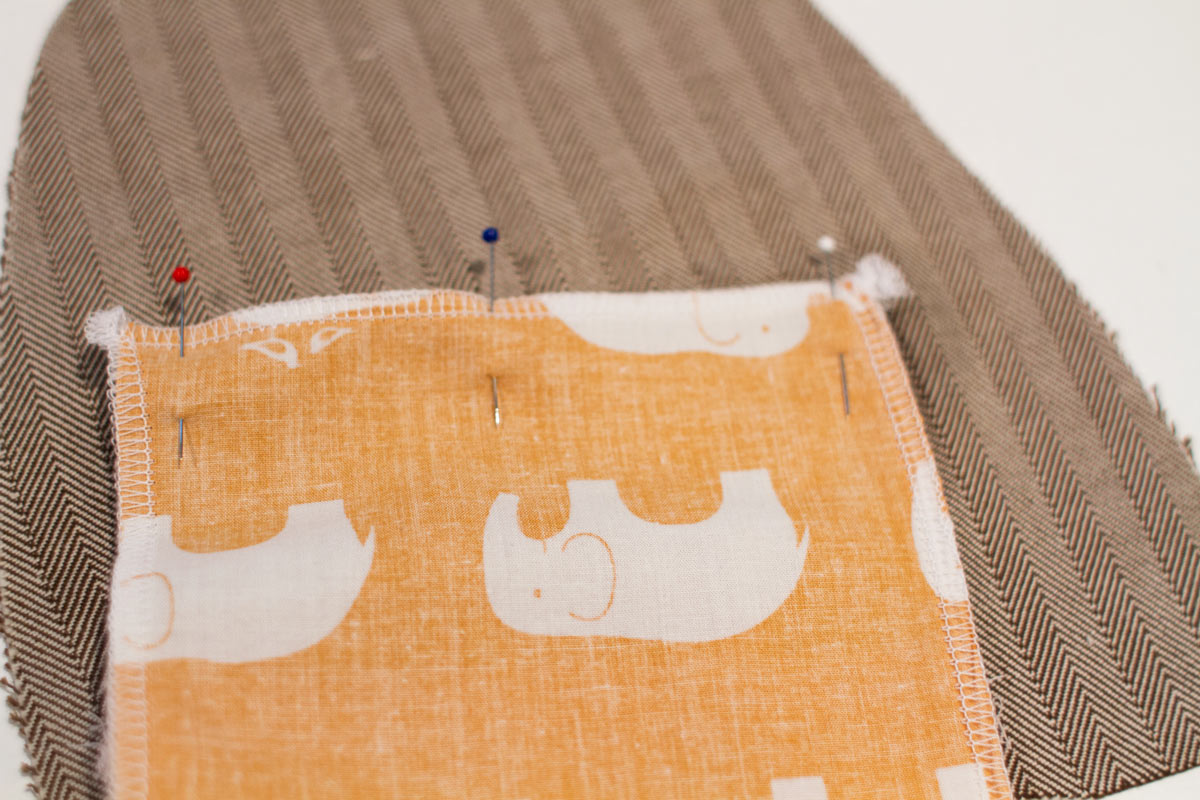
3. Pin the welt-pocket piece to the vest front, with right sides together and matching the placement dots.
Stitch only the top and bottom lines of the rectangle, stopping and backstitching or lockstitching precisely at the side edges of the rectangle (that is, at the dots). Precision here is important to achieve a clean finish, so take care to start and stop right at those dots!
4. Cut a slit through both layers of fabric between the two stitching lines, stopping about 1/2″ from the rectangle’s short ends. A rotary cutter is helpful to start the cut line for this step – just start right in the middle and don’t cut too far. You can use your scissors to expand the cut lines out to 1/2″ from the rectangle’s short ends if you’re less comfortable with the rotary cutter.
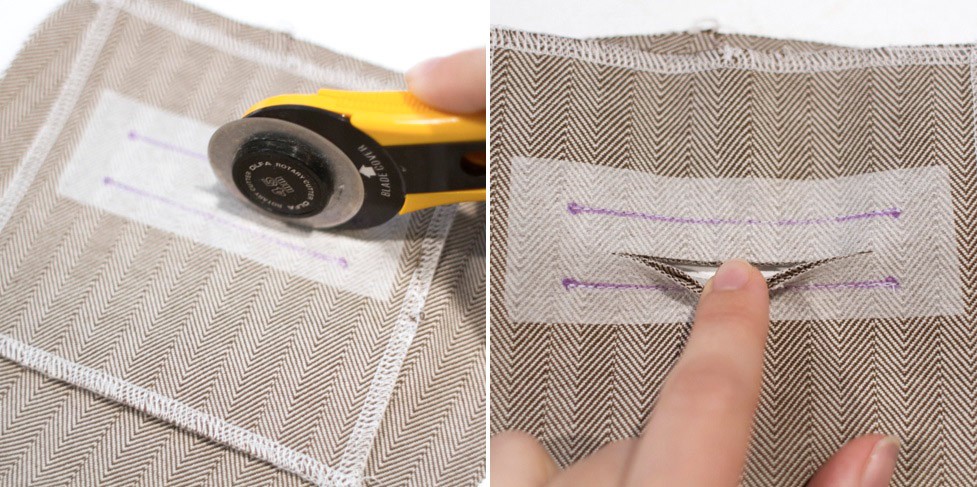
At the ends of the cut slit, clip through both layers to make a Y shape, ending the clips as close as possible to the rectangle’s stitching lines without actually cutting into the stitching.

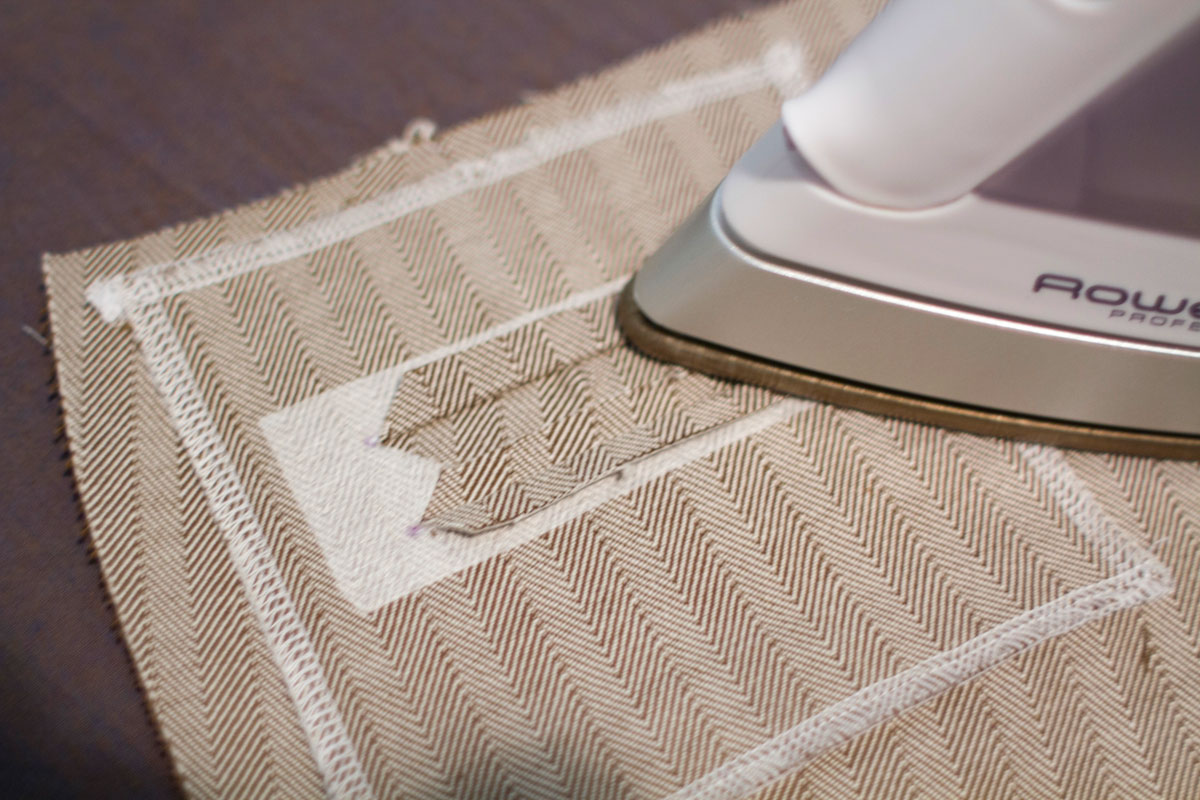
5. Press the cut seam allowances open at the top and bottom seams of the welt, pressing a crease all the way across the rectangle to the ends of the cut Y shapes.
6. Turn the vest to the wrong side, and reach through the cut opening to pull the welt-pocket rectangle through the vest’s wrong side.

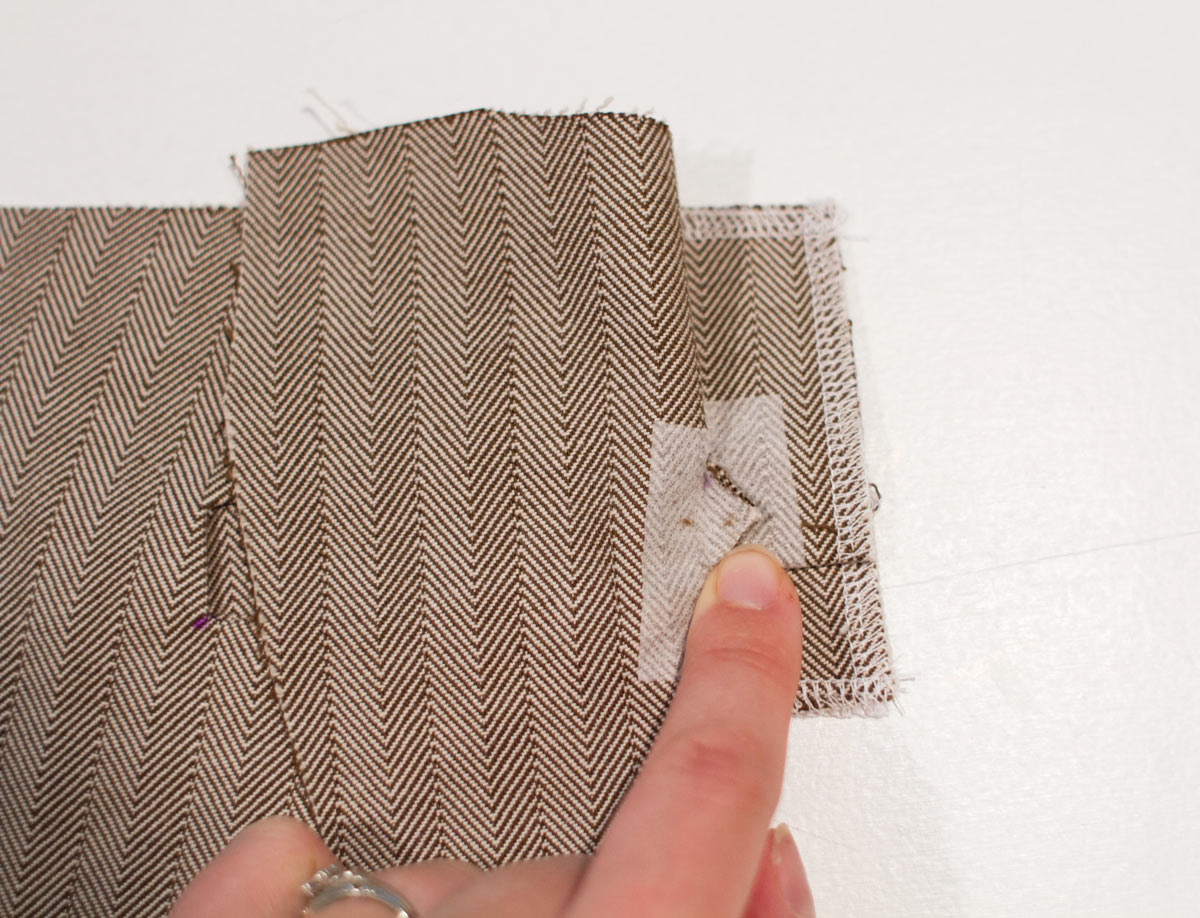
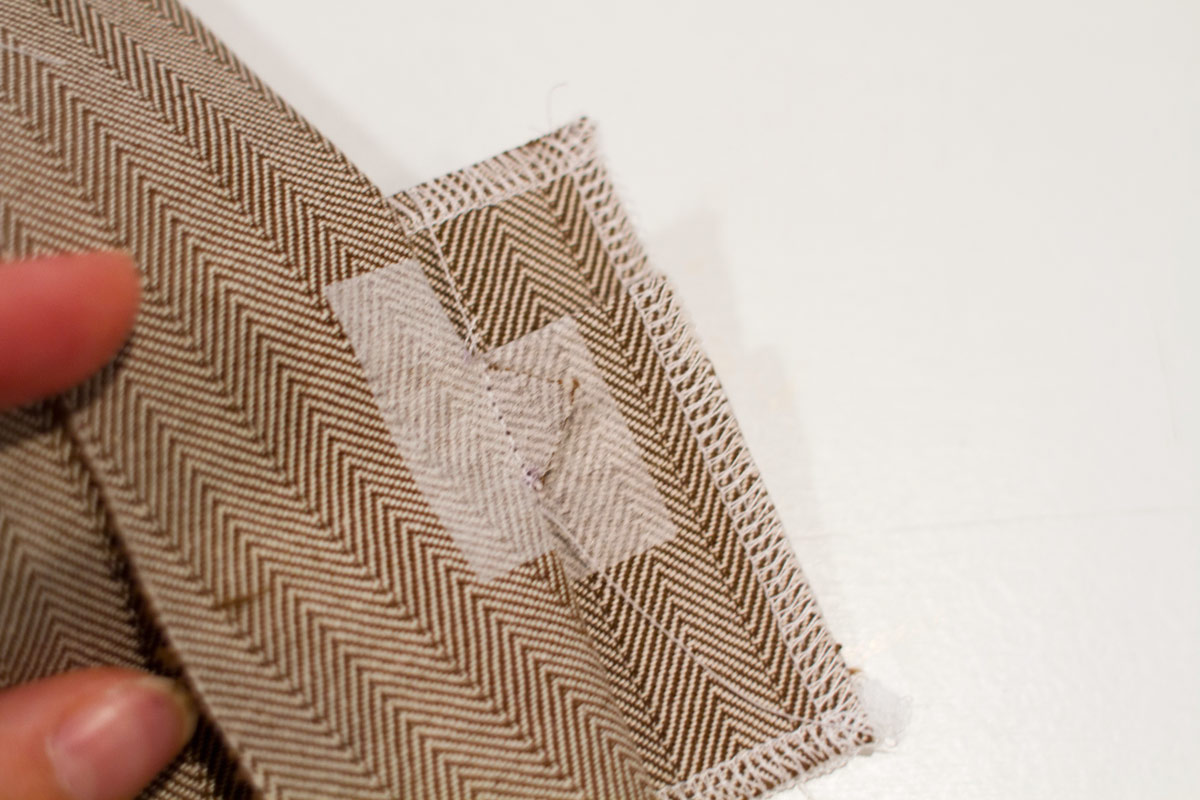
Press the rectangle flat, gently tugging the corners of the welt pocket fabric until it makes a nice rectangular opening. If your corners don’t look crisp, check to make sure you’ve trimmed all the way to (but not through) the backstitching at the dots as shown in step 4.
Once your cut-out rectangle has crisp corners and edges, carefully press the bottom of the welt pocket piece up as far as it will go, opening and pressing the seam allowances in the process, so the fabric has a nice crease.
This is the first step in making the welt itself.
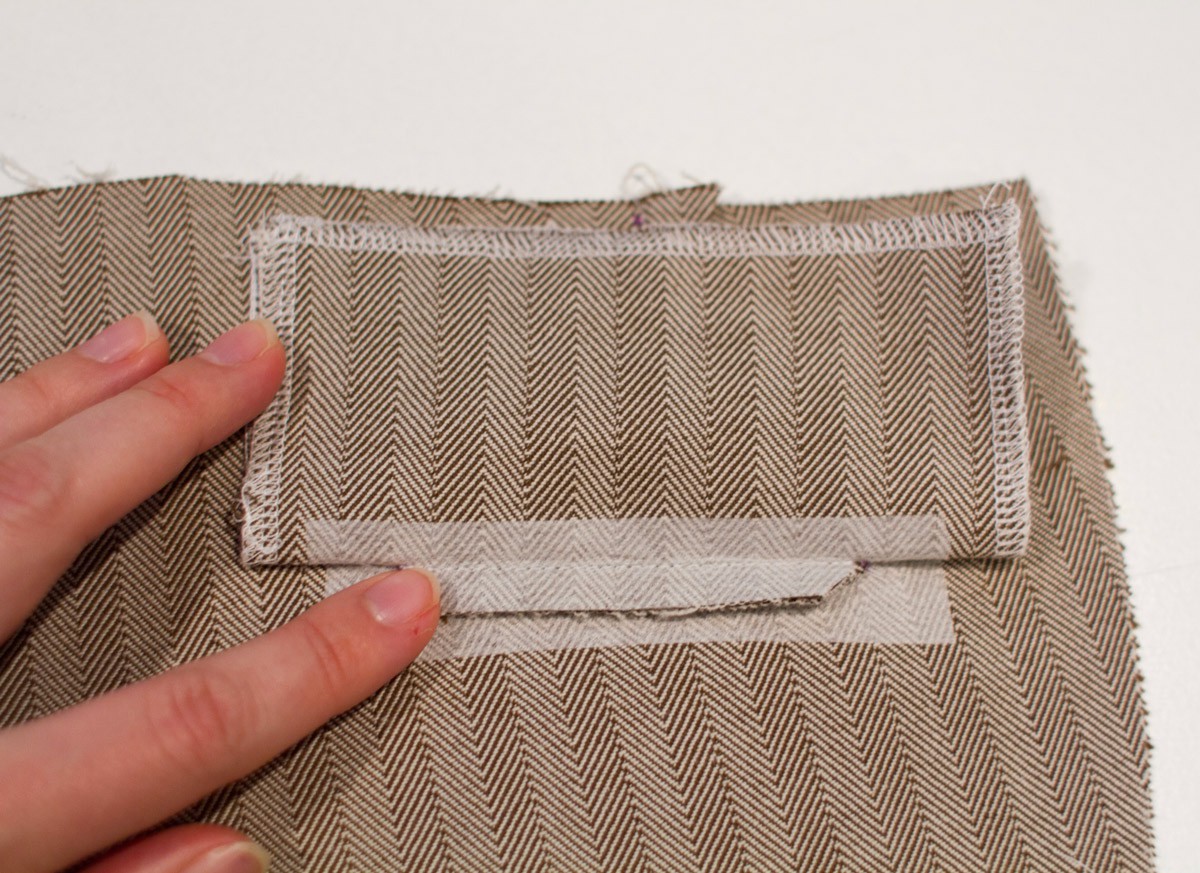
7. To finish making the welt, fold the welt fabric down again, making a crease at the top of the cut-out rectangle. This will be the welt of the welt pocket.
If you check it from the right side, it will look rather impressive already.
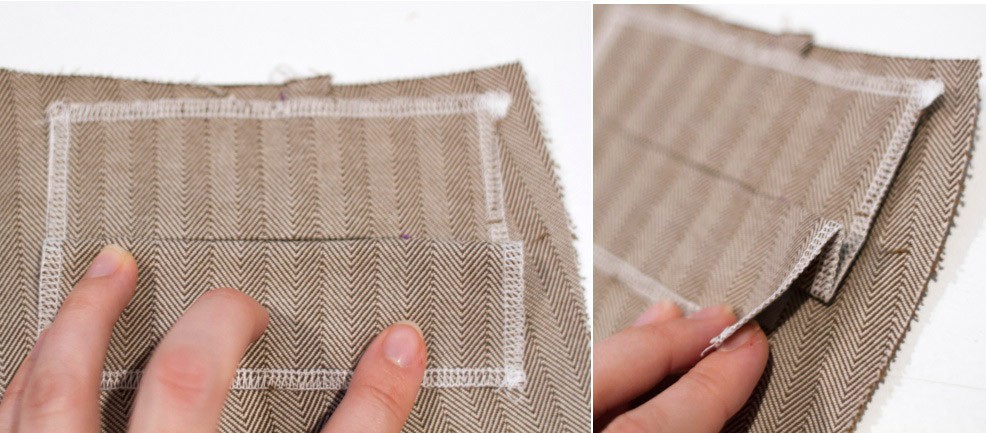
8. From the right side of the vest, fold the front vest away from one side of the welt as far as possible, exposing the welt-pocket piece and the little cut triangle at this edge of the welt.
Stitch the triangle to the welt pocket as close to the vest as possible, backstitching or lockstitching at both ends.
Check the welt from the right side of the vest and stitch the triangles a little closer to the vest front if necessary. Repeat this step on the other side of the welt pocket to to finish both ends.
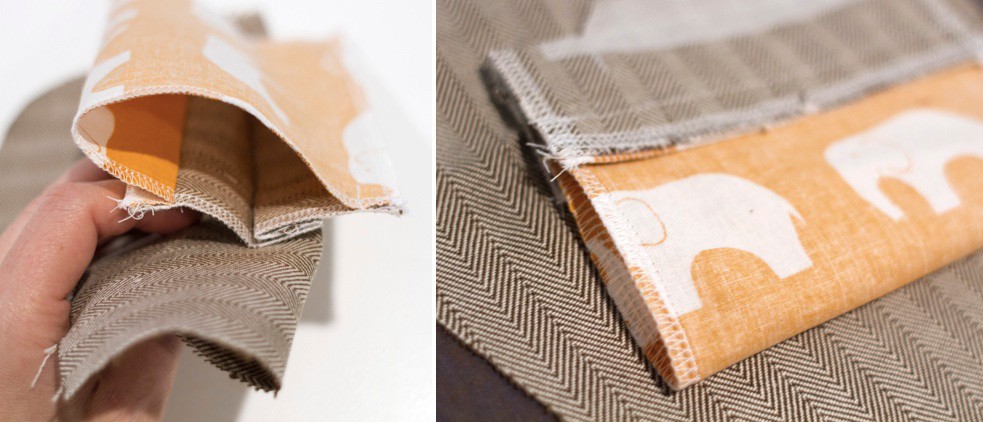
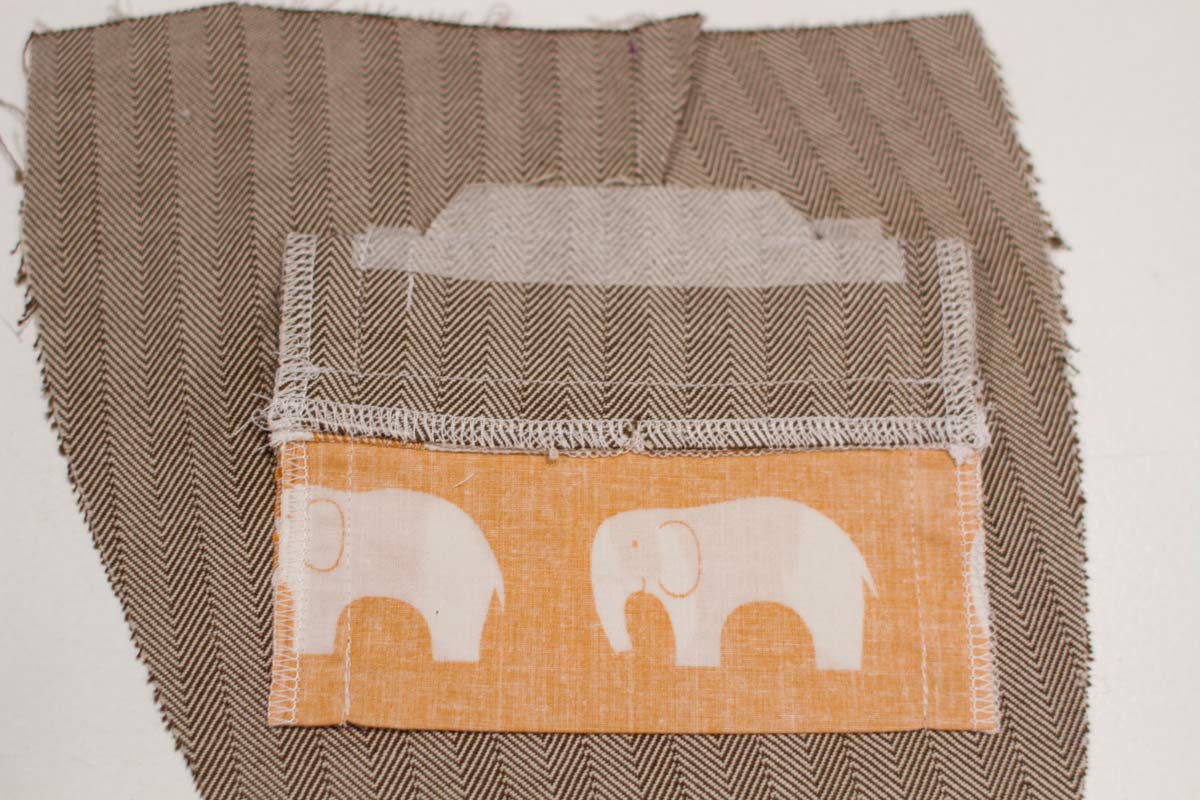
9. Fold the top of the vest out of the way and pin the top of the pocket bag to the top edge of the welt pocket fabric, with right sides together and matching the notches to each other. Stitch the two fabrics with a 1/2″ seam.
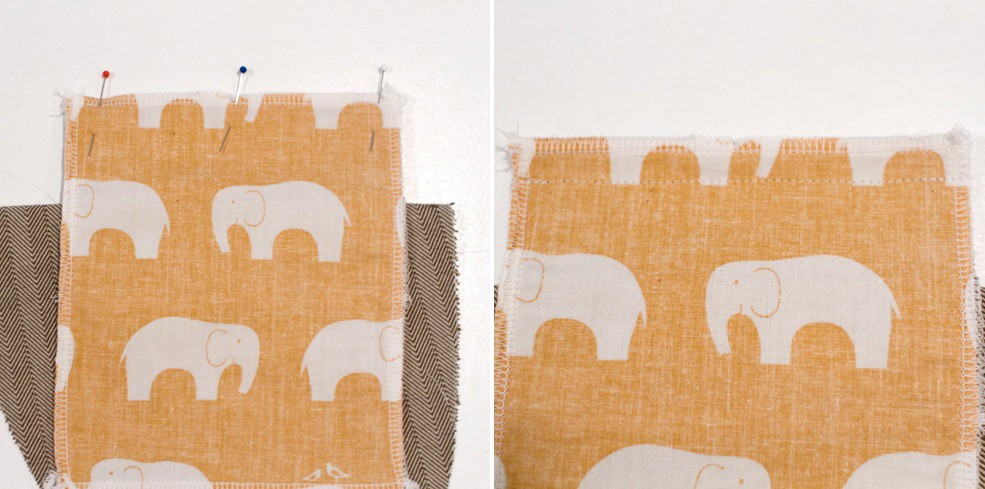
Press the seam allowances toward the pocket bag, then fold the top edge of the welt pocket down toward the bottom of the vest as far as it will go. If you check the right side of the pocket, you should see the main fabric, not the pocket bag, when you open it…the pocket bag will end up down inside the pocket when it’s finished.
Press a crease into the fold at the seam of the rectangle cut out. This fold will form the facing of the welt pocket so it will look nice when it’s opened.
If you want, you can stitch-in-the-ditch around the welt pocket at this point to help secure it.
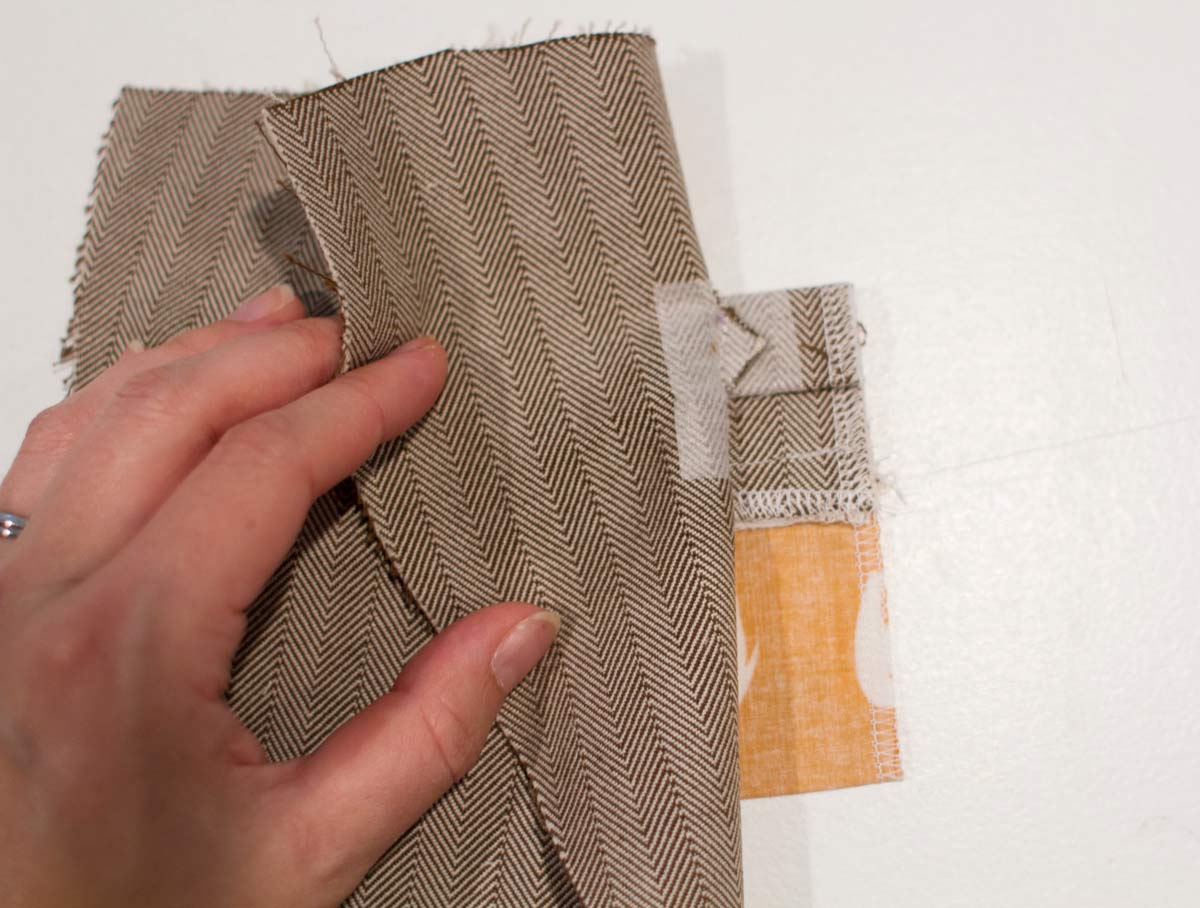
10. Pin and stitch the bottom edge of the pocket bag to the bottom edge of the welt fabric, with right sides together and the edges aligned.
Press the seam allowances toward the pocket bag, then pull the welt fabric and the pocket bag toward the bottom of the vest as far as they will go and press a fold into the pocket bag to form the bottom of the pocket. The very bottom crease of the pocket will actually be around the middle of the pocket bag piece, as shown below right. The key here is to pull the whole thing down before pressing.
11. Check to be sure the pocket bag is smooth and pressed flat. Then fold back the front vest along the sides of the welt and stitch the sides of the pocket bag closed with at least a 1/2″ seam allowance or as close to the welt-pocket edges as you care to stitch.
You can have as much as 1″ seam allowance here, so there’s some flexibility with regard to how close you stitch.
12. You’ve now finished the welt pocket! Repeat steps 1-11 to sew the welt pocket on the opposite vest-front panel (or pants panels).
The pocket bag is hidden inside…

…and from the outside, a crisp and clean welt pocket!
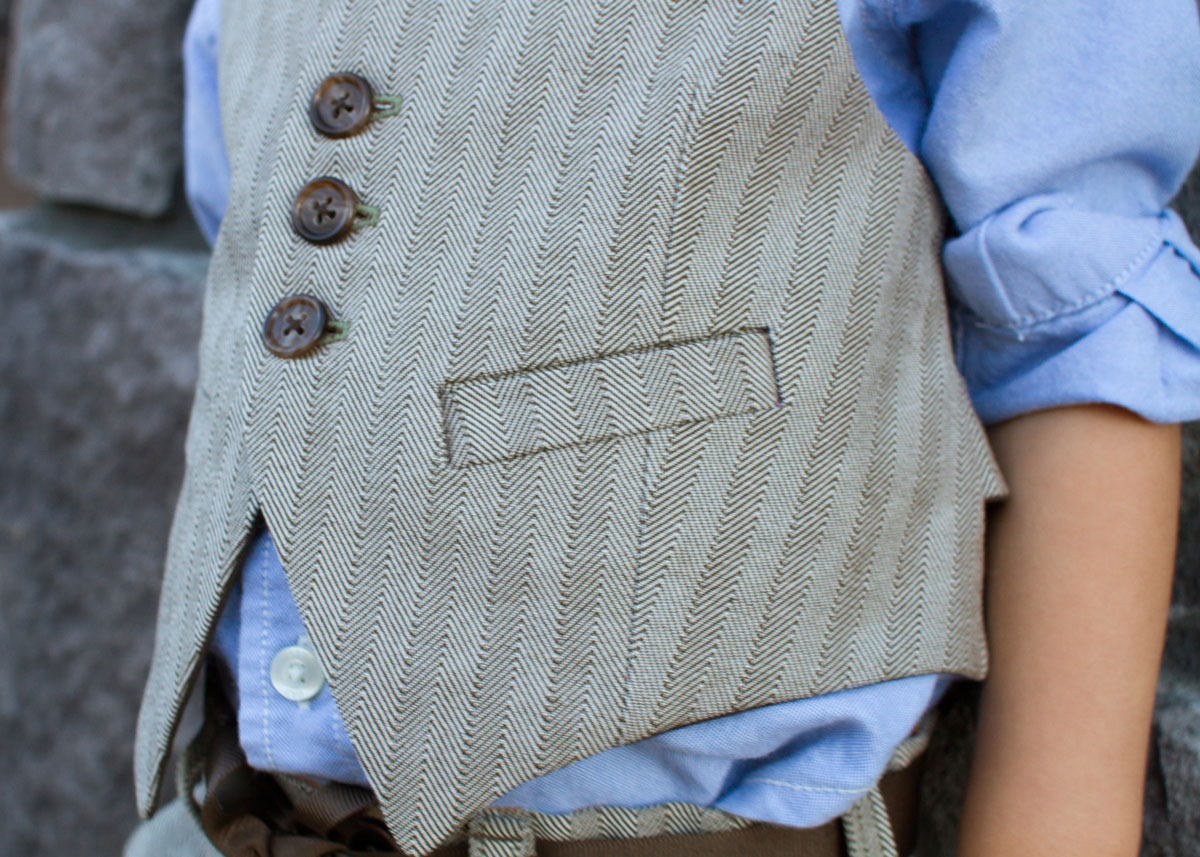
We hope this helps demystify the welt pocket process a bit!
If you enjoyed this blog post, why not sign up for our newsletter? It’s free, and you can opt to have new blog posts sent to you by email too!